First day with the chipper!

Oh, what fun!

I got the chipper assembled, and we’ve tested it out. Here’s how it went.

This is after lifting the box off, and removing the bubble wrap around that biggest chute. It was deep in that chute, under other stuff, that I found the instruction booklet.

Which included detailed instructions on how to remove the chipper from the box. :-D
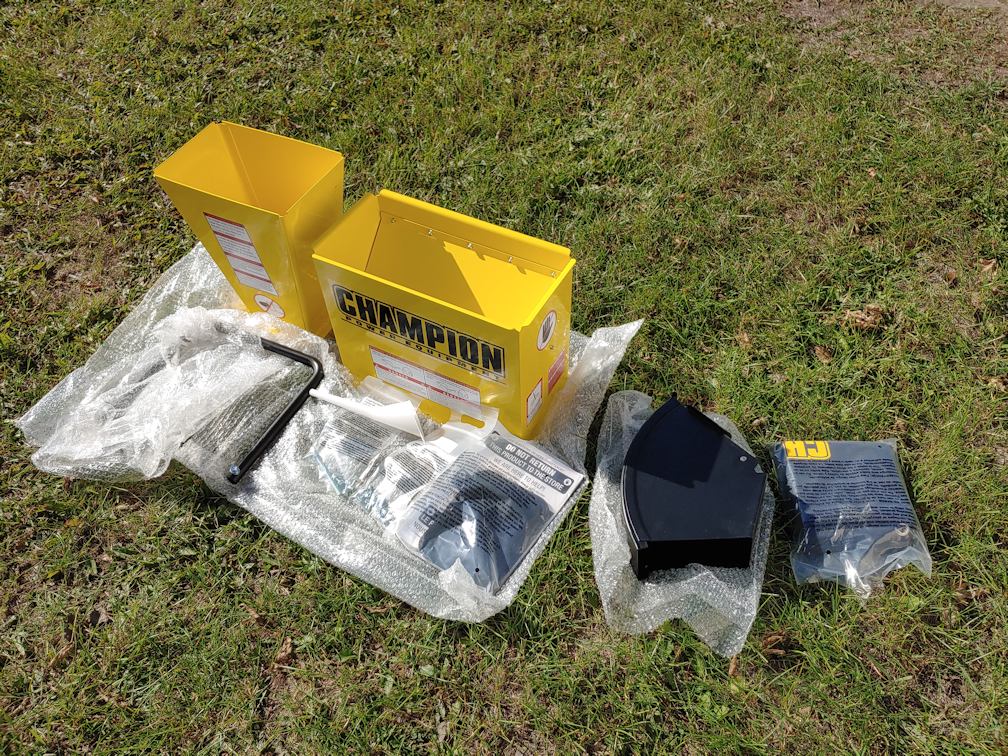
Time for assembly!

The tops of the shredder chute had to be put on first, then the handle. It wasn’t until that was on that I could grip it well enough to manhandle the chipper over the blocks holding the wheels in place, and the rest of the assembly was done outside.

Which didn’t take very long at all. :-)

Once it was together, I had to go and get fuel and oil. We had only a few litres of fuel left for the lawnmowers, so I had to refill the 20L jerry can anyhow. This thing takes 10W30 oil, and everything else we’ve got – including our van – uses 5W30. Oh, except the new push mower. That uses 0W30.

In reading the manual, it said to put in about 1.1L of oil, no more.

The oil, however, comes in quarts, or 946ml Which meant needing 1.16 quarts to max the oil level.

I bought two and filled it with one. The level should be checked before each new use, or at least waiting until after it has had several minutes to cool down, so I’ll see if it needs to be topped up the next time we use it.

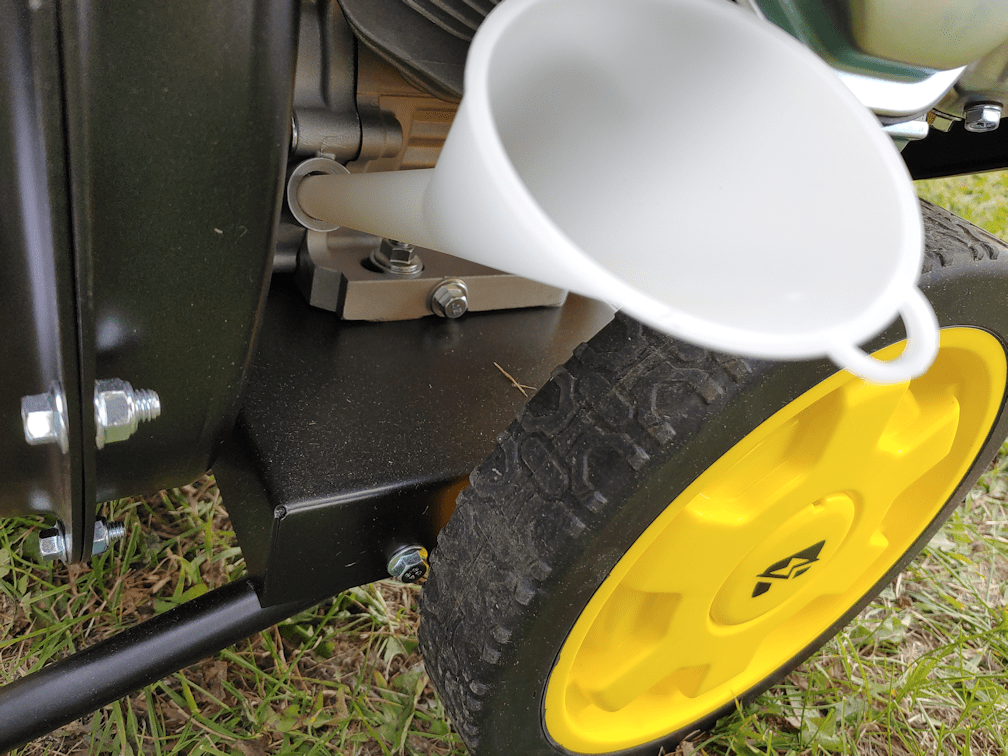
It came with its own oil funnel, which was greatly appreciated. The opening is tucked well under the engine, and the oil funnels I already have would not have reached, nor fit in the space!

The fuel tank on this thing is pretty massive! If I had not gotten more fuel, I would not have been able to fill it.

A couple of appreciated features. One is the removable gadget in the tank opening, with the red fuel level marker. The instructions made a big deal about not overfilling, and this makes a very handy visual reference. The other appreciated feature is the fuel gauge. Love it!

There was just one down side to the fuel tank, and that was with the cap itself. It takes a surprising amount of uumphf to turn the cap, and I couldn’t do it with my right hand at all, due to a combination of arthritis pain and that injured finger. My left hand has arthritis pain, but I still had enough hand strength to open the tank. Hopefully, over time, it will get easier to open.

Once it was all filled up with oil and fuel, I spent a bit more time going over the instructions before we were ready to test it out.

Ear protection is a must!

We also need to get more safety glasses. The pair I have got all scratched up somehow, to the point that I couldn’t see through them!

My daughter brought over the loppers and starting breaking down branches for me, while I set up the collector bag. It’s attached with only a drawstring. It held well enough once the chipper was started, but there were gaps that allowed chips to go shooting out over the fuel tank and around the engine. I’ll have to figure out if there is some better place to attach it. There is nothing in the instructions other than saying to put it over the diverter.

The collector bag is very durable, and I love the zippered bottom that makes it very easy to empty.

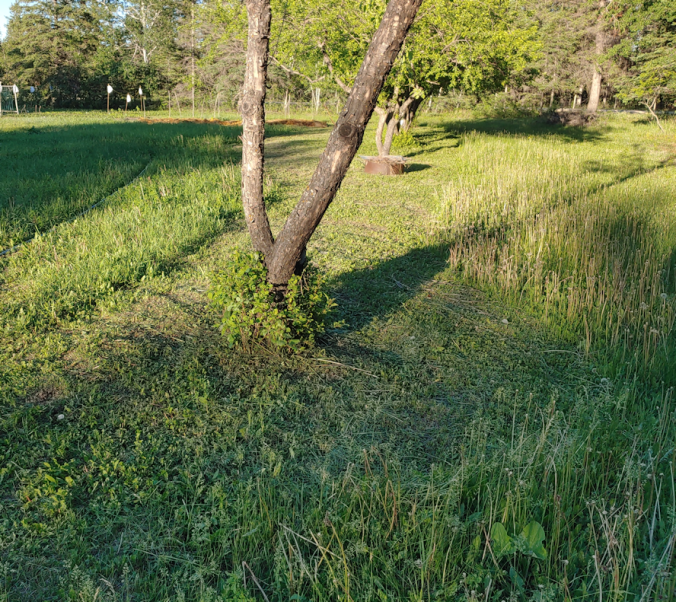
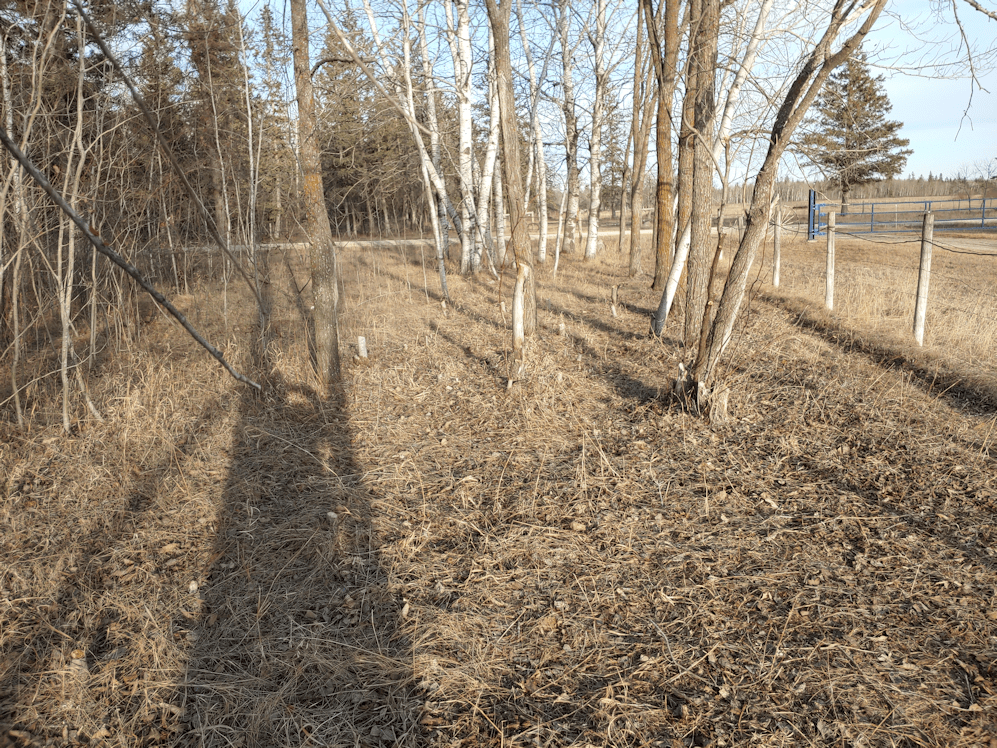
My daughter and I started on the branch pile closest to the garage to test it out. She had a bit of a surprise!

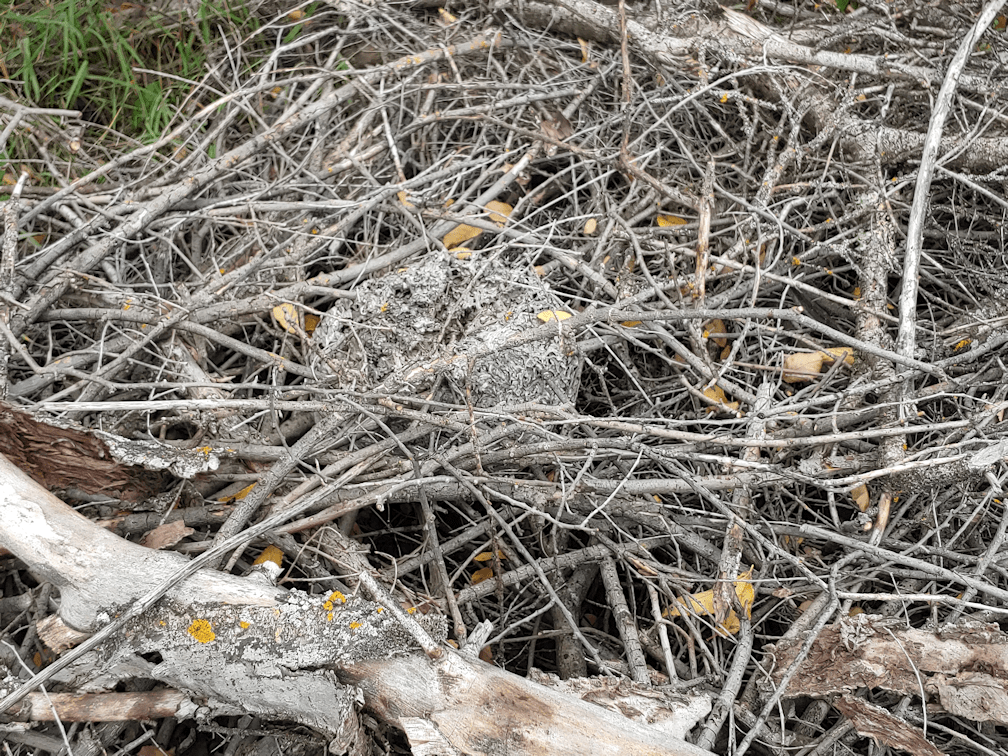
There was an old wasps nest in it. It was an active nest last year, so there were no wasps in it this year, but she didn’t know that when she uncovered it!

The chipper is also a shredder. The larger chute at the top is for leaves and small things, including branches no more than 1/2 inch in diameter. With this pile, that’s the chute we ended up using the most.

With the smaller chute, the maximum diameter is 3 inches, however that’s not just the width of the branch. If there is a bend in the branch, or any knobby bit from a smaller branch that was pruned off, it could be enough to prevent the branch from fitting.

The pile had a lot of very bent branches.

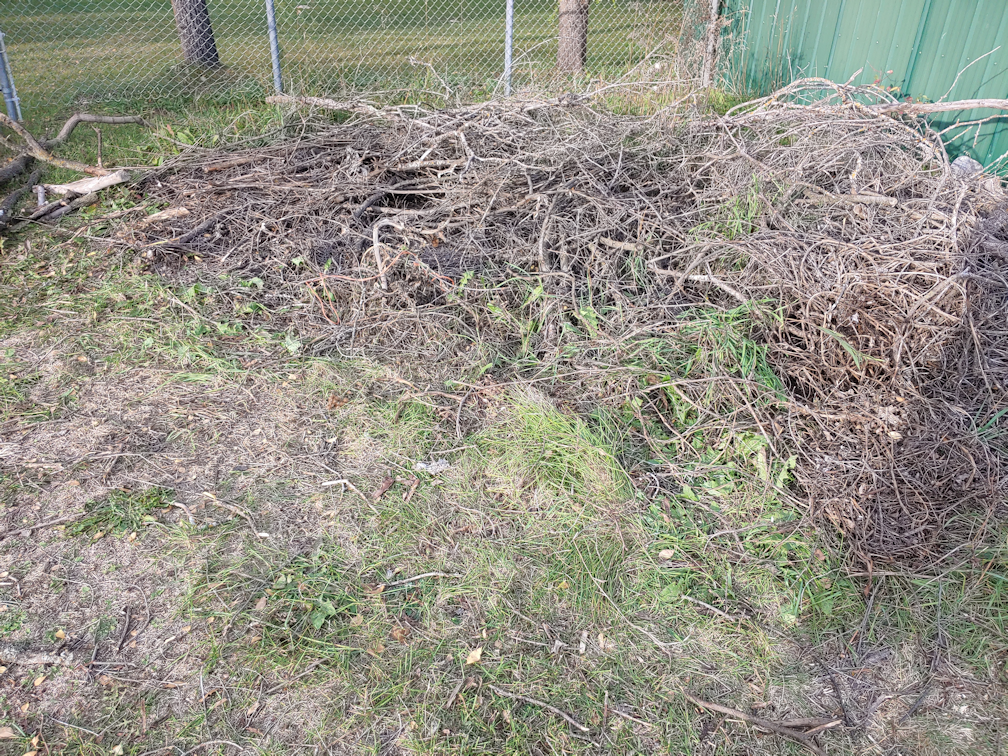
The worst of them, plus any pieces we had to cut off to allow the remaining branches to fit, got set aside. They will likely go into the burn pile.

We went through about 1/4 to 1/3 of the pile in about an hour. We did have to stop to take apart the smaller chute and remove a piece that got stuck. There was a little bit of a side branch sticking out just enough to catch on the opening under the rubber guard.

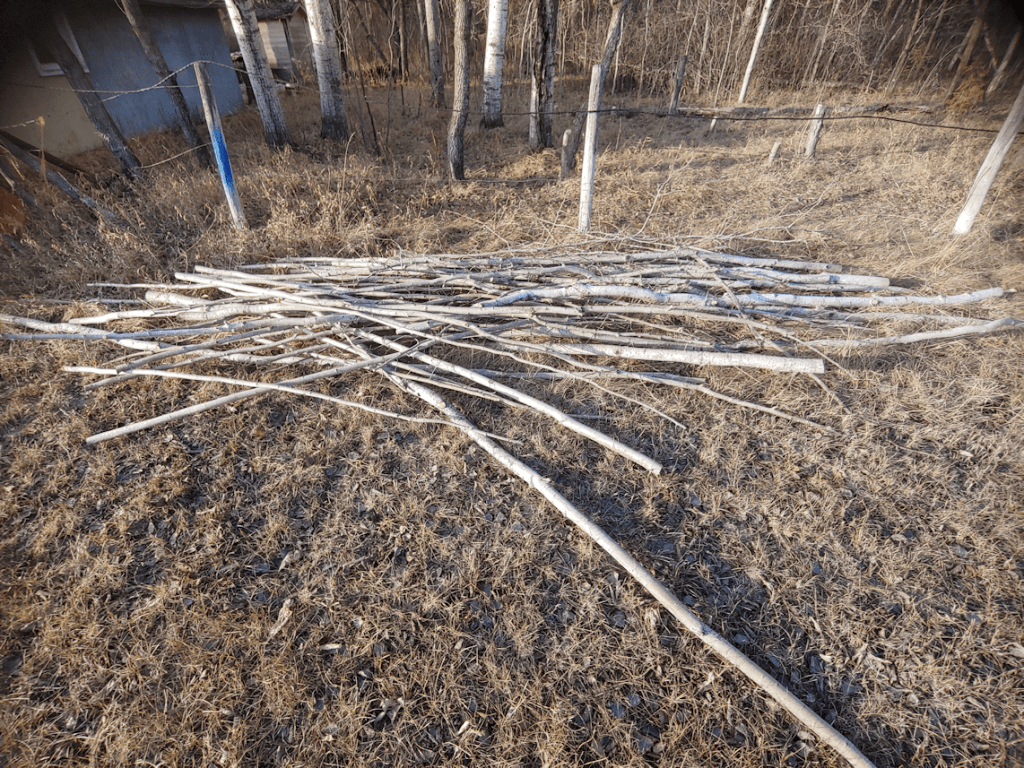
All those branches gave us this.

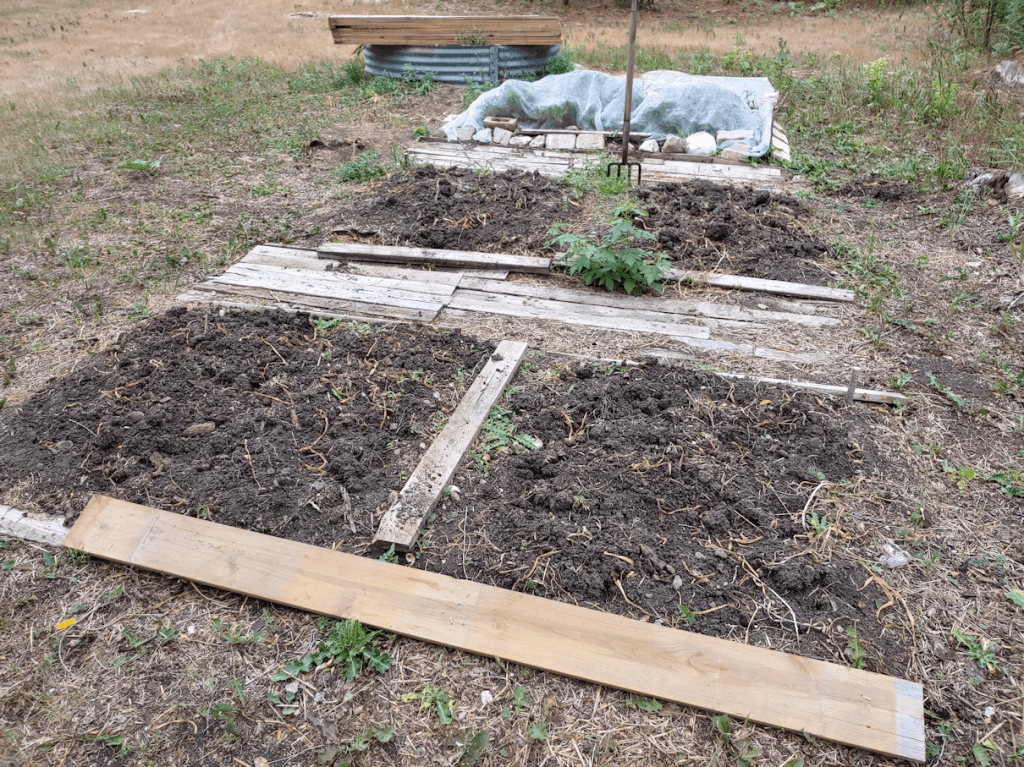
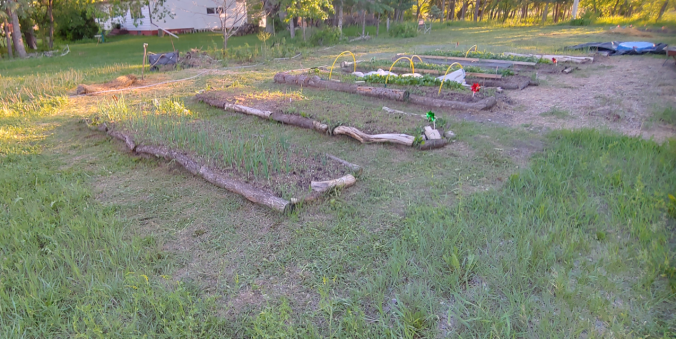
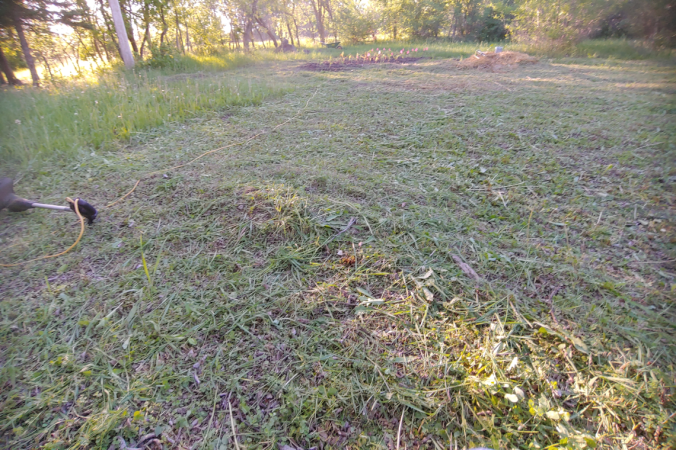
The larger pile is in the garden, near the high raised bed I am working on. The small pile is what built up under the chipper itself, that had blown out the top of the collection bag.

The chips are quite small. Smaller than the chips we had when the arborists came and cleared trees from the power lines and roof. I am quite happy with that. This will be used as we layer organic matter in the high raised bed, and will also be used as mulch, so the finer the better!

I’m also happy with how much less space the chips take up, compared to the branches they came from!

Another thing I really like about it; how easy it is to move around! This chipper is designed only to be moved manually; it’s not of a size that can be towed by, say, our riding mower. Which is perfect, because some of the places we will be using it in, don’t have space for a tow vehicle.

This thing is going to make such a HUGE difference in our clean up progress! It’s going to take quite a while to chip away the branch piles, but we have been adding to those piles for four years now, so that’s to be expected! Best of all, as we continue clearing away dead trees, we’ll be able to chip the branches right away, rather than dragging them over to the piles and making them even bigger.

I am just so thrilled with this thing!!!

The Re-Farmer

Clean up: our “second bathroom”, first coat inside, done!

After a quick run out to hit the farmer’s market, and then town, I decided to finish painting the inside of the outhouse while there was still enough light.

I’m glad I did. :-)

Here are the “before” pictures.

I had a few drips, while working on the top and ceiling. :-D

It was a bit tight to get photos of the inside, front!

There are a LOT of nooks and crannies around that door frame.

I actually started with the door. I figured I should get that done first, just in case it needed to get closed at the end of the day, so it would have more time to dry.

Then I worked on the most difficult areas around the door. For such a small amount of square footage, it took quite a while to get that done! Painting the inside of the door frame turned out to take quite a while, too, as there are a lot of gaps that I needed to squeeze the brush into.

Once the front was done, I methodically worked my way to the back. Of course, I found more staples and tacks that I missed! :-D

Since I wasn’t planning on taking off the toilet seat, once the sides were done, I painted the seat box under the toilet seat first. The lid leans against the back wall when it’s open, so I wanted to give the paint at least a little while to dry before having to close the lid again. On the plus side, there are only 2 points of contact under the seat, so even if still wet, closing the lid wouldn’t mess the paint up too badly.

Here are the “after” shots.

This time, I remembered my phone has a “panorama” setting. LOL

Yeah, I painted the toilet lid. Sort of. It had so many drips on it, I just went ahead and used the lid to get excess paint off the brush. :-D

And here it is, with the painted door.

While doing a second coat will take a lot less paint, I suspect we will need to buy another can. Those nooks and crannies took a lot more paint to cover than expected. Especially when I came across wood that had pieces fall out, or had a very rough finish. One of the beams supporting the corner still had bark on it, and winding gouges on the surface from insects. All of this ended up needing extra paint to get into the various holes and surfaces

What a difference!

One of the things we’ll have to do is put some sort of non-slip… something… on the metal sheet in front of the outhouse. It can get slippery when it’s wet.

After a second coat of paint, we’ll put the mirror cabinet back in – my daughter suggested just putting the old one back, rather than digging out the one in the basement, because then we’d just have to find somewhere to store the old one, anyhow! :-D Also, she noticed we had a chain latch, still in its package, that we can use on the inside, so we don’t have to buy a new latch. It will be mounted on the top cross piece of the door, so I won’t be trying to mount a latch where old screw holes have already damaged the wood. I’ve decided that, for a light, I will pick up another one of those LED, battery operated light switches. We have two of them in the house that come in very handy; one is set up in the bathroom to use at night instead of turning on the very bright main lights, and another is set up in a very dark corner where one of the upstairs litter boxes is kept. When we get one for the outhouse, I want to mount it across from the mirror, to take full advantage of reflected light. We’ll need some sort of dust, critter and insect proof container to keep toilet paper in, and maybe some wet wipes or something. The girls plan to put art on the walls. :-D

The next time something happens and we can’t use our indoor bathroom again, we will at least have someplace pleasant to go! :-D The only other thing is, we now have to empty the pit of all that gravel the groundhog dug up. It will be important to get that done before winter, because if we get any normal amount of snow, when it melts in the spring, we’ll have a big puddle in front of the outhouse, and the back of the garage, and water will drain into the pit again. The gravel is high enough in there, that there is no longer room for it, which would force the water above the floor boards. Mind you, it would probably end up draining into the groundhog’s den, but there is nothing we can do about that.

The main thing was getting at least this first coat of paint done, then digging out the pit. If we don’t have a chance to fix the roof before winter, I want to at least put a tarp or something over it. The rest can be done slowly, as we find the time.

The Re-Farmer

Shut off valve installed!

Well, that didn’t take much at all!

With the help of my younger daughter, we got the shut off valve installed on the hot water pipe.

Ha!

Just kidding.

My daughter did all the work. I took pictures and passed her things.

The first thing we needed to do was take off the “clamps” holding the pipe to the exposed floor joists above, on either side of where the pipes were in contact with each other and, I believe, the source of the vibrating noise that is so alarming. The “clamps”, however, were small strips of aluminum, hammered into place with finishing nails. We never did get the nails out. My daughter ended up ripping the aluminum off, instead. !!! While my daughter worked on that, I shut the water off to the hot water tank, then opened the tap to drain the pipe.

One of the things she noticed while trying to remove the aluminum strips is that the hot water pipe was actually bent upwards at this point. No wonder the crossed pipes were so jammed together.

Once there was a bit of flexibility in the pipe, it was easier to access and work on, too.

After deciding where to put the valve, the pipe got scrubbed clean, then the shut off valve was used to place marks on the pipe, so we could see where to cut it, and later see that the pipe ends were far enough inside the valve once installed. Thanks to needing to fix the kitchen sink a while back, we did have a nice little pipe cutter for the job. :-)

About two inches of pipe was removed, to make room for the valve.

The cut ends then got scrubbed and sanded, inside and out.

Then is was just a matter of sliding it in, and making sure the pipe was as far as it needed to go. The water to the tank was turned back on so we could test it for leaks, then the valve was shut off.

The whole thing took about 10 minutes.

With the valve in place, there is no water to leak at the tap, but if we need to use it for some reason before the tap can be replaced, we can just turn it on, use the tap, then shut it off again. Very handy.

Meanwhile, there is still the issue of the pipes.

For some reason, we have short lengths of pipe foam in the basement. It’s meant for a width of pipe I don’t see around. I put a section on the pipe, under the floor joists the pipe had been clamped to. It was just long enough to go under both.

I didn’t have any foam that was thin enough, so I jammed an old sponge I’d been using before, in between the two pipes that had been in contact, to absorb vibrations. I’d tried to squeeze it in before, but there was no give at all. I could only get it part way under, so it didn’t really stop the noise, though it seemed to make it better.

Now I am just waiting for someone to use the enough water to trigger the well pump, and see if the noise is still there.

We didn’t add a shut off valve to the cold water pipe, yet. For that, we’d need to shut water off to the entire house, and the pipe is behind the hot water pipe, so it will be harder to reach. That can wait until we are putting on the new taps.

I am quite pleased with how this worked out. I keep expecting things to go horribly wrong. :-D

So far, so good!

The Re-Farmer

So tired, but I got it done!

I love having so much space around the house. I really do! But taking care of it is a … well… you know…

After all this rain, I got mowing done, but never had the chance to do the week trimming around the edges. The lawn needs mowing again already, even without more rain, which is a good sign. This time, I decided to do the trimming, first.

I started yesterday.

I got all the areas on the south side of the house, particularly around the kibble house, cat shelter, well cap and other things in front of the sun room that is hard to get to even with a push mower.

Then I went around the edges in the front yard, including the sidewalk to the small gate, which has sections tree roots have pushed upwards high enough the mower can’t go over anymore, without hitting it.

Doing the south yard includes trimming around the bed the haskaps are in, the bed where the white lilacs are, in between or around various trees, around the asparagus bed, around the potatoes in their bags, around the storage house on two sides, and the outside of the chain link fence. With pauses to McGyver a fix on the chain link vehicle gate that got backed into by our vandal a couple of years ago that really needs its hinges replaced, and to finally drag out some bricks and rocks from under one of the lilacs growing against the storage house.

Then the east yard got trimmed, including as much as I could into the edge of the spruce grove that has been cleared. There’s only so far I can go into there with the trimmer, as I need to get in there with the lopper to get the trees that are trying to grow back. There is a space between the house and where more lilacs and the cherry trees we are keeping, with the now-gone bird houses at either end, that is easier to use the trimmer on instead of trying to maneuver the push mower. Driving through with the riding mower is a bit tight, with the concrete stairs in the middle of the house. I also used the trimmer in an area we’ve been slowly clearing to access into the spruce grove, where we will eventually be building the cordwood shed that will be an outdoor bathroom, but for now will be access to the largest group of dead trees we need to cut down.

For the west yard, I just did the edge of the old kitchen garden retaining wall. The grass in the west yard is so sparse, I probably won’t mow it at all.

By the time all that was done, so was I, so I stopped for the night.

Today, I finished the trimming.

Sort of.

I finished the edges in the north yard, then worked around all the low raised beds in the main garden area. The ones that the onions were in have been left alone, and I’ve given up trying to weed the decimated carrot bed (which, amazingly, has recovering carrots in it!), and the paths in between have gotten so overgrown, it was getting hard to see the beds at all. That took a while to get done! While I was at it, I trimmed in between the raspberries as much as I could. Then I dragged the trimmer over to the Crespo squash and the Montana Morado corn. With the squash, I could only trim around the barriers we’ve put around it. It is recovering amazingly well, which is kind of sad, since there isn’t enough growing season left for them to develop any squash. As for the corn, I used the trimmer in between each row, being careful not to take out any of the peas that are growing with the corn, but falling into the paths. For the longer ones, I tried to get them to grow up the corn stalk they are closest to. I found quite a few pea plants that are blooming!

This area is the “sort of” part. It is so rough, the trimmer is the best way to cut the grass and weeds. Not today, though.

Then it was time to drag the trimmer over to the far garden beds.

Did I mention this is an electric trimmer?

Just as we need 300 feet of hose to reach the furthest areas of these beds, I needed 300 feet of extension cords. That allowed me to trim around the squash tunnel, most of the Dorinny corn and the transplanted Hopi Black Dye sunflowers beside them. The peas planted among the Dorinny corn are doing pretty good, too. I trimmed around the green pea trellises, too, even though there are no longer any peas growing there. Of course the purple peas and the three bean beds got done. It looks like I will be picking beans tomorrow. :-)

Then the corn and sunflower blocks got done, which meant going in between every row with the trimmer (there is just no way to weed this area anymore), again being careful not to take out any of the pea plants. Then the summer squash got done, and finally all the crap apple trees.

You know those cartoons, where a character is going through a spooky forest, and the tree branches turn into hands that clutch and grab? That’s what crab apples trees do. It’s almost impossible to walk under them without getting snagged! Thank goodness I was wearing my cap. The last time I worked under them and forgot to wear one, I found myself having to untangle branches from my hair. There is just something weird about how these apple branches catch onto everything!!

What I didn’t even try to do, besides skipping the old garden area by the purple corn and Crespo squash, is anything in the maple grove. Once again, it is so sparse, I will likely skip it.

I look forward to when the areas between the trees are filled with moss, flowers and other lawn replacements we are working towards.

Anyhow. That was it for the day!

The mowing will wait until tomorrow.

Until then, the girls are watering the garden beds for me right now. This is the first time they’ve needed to be watering since we finally got rain. That’s the longest time we’ve been able to go without watering, all summer.

The Re-Farmer

Got it done!

We’re having some pretty hot and humid days of late. Not heat like we’ve been having all summer, thankfully, but more “average for August” hot. Though it didn’t rain last night, when I came out to do my morning rounds, the dew was so heavy, I would have though we’d had some, had everything else not been completely dry.

The squash and gourds are certainly enjoying the moist heat!

The Ozark Nest Egg gourd plants are busily climbing the fence and blooming – and completely dwarfing the Thai Bottle gourd plants (on the left).

One of the flowers even made its way through the chicken wire critter barrier! :-D

So far, they all appear to be male flowers. No gourds forming, though it’s possible there are some hidden under the leaves. I won’t mess with the chicken wire to look.

Thanks to all the wonderful rain we’ve had, the grass is actually green and growing again, and in need of a mow. It took hours for the grass to dry enough for that to be an option, which meant mowing during the hottest part of the day.

Or it would have been, had the battery on the riding mower not been dead! It’s only been used once this year, and I had to charge it then, too.

With the time it took to charge the battery, it was actually starting to cool down, so I guess that was a good thing! I took advantage of it and was able to do both the inner and outer yards, including areas I did not more the one other time this year we mowed. I kept doing as long as the light held, and managed to get it done just before it was full dark, though the yard light had turned on well before I finished. I was even able to mow in front of the storage shed. Which means that, weather willing, in the next day or two, we’ll have lots of grass clippings to rake up and set aside for the garden.

By the time I finally came inside, it was 9pm, but it was worth it! :-)

The Re-Farmer

Our 2022 garden: first raised bed box

With the garlic all harvested, we’ve got two empty beds that need to be readied for next year’s garden.

With these beds, we had dug into the soft soil we found under the wood pile, mounding soil into beds and making paths in between. This worked out quite well, but there were a couple of issues. One was, for such low raised beds, I found them too wide. They were about 4 feet wide, which would be fine for a high raised bed, but awkward to reach the middles on a low bed. That was partly solved by putting a board across the middle, which served to both mark where the different varieties of garlic were, and to give something to step on while trying to reach into the middle.

What can I say. I’m short.

The other issue was that the soil along the edges would end up in the paths, either from watering or from when the birds were digging around the garlic, early in the season.

The solution to both issues was to build a narrower box frame.

After scavenging in one of the sheds, I found some boards that would serve the purpose.

I dragged them all over to the beds. Here you can see one of them laid at the first bed I want to frame.

In total, I had 17 boards like the one in the foreground, plus 4 more that were the same length and thickness, about about an inch wider.

I decided to keep things simple.

I left four boards as is, then cut another four in half. The boards were all 6′ 1/2″ long and 5 1/4″ wide. Some of the half pieces would be used to increase the length, while the rest would be for the ends of the bed. I cut support pieces for the corners and to join the lengths together from some wood leftover from another project. Those were cut to match the width of two boards together.

The long sides were made by screwing the boards to the support pieces. The boards all have damage to them, ranging from old water damage and some rot, to splitting and cracking from being so very dry. Which is fine. They will do the job, and will last a few years, at least.

What wasn’t fine was flipping a board and almost catching my hand on these!!! They look like the screws were broken off on the other side, so there is no way to unscrew them from the wood. I have to think about the best way to get rid of these, using what tools we have, but for now, we’ll just have to watch out for them!

Once the side pieces were screwed together, making sure they matched in length, I brought over a couple of the wider boards to give a flatter, more even, surface to work on while putting on the end pieces.

Then I quickly tacked it together with just a single screw at each corner, to hold everything together while I worked.

Oddly, one piece was almost an inch longer than the others! Which is okay; the excess can be sawed off, later.

Here we have it! The finished box, next to the bed it will be placed at.

Here, you can see the difference in the dimensions quite clearly.

The box is about 9 feet long by 3 feet wide, and about 11 inches high.

In preparing these beds before planting the garlic, we dug out the soil and buried layers of straw and compost material at the bottom. Since the dimensions are being changed so much, I plan to dig out the beds again, then once the box frame is in position, will start filling it, hugelkulture style, by burying some of the branches we’ve been pruning for the past few years at the bottom, then layering the contents of our compost pile on top of that. Straw decomposes slowly, so I expect to find it when digging the bed out. If I do, I’ll be keeping it separate from the soil, so it can be layered back on again. As for the top layer of soil, I’ll take advantage of the situation to get rid of the weeds by their roots, then mix in some of the garden soil we purchased this year, before returning it to the bed. This soil tested healthier than anywhere else we took samples from, but it was still low in nitrogen, so adding the fresh soil will be a benefit. Once we have the materials again, the top will get layers of mulch to protect the soil.

I have enough wood to make a second box frame just like this one. I plan to build the second box before I start digging out soil. With the wider boards, there is enough to make a third frame for the bed that still has the beets in it, though it will be only one board high.

When this area is done, there will be three longer, narrower, framed beds with wider paths in between. This will make them much more accessible, even at their relatively low height.

Hopefully, I will be able to continue working on this tomorrow, but we’ll see how the day goes. I’ve got our rescheduled court date for the restraining order against our vandal in the morning. Hopefully, it’ll actually happen this time – and if the security guards try to tell me to leave and come back later, I will stay close this time.

The Re-Farmer

Clean up: spruce grove junk pile

Today is our only “cool” day before things start heating up again. Our high of the day was merely 25C/77F. We’re going to have another few days hovering at or above 30C/86F, so I wanted to get some clean up done while it was still relatively pleasant out.

I decided to clear things out to uncover the woodchuck’s den opening, under the junk pile.

This was a job I’d deliberately left for a while, as there were kittens in the junk pile and I didn’t want to scare them. Plus, the spirea and other undergrowth provided them with shade, and things to play with.

Since the kittens have been chased out by the grog, it’s time to clean up!

The first thing was to cut away the spirea and wild roses, until I could remove the old pallet. Since they were just cut to the ground, rather than being pulled up by the roots, the roses will come back next year. Unfortunately, so will the spirea!

Immediately after I took the above picture, a furry little face poked out and looked at me. The grog was home! I imagine he headed out the “back door” on the other side of the pile, as I kept causing a disturbance here.

As I worked my way along the fallen tree, I was able to pull more things up by the roots. The wine barrel planter that I uncovered was not yet collapsed when we first moved here. We used to be able to watch yard cats sitting on it in the winter, sunning themselves. After the pieces collapsed, it became a favourite play area for kittens.

The bushy Chinese elm next to the log are hiding an upright barrel planter.

I also uncovered what looked like a sprinkler hose. I have no idea how long it’s been there, but it appears that the tree fell on top of it. !!

After cleaning up the collapsed barrel planter, it was time to turn my attention to the upright one. On the ground to the right of it, you can see a bit of a red brick. Like other things I’ve found around the yard, I figured I’d be finding more bricks under the planter, once I cleared it out.

The first thing to do was pull out the pieces of wood. I was then able to remove the top metal ring (I’m keeping all of them), but the bottom ring has a smaller diameter, so it had to wait.

I can cut away the Chinese Elm that had been growing in this planter before, and what was growing this year was from the remains of the ones I cut last year. You can almost see the “stumps” that the new growth emerged from.

This is the wood from both barrel planters, plus a few odd pieces I found as well. Since doing a burn would still be stupid dangerous right now, these all went on the junk pile in the outer yard, waiting until we can hire someone to haul it to the dump.

After clearing away the wood and the metal ring, I broke up the soil so that I could take out the roots of the Chinese elm as best we could. Then I started poking around with a garden fork to take out any bricks that I expected to find buried under the planter.

I found a third metal ring, completely buried in the soil.

I also found that it was mostly flat rocks under the planter, not bricks! The one long, concrete brick I found was buried under where the collapsed barrel planter was likely sitting, before it got knocked over.

I find it interesting that care was taken to make sure the planters were on something solid, rather than on bare ground, yet they were sitting there for so long, everything sank into the soil.

After spreading out the soil that was in the planters and filling in the holes I’d made while pulling shrubs out by their roots, I dragged out the hose. I figured it was junk, since it seems to have been sitting there for a long time. I’ve found many hoses scattered about in sheds or the barn, and most of them were so old, they were brittle and cracked. I figured much the same with this, but decided to hook it up to a hose and test it out.

Much to my shock, it actually worked! The couplings were leaking, but all they needed were new rubber washers. There were two hoses together, and they both work. Which means, if we pick up some end caps for them, we can set them up in garden beds, like we currently have the soaker hose at the squash tunnel, for more efficient watering.

It was about this time we reached the hottest part of the day, so I stopped for now.

To get at the stuff where the sprinkler hose was, I’ll need to clear away the underbrush on the other side, then cut up the fallen tree to remove it in pieces.

Which will give me access to the back of the junk pile, too. There appears to be some wire fencing that may actually be usable back there!

This is the next area that needs to be worked on. All the underbrush to the right of the path through the trees needs to cleared out. This will give access to the dead trees that need to be cut down, as well as the back of the junk pile.

Clearly, that junk pile didn’t start out as a junk pile. The wood was carefully stacked and covered with tarps, but then junk got tossed on, the tarps blew off, and now the stacked boards are badly rotted. They’re also very full of nails and screws. !! I’d already cleared underbrush to access this side of the pile of wood, which was used when I worked on what are now the garlic beds, but what I cleared up is now mostly full of thistles. :-/

Where I’m standing to take this photo is about where we plan to build the cordwood practice shed that will become an outdoor bathroom, with composting toilet. We had intended to start work on it last year, but not it will wait until all those dead trees are taken down, since they would need to be felled towards where the shed will be. As it is, the new location for our compost pile, and the beet bed, may be in the way. These are very tall trees!

So that’s progress for today. It isn’t a lot, but it’s amazing how much difference even that little bit makes.

Plus, we now have a couple of “new” sprinkler hoses!

The Re-Farmer

A much better day today, and what will I do with these?

After yesterday being such a crappy day, I’m happy to say that today was much improved!

This morning, I found several bright bits of sunshine in the garden.

Several of our summer squash blossoms are now fully open! There are just male flowers right now, so it’s still too early to expect baby squash, but it’s still very exciting to see!

The summer squash was not the only thing in bloom.

Some irises in the flower garden outside the living room window started blooming today. These have been here for as long as I can remember, coming back year after year, decade after decade. They may well have originally been planted here before I was even born.

We got the trip to the smaller city that I meant to do yesterday. One of our stops was to Canadian Tire, where I was finally able to find the air filter I needed for the push mower. After double checking exactly what I was looking for, I realized that the last couple of times we’d looked for a filter, this type wasn’t in stock at all, so I was happy to find one.

We also made a stop at the nearby Walmart. We ran out of kibble this morning, and had a few other things we needed to pick up. Thankfully, we were able to get everything on the list, and still stayed under budget – something we couldn’t have done if we’d had to buy in town.

One of the other things we needed to get was more gas for the lawnmowers, so pretty much as soon as we got home, I changed the air filter on the push mower, and was finally able to finish most of the mowing.

I had started to move along the driveway with the riding mower, a couple of days ago, but there was no way I could use the riding mower to do the area in front of the barn. This is the first time this area has been mowed this year, and it was tall enough to make hay! I’ll go back with a rake and the wagon to pick up clippings for mulch. There was no way I was going to use the bag. I’d have needed to stop to empty it so often, I would never have been able to finish it all in one evening. As it is, there is still another area that needs to be done, but it’s not used at much. At least now, we don’t have to wade through knee high grass to get to the barn and shed!

I also finally got to cut the main garden area, that is too rough to use the riding mower on. Frankly, found myself thinking I maybe should have used the weed trimmer over all of it, but at the highest setting, the push mower was able to do the job.

I had done most of this area with the riding mower; the strip along the right was done with the push mower; you can tell by the darker green, because I had the mower set so much higher. This strip had been plowed, so there are still furrows. If I wanted to get the rest, among those trees, I’d have to use the weed trimmer.

It’s just a guess, but I’m pretty sure where I was standing to take the photo is where the telephone lines are buried. A thing to keep in mind when we plant the trees we are planning on.

This photo was taken from the same spot, facing the other way.

Not much left of that pile of garden soil!

Part of this section was also plowed. You can see the gate in the back, where the tractor and plow would have entered. The plow was dropped starting along the trees on the right. Why there, I have no idea. There hasn’t been garden there since I was a babe. My parents did try gardening here, when they first moved the garden closer to the house (it used to be way out by the car graveyard, when my parents first moved out here). As I child, I remember when the area that has the trees right, now, was a cabbage patch. The area the dirt pile is on now was no longer being used by then. I remember asking my mother why they stopped using this section, and she told me it was too rocky.

Considering how many rocks are everywhere else, that’s saying a lot! :-D

Anyhow, I still wonder why the plowing was starting that far back, but then, my sister thinks the person who did it was drunk at the time, so who knows? The furrows mean it’s another area for the push mower, though the section to the right is flat enough for the riding mower.

I was even able to do some mowing among the trees, to open up some of the paths. The plants at the bottom of the dead spruce tree in the left foreground bloom beautifully, so I’m making sure to leave them be. I’ll have to do the rest of the area around the trees with the weed trimmer.

Mid term goal is to plant low growing ground covers that we can walk on in the paths, while in between the trees will be a combination of ground cover and flowers, with one exception. The morel mushroom spawn my husband got for me for Christmas will be “planted” under one of the elms in the maple grove. He also got giant puffball spawn for me, too, but they like to grow among grass, not under any particular type of tree. I still haven’t quite decided what area I want to inoculate with those, yet. Just somewhere we won’t be going over with the mower.

That is not the only thing I have to figure out where to put. We also have these.

These are the Jiffy pellets we planted the Hopi Black Dye sunflowers in, some 2 months ago. The one that had sprouted got transplanted into the old kitchen garden. When a second one suddenly sprouted, almost a week later, I transplanted it a short distance away.

That made me curious enough to look at the rest of the pellets. I haven’t been watering the tray they were in, but when I lifted some of them up, I saw roots! No sprouts, just roots.

So I moved them all onto one of the baking sheets we got to hold the Solo cups we were using to start seeds, and added water.

Almost overnight, more started to sprout.

Currently, there are 7 new sprouts!

Why did it take these so long to sprout? Especially when the ones that were direct sown, in far less ideal conditions, sprouted so quickly??

And what will we do with them? At this point, I don’t think there’s enough growing season for them to fully mature, but now that they’re finally germinating, I don’t want to just toss them. Also, there’s no more room for sunflowers in the old kitchen garden, and the space they would have gone into in the garden got the Mongolian Giants transplanted into it, since these hadn’t sprouted at all at the time, and we thought they were a lost cause.

I think we will transplant them near the Dorinny corn. That wicked frost we had in late May didn’t seem to affect the corn sprouts at the time, but then they disappeared. They are supposed to be a Canadian frost-hardy hybrid, but that was an unusually cold night. While they looked unharmed the next morning, I guess it took a couple of days for the damage to become visible. However, the other corn seeds that hadn’t geminated yet came up soon after, so we will still have Dorinny corn, but it also means we have entire rows in the block with only one or two corn plants in them. I figure, we can make use of the empty space and transplant these sunflowers into them. Sure, they may not reach full maturity, but at least they’ll have a chance. Who knows. We might have a long and mild fall.

Then there are these.

These are the pink celery that should have been started indoors much earlier. They’ll eventually go into a container (or two?), so we can keep them outdoors for most of the growing season, then try using the sun room as a green house to extend their growing season though late fall.

Assuming they survive being transplanted. We’ll see.

All in all, it’s been a really good day. I finally got things done that kept getting delayed, I got to see the kittens, we had a fabulous supper of butter chicken one daughter made while I was mowing, and there’s panna cotta setting in the fridge, made by my other daughter. And tomorrow, we will be celebrating Father’s Day and my younger daughter’s birthday, early, with a pizza night. :-)

I’m looking forward to a great weekend!

The Re-Farmer

Just a trim…

The wonderful rains we’ve had has meant everything has exploded in growth.

Including the grass and weeds.

Today, I decided to break out the weed trimmer and get around some areas before mowing.

In progress, I figured I would keep trimming some other areas. Just the rougher areas, I told myself. I’ll do the rest with the push mower, I told myself. I’ll just do the places the mower won’t fit, I added.

Of course, it’s all rough out there.

Before I started, I took a look at the crab apple tree by the old compost pile. This one was looking pretty diseased last year, but other trees were looking worse, so this is a bit unexpected.

dead crab apple tree

Parts of it almost started to grow leaves. Then that wicket frost we got in late May hit, and it never recovered. Now it just looks dead.

Dang. That was one of the edible crab apples, too.

Note, however, the background of the photo, and how high the grass and weeds are. It’s high enough that getting the hose over to water the corn and squash is made more difficult than it should.

It was at the other crab apple trees that I started.

crab apple trees

The tree in the foreground has just a few live branches left. It is one of several that we will eventually be cutting down.

As for the weed trimming, the ground is pretty flat on one side, so I just went far enough that I wouldn’t be getting my head caught in the branches when I mow. There is something about apple branches are just grab onto things! If I’m wearing a hat, I usually get it pulled right of. If not, I end up having to untangle twigs from my hair. :-D

On the other side, there’s the first ridge of plowed soil. Aside from making it hard to mow over, when the grass gets tall, it’s one of those places we’ve turned an ankle, more than once!

Once at the far end, I trimmed around the summer squash. It’s particularly rough around there, as that’s where the person who plowed it last, turned the tractor, going in circles instead of turning the soil in straight lines in the same direction.

This photo was taken after my daughter had given the beds their evening water. The summer squash was looking pretty droopy while I was working around them, but they sure perked up fast after a good soak! :-)

Also, you can see where the garden cam is currently set up, on that saw horse sitting on its side. Last night, nothing at all triggered it. No deer visits to the garden! :-)

bean beds

When I started working around the bean beds, I had to get one more length of extension cord to finish the job. Where the bean beds are is actually fairly level, but I didn’t want to run a lawn more in between them.

garden beds

The extra length was enough for me to be able to reach all the sweet corn and sunflower beds – the pea trellises were prefect to drape the cord over, so it wouldn’t get dragged over plants. One of my daughters had already gone through the area to get rid of the tree saplings that are trying to overtake the area, so I was able to trim all the beds without having to work around little trees. This is not the most powerful of weed trimmers! ;-)

garden beds

Then I just kept on going. I trimmed around all the main beds, and even in between the old raspberry plants under the dead crab apple tree and the chokecherry. My mother had transplanted some there before we moved out, and when we started reclaiming parts of the old garden area, we found more that we transplanted into there. Eventually, they will be moved to a location that isn’t under trees. ;-)

The last area was the biggest job.

part of the old garden area

I had stopped for a break when I took this picture. Not only were the grass and weeds thickest and highest here, this is where the plow took the tightest turns, leaving the biggest ridges. One of which now has the Crespo squash growing in it.

All this, and we still need to mow in the areas that aren’t as rough! But at least it’s done, and we’ll have less chance of hitting something hidden in the grass, with the mower!

But that will wait. I was supposed to work on the squash tunnel today. Having the area around it trimmed will make that a bit easier to move around while it gets worked on, tomorrow. ;-)

That cheap little weed trimmer has done really well! It may be a pain, dragging the extension cord around, but it does the job. :-)

The Re-Farmer

Clean up: Baby chainsaw, out again!

I was very happy to see the battery charged up fast enough that I could use it again tonight. I quickly trimmed the poles I’d left earlier and moved them out, then got started. Both my daughters were able to join me this time, so I got to focus on cutting and trimming, while they cleared away the trimmed branches and hauled away the poles.

Here is the before and after.

I was also able to take out some of the smaller dead trees, though one had to be cut pretty high up, where the 4 inch bar could get through. Another didn’t even need cutting; once I’d cleared around it, I could just push it over!

After about half an hour of almost continual cutting, the battery started to die. I probably could have gotten a few more cuts out of it, but I helped the girls finish cleaning up, instead.

This is a very good start in materials to build with!

We then spent some time talking about what sort of trellises and arches to build (though I suppose “pergola” would be the word to use) and walking through the garden area to think about how we want to work things out. The strongest, heaviest poles will be used to support the winter squash, and for those, we were thinking of some sort of A frame tall enough for us to walk under.

Which, I admit, doesn’t have to be that tall. ;-)

Then we wandered around, looking at where we planted the bulbs and corms last fall. We have no idea if they survived the deep freeze we had last month. My bigger concern is how dry everything is. You’re not supposed to have to water these. Especially the tulips. But we’ve had so little snow this past winter! We’re supposed to get a little big of snow on Friday or Saturday, but even if it reaches us here, the amount of precipitation expected would be pretty negligible. It’s not unusual to have one last blizzard in April, which would actually be very beneficial, as far as precipitation goes. I’d rather have snow right now, instead of rain, as the ground it still so frozen, rain would wash away to the ditches, rather than watering the soil.

But I digress.

It was so great to finally get outside and start doing yard work! I was really missing it. :-) And our new baby chainsaw is turning out to be an awesome tool!

The Re-Farmer