After finishing my morning rounds, I remembered to check the tracking information and saw that our potatoes were ready for pick up. After picking up the nice big, heavy bag, I made a spur of the moment purchase and got some more wood shavings. We still had a small amount left over from last year, but since we can’t quite use our wood chipper yet, I decided it was worth picking up another bag. I’m glad I did!
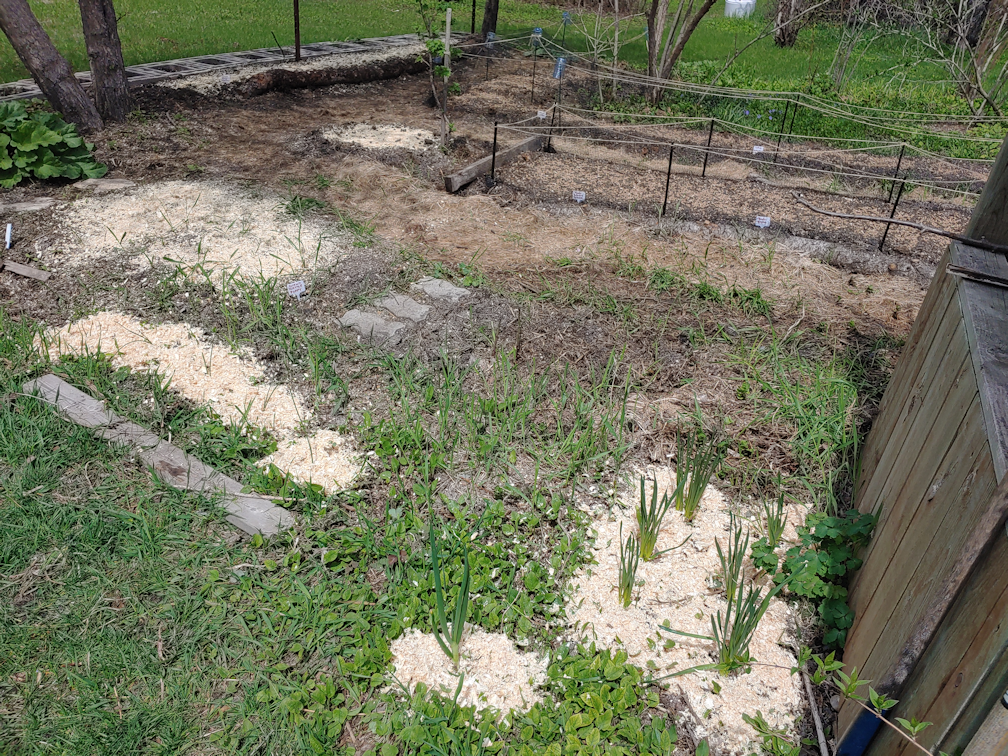
One of the issues we have with our soil is that, when it’s watered, it develops a hard crust at the time, which seedlings have difficulty breaking through. One way to reduce that is with mulching – and that’s something we don’t have in the old kitchen garden right now. A straw mulch would be too much for what we’ve got in there right now. We do have lots of the hardwood pellets we use for cat litter, but I decided to use the shavings, too.
For some things, I could use the shavings for a slightly thicker mulch, such as around the irises and daffodils, and that one onion that predates us and keeps coming back, no matter how many times something managed to crunch it. The onions along the retaining wall are super tiny still, so they just got a very light mulch, as did the area we planted poppy seeds in, and the tiny patch with lettuce seeds next to the rose bush. More can be added later, as things grow, if necessary.
I even mulched one of the retaining wall blocks. Last year, we found a mystery bulb lying on the grass. We weren’t sure which of the bulbs we’d planted had lost one, so I just stuck it into this cube to see what came up. Nothing did, so it was quite a surprise to see what looks like a tulip emerging this year!
For the beds that are covered with netting, I still used the hardwood pellets, since they can fit through the net. It was a bit difficult to get it to spread evenly, since they wanted to roll into the furrows seeds were planted in, but those are what we want to protect from crusting, anyhow.
All the mulch got watered, so they can help keep the soil moist, and for the hardwood pellets to break up into sawdust. The seedlings should be able to push through the sawdust just fine.
Over time, the crusting problem will lessen as more organic matter like this mulch, breaks down into the soil. Definitely a long term process, but that’s par for the course! This garden has already been 4 years in the works, since we started cleaning it up and prepping it, our first summer here!
Ah, but what about those potatoes we finally picked up?
That will be in my next post! :-) I am really happy with them!
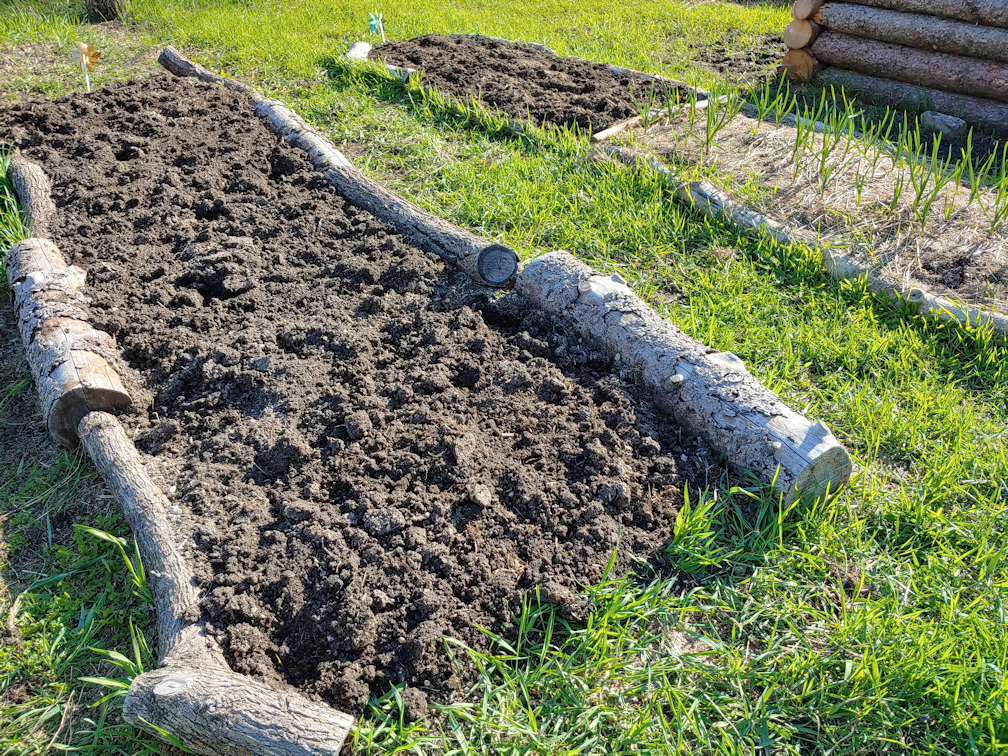
Last night, I was able to head outside again and work on a couple of the low raised beds. We’d done these in the fall, but they need more work again.
I managed to get a bed and a half done last night.
We definitely need to raise these beds higher. With the constant bending to pull the rhizomes and roots out, by the time I was done, I was feeling light headed and ill. :-(
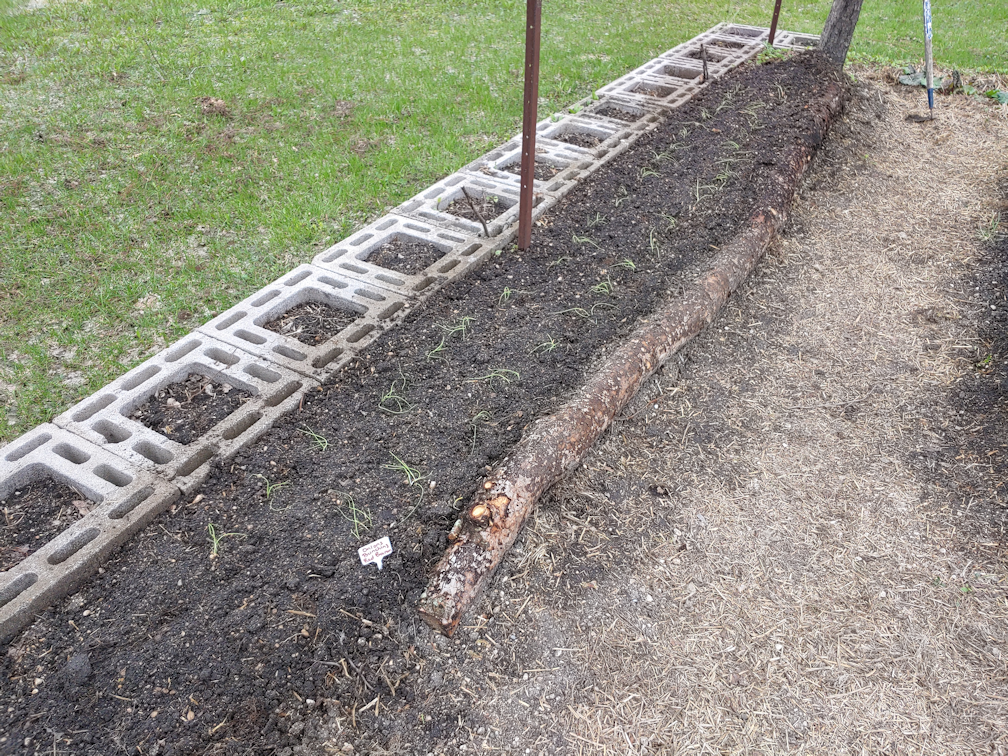
The garlic hear is doing very well. The other two beds are doing very poorly. Because I planted them in a grid, I could use the few sprouted garlic to figure out where others should be, and gently dug down. I’ve found some cloves with their bit of leaf sprouted, but not at all green. I suspect we may have lost a lot of cloves to the cold, even though they were heavily mulched.
The remaining three beds need to be worked on, but we’ll have to do the pea trellises, first. Those should be planted already, and the purple peas the sprouted from seeds we saved need to be transplanted. They are frost hardy, so we don’t have to wait until past our last frost date, and they’re getting too big for their pots.
Today, however, I was expecting our potatoes to come in, so I really wanted to get that second bed deep mulched. I was very happy to be able to pick up some more cardboard from my new homesteading friend this morning – and get to visit her chickens, guinea hens and ducks! I was very inspired. We so need to get a coop built, so we can have chickens!!
They didn’t have as much carboard as list time, but I was also offered stacks of egg trays, so I went ahead and took those, too. The one downside of this program: it may keep a lot of food waste out of the landfills, but the farmers and homesteaders are left will all sorts of packaging, and not all of it can be reused. Even some of the cardboard has a wax coating on it, can can’t be used as mulch. Stuff is still going to end up in the landfills.
But not the cardboard I got today! :-)
This is the area that needed to be worked on. This had two layers of black tarp over it!
We are dry enough that I could break out the weed trimmer (and three extension cords!) and use that, first.
I trimmed right into the ground as much as I could, which tended to reveal plenty of surface rocks. I stopped frequently to pick the bigger ones. I’m not sure how much of a difference it will make, but better to remove them while the chance was there!
After this was done, I dug some hoses out of the garden shed and set up. It was very hot (we hit at least 22C/72F, which is higher than forecast) and windy, so I wanted to be able to wet down the cardboard as I worked, to make sure it wouldn’t blow away.
By this time, the post office was open again, so I headed out to pick up the potatoes, only to discover they weren’t in yet! I suppose I should have checked the tracking number first. Ah, well. I needed to get more milk at the store, anyhow! The tracking number now says they should arrive tomorrow by end of day, but the store is open only half a day tomorrow. Hopefully, it’ll be in, in the morning. We’ll see.
Once home, it was back to work!
This is when I ran out of cardboard, including what was left over from last time!
This is where I ran out of egg trays, including some of our own that we’d been saving. They’re laid in interlocking layers, so each row is at least two layers deep.
What to do next?? This is a large area to cover.
I scrounged around the house and found some boxes I could break down. Then I remembered we still had some moving boxes in the basement. We’d been saving them for something – I can’t even remember what, anymore – but the new basement now gets wet where a rain barrel had been allowed to overflow, before we moved here, and the boxes have been water damaged.
Which is just perfect for here.
I used up almost all of the old moving boxes! I think there’s three left, now.
I kept having to pause and use the hose, because they were drying so quickly in the sun. The egg trays, at least, hung on to their moisture a lot more.
Then it was time to start laying out the straw.
This took up a lot of that big straw bale!
Since I had the hose handy, I took the time to wet down the straw every now and then – and the cardboard, so it would still be wet as I laid the straw down. It took quite a while to get it done, but I think it worked out better that way. I hosed down the other bed as well, but it takes a lot to get straw really wet. We’re expecting showers and thundershowers, on and off over the next couple of weeks, but it won’t be enough to really get it soak, so we’ll be hosing it down daily. I plan to chit the potatoes, so we should have a few days to get it really good and wet.
The high raised bed, with its onion transplants and sown spinach, also got thoroughly watered.
While I was working on this, a daughter was back out digging holes for when the trees come in, until the heat became too much for such heavy manual labour. It was bad enough that she had to break out the loppers to cut roots she was hitting, not to mention all the rocks she had to clear out, too! Including both the bison berry and the highbush cranberry, she’s digging two rows of 16, three feet apart. Then there’s just the holes along the lilac hedge for the 5 sea buckthorn, and those will be ready for when the trees arrive. The shipping date for those is scheduled for May 30, with an expected arrival of June 2. Once they arrive, we need to get them in the ground as quickly as possible – and have a way to protect the saplings from being eaten by deer!
For now, we are ready for potatoes. Now that we finally have a break in the weather, the next few weeks are going to see a lot of garden activity! I’m eyeballing the long range forecast, on three different apps, and while they are all slightly different, none of them are suggesting we’ll be getting frost, and overnight lows are looking pretty good. I might have to chance it with some of our transplants. The kulli corn is outgrowing their toilet paper tube pots and need to be in the ground! I’m still not even sure where I’ll be planting them. They can grow up to 8 feet tall, so I’m thinking of putting them along the back of the main garden area, where we’d tried growing gourds our first year of gardening. They’ll be protected by trees from the north, while getting full sunlight all day. They would be planted in two or three long rows, closer together, rather than a block, but I think it will still work out.
This is going to be a very interesting gardening year!
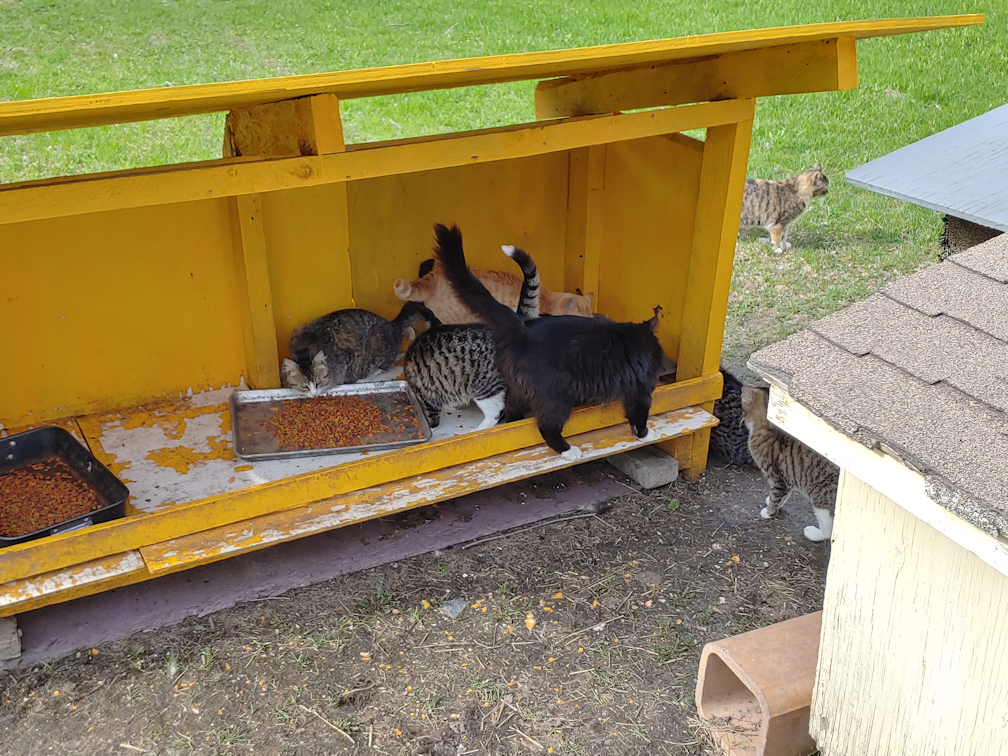
Today has turned out to be a warmer day than predicted, and beautifully sunny. When heading out to do my morning rounds, I had a whole crowd of hungry kitties, waiting by the sun room door for me!
They were running around so much, I didn’t even try to count them. While putting food in the kibble house, TDG not only let me pet him, but let me pull the big ole wood tick in the tip of his ear! In fact, he didn’t even seem to notice I did it.
Which reminds me; while topping up the cat food last night, I got to touch Rosencrantz a bit and finally got a closer look at one of her ears. I thought she might have lost the tip to frost bite over the winter, but the tip is still there! It’s just badly torn. Not a new injury. Not much we can do about it, unfortunately.
The transplants got set outside for hardening off. They were supposed to be out for 5 hours, but we ended up bringing them in a bit early. The winds really picked up, and some of the pots were being blown around.
Wind or no wind, I was determined to get the old kitchen garden finally planted!
This is now our beet bed. We bought two types of beets this year, Cylindra and Bresko, plus we had some Merlin left over from last year. The support posts handily divided the bed into three sections, so that makes it easy to keep track of where one type starts and another one ends.
After the bed was seeded and watered, I broke open the roll of netting. This is the stuff my daughter picked out that I thought could be used for deer fencing. It’s a much finer net than I expected! The black just disappears, too, but in the photo, you can see where the excess is bunched up along the sides. I’m really glad I found that big bag of cheap tent pegs in the garage. We used quite a few of them to pin down the edges of the netting. The short ends are held in place at one end by a stick rolled up in the excess, while at the other end, the excess went under a board I was using to mark the end of the bed.
Next was the L shaped bed. Lettuce went into there. I thought I had 4 types of lettuce left over from last year, but it turned out one of the envelopes was empty. That actually worked out, for the amount of seeds in the remaining packets.
The hard part was covering the odd shaped bed. One of my daughters came out and we sized up a piece of netting for the longer part of the L shape and cut it. The netting is 14′ wide, so we stretched it out on the grass and cut it in half.
The short side of the L, up to the label you can see near the bottom of the photo, is one type of lettuce, which is about as much as the other two together! There were still a few seeds left over, including some that had spilled in the baggie the seed packets were in, so those got scattered in the odd little bit of space next to the rose bush. They didn’t get covered with netting; the space is too small to bother.
The long side of the L shape was pretty easy to cover, but the short side curves around the lilac and gets wider at the end. While I used pieces from the canopy tent frame as supports at one end, there weren’t enough of that length for the whole bed, so I dug out some metal support rods I got last year. They’re not very strong and some had pieces broken off, making them shorter. Those matched the tent frame pieces more easily, but other were full length. I could push most if them deep enough to match heights, but with a couple, I kept hitting rocks that were big enough, I couldn’t seem to get around it. That one stake that has a spider web of cords from it is the highest of them all, and there was no way I could adjust it to avoid the rock I was hitting, and still have it where I needed it. (The bottoms of water bottles are there to keep the netting from falling down the stakes) That extra height in particular made pegging the netting down more of a challenge. In the end, we just had to push some of the stakes inwards to create some slack. We managed it, though.
That left one more bed to plant in.
For this bed, I transplanted the Red Baron bunching onions, in little groups of 3 or 4 seedlings. These are not going to get covered, since nothing eats the onions. Hopefully, the cats will leave the bed alone!
While working on this, I checked out the small bed we planted the poppy seeds saved from last year. I think they are starting to come up, but there are so many things coming up with them, it’s hard to tell! For all the roots I dug out of these beds, we’re still going to have a lot of weeds to fight off.
Now, the only thing left in the old kitchen garden are the retaining wall blocks. I’d transplanted mint into alternating blocks, but they’re not showing yet. I don’t know if they’re going to show up later, or if they got killed by the winter cold. It takes a lot to kill mint, but they did just get transplanted. I’ll leave those for now, but still plan to plant things in the remaining blocks. I just haven’t decided what, yet, since we will likely not be covering those. Plus, this area gets shaded by the ornamental apple trees a lot. With the T posts there, we could put up trellis netting and plant climbers, but anything like that would be deer or groundhog buffet, so we would have to find a way to cover them. It was very difficult to cover the retaining wall blocks last year. We’d planted lettuce in it last year, which we were able to protect from the deer, but didn’t count on the groundhogs getting at them.
We’ll figure it out. We can tuck something into the blocks, later one. For now, I’m just glad to finally get this garden basically done!
Oh, before I forget, just a quite update on my mother. I called her up this morning, and she’s still in a lot of pain. She’s quite surprised by it, it seems. She’s also disappointed. She thought that the doctor would be able to fix her. I tried to explain, they can’t fix everything, but she started taking about how, with all the modern technology we have, there must be something. I had to go back to using my husband as an example, since he’s been dealing with debilitating back pain for a very long time now. Even if they technically could do surgery for one thing, the risk was too high for little benefit, and it would have to be done again in 2 years anyhow – and that wasn’t even for the main source of his pain, for which there is nothing that can be done other than painkillers and, for some of it, physio. He hasn’t been able to do physio since we moved here. Some things just can’t be fixed. I don’t think my mother realised just how fortunate she is to have reached 90 and not had to deal with something like this before.
Ah, well. It is what it is. We just deal with the hand we’re dealt with!
Early this evening, the rain finally stopped, the sun came out, and the temperature warmed up several degrees higher than forecast. We took advantage of the break and quickly put the transplants outside to harden off for a couple of hours. Normally, I would have added an extra hour, but it was getting too late in the day for that. (I’m trying something different again with my photos; please let me know if you have any problems viewing them.)
There is SO much water all over the yard. Even areas that don’t seem to have puddles in them have standing water, hidden by whatever green growth is managing to emerge.
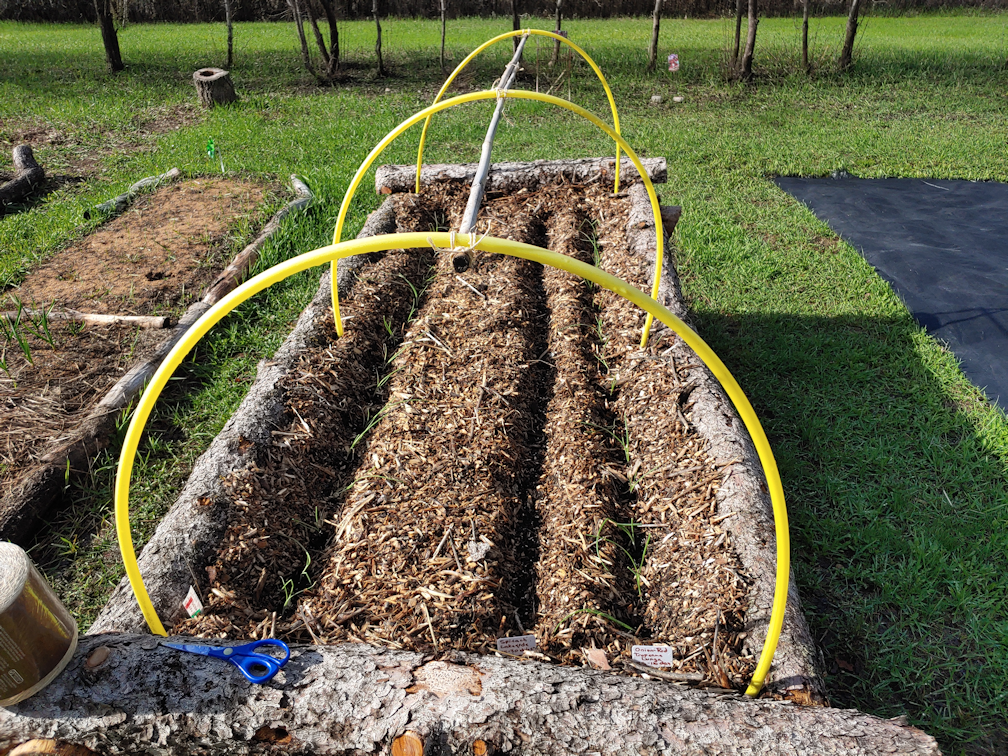
One of the things I wanted to get done was reinforce the hoops on the high raised bed. The problem was, I didn’t have anything long enough. So I made do.
We have some bamboo stakes that are getting pretty old and fragile, including some broken ones, so I was able to tie one full length one together with a shorter one, then attached it to the hoops. It’s now ready to have some plastic put over it, tomorrow evening, before the temperatures drop low enough for possible snow.
I also had a chance to clean up one side of last year’s squash tunnel. We’d only managed to do the other side in the fall, before the snow arrived. This year, we will be planting pole beans to climb the tunnel.
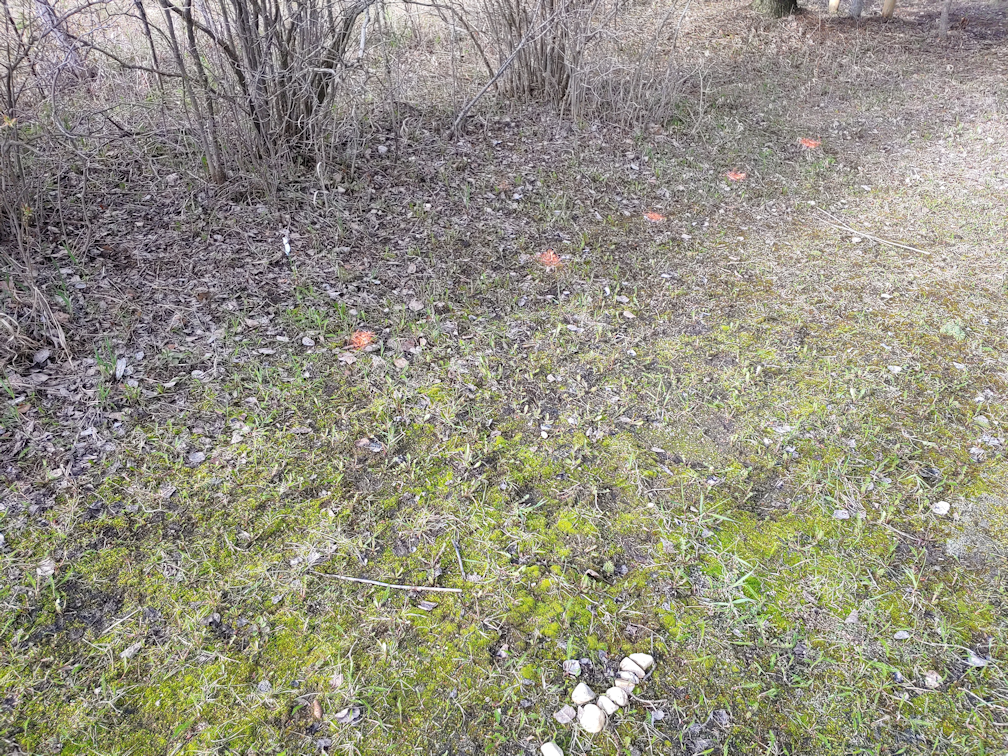
Here we’ve marked the future sea buckthorn locations. You can see the gaps in the lilac hedge, where the deer are getting through. It’ll take a few years, but the sea buckthorn should fill that in nicely.
Here, where the corn and sunflower beds were last year, we’ve marked where the silver bison berry will go. (At some point, we’ll even take out the old sunflower stems the deer didn’t finish off. :-D) Each will be about 3 feet apart in their rows. We are still debating how far apart to make the rows – certainly not the 16 feet recommended! We were thinking 4 ft apart at first, but might go with 5 feet apart. We also changed our minds about the 2 highbush cranberry, and will be adding those to the far end of the the bison berry. One of the reasons these are being planted here is for a privacy screen, which will eventually extend as far as the row of crab apple trees. The saw horse you can see in the distance is next to the last one of them in the row. The cranberry bushes will help extend the privacy screen a bit, and we will plant other things over the next few years to keep extending it.
The branch pile in the distance is completely surrounded by water right now.
Where I’m standing to take the above photo is roughly where the phone line is buried, so we will be leaving an open lane, wide enough for a large vehicle or heavy equipment to drive through, as we plant more trees and shrubs.
As the berry bushes we plant fill out and start creating that privacy screen we want, we’ll start doing more to clean up the fence line, which is in serious need of repair. It has trees growing on either side of it, some of which will be taken out completely, while others will have their lower branches pruned back. There are a few dead trees in there, too. In one area, there are wild Saskatoon bushes. I want to clean up around them so that they are not as crowded, and have better growing conditions.
Gosh, it felt so good to be able to get at least a couple of hours of work done outside! I’m just loving being able to finally do some decent manual labour again!
It was a bit cooler and overcast this morning, but still pleasant enough to get the plants outside for a couple of hours.
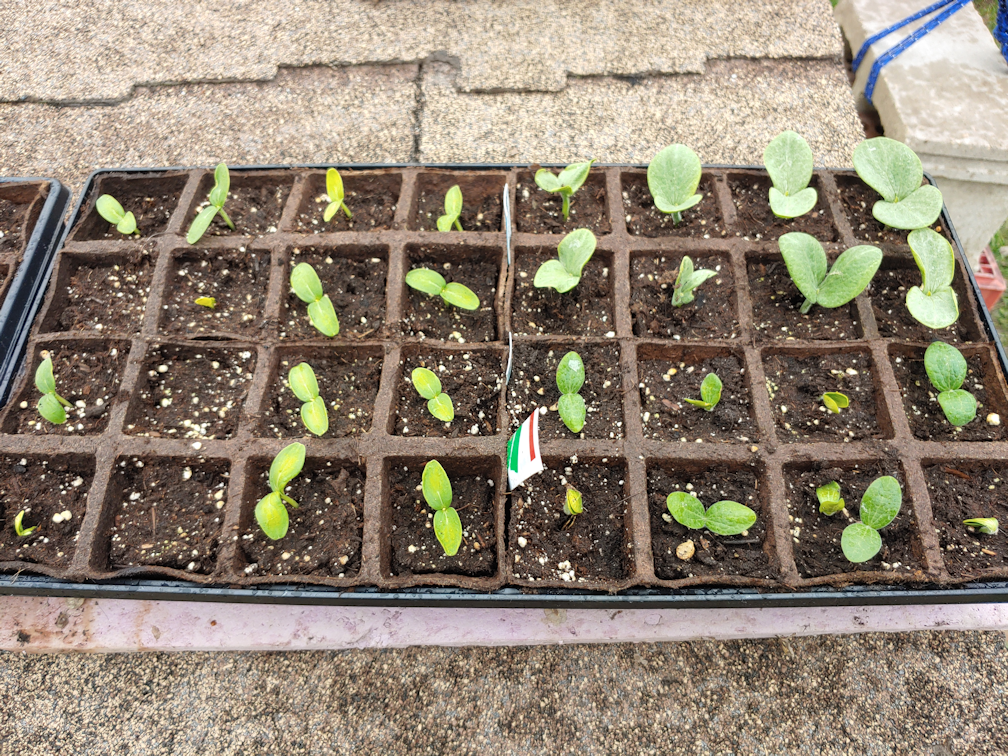
I am really happy with the newest seedlings. This tray has the cucumbers in the left half, with the Teddy and Red Kuri winter squash on the right. It took so long for the winter squash to germinate, I wasn’t sure they’d make it, but we have 100% gemination!
The purple peas in this tray are getting nice and big. The summer squash in the other cells took a long time to germinate, too, but they seemed to get a boost after I put the warming mat under them. It’s hard to see, but even the green zucchini is finally germinating, next to the peas. I thought the Magda squash had started to germinate, but not quite yet. We had less success with those the last 2 years we planted them, too. Our first year, we had only 2 surviving plants. Last year, there was just the one. Magda squash just seems to have a harder time of it.
So far, only 2 of the yellow zucchini have germinated. Last year, we had some germinate, but when they started producing fruit, they were green, and we no yellow zucchini at all. I’m hoping that won’t happen again, this year!
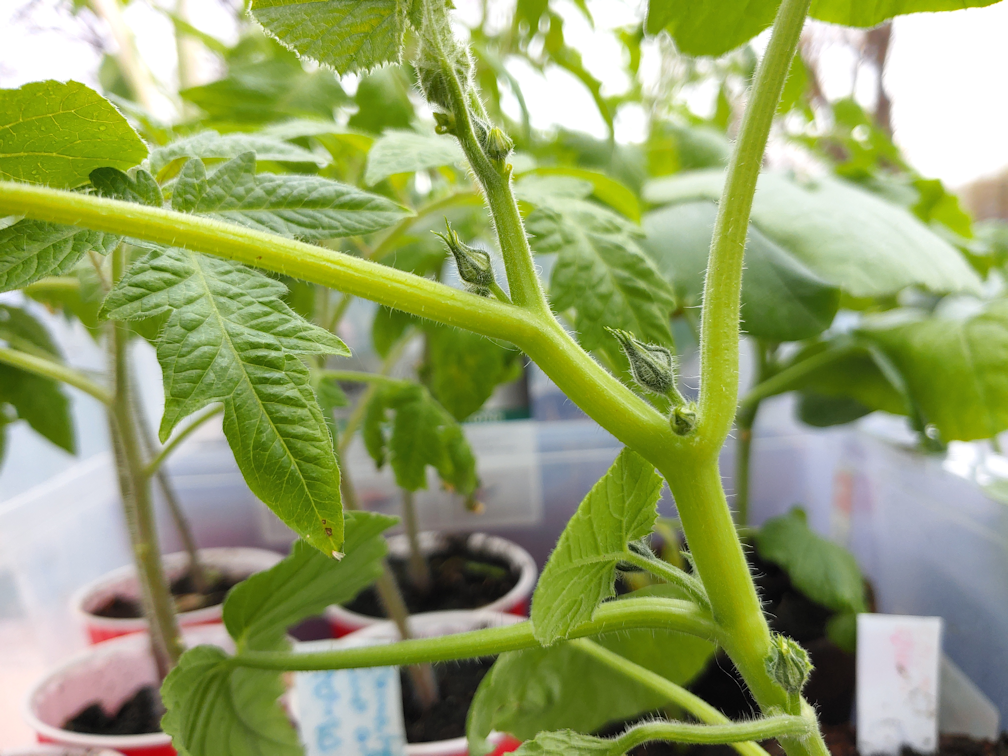
The transplants seem to be quite liking their time outdoors, and even the newest little tomatoes in the foreground are looking generally robust.
We have 3 Crespo squash – and they are budding! Would you look at that!
I considered pinching them off, but these first flowers would be all male flowers. The next batch of buds should be both male and female. So I’m thinking to just leave them? I don’t know. There is very little information out there on how to grow Crespo squash. They do seem to be very enthusiastic growers!
While moving the blooming Wonderberry in and out of the sun room, we have been brushing the 3 plants against each other, in hopes to pollinate them, just in case. I don’t know how if they are self pollinating or not. Nowhere I’ve looked about them even mentions pollinating.
The transplants were left out for 2 hours today, which gave me time to work on our very first direct sowing – and transplanting – in the high raised bed.
The first thing to do was dig trenches through the wood chip mulch, so that things could be seeded/planted into the soil beneath. We have three varieties of spinach seeds from last year, and for this bed, I chose Lakeside, which is the fastest maturing variety of the three. The tray of onions I grabbed are the red onions, Tropeana Lunga, which should look like this when they mature…
This image belongs to Heritage Harvest Seed. You can see what else we ordered with these, here.
By planting the onions around the spinach, they should help with keeping away harmful insects, and maybe even keep hungry critters away. The high raised bed is buffet height for deer, though, so we will be covering them later.
There is space to do a second planting of spinach in two weeks, which will also finish off the seeds we’ve got left of this variety.
The largest Tropeana Lunga seedlings filled the two outside rows, but there were still a few tiny seedlings left. The size that would be considered not worth planting. I hate to just toss seedlings, though, so I ended up sticking them in the soil at the base of the raised bed on the north end. When this was a low raised bed, it was quite a bit longer, so the soil is softer on that end. If they take, great. If not, that’s okay, too. We don’t have a lot of this variety, so I’m hoping to be able to overwinter a couple of bulbs to go to seed next year.
I was left with nice, soft potting soil in the tray the onions seedlings were growing in, so I used that to gently top the spinach seeds, and put just a little around each onion plant, more to keep the wood chips from falling onto them than anything else.
I have to say, I LOVE the high raised bed to plant in! It was completely pain free, with no strain on my joints. Well. I suppose that doesn’t include my arthritic fingers, but I didn’t even notice pain in my hands, either. It took me less than half an hour to plant into this bed
I didn’t bother watering these, since it was already starting to rain by the time I was finishing up. It’s been raining off an on, ever since. My daughter and I got a bit damp when we headed out later on, to figure out exactly where to plant our tree order when it comes in. With 30 silver bison berry to plant, those were the ones we need to figure out the most. They should be planted 3-4 ft apart. Since we are doing these as a privacy hedge, we will planting them 3 feet apart, with most of them along the east end of the garden area, leaving a lane just wide enough to drive through, if necessary, between them and the fence line. Taking into account where the phone line is buried, we’ll be able to plant two staggered rows of 10, though as we get closer to the spruce grove, we many need to jump the rows closer to the fence itself, to keep that driving lane open. There is a branch pile that will be in the way of any lane we leave open, but we’ll still be able to plant around it.
We’ve got 5 sea buckthorn that will be planted nearer the north fence line, to close a gap in the lilac hedge. Any remaining bison berry can also be planted along the lilac hedge, and still keep the lane over the telephone wire clear. This will leave a gap in the privacy hedge, once they’ve grown to full size, that will need fencing or a gate to close it off from deer.
The Korean pine are a whole other issue. Originally, I wanted to plant them in the space between the north side of the spruce grove, and the crab apple trees. These, however, have an 18 foot spread. At their mature size, they would completely fill that space, and we need at least some of it to be kept open to drive through. The alternative was along the north side, which would make an excellent wind break, but with that 18 foot spread and the lilac hedge, we’d be planting them on top of the phone line. Not going to happen.
Which means we’ll have to plant them in the outer yard.
Just past the fence on west side, which has a gate that leads into the garden, there is a space where we can plant 2 of them. Then there is the gate to the secondary driveway – our “emergency exit”, if you will. It was through here that one of our truck loads of garden soil was delivered.
The remaining 7 seedlings will need to be planted on the other side of that back gate, along where there is already a couple of rows of spruces, with some willows at the south end. If we plant them 18 feet apart (we might go with 16 feet), we will have a row of seedlings matching the length of the existing shelter belt trees.
The only problem with this is that the south end is currently under water.
Still, knowing that this is a low spot will help. We can make sure to basically build things up a bit, so that the seedlings will stay above water during spring melt.
Then we’ll have to make sure to put something over them to protect them from being eaten. I don’t know that deer would eat Korean pine, but they could certainly damage them, just by walking over them.
We have not yet received a shipping notice for the trees, but with so many holes to dig, the earlier we get started, the better. Hopefully, by the time they do arrive, we’ll be ready and can plant them right away.
Oh, I just double checked my order! We’re not getting 9 Korean pine. We’re getting 6.
Which means we won’t be digging holes in water, after all. :-D
It’s going to feel weird getting our little 2 yr old plugs and planting them so far apart. Especially since they will grow very slowly for the next 3 years. Which is exactly how my mother ended up planting so many trees way too close together! :-D
Oh, my goodness. I just checked the short range weather forecast, and it’s changed yet again. We’re supposed to get more rain over the next couple of days, then for the two days after that, we’re supposed to get a mix of rain and snow!
What I planted in the high raised bed should be cold hardy enough to handle that, but we might cover it anywhere, just in case, at least for the night.
Last year, May was a very warm month. On this exact day last year, we had a new record high of 30C/86F. The record low for today, -4C/24F, was set in 2002.
After a long, cold winter, it seems we’re getting a wet cold spring.
Still, there are things we can plant. I just hope things warm up decently in June, so we can get the warm weather transplants in!
Welcome to my second “Recommended” series. Here, you’ll find various sites and channels that I’ve been enjoying and wanted to share with you. With so many people currently looking to find ways to be more self sufficient or prepared for emergencies, that will be the focus for most of these, but I’ll also be adding a few that are just plain fun. Please feel free to leave a comment or make your own recommendation. I hope you enjoy these!
We are back on a gardening theme this time, but with a major difference. RED Gardens: Research Education and Development Gardens.
And WOW what a set up they have! I’ll just quote a portion from their About page (where you will also find links to their other social media and Patreon pages).
Based on the explorations and discoveries of a series of food growing spaces, located in the Cloughjordan Ecovillage, Tipperary, Ireland. This RED Gardens Project (Research, Education and Development) consists of 6 family scale gardens each one 100m2 (1000sqf) and following a different methodology, or approach, to growing vegetables. There is also a larger Black Plot, of about 1000m2 (1/4 acre) which is exploring issues and possibilities of an intermediate scale growing space.
The YouTube channel has been around since 2016. As you can imagine, there is a wealth of information available!
This early video explains the different types of gardens they are testing on, plus there is a Black Plot.
There are a number of videos about specific crops, comparing how they did in the different growing environments. One of their most extreme years was growing 54 tomatoes varieties.
No, that’s not a typo. Fifty four.
No, they don’t grow that many varieties of tomatoes anymore!
Other videos comparing things like climbing beans, pole beans, cauliflower, carrots, potatoes, eggplant and more. They even tried wheat.
Interestingly, this was a mix of wheat, not just one type. This plot produced enough to bake a surprising amount of bread. I like how he breaks down the math and calculated how much grain would need to be grown to produce enough flour to make X number of loves per week for a year. One thing I’ve never seen before is burying old, stale bread for trench composting.
And yes, bread was made with flour from this wheat.
How the bread was baked is really something to see! A multi-day process.
Their composting system has evolved quite a bit, over the years, which he explains in this video. I appreciate how he goes into dealing with their rat issues, too.
I think I’ll stick to my “just throw it on a heap” method. We end up burying our compostables in garden beds, anyhow.
Pests are another topic they cover, as well as things like different ways to water, making biochar, saving seeds, temporary microclimates, and so much more.
I like the yearly update videos.
It’s really impressive to see how things have worked out over the years, what was changed and why.
The goal at RED Gardens is to try different things, test and compare, collect and analyze the data, then make that information available to anyone who wants to grow their own food, as best they can, for their own circumstances, with the aide of the data provided. Most of us aren’t in a position to try so many varieties, or use so many different techniques. Having this data, even if growing in a different climate zone, can still be very useful.
And I admit – I kinda geek out every time I watch one of their videos.
Whether you’re a new gardener or an experienced on, I think you’ll find loads of great information at RED Gardens!
While I was working on the transplants, we got a call from the pharmacy delivery driver. I headed out to meet him at the washed out road, opening the gate before starting the van and heading out.
I was backing out of the garage, when a car pulled into our driveway!
He not only got through, he had no issues at all. The washed out road has been repaired! That means we can now reach the highway and go wherever we need.
I was very happy to hear this. Tomorrow, I’m going to go get the mail! LOL
Oh, the things that are exciting when you’re old and boring. ;-)
My main goal for today was to pot up the newest tomatoes, and move things to the sun room.
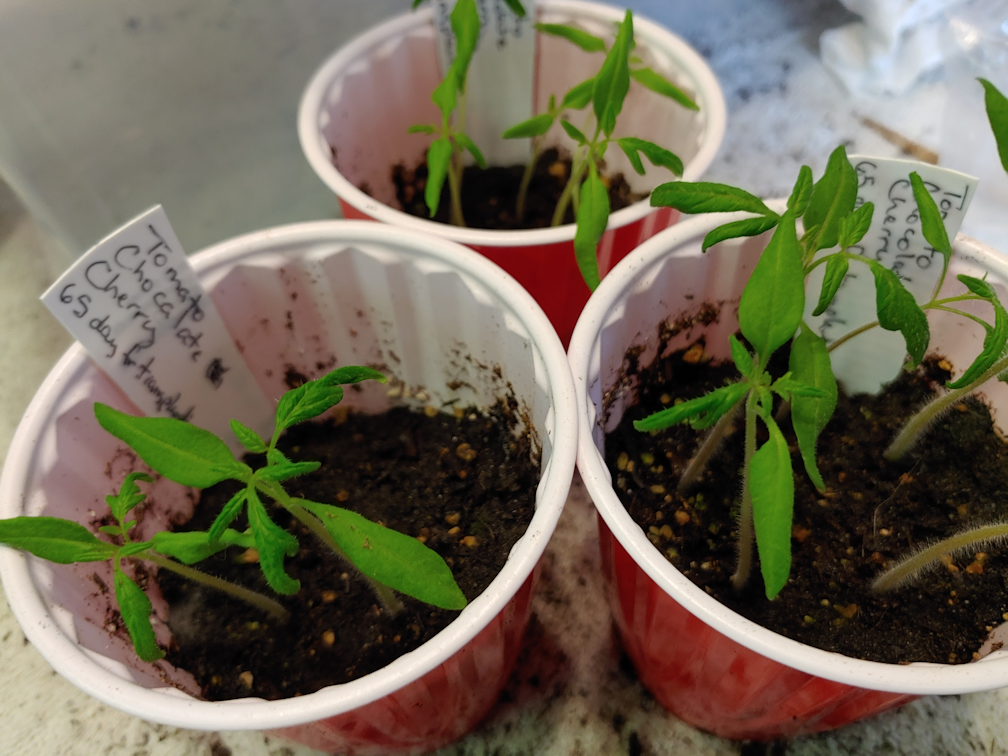
I started with the Yellow Pear tomatoes, which are in the image on the left. Of those, there was one seedling that I pulled out, as it was not suitable for transplanting. The Chocolate Cherry (on the right) got all seedlings potted up.
By the time it was done, we had 13 Yellow Pear tomatoes, and 12 Chocolate Cherry, ready to go to the sun room.
Before that could be done, though, the rest of the pots in the mini-greenhouse had to be taken out, and the mini-greenhouse prepped to be moved. The vinyl cover finally got removed, as did the aluminum foil lining it on three sides, to reflect as much light as possible. The foil has been saved for some other future use.
One of the sawhorses supporting the platform holding plants had to be carefully shifted over to make room for the mini-greenhouse frame.
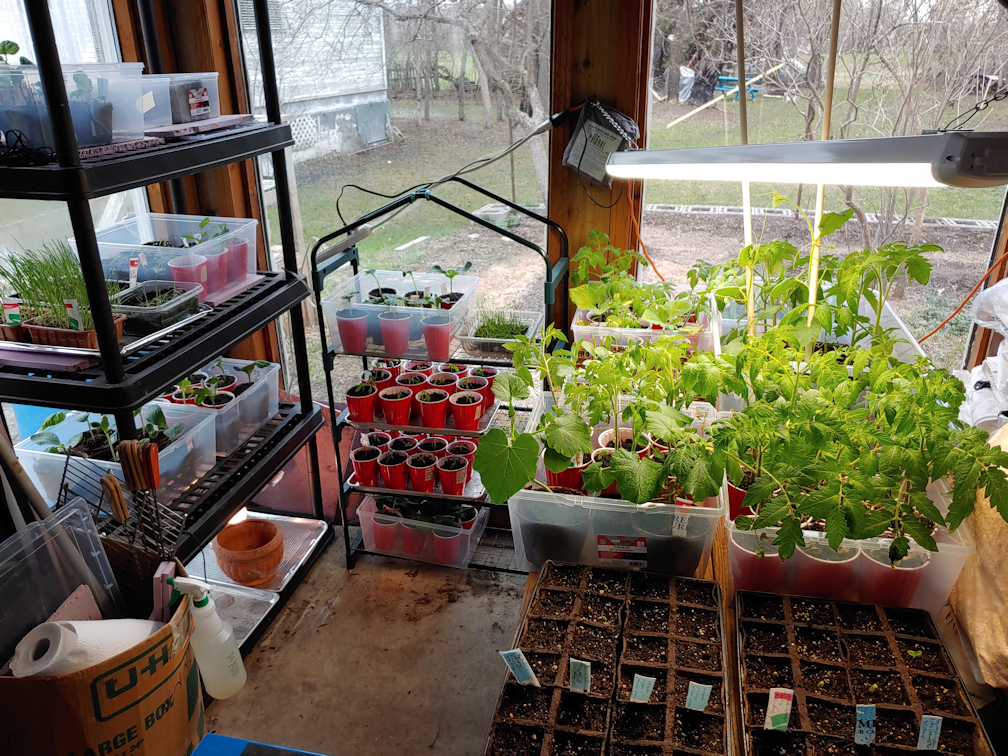
Things got shifted around in the sun room, too. The older tomatoes were getting too tall for the plant shelf, so they got moved to the platform, as did the large bin with the kulli corn. The tomatoes were so tall, I had to adjust the shop light higher, to fit.
Once the newly transplanted tomatoes and seedlings that were in the mini-greenhouse in the living room got oved over, I filled another bin with the seedlings from the large aquarium greenhouse and brought those over, too. Everything fit, with room to spare!
I did change a couple of things after this photo was taken. That terracotta pot was put by the lamp on the bottom shelf, just to get it out of the way. It got moved out, as did the lamp, and the bin at the bottom of the mini-greenhouse was moved to where the lamp had been, so it could get more light.
The seed trays on the bottom right of the above picture are starting to explode. More cucumbers are coming up, and all four of the King Tut Purple Pea seeds that we managed to save are germinating. There is even a Red Kuri/Little Gem squash making an appearance.
These are now the only things left in the big aquarium greenhouse.
There’s still no sign of any Yakteen gourds. As for the Kakai pumpkin that looks like there is a seedling popping up, that’s actually a stem. I was watching it for a few days before I finally took a closer look. It seems it started to germinate – but then the leaves broke off the stem. The stem end is what you’re seeing in that pot! There were more planted in the pot, so I’m hoping that a bit more time on the warming mat will result in germination.
The LED shop light that was used at the mini-greenhouse is now available to be moved to the sun room, but I haven’t figure out how I want it set up yet.
Funny. The living room suddenly feels much bigger, without the mini-greenhouse tied to a chair in front of the couch, anymore. :-D
It’s been a beautifully warm day. At 19C/66F, even the relatively high winds aren’t cooling things down much. The standing water in and around the yard has reduced significantly since this morning.
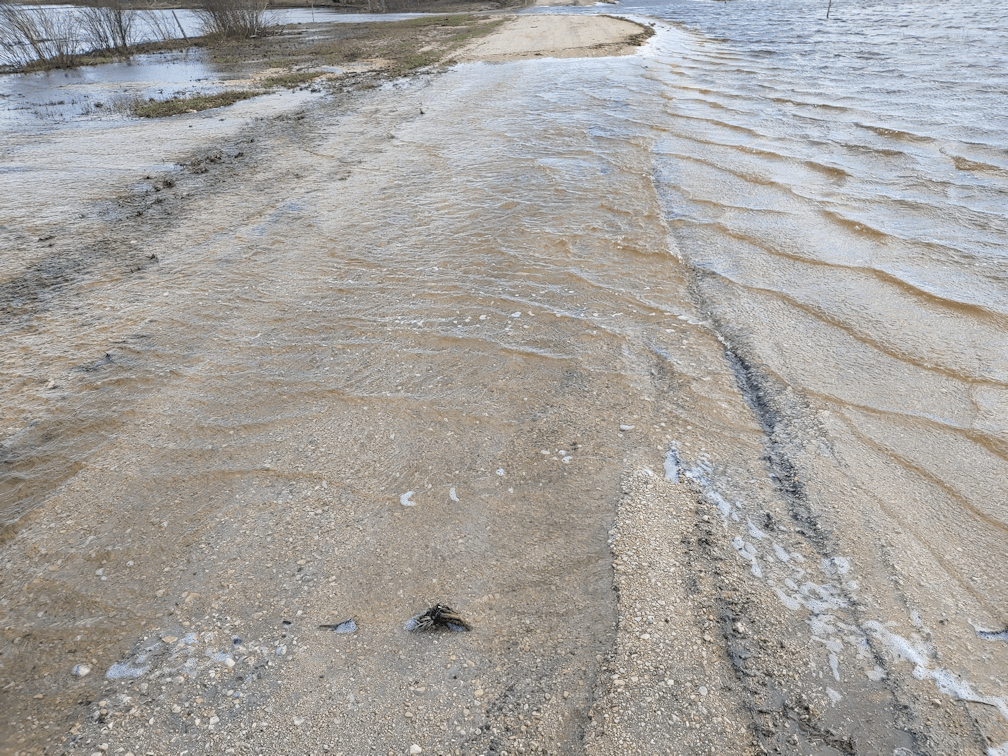
I decided to take the walk over to where the road is washed out to the south of us, and see what the status was – this time without Rolando Moon following me!
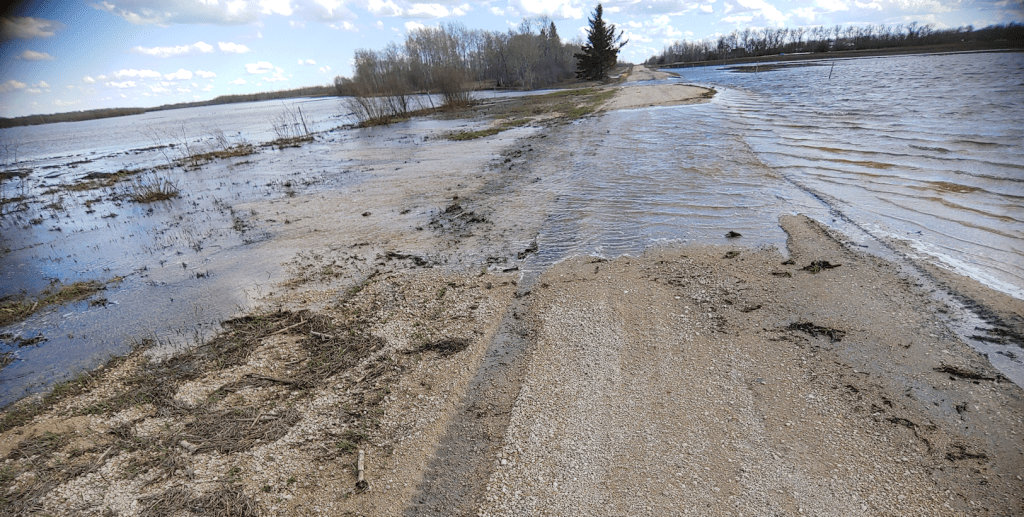
The waters have gone down a LOT, but the two washed out areas are not in good shape. The flow of water going across is very fast, aided by the wind coming from the northwest.
The wider, shallower area has eroded across even more. Where you can see a darker line is a ridge of clay that hasn’t been washed out yet; everything to the left of that would be very soft. As you can see by the rut on the far left, it’s not going to support the weight of a vehicle much. Still, if we had to, I think we could drive through this part.
The other part, however…
I wasn’t wearing my rubber boots, so I wasn’t going to cross to take a closer look. That further area looks quite a bit deeper than the last time I checked it out. This is where the road was already washed out down to the foundation rocks. There is no why our van can handle driving over that.
I haven’t checked out any of the other washed out areas. If this is still flowing as fast as it is, the others wouldn’t be much different.
Which means we still aren’t going anywhere for a while. :-/
While I was out, I checked a few other areas, including the tulip patch. I swear, they great at least 2 inches since I saw them this morning.
Something new that wasn’t there this morning, though, were these…
The very first cucumbers are sprouting! Seeing these, I took the “dome” off the tray. The transplants we’ve got in the sun room are doing quite well. Even the tomato that was broken at the stem, which got buried back into the pot, looks like it’s recovering.
I think that tomorrow will be the day to move the mini-greenhouse into the sun room, along with most, if not all, the seedlings still in the living room. The Chocolate Cherry and Yellow Pear tomatoes are still tiny, but they can be divided and potted up before being moved to the sun room. The Yakteen gourd have not sprouted yet, but at this point, the sun room is warmer than the living room. Even with them being on the warming mat now, they would probably do better in the sun room. Everything will do better in than in the enclosed spaces they are in right now, I think. We’ll also be able to move the second LED shop light and set it up in the sun room, too, if necessary.
It’ll be good to not have to worry about the cats getting at the seedlings anymore!
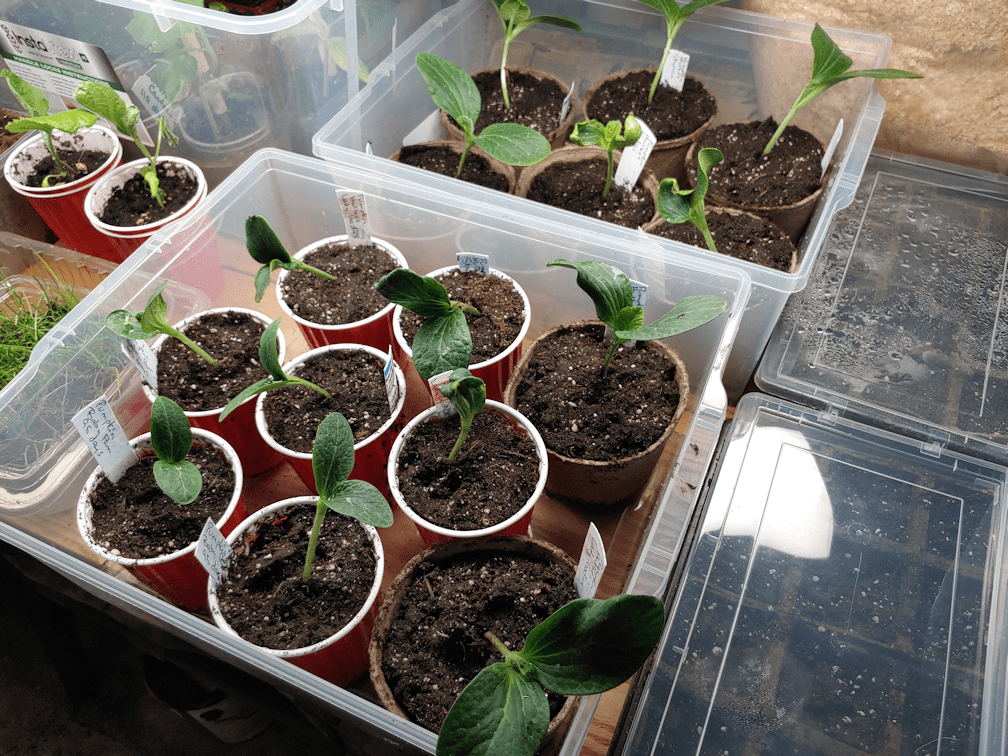
A lot of the squash in the big aquarium greenhouse were getting too big for their britches, so it was time to thin them out and pot them up!
The Giant Pumpkins were easy enough to do; there’s just one plant per biodegradable pot, so they just got put into bigger biodegradable pots with little issue.
With the others, we thinned by division. We had only a few of the larger biodegradable pots left, so the biggest ones were transplanted into those. After that, they went into the red Solo cups. Then they all went into the sun room.
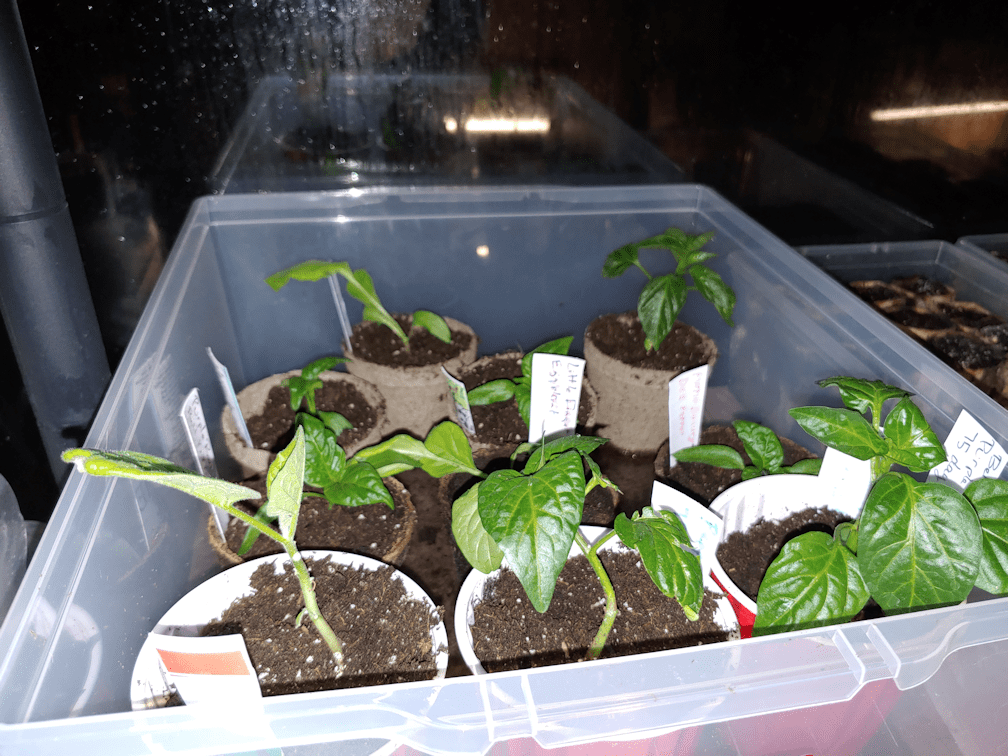
Once those were done, we went through the mini-greenhouse and moved the remaining eggplants and peppers to the sun room as well. A couple of them got thinned by division, too.
These two bins are all winter squash, the giant pumpkins and hulless pumpkins, under the bright shop light.
The gourds that were already in the sun room joined more squash and Apple gourds in a bin.
The peppers that survived the Great Cat Crush, as well as replacement starts of peppers and eggplants, got moved into the window shelf.
Back in the big aquarium greenhouse, there is now more room to space things out. The melons were looking leggy, so I put something under the bin they’re in to raise them closer to the light. There’s still just one Zucca melon sprouted (the big one in the foreground).
There are still some smaller squash and gourds on the heat mat. The Yakteen gourds have not germinated yet. I tried to get a photo, but the camera decided to focus on the aquarium frame instead of the plants. LOL
In the mini-greenhouse, there are still the Chocolate Cherry and Yellow Pear tomatoes, and the ground cherries. With more space available, they’re now all spread out to get maximum light and air flow.
It’s always a risk to pot up things like squash. Once the new bins were in the sun room, water was added to the bottoms to let them absorb more moisture from below; particularly the biodegradable pots, so the pots themselves wouldn’t wick moisture out of the soil and away from the roots. I left the shop light on all night, to hopefully give them the energy they needed to handle the changes.
As of this morning, everything looked pretty much as I left them. Nothing was drooping or otherwise showing signs of stress from being divided and potted up. So far so good!
In about a week or two, we will start hardening off the transplants. By then, everything that’s in the aquarium greenhouse and the mini-greenhouse should be moved to the sun room, with the tomatoes divided and potted up.
If all goes well, we should have most, if not all, or cold tolerant seeds direct sown outside by the end of the month, too.
It feels so good to finally be able to move ahead with the gardening!
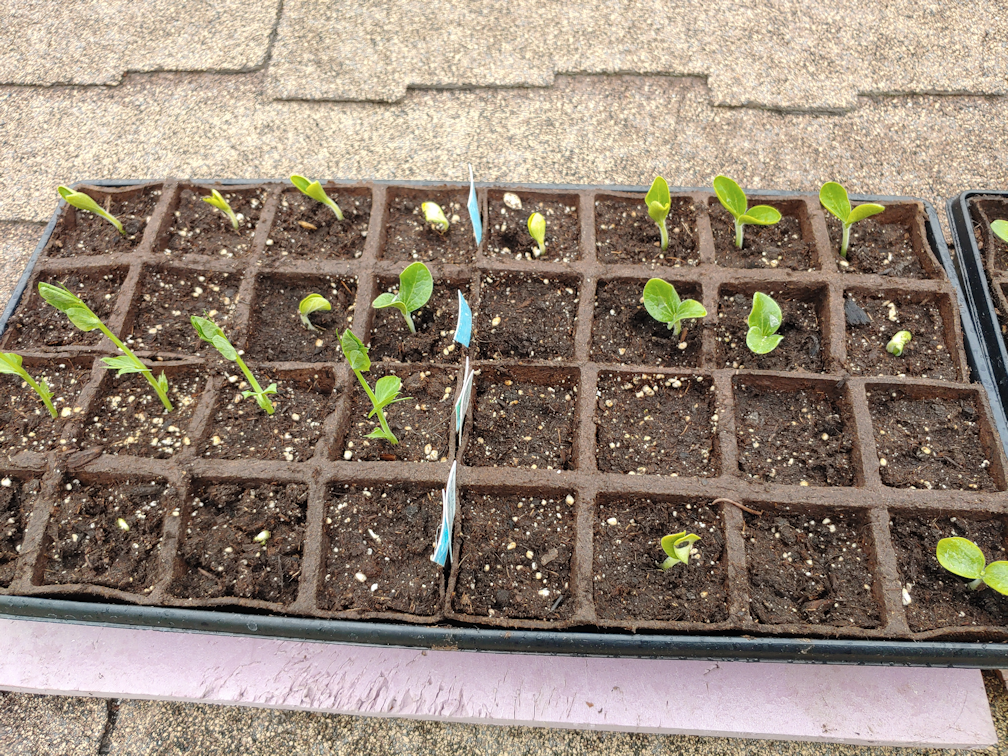
Okay, I went ahead and did it. I got one more tray of seeds started.
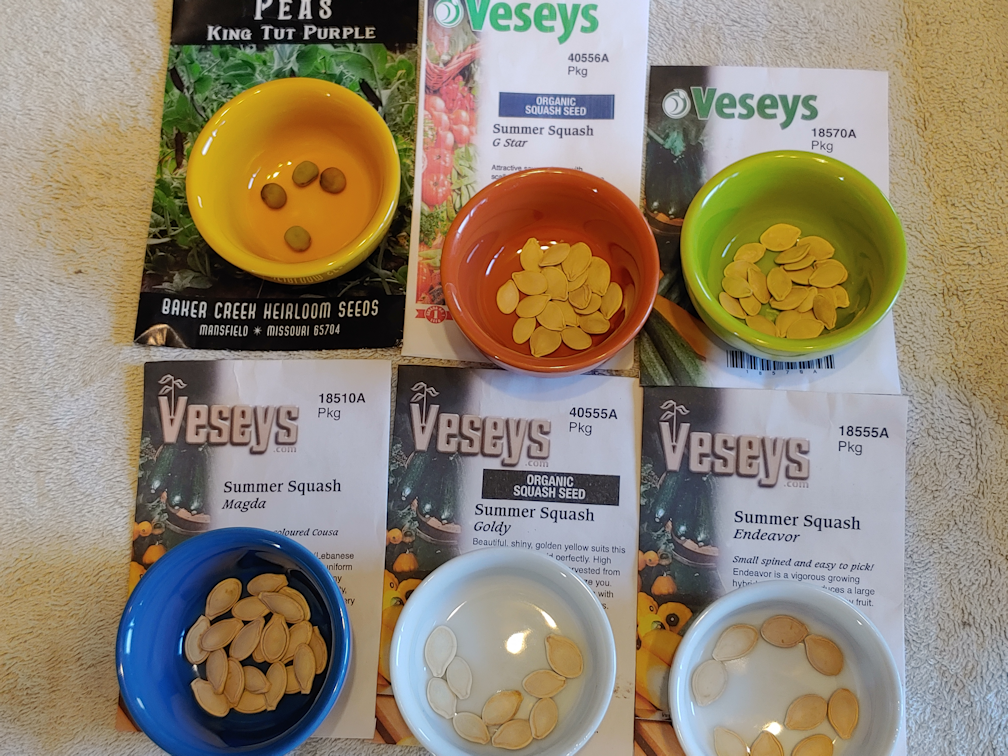
Most of them are summer squash.
I also decided to start the only 4 King Tut Purple Peas I was able to save last year. They did not do well at all in the drought, but they bravely tried!
The seed tray holds 32 square pots, and I wanted to plant just one seed per pot. I decided to start only 4 each of the Magda (a mottled light and dark green squash), yellow zucchini (Goldy)…
… and green zucchini (Endeavor). With these summer squash, I want to also try direct sowing more, and see if that makes any difference.
That left room to plant 8 each of the patty pans; Sunburst and G Star.
It occurred to me after I uploaded the pictures that I should have just planted each flat of 4 x 2 pots with one type, instead of two long rows of the patty pans. :-D Ah, well, The flats will come apart easily when it’s time to transplant.
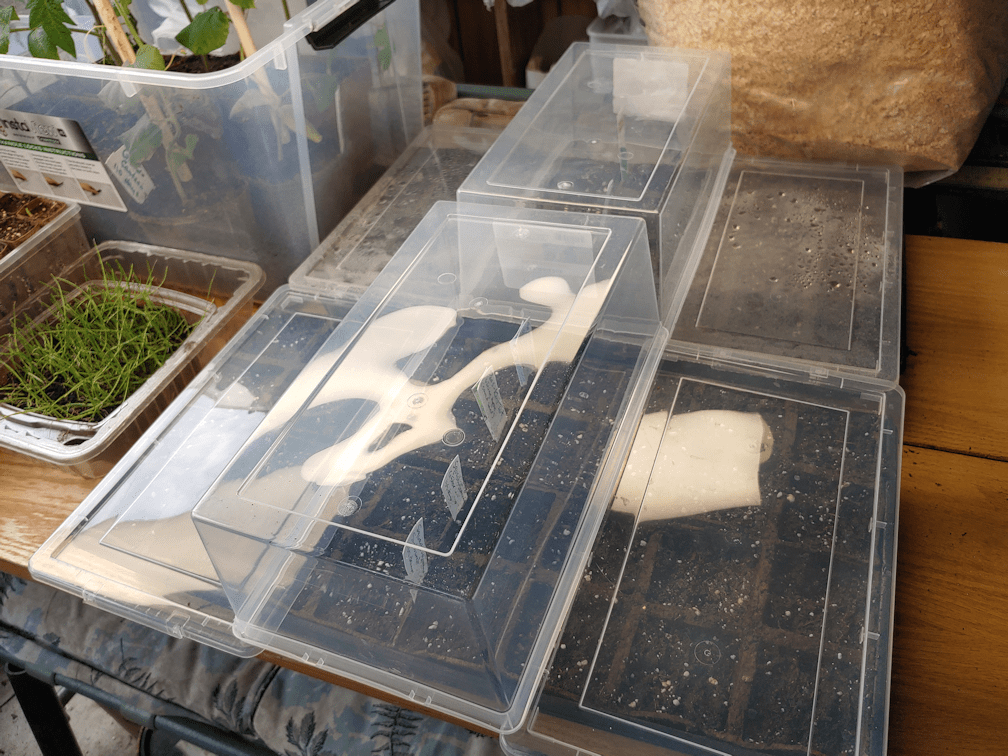
The tray then went straight into the sunroom, covered to keep them moist until they germinate. As you can see by the one that got pushed to the back, it’s working rather well.
There we are. Done. No more seeds will be started indoors.