Analysing our 2022 garden: final thoughts

Okay, it’s that time! I’ll be working on a serious of posts, going over how our 2022 garden went, what worked, what didn’t, and what didn’t even happen at all. This is help give us an idea of what we want to do in the future, what we don’t want to do in the future, and what changes need to be made.

Okay, so I’ve gone over how things went for our 2022 gardening year. We expanded our garden so much this year – and it was still less than we intended – I decided I need to do one last post to wrap it all together.

In a nutshell, though, I could probably just say this.

It was a terrible growing year.

In 2021, we got hit with drought and heat waves. For the longest time, we were out there watering the garden twice a day, just to keep it alive. With all that, things produced way better than I excepted, even when much of it did not thrive, or got eaten by groundhogs repeatedly, or got chomped on by deer.

I never thought that this year would be worse!

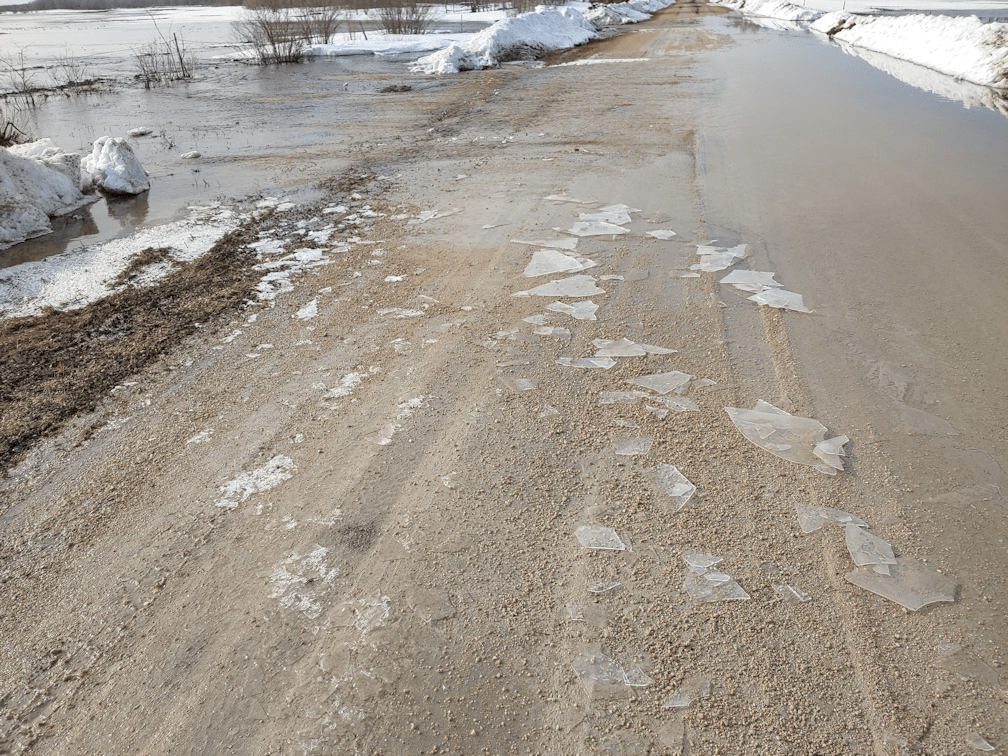
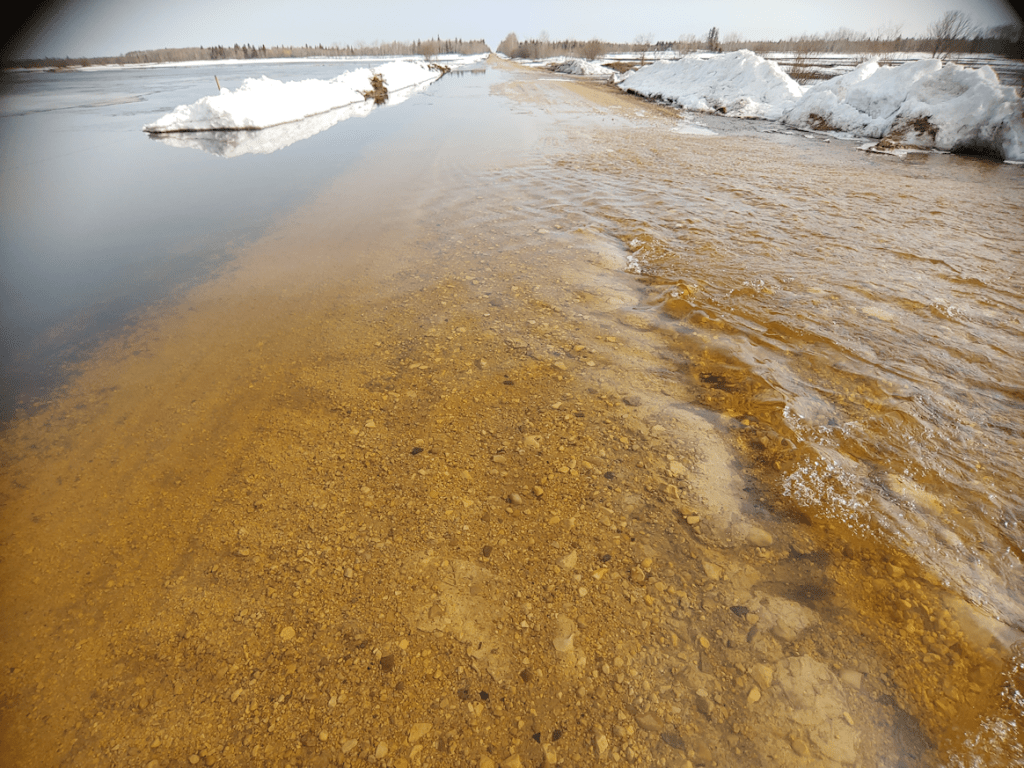
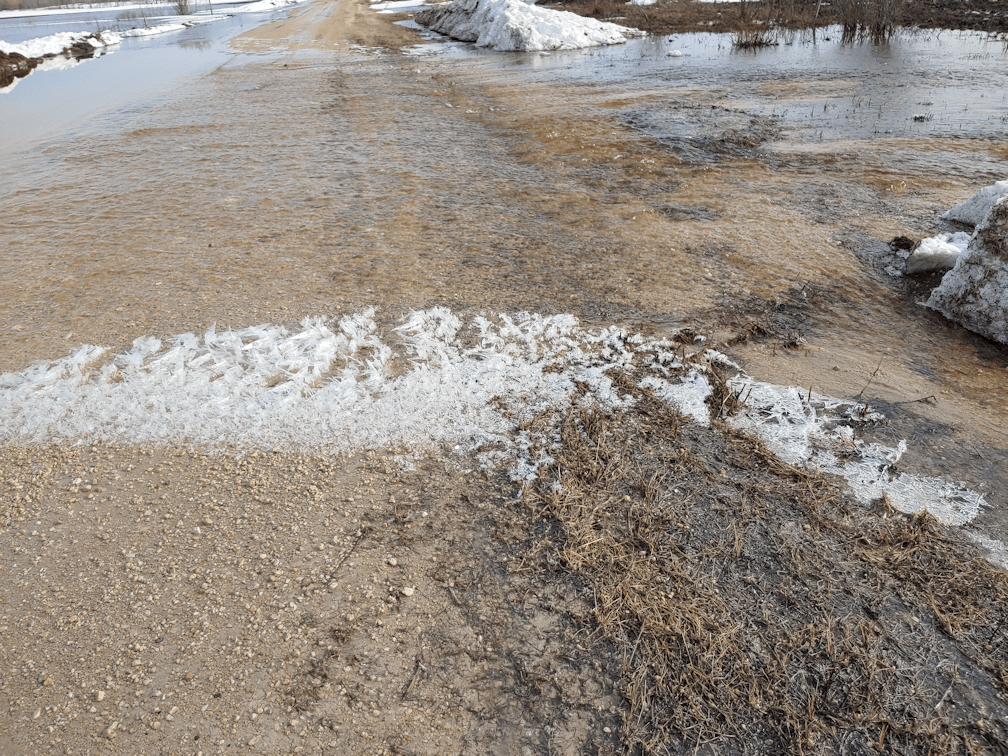
A lot of the failures can be attributed to things outside of our control. Winter dragged on long, as we got walloped with blizzards and large amounts of snow. I couldn’t complain about the snow, since we needed that moisture badly. Unfortunately, snow melts faster than ground thaws, and when the temperatures rose, the ground just couldn’t absorb it fast enough.

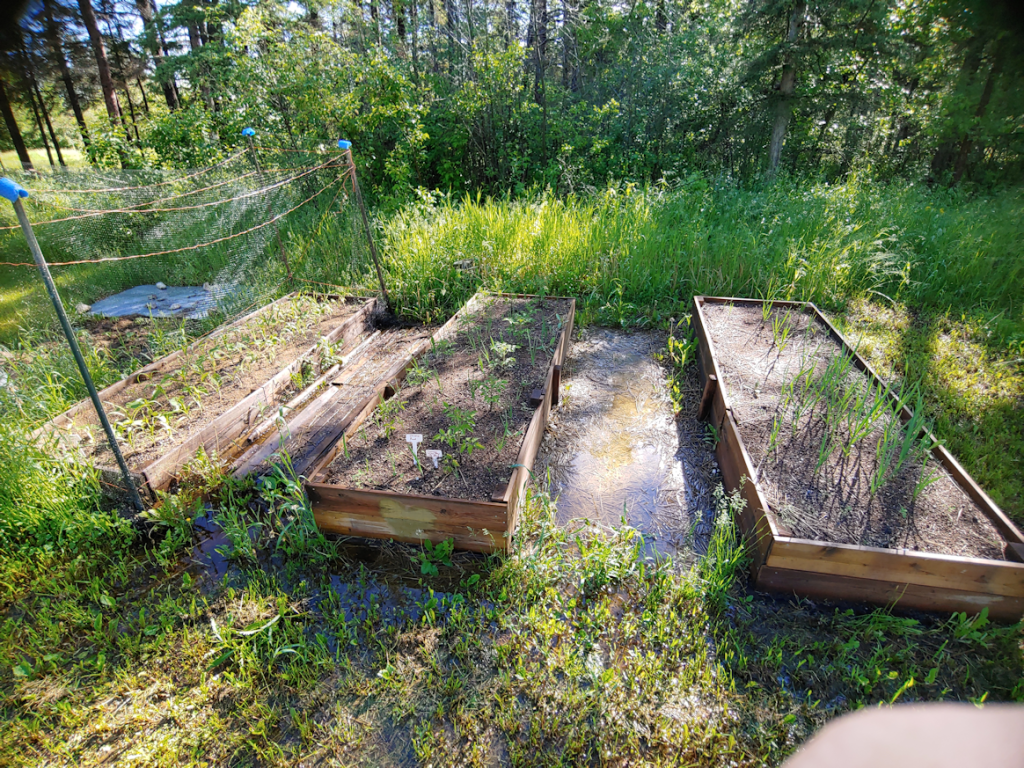
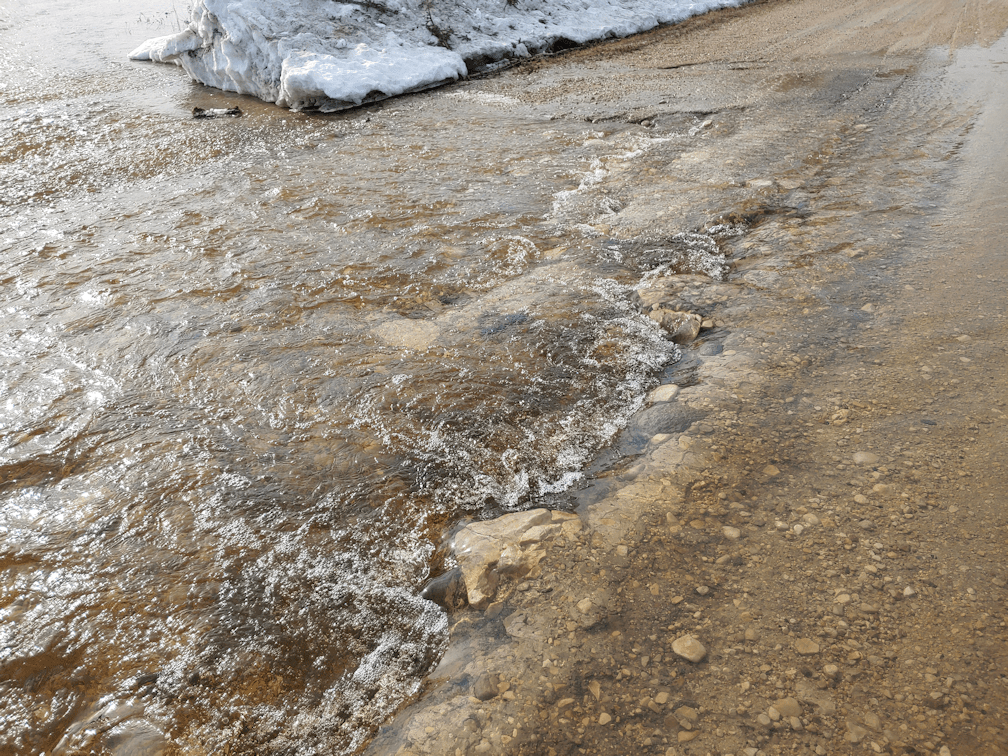
Even growing up here as a kid, I don’t remember ever having standing water in these areas!

The sad thing is, even with all this water, it would not have been enough to replenish the water table after years of drought.

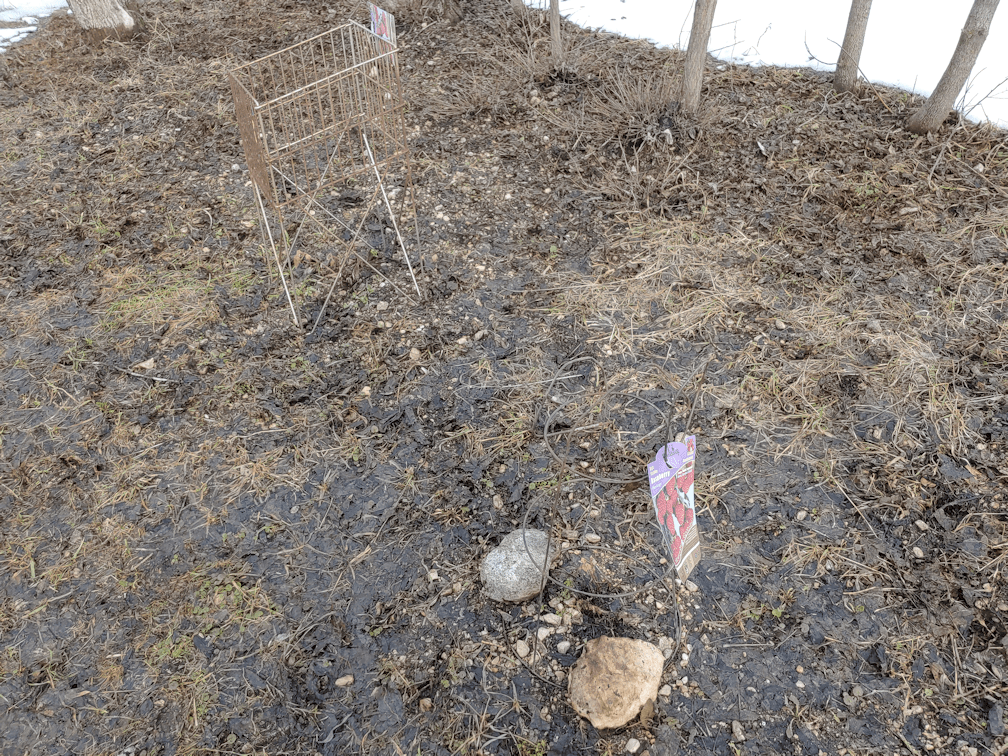
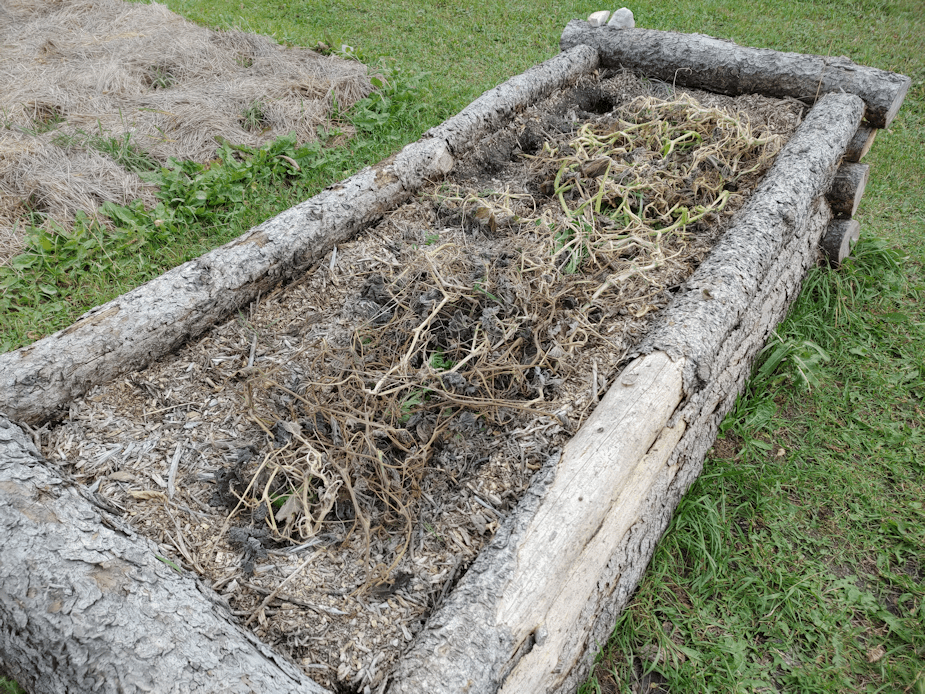
Where, last year, we had things produce far better than expected, this year, it was the other way around. It turns out our garden handles drought and heat waves better than flooding and average temperatures.

Gotta look for that silver lining, though. We’ve had the two extremes, which gave us a lot of information to help us decide on our next steps.

The goal is to grow and produce as much of our own food, and be as self sufficient as possible. When we get animals, we want to grow their food as much as possible, too. How we get to that point can be changed or modified as much as it needs to be!

A lot of what we grew this year will be grown again in 2023, though not necessarily the same varieties.

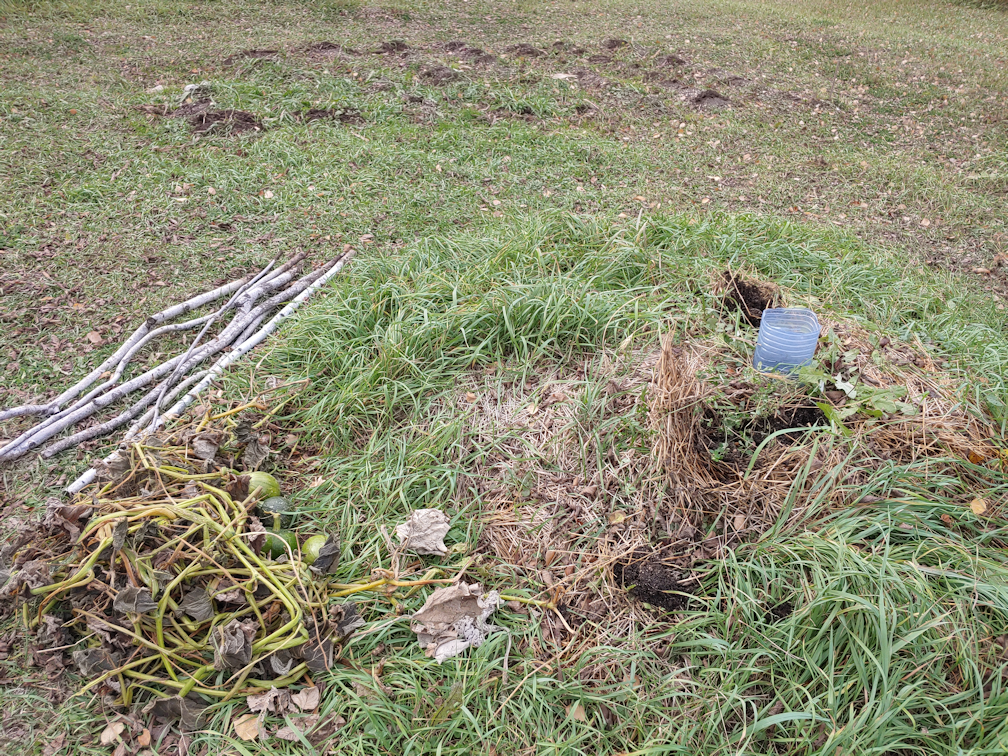
As we expand our main garden area, we’ll be moving away from the distant garden beds, where we are now starting to build up our food forest. That’s what those beds where there to help prepare the soil for.

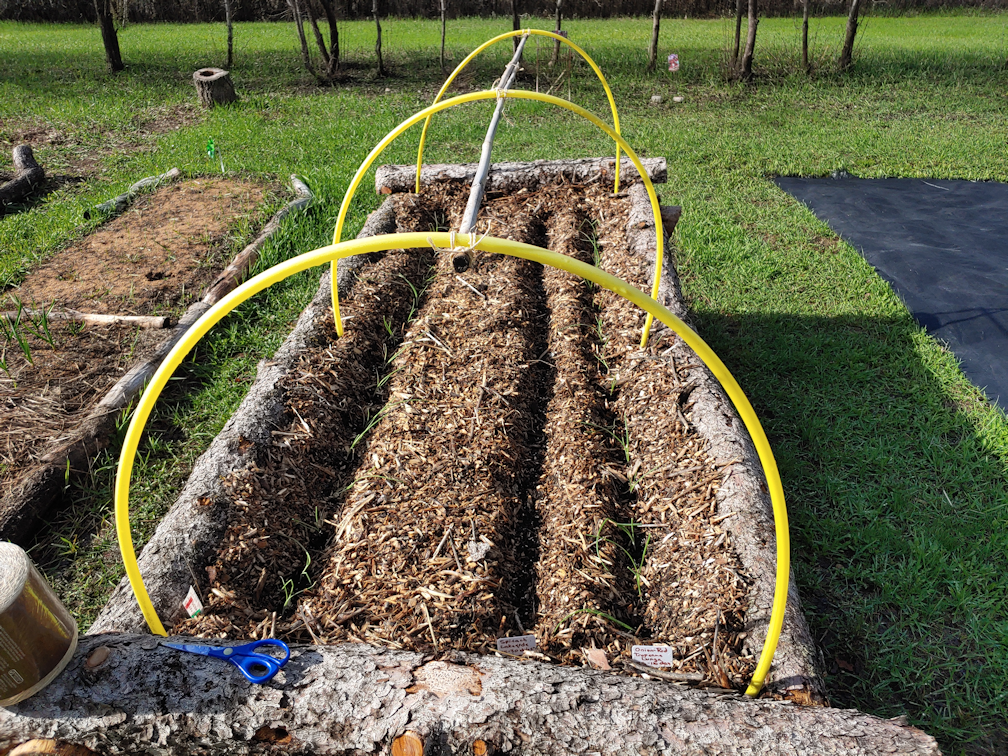
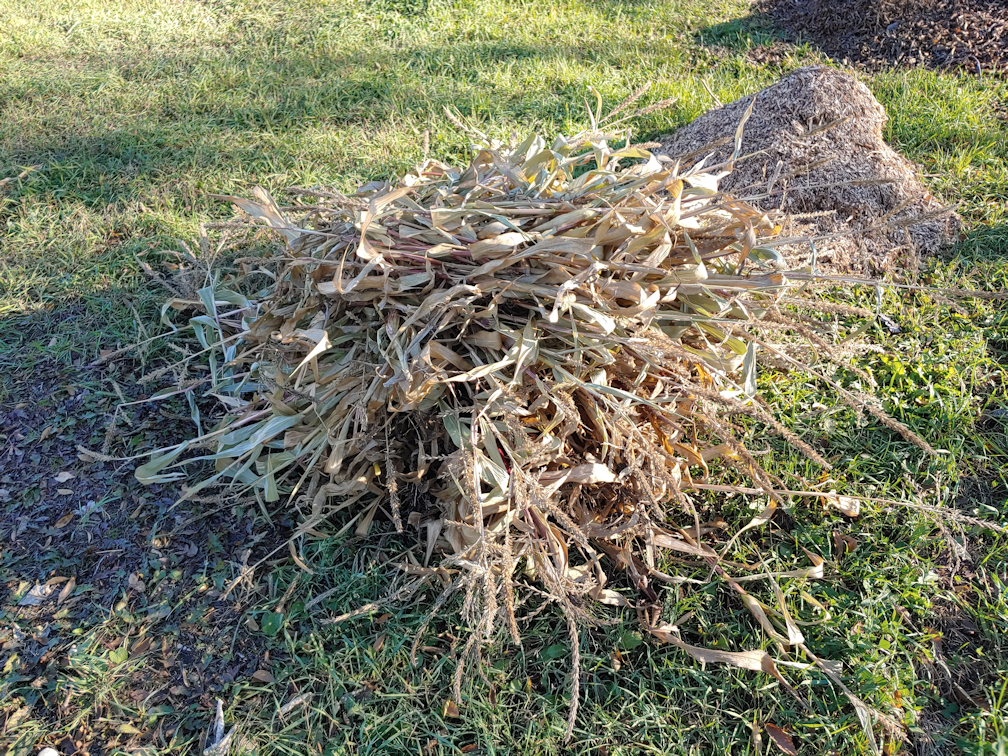
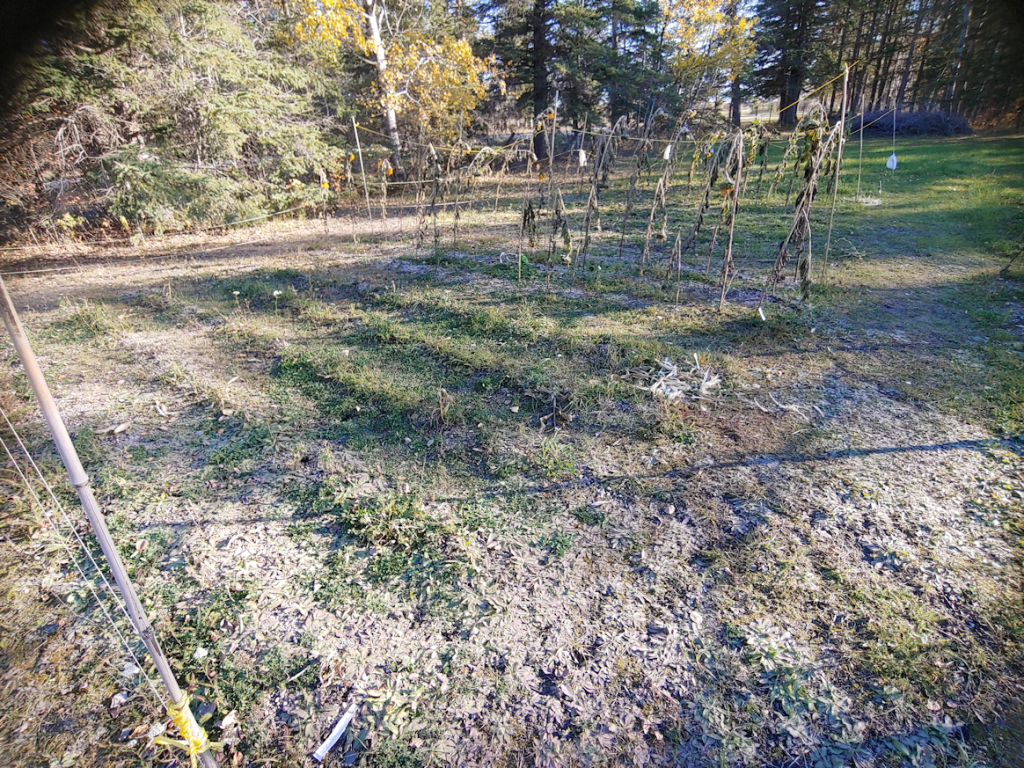
Which means that 2023 will have pretty much all the garden beds closer to the house, and we will be building more permanent structures. The temporary trellises have come down and, in the spring, we will be taking down the trellis tunnel, saving the wire to be reused.

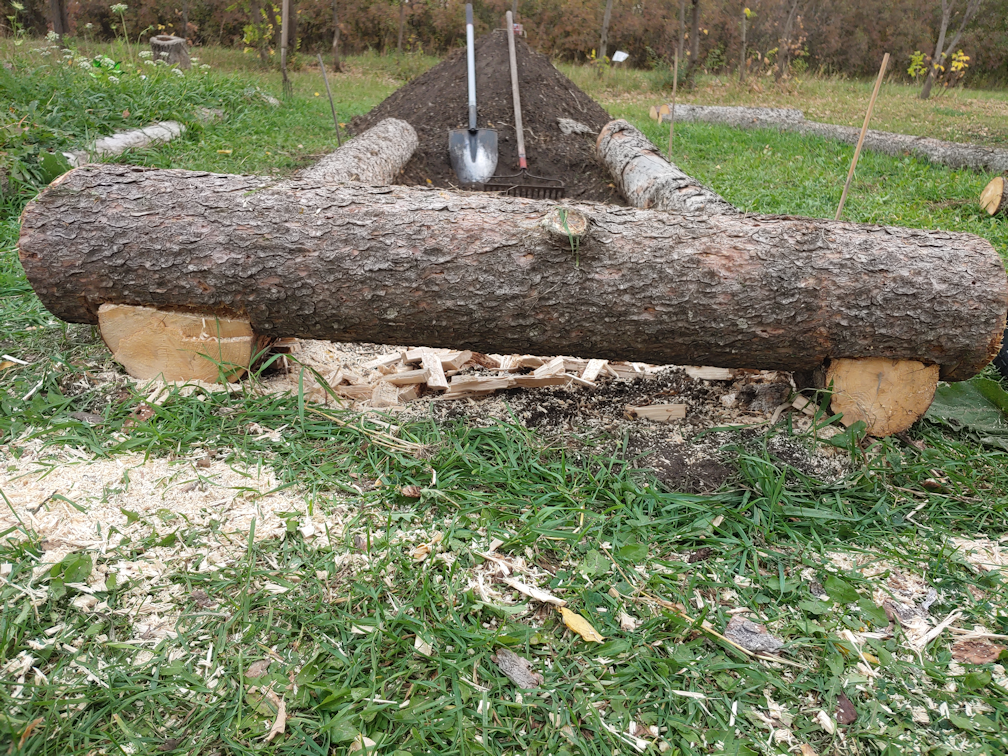
We plan to start building permanent trellis tunnels where some of the newest, deep mulched garden beds were started. We will also focus on building more high raised beds – the challenge is to safely harvest the dead spruces to build them with, since we don’t have the funds to hire a company to take them down for us. I don’t begrudge them the cost at all; it would be worth every penny. We just have too many other things pulling at those pennies that are a higher priority, when we can do most of this work ourselves.

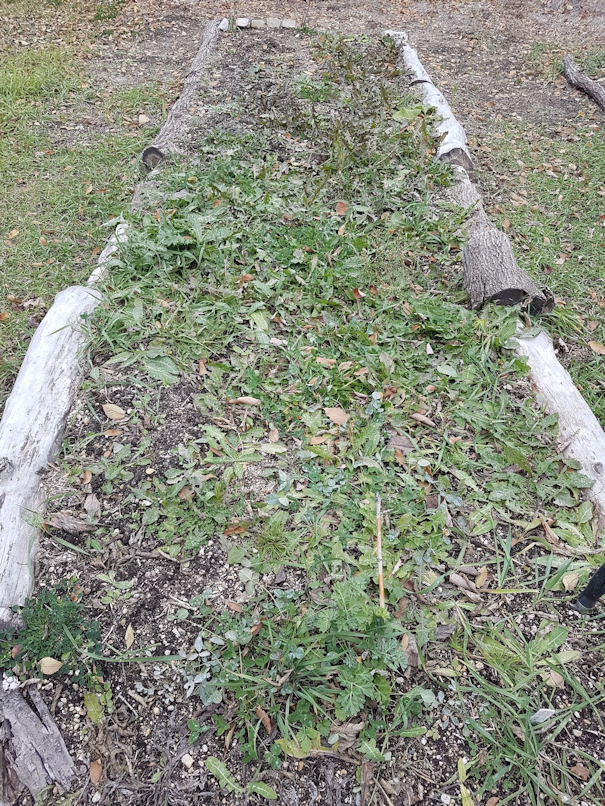
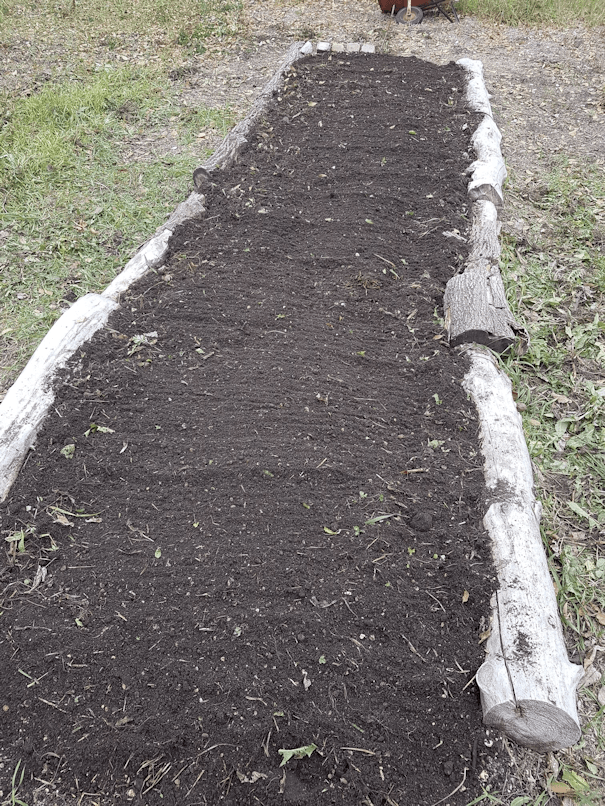
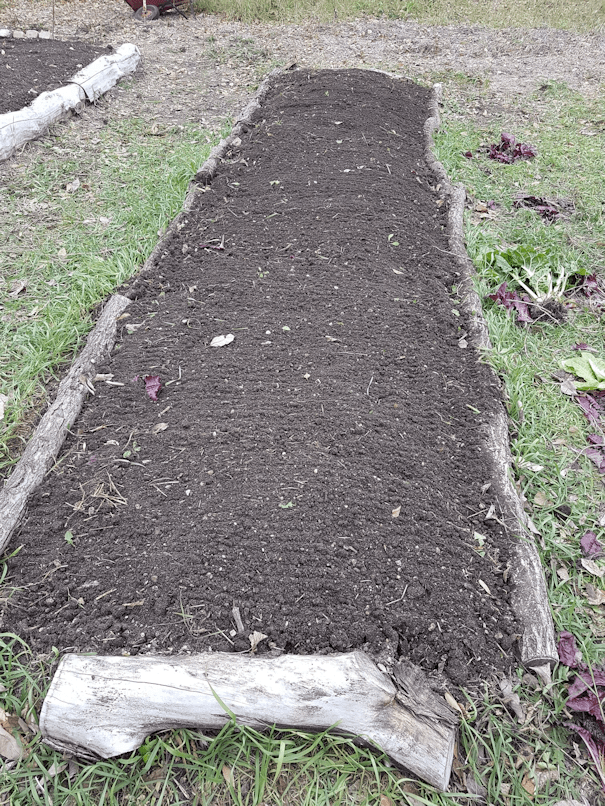
The low raised beds were enough to keep some things from getting drowned out, but in other areas, it still wasn’t enough. So while I do want to keep some beds low, the majority of our beds will be high raised beds.

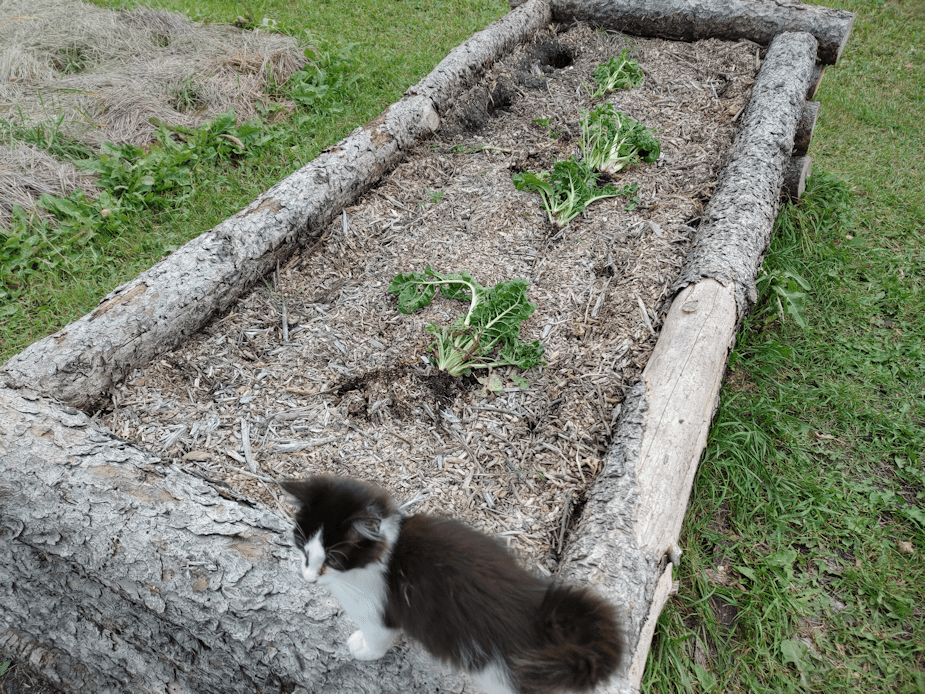
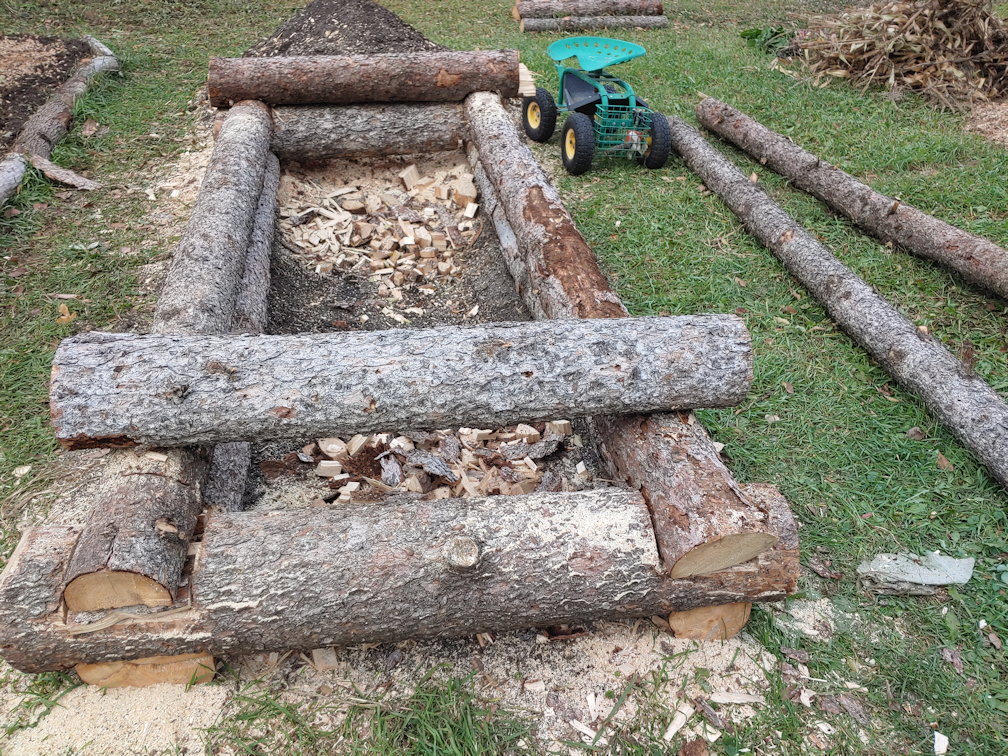
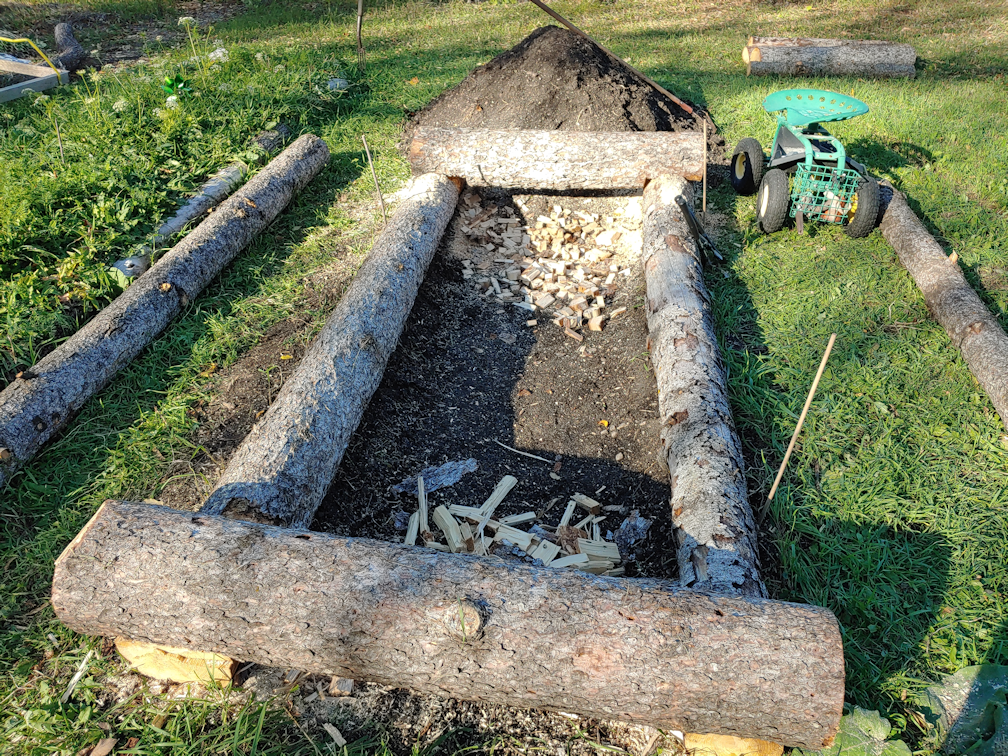
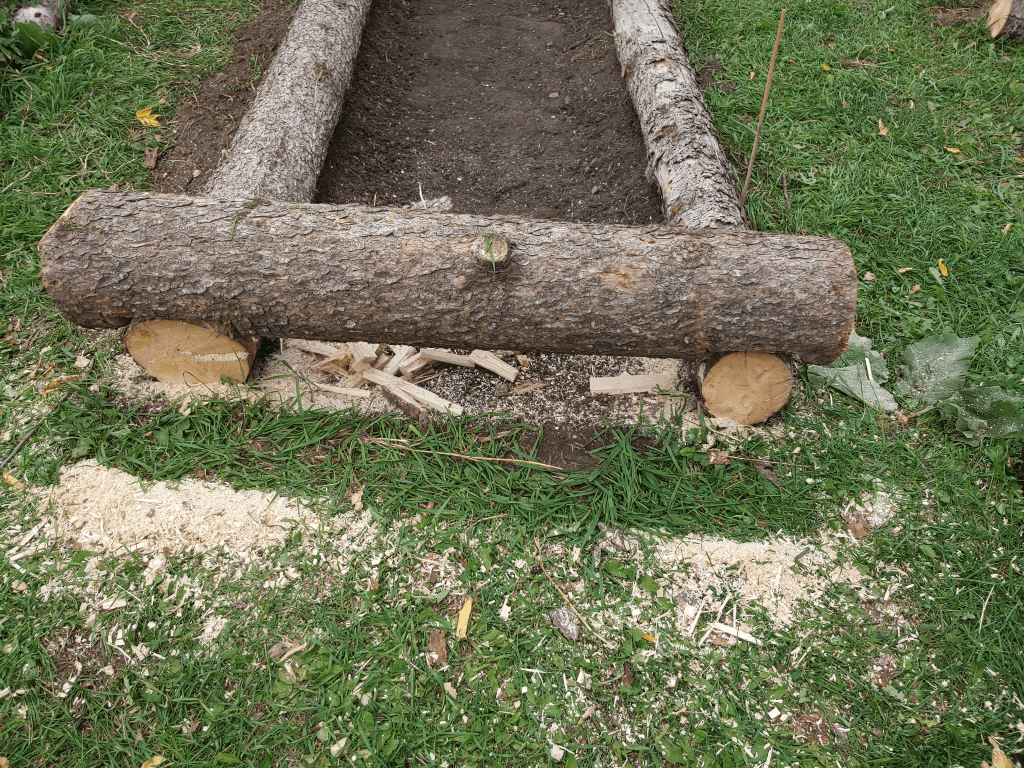
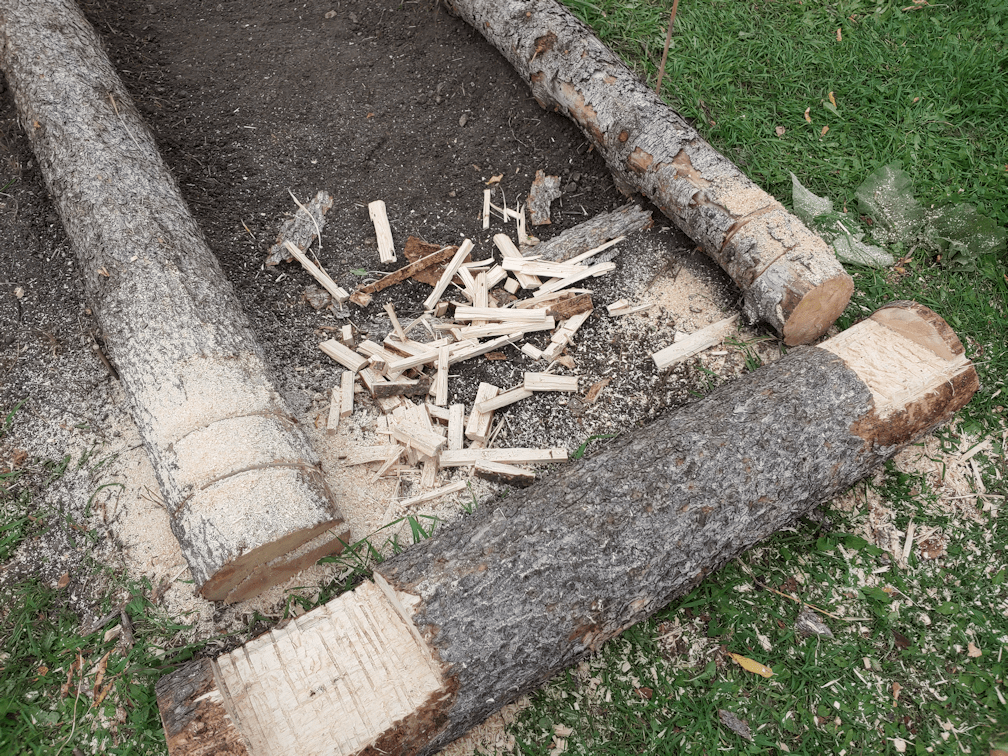
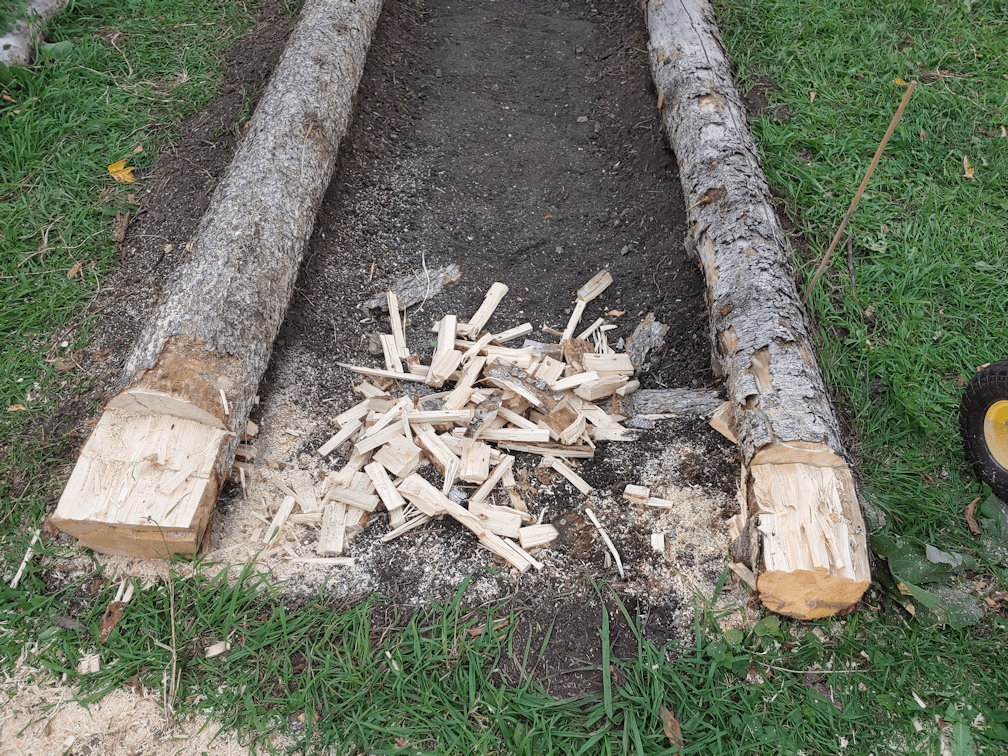
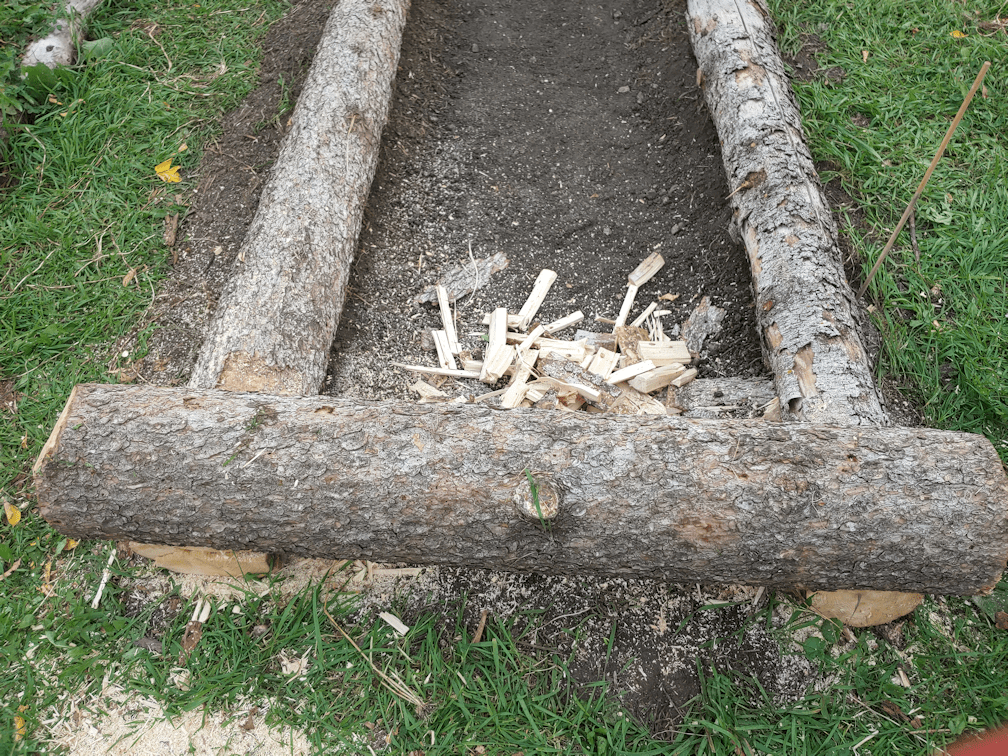
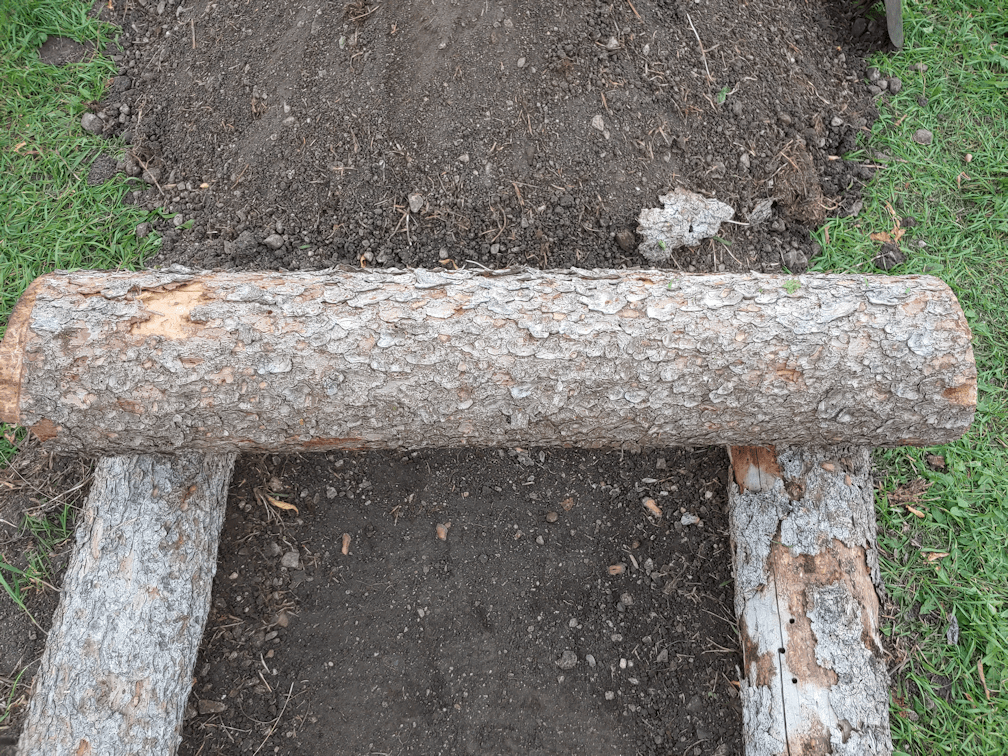
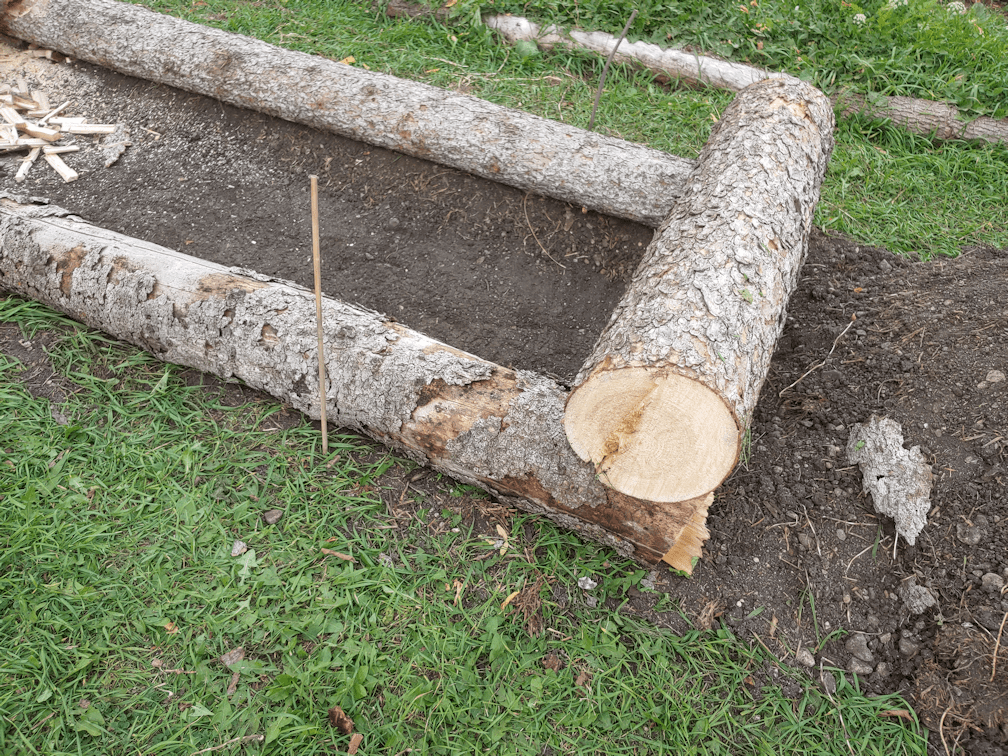
The one high raised bed that is complete, filled hügelkultur style, did very well. By the end of the season, it had settled quite a bit and needed a top up, which was to be expected. At this point, I think the bed’s “topsoil” is deep enough that it could be used to grow longer root vegetables now. This is definitely the way we will continue to build and fill our high raised beds, though we might tweak a few details, such as finding better ways to join the logs in the walls. We have a few more and better tools to help us now, and will continue to acquire more.

Since a major component of building our permanent beds is accessibility and mobility, as we build the permanent structures, we will make sure that the paths will be at minimum 4 ft wide – wide enough for a walker or wheelchair to turn around in. That will include the trellis tunnels we will be building. Now that we are aware of how much water can accumulate where we plan to build them, we intend to build probably middle height beds on the outside of the tunnels. Those beds will be 2 ft wide, since they will be accessible from only one side. I figure we should shoot for building at least three or four of these in the main garden area (not all in one year!), along with the 9′ x 4′ high raised beds we will be making. We will be sticking to 9′ x 4′ as much as possible, regardless of how tall the bed is, so that any covers we build for them can be interchangeable. Obviously, the narrower beds we plan to build at the trellis tunnels will be the exception, but the things planted in there would need different types of protection – if any at all.

Even aside from the trellis tunnels, we will want to built quite a few other trellises that can be moved around to wherever they are needed. Among the things that actually started to grow well (if too late), I noticed that the hulless pumpkins really, really wanted to climb. The melons we want to plant are also climbers, as are some of the gourds we want to grow. These would need support that can hold the weight of their fruit, so they will need the strength of the permanent tunnel trellises. Lighter climbers, like peas and pole beans, would be fine with portable trellises.

While we will be focusing on permanent structures in the main garden area, we are also needing to plan ahead to when we build permanent garden beds in the outer yard, where there is better sunlight. We are also working on plans for an outdoor, off-grid kitchen in that general area. That’s on top of the shed we need to dismantle, so that we can salvage the lumber for other projects, like the mobile chicken coop I want to build.

We’ve got a lot of building and heavy labour ahead of us, and none of us are quite able bodied, so it might take a while to get it done!

As terrible of a growing year it was in 2022, it provided us with much useful data, and will actually help us in planning our next steps.

Little by little, it’ll get done!

The Re-Farmer

We caught a break!

Early this evening, the rain finally stopped, the sun came out, and the temperature warmed up several degrees higher than forecast. We took advantage of the break and quickly put the transplants outside to harden off for a couple of hours. Normally, I would have added an extra hour, but it was getting too late in the day for that. (I’m trying something different again with my photos; please let me know if you have any problems viewing them.)

There is SO much water all over the yard. Even areas that don’t seem to have puddles in them have standing water, hidden by whatever green growth is managing to emerge.

One of the things I wanted to get done was reinforce the hoops on the high raised bed. The problem was, I didn’t have anything long enough. So I made do.

We have some bamboo stakes that are getting pretty old and fragile, including some broken ones, so I was able to tie one full length one together with a shorter one, then attached it to the hoops. It’s now ready to have some plastic put over it, tomorrow evening, before the temperatures drop low enough for possible snow.

I also had a chance to clean up one side of last year’s squash tunnel. We’d only managed to do the other side in the fall, before the snow arrived. This year, we will be planting pole beans to climb the tunnel.

Here we’ve marked the future sea buckthorn locations. You can see the gaps in the lilac hedge, where the deer are getting through. It’ll take a few years, but the sea buckthorn should fill that in nicely.

Here, where the corn and sunflower beds were last year, we’ve marked where the silver bison berry will go. (At some point, we’ll even take out the old sunflower stems the deer didn’t finish off. :-D) Each will be about 3 feet apart in their rows. We are still debating how far apart to make the rows – certainly not the 16 feet recommended! We were thinking 4 ft apart at first, but might go with 5 feet apart. We also changed our minds about the 2 highbush cranberry, and will be adding those to the far end of the the bison berry. One of the reasons these are being planted here is for a privacy screen, which will eventually extend as far as the row of crab apple trees. The saw horse you can see in the distance is next to the last one of them in the row. The cranberry bushes will help extend the privacy screen a bit, and we will plant other things over the next few years to keep extending it.

The branch pile in the distance is completely surrounded by water right now.

Where I’m standing to take the above photo is roughly where the phone line is buried, so we will be leaving an open lane, wide enough for a large vehicle or heavy equipment to drive through, as we plant more trees and shrubs.

As the berry bushes we plant fill out and start creating that privacy screen we want, we’ll start doing more to clean up the fence line, which is in serious need of repair. It has trees growing on either side of it, some of which will be taken out completely, while others will have their lower branches pruned back. There are a few dead trees in there, too. In one area, there are wild Saskatoon bushes. I want to clean up around them so that they are not as crowded, and have better growing conditions.

Gosh, it felt so good to be able to get at least a couple of hours of work done outside! I’m just loving being able to finally do some decent manual labour again!

The Re-Farmer

The current state of things

This morning’s rounds were extended rounds – but about a mile and a half! 😀

The first order of business was to check the old basement. The south side of the basement is still slowly getting wetter. The sump pump is doing its job quite well. The north side hasn’t really changed much, and I’ve no doubt the big blower fan is doing a lot to keep that side more under control. The larger puddles of water got swept into the drain or the sump pump reservoir, and another of the chimney blocks was brought upstairs, before I headed outside.

I hadn’t slept much, so I was outside earlier than the cats are used to, so I didn’t see many of them! 😀

The first cat I saw was The Distinguished Guest (TDG), and he was limping. Favoring the same leg that Potato Beetle still does. Now that we know why Potato Beetle was limping, I have less concern. It’s probably a bite or claw injury. Considering how aggressive TDG has been to the other cats, I can’t say I feel much sympathy for him. I didn’t see Potato Beetle this morning, and whenever that happens, I worry that TDG has injured him and he’s suffering somewhere. 😦

I don’t know where Rosencrantz has set herself up again but, wherever it is, it’s very close by. She just seemed to magically appear at the kibble house of late! The only thing I can say for sure is that she’s not coming from the junk pile.

Speaking of junk piles, while Junk Pile (we have GOT to come up with a better for her!) was eating, I blindly took a couple of shots of her kittens through the window. This was the best one. I think I count 5 in there.

While switching out the memory cards on the trail cams, I was happy to see the water on the driveway has actually receded. To get to the sign cam, I went outside the fence line and didn’t even try to go through the snow and water along the garden area. While I was at it, I “made” a bridge. 😉

This sheet of plywood I found in the garage was set up over the drainage ditch, turned the other direction, so I could drive over it with the riding mower. Which isn’t working and, according to the place I last took it to, not really worth paying someone to fix, anymore. Since we won’t be driving a riding mower through here anytime soon, I pulled up up the plywood and laid it the other way. That helped increase the flow of water, too. I don’t know who dug this drainage ditch, how long ago, or what they used to do it. All I know is that it’s very uneven and rough, even for just a push mower.

That done, I went for a walk to check out the state of the road heading south. For the first half mile, it was actually pretty good. There’s an area that has a series of small ponds on one side that has the potential to be an issue if we get the predicted rains – we’re still under a rainfall warning that extends to the north of us, with accompanying flood warnings – but this morning, it was still pretty good.

Then I got to where the municipal drainage ditch crosses the road.

The culvert is marked with that red plastic tube on the left, and is the only reason this section isn’t already washed out.

This drainage ditch crosses the quarter section we’re on, cutting through the rented out fields into our neighbour’s quarter, until it crosses the road here.

The drainage ditch then cuts across the corner of this quarter section to another road and another culvert.

I wasn’t going to go that far to check the state of the road, seeing how things are here!

The drainage ditch is completely full; the line of higher soil, created by dredging, marks one side of it. Right now, we’ve got one flooded field draining into another flooded field!

The first area that’s washed out is past the drainage ditch. You can somewhat see how much of the gravel has been washed off the road and into the ditch.

The second wash out has done a lot more damage to the road.

Half the road has been washed down right to the rock base!

I took this next wide angle shot while standing in the middle of the second wash out.

There is still SO much snow and ice.

Here, I’m standing in between the two washed out sections. The water is flowing with remarkable speed!

I took some video, too. Once I have time, I’ll test out my new movie making software and make a little video to upload.

So this road is not a viable alternate route for us. When I get a chance, I plan to walk the road to the north and see how things are, there. We may not be able to avoid the pothole riddled main road, though.

Enough snow has melted that I could check out a few other areas, once I got back home. The path to the outhouse and the back of the garage is still full of water, and the pit under the outhouse is flooded to the top.

The garlic beds are clear of snow, but the soil under the mulch is still frozen solid.

Our first high raised bed is also clear of snow – but the snow around it is still quite deep!

I noticed one of the cages protecting the raspberry bushes we got my daughter for her birthday last year was knocked aside, so I made my way through the snow to get to it. Some of it even held my weight, though when it did give out, I found myself knee deep in snow.

Once we have rows of high raised beds built here, I can see that it will greatly affect the snow in the area.

The arrow in the above photo is pointing to the raspberry bush, and shows where the cage is supposed to be. The cages got dug out of the scrap pile around the old garden shed and placed over the raspberry bushes, after we discovered the deer were nibbling on them.

I found a couple of large rocks under the trees to weigh the cage down. Hopefully, it will hold until we find a more permanent way to protect the raspberries.

Hopefully, the raspberries have survived. Shortly after we transplanted them last year, they got hit by that one unusually cold night in late May that killed off so much. Then there was the drought, the heat waves and the deer. Now we’ve got this winter that just doesn’t want to let go. These poor bushes have had a very rough start! At this point, there’s no way to see if they’ve survived the winter. Hopefully, we’ll know in a couple of weeks.

The snow has receded enough that I was able to check out a few more areas before heading back inside. Another check on the basement, then the last chimney block was brought upstairs. Getting those up the old basement stairs has been a real pain. It’s one thing to carry a block down the hallway or across the yard. It’s quite another to safely get them up those stairs. I finally got it worked out, though. Basically, once a block was lifted to the highest step I could reach while standing at the bottom, I had to go up a couple of steps, to line myself up with the next step it would go on, carefully bend at the knees (my busted up knees!), grab the block and brace it against my belly (sometimes, my extra girth comes in quite handy!), straighten my knees to lift the block while using the hand rail to keep from falling backwards, and use my belly to place it on the next step.

Then the process is repeated, step by step, to the top. Thankfully, there is room for a block in front of the door, which has to be kept closed to keep the cats out. Then it’s, open the door, chase away cats, wrestle the block clear of the door with enough space to get past it, chase away the cats again, then close the door – hopefully remembering to turn the light off, first!

After that, it gets easy. The only difficult part is getting through the old kitchen door, without letting any cats through.

It’ll be a while before we can prep the area the blocks are going into, so we can take our time getting the blocks out the rest of the way. Getting them out of that basement was the main hurdle, and I’m very glad it’s finally done!

And that’s the state of things for now. As I write this, we’re at 5C/41F and we’re supposed to reach a high of 9C/48F, so things are melting. The rains are supposed to hit us this evening and continue through tomorrow, before changing to a mix of rain and snow, the day after, with highs of 4C/40F.

Then, three days later, they are now saying we’re supposed to get a high of 18C/64F. Long range forecast after that has highs ranging from 16C/61F to 19C/66F for the next week.

Hopefully, by then, the soil will have thawed enough to be able to absorb more of that moisture!

We shall see how things turn out.

The Re-Farmer

Back Tracking a Bit, and Looking Ahead

A while ago, my daughters cleaned up the beds in the main garden area while I worked elsewhere. I’d asked for photos, but thought they’d forgotten to take any. One of them, however, did remember to get before and after pictures, and recently passed them on to me.

So here is some of the cleanup done by my daughters, almost a week ago.

This first bed had two types of onions in it; the yellow onions we stared from seed that actually survived the cats, and red onion sets. Before those were planted, a row of… Hmm. I’ll have to check back. I believe it was the purple kale that we got as free seeds from Baker Creek that got planted down the middle. If anything germinated, something got to them before we ever saw them.

As the onions got harvested later, the bed was left empty when they were done. It had been weeded as much as I could, between the onions, while the onions were growing. This turned out to be one of the easiest beds to clean up and took them very little time.

This is one of the three beds that started out with spinach. After the spinach was harvested, they sat empty until the heat waves finally passed. On the left of this bed, I planted radishes and … gosh, I can’t remember, but it was another cool weather crop. Neither survived the grasshoppers. Eventually, we planted some lettuce seeds that had spilled out of their envelopes and got mixed up. They turned out to be mostly one type; Merlot, I believe they were called, with a couple of buttercrunch that we got as free seeds from Baker Creek. We were able to add a mesh layer over the chicken wire cover on this bed, so they survived. Unfortunately, after a while, the lettuce leaves got very bitter and nasty tasting. I don’t know why. It’s not like they were bolting, and we weren’t getting anymore heat waves, but it got so bad, we just couldn’t eat them anymore. It’s a shame, because they handled the frosts we got extremely well. They didn’t go to waste, though, and are now adding nutrients to the high raised bed. 🙂

This was another bed that started out with spinach. Believe it or not, this bed got weeded quite thoroughly before I planted different radishes and one of the chard varieties. You can see the one chard that survived, surrounded by wire, in the background. Closer to the front you can see some bricks and stones that are surrounding the last couple of radishes that survived. This bed turned out to be very difficult to clean up and was thoroughly filled with rhizomes. It took so long to clean up, this was where they had to stop for the day.

Before they left, though, my daughter had gotten a before picture of this last bed. It was the third bed with spinach in it, then it got planted with the Bright Lights chard and French Breakfast radishes. The chard did well until it got hit repeatedly with frost. It handled a couple of frosts very well before finally freezing beyond recovery. There were only a couple of the radishes that never quite recovered from the grasshoppers. Like the lettuce, they got pulled and composted into the high raised bed. My older daughters were able to come back to finish cleaning this bed a couple of days ago, and it was much faster and easier than the last one they did!

Over time, each of these beds will be replaced as high raised beds. They are about 14-15 feet long, but will be reduced to 9 ft, so it will be easier to build frames for protective covers that can be easily moved by one person. We will keep using the dead trees we clean up from the spruce grove to build the beds for as long as we have enough of them. That should be enough to do the remaining five beds. That will leave us room to do a second row of high raised beds, if we choose, but by then, I think we will no longer have enough wood from dead spruce trees to use. We shall see. It’s a big job that is going to take a while to do. In the spring, we will plant into these beds as they are, but now that we have a chain saw, I expect to be able to cut down the dead trees and cut the lengths we need in advance, so that in the fall, we will just need to assemble them.

To get the height of our first high raised bed, we used eight 9ft logs and eight 4 ft logs. With five more beds to build, that means 45 nine ft logs and 20 four ft logs. It took us most of four trees (including one that was smaller than the three we cut from the spruce grove) to make this one bed. The remaining trees that need to be cut are all quite large, but if we assume four trees per bed, that means we’ll need 20 more trees to do the remaining beds.

We have more than that many dead trees to cut. It will only be a question of how solid they are, or if they have rot or ant damage to the trunks. A few of them are so big that I would want to split the logs cut from the bases of the trunks, lengthwise, and use them at the very bottom of the beds, so they’re not too thick. If the wood on all the remaining trees is sound enough, given their size, I am thinking we will probably need closer to 15 trees to finish the beds rather than 20. Considering we have probably another 24 dead trees to cut, that just means more beds we can build!

Just thinking of having a whole row of high raised beds here makes me very happy. I can hardly wait!

The Re-Farmer

High raised bed – it’s done!

Oh, my goodness, what a difference having that new chainsaw made!

But before I could break it in, I needed to drag down the stuck tree, so I could use the wood in the high raised bed. Thanks to my husband very securely attaching the hooks I got to the rope I got – rope rated to 450 pounds – it was a simple matter to use the van to pull it out.

My goodness, where those top branches ever entangled! When I started pulling it, it didn’t fall, but stayed stuck until I got far enough that the tree was no longer dragging on the ground, but lifting up. At which point, it rolled up and got dragged over the compost ring, then finally it broke free from the branches and dropped.

Right on the cherry trees we are intending to cut away, so there’s no loss there!

After replacing a large divot of sod that got dragged out, I then used the baby chain saw to start cutting away the branches, and cutting away the top of the tree.

Then it got rolled onto the compost ring, so the rest of the branches could be trimmed off.

Finally, it was time to break out the new chainsaw!

Of course, I took the time to read the manual, first, then added chainsaw oil to the reservoir.

Then I measured out and cut a pair of nine foot lengths from the tree trunk.

The bucksaw does a great job, but the chainsaw did in mere seconds what would have taken me probably 5, maybe even 10, minutes, per cut, by hand!

Then, while I dragged the logs over to the high raised bed, I helped a daughter move the rest of the tree trunk aside, so they could set up the wood chipper. They cleaned up all the dead branches from the tree, as well as the little cherry trees we’d cut away to access the last tree we’d cut down.

They spent more time prepping the branches to fit the chipper and shredder, than actually doing the chipping and shredding! Unfortunately, the little spruce branches were so twisted, they ended up clogging the shredder chute to the point that my daughter had to take it off to unclog it. Once that was cleared up, they did a few celebratory shreds before heading inside to start on supper.

Meanwhile…

I started working on the high raised bed by first taking it apart! I cut away the notches in the base logs so that the cross pieces would sit lower, and no longer have that gap that was there before. I also was able to clean up the cuts and make adjustments, as needed.

The new nine foot lengths were thicker than I thought, so after I put the bottom cross pieces back, I used the new logs for the next level.

I ended up not needing to cut notches in them at all. Instead, I was able to just adjust and cut the notches in the next level of cross pieces to fit.

It was SO much faster and easier to cut the notches with the chain saw! Pretty much every notch we’d cut before needed modification.

I used smaller, thinner, logs at the top, which turned out to be a pain. These are from higher in the tree, which meant they were not as straight, and had more little branch stubs all over. I ended up having to trim logs along their lengths to get rid of lumpy bits, so things would sit against each other better.

Then I went and cut two more four foot lengths to do the last cross pieces.

There we have it! The high raised bed is built!

Standing next to a corner, it’s just barely reaches my hip. For mobility and accessibility purposes, we could probably have gone higher than this, but I think this will be fine.

Now, we just need to fill it! We’ve got old logs for the bottom, with corn stalks, leaves, grass clippings and garden waste to layer in. I’ll add thin layers of soil in between each layer of organic matter before topping it off with soil for about the depth of the top logs.

That will be a job for tomorrow!

I may have had to juggle the budget a bit to get that chainsaw, but it was worth every penny. There is no way I could have finished this today, without it. In fact, I have my doubts I would have been able to finish it before winter, at the rate things were going!

About the only other thing we might end up doing with this is maybe get some short pieces of rebar, drill holes through the top couple of logs and set the rebar in them to really make sure the logs stay in place.

It’s really a horrible, messy, slapdash job, but it will still probably last us many years.

Now we just need to cut down more dead trees, so we’ll have the material to build more!

The Re-Farmer

Our 2021 garden: cleanup up and high raised bed progress

While I was working on the garlic, my daughter did a whole bunch of clean up!

She pulled the Dorinny corn stalks that were next to the squash tunnel, then pulled all the squash, gourds and melon. Aside from the sunflowers, which we will be leaving for the deer to nibble on in the winter, we just need to weed and prep the beds that will be used next year, and put away things like the bin we keep tools and supplies in, empty the rain barrel and put it away for the winter, and take down the last of the critter barriers.

Then she pulled all the purple corn stalks, removed the three layers of barriers we had around the Crespo squash, and pulled those, too. I’m not sure what I’ll be doing with the corn block. There’s some very good soil there. It would be good to plant some sort of legume there, next year, to replace the nitrogen the corn used up. As for the squash hill, that’s something else I’m not sure what do do with. When we plant squash again next year, I want it to all be on the other side of the main beds, where they get more hours of sunlight.

What a sad sight. The Crespo squash had recovered so well from the critter damage! I definitely will be trying these again – with critter barriers, right from the start!

Once I finished with the last garlic bed, I pulled the frozen chard and the remaining radishes we’d hope to grow for pods.

All those radishes we planted, and these are the only ones that survived the grasshoppers!

It’s a shame we don’t have chickens. They would have loved all the greens we pulled today! Not that they will go to waste. They will get buried in the beds as we prepare them for next year. There are still four more beds in the main garden area, including the one with lettuce still in it, to clean up. The lettuce is handling the overnight cold very well, but they have become very bitter tasting, so they will be pulled. Of course, there is still the high raised bed to work on.

I had company while I worked on the garlic. The cats do like the high raised bed. I’m sure the wood is much warmer on their toes than the ground. 🙂

My daughter was able to help with the high raised bed this time. She finished making the notches on the next end piece, in the background, while I cut another 9′ side piece from the last tree we cut down. She does not like using the baby chainsaw, and much prefers a hammer and chisel, so I started on the notches on the end piece in the foreground, until the second battery on the baby chainsaw ran out. By then, it was starting to get dark, so my daughter finished up the end piece she was working on and we called it a day. You can’t see the cuts I made on the end piece in the foreground, as I rolled the log onto them. They make it less likely to roll around, should the cats decide to climb all over it again.

The side pieces that are waiting are from higher up in the tree trunk, and quite a bit thinner than the other logs. Almost too thin. Since we will probably make this bed four logs high, I am thinking I should wait until I have thicker logs to use, and save the narrower ones for the top row. The tree that’s still stuck on the branches would give me logs that are just the right size – if we could get it the rest of the way down! 😀 It’s either that, or find another dead tree to cut down. The problem with that is, most of the trees that need to be cut down are all really huge. They might be too big!

As glad as I am to have so many dead trees available that are still solid enough for this project, I’m a bit sorry to be using them. These are the trees we intended to use for the walls of the cordwood shed we plan to build as an outdoor bathroom. It’s possible, however, that we will be able to get a load of cast-off electricity poles. These are the remains of poles that broke in storms or had to be replaced for some reason, and we’re on the mailing list with the electric company. They don’t come available often, and not always in our area, but these are cedar poles and would be much better to use for cordwood walls than spruce. So maybe it’s for the better, that the dead spruces are being used to build high raised bed gardens!

The Re-Farmer

Our 2021 garden: clean up, little harvests and high raised bed progress

It was a chilly day for it, but we got quite a bit done cleaning up in the garden today.

My focus was on finishing with the abandoned carrot bed that was half done yesterday.

This is how it was left lat night. The second half had the Kyoto Red carrots planted, and after the groundhogs got at them, most had gone to seed when they grew back among the weeds.

Yet we still managed to have some carrots of an edible size!

There were a lot more twisted ones than with the Napoli carrots. This bed had been built on top of one of the potato beds we’d planted the year before, then basically doubled the length. The half the Kyoto Red were on was on top of non-amended ground, and you could see in some of the longer carrots, where they had hit rocks or harder soil, and twisted their way around. Even using the garden fork to loosen the soil and pull up the carrots was harder than the first half.

What a difference with the carrots that had gone to see!

It doesn’t look like we’ll be collecting any; if there are any mature seeds on some of these, I can’t tell.

Once I pulled as much as I could, I started working on cleaning out the weeds and roots. One of my daughter came out after I started that part, and she started working on the sweet corn blocks.

She stacked those next the high raised bed, as I’ll be using some of them in the layers of material used to fill it.

The sunflowers were left for now, but all three blocks of sweet corn were cleared.

She also pulled the summer squash and beans. These beds will be used again next year, so I got her to leave the plants there for now. The beds still need to be weeded and prepped for next year, and I might be able to make use of the plants to improve the soil more.

My daughter also moved the sprinkler hoses, but they were pretty cold and brittle, so they’ve been laid out in the sun for now. It’s supposed to start warming up over the next while, so I’ll wait for a nice warm day before rolling them up for storage.

By the time she got all that done, I was just finishing cleaning the carrot bed. Thankfully, none of the other beds will need as much work to clean them, and will go a lot faster!

My daughter did the final leveling and raking of the bed while I got the tools to continue working on the high raised bed.

I’m finally starting to get a bit of a method down. Between that and the narrower logs, I’m getting the notches cut faster. The logs on the ends are so huge, if I were making this bed only two logs high, I could leave the ends as they are now! As it is, when I add the end pieces for the next level, the narrower side logs means I should only need to cut notches on the cross pieces.

When I got to the point where the second battery on my baby chainsaw needed to sit for a bit before I could squeeze in a few more cuts, I took the time to cut some of the sunflowers. Checking them this morning, I was seeing a lot more losses to birds, so I figured we should get them inside while we still had seeds. 😀

One pile has the Mongolian Giants and the other has the Hopi Black Dye. I don’t know that all the seed heads I collected will give us finished seeds, but we shall see. I cut the stalks pretty long, which meant some of them included the little baby sunflowers that were branching out, too. Those will, for sure, not have any mature seeds on them, but that’s okay.

At this point, we would be hanging them someplace warm and dry. The best place right now is the sun room, and we have no way to hang anything in there just yet, so I made do.

They should still get good circulation around them on these shelves as they dry. I am very curious as to what we will get out of them!

There is a lot more clean up to do, but thankfully we are expected to continue to get mild weather. So much so, that I am still holding off in broadcasting the wildflower seeds for a while longer. Doing this in the fall will only work if there is no chance of germination, so I would rather wait a bit longer. I think one more week will do it, just to be on the safe side.

The Re-Farmer

Today’s progress: high raised bed and half a carrot bed. Plus, a robocall with a difference!

One of the things about living our here is that phone calls are pretty rare things.

We like it that way.

Every now and then, we’ll get a robocall. Sometimes, from political parties, for conference call town hall meetings, or urgent messages telling us that we are about to be arrested by Canada Revenue for some reason or another, if we don’t call them immediately – and give them our personal information, of course. You know. The usual.

I was just preparing to write this post when we got a robocall with a difference. It was for our municipality, but from the RCMP. It was a warning that there was possibly an armed and dangerous suspect in our area! And by “our area”, they meant the two nearest cities, plus our region. Not municipality. Region. Which is huge.

The alert came with a name, but no description of the person. We did get a description and license plate of their truck, as if that means anything.

After the call, I settled back at my compute to continue with this post. I am happy to say I finally got some progress on the high raised bed that’s worth blogging about. Of course, I’m keeping a close eye on the weather. One of the handy things is that I have a little icon from The Weather Network in the corner of my task bar with the temperature on it and, when warranted, it flashes red with a white lightning bolt as a weather warning. We used to get those whenever there was a frost warning, but I have not seen that, even after last night’s heavy frost. It was flashing when I sat down, though, so I figured we were finally getting a frost warning.

Nope.

My weather app was giving a public safety alert, and it took me to the exact same message from the RCMP that I got from the robocall!

There is no other information about this guy, but they sure to want us to know he’s dangerous and might be in the area!

Or hours away from us, considering how large of an area they are including!

None of us are particularly concerned, but the warnings are appreciated.

Anyhow. To the topic at hand!

Progress on the high raised bed has been frustratingly slow. My tools are the baby chain saw, a hatchet (our other axes are too big for the job), a hammer and a chisel. Basically, I use the baby chain saw until both batteries are drained, with the other tools used to remove material in stages.

Today, I also worked on the carrot bed next to the high raised bed, which meant the first battery actually had time to charge, giving me a chance to get more done than usual.

Which means I FINALLY got the second log in place on one side of the bed.

That took ridiculously long to do! But, it’s now in place, and I’ve started on the other side.

I used the second log to mark where I needed to cut the notches on the side log and end logs. The logs at the end are the thickest, so I started removing material from there, first.

I think part of why I’m so frustrated is, I’ve got three chain saws. The gas powered one broke when I tried to start it, simply because the plastic shell was so old and brittle. The electric one I found was checked out, and they found nothing wrong with it and just sharpened the chain for me, but I discovered it leaked chain oil when I found it in a puddle after the first time I used it, which was for just a single cut before I switched to the baby chainsaw. The next time I used it, I found it would simply stop cutting after just a few seconds. I still have the little, electric, convertible pole chain saw with a 10 inch blade my husband got for me a couple of years ago. It would be enough to do the job, but something went wrong with it the first summer we got it. I checked it out again today, and it basically just screams when I try to make a cut, and the chain stops turning. I’ve got that in the van now, for the next time I go into town and can leave it at the small engine shop to see if they can fix it. I can’t even try using the reciprocating saw. It runs, but no longer shuts off. It needs to be unplugged to turn it off, and it even starts trying to run when it’s plugged back in, making and it quite unsafe to use.

If even one of those chainsaws worked, this thing would be done by now!

*sigh*

Ah, well. It is what it is. Hopefully, I will still be able to complete the high raised bed, and fill it, before the snow flies.

One of the things I found with the baby chainsaw is that, when it first seems to run out of juice, and the red light starts blinking on the battery meter, I can set it aside for a little bit and it will actually “recover” and run again for a while. That usually gives me time to chop or chisel away excess wood. I can usually do this a few times before the battery is finally completely dead. This also gave me time to pull carrots while waiting on the battery life.

I just dug up the Napoli carrots in half the bed. With the Kyoto Red mostly gone to seed, I figured they could wait.

Pulling them all from in between the weeds was certainly a challenge, even using a garden fork to loosen the soil and weeds!

After draining the second battery on the baby chainsaw, I had time to clean up the weeds, pulling out all the roots I could. If some leaves got left behind, I didn’t care, but my goodness, there were some REALLY deep roots I had to dig out!

Half the bed, all done! Hopefully, I’ve pulled out enough roots that it won’t get this bad again, next year! The time it took to do this was enough for a battery to charge, and get more done on the right raised bed.

The temperatures are supposed to stay the same as today for a couple more days, then start to warm up again, which should hopefully give more time to work on the high raised bed and, of course, finish cleaning up all the garden beds and ready them for next year, too.

The Re-Farmer

Our 2022 garden: a bit of high raised bed progress

After several days of rain, I was finally able to get a bit more work done on the high raised bed that is being built.

Such slow going!

I was able to cut the four notches to fit the end piece on, but it is not done. I made as many cuts as I could with the baby chain saw, then used the hammer and chisel to take off the excess wood while the batteries charged. Unfortunately, I finished with the chiselling faster than the batteries charged, so when it came time to use the baby chainsaw to do the finishing, I didn’t get very far.

I’ll have to get back at it, later. It’s the notches on the side logs that need to be deepened more.

Little by little, it’ll get done!

The Re-Farmer

Our 2022 garden: high raised bed build, day 2

I did a fair bit of running around this morning, and was even able to get a quick visit in with my mother. We are hopefully now well stocked with cat kibble for the rest of the month. It’s also coming up on Thanksgiving here in Canada, which means cheap turkey season, so I got one for this weekend, and another for the freezer. 🙂

Once back at home, I grabbed a quick lunch and the girls and I headed outside. While they worked on raking leaves for me – and running to and from the house for any tools I needed – I worked on the high raised bed.

The bottom got prepared a bit, first. I straightened out the edges and shoveled out some more soil, then used a thatching rake on the bottom. I eye-balled four feet across and raked up the edges where the logs would go. Then I got two nine foot lengths in. The first one was placed right where I wanted it to go (that’s the one on the right), then placed the two sticks against it. From the sticks, I measured four feet and placed two more sticks, then rolled the second log up against the second pair of sticks.

Once those were in place, I rolled an end piece against them and used their width to judge where to begin cutting. This end piece was the bottom of the trunk, so it had one very uneven end. It was measured and cut at more than four feet to compensate for that. That made it long enough to cut a notch out to fit the logs, rather than cutting right to the edge.

I used the baby chainsaw to cut the outer edges of the notch, then made a cut lengthwise. I then spent the next while using a hammer and chisel, sometimes a hatchet, to cut out excess wood, which you can see inside the bed. After most of the wood was chiselled out, I use the baby chainsaw to cut into the remaining excess wood, as you can see above.

Then I kept running it over the area to level it more. I wasn’t after perfection, here, and don’t have the tools to do a better job, so this was as good as it was going to get!

It didn’t take long for me to drain the battery on the baby chainsaw and have to switch to the second one

When I started working on the other end, I made plenty of cuts to make chiseling the excess out, easier!

I got it to this point with the chisel before going at it with the baby chainsaw to level it off some more.

Then I got a daughter to help me place it on the logs, so I could use it to mark were to cut wood out of the ends.

By the time I finished making cuts to depth, I drained the second battery. That’s okay. It was enough to get started, and since I was removing wood to the edge, it would be easier to take off the excess with a chisel than with the notches.

Right?

Ha! Of course not.

Both logs had knots in them. One of them had two.

Those were a real pain in the butt to work through with nothing but a chisel or a hatchet to cut through them!

On the plus side, working on this took enough time that the first battery was almost fully charged again, so I could use the baby chainsaw to finish off the area.

That done, the end piece could be set in place.

As you can see, there is quite a bit of a gap under the end piece. This is not a concern, as the bottom of the bed will be filled with logs. It will be an easy matter to find a piece that can be fit under that cross piece.

The good thing is, all those bits of wood I’m cutting out will not go to waste, as they will be buried with the old logs. We’ll have things decomposing at different rates, all of which will release their nutrients slowly over time while the wood will act like a sponge, reducing the need for watering.

By this time, we started to get a bit of rain, so I stopped for the day. The girls finished raking and headed in to make supper while I prepped to continue later.

I chose a second cross piece that was close in size to the one at the opposite end. As before, I will use the other logs to see where to make the cut outs. Hopefully, I’ll be able to continue on this tomorrow. It depends on whether or not my mother will need me to drive her around or not.

This would go a lot faster if I had a full sized chain saw. 😀 Ah, well. We use the tools we have!

Meanwhile, I now have a nice pile of leaves to use when it’s time to start layering on top of the logs that will go on the bottom of the new raised bed! It’s been pretty windy, but hopefully they won’t blow away. 😉

I’m glad we have found a way to make use of all those dead spruces we need to take down!

The Re-Farmer