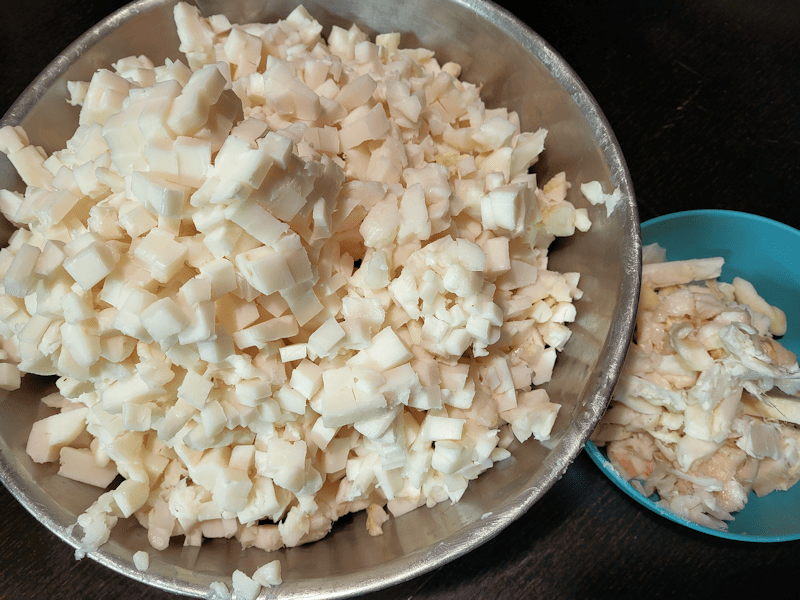
Well, this is certainly a long process!
Here is what the slow cooker looked like this morning.

I stirred it, breaking up the clumps of fat, several times, adding a bit of time to make up for the heat lost while the lid was off, each time. In total, this picture was taken after about 10 or 11 hours.
I added more time.
By the time I was ready for the next step, it was at about 13 hours on low, plus whatever length of time it ended up being on warm, because I couldn’t get back to it right away, and needed time to sanitize the canning supplies.
It’s hard to tell in the photos, but those extra hours did render out and clarify the liquid fat more.
The next step was to scoop out the solids.
Those went straight into a wok-style frying pan.
Not all of the solid bits can be scooped out, with some being small enough to go through the holes. Various sites I’d looked up suggested straining the fat through a coffee filter while pouring it into the jars.
Tip: if you use a coffee filter over your canning funnel, make sure there is a small sieve under it, or the weight of the fat will pull it right into the jar.
Ask me how I know that? Go ahead! 😂
Seriously, though, don’t use a coffee filter. It takes forever for the fat to drain through. Things would start cooling down too much, and the fat needs to still be hot or it’ll all clog up.

Use a small sieve with a very fine mesh. That will work much better!
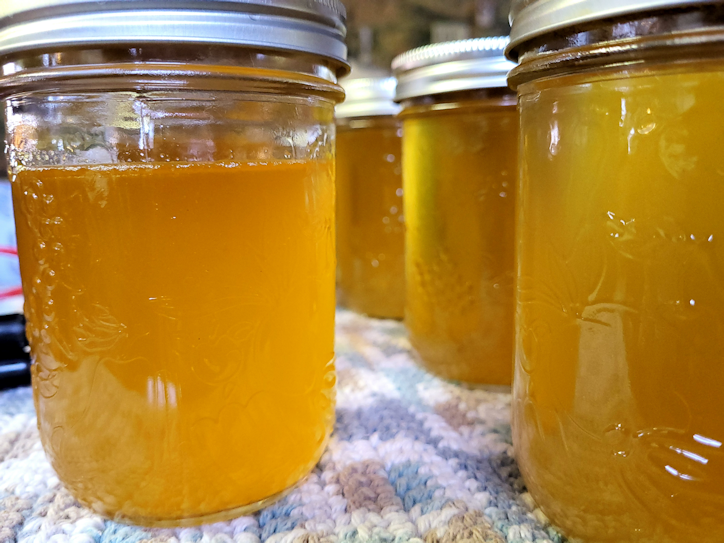
I had sanitized a full dozen 500ml/pint jars, just in case. Once all the solids were filtered out, though, I filled almost 7 jars.
While these will not be processed in a canner, I still did all the things I normally would if I were going to process them, including wiping the edges with vinegar, and finger tightening the rings.
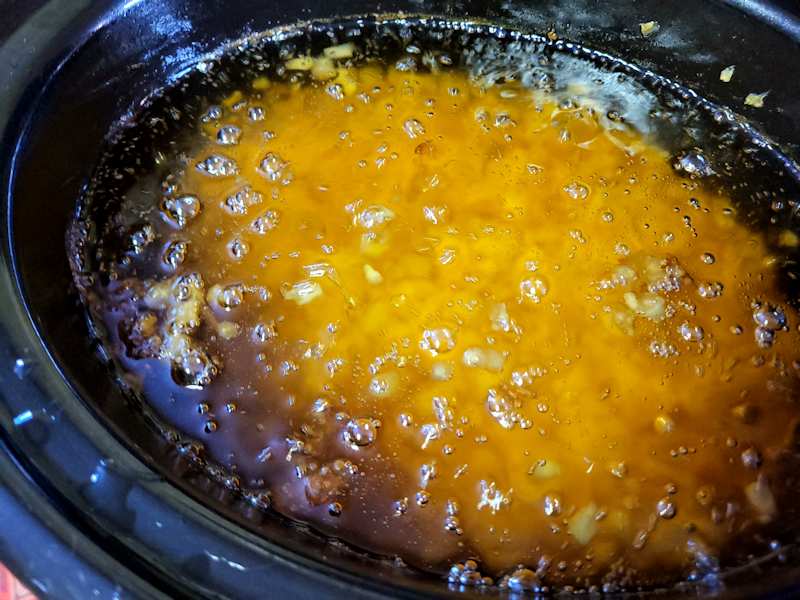
Once those were done and set aside to cool, it was time to work on the cracklings. These were cooked at medium low heat for several hours.

As more fat was rendered out, it would start to foam up like this.
This picture was taken about about half way through the cooking process. I set up a chair in the kitchen while doing this, since it needed to be watched over and stirred so often.
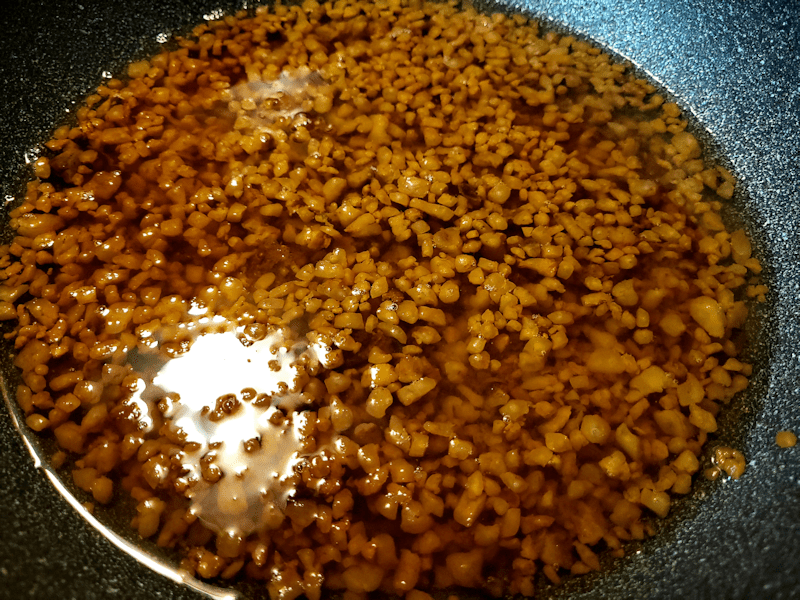
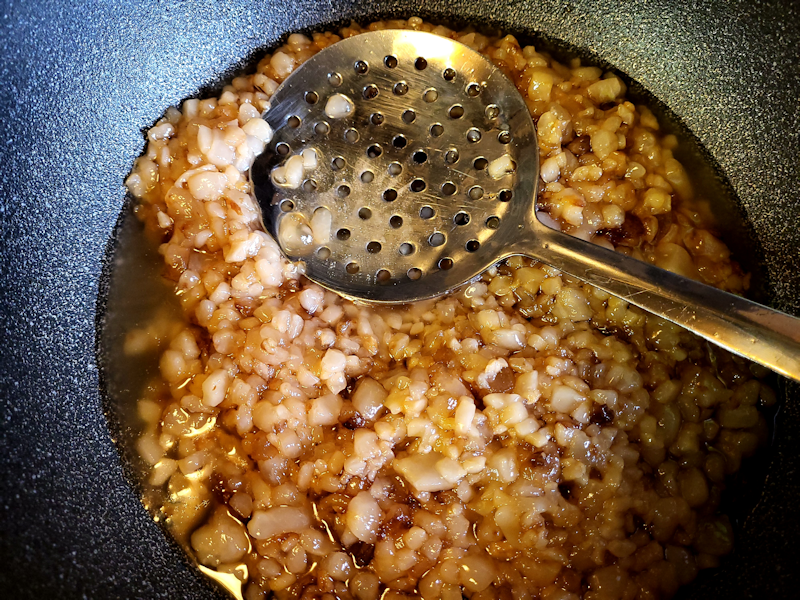
I cooked it down until it looked like this. Deciding when to stop was pretty much based on scent. Once things started to smell like things were starting to char a bit (the tiniest pieces could potentially start burning), I figured it was good enough!
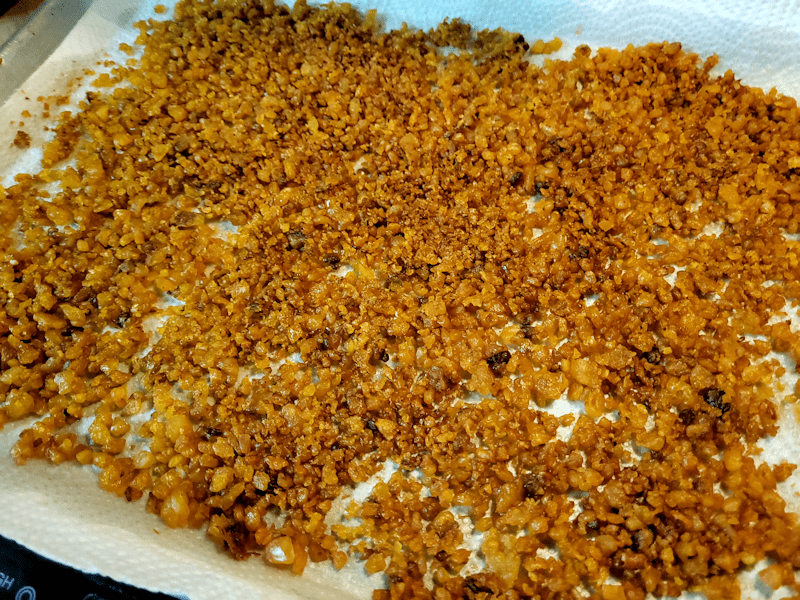
The cracklings were then scooped out, as much as possible, onto a baking tray lined with paper towels. Then the last of it was strained into another 500ml jar.

Look at that difference in colour!
The last jar was filled more than I normally would, but I didn’t want to leave such a small amount in the pan. It didn’t need as much of a head space, as it got a twist lid, instead of a canning lid and ring. While it’s cooling down, the lid is simply resting on top, to keep the dust (and cat hair!) out. As the other jars cooled, I even heard some of them pinging, but I didn’t want that with the plastic twist off lid.
The jar from the cracklings will be used first, and then the one that has the least in it – which you can see in the photo is cooling down quite a bit faster than the others! Lard is a neutral flavoured fat, but that last jar will likely have more of a flavour to it. It should be interesting to try it out and compare.
Here are the cracklings – after being flipped. It was too messy to try and take photos of the process. I have several of these 9×13 baking trays, so to flip it, I covered the top of the cracklings with more paper towel, put another baking tray on top, upside down, then carefully flipped the whole thing. Once flipped, the grease soaked paper towel was removed, scraping off as much of the stuck cracklings as I could, and thrown away.

More paper towel was added over the top.
Then, because we have cats, I added another layer of paper towel, set a clean baking tray on top, then weighted that down with the slow cooker (cleaned and washed, of course, ready for the next batch!).
Tomorrow, I’ll salt the cracklings and put it in a jar, to be added to as the other batches are finished.
I will stick to doing just one slow cooker batch at a time. It’ll just be easier that way, even though it’ll take longer. Each batch is a 2 day process! I’m pretty sure I can do the rest of the fat in two more batches. We might start running out of pint jars that aren’t still sealed in their packages. I want to save those for when we’re actually processing things in a canner. We can move up to the 750ml jars if we have to, though.
This one batch, which started with enough cubed fat to fill the slow cooker, gave us 7 pint jars of white lard, plus one pint of golden crackling lard. If the other two batches end up similar in size, we could have the equivalent of 21 pints of white lard, and 3 of the crackling lard.
We don’t normally buy lard. It really came down to the budget. Now that we’ve got it, it should be interesting to see how much we actually use it. That will help us decide if it’s worth doing this again, in the future!
The Re-Farmer