Our 2022 garden: sweet potatoes, bed prep and… frost?

Yay! A day without rain! We finally got to get some serious work done outside!

I had a few goals for the day, but before I could even start on any of them, I had to get the weed trimmer out. The grass is getting out of control, but it’s still too wet to mow in most places. In the main garden area, the ground is so rough, it’s just easier to use the weed trimmer.

Easier on the lawn mower, that is. Not on me! Particularly since I was trying to trim as close to the ground as possible, as well as under the logs framing the beds. It’s pretty much all crab grass, with some dandelions thrown in for good measure, so it’s all going to come back, but at least it’ll take a bit longer, this way. :-/

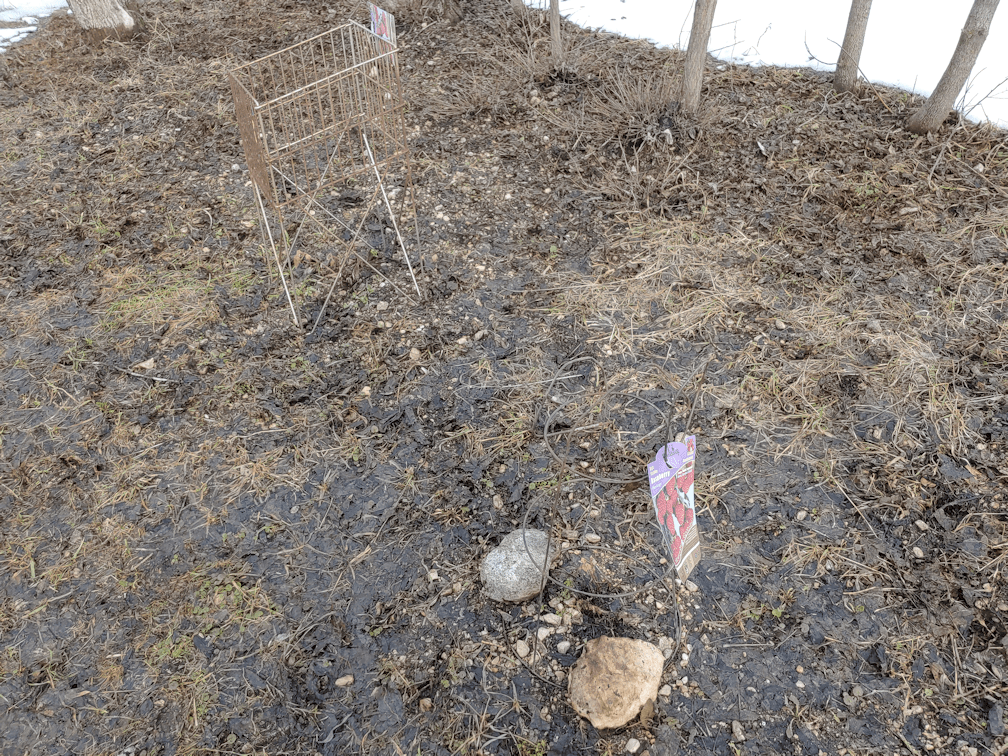
Once that was done, I decided on where I would put the purchased grow bags we are testing out this year. I picked up a couple at Canadian Tire, mostly because they were on clearance. My original plan was to try growing some sweet potatoes in one of them, then have the remaining slips planted in the ground. The bed I was going to use for that now has the white strawberries in it, so I figured they could all go into the grow bags.

I decided to place them near the small potato bed, where they will get full sun, and be sheltered from the winds at least somewhat. I did put some straw in the bottom of the bags. The straw will act as a sort of sponge to hold moisture, but it also held the sides of the bags up, making it easier to add the soil.

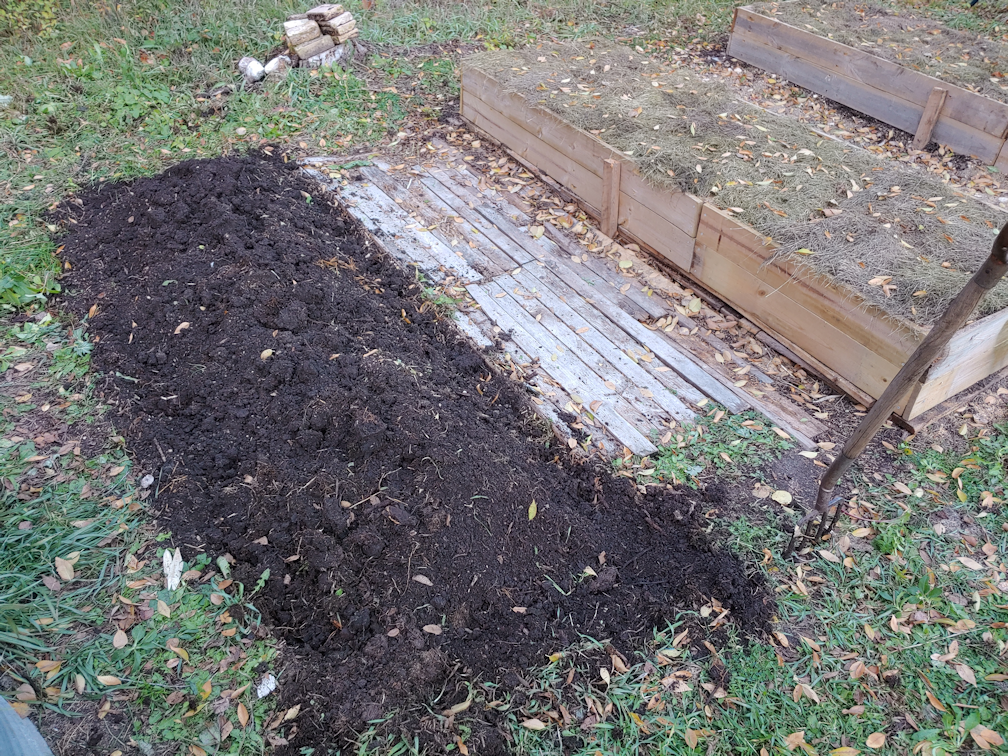
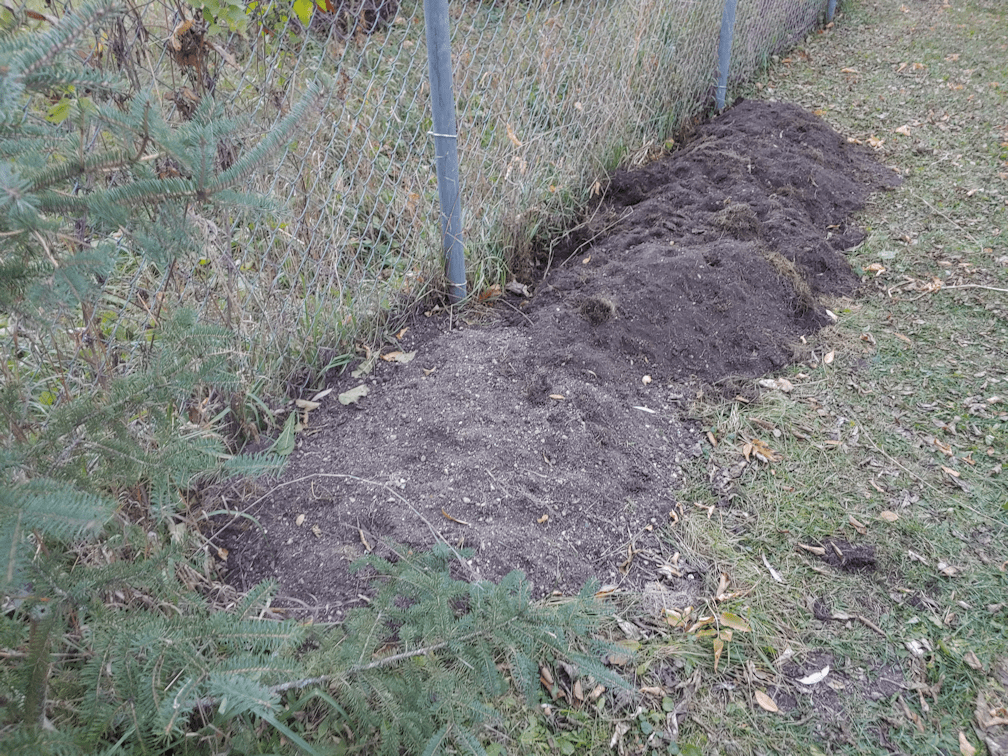
The truck load of garden soil by the main garden is mostly used up, but so far it has been enough for what we need. The problem is that, after a year, it’s so full of roots, it’s actually hard to stab the spade into it!

We really need a soil sifter. I don’t have the materials to make one right now, so I rigged one up.

This steel mesh is what we use on the burn barrel as a spark catcher. I used it to sift soil last year. A couple of sticks to support it over the wheelbarrow, and it worked all right. Some roots still got through, but at least the big stuff was kept out.

It took a couple of loads to fill the bags. They’re not that large, but even with the straw on the bottom, they hold quite a bit of soil. I decided not to fill them to the top. I figure, once sweet potatoes start to form, they’re going to need some space. I’ve never grown them before, so we’ll find out!

Also, you can see that one of the handles has already torn off on one side!

These bags are probably too small for sweet potatoes, but this is a bit of an experiment, anyhow, so we’ll see.

For these, I decided to use the stove pellets as mulch. In the above photo, the one on the right had its first watering, and you can see they’re already starting to swell and soften.

After wetting them both down, I left the pellets to absorb the water and moved on to our other experiment.

I got a pair of these at The Dollar Tree to test out. The fabric they’re made of is a thick felt.

Hmmm… Did I mention I got these at The Dollar Tree?

You get what you pay for! The first one I opened, and it had a hole in it!

Some of the stitching looks like it simply came undone, but the opening was about a third of the circumference!

The other one was fine, though, so I gave the first one to my daughter. She’s been doing a lot of sewing, so she’s got all the supplies on hand and was able to stitch it up for me.

While she worked on that, I filled the second one. As with the others, I added straw to the bottom, using it to help hold up the sides. In between loads of soil to fill it, I watered the pellets in the first bags a couple more times, before smoothing out the sawdust, then repeated the process on the smaller fabric bed.

It looks so small compared to the other two!

The sweet potato slips I ordered was a 5 pack, and I decided to plant 2 in one of the green bags, then 3 in the black felt bed. I wanted to see if the black fabric, which would absorb more heat, would be better. We did get a short season, cooler climate variety, but they are still a heat loving plant.

Well, would you look at that!

We have extras!

After breaking up the bundle of slips (there was still ice in the packing medium!), the green bags got two each, while the shorter but wider black fabric bed got three.

Sweet potato slips, I’ve learned, are the only other plant that share a trait with tomatoes, in that you can bury them up to their leaves, and new roots will grow out of the buried stems.

I’m sure these bags will be too small, but with how sweet potato vines grow, I think I will let them spread onto the ground. Where the vines touch the ground, they can root themselves, and grow more sweet potatoes. So we might get some growing in multiple places. :-)

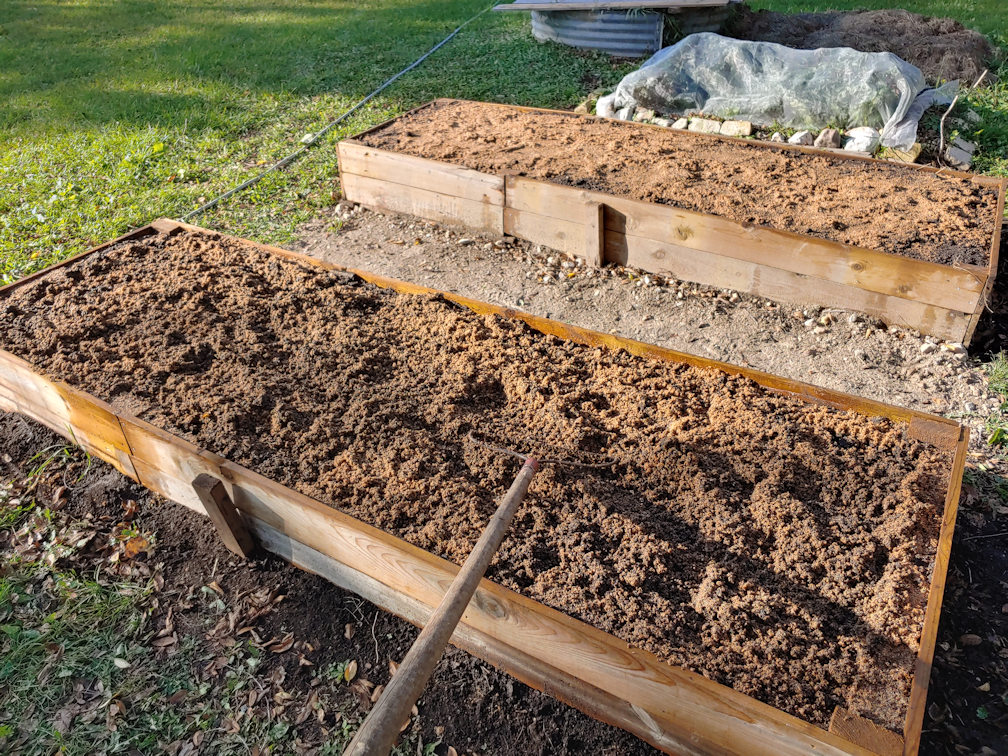
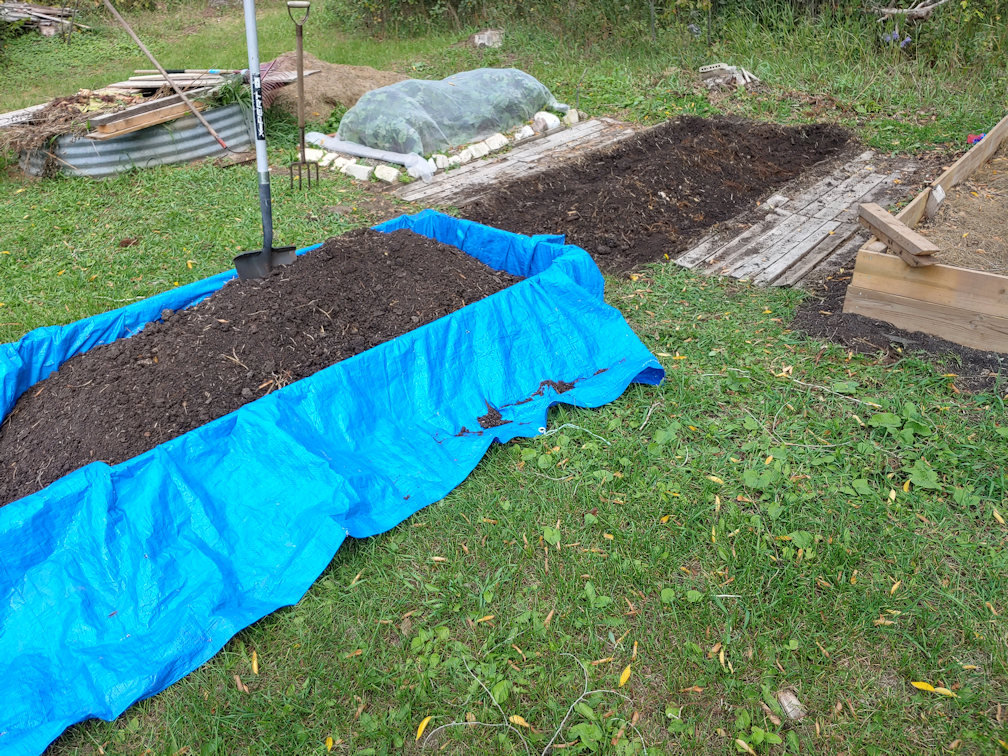
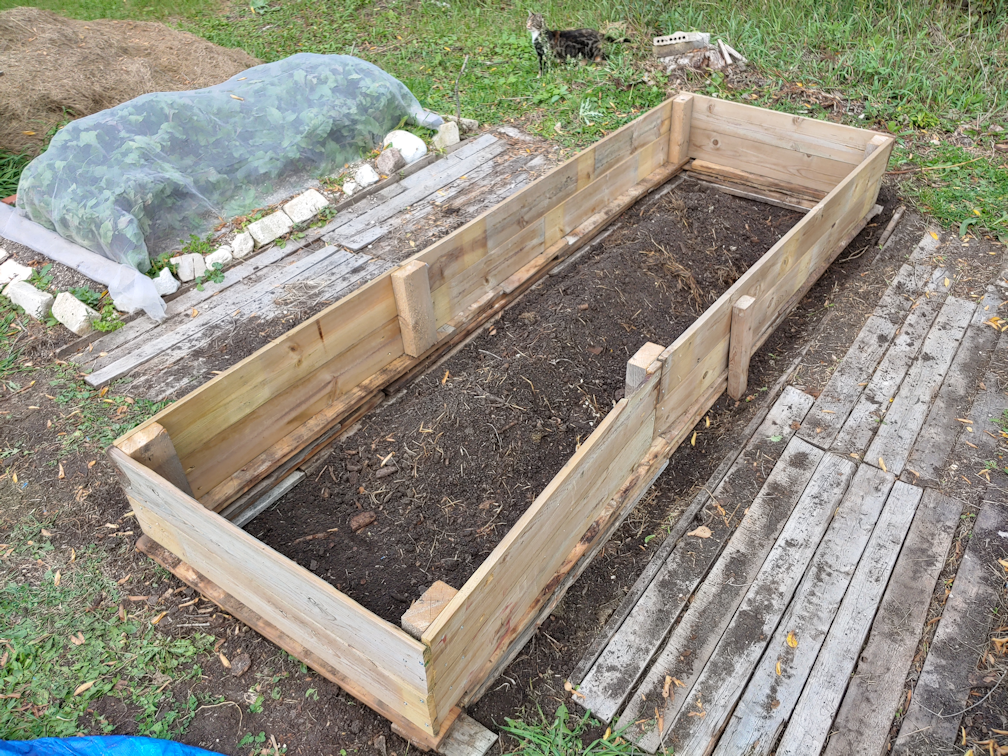
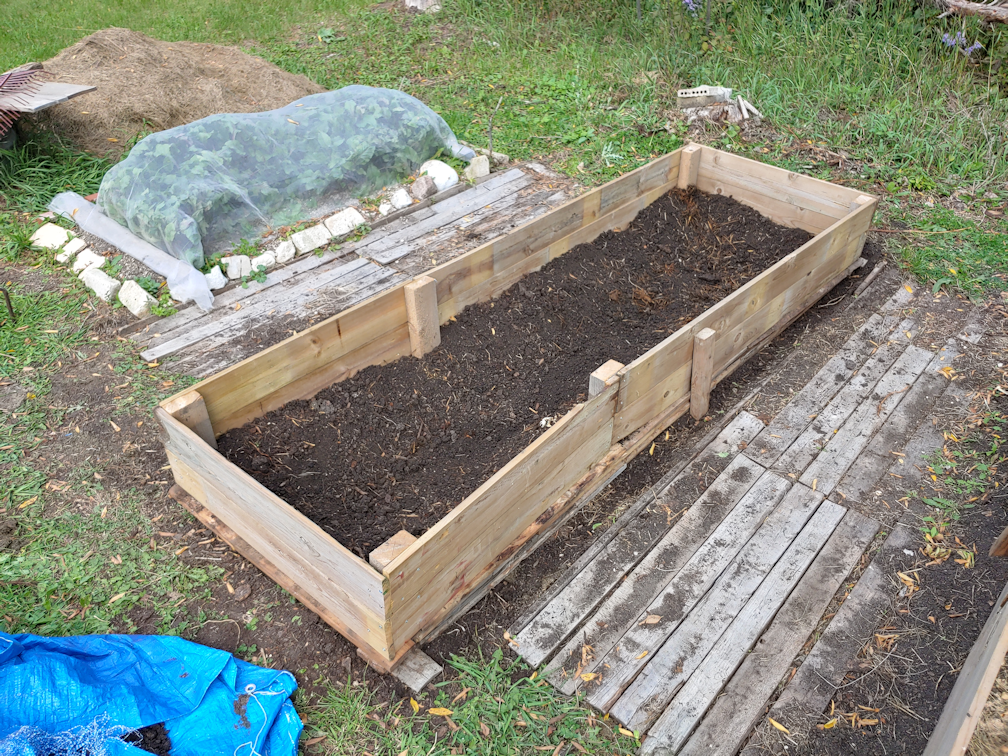
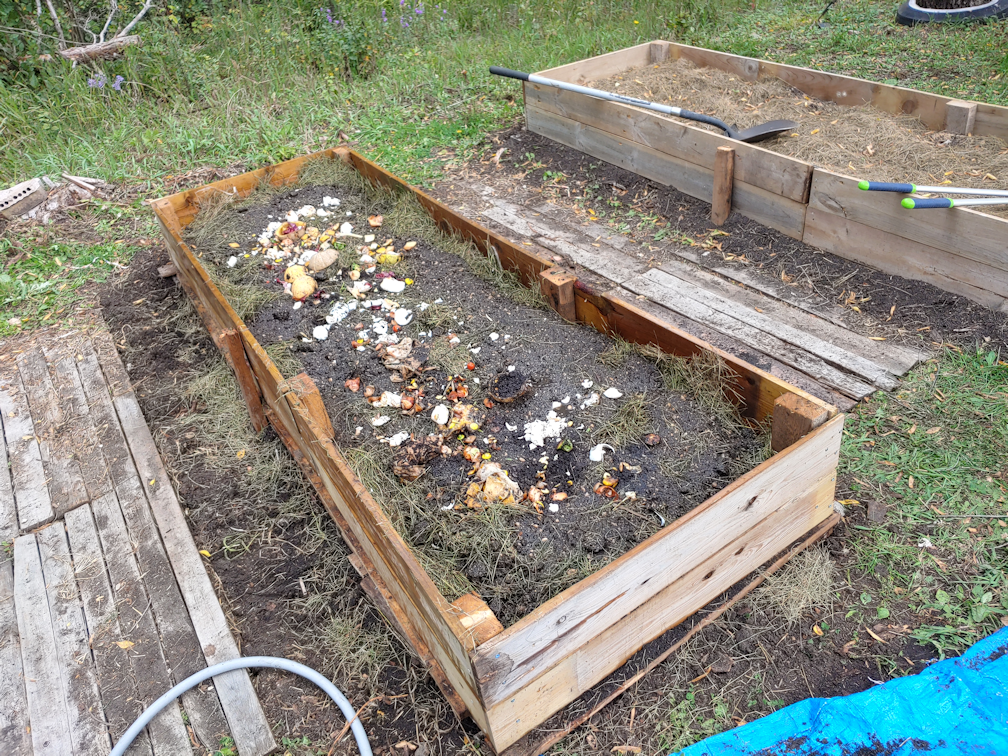
Once those were in, I got to work on one of the low raised beds that needed to be weeded (again) and prepped for planting.

It was actually a bit worse than the remaining bed that needs to be weeded. I got as many of the rhizomes and dandelion tap rooms out that I could. I know I didn’t get all of them, but at least I got most.

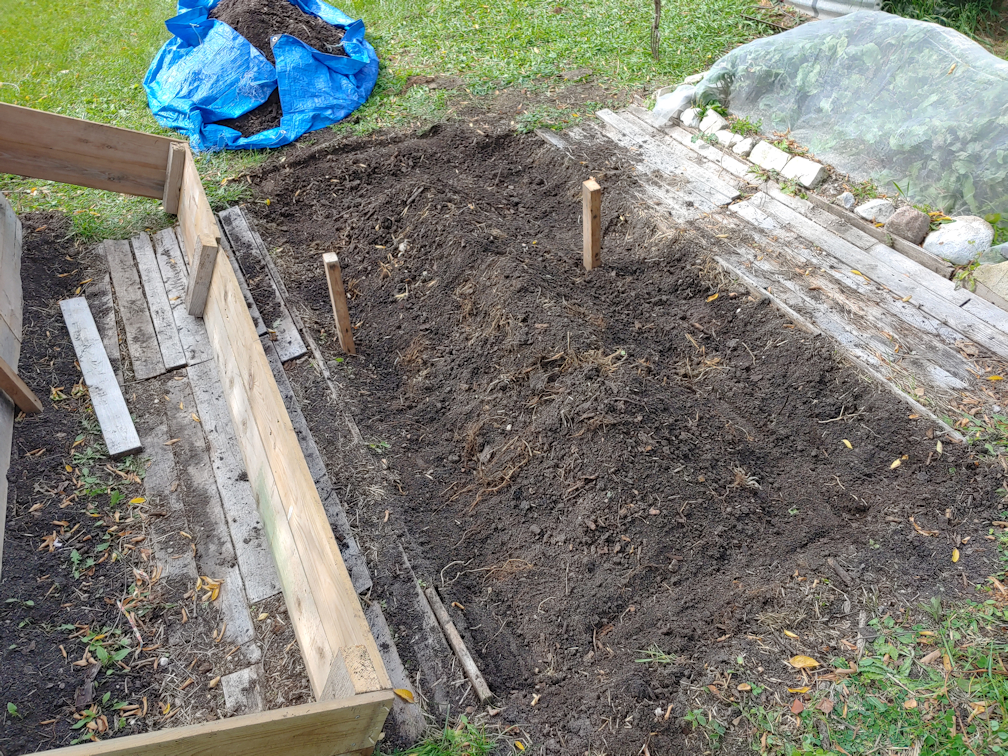
We’re running low on the canopy tent pieces I’m using for supports. This bed got only 6 of them. The other beds got 8. There are 4 left of these longer ones. After that, there are only some really short pieces. Short enough that I’m not sure where we can use them in the garden at all!

By the time I got this bed done, I really needed a break, so I popped inside for lunch … er… lupper? and a rest.

When I sat at my computer, one of the first things I saw was a flashing red alert on my task bar’s weather app icon.

It was a frost advisory.

*sigh*

Pretty much everything else we’ve got going right now is frost tolerant. These sweet potato slips, however… yes, they’re supposed to be a cool climate variety, but they just got planted!

I decided to play it safe.

We hang on to more of our water bottles, rather than putting them in recycling, and this is one reason why! They can be used as cloche over smaller plants.

Such a hot day, and we’re supposed to get frost. Ugh.

Okay… “hot” is relevant. It was only 16C/61F out there! It certainly felt hotter while working outside. I got a wicked sunburn on the back of my neck. My daughters chastised me for not wearing sunscreen, while one of them applied some aloe vera gel on the burn for me. :-D We do have sunscreen. Somewhere. I just forgot sunscreen existed, and didn’t even think that I might get sunburned!

Tonight, we’re supposed to dip to 2C/35F. Tomorrow’s high is expected to be much the same as today, while the overnight low is supposed to be 4C/39F. After that, our overnight lows are supposed to continue to slowly increase over the next couple of weeks.

Which means that we have one more night before we can start transplanting our warm weather crops. Even then, though, we will start with the ones that are most likely to handle colder overnight temperatures. There is still lots of work that needs to be done, including a repair on the squash tunnel – one of the screws holding a bottom cross piece snapped. Likely because of the winds we’ve been having.

There is still so much to do! The extended cold and the rains have really set things back.

Once everything is in, though, I expect we’ll have quite a good growing season. I look forward to not having to water all the garden beds, twice a day, almost every day, like we had to last year.

Between the weather and the critters, though, nothing is ever a sure thing!

The Re-Farmer

Our 2022 garden: beds prepped, spinach, onions and turnips sown

With a steady rain all night, we’ve got a lot of standing water and mud in the yard again. The straw mulch where we will be planting our 5kg bags of potatoes got well soaked, though, so I don’t mind.

This afternoon, I finally had a chance to work on the garden again, and I’ve got some thing figured out, too.

The spinach sown in the high raised bed has started to sprout. There was room for one more row of spinach, so that got planted today.

Then it was time to work on the low raised beds.

We are well behind on direct sowing our cool weather crops, so I focused on the 2 1/2 low raised beds that my daughter and I had gone through, pulling out as many roots and rhizomes as we could. A few that we missed started growing again (there will always be some of those!), so I pulled out some more, before leveling the beds out. I decided to use the stove pellets as mulch for these beds. After leveling the soil in one bed (the back of a fan rake is great for leveling the soil), I’d scatter some pellets as evenly as I could over the bed, soak them with the hose, then work on the next bed. It generally took about 3 soaks before the pellets had expanded and broken up enough to be spread evenly with the back of the rake.

It always surprises me just how much sawdust is packed into those tiny pellets!

Once those were done, I gave them one last spray with the hose, then moved on to what will be a deep mulch bed for the 1kg package of potatoes. We had considered planting those in the low raised bed by the compost heap, but have decided the kulli corn will go in there. It’ll be easier for us to put a barrier around the wooden frame to keep the critters out. Potatoes need no such barrier.

In our second summer here, we started preparing an area for future gardening by mulching the area heavily with straw, and trying to kill off as many weeds as possible. You can read about those preparations here, here, here, and here.

Yeah. It was a big job, spread over months.

The next summer, we had our first garden, and all along the north side, we planted a row of birdhouse gourds. We’d started them indoors, but I thought our last frost date was May 28, the same as a town to the east of us, only for us to get hit with a frost on June 2 – which was the last frost date for a town to the north of us (our own little hamlet is too small to be on any of the frost date lists). The gourds didn’t really survive, and since then, this particular area has not been planted in.

The straw you see raked aside in the above photo has been there for 4 years.

The area was still mostly clear of crab grass, though I spent some time pulling those out. With the straw layer, the rhizomes tended to be running across the surface of the soil, so that made it easier to get them.

I knew we had a few moving boxes left in the basement. I thought there was three left, so I cleared an area to roughly match how much I thought those three boxes, opened flat in a single layer, would cover.

I was wrong.

There was 5 boxes left, so I laid them down folded in half, to get a double thick layer. This should be more than enough for the smaller amount of potatoes.

After soaking the cardboard, I put most of the old, wet straw back, then topped it with some newer straw to get a good, thick later.

This bed is now ready for potato planting.

While I was working on this, the girls got the fire pit going, and I finished just in time for a wiener roast. :-D

We’ve used that fire pit in the past month, almost than we’ve been able to in the past 4 years. No fire bans, this spring!

After the girls made sure I was fueled up, it was back to the low raised beds. Time to do some planting!

Look how big that garlic is!! They are just thriving, here.

For this half-bed, I marked out a grid, but planted in rectangular boxes. I started with some spinach – a variety called Space – planted around the middle of the bed. There are still some seeds of this spinach variety left, if we want to sow some for a fall harvest.

One those were in, the outer perimeter, I planted some onions. These are Red of Florence; the last of the onions we started from seed.

The centre of the bed was left empty. Later on, we’ll put in plants that we won’t be harvesting leaves from, or harvesting many times. Perhaps we’ll put some eggplants or peppers in the middle. There’s room for only a few plants in this half-bed.

There will be more room in the next bed.

The centre row was marked, but nothing is planted in it. On one side of the centre line, a third variety of spinach, Lakeside, was sown. On the other side, Tokyo Silky Sweet turnips were planted. Then, all around the perimeter the last of the Red of Florence onions were planted.

The onions being planted around the perimeter like this is to dissuade critters at least a bit. That is not our first defense, though.

These will be covered with netting. I’m not sure the bamboo stakes will hold those hoops very well, though. Trying to push them into the ground, I kept hitting rocks. In one spot, right at a corner, I just couldn’t get around a rock, so that one is more shallow than I would prefer. A couple of stakes broke while I was trying to push them into the ground. Since I couldn’t get them very deep, I ended up having to break the tops off of the rest, to be able to put the hoops on them.

Later, bamboo poles will be tied to the centre of the hoops to hold them steady and hold up the netting when it’s added on. Not until after something has been transplanted in the middle.

For the long bed, I grabbed pieces from the canopy tent that was dismantled. Those were easier to pound into the soil. Literally. I had a piece of would I could use as a mallet, and got them in pretty deep.

With the logs bordering the bed, the supports aren’t spaced very well. For the ones in the middle, most had to be squeezed into the spaces between logs. Which is fine. After something is transplanted in the middle, cord will be strung through the holes in the supports around the perimeter, then criss crossing across the middle to support the netting. With them so oddly spaced, it’ll be wonky, but it’ll work.

The ground staples will be used to tack the net down , but we still want to be able to easily life the sides, to harvest greens as needed.

The third bed was left for tomorrow. We have 2 more varieties of turnips to plant, or I might do carrots, first. They should have been sown about a week or more ago!

Beds will continue to be bordered by onions from sets. I’ve got 2 boxes of yellow onions and one of red onions, so there is plenty to go! :-)

The other thing that really needs to get done are the two varieties of peas. Hopefully, it won’t get too hot for peas over the next while! Meanwhile, we need to get those potatoes into the ground.

The next few weeks are going to be very busy in the garden! Lots to go in, in a very short time.

The Re-Farmer

Some progress today

I’m going to try something a bit different with my images today. I’m starting to run low on storage space on WordPress. The only way to increase it is to upgrade my legacy plan – at more than triple the price. Instead, I’ll try uploading them elsewhere and embedding them. Please let me know if you have any issues with them.

I actually got useable pictures of the outside cats while doing my rounds this morning!

I spotted a dozen of them, in total, this morning. There was about eight of them waiting at the door for me! It’s been a while since they’ve done that. :-)

Today, I actually got ahead on a few things. I wasn’t sure if I would, since I was heading to my mother’s to help her with her shopping and didn’t know how long I’d be gone.

I picked up our usual lunch along the way, though she didn’t think she would be up to a larger meal. I figured if she wasn’t, we could just put it in the fridge for later. By the time I got there, though, she did have some of it, and was glad for the change. Plus, she still has some for later, so that worked out.

She is feeling better, though still says she hurts from top to bottom. My brother thinks she has the flu, though the way she describes it, it sounds like how I get when the barometric pressure changes drastically – and we do have thunderstorms on the forecast! To be honest, most of my joints are hurting, too. Stiff and sore finger joints are making it hard to type! So to me, that seems a likely cause, since she has no other symptoms other than a slight headache.

Still, she wasn’t going to go to the grocery store with me. She took her Tylenol, and was going to stay home to rest. She was feeling pretty sad about having to miss a dinner event tonight. One of the local colonies used to host annual dinners with entertainment for widows and widowers, and she looked forward to them every year. They weren’t allowed to host these for the past two years, and she really missed them. When they called to confirm if she were coming and she had to say no, they asked if they could bring her a care package! She happily said yes. That was sweet of them. :-)

After going over her list to make sure I knew what she wanted, and in what quantities, etc., I headed to the grocery store. As I was unloading the items at the cash desk, the cashier asked about my mother! I didn’t recognize the cashier, though; it’s the first time I’ve seen all of her face, but she recognized me since I have never been able to wear a mask, and this is one of the few places where it was safe for me to go to. It was nice that she asked about my mother. She thinks my mom is funny. :-D

Once back at my mother’s place and putting stuff away in her fridge, there was a knock at the door. It was one of her neighbours, coming to check up on her! Then, as I was leaving, a passed another neighbour coming out of her apartment, and she asked how my mother was, too, telling me she’d checked on her last night.

I am glad that my mother has so many neighbours keeping an eye out for her! Now that the abusive caretakers have quit, things are really good in her building now. :-)

It turned out to be a really nice day today, and the winds died down, so once I got home, I snagged a daughter and we set the platform up for hardening off the transplants, out of reach from critters that might eat them. There are now so many seedlings germinating in the flat trays of cucumbers and summer squash right now – only the green zucchini isn’t germinating yet – I even brought those out, too, setting them up on the roof of the cats’ house, along with the new strawberries. It’s been a few days since we brought the trays and bins out, so I only wanted to leave them for an hour. They really should have been in the shade, but that wasn’t an option, so I brought a hose out of storage and misted them all, and made sure the trays and bins all had water in their bottoms.

Then I took advantage of the lovely day and finished up the chimney block planters at the chain link fence.

The last four got a layer of shredded paper on the bottom, a layer of the soil from the new bed in this spot last year, a layer of straw, then topped with more soil. Between the space the blocks take up, and the layers of straw and shredded paper, there was extra soil, so that got used to top up the four blocks that were done in the fall and had settled. This is the garden soil we bought two truckloads of last year, so I didn’t want to waste any! Once these were filled and the soil in the path smoothed off, I used straw to cover the path along the blocks, so it wouldn’t be muddy to walk on. The blocks all got watered to help the soil settle in, too.

These are now ready for anything with a vining habit, or that can use the support of the fence.

That done, I decided to do a bit of work in a bed I’d already prepared in the old kitchen garden. I noticed some greenery coming through at one end, and wanted to pull those out so they wouldn’t cause problems for the food plants we’ll be planting there. A good excuse to use my new garden fork! :-D

Well, it didn’t turn out to be the quick job I thought it would be.

I’d already prepped the bed using a hoe, but once I started digging deep with the fork and pulling those plants up from the roots, I just kept finding more roots.

And more roots.

Then more roots!

Before I knew it, I was working my way across the entire bed.

Part way through, my timer went off. I got my daughters to help me bring the transplants back into the sun room, so I could get back to work faster! :-D

While working on the bed, I remembered that we still had an upper piece of spruce tree by the compost heap. Most of it had been used in the high raised bed, but the upper parts were too thin and wonky. I figured it would do very well in the old kitchen garden. When I was done pulling out as many roots as I could – there was no way I was going to get all of them! – my daughters helped me bring the log over and set it in place.

After leveling the soil, I hosed off the log and the blocks to clean things up a bit and settle in the soil. Later on, we’ll add more straw to the paths, and I’ll make sure to push some against the underside of the log as much as possible, to make sure no soil gets washed out under the bendy parts of the log.

I think this will work out rather well. As we find ourselves with other leftover pieces of log like this, we’ll probably border the L shaped bed with them, too, to help keep the soil from eroding into the paths.

You can see some of the roots I pulled out, in the lawn on the other side of the retaining wall blocks. While all the roots couldn’t be removed, it should still go a long way in reducing how many of these… whatever they were… from growing around whatever we end up planting here.

One thing is for sure; the soil here is SO much improved since we first started working on this garden! I could easily push the garden fork deep into the ground, and the soil was rich with earthworms. This bed would do well for any deep root vegetable – as long as we can keep the groundhogs and deer out!

Speaking of which…

The wire fencing we’ve managed to put around the tulip patch seems to be working. No new tulips have been eaten, and even among the ones that did get eaten, some look like they are growing again. They won’t be able to bloom, but should at least be able to store enough energy to be able to regrow next year.

One other thing that is growing well is the garlic in the main garden area.

They are getting so tall! The garlic in the other two beds, in the south east yard, are just barely breaking ground right now, but here, some of them at as much as 8 inches tall! What a difference. They were planted at the same time, and mulched the same way. The only major difference is location and, with that, sunlight. This particular bed, which is right next to our first high raised bed, would be getting light for more than 12 hours, this time of year. The other two beds get at least 8 hours of light this time of year, but are in shade for the morning hours.

This bodes well for when we build more of the permanent high raised beds in this area.

Gosh, it feels good to be working outside again! We’re supposed to get light rain tomorrow, with warmer temperatures. Weather willing, I’m looking forward to getting back at it! I especially want to prepare the areas the potatoes will be going in. I got an email with a tracking number from Canada Post today, and they should arrive by the 24th.

I can hardly wait to get those into the ground!

The Re-Farmer

The current state of things

This morning’s rounds were extended rounds – but about a mile and a half! :-D

The first order of business was to check the old basement. The south side of the basement is still slowly getting wetter. The sump pump is doing its job quite well. The north side hasn’t really changed much, and I’ve no doubt the big blower fan is doing a lot to keep that side more under control. The larger puddles of water got swept into the drain or the sump pump reservoir, and another of the chimney blocks was brought upstairs, before I headed outside.

I hadn’t slept much, so I was outside earlier than the cats are used to, so I didn’t see many of them! :-D

The first cat I saw was The Distinguished Guest (TDG), and he was limping. Favoring the same leg that Potato Beetle still does. Now that we know why Potato Beetle was limping, I have less concern. It’s probably a bite or claw injury. Considering how aggressive TDG has been to the other cats, I can’t say I feel much sympathy for him. I didn’t see Potato Beetle this morning, and whenever that happens, I worry that TDG has injured him and he’s suffering somewhere. :-(

I don’t know where Rosencrantz has set herself up again but, wherever it is, it’s very close by. She just seemed to magically appear at the kibble house of late! The only thing I can say for sure is that she’s not coming from the junk pile.

Speaking of junk piles, while Junk Pile (we have GOT to come up with a better for her!) was eating, I blindly took a couple of shots of her kittens through the window. This was the best one. I think I count 5 in there.

While switching out the memory cards on the trail cams, I was happy to see the water on the driveway has actually receded. To get to the sign cam, I went outside the fence line and didn’t even try to go through the snow and water along the garden area. While I was at it, I “made” a bridge. ;-)

This sheet of plywood I found in the garage was set up over the drainage ditch, turned the other direction, so I could drive over it with the riding mower. Which isn’t working and, according to the place I last took it to, not really worth paying someone to fix, anymore. Since we won’t be driving a riding mower through here anytime soon, I pulled up up the plywood and laid it the other way. That helped increase the flow of water, too. I don’t know who dug this drainage ditch, how long ago, or what they used to do it. All I know is that it’s very uneven and rough, even for just a push mower.

That done, I went for a walk to check out the state of the road heading south. For the first half mile, it was actually pretty good. There’s an area that has a series of small ponds on one side that has the potential to be an issue if we get the predicted rains – we’re still under a rainfall warning that extends to the north of us, with accompanying flood warnings – but this morning, it was still pretty good.

Then I got to where the municipal drainage ditch crosses the road.

The culvert is marked with that red plastic tube on the left, and is the only reason this section isn’t already washed out.

This drainage ditch crosses the quarter section we’re on, cutting through the rented out fields into our neighbour’s quarter, until it crosses the road here.

The drainage ditch then cuts across the corner of this quarter section to another road and another culvert.

I wasn’t going to go that far to check the state of the road, seeing how things are here!

The drainage ditch is completely full; the line of higher soil, created by dredging, marks one side of it. Right now, we’ve got one flooded field draining into another flooded field!

The first area that’s washed out is past the drainage ditch. You can somewhat see how much of the gravel has been washed off the road and into the ditch.

The second wash out has done a lot more damage to the road.

Half the road has been washed down right to the rock base!

I took this next wide angle shot while standing in the middle of the second wash out.

There is still SO much snow and ice.

Here, I’m standing in between the two washed out sections. The water is flowing with remarkable speed!

I took some video, too. Once I have time, I’ll test out my new movie making software and make a little video to upload.

So this road is not a viable alternate route for us. When I get a chance, I plan to walk the road to the north and see how things are, there. We may not be able to avoid the pothole riddled main road, though.

Enough snow has melted that I could check out a few other areas, once I got back home. The path to the outhouse and the back of the garage is still full of water, and the pit under the outhouse is flooded to the top.

The garlic beds are clear of snow, but the soil under the mulch is still frozen solid.

Our first high raised bed is also clear of snow – but the snow around it is still quite deep!

I noticed one of the cages protecting the raspberry bushes we got my daughter for her birthday last year was knocked aside, so I made my way through the snow to get to it. Some of it even held my weight, though when it did give out, I found myself knee deep in snow.

Once we have rows of high raised beds built here, I can see that it will greatly affect the snow in the area.

The arrow in the above photo is pointing to the raspberry bush, and shows where the cage is supposed to be. The cages got dug out of the scrap pile around the old garden shed and placed over the raspberry bushes, after we discovered the deer were nibbling on them.

I found a couple of large rocks under the trees to weigh the cage down. Hopefully, it will hold until we find a more permanent way to protect the raspberries.

Hopefully, the raspberries have survived. Shortly after we transplanted them last year, they got hit by that one unusually cold night in late May that killed off so much. Then there was the drought, the heat waves and the deer. Now we’ve got this winter that just doesn’t want to let go. These poor bushes have had a very rough start! At this point, there’s no way to see if they’ve survived the winter. Hopefully, we’ll know in a couple of weeks.

The snow has receded enough that I was able to check out a few more areas before heading back inside. Another check on the basement, then the last chimney block was brought upstairs. Getting those up the old basement stairs has been a real pain. It’s one thing to carry a block down the hallway or across the yard. It’s quite another to safely get them up those stairs. I finally got it worked out, though. Basically, once a block was lifted to the highest step I could reach while standing at the bottom, I had to go up a couple of steps, to line myself up with the next step it would go on, carefully bend at the knees (my busted up knees!), grab the block and brace it against my belly (sometimes, my extra girth comes in quite handy!), straighten my knees to lift the block while using the hand rail to keep from falling backwards, and use my belly to place it on the next step.

Then the process is repeated, step by step, to the top. Thankfully, there is room for a block in front of the door, which has to be kept closed to keep the cats out. Then it’s, open the door, chase away cats, wrestle the block clear of the door with enough space to get past it, chase away the cats again, then close the door – hopefully remembering to turn the light off, first!

After that, it gets easy. The only difficult part is getting through the old kitchen door, without letting any cats through.

It’ll be a while before we can prep the area the blocks are going into, so we can take our time getting the blocks out the rest of the way. Getting them out of that basement was the main hurdle, and I’m very glad it’s finally done!

And that’s the state of things for now. As I write this, we’re at 5C/41F and we’re supposed to reach a high of 9C/48F, so things are melting. The rains are supposed to hit us this evening and continue through tomorrow, before changing to a mix of rain and snow, the day after, with highs of 4C/40F.

Then, three days later, they are now saying we’re supposed to get a high of 18C/64F. Long range forecast after that has highs ranging from 16C/61F to 19C/66F for the next week.

Hopefully, by then, the soil will have thawed enough to be able to absorb more of that moisture!

We shall see how things turn out.

The Re-Farmer

More fall clean up, prowlers, and there’s a stranger in town!

While it was a warm day today, it wasn’t quite warm enough to work on garden beds, so once the outhouse floor was done, I focused on doing a number of small jobs around the yard.

One of them was to replace the grass mulch on the garlic beds with a thick layer of straw. The grass mulch went into the newly framed bed, which has a trench in the soil for now. We’ll toss our kitchen scraps for the compost into the trench as well, before it all gets buried in fresh garden soil.

While I was getting ready to roll up the garden hoses at the back of the house, the cats were prowling all around me! It seems like, everywhere I turned, there was a cat, circling around me.

Except for Tuxedo Mask. The cheeky bugger planted his butt in a plant pot! The flowers in there are one of things my mother planted that turned out to be invasive. After telling me there was nothing in the old kitchen garden she wanted me to save, and I cleaned out and covered it all with layers of cardboard and mulch, she changed her mind and wanted me to keep them. They pushed their way through the layers of mulch, anyhow, so I transplanted some into this pot while preparing beds to plant in this spring. They’ve still managed to take over a section of the old kitchen garden, but it’s an area that is overshadowed by lilacs, honeysuckle and roses, so it’s not likely we’ll ever plant anything else in there. We’ll just have to keep them out of where we have built new beds, which looks like it’s going to be a challenge!

These flowers, which look a lot like periwinkle, are very hardy. They won’t have any problem recovering from a cat sitting on them, so I didn’t bother chasing Tuxedo Mask off!

I probably should have waited for a warmer day to put away the hoses, but it’s done now, except for one hose in the front of the house that I left for a bit longer. From the long range forecast, this weekend will be the last warm days, then the day time highs will slowly drop. Even so, we’re not expected to have highs at or just below freezing until past the middle of November.

I’m good with that!

After doing some other clean up around the yard, I got the burn barrel going for a while, then headed inside before the light failed. At the last minute, I decided to top up the cat kibble, which had been gotten into by that big skunk again. Of course, as soon as I came out of the sun room with the container of kibble, I had cats prowling all around me, crying like they were starving to death.

Including… hold on…

That wasn’t Tuxedo Mask over on the sidewalk. He’s busy trying to trip me on the way to the kibble house.

We had a stranger in our midst!!

After refilling the kibble trays, I was able to try and get photos.

What a handsome stranger!

The other cats didn’t seem the least bit bothered by his presence, either. I saw the kittens act more skittish around Creamsicle Baby than this guy!

He moved away from the food while I was trying to get a photo, prowling around the cat’s house and kibble shelter, and making his way back to the sidewalk, but he never ran away.

Even when my older daughter came out to see him, he stuck around. I went inside to let my younger daughter know. She was in between batches of bread baking, so she was able to come out, too. He did eventually start eating while my daughter was just a few feet away.

I wonder where he came from? This is the first time we’ve had a long haired cat come by, and the first time we’ve seen another tuxedo.

As long as the cats get along, he is more than welcome!

The Re-Farmer

Boxes, tubers, broken tools and… cows!

We’re having another lovely, mild day with sunny skies. A perfect day to get more done outside!

My main goal for the day was to finally build the third low raised bed box and set it up.

The ground is starting to freeze, though, so I couldn’t make quite as deep a “foundation” as with the other beds. It should be all right, though.

This is as much as going to be done with it, for now. Things are supposed to get warmer of the weekend, so I might get a chance to bury stuff from the compost pile down the middle, then top it up for the winter.

While I was building the bed, my younger daughter started working on beds in the old kitchen garden.

Beds that were more shaded than other areas.

Beds that were more frozen than not!

Alas, it was too much for our garden fork; one of the few useable tools we found that hadn’t been “disappeared” while the place was empty. It had a tendency to bend in that spot, and when my daughter tried to straighten it, it broke! The poor thing felt so bad.

The old kitchen garden got left for warmer days, and my daughter moved on to clean up the remaining bed at the chain link fence. The chicken wire protecting the cucamelons and gourds had to be removed, the plants pulled, and the soil moved to prepare for the block planters.

The cucamelons did not to well in our drought. The plants grew, there were many, many flowers, with teeny little fruit, but very few of them ever matured. Very likely, they just didn’t get polinated.

As my daughter dug the area up, however, she discovered they did much better below the soil!

Cucamelons produce tubers. I’d read that, in colder climates like ours, they can be dug up, put in a pot of soil and overwintered indoors, then transplanted in the spring. I tried that last year, but the tubers just disappeared in the soil. They, however, were nowhere near as big and thick as these ones!

My daughter set aside the biggest ones, and we will try overwintering them. Maybe at this size, they will have a better chance of surviving to be transplanted.

When my daughter was done cleaning out the bed, she headed inside and I continued working on it.

We had four of these chimney blocks waiting. My daughter had already moved the soil, and I just needed to level it for the blocks.

I found more cucamelon tubers in the process!

I ended up moving the blocks a little bit further away from the fence, so that when we bring up the remaining blocks and lay them down, the fence post won’t be in the way. I put leaf litter in the bottoms of the blocks before filling with the soil, since there is so much of it handy.

It was around this time that I could hear the sound of a utility vehicle nearby, so I headed over. The wife of the couple renting the property had come over to check the electric fence. I have spoken and messaged with her quite a few times, but this is the first time I met her in person! She brought their little daughter along, too, and she was a great help with holding the wire for Mom. It did take quite a while to find one of the ends; it must have gotten caught on a cow’s leg when it got spooked. Not only was it well away from the fence, but a couple of the support poles were pulled right out of the ground!

There was just enough slack that she could twist the wires back together, then we went around to another section where she said she had found a cow had gotten through, in a very unusual spot. She agreed with me, that something must have spooked the cows into going through areas they normally don’t.

While we were walking around, the cows were intensely curious about us humans – and looking for another grain treat!

Just look at those adorable faces!!

Unfortunately, they were a bit TOO interested in Tiny Human, who was starting to get scared. With just cause. Cows may look docile, but they can be aggressive and dangerous to an adult, never mind a wee one. Tiny Human was much more comfortable being carried by Mom!

I took the opportunity to tell her about where we are looking to put a fence through the old hay yard, so we can plant trees for a wind break against the south winds. She let me know that they will likely take out the old fences completely, and put in new, because of the cows getting through so often. We also talked about redoing the fencing around the septic field, so we can still access it from our side, rather than filling in those gaps the cows got through this time. She said she would pass on the things I brought up, and hopefully her husband will soon be able to find the time to come over and we can do a more thorough walk about and discuss it in more detail. They are such good renters. With all our long term plans, I don’t want to be doing anything to make it more difficult for them. That’s part of why I wanted to make sure they knew about where I want to add the fence and plant a windbreak, since it takes away some of the land the cows graze in.

So, all in all, it turned out to be a very productive day, on several levels. :-)

The only down side, is we how have to replace a garden fork. :-D

The Re-Farmer

Our 2021 garden cleanup: progress and plans for the day

I worked on some of the garden beds yesterday, until it got too dark to keep it up. Here is what I managed to get done.

The first bed I worked on was the beet bed by the garlic, as this one will be getting a box frame soon. I started by removing the bricks and rocks around the edges, some of which you can see in the background.

I had to come back this morning to get a picture of this area. The beet bed had a row of red bricks along one side, which I moved over by the tomato bed. Then I went around the house and yard to pick up all the red bricks I could find and brought them over. When this bed gets cleaned up, we’ll re-do the boards along the fence, so that they fit better between the fence posts and line the entire length of the fence, to keep soil from washing through the chain link. The rest of the bed will be framed with these bricks, to keep the soil from washing into the path.

Amazingly, even though the vines are quite dead, there are still tomatoes ripening. I did not expect that, with the temperatures we’ve been having!

The beet bed then got weeded, and lengthened to match the garlic beds. I also moved the soil more towards the middle. I will not be digging out the soil to do the layering like I did with the others on this one. We only have wood enough to make a box frame one board high, so even though the boards I found are wider than the ones used in the other beds, it still won’t make a bed as deep as the others. This bed also got layers of material buried in it as it was made this spring, and quite a lot of the new garden soil was added, so it won’t need as much material to fill it. Once the box is built, it’ll pretty much just be laid over the existing bed. About the most I’ll do is make a “foundation” of old boards, like I did with the other two beds. Once that’s in place, I will make a trench in the middle of the soil and bury more organic material from the compost pile, but that’s about it.

The next area I worked on was a quick job. I just had to spread out and level the soil from the potato bags (and even found a few missed potatoes!). Nothing fancy is happening here. There are some lilies that need to be broken up, and they will be transplanted here.

The last spot I worked on before it started getting too dark was where the poppies had been. One of the things my daughters and I observed over the summer is that we needed to make areas to walk through, without stepping on plants. So at one end, by the rhubarb, I used the flat stones I found under the old wine barrel planter along the spruce grove as stepping stones. The rhubarb covered the poppies that had been planted near it, so I’m considering transplanting those somewhere else completely, but that won’t be done until the spring. We have only three interlocking bricks, so I used them as stepping stones at the end nearer the laundry platform.

The poppies that were here would have self seeded, which my loosening of the soil would have disturbed, but that’s okay. I did harvest a few little pods. I will broadcast more seeds some time over the next few days, then do it again in the spring. Once they have established themselves, this should end up being a permanent bed for Giant Rattle Breadseed Poppy. I do plan to get another variety of edible poppies I found from a Canadian source, but those will be planted in a completely different area.

So that’s as far as I got, yesterday evening. Today, I won’t be working on the garden clean up at all. My daughters will be working on that, later today. It’s supposed to warm up a bit more, but I’m really hoping the winds will die down. They made things quite bitter while I did my rounds this morning!

I’ve asked them to take before and after pictures for me. :-D

As for me, I have decided that I will can some of our beets. After going over my recipes, we do have enough to pickle. My daughter has been doing refrigerator pickles with the summer squash, which is great, but they take up a lot of room in the fridge, so I want to do water bath canning, so they will be shelf stable. I should at least get a half dozen 500ml jars.

I’d better get started!

The Re-Farmer

Low raised beds: ready for planting

Oh, what a lovely day we’re having today! As I write this, we are at 17C/63F, which is a couple of degrees warmer than forecast. We’ve got beautiful blue skies and sunshine, though it was a bit winder than I would have liked – only because I needed to do some spray painting.

While the girls cleaned the eavestroughs, then brought the pieces of insulation from the barn to put around the based of the house, I started with spraying the sign I’m working on with reflective paint. With a white base, the reflective paint is not visible. Later this evening, I want to try taking a picture of it with flash, which should show me how well it worked. According to the label on the can, it works better with a light coat than with a heavy one, so as long as I got good coverage, it shouldn’t need another coat.

That done, I grabbed the baby chainsaw with the one charged battery (I forgot to switch them in the charger!) and did quick work on the high raised bed. After taking about an inch more off the notch on one side, that was done. I had enough juice left in the battery to start cutting away excess on the top of the end piece, where the next log will rest. I didn’t get very far, though.

Those little jobs out of the way, I got to work on the big job! Topping up the low raised beds, so we’ll have somewhere to plant the garlic when it arrives.

One of the beds wasn’t filled as much as the other, so I started with that one, first. We had soil from the potato bags in the kiddie pool, and there are still 10 bags of fingerling potatoes, so I decided to use it as filler, as it had already been amended with organic material. With all the rain we’ve been having it was very wet and heavy! While filling the wheelbarrow, I could see some nice, fat, happy worms in there, too. :-)

It filled a couple of wheelbarrow loads, with some soil being left to weigh down the kiddie pool, so it doesn’t blow away. I even found a couple of little potatoes that got missed in the process! After spreading it around evenly, I added another three wheelbarrow loads of the garden soil we bought in the spring. I’m really glad we were able to get two dump truck loads! We’d have been out by now, if we hadn’t, I’m sure.

After the one bed was filled, I brought another three wheelbarrow loads of soil for the second bed, then leveled them both with a garden rake.

Next, I split a 40 pound bag of hardwood pellets between the two beds, and worked them into the soil. One of the things we found with the new garden soil is that, over time, it gets really hard and compact. Since we don’t have any compost or manure to help prevent that, the pellets should do the job.

After working the pellets into the top couple of inches of soil, both beds got thoroughly watered, until the pellets reverted to sawdust. They absorb quite a lot of water in the process.

The sawdust does tend to rise to the top, though, so after they got a solid soak, I worked it back into the top couple of inches again.

They are actually a bit fuller than I had intended. The garlic will get a heavy layer of straw mulch after they are planted, so having it a bit lower would have help keep it from blowing away. The beds will settle, though, plus they will be covered with plastic, before we get snow that stays.

If all works as intended, these beds, with their layers of wood and lighter organic material in them, should require almost no watering, even if we have another summer of drought. If we had a wet summer, they should have good drainage, too.

I do find it kind of funny that I had to get these two beds ready for the garlic, because the other beds we have, in the old garden area, still have things growing in most of them! Not counting the one that’s being converted to a high raised bed right now, the only one that’s completely empty had onions growing in it, so I wouldn’t want to plant another allium in it.

It should be interesting to see how the garlic does in these beds!

The Re-Farmer

Low raised bed: path patch

My darling daughter was able to do a patch job last night, beside the low raised bed I finished yesterday.

That pile of salvaged boards is coming in very handy! We are getting it down to a point where we are starting to reach wood that isn’t rotted out or weather damaged, too. We might actually be able to start using some of it to build things!

There is a much smaller gap on the other side of the box. That one just got a bunch of rocks that had been pulled out of the soil.

I look forward to when we can top the paths with gravel.

The Re-Farmer

Second low raised bed: done!

You can read about the first raised bed I did, here and here. Things were done a bit different this time, so here is another step-by-step post with lots of photos! :-) I actually started this bed over a week ago. This is how it looked then.

This bed has been almost completely untouched since the garlic was harvested, letting the weeds get fairly large. This made them easier to pull.

Along with pulling the weeds, with as much of the roots as I could, I lengthened the bed to match the size of the box. Right away, I could tell this one was going to need a “foundation” under the box, too. I was definitely hitting rocks, and a whole lot of roots, while trying to loosen more soil and remove grass and weeds.

Once the weeding and loosening of soil was done, it was left to sit so that any weeds I missed would have a chance to start growing again.

When I started working on it today, the first thing I did was go over the area again, pulling out any new growth by the roots. Then it was time to start shoveling!

Like the previous bed, this one had been originally amended by burying the contents of our compose pile and straw. So I only wanted to remove up to the straw, basically.

In the process, I was finding a LOT more roots! It looks like the cherry trees are encroaching again.

Once I was satisfied with how much of the topsoil I had removed, I raked around the edges to try and level the soil where the box would be resting, as much as possible, while heaping it all in the middle.

Then the box was laid down and, once I had it where I wanted it, I used a sledge hammer to hammer in the supports on either side, at the middle, to prevent the long sides from bowing out when filled with soil. I also hammered down the corners and such, to leave marks in the soil that I could use as guide lines.

The ground wasn’t anywhere near as level as I probably should have made it, but that’s okay. Things will settle and adjust over time, and these boxes can be easily replaced in the future, if need be.

The next step was to raid the pile of old, salvaged boards that the groundhogs have made their den under, and build up a foundation to support the box. Once that was in place, a daughter came out to help me carefully place the box on top of the foundation, and in between the support posts.

Then it was just a matter of shifting the foundation boards a bit, to make sure the box was fully supported. Again, not quite level, but that’s okay.

The soil heaped in the middle was then raked out to the sides, covering the foundation boards and creating more of a recess in the centre.

Then it was time to add the first layer of fill, and raid the branch pile. This time, I added more and larger branches than with the first bed I did.

This, unfortunately, left a lot of gaps and air pockets. They will fill in as the wood decomposes and everything settles and sinks, but that will take time. To help fill in spaces and speed up the decomposition process, I started adding back some of the soil. After returning about a quarter of the soil, I hosed it down thoroughly, so wash it further down into the gaps, then added about another quarter of the soil and soaking it down again.

The next layer was contents from the compost heap, most of which was greenery I’d cleared from around the dead spruce trees that were cut down. This got another soak, another scattering of soil, and yet another soak.

The next layers were grass clippings and shredded paper. This time, after soaking it all down, I walked back and forth over the whole thing, to try and compact and break the buried branches more.

It as at times like this that being a woman of generous proportions comes in handy. ;-)

Yet another thin layer of soil was added and soaked down.

Note the gap between the box and the board path. By this point, it had become a bit of a safety hazard! Without the soil to hold them in place, the boards at the edge kept moving and catching on my feet, and I was constantly catching myself to avoid twisting my ankle in the loose and lumpy soil in the gap.

Another thin layer of grass clippings was added and hosed down. At this point, the fill in the new raised bed is about the same level as in the first one. Adding the extra and larger branches made a noticeable difference, even after being tromped down.

Once this was done, it was time to amend the remaining soil on the tarp. I added about half a 40 pound bag of wood pellets, as was done in the first raised bed, and then a couple of wheel barrow loads of new garden soil was brought over; one added to the soil and wood pellets on the tarp, and the other added directly on top of the grass clippings, then raked out as evenly as I could.

It was about this time that a daughter came out with the kitchen compost buckets, so that got added straight into the raised bed and spread out, then hosed down again.

The next while was spent mixing the soil and wood pellets together, as much as I could, before adding it to the bed.

Once the soil was added, it was raked out evenly. This layer was NOT hosed down, though.

One more layer of grass clippings was added as mulch, then it got one last, very thorough, soak with the hose. This was the time to clean up the sides and edges, too.

This is as much as will be done in the bed, this year. Both beds will get more amendments added to them in the spring, after they’ve had a winter to settle and sink.

Also, remember the gap in the path on the other side of the bed?

I was going to work on filling that to make it safe, but I had reached my limit. A daughter will be working on that for me later. As these beds have been worked on, and rocks were found, I had been tossing them next to a nearby stump; you can see it in the background, with some bricks on it. Those can be gathered to use as fill in the large gap on the far side of the bed, and more boards will be added, and whatever else my daughter can thing of to make it safe to walk on. The eventual plan is to cover the board paths with sand and gravel.

After this, there is still the third bed in this location to be made, but with the beets still growing, there is no hurry. The last bed will be just one board high, as that is all the wood of this type we have left, but these boards are slightly wider, plus we still have plenty of the scrap wood bits to use as a foundation, so it shouldn’t be too much of a difference.

Two raised beds down; seven more to go! :-D

The Re-Farmer