First frost

Well, it finally happened. We had our first frost this year, on the night of October 3 – well past our average first frost date of September 10.

It’s still earlier than last year. A year ago today, which was our Thanksgiving day (this year, it’s next week), we had just had a lot of rain the day before, and were still harvesting from the garden, and not needing to cover anything.

Also, our another hot water tank died on us.

We have nothing to complain about. We still have a couple of beds in the garden we could cover that, if the forecasts are at all accurate, can continue to be covered at night and kept going for a few more weeks, if we want.

Also, no snow. We might get rain tomorrow, but the earliest we’re currently expecting snow is a little bit overnight, more than two weeks from how.

Last night, we did go below freezing, and had our first morning of using warm water from the house to give to the cats, instead of filling their water bowls from the hose.

The kittens were quite happy when I added the warm water on top of the ice! All those crackling noises had then entertained. 😁

The cold was enough to finally do in the mighty, mighty Crespo squash!

I’m still amazed by how huge those plants got!

This morning, the septic guy came to empty the tank for the winter. After he did that, he adjusted the weight next to the float/pill switch he replaced for us this summer. He tried adjusting the line from the basement first, but had to do it from inside the tank.

What a guy. He was actually on the ground, his upper body leaning right into the tank to reach.

As if that weren’t enough, he showed up with an eye patch and sunglasses over his regular glasses! He somehow detached a retina and, while it is healing well, without the eye patch, he was seeing double. I can barely even lean over the open tank to see inside without feeling like my glasses will fall off, and there he was, hanging head first right into the tank. He did take off the sunglasses for that, but yikes!

He got it done, though, and now the weight will no longer get hung up on the inside of the grey water side of the tank.

I’m really glad he was able to do it. It had gotten caught again this morning. I’d brought the hose from the garden to the house. The tap is in the wall next to the septic tank. I’d shut off the tap and left the nozzle open, so water could drain out rather than freeze. Not much drained out, though! When I turned the tap on so I could use the hose on the weight inside the tank, it was barely a trickle. There was too much ice in the hose. Still, it was enough to get the weight free hanging again, and I could hear the pump shutting itself off in the basement, as soon as it did. The hoses will be put away, soon, so we wouldn’t have been able to keep this up for long.

Now that the tank has been emptied, we can start preparing to cover it for the winter – but we still need to have the company come in and repair the expeller out by the barn. I’ve called and left another message, and still no call back!

After the septic guy was done, my daughter and I went into the root cellar. After wiping down the shelves and covering most with paper, we brought in the onions and garlic, then assembly lined it to bring the winter squash down. They had all been sitting on the washing machine, and we need to use that today!

While my daughter finished in the basement (there was no way my knees could handle going up and down those stairs!), I got the drainage hose for the washing machine set out the storm door window again. We’d been leaving it set up for at least the past month, but with temperatures dropping below freezing, we wanted to be able to close the inner door.

It won’t be long before we’re going to have to start using the drain to the septic tank again. Between the expeller needing to be fixed, and the state or our pipes, we’re hoping to delay that as long as we can.

Last night, I did the first treatment with the Free-Flow Drain and Line Maintenance stuff.

The instructions say to start at the drain closest to the tank, so that anything loosened in the pipes doesn’t end up clogging things further down. The closest is the access pipe in the floor of the basement. Based on the diameter of the pipe, that took 4 tablespoons of product in a cup of warm water. A cup of water isn’t enough to get the stuff to where things get hung up in the pipe, so I had to chase it down with more water.

We can do the next treatment tonight. That will be the bathroom sink, toilet and tub. The main drain pipe from under the bathroom is as large as the floor drain, but the product has to go through much smaller pipes, first, so we’ll do a smaller amount, but do all three at the same time.

Depending on how this works out, we might do these drains more than once, before moving on to the next furthest drain.

Once we’ve done the treatment with this stuff, we’ll start using the Septic Remedy stuff for regular tank maintenance.

None of which will make much difference at all, if that ejector pipe doesn’t get repaired!

In other things, I finally got a call back from the place that does Meals on Wheels in my mother’s town. After a bit of back and forth conversation, my mother is now set up to get meals delivered, instead of having homecare come in to do batch cooking. They only deliver three days a week, though. They no longer have enough volunteers to do five days a week. If I were living in the same town as my mother, I could have arranged to pick up meals on the other days myself and bring them to her, but it’s just not possible to do from where we are. The cost of gas would be higher than the cost of the meals!

One of my follow up calls to my mother, while arranging this, happened to be just after my sister left. She had come by for a visit, and to drop off some vegetables from her garden for my mother.

Including tomatoes.

My mother isn’t supposed to eat tomatoes.

*sigh*

It does mean I won’t be going over there to help her with her grocery shopping until after the weekend, though, which is helpful.

As for today, I’m going to have to make it a day of rest. It seems all the stuff my daughter and I were able to get done yesterday was pushing it for me. Last night, I rolled over in bed and got hit with a Charlie horse. Thankfully, I was able to message my older daughter and she was able to come help me. It was several hours before I could get back to sleep. My attempt at napping after my daughter and I finished with putting stuff in the root cellar, then setting up the laundry, was a failure. Being aggressively cuddled by cats was something I could get used to, but that’s when the Meals on Wheels lady called. By the time I was done all the phone calls, sleep was just not going to happen.

My every joint still and sore, though. The temperature fluctuations are not helping! Neither is the brain fog from lack of sleep.

Hopefully, we’ll get caught up over the weekend, but we do have warmer weather coming, so hopefully we’ll be able to get quite a bit more done.

I need to reign in my expectations, though. I keep forgetting how broken I am.

I think it’s time to make an appointment with the doctor and see about applying for disability. My last doctor said he felt I wasn’t at that point, yet, but that was a few years ago, and he’s moved on to another clinic. We’ll see what this other doctor has to say about it.

Something to do next week, though. The clinic doesn’t take calls on Fridays.

As for right now, it’s all I can do to stay awake, so if this post sounds disjointed and rambling, that is why!

My apologies!

The Re-Farmer

Trying something new

With all the problems we’ve been having with our plumbing and septic system, we’re doing everything we can to find ways to not just fix them, but to prevent them from happening again.

Once of those things is the use of enzymes, both for the septic tank and for the drain pipes.

The drain pipes are one of our biggest problems. There’s a section that needs to be cleared. We have the commercial drain auger, but access to the pipe is almost directly over the sump pump reservoir and hard to get at, between the mess of pipes around it, and a wall. We will get that done, eventually, but I will be doing it with the help of my brother, when he is available. The alternative is a $300 minimum visit from a plumber so he can use his commercial drain auger, instead… 🫤

Until then, we are doing everything we can to get the drains clear using bacteria and enzyme products. Since I had to go to the town north of us to pick up kibble at the feed store anyhow, I went to the hardware store there that carries a produce we’ve been using quite a bit.

After looking over their display, though, I decided to try something different.

One of them is specifically for the septic tank, so we won’t use that until after we get the tank emptied for the winter, which is a call I need to make today.

Looking at the instructions for the other one, I decided it was worth trying. It is to be used in stages, starting from the pipes closest to the septic tank. Which would be the accept pipe in the floor, right next to the pump. That’s where I’ve already been having to shove a hose through on a regular basis, to clear what feels like two bottlenecks between the opening and the tank.

The next closest would be the bathroom. Tub, toilet and sink are all really close to each other, so any one of them can be used to apply the product.

After that, it’s the drain for the laundry, and finally, the kitchen sink.

We really need to get things cleared up. We’re still draining our washing machine through a pipe running out the storm door window and into the lawn. When a large amount of water drains out of the kitchen sink, like draining a sink full of wash water, we can hear the water gurgling and backing up to the drain pipe for the laundry, with is just a few feet away. The pipe from the kitchen to the corner of the basement has already been cleared by a plumber. It’s the rest of the pipe, from the corner of the basement to where it goes through to the septic tank, that hasn’t been done yet, and that’s the one that needs to be worked on the most until we can get it augered.

We also have to consider the pipe from septic pump to the ejector, out by the barn.

Which still needs to be repaired.

Another call I need to make today!

While at the hardware store, I asked about a septic pump. With all the problems we’ve been having, and with how often it’s been running dry, it’s going to wear out. It already sounds wrong, but at least it’s working. I’ve been searching online to find out where we can buy one, and I’m even saving my Canadian Tire dollars towards the cost of one – but have had no luck. Any searches bring up septic pumps that are designed to be installed in the tank itself. Ours is in the basement.

It turns out, they are marketed as utility pumps, though when he was looking through his computer, he ended up having to search under sump pumps, which is something else entirely. The hardware store does carry them, but none were in stock that I could see. He was able to give me a printout, though.

As for the price, it turned out to be pretty much what I was expecting. $500

A quick search at Canadian Tire, though, and it seems they don’t carry the type of pump I need. The closest they have is a transfer pump for irrigation. It’s designed to pump water from a pond, creek or lake into an irrigation system. My sister has one of those her husband set up to water their garden from the creek their home is next to. I suppose, technically, it would do the job, but that’s not what it’s designed for.

So… we’ll have to come up with $500 over the next while, so we can pick up a “spare” before the current pump wears out!

Until then, we will be going everything we can to keep the system maintained as best we can, starting with using these new-to-us products.

Here’s hoping they do the job as promised!

The Re-Farmer

A little green friend, and painting progress

We’re supposed to get rain tomorrow morning, but I’m not counting on the forecast. The garden needed watering. So, while I had a sprinkler going in the main garden, I took off the diverter on the full rain barrel in preparation to water the south garden beds.

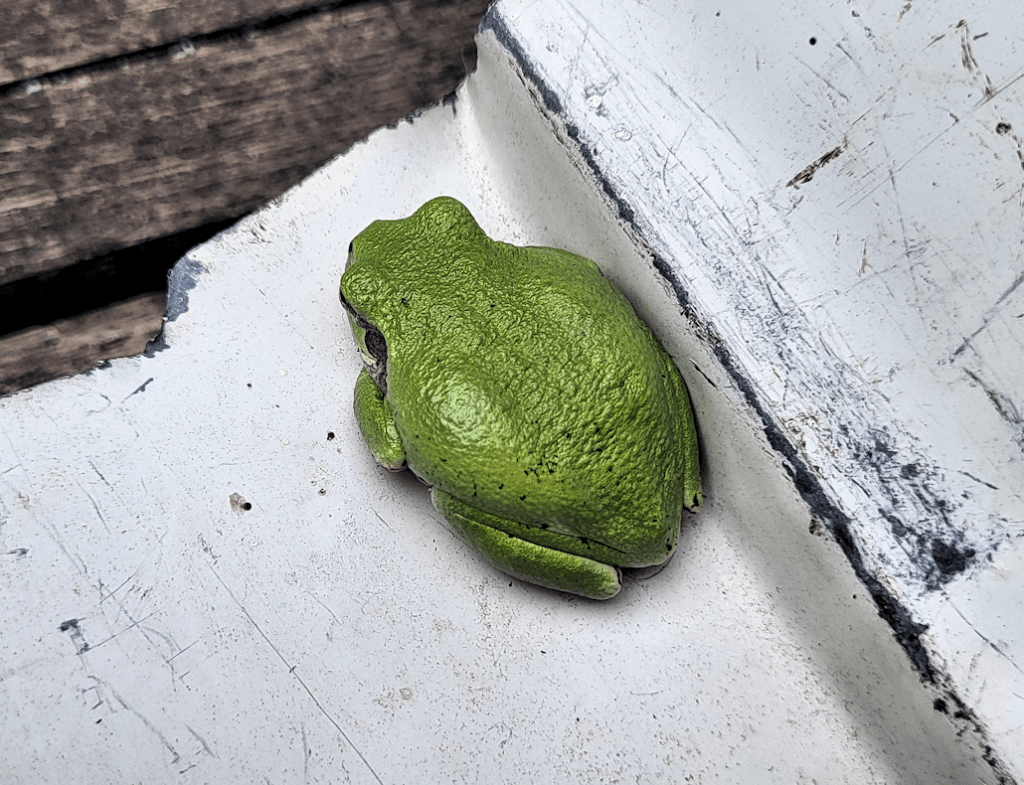
Look what I found hiding under the down spout!

I just love these tree frogs! They’re so adorable!

Between the smoke and the heat, I decided to work on a semi-indoor job today. The inner sun room door is not meant to be exposed to the elements the way it is, when we have both doors wide open as we do for most of the summer. Since we’ve got outdoor paint left over from doing the stump bench and table, I decided to use it on the door.

Here is the progress so far.

I’ve got inside and outside shots starting after I’d scrubbed the door down and removed the loose bits of veneer, then after using masking tape on it. I made sure to cover the hinge plated, door knob roses and the latch.

One of the things I noticed as we cleaned and cleared stuff shortly after we moved here is that any doors that got painted, no one taped off anything. Which is almost painful to see, when the antique door knob/skeleton key plates, and even the knobs themselves, were painted over. Unlike the door I’m painting now, which is a modern, hollow core door, these are solid wood doors, too. I’d love to strip the paint off and maybe stain or varnish them, but that’s a project for well into the future!

I got the first coat of paint on, and I figure this is going to need at least three coats. We might end up finishing off the gallon of paint on this! It would have been nice to use the same blue as the outer door, but we use what we’ve got. That outer door isn’t going to last too much longer, anyhow. Like the one it replaced, it’s already starting to come apart in places.

Depending on the weather, I hope to get another coat done tomorrow. I’ll be heading out tomorrow morning on some errands, then the next day I’ll be taking my mother to her medical appointment. My younger daughter is feeling better now – she was actually able to eat! – so maybe she’ll be up to doing a coat or two while I’m gone, and if it doesn’t rain. We shall see. With the first coat on, at least the door won’t be getting any worse while waiting for more coats!

The Re-Farmer

So many! and… no wonder we were having problems

I counted 26 this morning!

It always amazes me how many of the cats have a preference for eating under the water bowl shelter. At one point, I counted 5 under there.

They also really appreciate that sheet of insulation under the kibble house in the winter. Every now and then, I’ll walk past the back of it and see a whole bunch of noses peaking out from under the back wall, where there is a much smaller gap.

I’ve been seeing Rosencrantz again and, unfortunately, she is looking pregnant, too. She had a really early litter last year, though not as early as Junk Pile did this year, and lost it. She went on to have a late second litter with 3 white and greys, Pinky, with his unique patches of mixed orange and grey fur, and a tortie.

For the third day in a row, Junk Pile followed me around while I was doing my rounds, all the way to the sign cam, and let me pick her up and carry her back to the house. She rode calmly in my arms, the back of her head nuzzled against my face. What a massive change in personality! I’ll take it, though. Hopefully, it means we’ll be able to catch her and get her spayed this year.

On a completely different note…

I made it to the Walmart with my mother’s car yesterday. I’m happy to say it ran well, and the roads that were so treacherous just a few days ago are now clear.

One of the things I was able to pick up was a universal fill valve and flapper kit for the toilet. We’ve been having issues for a while now, because … well… see for yourself.

That bit of white hose is almost completely blocked. It was taking forever for the tank to refill after flushing. The flapper would also get stuck slightly open, which meant the water was draining almost faster than it could be refilled. We would have to hold the lever down until the bowl was completely emptied, or the flapper wouldn’t close properly. The flow of water was so slow, it often wouldn’t finish flushing, so we’d have to wait 5 or 10 minutes to flush again.

The flapper couldn’t be replaced; there is something very different about it, and my daughter couldn’t even see how it was attached, but her sister scrubbed out as much of the gunk as she could, and it is working much better. The tank refills so much faster now! The only thing we have to tweak is how much water is in the bowl. For some reason, it has always been very low, and this old valve doesn’t seem to have any way to adjust water levels for the bowl; just the tank. Getting that adjusted will help a lot with reducing the clogs and slow drains we’ve had the entire time we’ve lived here! My daughters are also planning to scrub the inside of the tank as best they can, but it’s lines with Styrofoam insulation, which we have to be careful not to damage. I’ll have to look for the septic safe anti-iron tank tablets again. The last few times I’ve looked, they were out of stock. I’m hoping to avoid having to order online.

Oh, that reminds me. I made a quick stop at the post office on my way out, yesterday, and my new, low limit credit card was in. Once I was home again, I had to call the toll free number to activate it. Of course, the guy I spoke to had a whole spiel he had to give after activating it, to try and sell me insurance, so if I loose my job or something, the balance will be paid. Of course, I was laughing at that, since I cannot get a job. When I mentioned that I want to keep the limit low and just use the card to rebuild my credit rating, he finished off the call with some advice. He gave me the date for my billing cycle, which is the 7th. My intention was to use the card at the end of the month, for gas and groceries, when we do our city shopping, then pay it off right away. He suggested I wait until about 2 days before the due date, which would still be within the 21 day interest free grace period. Waiting to pay until just before the next billing cycle improves the credit rating faster. It would also be helpful to include regular automated payments taken from the card. This shows that the card is actually being used regularly. With the card I have, gas, groceries and automatic payments have a 1% cash back, while everything else has a .5% cash back. I don’t have anything I want to put on automatic payment, though. With our utilities, I like to pay manually, because I always over pay a bit, to build up a credit. That way, if we are ever in a pickle or things just get really tight for some reason, we could have a month or two of reduced payments, or even no payments at all, to free funds up in the budget.

Well, we’ll see how it goes.

Getting all knobby

In my last post, I commented that it sounded like my daughter was finished cleaning the knobs that we found to fix the door to the old kitchen.

I was wrong.

She was down in the basement, using the buffer in my Dremel kit on the knobs!

She just took this project right over, and I’m happy she did. She did a much better job than I would have! :-D

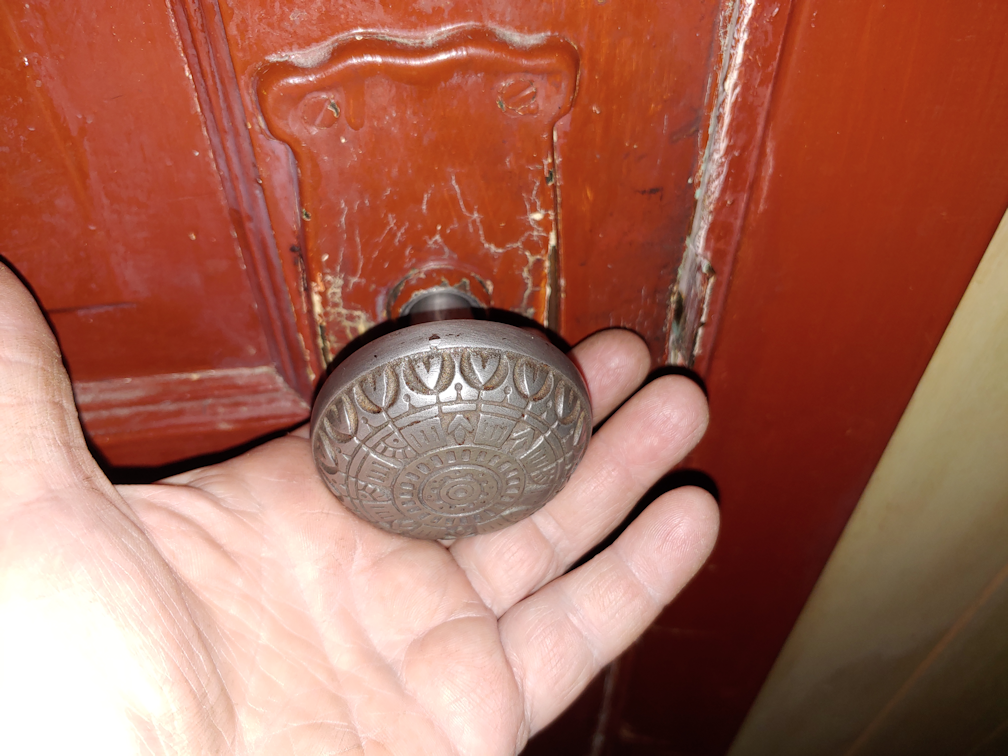
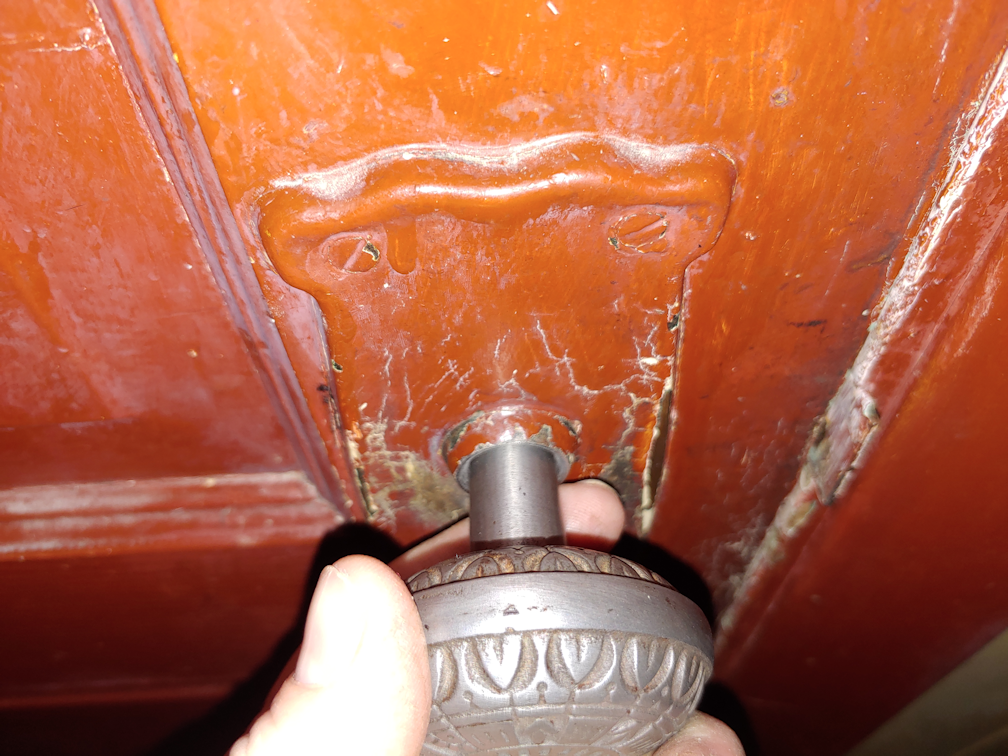
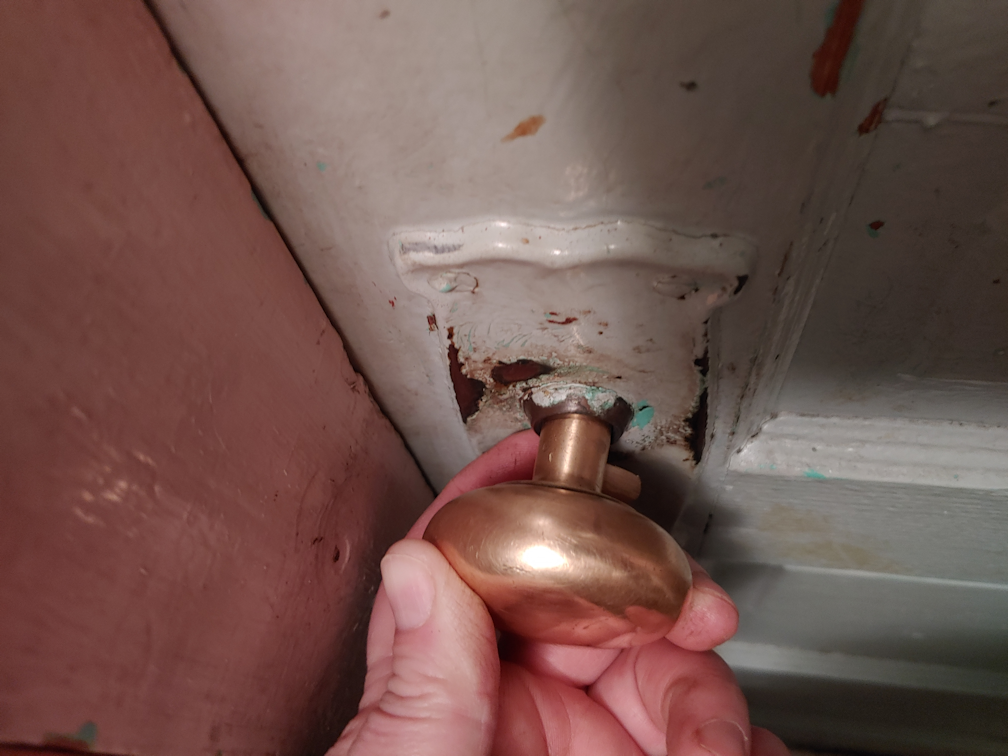
This is how the knobs looked when I dragged them into the light.

Even as filthy as they were, they were still kinda pretty!

Oh, did they ever clean up good!

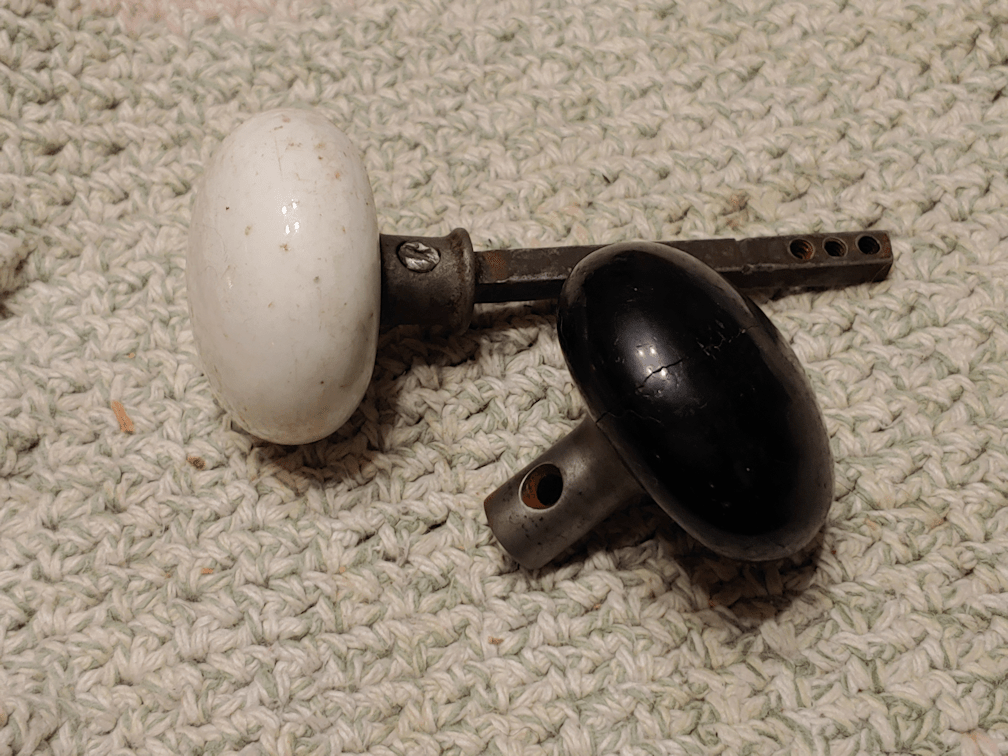
These two were out of the running. We were never able to get that screw out, and the bar was very wobbly. Also, there was no screw to fit the black knob.

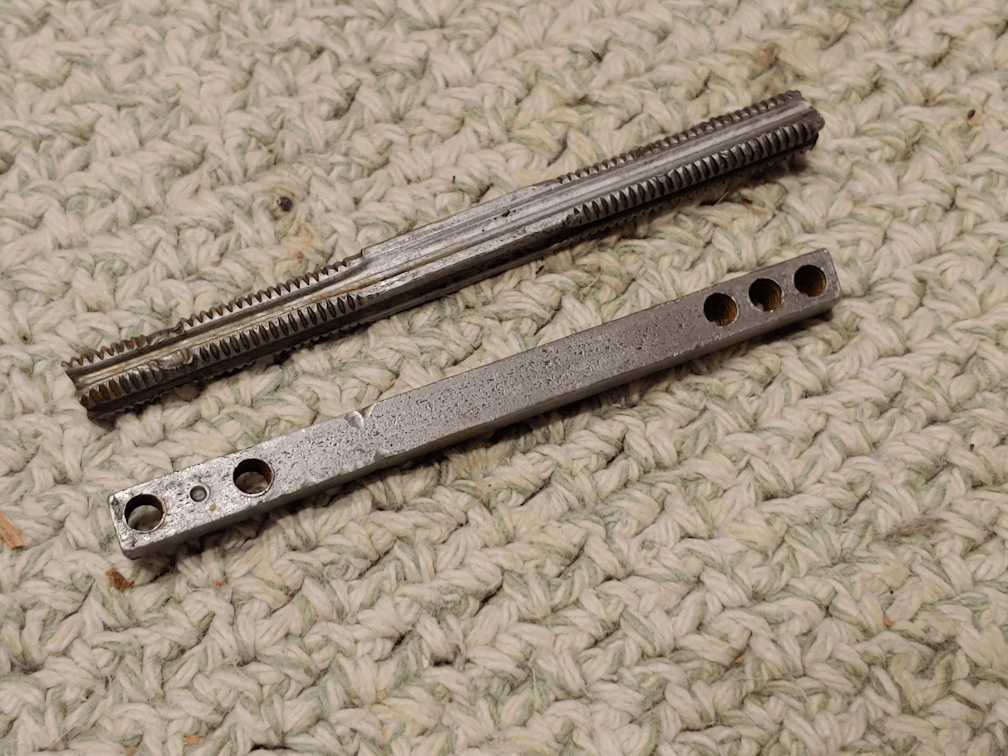
We had these two bars to work with. They were both the same size as the damaged one, except for the length. These are shorter than the damaged one.

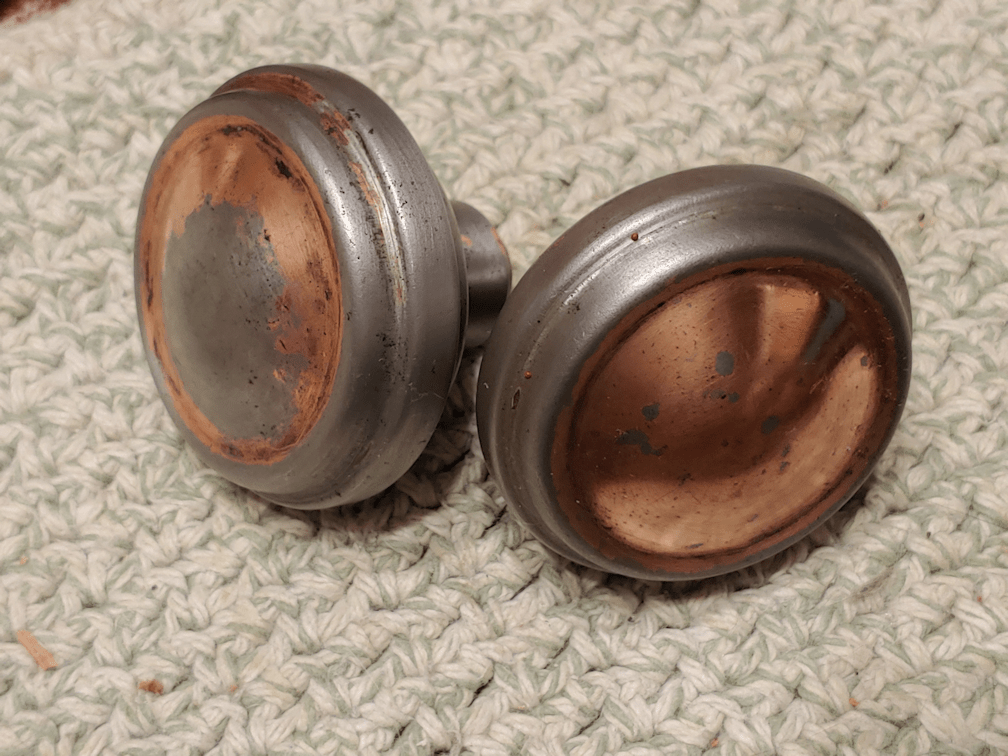
These are the knobs that came off the door, with crud and paint removed, revealing some of the copper.

These fit on the threaded bar, and had their own screws, but we didn’t want to use these again. Not when we had such pretty alternatives!

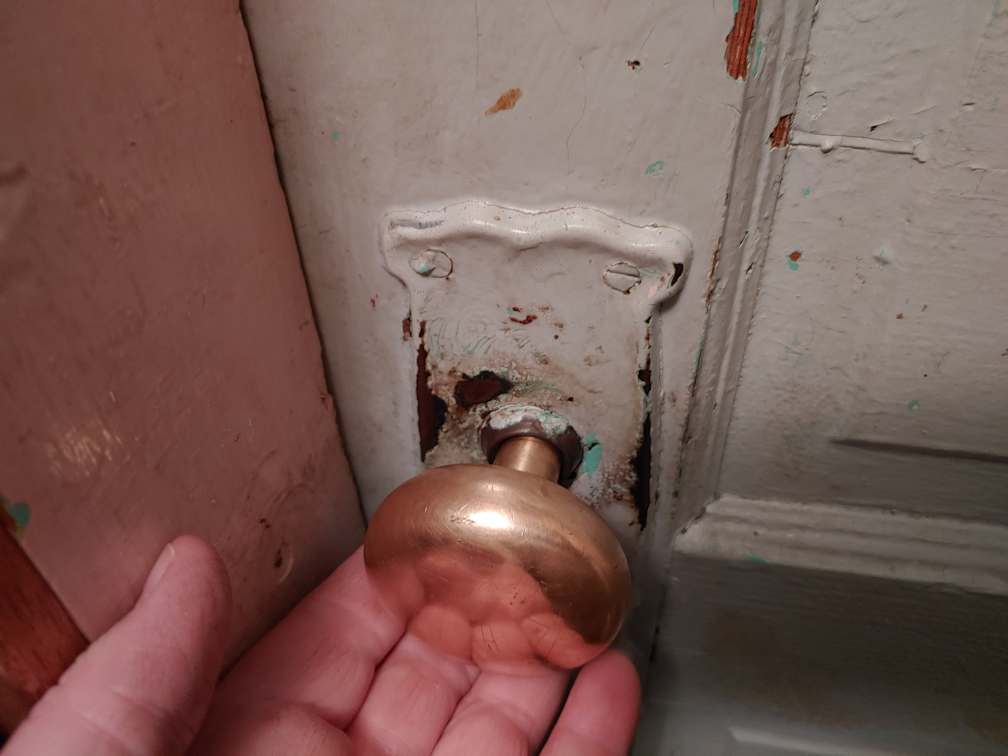
Aren’t these pretty? Uncovering the gold colour on the one was a very pleasant surprise.

These are threaded, so we could use them on the threaded bar. They are a bit smaller, though. Plus, we liked these ones, better.

We did not expect one of them to turn out to be brass! And that decorative one… wow, did my daughter do a great job cleaning that up! Especially where the paint had gotten right into the design. Their large sizes are more comfortable in the hand, too.

These fit on the non-threaded bar.

Sort of.

There was only one screw between them. Though we had screws from the other knobs, this one was longer, to fit into the holes in the bar, and the threads were different, too.

The screw went into the silver knob, which is where it came from originally. The bar fit very tightly into the brass knob, but without something running through the knob and into the bar, it could still get pulled off.

If we didn’t have a screw, we could still use a peg, right?

My daughter ended up using a piece of bamboo chopstick and trimmed it to fit. Then she installed the knobs into the door.

After hours spent scrubbing, cleaning and buffing, it took about a minute to install! :-D

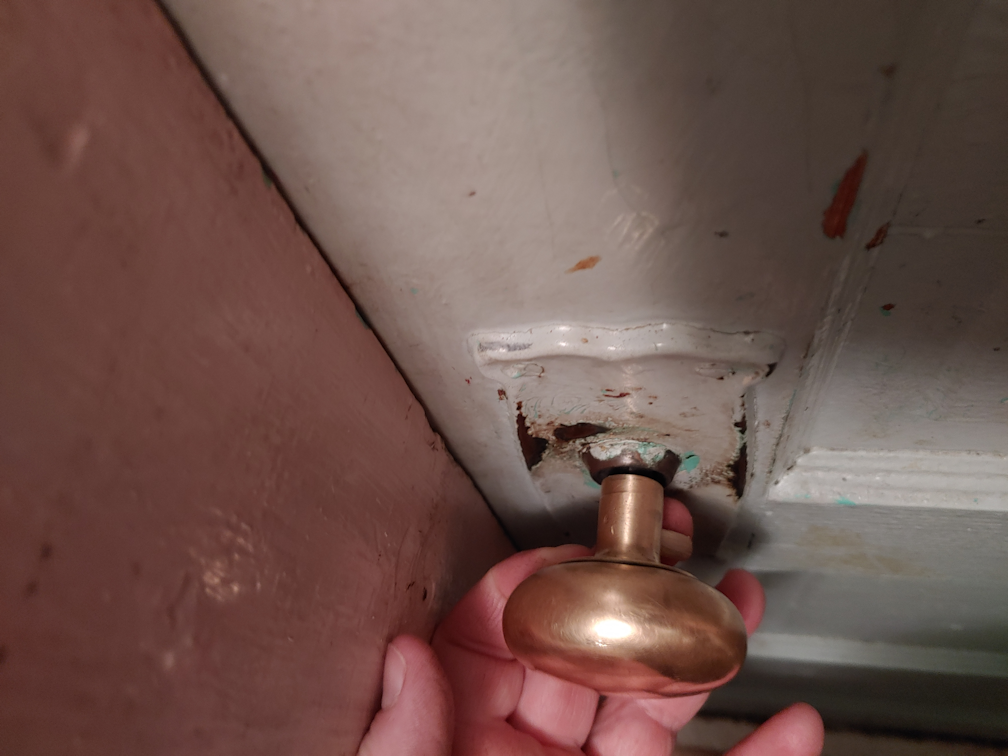
The only problem is, the bar is too long. Even taking into account the different holes at each ind of the bar that would allow for some adjustment. With the original bar, the knobs could screw in as far as necessary to fit. The non-threaded bar isn’t that flexible. There are only so many holes that could be used to set the knobs.

Which means the whole thing gets pulled in and out while being used. The knobs actually fit into the openings in the plates perfectly, though.

Man, that door looks so battered and gross, now that it has these shiny, pretty knobs!

You can see the peg on this knob, left long to make it easy to remove, if necessary.

As we tested the door, there were still some problems opening and closing it that left us concerned that we’d be breaking the bar or something. This has long been an issue with the door, completely aside from the troubles with the knobs. It reminded me to take a closer look.

Sure enough, the top hinge plate was coming loose from the frame.

The hinge plate – and the screws – was painted over, of course.

*sigh*

My daughter was able to get it tightened, though, and that solved the problem. The door latches open and closed much more smoothly now.

Looking at the door while it was closed showed something very odd. I’d never looked closely before. I’d noticed the gap between door and frame at the top before; that’s easy enough to see. This is a very dark spot, so I used a flashlight to examine the rest of the door and frame and discovered that, by the middle, the door was flush against the frame. At the bottom, however, there was a very small gap that had opened up after the top hinge plate was tightened against the frame.

Normally, I would say that this was because of the house shifting, but the size of the gap at the top of the door, where it ends up snug against the frame in the middle, only to pen up again at the bottom, suggests to me that the door itself isn’t straight at that edge. Chances are pretty good it has been like this since the door was first hung!

Anyhow.

Now that the door is secured and the knobs replaced, we’ll just need to add something to keep the knobs from sliding back and forth as the door is used. I’m not sure what to use, yet. Need to think about what we’ve got, lying about!

I think, in the future, I’m going to be keeping an eye out for any other old doors lying around. If we’ve got another similar door in a shed somewhere, we might be able to salvage the parts and pieces and replace the current bar with a shorter one.

The important thing, though, is that it’s fixed. That means, when I go out to do my rounds in the morning, I won’t have to get someone to let me into the house when I’m done!

The Re-Farmer

Dealing with knobs

The delay we had as we prepared to take Tuxedo Mask to the vet requires a bit of background explanation.

For the past while, we have been going in and out of the house through the sun room. While I did a repair on the door of the main entry, where it was falling off its hinges, it didn’t last. The wood continued to split, and the door frame itself is splitting. Basically, we need to replace the entire door and frame set, which I hoped would have been done by now, but other things laid claim to our budget. We avoid using that door, so as not to damage it even worse. We do have another door in the dining room, but that one doesn’t have a key lock, and has troubles closing. Yeah, that door and frame needs to be replaced, too, but at least nothing is splitting apart. Anymore. The storm door on the outside was badly rotted at the bottom, and my brother repaired that before we moved in, sweetheart that he is.

Going outside through the sun room, however, means first going through a door to the old kitchen. That room isn’t heated and has little insulation, so we use it for storage and the chest freezer, and it’s a critter safe place to store our garbage bags until we can get to the dump. The cats are not allowed in there, but they sometimes slip through.

The good thing is, it is a buffer zone. The old kitchen goes out into the sun room. There is the original (?) wooden door on the inside, and a storm door on the sun room side. When the sun room was added on, the storm door stayed, and comes in quite handy.

The sun room acts as another buffer. There have been times where inside cats have made it as far as the sun room, or outside cats as far as the old kitchen, but not at the same time, thankfully! :-D

Then there are the sun room doors to outside; an inner door and a storm door, both salvaged. My late brother worked in demolitions, and most of the sun room was built with material he was able to salvage from who knows where!

It’s the old kitchen door that has been increasingly a problem.

From the inside, the knob worked only in one direction. If you turned the other direction, it would just spin in place. The door itself didn’t want to stay closed, and sometimes I would think I closed it behind me, only to come back later and discover cats milling around the old kitchen! Both knobs were also loose and rattled, but the outside knob (the old kitchen side) seemed to work better.

Until today. When it suddenly just didn’t.

While getting Tuxedo Mask into the cat carrier, my daughter needed to go back into the house, and couldn’t open the door. The knob just spun in place, doing nothing. My husband had to open the door from the inside to let us in!

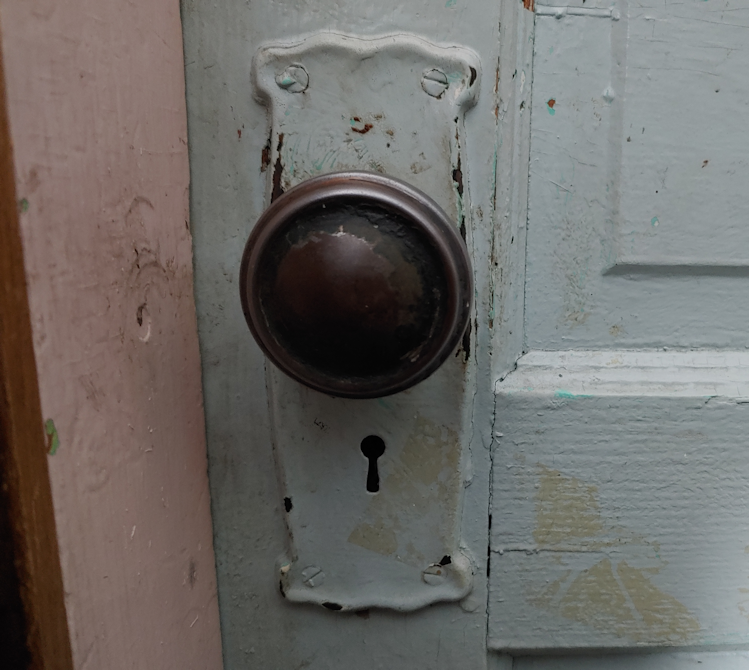
Before we left, I quickly took a couple of photos of the door knob, with plans to go to the hardware store while my daughter took Tuxedo Mask to the vet.

Yes, this is a very, very old door. It’s the original, I believe, which would mean it’s been there since about the 1930’s. I don’t think that’s the original knob, though.

Once at the hardware store, I asked for help, so I could be sure I got the right kind of replacement knob. The first two staff weren’t sure, so they got the manager to help me.

He took one look at the photos and said, “no.”

He had no door knobs that would work. If we tried with a modern door knob, we’d have to drill a new hole.

That would mean removing the plates, of course.

You’ll notice how thoroughly painted over it is on this side. Even if I manged to get the screws out, getting it free of the door, without damaging it, would be difficult.

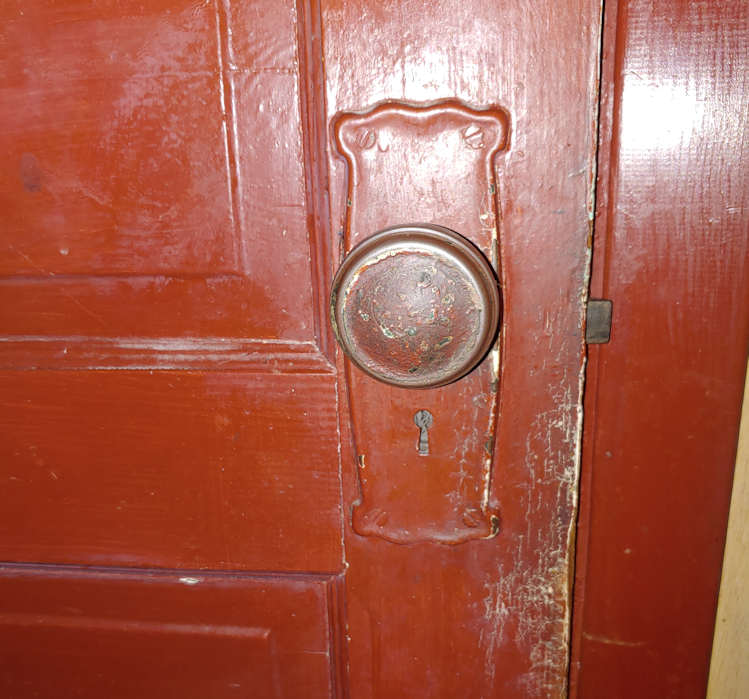
Of course, the other side is painted over, too.

He suggested that I try a second hand store. Sometimes, people donate their old door knobs.

Which is when I remembered finding door knobs when we cleaned out the new part basement. Some downright pretty ones, in fact.

Once we got home, got Tuxedo Mask set up in the sun room and my other daughter let us into the house, I headed straight for the basement. The knobs were easy to find, as I’d put them all in the same drawer.

Rifling through, I found three potential pairs of knobs. There was one more, but it was a more modern knob with its own plate that couldn’t work.

I started off by trying to clean them first. My younger daughter came along to help and, from the sounds of things as I write this, she finally finished. She was absolutely determined to clean all the recesses in that one more elaborate knob. A couple of them had paint on them, and all of them were incredibly filthy.

I’m going to have to take a photo of how they look after cleaning. They are gorgeous!!!

The screw on the white enamel one, however, is damaged and we can’t do anything with it, so that one’s not an option. My daughter worked out which two fit knobs together best while cleaning them.

After a while, I went to take off the old knobs.

*sigh*

One of these days, I’d like to get the paint off this door and refinish it. Maybe with a nice stain or something. It’s not a standard size door, so if we were to ever replace it, we’d be resizing the entire door frame. It’s in a log wall, so that’s probably not an option.

It took a while to get the knobs off, as the bar was deeply threaded into each of them.

Can you tell which one is the one I took off the door?

Yeah, the bottom one.

No wonder the knobs wouldn’t work right.

My daughter and I were just starting to clean the knobs I found in the basement when my mother phoned. Eventually, I mentioned to her what happened to the door. As I described it, she started telling me that I could get my brother to fix it. You know, the brother that lives an hour and a half away. :-/ I told her that we couldn’t do that. Then I had to explain – again – that we don’t use the main doors anymore, and why, so these doors are the ones we use all the time, now.

As I was adding in why we couldn’t use the dining room doors either, my mother started asking, why is everything breaking down all of a sudden? I told her it isn’t “all of a sudden.” These things were breaking down for many years. It’s just that nobody noticed it happening. Even my dad, while he was still living here, would no longer have seen a lot of it and, even if he did, was in no position to do anything about it. Now we’re here, and very active, so things that have been slowly breaking down over the years are finally just giving out.

Aren’t we the lucky ones? :-D

I think she even got it a bit, because she started talking about how she had relied so much on the boys taking care of things, she didn’t know anything about it all.

Which is a huge step forward from her usual, “you need a man in the house” lecture! :-D

So, hopefully, we’ll get the door working again tonight, or maybe tomorrow morning. The knobs have been scrubbed with vinegar and water and I want to make sure they are completely dry before we put the ones we’ve settled on, into the door. Once I got them off, I realized the knobs themselves are just fine. They even look a lot nicer, once the paint and scunge was removed! We much prefer the pretty ones, though. Hopefully, it’ll work.

If not, we’ll have to start digging through some of the sheds and the barn, and see if there are some really old doors we can steal the knobs from.

The Re-Farmer

Fall clean up: squash beds done

Yay! The squash beds in the old garden area are now all done.

Also, where the pumpkin mounds were, we now have three new beds.

Here is how it looked when I started.

The bamboo stakes are marking where I planted the seed potatoes I found while digging up the potato beds. It should be interesting to see what happens there in the spring!

Being such a narrow row, it shouldn’t have taken long to prep this area. It was, however, incredibly full of rocks. Not even big ones, really. Just so many! If we decide to continue planting here, this area would be the one most in need of a raised bed. If we do build a raised bed in this area, it’s going to be long, narrow (no more than 2 ft wide), and will have a built in trellis for a back “wall”.

Here is how the pumpkin mounds looked before I started.

The black that you see is the ashes cleaned out of the fire pit.

The crab grass growing through it is noticeably brighter!

Once done, here is how the back row looked.

It’s hard to see through the mulch, but I turned the soil and mulch, so the more decomposed mulch was more on top, and the less decomposed mulch was partially buried. I don’t know what we’ll plant here next year, but whatever it is, it’ll need to be pretty hardy, until we can build the soil up more!

Here is how the pumpkin mounds look now.

I was pretty sure about turning one of the mounds into a larger bed, but with so much crab grass, I didn’t think I would do the others. However, after a year covered in mulch, and a lot fewer rocks then in other areas, the soil was much softer than expected, and I ended up turning them all into larger beds. The one on the left had the least amount of grass and weeds to clean up, but it also had the most rocks that needed to be cleaned out! When I started on the middle mound, the soil was so much better than it had been, I went ahead and dug another bed, pulling up as many weed roots as I could. That went fairly easily with the crab grass. They took the easy route, and their rhizomes spread like a net under the mulch, rather than into the ground. Those come up quite easily.

Then I hit a patch of Creeping Charlie, making its way through the mulch. I lost about an inch or two of topsoil, pulling up those root mats. !!

The third bed was even easier to dig up, so that went very quickly.

So this area now has 6 beds in total, ready for next year. :-)

The next area to prep will be the carrot and beet beds. I’ve been leaving them in the ground as long as possible. Which might be working for the carrots, but the beets are mostly a lost cause. Too many visits from deer! That area will be cleaned out and prepped for the winter garlic that should be coming in within the next couple of weeks.

I will leave that for tomorrow, however. Today, we need to strain the crab apple cider vinegar. We meant to do it yesterday, but so many things went sideways, it got postponed.

I am happy to say that the septic truck did show up yesterday, shortly before 6pm. The poor guy looked so tired! All I could say after greeting him was “long day?” I think he had been bracing himself to be given a hard time for being so late, because all the tension seemed to just droop out of his body as he simply said, “yeah.” He ended up spending half an hour on the tank. I honestly don’t know how my parents emptied the tank only once a year with 7 of us. We didn’t empty it this past spring, since we’d had him come out in the winter, when things started backing up into the basement. So it was more than 6 months since it was cleaned out, and it showed!

When we booked him to come in, I asked how much it would cost so I could take out cash; it’s not like these guys can take debit. ;-) I didn’t have exact change, but when it came time to pay, I didn’t ask for any, even when I confirmed the amount and he gave me a lower number! Maybe he was giving me a deal for being so late but I figure, if anyone deserves a tip, it’s the septic guy! If I’d had more to give him, I would have!

I really, really appreciate people like him. What would we do without people willing to do such dirty jobs?

Meanwhile, I have not heard back from the plumber. We’re getting near the point of having to call someone else. Our plumber knows this place and has been doing work here for many, many years, plus he’s really gone above and beyond for us, so I would rather not go with someone else. But we need to get that well pump changed. We should have done it months ago, but all our “spare” funds went to paying for the new differential on my mother’s car. If it does turn out to be something wrong in the well itself, we want to find that out now, not when there’s snow on the ground! We shall see how that pans out.

The Re-Farmer