In my last post, I commented that it sounded like my daughter was finished cleaning the knobs that we found to fix the door to the old kitchen.
I was wrong.
She was down in the basement, using the buffer in my Dremel kit on the knobs!
She just took this project right over, and I’m happy she did. She did a much better job than I would have! :-D
This is how the knobs looked when I dragged them into the light.


Even as filthy as they were, they were still kinda pretty!
Oh, did they ever clean up good!
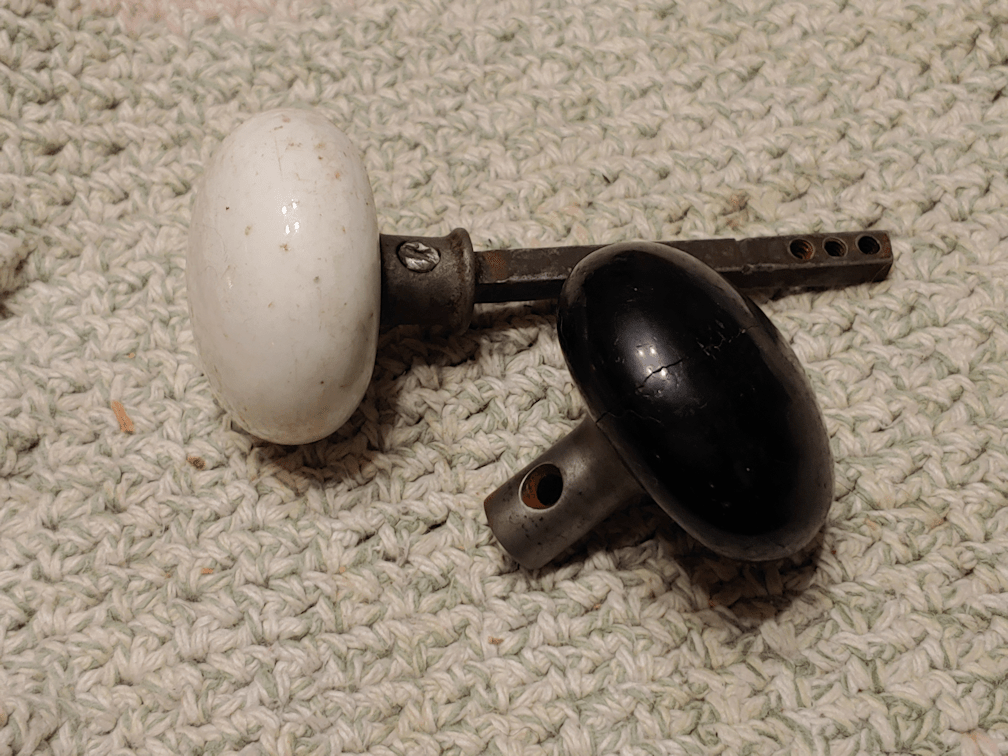
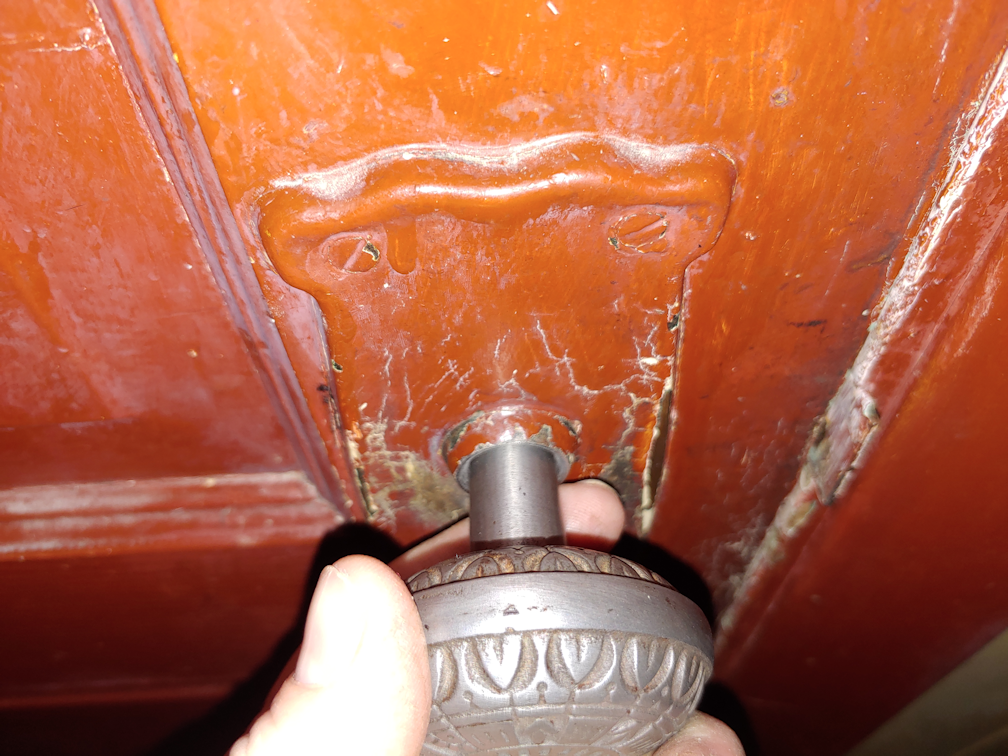
These two were out of the running. We were never able to get that screw out, and the bar was very wobbly. Also, there was no screw to fit the black knob.
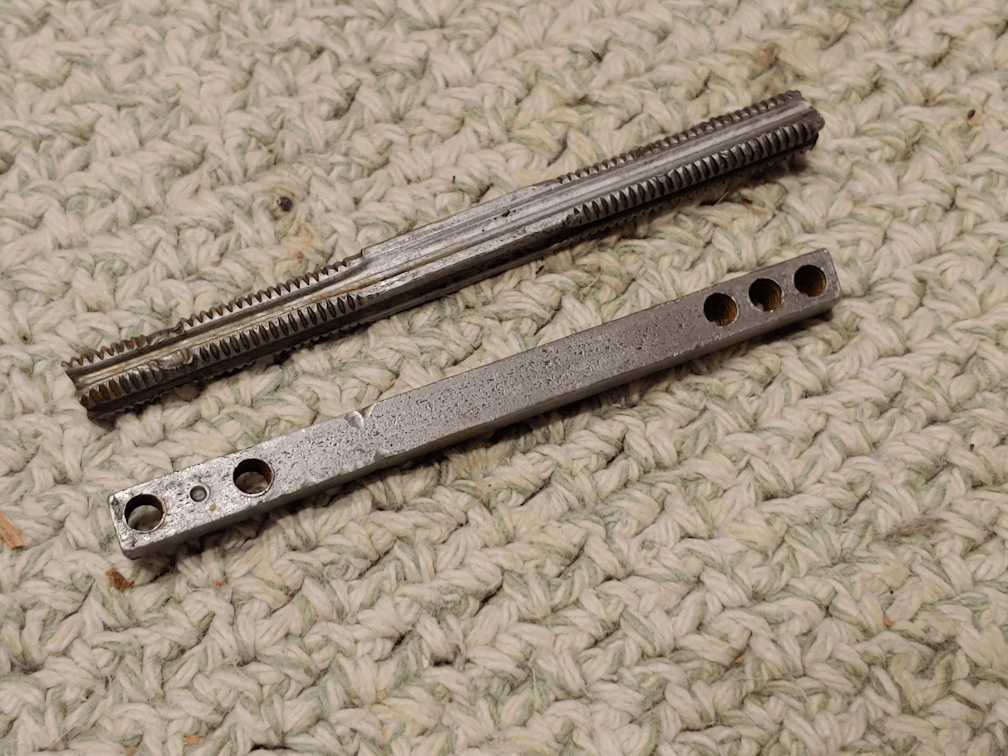
We had these two bars to work with. They were both the same size as the damaged one, except for the length. These are shorter than the damaged one.
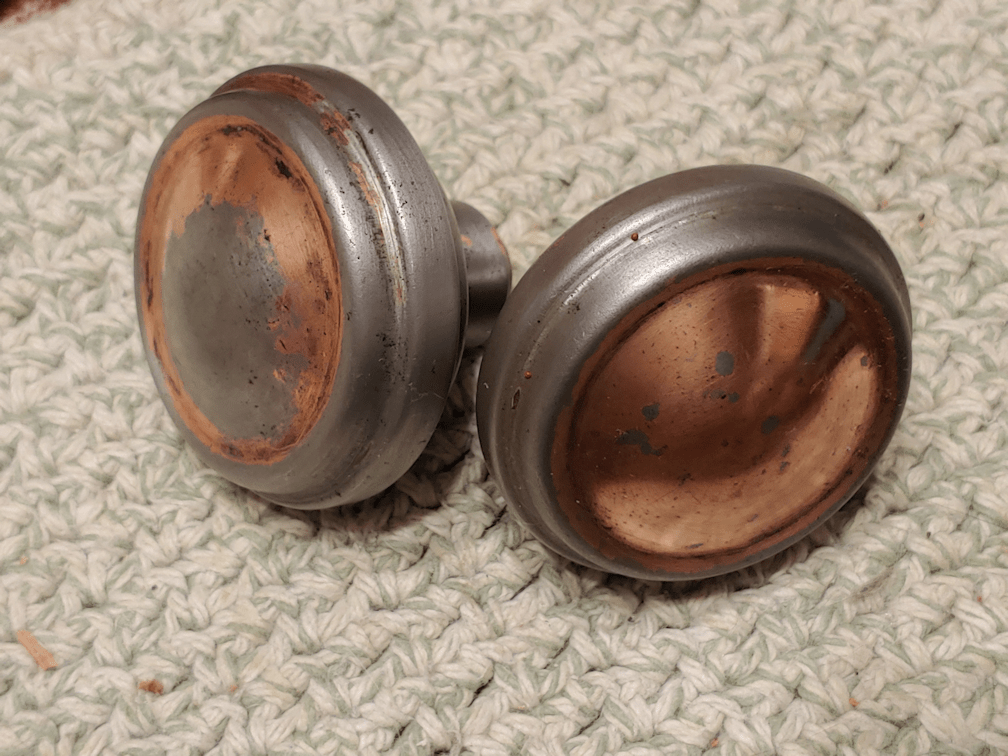
These are the knobs that came off the door, with crud and paint removed, revealing some of the copper.
These fit on the threaded bar, and had their own screws, but we didn’t want to use these again. Not when we had such pretty alternatives!

Aren’t these pretty? Uncovering the gold colour on the one was a very pleasant surprise.
These are threaded, so we could use them on the threaded bar. They are a bit smaller, though. Plus, we liked these ones, better.

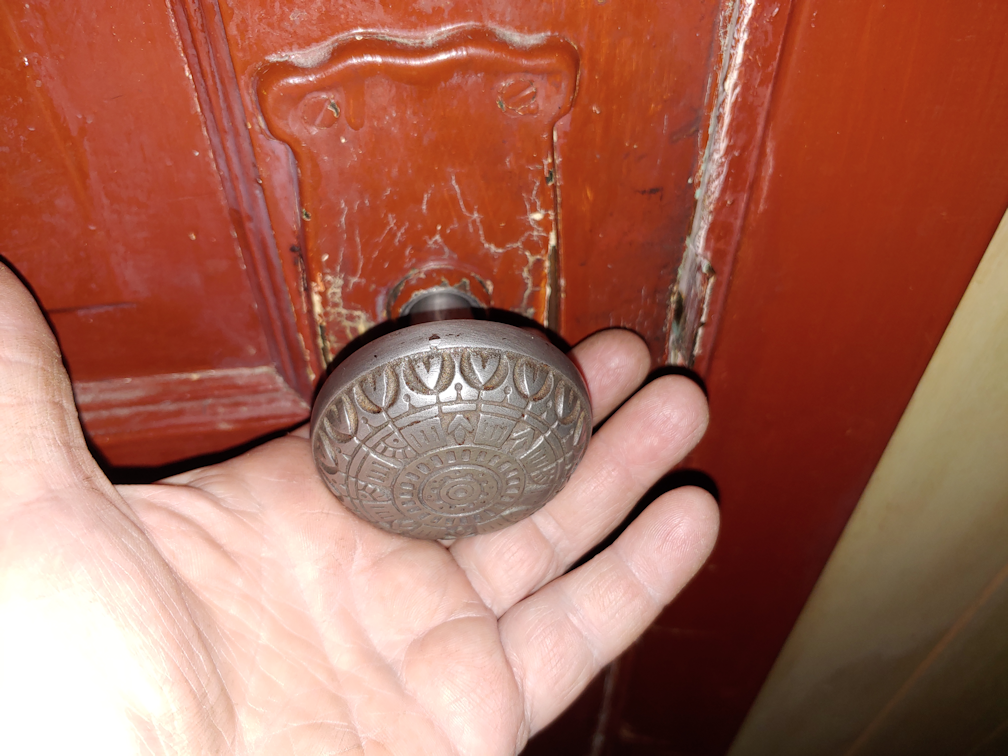
We did not expect one of them to turn out to be brass! And that decorative one… wow, did my daughter do a great job cleaning that up! Especially where the paint had gotten right into the design. Their large sizes are more comfortable in the hand, too.
These fit on the non-threaded bar.
Sort of.
There was only one screw between them. Though we had screws from the other knobs, this one was longer, to fit into the holes in the bar, and the threads were different, too.
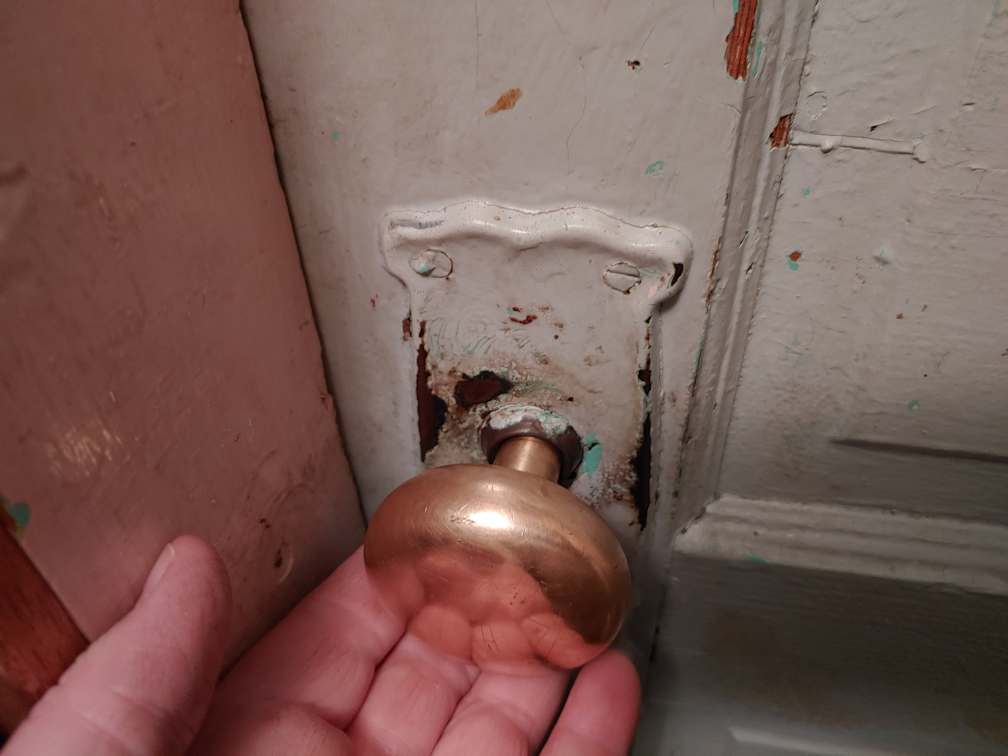
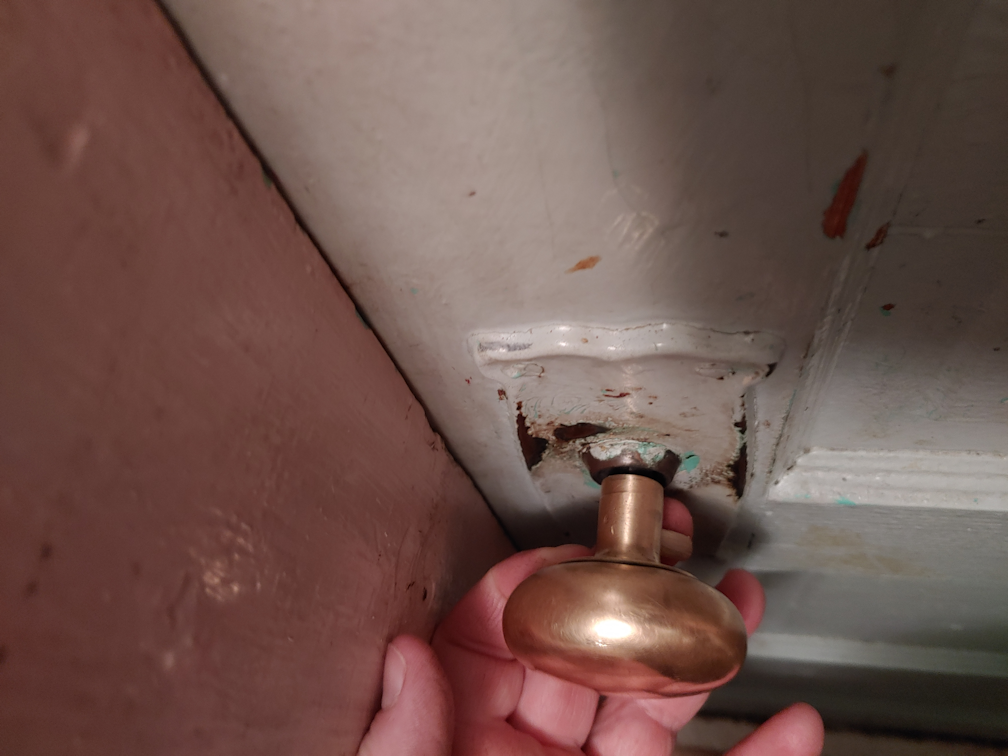
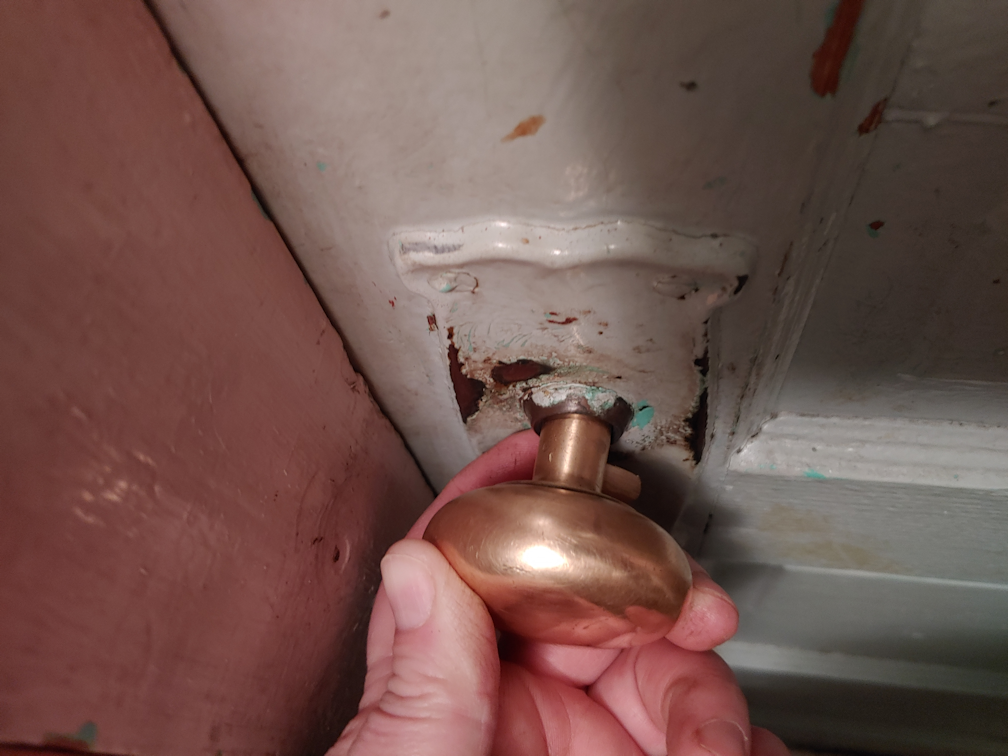
The screw went into the silver knob, which is where it came from originally. The bar fit very tightly into the brass knob, but without something running through the knob and into the bar, it could still get pulled off.
If we didn’t have a screw, we could still use a peg, right?
My daughter ended up using a piece of bamboo chopstick and trimmed it to fit. Then she installed the knobs into the door.
After hours spent scrubbing, cleaning and buffing, it took about a minute to install! :-D
The only problem is, the bar is too long. Even taking into account the different holes at each ind of the bar that would allow for some adjustment. With the original bar, the knobs could screw in as far as necessary to fit. The non-threaded bar isn’t that flexible. There are only so many holes that could be used to set the knobs.

Which means the whole thing gets pulled in and out while being used. The knobs actually fit into the openings in the plates perfectly, though.
Man, that door looks so battered and gross, now that it has these shiny, pretty knobs!
You can see the peg on this knob, left long to make it easy to remove, if necessary.
As we tested the door, there were still some problems opening and closing it that left us concerned that we’d be breaking the bar or something. This has long been an issue with the door, completely aside from the troubles with the knobs. It reminded me to take a closer look.
Sure enough, the top hinge plate was coming loose from the frame.
The hinge plate – and the screws – was painted over, of course.
*sigh*
My daughter was able to get it tightened, though, and that solved the problem. The door latches open and closed much more smoothly now.
Looking at the door while it was closed showed something very odd. I’d never looked closely before. I’d noticed the gap between door and frame at the top before; that’s easy enough to see. This is a very dark spot, so I used a flashlight to examine the rest of the door and frame and discovered that, by the middle, the door was flush against the frame. At the bottom, however, there was a very small gap that had opened up after the top hinge plate was tightened against the frame.
Normally, I would say that this was because of the house shifting, but the size of the gap at the top of the door, where it ends up snug against the frame in the middle, only to pen up again at the bottom, suggests to me that the door itself isn’t straight at that edge. Chances are pretty good it has been like this since the door was first hung!
Anyhow.
Now that the door is secured and the knobs replaced, we’ll just need to add something to keep the knobs from sliding back and forth as the door is used. I’m not sure what to use, yet. Need to think about what we’ve got, lying about!
I think, in the future, I’m going to be keeping an eye out for any other old doors lying around. If we’ve got another similar door in a shed somewhere, we might be able to salvage the parts and pieces and replace the current bar with a shorter one.
The important thing, though, is that it’s fixed. That means, when I go out to do my rounds in the morning, I won’t have to get someone to let me into the house when I’m done!
The Re-Farmer


Flat washers
LikeLiked by 1 person
Oh, yes! I have drawers, cans and buckets of those, all over!
Just not in the house. Lol
LikeLike