I am finally able to settle in to start this – though I’m also waiting for a phone call and might be making a trip into town, still, so we’ll see if things get interrupted!
My plan had originally been to drop the truck off this morning, then use the courtesy vehicle to do the stock up shopping in the city. CPP Disability came in yesterday, though, so I figured I may as well do that right away, and not have to worry about driving a strange vehicle in the city. I’ll do another post about the stocking up.
Once home and everything was put away, I grabbed a quick supper, then headed outside. I really wanted to get that bed cleaned up and finished.
Of course, it took longer than expected.
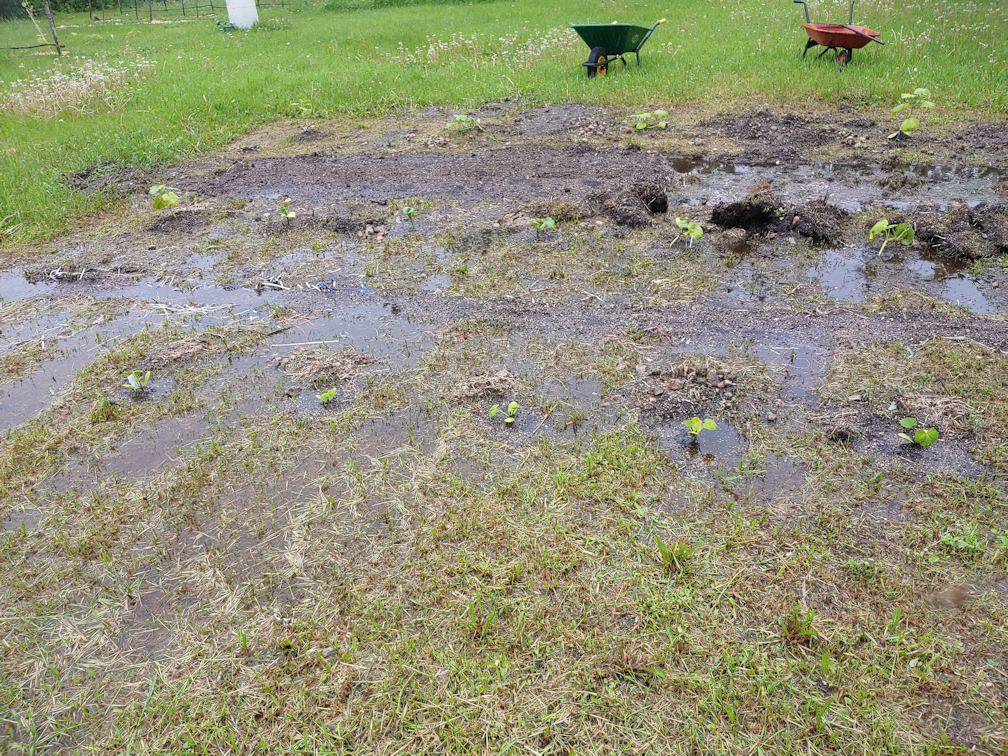
I started working my way down the unfinished side from the North end, closer to the trees. Almost immediately, I could feel I was hitting something not rock with the garden fork. I kept working my way down and around it, but it was a while before I could actually uncover it and start moving it around with my hands.
Yeah, it was a big ol’ tree root.
In the first photo, I’d worked maybe 8 ft down the side before I could uncover it and not have the soil immediately fall and cover it again. The further down I went, the more I could get under it and loosen things up around it.
In the next two photos in the slide show, I’d finally reached a point where the root veered off to the side and out of the bed.
Yes, Sir Robin was helping me the entire time. He was really, really interested in where I was digging!
One I cleared a bit more of the root into the path, I went and got the loppers to cut it. With all the digging I’d already done, it was pretty easy to pull the rest up. It didn’t all some out, though. About a foot or so from the end, it broke free. I think this was actually a piece that branched off an even bigger root, further down!
Before we planted potatoes in this bed, I trenched it. That root was not there in the spring!
Given how far I got before it veered into the path, I can certainly see why I was finding so many tree capillary roots at the south end of the bed.
I got the bed done, though – with another bumper crop of rocks – and used the landscape rake to level the soil and make it all niche and even, as much as I could.
I then hosed it down before I got my second package of painters plastic drop sheet. It’s 10′ wide and 25′ long. It was really calm at the time, so I was able to open it up, then fold it in half, lengthwise, so it was only 5′ wide. Then I covered the bed and made sure to get everything as tight and snug as possible, with the excess length folded over at the south end. I took boards that were around the carrot bed to weight down the ends, rolling the boards in the excess plastic and pulling it tight again, before using the remaining boards I had to weight down the sides. The plastic has good contact with the soil surface, which means it should solarize properly, unlike when I’ve tried to do it over less level beds, or over areas with grass stubble on it. Well. Maybe not “properly, but at least better!
As you can see in the next picture, taken with flash, it was dark by the time I was done.
I stayed out longer to cover the winter squash, summer squash, peppers and remaining eggplants. The overnight low they were predicting had changed again, and we were to expect 5C/41F.
I am so glad I covered all the beds.
We dropped to 3C/37F last night.
The last picture in the series was taken this morning, while I was doing my rounds. It was still too cold to uncover them, though, so it got left until later.
I then headed out to town to drop the truck off at the autobody place for the insurance repairs. Before taking the courtesy vehicle – a 2020 Caravan – we did the necessary paperwork, and I signed an insurance waiver. If I were to get into some sort of accident or damage the vehicle, I’d be responsible for a $750 deductible. Or, I can sign the waiver and pay a little under $8 a day to cover that.
I’ve got the van for four days, or one day. Looking at the time as I write this, I’d say, four days. There was the possibility that they’d get the frame repaired and painted today, to a point that I could bring the truck home while it cured. I would then bring it back on Monday and they’d install the new cover. I would get a phone call before they’re done for the day to find out. I’m pretty sure they close at 5, and it’s past 5 as I write this, but maybe they close at 6. I can’t remember.
I was warned about some unusual things on the van. The first, I misunderstood. She was telling me where the shifter was, and I thought she meant it was behind the steering wheel on the column, like our truck, instead of in the front of the console between the seats, like my mother’s car.
It was neither. It’s behind the steering wheel, on the dash.
It also has a “square” key, which I’d never heard of before. Instead of a metal key, it has a plastic square that gets inserted, just like an ordinary key. The disorienting part of that isn’t just the shape of it. On one side of the square is the bright red panic button!
After spending a bit of time figuring out where things were and adjusting my seat, I headed off to the town to the north of us to pick up more 40 pound bags of kibble. I had just parked when I got a call from the autobody place.
The tech working on my truck, on seeing the condition of the rails that would be painted (only the rails, not the sides and fenders, as that would not be covered by insurance because of the rust), he wanted to know if I preferred to have it done with flatbed paint, instead. There would be no extra cost, and he felt it would give more protection to the rails. After talking about it for a bit, I agreed. It should be interesting to see how it turns out!
I then went into the feed store and paid for four 40 pound bags of kibble. The woman who processed my sale then came and helped me grab the bags. I’d mentioned it was the first time I’d driven this vehicle and, as we came out with the first two bags, I realized I didn’t even know how to open the back of the van. Was there a handle, or would I have to use the key fob, which I would not be able to reach without putting down the bag of kibble?
There was a handle. 😄
Once the bags were loaded, I tried to close it manually, but it didn’t want to close until it got past a certain point. I looked around later, and could see no buttons or anything to make that easier.
When I parked in the garage and took the key out of the ignition, though, I accidentally opened the back of the van! I did figure out how to close it using the fob, at least.
I couldn’t bring the bags in right away, though. It’s been a while since we had to store that many bags of kibble, so I had to organize and make space in the old kitchen, first. Which I did, after finally having breakfast.
Much of what I had to deal with was cardboard. Some was meant for the garden. Others had glossy coatings on them, so they needed to be sorted out. Normally, they would have gone to the burn pile, but we haven’t been able to do a burn in over a year. Between things like the weather, or fire bans, I already had quite a mess to clean up recently. I plan to take it all to the dump, but I won’t be doing a dump run until we get the truck back.
After sorting that out, it was back to doing clean up in the yard and garden. The garden beds got uncovered, though high winds made that a challenge! Then I started working on things like taking down the wire that was used to trellis the peas, and to protect the Arikara squash from critters.
For now, I’ve been putting all the garden stakes, poles, ties, netting, etc. in one spot, before they get a final organizing and bundling and putting away for the winter. I’d put the bent up wire supports that failed to hold up netting under the weight of playing kittens. One of the things I’d done as we emptied the sun room was hose down a cat cave that kept collapsing. I ended up rolling down the sides to try and make it into a sort of nest, but it keeps getting bend out of shape. The “cave” itself is basically around, thick bag with a drawstring cord to close up the top.
Those bent up wires might not be useful for holding up the netting, but I decided to try something with several of them. It’s a heavy gauge wire, but still flexible enough to bend into shape, and keep the shape.
I ended up using three of them to make a wire support for inside the cat cave. Two were formed into rings, with the top ring slightly smaller than the bottom, and a third was wound and bent and wound some more, to hole the top and bottom rinds apart. Then I stuffed it into the cat cave and closed up the drawstring top.
With the top ring where it is, the to can’t close completely anymore, but that’s okay. The sides are now being held up.
The ultimate test will be what happens when the kittens decide to climb all over it. So far, it’s holding!
I’d used three of the wire supports to make that, but had brought four, just in case.
I found a use for that one, too.
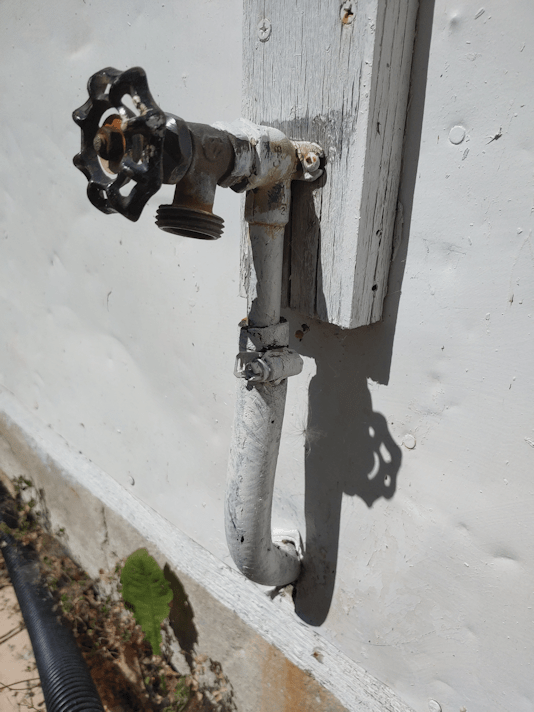
Yesterday, I’d picked up replacement sump pump hoses to replace our broken one.
The hose runs along the base of the house to drain into the old kitchen garden. That bend to go to the side instead of straight out (which is how it used to be, before I replaced the old one) was enough to finally break the hose.
Taking off the broken bit and replacing it was easy and fast enough, but I wanted to make sure it didn’t happen again. If only I had something strong, yet flexible, to brace the hose at the bed…
Enter that fourth wire support, some wire cutters and electric tape.
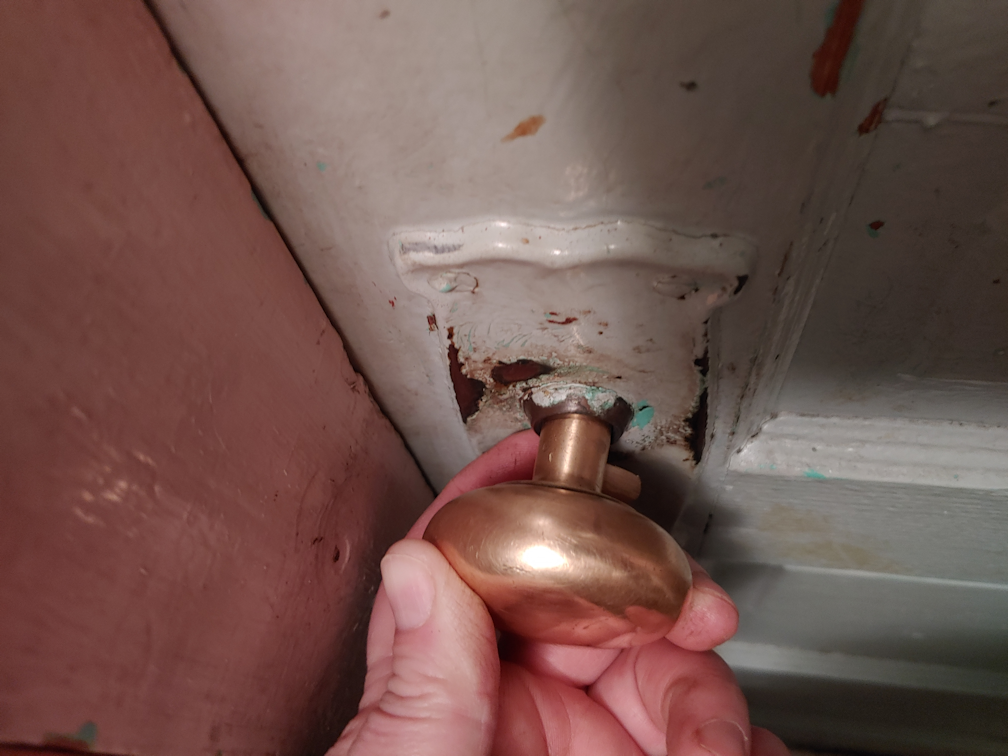
In the last picture, you can see that I set two lengths of the wire on either side of the hose. I taped it to the piece coming out of the wall, first, just to secure it while I worked. The lengths of wire were give a gentle bend, then got taped into place. Only then did I give the hose, which was already stretched along the base of the house, I final straightening out and setting it in place. The new hose is slightly longer than the old hose (which I’d bought from a different company). Which will come in handy in the spring, if it’s wet enough to trigger the sump pump. It reached the rectangular garden bed in the old kitchen better. I’ll want to make a larger, longer, opening under the logs at the end of the bed, and it can then be set right into the opening to drain under the bed, instead of running down the paths, and water whatever gets planted in there from below.
Aside from that, there was just a lot of small things that got done around the yard. It was so incredibly windy, it limited some of the things I could work on. Thankfully, the winds seem to have died down a bit since then.
My daughter, meanwhile, has been going all out on cleaning the sun room – way more than I would have done, I’ll be honest! She even got a household step ladder and a small hand brush to get into less accessible areas. When it comes time to bring things back in, she plans to scrub, then oil, anything with wood. Since we can’t take the cat cage out without dismantling it, she floor can only be washed one side at a time. With the cat cage going on top of interlocking mats, to protect from the cold concrete floor, it has to be thoroughly dry before things can be moved over and the other side can be done.
While she was working on that, I took the hose to pressure was the larger plastic shelves that supported the platform above the cat cage. The bottom shelves, in particular needed a thorough cleaning.
We need to figure out some way to keep critters from using the corners of the room. There’s no room for litter pans there.
Oh, I just got the phone call I was waiting for – and it came after they closed!
We’ve got the van for the weekend.
I also got a final tally on what it will cost. There’s the $500 deductible, of course, but the “betterment” will cost $193.92 after taxes. Add in the waiver I signed, as extra insurance should I get into an accident with the van, there’s another roughly $35 on top.
That’s a solid Costco shopping trip right there. 🫤
It will be so good to have that fixed and a cover on the truck box again. I hate having things in there without a cover, when driving at highway seeds – even though I know that there’s nothing I put back there that might blow away! It’s more that things can be seen and walked off with. Granted, it would take some effort for someone to walk off with a 40 pound bag of litter pellets, but not so much for a 9kg bag of kibble.
So there’s all that caught up with!
Next, we’ll take a look and what my stock up shopping trip looked like for the money.
*sigh*
The Re-Farmer