Recreating Mom’s soda cheese: the taste test

Part One
Part Two
Part Three

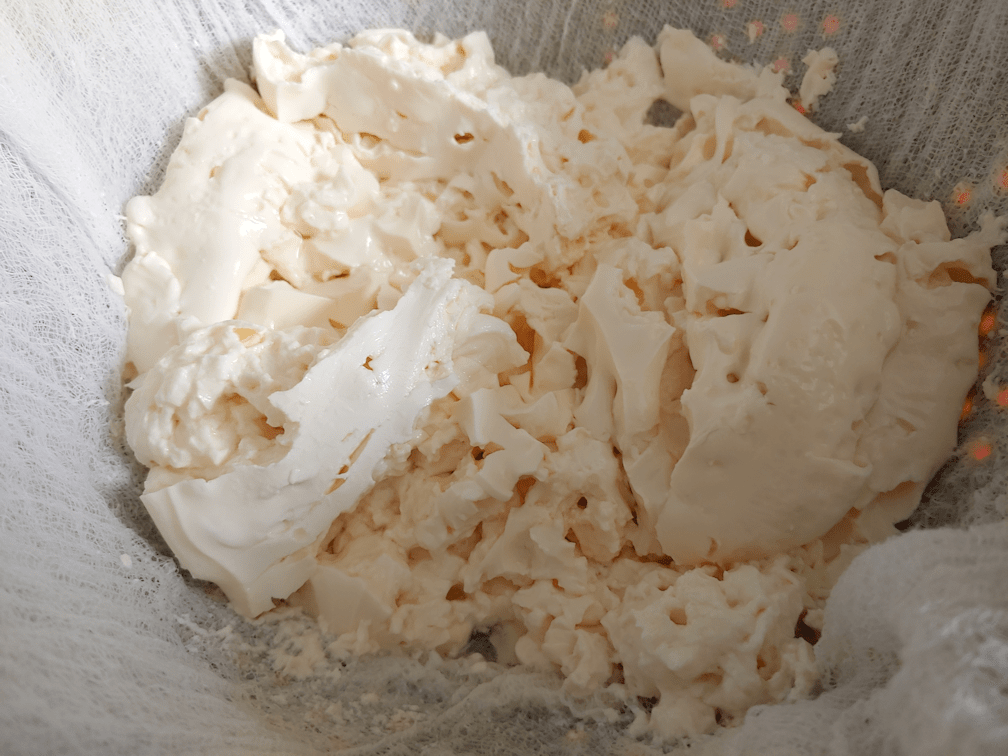
Well, here it is! The final product in trying to make my mother’s baking soda cheese.

Did it work?

Well… sort of.

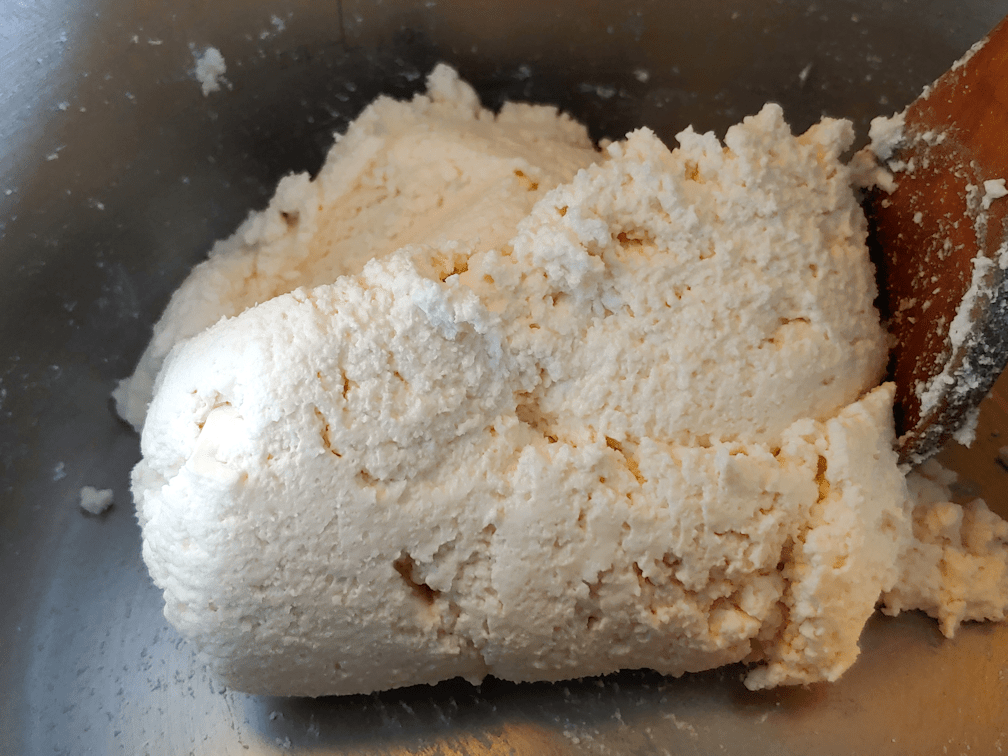
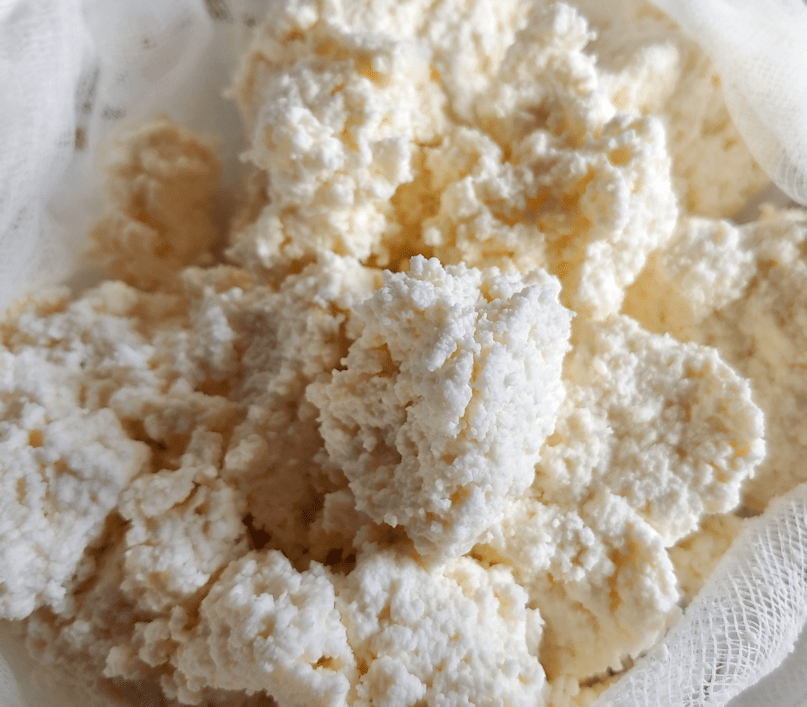
First of all, this is not at all like what I remember my mother’s cheese looked like. That was a semi-hard cheese that could be sliced. This… is not. It’s more like a cream cheese in texture, but it wants to crumble more than spread. It can, however, be spread.

As for the taste… I have a really hard time describing it. It’s a young cheese so, of course, the flavour is very mild. Which means it would lend itself very well to the addition of herbs and spices and other flavours. As it is now, with just salt, there is a sort of tanginess to it that I can’t put my finger on. It somehow manages to be both mild and bold tasting, at the same time!

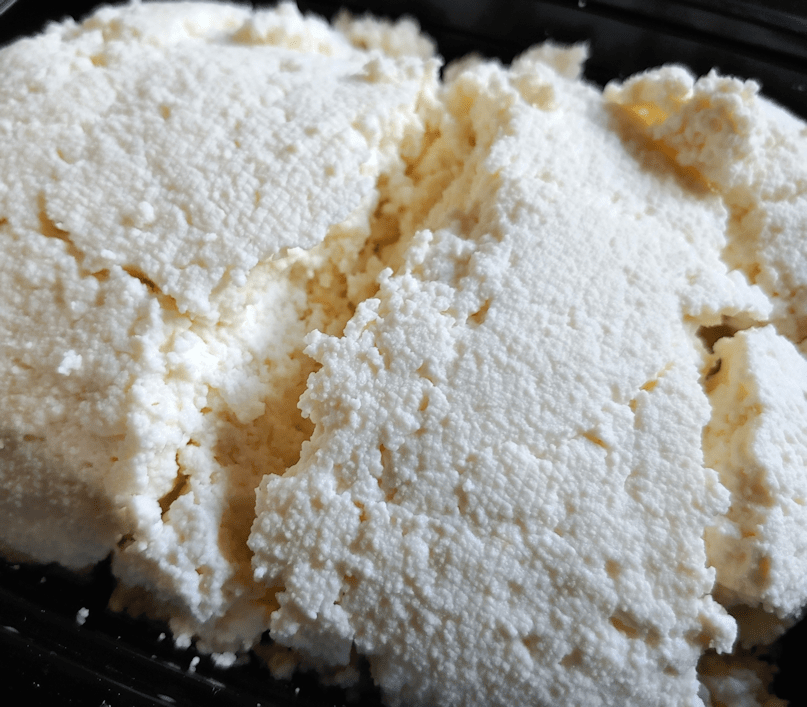
Oh!! I just realized what it reminds me of. It’s very similar to a Boursin.

All four of us have had a taste, and we do have a consensus.

It’s very good. Delicious, even.

In fact, as I write this, I’m enjoying it on a slice of oatmeal bread, with a cup of Irish Breakfast tea.

What I should probably do is take some to my mother, so she can try it and tell me how it compares to what she made. After all, I only ever saw the finished product once, and that was many years ago. Based on my memory of it, I did not succeed in recreating it. However, the finished product is very good.

With the cost of milk these days, compared to a container of Boursin cheese at the grocery store, we’re not really saving any money by making it ourselves. If I were to compare to the cost of a block of plain cream cheese, we’d be losing money by making it ourselves.

Is it worth making again?

Absolutely. And we will, probably in larger quantities.

It may not be as I remember my mother’s soda cheese looked like (I can’t compare the taste too much, since hers had been flavoured with caraway seeds), but that’s just more reason to keep trying!

The Overview

Okay, so let’s look at why it might not have turned out like my mothers. What differences were there?

First up, quantity of milk. I’m now convinced that my original notes, which said “about 5 gallons” of milk was accurate. My parents still had a few cows at the time I visited and saw this cheese, and it was just the two of them, so they would have had a LOT of excess milk.

Second, she used raw, skim milk. My parents always ran the milk through the separator. While I’m sure they must have done it once in a while, I don’t remember my parents ever setting aside whole milk. Until it finally closed, my parents sold their cream to a local creamery for a bit of extra cash (though they sometimes took payment in butter!). Skim milk was for home use. Cream was for selling. I used the type of milk we usually buy; homo milk (3%). We never, ever buy skim, because we all find it incredibly disgusting. So what I made has a higher fat content than hers would have, plus our milk was pasteurized and homogenized. Hers would not have been.

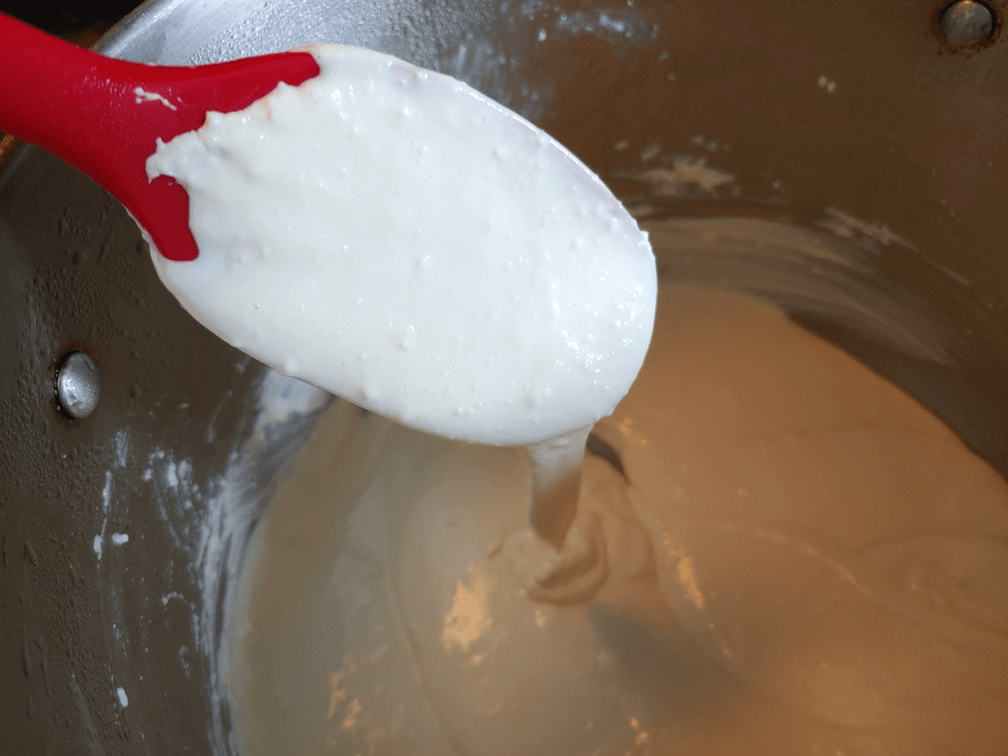
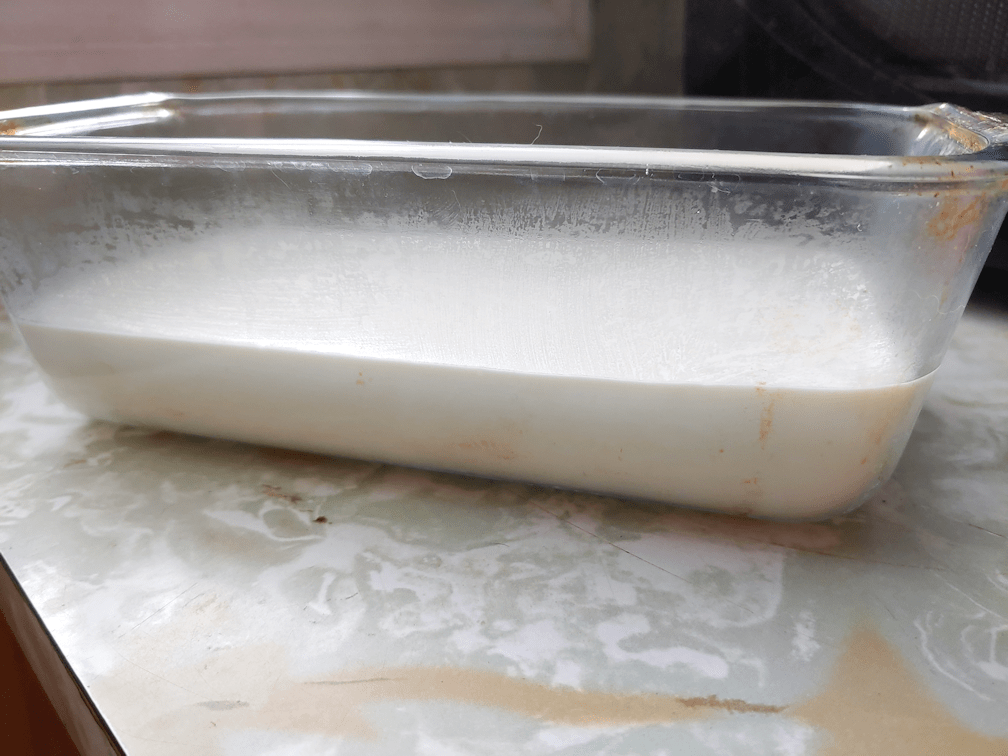
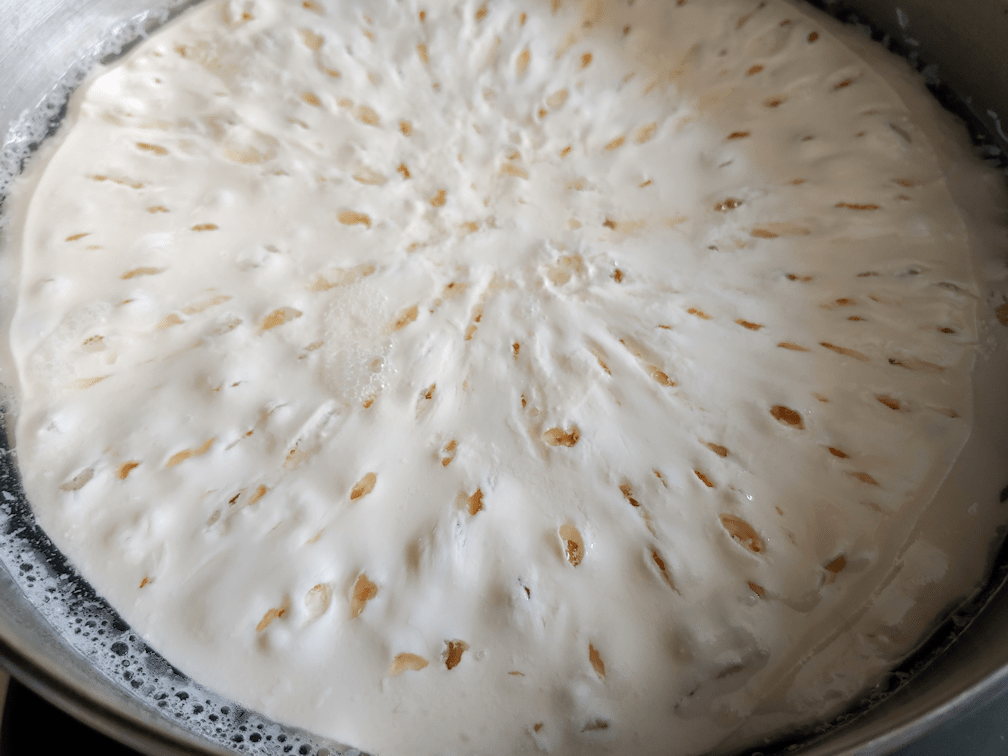
Other differences include my hanging the cheese to drain, when my mother had just set it aside; my curds may have been drier than hers. She melted her curds in a frying pan before pouring it into a mold. Chances are, the frying pan she used was cast iron. If so, that too would have made a difference. She would have made hers in the summer, when the milk would have soured much more quickly. Even the natural yeasts in the air might have made a difference, and while my mother would have ensured everything was clean, she could not have sanitized things to the extent that home cheese makers can, now. The salt I used also would have been different. She would have used ordinary table salt, which would be iodized. I used non-iodized coarse salt that had been run through a coffee grinder to powder it.

There’s also the fact that she may not even remember some details, or had not thought to mention some because, to her, they were just so obvious she couldn’t imagine them not being done.

There are so many little things that could have made a difference, but until I actually take some to my mother to try, I don’t even know just how different ours is from hers! For all I know, I could be remembering her cheese completely wrong, or the cheese I remember is not the one she remembered and gave me her instructions for. We could have been talking about two different cheeses completely, and not known it.

I guess that’s just how it can be. I’ve had an interest in recreating ancient recipes for many, many years, and this sort of reminds me of that. When the ancient recipes were written down, they weren’t at all like modern recipes. Often, they were little more than a list of ingredients, with no or few quantities. The writer assumed the reader would already know the details. My mother just used what she had, in the quantities she had, done in the ways she knew.

I’m just fortunate I can still actually ask her for details, even if she can’t always remember them.

The Re-Farmer

Recreating Mom’s soda cheese; final steps

Part One
Part Two

After sitting overnight, tucked away in the oven, it was time to take out the cheese and do the final steps.

This is what it looks like this morning, after stirring.

It… looks like dry cottage cheese.

The next instructions were:

Add salt to taste, if desired. Add colour if desired. Add herbs/spices, if desired.

For this first attempt, I am only adding salt.

If you look closely, you can see the salt on the curds in front of the spoon. My mother would have just plain table salt, since that’s what she would have had. I stole some of the powdered salt my daughters use in the popcorn pot. It’s just coarse salt that has been run through a coffee grinder, so it can be added to the oil that popcorn is popped in, and actually stick to the popcorn as it pops. That got very thoroughly mixed in while I started the next step.

Put to frying pan on low heat, in batches, and heat. Mix while heating.

The more the curd got mixed, the more dough-like it got in consistency.

Then, it actually started to melt!

I know that’s what my mother said, but I still felt surprised by it!

I even had to change spoons. By this stage, the texture was a bit like cake batter.

When melted completely, pour into form.

I didn’t know how long it needed to be stirred, but my mom said to pour it, so I just kept going.

Just look at this! It really did get to a pour-able consistency, unlike any other cheese I’ve ever worked with! At this stage, it was like well stirred sour cream in consistency.

I then poured it into a loaf pan I’d scalded and had ready. This level if what 1 gallon of milk was reduced to.

Leave to rest until cool.
When cool, ready to slice.

This is the stage we are at now. I covered the loaf pan with a narrow wooden cutting board I have. I considered covering it with plastic wrap, but I wasn’t sure I wanted the condensation build up, and the board would keep the dust off while also allowing a bit of air.

I’m hoping that, as it cools, it shrinks a bit, so it’ll be easier to remove from the loaf pan.

I did taste it after pouring it into the mold (I admit it. I licked the spoon!). The salt definitely improves the otherwise bland flavour. There is another flavour in there that I just can’t identify or describe. I’m hoping after we do a taste test, later, someone in the household will be able to describe it!

I am really looking forward to trying this!

The Re-Farmer

Recreating Mom’s soda cheese; the next steps

Okay, so the curds have been hanging for about 5 1/2 hours, and I’ve moved on to the next steps in trying to recreate my mom’s cheese.

Now, my Mom had said to just set it aside for a few hours, or overnight, so hanging it may have changed things a bit. I don’t know. But this is what it looks like after hanging for most of the day.

Also, it’s a good thing I covered the whole set up with another cheesecloth, because the cats REALLY wanted to get at this!

The next instructions are:

Put solids into large pot.
Add about 1 tsp baking soda and mix thoroughly.
Leave overnight.
Will rise like bread.

Hmmm.

Looking at how little there is in here, I’m starting to think that my original notes, saying about 5 gallons of milk, was accurate. There is not a lot in here, and when I saw my mother’s cheese, it filled an ice cream bucket, so there’s no way it was only 1 gallon.

Which means I’ve been using the quantities for vinegar and baking soda for 5 gallons, not 1 gallon. Yet, 1 tsp of vinegar to sour 5 gallons seems like way too little. Mind you, she would have been making this in the summer, and the milk probably would have soured quickly, with no vinegar at all. Knowing she was pretty loosey-goosey on the quantities to begin with, it’s really hard to know. Considering how long it took to sour using 1 tsp of vinegar to 1 gallon of milk, I suspect it’s actually the correct amount, and that I would have needed more, if I were using more milk.

This is after very thoroughly mixing in the baking soda. Yes, I used 1 tsp for this amount.

The curds feel like a cross between cream cheese and cottage cheese. I spent quite a bit of time mixing it, because I wanted that baking soda to be worked in as much as possible.

My mom said to leave it overnight, which means she would have just left it on a counter, but I have put the covered pot into a warm oven, because of how chilly that part of the house gets.

She commented that it will “rise like bread.” That makes sense, since we should be seeing a chemical reaction between the acidic milk soured with vinegar, and the alkaline baking soda. It’s something I’m used to when working with sourdough, but with cheese? I did get the sense that the curds were starting to feel “fluffier” by the time I finished stirring in the soda, but that could be just my imagination because I am expecting something like that.

I did taste the curds before and after adding the soda. As I mentioned before, it has very little flavour right now, but I did feel that the baking soda … softened… the flavour, if that makes sense.

After it has sat for the night, salt, colours and herbs and spices can be added. For this first attempt, I will be adding some salt, but that’s it. If we make it again, we’ll experiment with adding herbs and spices or whatever.

I am incredibly curious to see what it looks like by morning!

The Re-Farmer

Recreating Mom’s soda cheese

I am currently in the middle of an experiment.

Growing up here, as a subsistence farm, we had cows for milking and for beef. Even with 7 of us, we were milking enough cows to have excess milk. I remember my mother making cottage cheese (which I did NOT like), but that was the only type of cheese I saw her make until some years after I’d moved off the farm. I’d come out to visit, and saw some semi-hard cheese in an old ice cream bucket for a form. It was slightly harder than a cheddar, sort of tannish yellow in colour, with caraway seeds in it. It was quite tasty. I asked my mother about it, and she said she had made it.

A few years ago, I asked my mother about how she made this cheese I remembered. Unfortunately, she thought I was talking about cottage cheese, and the more I described it, the more perplexed she was.

After moving here, I was having a conversation with my mother about making and preserving food, when she mentioned a cheese she’d made. It was the one I remembered! I quickly took advantage of the moment, and got her to describe to me how she made it. I knew it had to be different, because my mother did not have access to rennet or any of the bacterial starters. She didn’t have a food thermometer, either.

Getting any sort of information like this from my mother has always been difficult. I remember the first time I tried to get a recipe for a soup she made. I remembered some of the ingredients, and asked her if she remembered how she made it. Instead of answering me, she started mocking me for not knowing how to cook and not knowing how to make soup. Never mind that I was already married and a child, by then, and had been feeding the family just fine.

I never did find out how she made that soup.

This time, I did manage to get the information down then, after I got off the phone with her, re-wrote it into more cohesive instructions, since the conversation bounced all over the place. When I was finally ready to try it, I was perplexed by some of the quantities, so I called her to clarify. Did she really start with 5 gallons of milk, or did I make a mistake writing it down?

Finding out was like pulling teeth! She kept avoiding answering the question, and kept saying, “you mean you’ve never made cheese before?” in total shock. Then giving me instructions on how to do different parts. I kept going back to the quantity, and asked her if she had used 5 gallons, only to be told how I should just use one gallon, because 5 gallons is such a lot… *facepalm* Then she talked about how she’d never made it using milk from a store, and how I could use lemon juice instead of vinegar, and on and on. It took a while, but I managed to explain that I have made cheese before, I did only want to use 1 gallon, and if the instructions I had was for 5 gallons, I’d have to know that, so I could adjust the other quantities.

What it came down to is, my mother never measured. She used whatever amount of milk she had, and went from there. I did know that. What I needed was some sort of approximation, because there is a heck of a big difference in quantities involved.

Finally, she told me she used about 1 gallon.

*sigh*

Once I had that clarified, I finally got a batch started. Here are the instructions I got from her, highlighted in blue, with my own commentary.

Milk – about a gallon
Add 1 tsp vinegar to make sour. May take all night.

This part actually ended up taking almost two days. The milk was supposed to rest at room temperature, but with how cold our house is – especially the kitchen – I put it in a warm oven.

When sour, put in pot/roaster into oven to warm (lowest heat) until forms curds and whey.

We finally reached that stage this morning.

This is how it looked.

I have no idea if this is how it’s supposed to look.

Drain through cheesecloth.

There is nothing about cutting the curds or anything like that, first. Just to drain it.

I did give it a taste at this point. It doesn’t have much flavour to speak of. The texture was a lot denser than I expected it to be, considering how it broke apart.

Set aside for a few hours or, preferable, overnight.

This is the stage we’re at now, though I’m cheating a bit. I dug out the stand I made to hang jelly bags or drain yogurt cheese, tied off the cheesecloth and hung it.

After taking this photo, I covered the whole stand and bowl with another cheesecloth, to keep out the dust and cat fur – and cats!

Since I got to this point so early in the day, I will likely continue after a few hours, rather than leaving it overnight, because…

Put solids into large pot.
Add about 1 tsp baking soda and mix thoroughly.
Leave overnight.
Will rise like bread.

… it will sit overnight again, after this stage.

As for the whey, I think it’s time to do some more bread baking! I love using whey as the liquid. It adds so much flavour!

The next instructions have me wondering.

Add salt to taste, if desired. Add colour if desired. Add herbs/spices, if desired.

This is all stuff that’s supposed to be added after the baking soda gets added, and after it rests overnight. Which seems odd to me, but that’s how she did it, so that’s how I’ll try it!

Put to frying pan on low heat, in batches, and heat. Mix while heating.
When melted completely, pour into form.

… melted?

It can melt at this stage?

I am really perplexed by this.

I’m not sure what I’ll use as a form just yet. It will depend on what I see when the time comes

Leave to rest until cool.
When cool, ready to slice.

If I hadn’t see my mother’s cheese, I would never guess that these instructions would get that result. As it is, I am still unsure of what I’ll actually get!

So this should be an interesting experiment. I hope it works, because it’s really easy to make, even if it does get spread out over several days.

The Re-Farmer

Lemon cheese, end result

Here is how the lemon cheese turned out! 😀

This photo was taken right after the bag was taken down from the hanging rig.

Of course, I gave it a taste.

It has very mild in flavour, as to be expected with a cheese like this. Lightly salty – I probably could have added maybe an extra half teaspoon, instead of the quarter teaspoon or so I added, to adjust for using 4L instead of 1 gallon. It has a light, almost creamy texture to it.

Because it’s so loose, I squeezed it together in the cheesecloth a bit, then put it back into the colander over the bowl, put a plate over it and weighed it down with my stone mortar. Just for a couple of minutes, to make it easier to transfer into a container.

Since it’s such a fresh cheese, it will need to be finished quickly.

I don’t think we’ll have a problem with that! 😀

Then, because I had a big bowl of still-warm whey handy, I made up a double batch of bread, using whey for the liquid. This works out really well. Yeast seems to really like whey. The dough has a softer feel to it while kneading, and the finished bread is lighter, with a delicate crumb and a lovely flavour.

We’ll be storing the rest of the whey in the fridge to use in other baking. It would be awesome in a sourdough bread!

I’m quite pleased with the end result of this cheese. Definitely something I will be making again, and maybe playing around with adding things, like fresh herbs, to it at the salting stage.

The Re-Farmer

Making lemon cheese and a hanging rig

I’ve been planning to do this for a while, and finally had the chance today: making lemon cheese. I’m using a recipe I found here. Do check this site out. Especially if you’re interested in different ways of preserving food, though there is lots more there, too.

After sanitizing my equipment, I started heating the gallon of milk.

Well… not quite.

This is Canada, and our “gallon” of milk is actually 4L, as you can see on the very handy measurement inside the stock pot I am using. A litre is just a bit more than a quart. At 4L, the difference is enough to warrant adjusting the quantities of the other ingredients.

Which are lemon juice and salt (I used Kosher salt).

For a gallon, the recipe called for 8 Tbsp of lemon juice and 1 Tsp of salt and I adjusted those quantities up slightly when I measured them out.

After heating the milk to between 185F – 190F (I got to break in my new candy thermometer. 😀 ), the milk is taken off the heat and the lemon juice is added. (I used 3% homogenized milk.)

It curdles immediately.

It then gets covered and left to sit for 15 minutes.

Which is when I dashed downstairs to do a quick build. The cheese would need to be hung to drain later, and we don’t have a good set up for that. We’ve made do with whatever we could come up with when making jelly or yogurt cheese, but we plan to be doing more of this sort of thing in the future, so having a rig to hang things to drain would be very useful.

Since we have also finished the basement and have some pieces of wood handy, I can actually do something about it!

When my timer went off, I’d reached this point.

There was just enough of the wood we used to build a frame to block the entry into the old basement, to cut 2 ft long side pieces. One of them is missing a chunk at one end, but it’ll do. I then cut a matching 2 ft long cross piece for the top, and a pair of base pieces.

Then my timer went off and I headed upstairs. Thankfully, my daughter was handy, and she took over with putting the curds into a cheesecloth lined colander over a bowl, to drain for 10 minutes. That was just enough time for me to finish my rig.

I used what screws I had that were long enough, which were really way too long for the job, but whatever. I also added a cup hook to the centre of the cross piece to hang things from.

It is a pretty ugly rig right now. Normally, I would have sanded the pieces and used more appropriate screws. It’s kinda wobbly, but steady enough for the job.

By the time I took it upstairs to give it a good cleaning, it was time to add salt to the cheese curds.

Here they are, after salting.

This is basically cottage cheese, really. My daughter had given it a quick taste after salting it and says it tastes quite different from cottage cheese, but we’re not washing the curds or anything like that, either.

The recipe then says to hang it for 30 minutes for a spreadable cheese, or up to 2 hours for a dry and crumbly cheese.

We were using a fresh cheese cloth, without cutting it down to size, so I ended up tying the cheesecloth around the cross bar instead of using the hook.

We checked it after half an hour and decided to let it hand for the 2 hours. We’ll see how it looks, then!

When we’re done with all this, I will probably take the rig apart and finish it properly. Give the pieces a good sanding, then screw it back together, with some wood glue to make it more stable.

I am so loving having that space in the basement to be able to do projects like this!!!

The Re-Farmer