We were wrong

We were all wrong.

We also had no way of knowing how or why we were wrong!

My brother, saint that he is, came out today to work on both the frozen ejector and the septic pump problem.

My SIL dropped him off, as he would be taking their car that they loaned us, back. The first thing he did was head to the ejector – he was here for an hour before we even saw him! He set up a low power heater around the ejector and covered the whole thing with a tarp to hold what little heat there was.

When I came out to join him, I was surprised by how much is was snowing. There had been no snow at all when I did the morning rounds and opened the gate for them. We ended up having what felt like a light snow, though it was actually heavier than it seamed, it was so calm out, the whole time.

He had spent yesterday evening running around all over the city, looking for the parts and pieces he needed for the septic pump. With the water leaking out of the filter, he concluded that the back valve was leaking. The pictures he asked me to take and sent to him helped a lot, as he couldn’t quite remember the details on the pump.

Once he did as much as he could around the frozen ejector, I helped him bring in his tools and supplies into the basement.

He came well prepared. A habit he got into when he would come here to fix things for our late father, because all Dad’s tools were scattered all over, or “borrowed” by our vandal.

First, I need to explain what we were wrong about.

When we first started having issues, I was thinking the pump itself was the problem. I thought it was about 20 years old and, which all the plumbing issues we had and with it running dry for way too long at times, I was thinking it was wearing out. It was even starting to sound worse.

I was wrong.

My brother replaced the pump only about 10 years ago, got the best pump available at the time, and he had full confidence in it.

The company that installed the ejector also thought it was the pump, with not enough pressure going through the venturi valve, causing the ejector to freeze.

He was… partially right. There was low flow, so low pressure, but it wasn’t because of the pump.

Other thoughts from various people, including me:

– that there was an air leak somewhere in the pipes from the tank to the pump.
– the O ring was failing
– the pipe from the house to the ejector was starting to get filled with gunk
– gunk from inside the pipe to the ejector was breaking loose and clogging the venturi valve
– the ground around the venturi valve was too saturated (which may still have been a contributing factor)

While it sounds like we’re talking about two problems – the frozen ejector and the septic pump problems – once we set up the emergency diverter, we got more of a sense that the problem around the pump lead to the ejector freezing. Thawing the ejector is its own problem.

With the water draining out of the filter, my brother conclude that the back valve was broken and wanted to replace it.

He was half right.

He was going to replace a whole section of connectors and a bit of pipe, removing the original back valve completely, and installing a new one, in line.

I’ve actually uploaded a bunch of short videos, because photos could not do it justice. Here is the first one. Here, the section of pipe and elbow connectors has been removed, but not the back valve.

No, you will not see the brass filter in another video. We never used it.

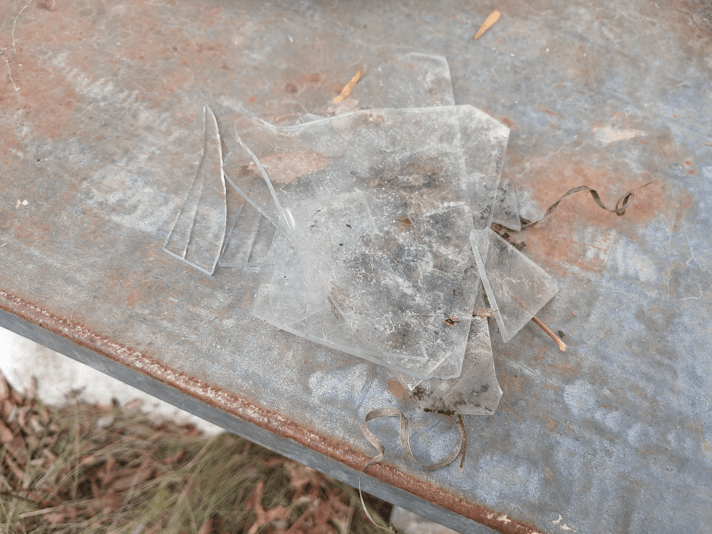
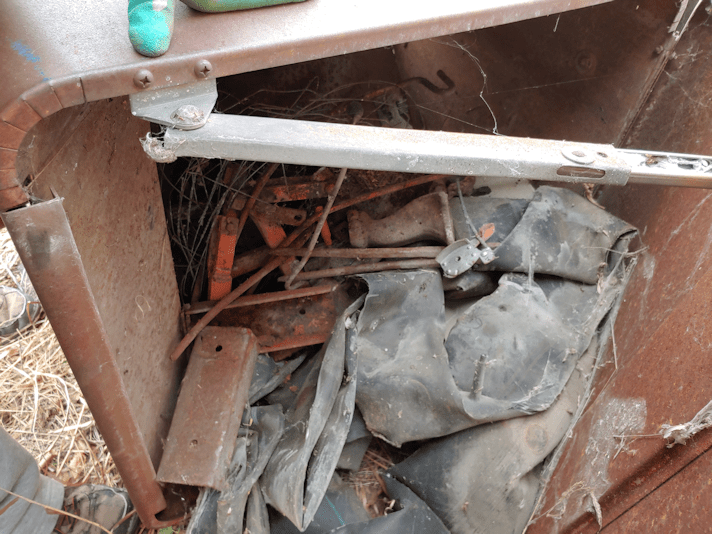
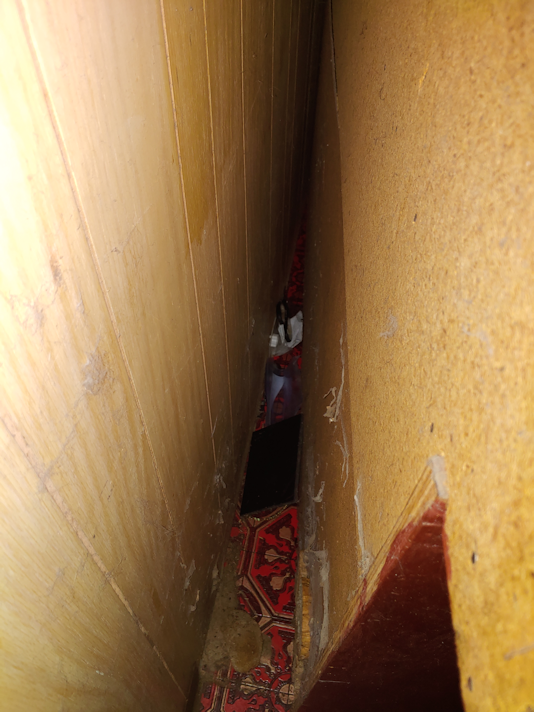
Instead, we found this.

W. T. F.

We were just flown away. HOW did a piece of cloth that big get into there! How many years was it there?

That is a BIG chunk of fabric! The fact that the pump worked at all with that in there is amazing!

With that filter installed after we moved here, we know it had to have happened before then. I don’t know when the other filter was finally removed, because it never worked. My guess is the fabric got into the pipes somewhere in that time between filters.

The only way I can think of how that got into the system is either by getting flushed down the toilet somehow, or it fell into the tank at some point when the lid was open.

It could well have taken years to get sucked into the pipe and work its way through all the elbow connectors. There are three on either side of the filter, and even when there was just a straight pipe before this filter was installed, the elbows were still there.

Then, once it got through the pipe, it got forced through the valve, where it could go no further.

Upon removing the fabric, my brother looked over the valve, and it was undamaged.

So he just put everything back together as it was, with fresh Teflon tape on the threads.

One of the other things he did was set up the switch by-pass. Right now, we have a switch on the wall to turn the pump on and off manually – but the pump won’t run unless the pill switch in the tank is high enough to trigger it. He’d set up the wiring before, but they were tucked behind the switch plate. He set the wires to they were now outside (after I turned the breaker off, of course) and connected them, so that when the switch was turned on, the pump would run immediately.

Before starting work on the pump, he ran it to drain the tank. It had run not that long before, so there wasn’t much in there, but he wanted to make sure it was empty before he started taking off pipes and draining what water was inside the pump itself. He was going to need to test it again later, so we had to run water for quite a while, just so he could have something in there to test the pump with, once everything was back together.

It takes a long time to fill that tank.

Eventually, though, we got it to the point where he could turn the pump on and test it out.

At the very end, you can see a sudden change in the flow. That’s when the tank was empty and the pump had to be shut off immediately.

What a thing of beauty. Everything was flowing well – just like when it was installed!

Which makes me think that piece of fabric was stuck flat against the inside of a section of pipe somewhere between the filter and the pump, because that filter and pump were working great at the start, and for quite some time after.

We’ve had other problems with the system that, in retrospect, were probably caused by that piece of fabric moving down the pipes a bit further, then a bit further, then a bit further.

There was absolutely no way anyone could have known.

Oh! I just heard the septic pump turn on as I write this. I’d checked the filter earlier, and it was completely full, and I know it’s pumping fine and faster than it has in probably years!

The only down side is the vibrate-y noises from where the emergency diverter makes contact with things.

Wow. The pump just turned off. That took less than two minutes, easily!

What an excellent pump.

I am so happy to be wrong about that pump!

Once that was done, my brother disengaged the bypass, so the pump would only turn on when triggered by the pill switch. My brother wanted to test it again, but it would take a while I left a tap running in the old laundry sink, next to the pump, but I made sure the rest of the family knew to use water, flush toilets, take showers, to fill that tank enough to test it again.

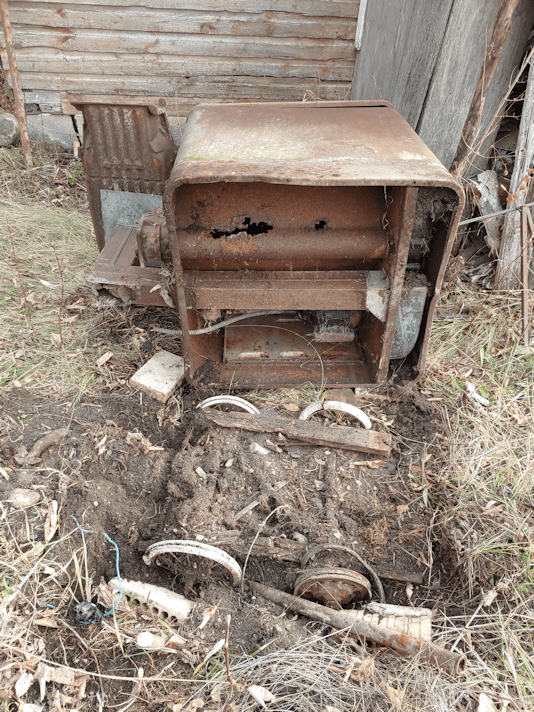
Then, it was time to head outside and work on the ejector.

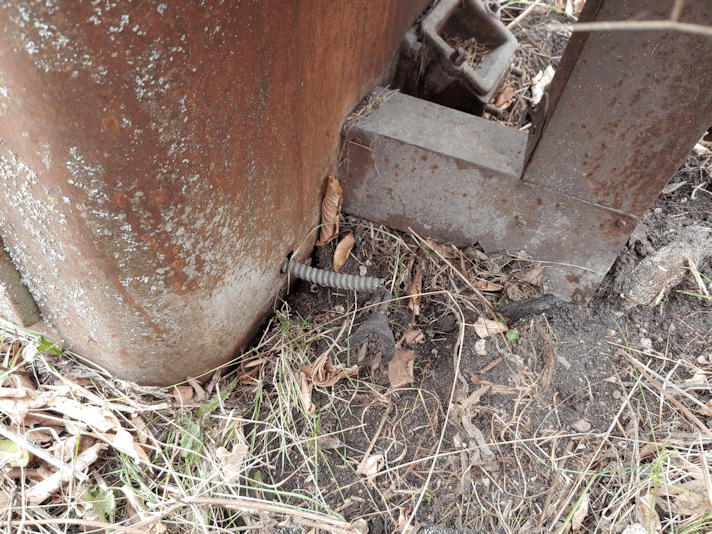
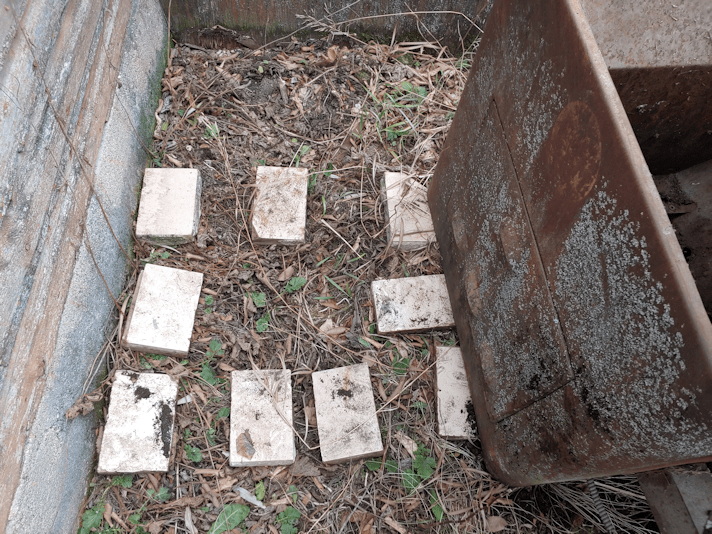
In the first photo, you can see the fluid level is quite high, because my brother had poured in about half a jug of liquid ice melter – calcium chloride. This won’t damage the plastic pipes, but there is a brass fitting at the bottom that could potentially get corroded, but that would likely take a long time. Once things are thawed out, we can hook the pipe back on and anything down there will get flushed away when the pump sends fluid through.

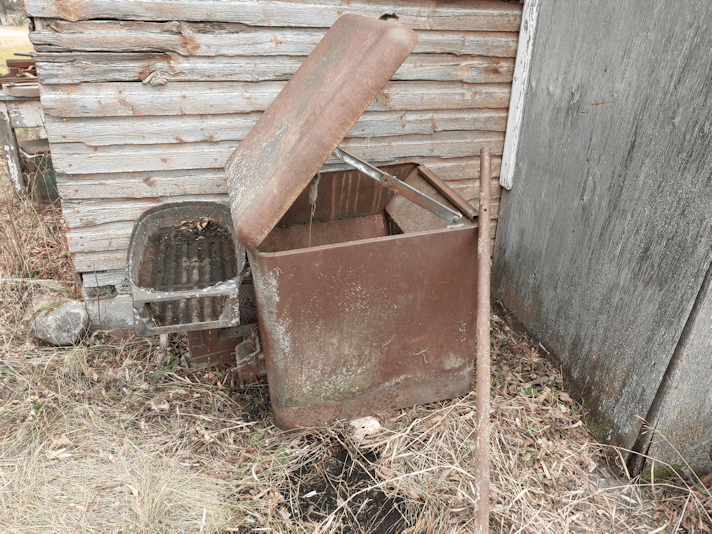
In the next photo, my brother is using the heat gun on the copper pipe to try and get the ice inside the venturi pipe – the discharge pipe – thawed more. It had been frozen to the top before. When we got there and my brother started this, it was down about 2 inches. By the time we stopped, it was down about 4 or 5 inches.

We spent quite a bit of time out there in the falling snow, using the heat gun and the copper pipe and the calcium chloride to get more of it melted down. There was no way it was going to be thawed out completely, though.

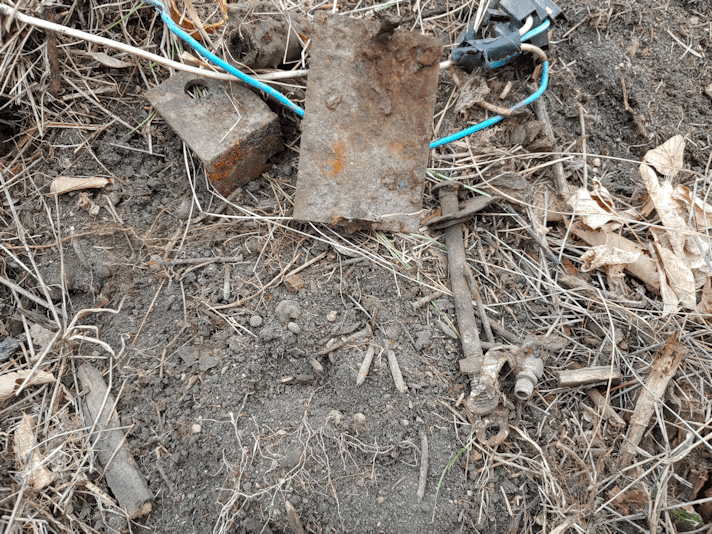
For that, we used the heat tape that came in the mail yesterday. That’s the blue you can see in the third image. The glass tape that game with it wouldn’t stick, buy my brother brought electric tape that he kept in a pocket inside his jacket to keep it warm, and that worked. We ended up using the heat tape box to hold the sheet of metal roof out of the way, as it rests right against the pipe. Being frozen to the ground and covered in snow and ice, we can’t move it away. My brother dug through his tools in the barn and found something to bend it back.

The cap and elbow were put back on the ejector, but only loosely. We want to be able to pop them off easily to check on how it’s melting.

My brother did some scrounging and dug an old, rotten saw horse out of the snow to put over the ejector. This would keep the tarp from having contact with the ejector itself. The last thing we want is for it to snap off the elbow or something in the wind.

Last of all, the tarp was wrapped around the whole thing – black side out to absorb warmth from the sun (whenever we get sun next) and tied off a bit. If we get high winds from the south, it might still get blown off, but it can’t be tied down too tightly, or I’ll have trouble checking on it.

All of this took quite some time, with a few trips to the barn or the garage, etc. to find things we needed. At one point, I needed to go into the house. As I was leaving, I caught a light whiff of septic, so I went around to check on the outflow pipe.

The septic pump must have just shut itself off by the time I got there. I could immediately see a whole lot more snow had been washed away. In some areas, the flow goes under the snow, creating gaps in the snow above in places. While there was no water coming out of the outflow pipe, I could see through one of the gaps, water that was flowing fast. The pump was definitely working well!

Before he left, my brother checked the pump in the basement one more time – the filter was full to the top and the filter basket was floating, just like it should be – then checked the outflow pipe. He was surprised by the direction the water was flowing, but I wasn’t. There’s a reason I have a retaining wall at that end of the old kitchen garden!

Now that this is fixed, and we’ve had the clogged drained fixed, we need to use our water. Especially in the kitchen and laundry. We still need to set the washing machine drain hose back into the pipe – no one has needed to do laundry yet – and I plan to do a machine clean cycle. That uses straight hot water. We’re also going to keep up the drain maintenance routine we’ve already started, plus what the plumber recommended we do with the kitchen sinks every few days. Last night, I even flushed out the access pipe to the septic tank in the old basement floor with the hose, to make sure that second bottleneck was still clear. Having the laundry draining into the septic again should actually help keep that clear, too.

By the time my brother left, he’d been here about four hours, with a brief stop for lunch, working on all this!

My brother is allergic to cats, so I had lunch with him in his car.

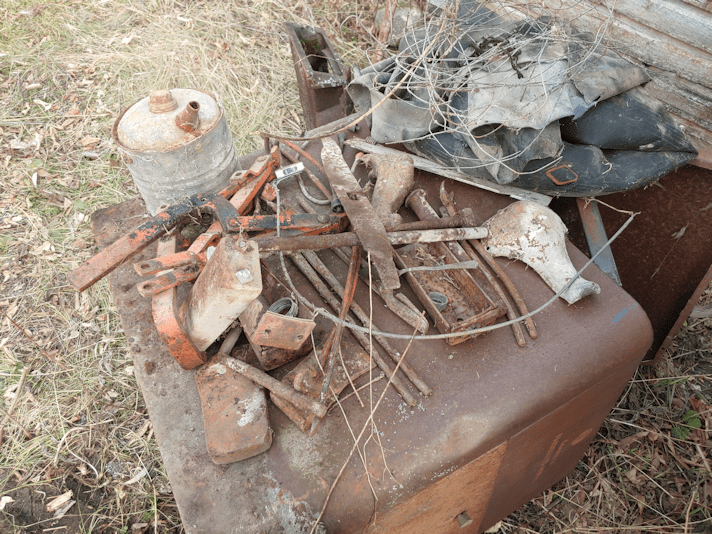
Meanwhile, he can return all the parts and pieces he never needed to use, and get his money back!

We’re still blown away by finding that piece of fabric stuck in the valve. So utterly unexpected.

The fact that nothing was damaged by it is pretty amazing, too.

So we were all wrong about what was going on, and that’s just fine! With some of the possible causes, this is one of the easiest fixes there could have been.

As for the frozen ejector, it’s hard to say how long it will take for the calcium chloride to work its way down to the bottom. Then my brother will need to come back and switch the pipes so we can test it out and, hopefully, be able to leave it.

We might not be using the emergency diverter all winter, after all!

Wouldn’t THAT be nice!

Also.

My brother is the best.

The Re-Farmer

2021 garden: odd one out, and barrier attempts

We are once again hitting higher temperatures, with no more rain, so this morning I started watering the garden beds again, moving the sprinkler every half hour or so. While checking the conditions of the various beds, I had to get a photo of this summer squash. It was the last one to start producing fruit, and when it finally did, it was definitely the odd one out.

And what is so odd about this lovely green pattypan squash?

We only bought yellow pattypan squash seeds.

So… we planted both green and yellow zucchini, but only have green zucchini developing. Then we planted only yellow pattypans, but have both green and yellow squash!

Too funny.

While checking the beds I’d watered last night, I was disappointed to find that more of the Crespo squash has been eaten. :-( So I snagged a daughter to help me put the last of our chicken wire around it.

We didn’t have enough to go all the way around. I checked the junk pile around the garden shed and found some 2 inch square wire mesh. It was all bent up – when I first found it while cleaning up the maple grove, it was buried in undergrowth – and a mess, but we straightened it the best we could and happily found it long enough to cover the gap left by the chicken wire. I used some other scrap wire that was tangled up in the mesh and used it to attached the pieces together near the ground, so no little critter could just slip in between them.

I’m hoping it works. It’s going to make filling the water reservoir in the middle (half buried, so water the roots) more difficult, though.

I’ll put up with it.

The Re-Farmer

Clean up and… there are no quick and easy jobs here!

Photo heavy post ahead! :-D

Today is supposed to be our last warmish day in quite some time, and we are very fortunate to have it. Just yesterday, a major system passed through. To the north of us, they had near blizzard conditions. To the south, it was rain instead of snow. Yet, there on the weather radar, was a clear spot in the system, passing over our area!

I am quite grateful for out continued mild weather! It gave me one last day to patch the other window in the pump shack.

Here is how it looked before I started.

In the forefront is an old forge my dad made. My brother told me he’d cobbled it together using an old blower that the tray of coals is attached to.

I’d already cut away the bigger saplings that had self sown in the area. Before I could start, I had to cut away some more, move the steel bars and that flat piece of metal with a slight curved shape to it (it turned out to be partly buried), out of the way.

I also pulled this out of the grass.

I don’t know what it is, but it’s in the pump shack now. My brother had said something about it in passing, but I just can’t remember. I understood that he felt it was worth salvaging and protecting, so that’s what I’m going.

After clearing things away, I was able to pick up all the broken pieces of glass.

As I looked more closely at the window itself, I realized it was just held in place with three bent nails. All I had to do was rotate them, and I could take out the whole thing!

So I did.

It’d hard to see, but each piece of glass has tiny little metal things holding the panes in place. They have pointed ends driven into the wood frame. The glass was then caulked to the frame, but most of that has long since fallen off, revealing those metal bits in the process.

I decided to use some rigid foam insulation to fill in the hole, as well as support the wooden pieces that were holding the remaining glass in place. I trimmed the inside edges of the insulation so it would fit more flush into the recesses of the wood.

Everything was very loose. Even the corner joins. Though the thickness of the piece of insulation would help keep things from moving around, there was still a pretty high chance other pieces of glass could fall out.

So, I got out the silicone caulking I had left and caulked it all, then put the window back in place.

It looks horrible, but it’ll do the job for now.

Here is how it looks from the inside.

Any work done on this building is just keeping it going as long as possible. It really needs to be replaced completely. Even the concrete floor is cracked and heaving. But it still keeps things inside dry, and it isn’t collapsing, like other buildings, so it’s worth it to keep patching things.

That done, I turned my attention to the old forge. Now that things were cleared away under the window, I wanted to move it next to the wall, for a bit more protection from the elements.

It had sunk into the ground and, as I was looking around to see what I had to work with, I found the plug for it! :-D

I tried lifting and shifting, and while I could move it a fair bit on one end, the end with the coal tray was much heavier. The tray itself has only two screws holding it to the metal, so I couldn’t even use that as a grip to lift.

I ended up grabbing one of the steel bars I’d set aside, using it as a lever. The ground was pretty soft, so I also tried using bricks, as well as another, shorter, bar I found in the grass, as support.

I was having a hard time getting things under it, though. There was something blocking me.

Did this thing have legs?

No!

Are those… wheels???

By now, I realized I would need to tip it over onto its side, because I just could not lever the heavy side out of the dirt and over the overgrown grass.

The coal tray had stuff on it, though, so I took that off.

It was asphalt shingles, covering the coal. The yellow metal piece was on top, but the round metal piece was something I found under the shingles, lying on top of the coal bits.

I then tried to use the bar to lever it around some more. There was really just one place solid enough to put the bar. The piece you can see under the coal tray is hollow, which I discovered when it started crumbling when I pushed the bar against it.

I did, eventually, manage to get it on its side.

Yup. Those were wheels! But they weren’t attached to the forge!

There was still some rotted wood attached. It was like a little wheeled scooter that the whole thing was resting on.

It wasn’t until I uploaded the pictures that I realized where the motor was. It is on the light end!

I kept trying to shift the forge, but the weight on one side made it very awkward to do anything.

I’d opened it before and saw someone had stuffed some inner tubes inside. Maybe I could take the blower pieces out or something, and lighten it?

There… is no blower in there.

What on earth was I seeing in there? Hidden away, under the inner tubes?!!

Dear Lord in Heaven.

It’s a grinding wheel.

Why on earth did someone put a grinding wheel in there?

Not that I mind too much. This might be the one I remember as I child. The log building it was in had been burned to the ground to get rid of it, and as far as I knew, none of the stuff inside had been removed, first. So I’m actually very happy to see this.

After moving it away, I started pulling other things out.

There was just so much stuff!!

I found 4 inner tubes, a gas can, a lawnmower blade, the throttle cable from a lawn mower, and even a spoon.

There are also blacksmith tongs, though one has the handle broken off. A couple of objects with lots of pivoting pieces on it. A couple of old metal legs, like off an old-style bathtub. Two ax heads, and more odds and ends

Two things in there really excited me. I don’t know what they are called, but from videos I’ve watched of people using carving benches, I recognize them. One end goes into a hole drilled into the carving bench, and the other holds the item being carved in place. It was something I realized I could really use, if I plan to extend my carving repertoire. I just had no idea where to find them – a hard thing to do when you don’t know the name of what you’re looking for – and some of the carvers whose videos I watched, commented on how expensive they are They’d made their own, instead.

Now I have two!

So I’m pretty excited about that!

Once empty, I was able to right the forge again.

After seeing the remains of the wheels it was on, I decided to take some of the glazed bricks I’ve been finding and put them under the forge.

Even empty, it was still hard to move! The light end, I could grasp and lift, but the heavy end was harder to get a grip on. I ended up using the bar to lever and shift that end, to get it onto the bricks.

I did finally get it in place!

You can see the bar I used to lever it.

The coal tray looked like it was cracked, but I think it was there for a purpose. The “crack” extends to some holes in the middle of the coal tray. Under the holes is the squared pipe. The air from the blower was directed under the coals through there.

I considered throwing away the wheels, but the frame they’re attached to looks like it might actually be salvageable, so I am keeping it for now. I just knocked the dirt and roots out of the spokes, first.

After that, it was time to clean up where the forge had been sitting.

I’d found a few metal bits and wires. Then some nails.

Then more nails. And screws.

And more nails!

I think a container full of nails, screws and other odd bits had spilled there. The last thing I wanted was for someone to step on them and get sepsis or something.

So I dug out what I think is the original lid for our septic tank, to use as a tray, and magnets.

Along with the nails, I found bits of spark plugs, a gas cap, the tooth of a hay mower, and miscellaneous other bits!

Once that was done, and my younger daughter helped me tuck the keepers I’d found into the pump shack, I enlisted her help to move the other thing I don’t know the name off. One of the pictures below is from when I first dug it out from beside the fuel tank, yesterday. This is another of those things my brother said was worth salvaging and protecting, so I wanted to move it into the pump shack.

In the older photo, you can see what looks like a completely sheered piece of steel, in the middle.

There was dirt and roots jamming one of the pieces sticking out the narrow side – in the first picture, it is completely hidden by grass. It now rotates freely again.

Between the two of us, we could not lift it! Not without risking injury, anyhow (and I think my daughter might have hurt her back trying, but isn’t telling me, so I won’t worry. :-( ). I’m astounded by how heavy this thing is.

One thing we noticed after trying is that some ?oil? leaked out.

I ended up rolling and flipping it, end over end, until it was under the coal tray of the forge.

We could hear fluid sloshing inside!

So that’s tucked away as much as it can be, for now.

My goodness, what a lot more work there turned out to be! But it’s done now, and we don’t have to worry about this stuff as winter comes in.

The Re-Farmer

New stove is in!

Okay, I am beyond excited right now!

The new stove is in, and it’s absolutely fabulous!!

Yes, it did also take a couple of hours to get it done, but not for why you might think.

First off, moving the counter turned out to be a lot easier than I feared. Once I moved the dining table as far into the corner as I could, I had enough space that I would not have to move any other shelves.

Once the drawers, which held most of the weight (especially the cutlery drawer!) were removed, I also found I didn’t need to empty the cupboards, either. Once I got the counter unstuck from where it has been sitting for so many years, there were no issues.

I admit, it was a lot less disgusting back there than I feared.

Also, yes. That’s a piece of toast on the floor.

Oh, dear God. I just realized.

There’s another piece of toast stuck to the back of the counter.

I have just returned from pulling the counter away from the wall and cleaning it out.

Those would predate our moving here. In fact, they probably go back to before my dad had to move to the nursing home. Which means they’ve been there for probably more than 5 years.

And yeah… it’s still actually less disgusting than I feared.

There were a couple of things I expected to find, since I was there when they fell behind the counter. I did not expect to find a new jelly bag.

I was wondering what happened to the second one from the package…

Then there was this.

This would go back to before my mom moved to the senior’s apartment she lives in now, so it’s probably been there for more than 6 years.

The counter itself turned out to be remarkably easy to move. It didn’t even catch on anything in the process.

Then it was time to shut off the breaker and move the old stove.

What the flash in the photo picks up, that I couldn’t see when I went to move the power cord, is that grease had dripped behind the stove, onto the cord.

That was really gross to handle. I couldn’t even put on the disposable gloves we would normally use. It’s so hot and sticky, I wouldn’t be able to pull them on. So I used paper towel to handle things.

Things were so sticky back there, it took more effort than it should have, to unplug the old stove.

*shudder*

Once the stove was clear, I peeled off the self-adhesive shelf liner that was used as a backsplash.

Then I was done. It may not have been a lot of actual physical labor to most things around – I easily did it by myself – but by this point, I was absolutely dripping with sweat.

The girls then took over and did the hard part.

Cleaning.

Those two are absolute saints.

That floor is just … wow. The difference between the part worn out from decades of feet, and the part under the counter, could not be more dramatic!

Clean up done, the girls got to use the time needed for everything to dry, to cool down and stop sweating. Then they put up the self-adhesive backsplash.

Then we finally unpacked the new stove from it’s box. After measuring the other counter, we found we did not need to adjust the legs – at least not before we put it in place. The daughter that was trapped in the kitchen used a level on the floor, and it definitely sloped downwards, away from the wall.

The height of the stove, without adjusting the legs, was exactly the same as the height of the counter, but a sloping floor would have to be accounted for. First, we had to plug it in and get it in place.

Here, you can see how the 4 pieces of self-adhesive tiles were placed for the backsplash. We will get a couple more and fill in the gaps, later.

Then one of my daughters was an angel and sprawled on the floor while her sister and I tipped the stove flat against the wall.

Which made it perfectly level!

I guess it’s good to know our walls are straight, if not our floors… :-D

That made it a lot easier for my daughter to adjust the leveling legs.

No more food sloshing to one side of the pot or pan when we cook, now!

Once everything was in place, back went the counter.

The new stove is the same width as the old one, but deeper, so it sticks out further than the other one did.

It also has a much larger oven, so we’re very good with this!

It’s going to take some getting used to having the controls in front.

Once the breaker was turned back on, the girls figured out how to set the time, using the 24 hour clock setting. Then they tested out the cooktop.

We are just entranced. I don’t think we’ve ever had anything so nice and new before. It heats up so quickly, it’s mind blowing! The larger front cook surfaces have two sides to their controllers. Use one side, it heats the full circle. Us the other, and it heats a smaller circle.

It also has no element in the oven, and the self-cleaning function is a safer, less power consuming, technological upgrade. We’ve had self cleaning ovens before, and never used them. This one, I actually will!

Best of all – no more sparks!

I am so glad this is finally done, and so thrilled with the stove itself.

Next thing on the list: replacing the taps and faucet in the kitchen sink. :-)

I’m really, really hoping someone installed shut off valves under the sink at some point. I’d really prefer not to have to shut off water to the entire house, just to work on the kitchen sink! :-D Not that I’ll have anything to do with replacing that. A much more able-bodied daughter is going to have to crawl under the sink. :-D I actually went back to pictures I took from the last time we had to go under there, when the drain on one of the sinks broke apart. None of them show enough that I can actually say for sure, and we can’t remember. We don’t really use the cupboards under the counter the sink is in. Only one drawer and one cupboard at the end is actually positioned in a usable space.

Well, we’ll find out soon enough.

Until then, we’re just going to try not to melt away.

The Re-Farmer