Thanks to my wonderful daughter taking over for me, yesterday, we had a couple of fresh loaves of bread to try this morning.
I’d started by having the dough baby soak overnight, then added flour to make a sponge. After several hours, this is what the sponge looked like.
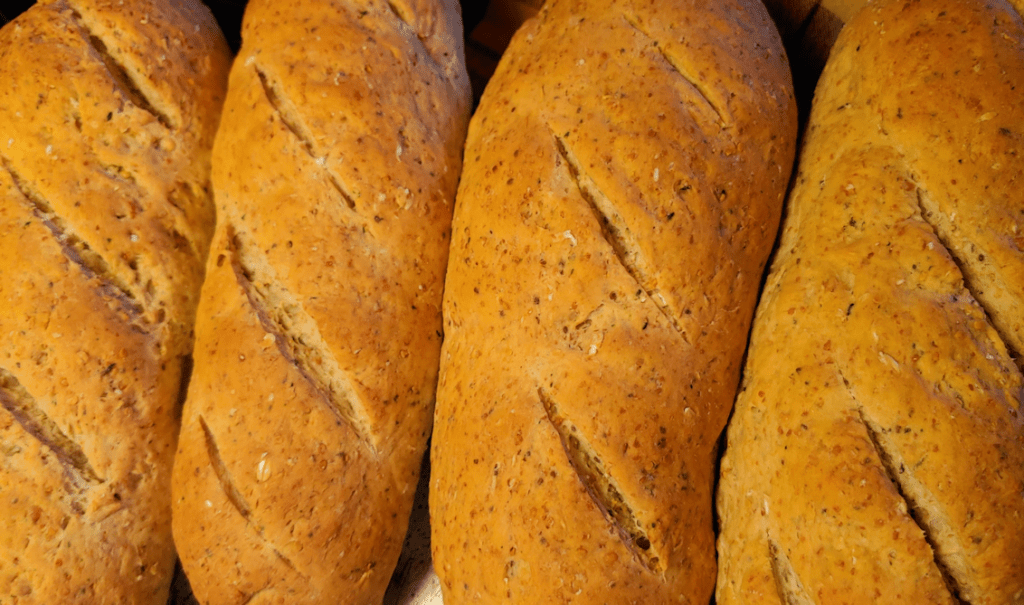
My daughter set aside half of this, then used the remaining sponge to make our basic bread. Instead of using loaf pans, she made two big, flat loaves on a baking tray. Here is what I used for breakfast, this morning! :-)
The bread had a very mild sourdough flavour. For all the months the dough baby sat in the flour, it did not get any stronger in flavour. It was mild enough that I could put them with slices of brie under the broiler, and the flavour of the bread did not overpower the flavour of the cheese. The bread had a very nice texture to it, too.
As for the sponge that had been set aside; my daughter had used the flour from the dough baby’s canister in the bread, but there was still some left. I kneaded some into the sponge to make a stiffer dough, then refilled the canister half way with fresh flour, added the bough baby, then topped it with more flour. The canister is semi-transparent, so when I checked on it an hour or so later, I could see the dough baby had risen enough to work its way through the flour, so I gave the canister enough of a shake to cover it up again. With our temperatures slowly cooling (though I saw a 30C day in the forecast!!), we’ll be using this more often, which should further develop the flavour.
As someone who has never managed to keep a sourdough going for more than a couple of years, I really appreciate how low maintenance the old dough method is. If we can’t going to bake as often, it’ll just stay in its flour bed and dry up. It doesn’t need to be constantly used, fed, stirred, or kept warm. I think this will work out really well for us!
With how hot it’s been all summer, we’ve done no baking at all. It was simply too hot in the house to do baking and heat it up even more! Only recently did my daughter finally start baking some bread again.
Which means that our dough baby has been sitting in its flour, unused, for several months. That’s one beauty of using this type of dough starter; it doesn’t need to be regularly used and fed, the way a wet sourdough starter needs to be, and will just go dormant.
Last night, I woke it up! :-D
It really doesn’t look any different, once it was dug out of the flour.
The flour it was in, however, did look a bit different.
The dough baby has its own canister of flour, which had started to form a sort of shell around the dough. When I opened it, I could really get that sourdough smell, and it was as much in the flour as from the dough baby. I will be using this flour when doing the bread baking, as it is probably infused with yeast, too.
As dry as it was, the dough baby had lots of air pockets in it, making it easy to crumble apart.
I stirred in 2 cups of very warm water, then set it in a warm oven overnight, lightly covered. After a few hours, I checked it and decided to go ahead and cheat by sprinkling a bit of traditional yeast (not the fast acting type) and a bit of sugar into it as well, then swirling it about.
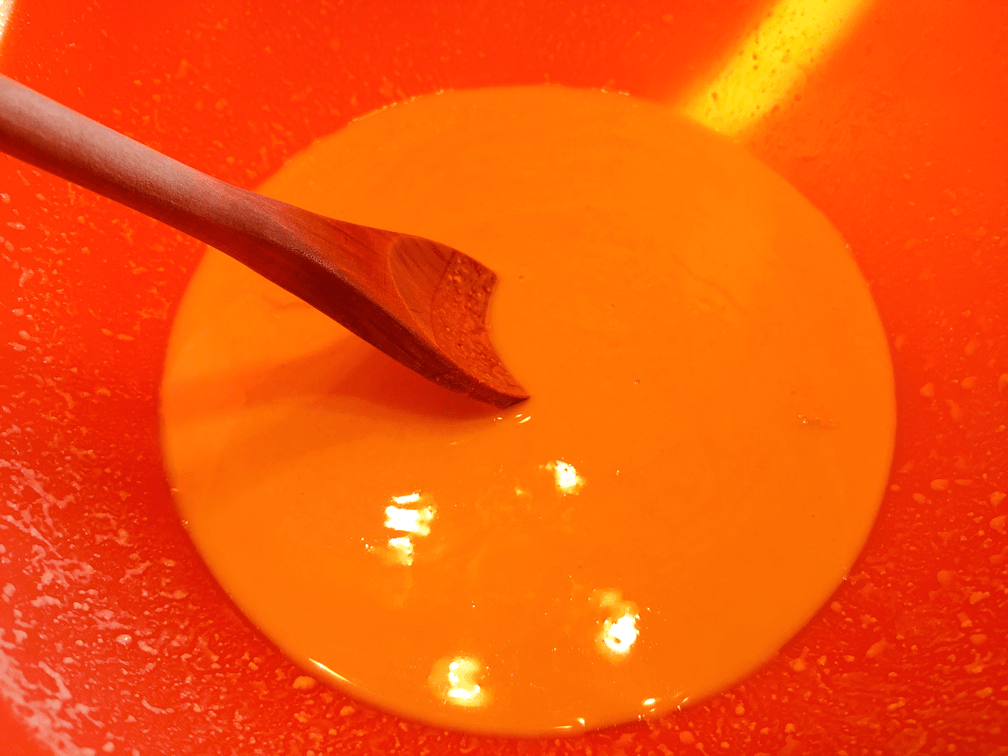
This is how it looked in the morning, after being stirred again.
That orange bowl really messed with the colour!
Anyhow, it was lightly bubbly by morning. After stirring it down, I added some of the flour from the dough baby canister.
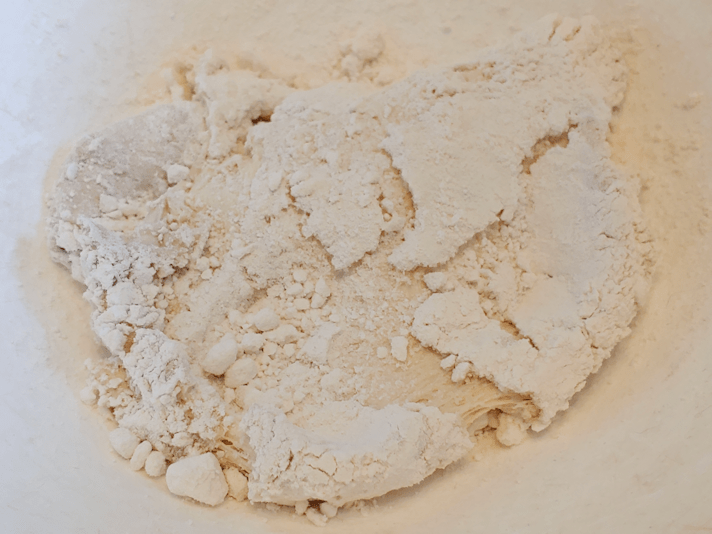
I tried to get some natural light on there, so you can see the proper colour!
I broke up the flour as much as I could, but I’m not too worried about the lumps at this point. I added maybe a cup and a half of flour to get it to the consistency of a thick batter. It then went back into the warm oven for the sponge to develop.
It will take a long time for the sponge to develop without adding more commercial yeast, so bread baking with it is going to be an all day process, today! It’ll be checked regularly, but for this sponge stage, I figure it will take a few hours before I continue with the bread baking. :-)
A while back, we tried a recipe for overnight bread, which you can read about here, and find a link to the original recipe we used.
I then tried an “over day” version, using the dough baby from my Babcia’s bread experiment. It was fantastically successful!
We’ve made it again, as a pretty basic no-knead bread and, once again, it turned out awesome!
If you are new to this blog and don’t know the background to this, you can read the story behind my experiment to try and recreate the bread my grandmother made in pre-WWII Poland, as my mother remembers it. Or you can check out all the posts about it at this link. All links will open in new tabs, so you don’t lose your place here!
Here is how we made No-knead bread, using the old dough method.
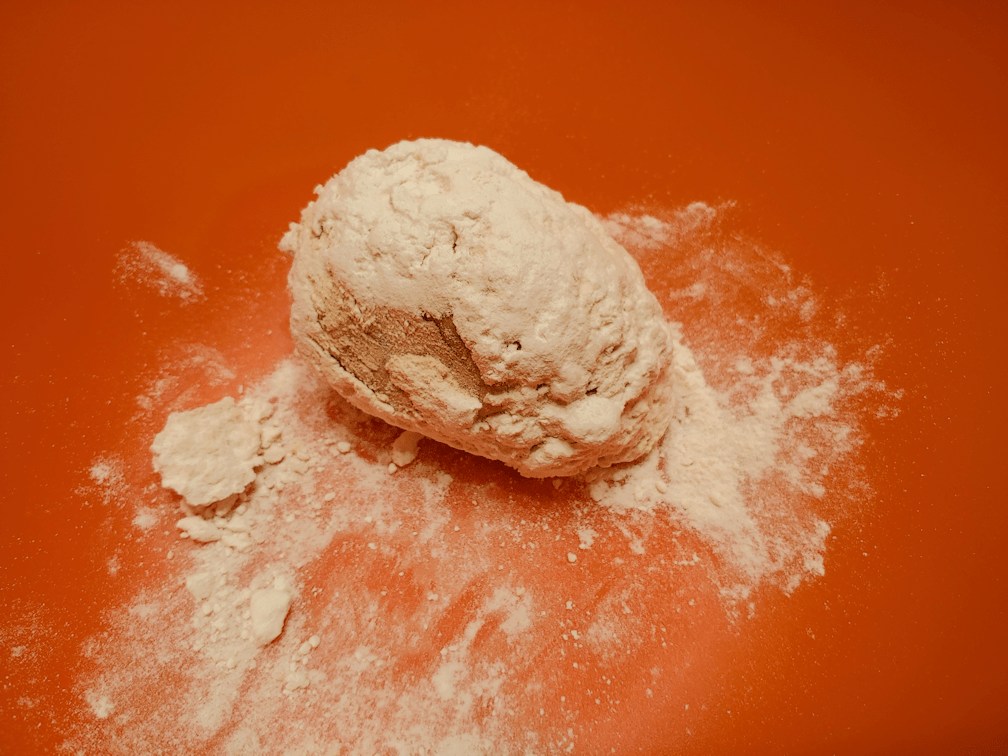
The first step is to dig the dough baby out of the flour it sleeps in.
My Babcia did bread baking once a week, and when the old dough sits that long, it tends to be dry enough to break apart into pieces before reconstituting it. This time, the dough baby had not been sleeping in its bed of flour for that long, and it was still quite… doughy! :-D
So I just pulled it apart a bit and placed it in the bottom of a very large bowl.
I don’t know how much that is. Maybe about 2 cups, including the flour stuck to it? The dough baby rises and collapses while stored in the flour, and I made no effort to measure the quantity.
I also pre-measured 2 Tbsp each of course salt and sugar, and 1 Tbsp of yeast.
The yeast would be optional. The dough would need more time to rise without it, which would give more of a sourdough flavour.
Four cups of very warm water was added to the dough baby. Since it wasn’t dry enough to break into pieces, I spent some time stirring it and breaking it up in the water.
Then, the sugar and yeast was added and mixed in, the bowl loosely covered, and it was left for about 10 minutes.
I like to use traditional active dry yeast, rather than quick or instant dry yeast, but that’s just me. The traditional yeast needs more time to proof in the liquid compared to the quick yeast, and the instant yeast wouldn’t need to be added at all at this point, but would be mixed in with the flour.
If I were not using yeast, I would leave the water, dough baby and sugar mixture in a warm place for much longer, checking regularly to see how active it was.
Here is how it looked after 10 minutes. I stirred it again to break up the dough baby a bit more.
Then it was time to add some flour.
I started by adding 3 cups of flour. It’s easier to mix in that amount compared to starting with just one cup.
I decided to use Durum wheat flour at this point, just because I have it. Use whatever flour, or mix of flours, you like best!
After the first 3 cups was thoroughly beaten in, I added another cup of flour and the salt.
More flour was beaten in, about a cup at a time at first, then a half up at a time.
How much flour to use is something I’ve never been precise about. I know there are bread bakers that weigh and measure precise amounts, but in my experience, that just doesn’t work. The amount of flour needed can depend on things like how fresh the flour itself is, to how much humidity there is in the air.
With 4 cups of water, I would have expected to work in at least 8 cups of flour for this recipe (with my usual kneaded bread, I typically used 5 or 6 cups of flour to 2 1/2 cups liquid).
We are very, very dry right now.
Today, I worked in 7 1/2 cups of flour, and probably could have done with a bit less.
By this point, I was working the flour in with my hand rather than trying to stir it with a spoon. If you have an electric mixer with a dough hook, go ahead and use it!
Before setting it aside to rise, right in the same bowl, I sprinkled some flour over the top and sides, in case it rose high enough to touch the bottom of the bowl’s lid.
Lightly cover the bowl, then set it in a warm place for about an hour. With our chilly our kitchen is in the winter, I heated our oven to its lowest setting (145F on “warm”), then shut it off before I started mixing the flour into the dough. The covered bowl is left in the warm oven, with the light on, to rise. Anywhere that is warm and draft free will do.
Here it is, after an hour. It just barely touched the bottom of the lid! :-D
The dough it then pushed down and worked a bit to incorporate the flour that had been dredged on top.
Next is a very, very important step.
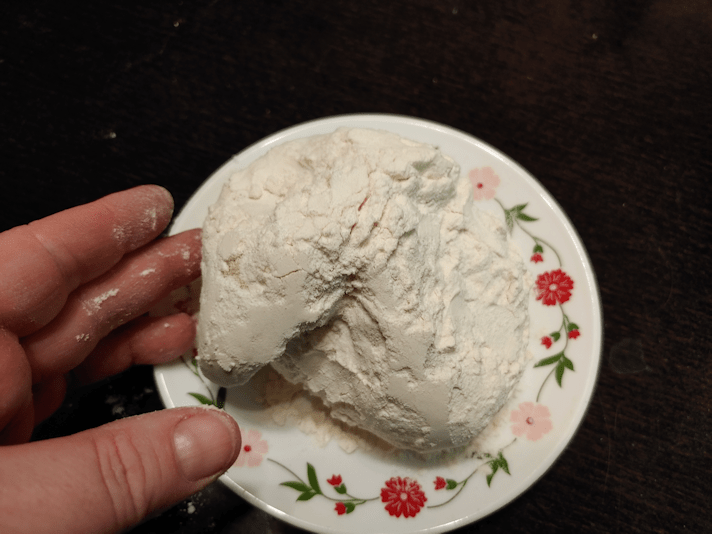
A piece of the dough needs to be removed and set aside for the next batch of bread!
I dumped some flour on a container and plopped about a cup of dough onto it.
Once the new dough baby was set aside, the rest of the dough was dumped onto a 9×13 inch baking sheet that was lined with parchment paper. The last time I made this, I used a parchment paper lined lasagna pan, but I could also have split it into two parchment paper lined loaf pans.
If I didn’t have parchment paper, I would have well oiled the pan, first.
Speaking of oil…
After spreading the dough out to fill the bottom of the pan, I stabbed at the dough with my fingers to create “dimples”, then topped it with oil, course salt and dried parsley flakes.
I happened to still have some fake truffle oil that I used, but an olive or avocado oil would work just was well.
The pan was then set aside for the dough to rise again. Since this batch is so flat and thin, I started preheating the oven for 450F right away. Had I used loaf pans or the lasagna pan again, I would have let it rise longer before preheating the oven. If I had used no yeast at all, it would be left in a warm place until doubled in size.
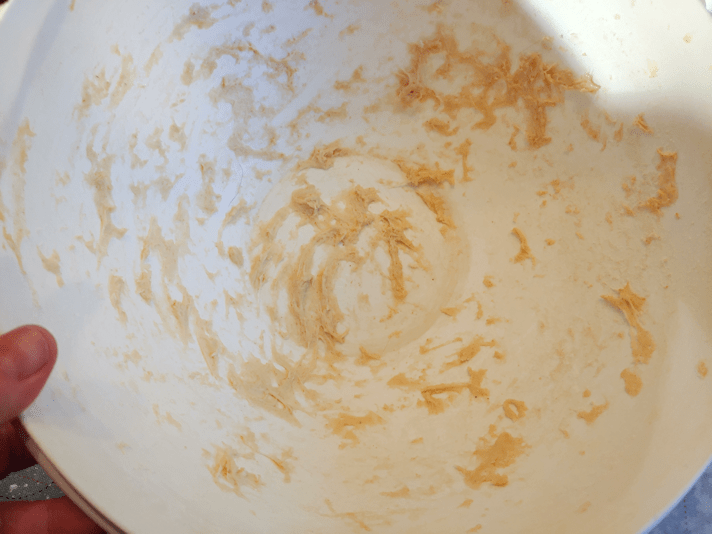
While the shaped loaf was waiting to go in the oven, there is this to deal with…
The bottom of the bowl still has quite a bit of dough stuck to it!
We can’t let that go to waste!
Into the bowl went the new dough baby, and the flour it had been resting on.
While working the flour dregs into the dough baby, scrape as much of the dough stuck to the sides and incorporate it into the dough baby.
You probably won’t get all of it off the sides, which is okay.
The dough baby is now ready for a nap. I have a canister of flour that I bury it in, but it can also be buried right in a bag of flour, as long as you’re not planning to use the flour for anything else in between bread baking!
After the dough baby has been buried, it will rise quite a bit before collapsing in on itself, breaking through the surface of the flour. Remember to check on the dough baby later on, to make sure it is still covered in flour.
Once the oven is ready, place the pan of bread into oven and bake. If you wish, place a container with about a cup of water on the rack under the bread pan, to add some steam to the oven as it bakes.
For a very flat loaf like what I made today, it took about 25 minutes. A deeper loaf, or a pair of loaf pans will likely need 30-40 minutes. Bake it until it looks like this.
With the oil added to the surface, it will have a deep, golden colour when it’s ready.
When baked, remove from the oven and left to cool for a few minutes. Once it is safe to do so, remove the bread from the pan and onto a cooling rack (parchment paper makes that job a LOT easier!).
I really like the big, flat slab of bread, but it is a bit hard to cut a slice off! :-D
Here is how it looks on the inside.
The crumb is light and fluffy, yet still wonderfully chewy. The star of the show, however, is that golden, flavorful top crust! It’s just a lovely and delicious combination of textures and flavours.
The only problem with this bread is how difficult it is, not to just scarf it all down right away! :-D
Here is the recipe.
Old Dough No Knead Bread
Ingredients:
old dough set aside from previous bread baking
4 cups warm water
2 Tbsp sugar
1 Tbsp traditional active dry yeast (optional, or use 2 Tbsp if you don’t have old dough)
2 Tbsp course salt
about 7 or 8 cups of flour
small amount of good quality oil (olive oil, avocado oil, etc.)
small amount of dried parsley and course salt
Break up the old dough into a large bowl. Pour water over the old dough and stir. Add the sugar and yeast and leave to proof for about 10 minutes. If you do not have old dough, use the larger amount of yeast and proof it in the sugar water. If using only the old dough and no added yeast, leave the bowl in a warm place until the mixture is bubbly.
After the yeast and old dough has proofed, add 3 cups of flour and mix thoroughly until it forms a very smooth batter. (An electric mixer can be used at this stage.)
Add the salt and 1 cup of flour, mixing thoroughly.
Add more flour a little at a time, mixing thoroughly after each addition, until it reaches a thick but sticky consistency. Use your hands to mix in the last of the flour. (If you have an electric mixer with dough hook attachments, switch to the dough hooks at this point.)
Leaving the dough in the bowl, dust the top of the dough with flour and cover loosely. Place in a warm spot to rise until doubled in size.
Prepare baking pans by lining with parchment paper or oiling thoroughly.
When the dough has risen, punch it down again, folding it into itself to incorporate the flour dusted on top.
Dust some flour on a small plate or bowl. Remove about a cup of dough for the next batch of bread, setting it aside on the floured container until later.
Pour the remaining dough into the prepared baking pan(s). Using your hands, press the dough to fill the pan to the edges and corners, then stab into the surface with your fingers to create dimples in the dough.
Carefully sprinkle oil across the surface of the dough, then use your hand to spread it evenly across the surface.
Sprinkle the oiled surface with course salt and dried parsley.
Set aside in a warm place to rise.
While the bread is rising, return the dough set aside earlier to the mixing bowl, along with any flour in the plate or bowl. Use the flour and the dough ball to scrape off any remaining dough stuck to the surface of the bowl, working the dough ball until smooth. Shape the dough into a ball, then bury it in a container of flour, for use in the next batch of bread.
When the pan of rising bread is almost doubled in size, preheat the oven to 450F.
Place the bread in the centre rack of the preheated oven; if desired, place about a cup of water in an oven proof container on the lower rack to create steam.
Bake until the bread is a deep, golden colour – about 25 minutes when using a 9″x13″ baking sheet, about 30-35 minutes if using loaf pans, or a cake or lasagna pan. The finished loaf should sound hollow when the bottom is tapped.
Set aside to cool in the pan for a few minutes, then transfer the bread to a rack to finish cooling.
I experimented with the no-knead, overnight dough recipe I’d made before, using the old dough bread baby from my Babcia’s bread experiment.
I didn’t take any process photos this time, since I was winging it. The “overnight” dough became an “over day” dough, for starters! :-D
Instead of making a pair of loaves, I made one giant loaf in a parchment paper lined lasagna pan.
As I was spreading the dough out as evenly as I could, I found myself thinking it was looking a bit like a focaccia. Too bad we’re out of olive oil.
Then I remembered… we still have some fake truffle oil (the only kind we can find, or afford!) left.
I ended up drizzling the top with the fake truffle oil, spreading the oil around evenly, then stabbing the dough with my fingers to make lots of little holes, which also helped even the dough out in the pan more, before sprinkling on some coarse salt and dried parsley.
Of course, it wasn’t real a focaccia recipe, and it rose quite a bit. This is how it turned out.
This turned out to be, hands down, the best bread I have ever baked! Definitely a winner!!
I think the next time I try this, I’ll use a baking sheet instead of the lasagna pan, to make a thinner bread. Mostly, because I think it’ll be easier to slice than this was, but it’ll also give a larger surface for the oil and salt crust. The texture and flavour it gave was amazing!
Next time, I will definitely take process shots and share the details here!
Yesterday, I made another batch of bread using the old dough stored in flour as a starter. I did change things up a little bit, though.
One of the things about trying to recreate how my grandmother did this is, I’m relying on my mother’s childhood memories. There would definitely be things my mother never noticed, never saw, or simply doesn’t remember. In reality, my grandmother would have made do with what she had, so while their bread would certainly have been as basic as flour, salt and water, if she had had other ingredients, she would have used them. I know they would have made their own butter and rendered their own lard. They may even have pressed their own seed oil (my mother does remember processing hemp, so they likely had hemp oil, too). They likely had honey or some type of sugar, if only rarely. It’s hard to say, though, since my mother doesn’t remember very much of that, and none of my research so far has turned up more historical detail. There just isn’t a lot out there to describe how people in poor, backwater villages ate because, frankly, most of the people recording such things either didn’t know about them, or were indifferent to how ordinary people lived.
I do think that there is room to experiment a bit and still be pretty true to how Babcia would have done things, even if they were only on special occasions or when she happened to have access to ingredients.
With yesterday’s baking, one of the things I changed up was how long the old dough was left to soak in warm water. My mother says it was left overnight. My grandmother had a large lump of old dough, for her weekly baking of a dozen or so loaves, but I’m not working with such quantities. The amount I’d set aside from the last batch was the largest I’d done yet, and it was getting too big for my canister of flour. In fact, I didn’t get any pictures of it when I took it out, because there was just too much flour all over, it was bigger than the plate I’d brought to hold it, and I just broke it up into my crock right away.
When the old dough was left to sit in a warm oven overnight, it seemed to me that this was too long. It was no longer actively bubbling by morning. So this time, I decided to just let it sit for a few hours. I also added a small amount of sugar (about a tablespoon to 2 cups of water that had been boiled, then allowed to cool down to the right temperature) to feed the yeast. Last time, I supplemented with a bit of commercial yeast, but not this time.
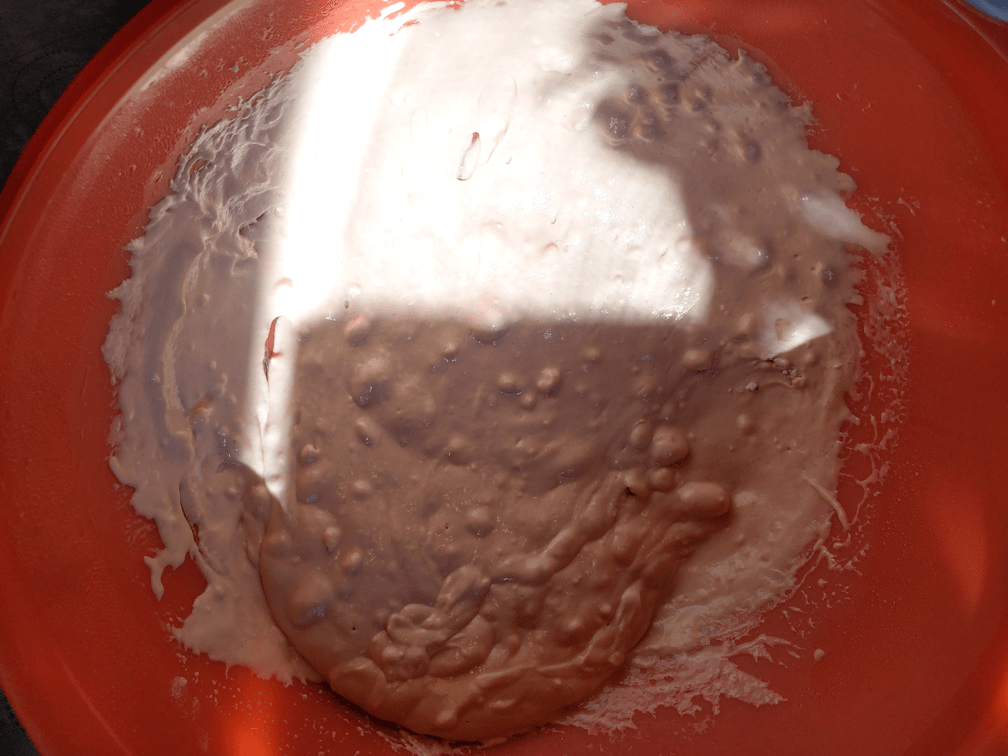
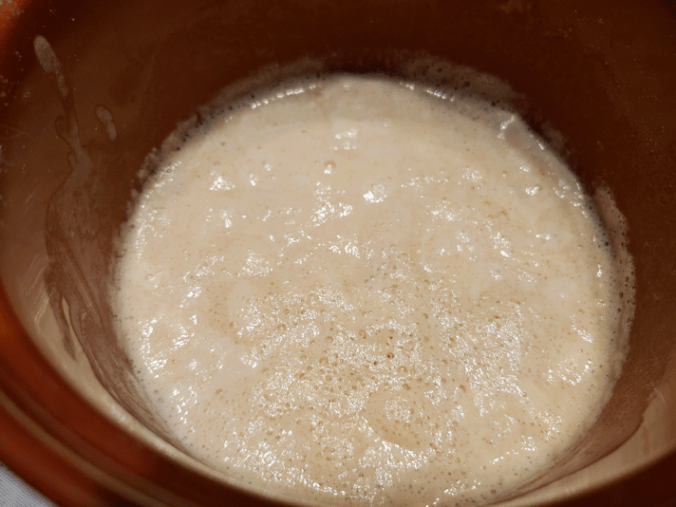
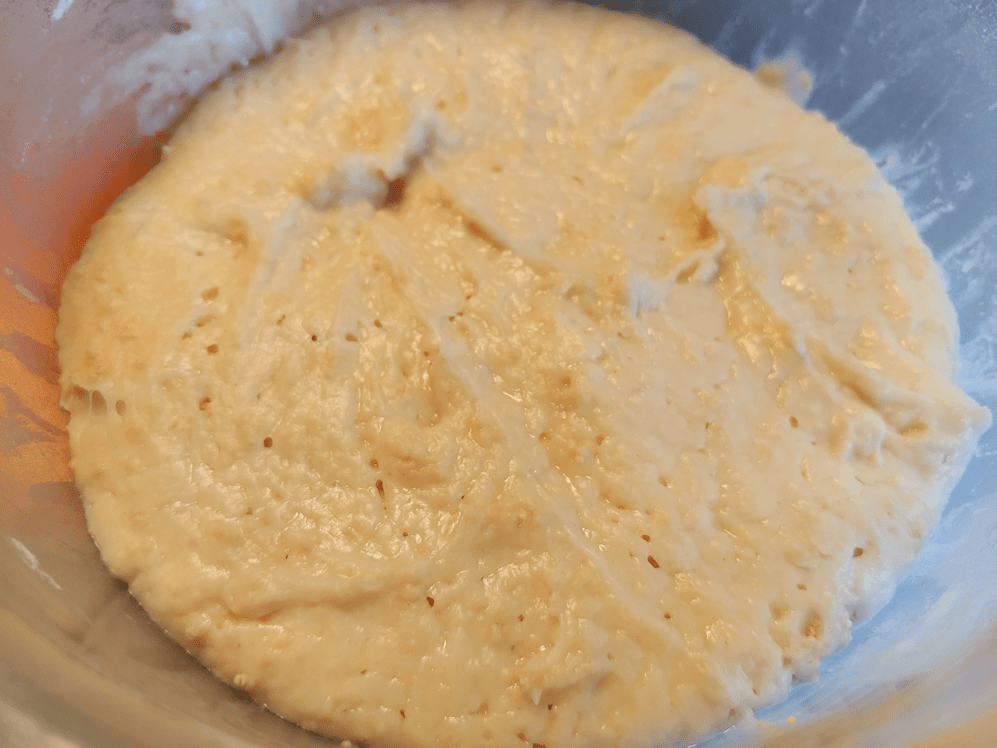
This is how it looked, after about three hours sitting in a warm oven.
Just look at how bubbly that is!
I did add a bit more sugar (another tablespoon or so) to the dough as I mixed it, too. No added yeast. This was a slightly larger batch than before, too. Previous batches used about 3 cups of water in total, to 4 or 5 cups of flour, but this time I used about 7 cups of flour to 4 cups of water. Then, after cutting away a piece of dough for next time, I tried something else.
I kneaded in a cup of thick cut rolled oats. This is something my grandmother would have had, at least sometimes, so I have little doubt that she would have included it, when it was available.
Normally, I would have added the oats at the very beginning, leaving it to soak in boiling water until it was cool enough that the yeast or sourdough started could be added. I wasn’t sure how that would affect the dough set aside for next time, though, so I left it until later.
I knew the flakes would still soften while the dough was rising, and it would add some texture, too. Kneading it in was a challenge, though! I deliberately left the dough stickier than I usually would have, just to make working in the rolled oats easier, and it was still trying to fly all over the place! LOL
Unfortunately, I completely forgot to take pictures after this!
The dough itself just did not want to rise! Yes, it was in a warm oven, but I’m using a plastic bowl (metal can react with sourdough, affecting the flavour, and this is pretty much a kind of sourdough), so I didn’t want to make the oven much warmer. It did rise some, and again as I formed the loaves, but even the smaller loaves didn’t rise as well. I really should be leaving it to rise for far longer, but it’s just to dang cold.
It does rise more while baking, of course, so that helps. The bread was still dense, but it did still have plenty of air bubbles in it. The rolled oats did soften up, as expected, while still adding a bit of nice texture and a subtle flavour.
Speaking of subtle flavours, there is most definitely a light sourdough taste developing.
I made a total of 8 small loaves out of this batch; 4 round loaves (basically just big buns!) baked in a cast iron pan, and 4 long loaves baked on a pizza stone. At 400F, the round loaves needed about 40-45 minutes to bake, while the long ones needed about 30-35 minutes. I have no idea how long my grandmother would have baked hers, since she had a masonry stove, and I don’t know what method she used to determine when the temperature was right.
As for the bread it self, it was quite tasty. I like the addition of the rolled oats. This morning, I cut one of the little long loaves into slices, pan toasted one side in butter, then topped each with a slice of mozzarella, for breakfast. It was very nice! It probably would have been nicer to broil the cheese, but I didn’t feel like fussing with the oven. :-D
Next time, I’ll have to remember to take pictures through the whole process. :-D
For the next while, as I remove part of the dough from one batch to use in the next batch, I will be taking out slightly larger pieces of dough, to make larger batches of bread with it, next time.
Our flour canister is tall and narrow, so I’ve made a point of flattening the dough baby a bit before burying it in the flour. When I opened the canister last night, I found the dough baby had grown enough to emerge from the flour like a mushroom!
I think today’s dough baby will the the last one I can fit into the canister! I’ll have to start burying them directly in the flour bag. They get so big! Which is encouraging, since that shows how lively the yeast is, so it’s a good problem to have. :-D
The dough baby was light, with a slightly crunchy dry shell, and a thick bubbly interior. The larger size made it a bit harder to tear apart to put in the little crock to soak overnight, so the pieces were a bit on the large size. That did not seem to make a difference to how it looked in the morning.
I soaked it in 2 cups of warm water overnight then, because I wanted to increase the amount of dough I was making, I cheated a bit and let maybe a tablespoon of commercial yeast proof in another cup of warm water. Right now, I’m getting enough to make the equivalent of 4 small loaves, and I eventually want to be making the equivalent of 4 large loaves. I don’t plan to get to my Babcia’s level of a dozen loaves at a time! :-D Making enough for 6 or 8 loaves, maybe, but not a dozen!
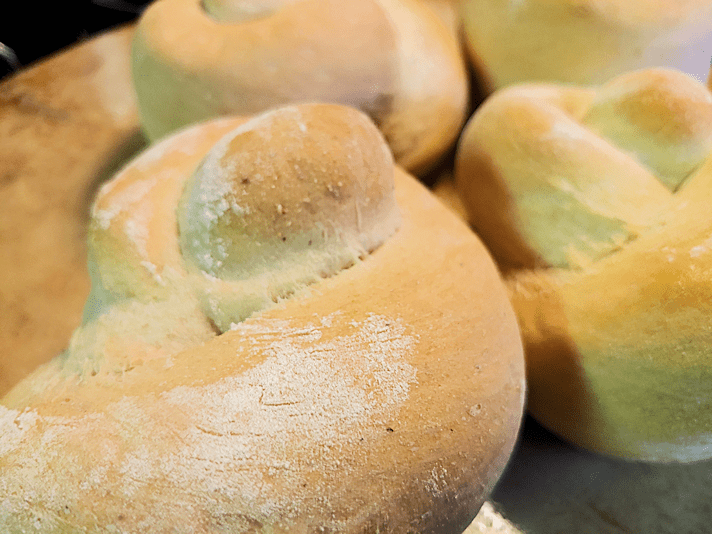
Once again, I used a mix of all purpose and Durum wheat flour, and let it rise only once before shaping. When I am no longer using commercial yeast, I’ll add an extra rising again. I also split it to do one half plain, and one half fancy. For the first half, I made it into 4 knotted buns and used a cast iron pan to bake them in again, which is working out very well.
The second half got divided again, to make a pair of rolled loaves.
Each piece was rolled out, then small pieces of leftover ham were scattered evenly, followed by generous amounts of shredded sharp cheddar, mozzarella and Monterey Jack cheese.
Before rolling them up, I did dampen the edges with water, but I did not try to seal the dough.
Once rolled up, the ends were tucked under, and they were left to rise.
The knotted buns were baked first, and turned out quite adorable.
The ham and cheese rolls, as expected, did leak out the bottom seam!
That’s okay. It just got crispy on the bottom of the pan, for some extra deliciousness. :-)
I would not recommend doing this without using parchment paper. :-D
A huge bubble formed under the top, as the cheese melted and the layers collapsed below. That did make it a bit hard to cut through! :-D
The ends that were tucked under were a lot more substantial. I the slices where the large bubble formed, the top crust was almost like a fancy chip! :-D
We had them for supper with tomato soup. It was a very nice combination! :-D The crispy cheese bits made for a lovely little treat, too.
After yesterday morning’s cat disaster, the girls were kind enough to drop their own projects and take over cleaning up.
While I was doing my rounds outside, the furry little monsters created another mess. One of the jade plant posts I’d managed to shield from their digging got knocked to the floor. *sigh* I was able to repot the plant. Not sure if it will survive. Once again, the girls took over the clean up so I could take care of other things. At least I wasn’t bread baking today!
The one down side of using my grandmother’s method to bake bread is, once I take the dough ball out of the flour and start it soaking overnight, it must be used the next day. There’s no way to postpone it if other things happen!
By the time we were doing cleaning up and putting things away, I started the bread baking much later than planned.
I did, however, cheat a bit. I wanted to mix up more dough, so I could take off more to set aside, for larger batches in the future. As it was, the overnight soak was not looking as active as I would have liked, so I did end up adding some yeast and a touch of sugar, and let that bubble up some more.
Then, since I have it, I used half all purpose flour, half durum wheat flour.
This is after it had about an hour to rise.
I notice a definite difference in the dough, when using the durum wheat flour. The dough feels smoother and more elastic. It was very noticeable when making the pasta, but even at half-and-half, for the bread, it is much nicer to knead.
My grandmother would have used whatever flour they had, so mixing it up like this is probably not all that different from how she did it.
After removing a portion to set aside for the next batch, I split the dough in half. The first half was left plain, though I did have some fun with it, anyhow.
I split the dough into 4 pieces (because there’s 4 of us), and made knots.
The resulting bread was a bit denser and chewier with the durum wheat flour in it. We all like our bread on the toothsome side, so we quite enjoyed it.
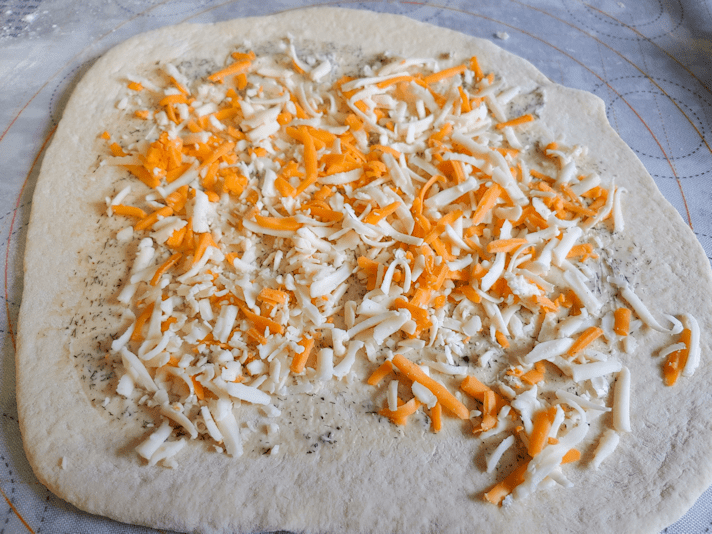
For the other half, I was going to do a cheese roll, but my daughter suggested rolling and folding it. With the extra gluten in the durum wheat flour, it could actually handle that, so I have it a try! This time, I made two loaves.
After rolling the dough out flat and as thin as I could, I used some of the herb butter my husband had made. I don’t know what all he included in there, other than a LOT of dill (the container slipped…), some caraway seeds, and a touch of lemon juice.
Then I added some shredded cheese. It’s a mix of sharp cheddar, mozzarella and Havarti.
Then I folded it in on itself.
It then got rolled out slightly and folded again, before final shaping. I had to use a touch of water to get the edges to stick closed.
Once in the pan, I flattened them out a bit more with my hands, before leaving them to rise.
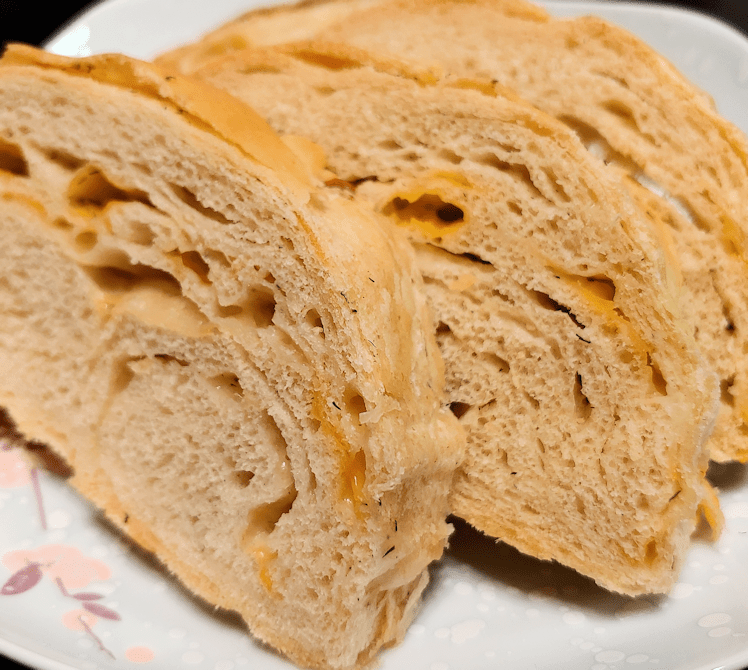
Of course, some of the cheese did make its way through the dough as it baked, but my goodness, it looked and smelled wonderful!
It was quite flaky on the outside. On the inside, the dough absorbed much of the butter, leaving cheesy little pockets all over!
It was quite enjoyable! I don’t know that I would go so far as to do the folding method again (though it would be awesome to do that again with some sliced green onions, to make a version of green onion cakes!), but I definitely do it as a cheese roll in the future.
Until then, I am not going to have some with my lunch!
Okay, so after accidentally killing off our ball of old dough “yeast”, I had to start over. Since I have no idea how my grandmother got her first ball of old dough, this is all a guessing game, anyhow!
This time, I went with another old technique: the sponge.
It’s just 2 cups warm water, 2 cups flour and 2 Tbsp of yeast, mixed together. This is the sort of thing one might put into the fridge overnight, to bake in the morning. Instead, I put it in the oven that was warmed up to its lowest setting, then turned off.
After about an hour or more, the resulting sponge was all soft and fluffy!
I added another half cup of warm water, which also made it easier to transfer it to my big mixing bowl, then added the salt and flour, as usual.
Once I’d kneaded in as much flour as I wanted (I have to catch myself and not add too much!), the dough was set aside to rise in a floured bowl. Once again, it went into a warm oven to rise.
But not before I took out a dough baby! My mother described my grandmother as taking dough out for the next batch after the second rising, when she was shaping the loaves. Since I’m using actual yeast in this, I did only one rising before shaping the loaves. I flattened the ball out this time, to see how that changes things as it sits buried in the flour.
As for the rising dough, it ended up taking about 2 hours, even with using commercial yeast!
This would have been a 2 loaf recipe, but I decided to play around a bit.
I made 4 plain mini loaves, first.
Yes, there are only 3 in the picture. My husband already ate one. :-D
After taking the picture, I ate one, too!
The other half was used to make surprise buns. During our city shop, I’d found a gouda-like cheese (I can’t remember what it was actually called) with truffle in it. There was still some left, so I cut it into small slices and wrapped them inside the dough.
I did try and seal the dough well, but as you can see in the photo, the cheese still made its way out, and started bubbling in the middle!
I can hardly wait to try it out!
With our new dough baby, I will have to make a point of using it every few days again. Since I didn’t start out with an “instant sourdough” yeast, it will take longer to develop that sour flavour. At least, that’s my assumption.
I will also keep taking the dough baby out for the next batch at the start, as the dough it being setting aside to rise. That way, I can do things later on, like knead baking soda in again, or knead in things like herbs or shredded cheese or anything else that catches my fancy.
Ah, I was afraid of this. I managed to kill the dough ball.
My mother describes how her mother would bake only once a week. So after working using the old dough after letting it sit in the flour few a few days, this time, I left it longer. Last night, I took it out and prepped it to soak overnight, as usual. Unfortunately, I did not have my camera with me.
The dough ball didn’t look any different on the outside from before. The extra time did mean the inside was drier, which I did expect. It was basically a hollow ball. Being drier, it was easier to break up into small pieces. I added 2 cups of water that had been boiled and allowed to cool to the right temperature (because of concerns with our well water), and it was set in a warm oven with the light on, overnight.
This is what it looked like this morning.
Yeah. That yeast is dead.
In stirring it up, the dough was completely dissolved, but no hint of yeast activity.
I can say with confidence that the extra time buried in flour did not kill the yeast. I could have dehydrated it completely, and it should have reconstituted and kept right on going.
One of the things I mention in there was that I “cheated” by using baking soda. If you’ve worked with sourdough recipes that called for baking soda before, you know what happens! There is a lovely chemical reaction that results in a light, fluffy dough or batter.
My mistake was, I didn’t take the dough ball out before I added the soda. That chemical reaction would have continued after I buried the dough ball in the flour, which is why it still developed a hollow center. However, as I thought might happen, the yeast was spent in the process. I didn’t remember to take the dough ball out until too late in the process, but I hoped that maybe it would still work. Alas, it did not.
Well, this IS and experiment!
So I am restarting the process. I don’t have the “instant sourdough yeast” I used before, so I am using regular yeast to make a sponge, which is currently in a warm oven to get all spongy. I’ll post the details later, but it is also a very old technique. It will slow down my bread baking plans for the day by quite a bit. Ah, well. That’s okay. It’s a learning process, and that’s the whole fun of it!
Last night, I prepared the dough ball from our previous baking. I was really curious about our bubble!
Seeing this reminded me of a story my mother told me, when I was a child, helping her bake bread.
There was a young couple and, while the husband was at work, the wife decided to bake bread. The only problem was, she’d never baked bread before!
She followed the recipe and set the dough aside to rise.
It wouldn’t rise.
After a very long time, the wife decided she had failed somehow and was feeling quite ashamed of her failure. Her husband would be coming home from work soon, so she decided to hide the evidence by burying the dough in the garden.
It was, however, a sunny and warm day. Some time later, her husband happened to glance out the window and saw what appeared to be a giant white mushroom growing in the garden!
The wife didn’t realize the house was too cold for the bread to rise properly, but once warmed by the sun, it rose quite enthusiastically!
Alas, the poor woman’s secret was out, and she had to explain to her husband why there was a giant bubble growing in their garden. :-D
I was talking to my mother on the phone just a little while ago, and told her about the bubble that emerged from the flour, asking if she knew what it made me think of when I saw it.
She knew exactly what that was!
We got a good laugh over it!
So what did this bubble look like when I dug the bread egg out?
Rather funny, I thought!
Like last time, it was light, with a dried, crisp outer shell, and lovely, bubbly dough inside.
I broke it up into pieces, putting it in a crock with 2 1/2 cups of warm water – the full amount I would be using in the dough – and set the crock into a warm oven with the light on, and left it overnight.
Here, you can see how it looked the next morning, after a good stir, and how the finished dough looked as it was set aside to rise.
Since I expected this to take a while, I decided to make a 2 loaf recipe of basic bread. In the time that took to rise, the old dough bread still needed more time!
With the plain bread, I took half of the dough, cut it into a dozen pieces, rolled each piece into long, flattened strip, which got wrapped around a hot dog wiener.
It’s been a long time since I made these!
That worked out quite well!
The other half of the dough, meanwhile, also got split into a dozen pieces, which got made into buns.
I baked those in a cast iron pan, to make pull-apart buns.
My Babcia’s Bread experiment still wasn’t rising, so while the buns and wieners were rising, then waiting their turns for the oven, I made another batch of bread.
This bread was my usual oatmeal flax bread, with the addition of chia seeds and hemp hearts. I made a 2 loaf recipe, but divided them into 4 smaller loaves.
By now, my Babcia’s Bread was still not risen a much as I would have liked, but with the oven in use, there wasn’t anywhere I could keep it warm. Besides, it did rise at least some.
I decided not to do three risings this time.
Plus, I cheated.
The bread egg is the same principle as a sourdough, without the moisture levels. Which means the developing yeasts would become increasingly acidic.
I decided to take advantage of that and employ a bit of chemistry.
What happens when you mix baking soda and vinegar?
Lots of bubbles, of course!
What happens when you add baking soda to an acidic bread mixture?
More bubbles!
I sprinkled some baking soda onto my kneading surface and worked it in quite thoroughly. The dough turned out to have risen more than it appeared to have, so it was already pretty light and fluffy. As I kneaded in the baking soda, I could actually feel the dough becoming even lighter and puffier in my hands!
After kneading it enough to ensure the baking soda, along with a little more flour to keep it from getting too sticky – and remembering to take off a ball of dough for the next baking! – I divided it into 4 small loaves and set them aside to rise some more more.
While my Babcia’s Bread dough was still rising, I had time to make yet another batch of bread. Surprise bread!
This time, I made a plain 2 loaf recipe, then added parsley, garlic granules, paprika and dill. After letting it rise, I made a dozen buns, each stuffed with 1 cube of mozzarella and 1 cube of old cheddar cheeses.
It turned out pretty awesome, if I do say so myself!
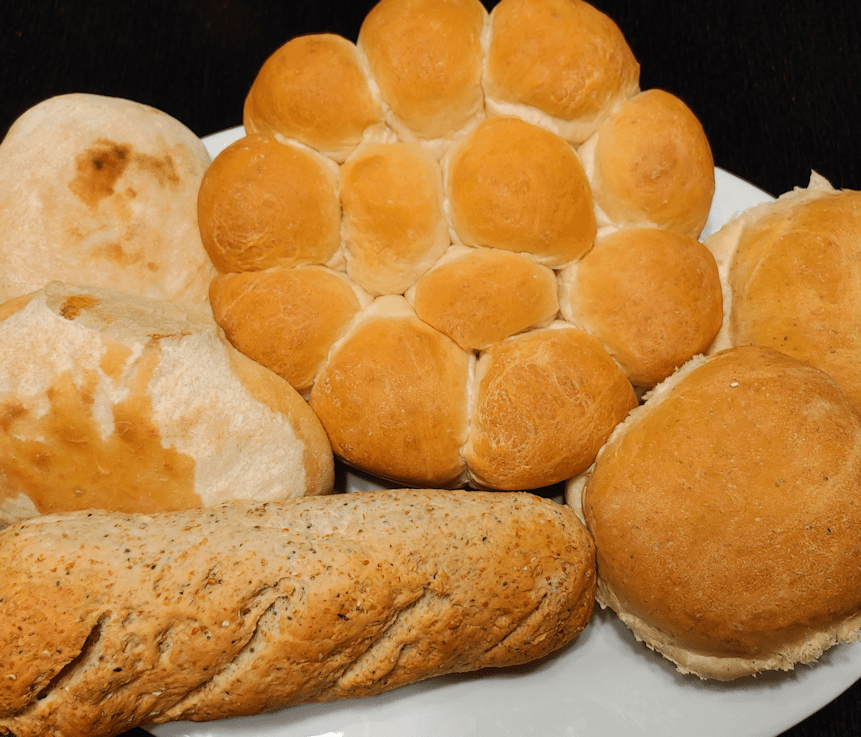
Here is my bread baking for the day – minus the hot dogs, which were already eaten! Top left is 2 loaves of Babcia’s Bread. In the middle is the pull-apart buns that were baked in a cast iron frying pan, and on the right are a couple of surprise bread buns. In the foreground is one of the oatmeal flax loaves.