I was very happy for a pleasant breeze to cool me down while I was working. I got the last of the bed turned and weeded, the boards laid out to mark where the log frame will go, and the soil evened out and leveled off as best I could.
Since I was wanting to finish off the onions and shallots, I decided to work in a grid instead of rows. I marked off 5 rows lengthwise first,, about 3 or 4 inches apart, then made cross rows, also every 3 or 4 inches apart.
Once the lines were marked out, I used the jet setting on the hose to drive water into all the marked lines. It makes it messier to transplant into, but it evens out the soil and gives deeper moisture for the roots to reach for.
After that, I just laid out the transplants where the lines crossed, starting with the yellow bulb onions at one end. I got to about half way down the bed, maybe a little more, before I finished them. Then I planted the shallots at the opposite end. Last of all, I used the grass clipping mulch I’d removed earlier today, to scatter a light mulch around the transplants.
I was very happy to see that this left me an open space where something can be direct sown. I’ll go through my seeds to see what I’ve got that will mature in less than 2 months, since we basically just have July and August left for a growing season.
This is really late for onion transplants. My intention had been to interplant them with other things, but that doesn’t really work out with the winter squash and melons, since those will get bigger and overshadow the onions. At least I got some in with the tomatoes.
We shall see if the weather holds long enough for all these onions to fully mature!
I’m now going to let my self breathe for a bit. I have some direct sowing to do, including where the spinach was planted, and that’s about it. After a break, I’ll get back to working on the trellis beds. Hopefully, we’ll dry out a bit and the winds will die down, and we’ll be able to harvest more logs for the raised bed frames. The forecast of rain to start this evening and continue for about 4 hours has changed. Now it’s saying we’ll get some rain for about an hour, around 10pm. On Friday, though (today is Tuesday), they’re still saying rain all day, starting about 5am Friday morning, through to 1am on Saturday morning. Aside from the brief rain we’re supposed to get tonight, though, we’re not supposed to get any rain at all until Friday.
I might actually be able to do some mowing! How exciting!
I didn’t get all the stuff on my list done, but my goal was to get most of it, and I managed that!
I had intended to start earlier in the day, but ended up unable to sleep for some reason, until about 5 or 6, when I got an hour or so of actual sleep. Not very good sleep, though, as I had several cats draped over me, and I really, really needed to pee! 😄😄
By the time I got out, it was coming up on 9am and starting to get warm already. The first job I did was work on the trellis bed, which needed a serious weeding before anything more could be done in it.
We are starting these beds out at two logs high, and they will most definitely be made higher, over time. It didn’t take me long to realize I needed to use the scooter, to make the weeding less painful. This is the first time it’s been used since last year, to all the tires needed to be pumped up.
This bed has the onions transplanted out of the bed that now has winter squash in it, as well as a few I found in the other bed that was shifted over, but has not been planted in yet. These onions are doing very well! As these had over wintered, they should go to seed this year, which would be awesome.
All along one side, where a permanent trellis will be built in, I wanted to fit as many of the Summer of Melons Blend transplants as possible. This bed is a little messed up as, on what will be the trellis side, the bottom log is bowed inwards. This works out to ensure the vertical trellis supports will be even with each other, but it means that we loose several inches of planting area. With that in mind, I used a couple of stakes to mark the ends of where the row of melons would be, then used another stake to mark a line from one to the other, far enough in for the melon roots to have space.
We had some packages delivered yesterday, so I had some packing paper and cardboard that I could lay down between the markers.
The next part was the most difficult. Getting the transplants out of the large celled trays and so I could space them out between the markers.
With other things I grew in the large celled trays, I didn’t have too much trouble getting them out. Their roots held things together enough that, usually, I could loosen them by squeezing the cells a bit, then pull the whole thing out by the plant stem.
Not with these melons!
Their stems and roots are way too fragile. Plus, as I tried to push the soil and root cluster out, the soil (seed starting mix, actually) would start to break apart. With some, I had to use a narrow trowel to scoop it out. When it got to that point, there was no way that the roots could not be disturbed quite a bit!
Interruption! I ended up going into town. My husband needed something, but I also ended up getting Dairy Queen to bring home. I was too tired and sore to cook, my younger daughter is caning it and can’t stand long enough to cook, and my older daughter became ill during the night and still feels unwell! I headed out just in time; the rain hit while I was on my way home. I was just getting in the driveway when the radio started blaring an emergency alert. Parts of our province was under a tornado watch, and the weather office was tracking some. Not anywhere near us, though. We’ve got a bit of a break in the rain as I write this, then start up again at around midnight, and keep raining for about 6 hours!
Now… where was I? Ah, yes…
So getting those melons out of the tray was not a good thing for those roots! I would not be surprised if we loose some of them.
Because we will be training the melons up a trellis, I was able to space them closer to each other, getting 17 transplants laid out. That leaves another 4 transplants in this Summer of Melons Blend that still need to be transplanted.
Once I figured out where they were going, I cut through the packing paper and cardboard and found the line I’d marked out earlier, to dig the planting holes. Once the holes were all watered and the melons transplanted, I made use of the bark I’d taken off the logs for the bed the winter squash is in, to weigh down the paper and cardboard mulch, so it won’t blow away. Then everything got another thorough watering.
That left a section on the other side of the bed to plant in. I decided to put bush beans there, and planted the Royal Burgundy seeds. It’s not a large space, so there were seeds left over that we might plant somewhere else. Grass clippings were added on either side of the row for mulch.
That bed is now done!
The next thing on my list that I decided to do was to work on the bed with the winter squash. I used a stake to mark out a little trench to plant in, on either side of the winter squash and their grass mulches. Since the bed’s frame is not going to be complete for a little while, yet, I needed to make sure they weren’t too close to the edge of the soil mound. On one side, closer to the high raised bed, I planted the Dalvay shelling peas. We have quite a lot of seeds. I spaced them 4-5 inches apart, and had lots left over. After pushing the seeds into the soil, I made sure to cover them in such a way that there is a soil “wall” on the outside, and there is still a bit of a trench for the water to collect in before being absorbed.
I did the same on the other side, with the Carminat purple pole beans. I didn’t have as many of those left, so they were planted more like 6-7 inches apart. When I finished the row and still had a few seeds left, I went looking for spaces that looked a bit wider and added them there. We no longer have any Carminate pole bean seeds left!
The seeds planted and watered, I grabbed a bundle of bamboo poles and set up 5 to each side. After the beans and peas have germinated, we will add netting to the bamboo poles for the peas and beans to climb.
This bed is now done. At least, when it comes to planting!
After that, I took a hydration and sustenance break. While I was doing that, my younger daughter headed outside to try and get some lawn mowed. Even after waiting until noon, that grass was still so wet! That’s not even taking into account the low areas where standing water collects. There were whole sections she had to just go around and leave alone.
It may be making things hard to mow, but the gardens sure love it! All the stuff we planted previously is doing really well.
When I got back outside to continue working in the garden, though, the poor melons were looking pretty limp! Aside from the obvious transplant shock, we were reading our high of the day. I ended up misting them a bit to help relieve them from some of that heat!
I decided the next thing that needed to be done was to get the drum gourds and pumpkins planted. They are the largest transplants, and needed to get into the ground faster.
In the space in line with the high raised bed, we’d made a pile of grass clipping mulch. Most of it was used throughout the garden last year, but there was still some grass clippings and shredded paper mulch left. I raked what was left aside, clearing a rectangle about the same length and the high raised bed. Eventually, the high raised bed will either had a matching bed near it, with a space between them, or we’ll just add a new bed attached to the current high raised bed. I haven’t decided, yet.
With a garden bed planned for the area already, I figured it would be a good place to build squash mounds, which can be incorporated into whatever bed we end up building there.
I just had to sift some more soil from the pile in the outer yard.
I made three mounds of soil. Each of them got a gallon water bottle with its bottom cut and no caps, placed upside down in the middle. They got filled with water to slowly drain.
I had two pots with the pumpkins from the free seeds we got at the grocery store by my mother’s place. They have grown so much!
I also had two pots of drum gourds, but each pot had two very strong and healthy plants in it. What a difference from last year, when I ended up replanting them, several times, and ended up with none!
As expected, when I took them out of the pots, there was no separating them. Their roots were just too entwined. So I kept them together, but after planting them, I gently teased the stems away from each other. As they grow, I want to train them to run in opposite directions.
Once they were all in, the grass clipping mulch that had been raked aside was drawn up and around each mound.
And I was done for the day!
Well. Almost.
My daughter had done as much mowing as she could and gone inside. I sent a message asking for a hand with my next task, only to see her come hobbling along with her cane! She was in a world of hurt. 😢
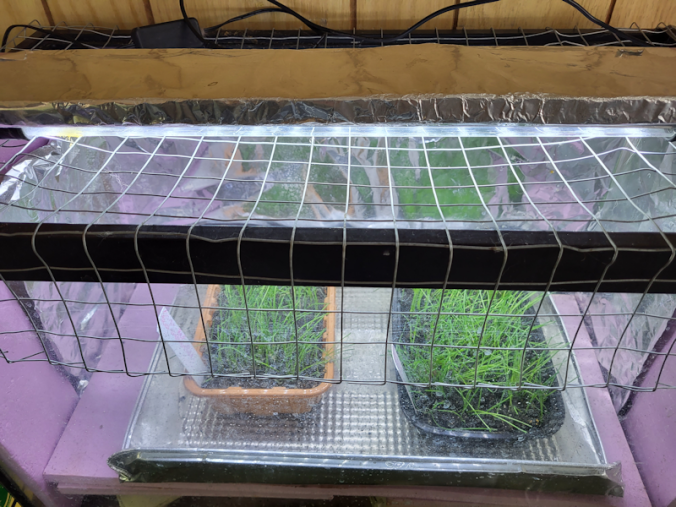
With the possibility of thunderstorms tonight, I’d set up the support hoops for the row “greenhouse” I’d picked up at a dollar store to try. The set came with a plastic cover, but I wanted rain to get through. I just didn’t want the little transplants to be battered with rain!
So I brought out a roll of mosquito netting to put over the hoops. Unfortunately, the netting wasn’t long enough to cover the entire row of melons. We ended up moving the hoops a bit closer together, and set it up over the end where the transplants seemed to be needing the most protection. Once the netting was over the hoops, we used bricks, boards, branches – anything we could find, to weigh the edges down.
By the time that was done, it was just too hot to keep going. Still on my list was to plant onions or shallots in the high raised bed, around the peppers. There’s also that second shifted bed that needs to be prepped for planting.
We still have 4 Summer of Melons Blend transplants, but we also have another 15 pots with melons we actually know the names of Plus, there is still 7 winter squash to transplant, and a few tomatoes. Anything else would be direct sown.
If all goes well, tomorrow my priority is to get the shifted bed prepped for planting. I have decided to get the last winter squash transplanted. There will be more space between them compared to the other bed, which I plan to take advantage of. I have a variety of sweet corn that is only 55 days to maturity, so I will plan small groups of them in between each winter squash.
Once those are in, the next three beds need to be weeded and shifted over. We’ve got plenty of melons that will need to be transplanted, including a couple of Zucca melon. I will find a way to give them their own hills to grow on, since their fruit can reach 60 pounds in size. The rest of the melons will be need trellises to grow on – and I’m starting to run out of takes!
We also have the last, sad little San Marzano tomatoes to plant, and last of all, all the onions and shallots will get tucked away, in between other things.
Once all the transplants are in, I went to direct sow more summer squash. I also want to plant more carrots – it’s probably late for those, but I’ll try , anyhow. I’ve got yellow and green bush bean seeds, too, if there’s room for them.
I’m actually starting to see a light at the end of the tunnel!
I just have to make sure not to push myself too much, though, so I don’t have to take more days “off” to recover!
Today is turning out to be such a gorgeous day! The outside cats are very happy and spending more time outside, rather than in the sun room.
Unfortunately, the skunks are out, too. I went into the sun room from outside and found one in there, eating the cat kibble. At least the skunk doesn’t bother the cats any, and the cats generally stay in the sun room while the skunks are there. The racoons, on the other hand, usually come in groups and tear the place apart, digging for stray bits of kibble, and they’re easily twice the size of any of the cats. Expect maybe Shop Towel.
As I write this, it’s coming up on 4pm, and we’re at 13C/55F, with a “feels like” of 15C/59F. I couldn’t resist! I had to get out there and get some work done!
So I decided to work on the low raised bed that runs along the chain link fence between the people gate and the vehicle gate. It needs to be narrowed for better reach, but we didn’t get a chance to work on it before the ground froze.
I’ve been making sure to take photos and videos that will be put together in a video later on, but there was one thing I found I just had to share now.
After removing the mulch to get started, I found onions!
Last year, after transplanting onion seedlings in various places, I still had lots of teeny, tiny onions left over. I also found onion bulbs in various places, from the year before, that had survived the winter. Most of the seedlings got transplanted just inside the bricks framing the bed – and most did not survive. The bulbs I found from the previous year’s onions – Oneida onions, if I remember correctly – all got transplanted at one end of this bed, plus there was a single surviving shallot that survived the previous year’s flooding that I just left to grow. It tried to go to seed, but didn’t quite make it. I didn’t harvest any onions out of here in the fall, because there was nothing to harvest.
Well, those previous year onions actually survived the winter, and I uncovered a bunch of them! Even the shallot at the opposite end was starting to show green!
Where they were growing was part of the bed I had to move to make it narrower, so these had to go.
The largest bulbs in here are the yellow onions that I think are Oneida. The shallots had two bulbs growing against each other, plus there were a few little onions that I think may have been survivors last year’s transplants. There is a pair of bulbs that look like yellow onions that I think might be a different variety of shallots, but I’m not sure.
These got transplanted in the raised bed we will have peas planted all down the middle. I haven’t quite decided what I will plant on either side of the peas but, at one end, it now has these onions. If they survive, they should go to seed, which would be awesome. Onion seeds are viable for only a year, but once the plants go to seed in their second (or, in this case, third) year, I believe they go to seed every year. We could potentially have our own annual onion seeds to collect.
We shall see!
After the onions were transplanted, I went to work on the end of the bed next to the people gate. That’s where I’d found there were broken pieces of sidewalk blocks and bricks, buried under the soil. You can read about that here.
Unfortunately, the ground it still too frozen. I got one broken piece loose that can be left in place, as it will not be under the bed. I was able to remove another broken piece, but found the edge of yet another chunk. I tried pouring water over it do make it more visible, and possibly thaw the soil a bit, too, but eventually had to stop. Depending on where it extends under the soil, I might be able to leave it for now.
When I realized I was just chipping through soil that was frozen rock solid, I set that job aside and started working on pulling up weeds along the edge of the bed, and moving the soil away from the path and closer to the chain link fence. In some places, it worked out okay, but for the most part, the ground is just too frozen.
With the mulch removed and the black soil now exposed to sunlight, it should start thawing out faster. Hopefully, we’ll have that bed reworked and ready for planting, soon. It’s one of the areas thawing out fast enough that we will be able to direct sow things that can be planted before last frost.
Gosh, it felt good to be working out in such a beautiful day!
Okay, I’ve got a couple hours before I can pick up my new computer, but I couldn’t help but make one more post.
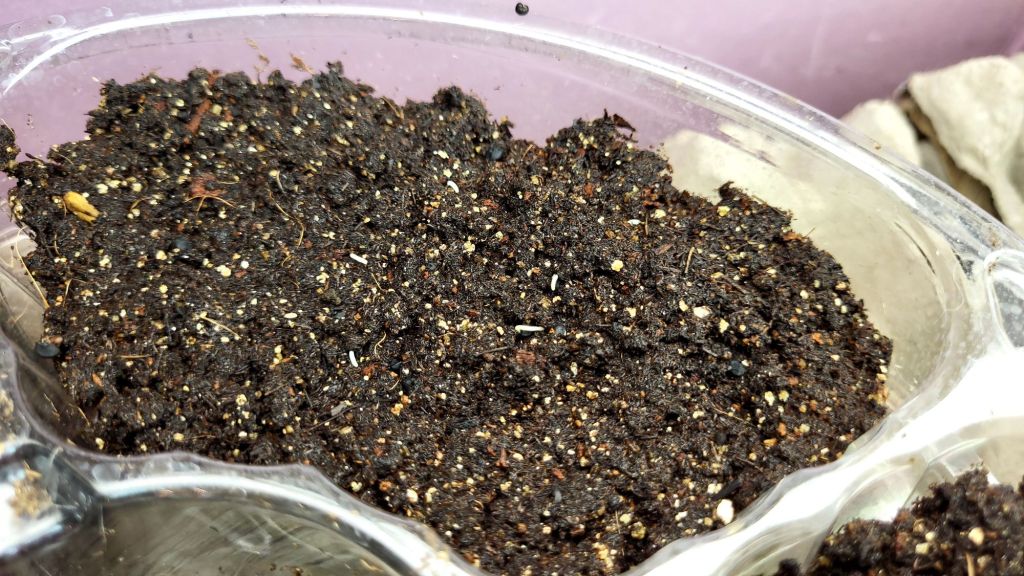
We have sproooots!
They are just barely visible, like tiny white worms! 😆
The yellow onions and the shallots, which are both in the large aquarium greenhouse, are emerging. The red onions are in the small aquarium greenhouse, which is slightly cooler, so that may be why nothing is sprouting there quite yet.
Onions are something we use a lot of. I once took the time to estimate how many onions we go through in a month when buying them from a store, and calculated an estimate of how many we would need to plant to meet our needs. I think it came out to something like 200 yellow onions. That did not include red onions, which we bought less frequently. It also didn’t include shallots, which we rarely bought, because they are so expensive.
Which meant that, if we wanted to grow enough onions for the four of us for one year, we’d need to plant more than 200 yellow onions because, once we have them handy, we would probably be using them even more often than we normally do.
Plus the red onions.
Plus we wanted to plant shallots, because they are so expensive, but we like them.
With onions, we could buy sets for easier planting. A lot of sets. Or, we could start them from seed. Seeds would cost less than sets, plus we would have more varieties to choose from.
For our geographical area in Canada, we need to choose long day onions. Until I started growing them myself, I didn’t even know there were such things as long day, short day and day neutral onions!
As shown in a video in the Best Laid Plans post, we also need to start seeds indoors very early. Onions need a much longer growing season than we have.
We chose two red varieties, one yellow, plus shallots for this year. In the red onions, we’d grown Red of Florence successfully before. We like the taste of them, and their elongated bulb shape makes them easier to cut up compared to round bulbs. I also bought some Red Whethersfield to try, choosing them for their purported storability, as well as their flattened shape. With the yellow onion, we tried a new variety called Talon. The shallots variety we tried before wasn’t available, so we got the Ambition shallot to try.
Over time, we shifted some into them small aquarium greenhouse, because we needed the space.
With the issues we had starting seeds indoors and destructive cats, we also began our plans to turn the living room into a cat free zone. This required not only making a door that would keep the cats out while not being a permanent addition, but also a sort of window to block an opening in one of the shelves that act as room dividers. Protecting the seedlings in the aquarium greenhouses and the covered mini greenhouse we have was not good for the seedlings, as it was hard to give them the air circulation they need. By the time we had to move the first batch of seedlings out of the aquarium greenhouses and start other seeds, the barrier was built, and we now have a cat free zone!
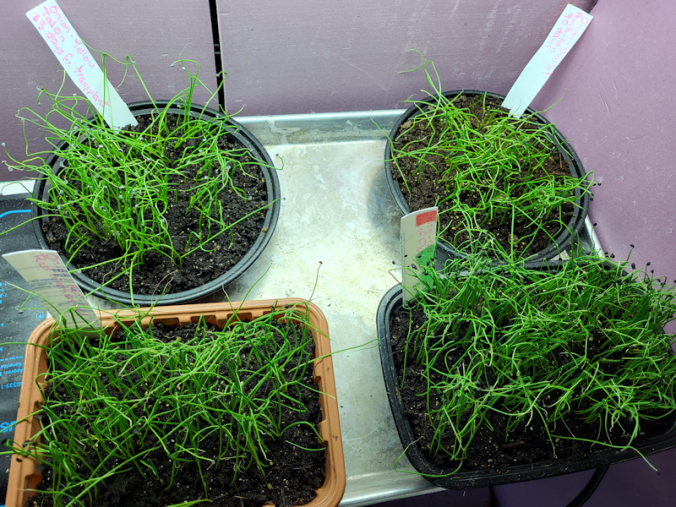
With so many onion seeds to start, we went with densely sowing them, which I talk about in this post, including videos from MI Gardener explaining the technique. All the varieties grew very well, very quickly!
Since we had so many onions to transplant, we didn’t plan on dedicating entire beds to them. Instead, they were mostly planted as borders, where we hoped they would also do double duty as insect and deer repellers.
There was just enough Red Whethersfield onions to encircle the Roma VF tomato bed.
The Talon onions encircled the other two beds with tomatoes, with the last few going into the ends of the high raised bed.
In the above Instragram slideshow, you can see the Red Whethersfied and Talon onions around each of the tomato beds.
With the Red of Florence, they ended up all over the place! Some shared grow bags with peppers.
Others got planted between rows of spinach.
There were so many Red of Florence seedlings, it was hard to find space for them. After the spinach was harvested for the season, we still had seedlings left, and most of them went in where the spinach had been, leaving us with one bed dedicated to just those onions. We still had onion seedlings left over, including some of the yellow onions . By this point, they were the last little, spindly seedlings that we probably shouldn’t have bothered transplanting. Those ended up getting transplanted into the bed where we had peas and greens at the chain link fence.
Then there were the shallots. They got their own little bed, with a few last ones tucked into the end of the wattle weave bed.
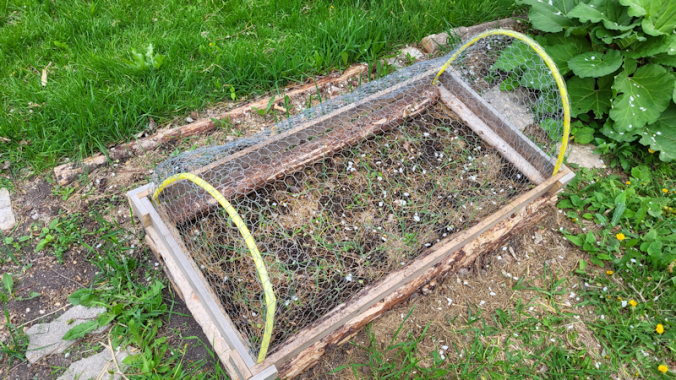
Once the open ends of the cover got chicken wire over them, we could finally keep the cats out of there!
So, how did the onions and shallots turn out?
With the Red Whethersfield, not at all.
I have no idea what happened to them. They were there and growing, and then just basically disappeared. Not a single transplant made it. It was really quite strange!
The seedlings planted in the bed along the chain link fence never really grew at all, with most of them dying off. That was not a surprise, really, considering how small those seedlings were.
The Talon onions around the tomato beds and in the high raised bed did better.
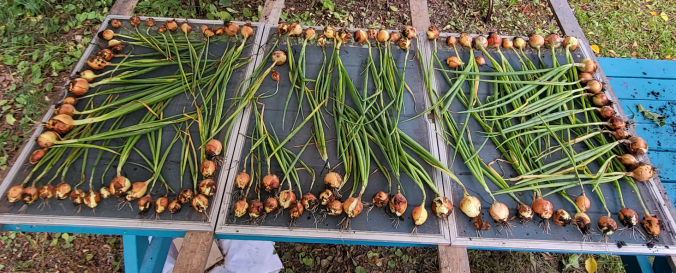
This picture is of the last of the yellow onions that got harvested, being left to cure. They were later braided to hang in the house. As I write this, there’s still a few left. Oh, there were a few other yellow onions in the high raised bed that were harvested later. They were still growing so well, we left them as long as possible before harvesting them.
The Red of Florence did a lot better, in most places. The ones in the grow bags were smaller, but those were where we turned out to have issues with fine tree roots making their way into the soil from below. The ones planted in between the spinach got quite large, with the ones transplanted after the spinach was harvested only somewhat smaller. We got a lot of onions out of that bed!
That bed was left until after the first few frosts before it was harvested completely. We already had some cured and braided indoors, but these last ones were still actively growing and would not have cured properly, so most of them ended up chopped up and in the freezer, with some set up to dehydrate in the oven.
Now, every time we open up the chest freezer, we get a strong smell of onions!
With the dehydrated onions, I ended up using our spice grinder and powdering about half. I think I like the onion powder more than the dehydrated pieces.
As for the shallots, they turned out to have self seeded company! Even though the soil in that bed was completely reworked, with fresh garden soil added, they still had seeds from years gone by in them. Specifically, dill and poppies. We’d planted Giant Rattle Poppies in this space before the little raised bed was built, so I left the poppies to grow. The self seeded dill keeps coming up every years, but never gets particularly large, but we still like to harvest the leaves for cooking, so I left those, too. The poppies grew so tall they started growing through the chicken wire of the cover, making moving it for weeding pretty much impossible. When they started blooming, we realized they were a completely different type of poppy, that my mother grew at some point! No Giant Rattle Poppy seeds seemed to have survived. 😄
When it came time to harvest the shallots, I actually left them be until the poppy pods were dried out. Once I could harvest the pods, the cover could be removed and the shallots finally harvested. They were smaller than they should have been, likely because they had so much competition for water and nutrients, but still pretty good. We got a decent amount to harvest and, as I write this, we still have some left.
Final thoughts on onions and shallots
It’s a given that we will be planting onions again next year. We will probably get more Red of Florence seeds again, as they do so very well.
I want to try the Red Whethersfield again and hopefully actually get some to taste! I’m still somewhat perplexed as to why they to utterly failed, but I suspect it has more to do with the growing conditions in that bed, then anything else.
We definitely need to plant more yellow onions, though. There turned out to be fewer seeds in the package than I expected. I need to pay more attention to seed counts! The Talon onions did all right, but they did not reach their full size potential. In fact, we only got a couple among the tiny ones planted in the high raised bed that got really big. This would be due to growing conditions and compacted soil, which we have issues with.
I want to do shallots again, though I might try a different variety, as we’re still in the “what kind do we like?” stage.
Which means I need to choose and order seeds soon, because we’re coming up on December in a few days, and we need to get seeds started in January! In fact, we could actually get them started in December and not go wrong.
At some point, we will try growing green bunching onions again, and I want to grow leeks, but those will wait until we’ve had more time to improve and amend our soil, and build more higher raised beds. Soil compaction is one of the major obstacles we have to deal with before we can grow those successfully.
All in all, onions, shallots and garlic will probably remain a staple in our garden, every year.
Yes, I just place our first order of seeds for next year’s garden. We might not need to order many seeds this year, considering how many we have left, but one thing we were out of completely was onions. Onions seeds only last one year, anyhow. Plus, today is the last day I can use the promo code from Maritime Gardening to get free shipping. 😁
This is what I ordered today.
I’m trying a new variety of yellow onion this year. Frontier. From the Veseys website:
Incredibly strong necks and consistent size! Frontier is a standout variety with our trial staff. Bulbs are golden, large and uniform with small necks that cure quickly. Ideal for fresh and storage markets, Frontier is long day hybrid onion with superb disease resistance. Matures in 100 days from transplant. Approx. 200 seeds/pkg.
I’m also trying a new type of shallot this year. Creme Brulee. From the website:
First Shallot AAS winner! An elongated shallot, Creme Brule has a citrusy flavour when eaten raw but when cooked, sugars are enhanced and do not leave an overpowering aftertaste. Bulbs are 4-5″ with a coppery pink skin. An attractive, easy to peel echalion, perfect for the home gardener or market grower! Matures in 95-100 days from transplant. Approx. 150 seeds/pkg.
I do still plan to try the Red Whethersfield onions again, and will probably get Red of Florence again, but those are from a different source.
Of course, I didn’t get just onions! I also got:
Yes, we will be trying to grow melons again (I’ll have a garden analysis post about this year’s melons coming up soon). We still have seeds, but I decided to get the Summer of Melons Blend. From the website:
Veseys exclusive! Best for the home gardener. This blend is the ideal solution to stretch out these beautiful summer flavours. It begins with sweet, early maturing hybrid varieties then keeps going through summer and into early fall. Maturity ranges from 75-85 days from transplant. Approx. 20 seeds/pkg.
I like having a variety, and having melons that mature at different rates – while still within our short growing season! – is bonus. It’ll also be a surprise, since the varieties included aren’t mentioned!
Veseys exclusive! Great range of colours and sizes. This exclusive Veseys blend contains a riot of shapes, sizes and colours that will bring your fall display to the next level. Some of the weirdest and wildest looking squash that we have seen in our trials. Ideal for both home and market gardeners looking for a great display without having to buy separate varieties. All are edible, and are strong vining types so they grow well together. Approx. 20-25 seeds/pkg.
I’ll have a garden analysis about our winter and summer squash, too, which was a real hit and miss situation. We do still have lots seeds from what we grew (or tried to grow) this past year. I have zero interest in having a “fall display” (who would we be displaying it for, anyhow? 😄). I like to try new varieties, but am hesitant to buy an entire package of seeds for something I’m not sure of. This way, we get just a few seeds of different varieties to try and – if they make it! – see if we like them enough to order more in the future. At some point, we’ll settle on one or two favourites and save our own seeds. Until we get to that point, we would be dealing with cross pollination, so any seeds we save as we’re experimenting would give us different results that may not be as good.
Just a small order for now. Soon, I’ll place another order for the red onions, so that we’ll have all the seeds ready to start them in January. Because, where we live, gardening starts in winter!
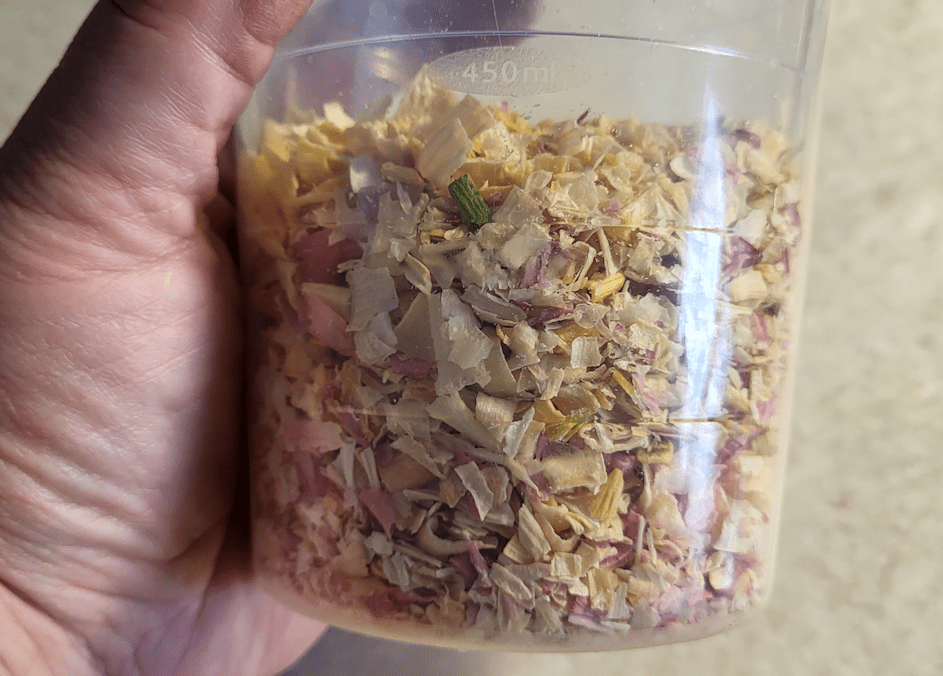
When the last of our Red of Florence onions got processed, I set up three 9×13 baking sheets in the oven to dehydrate some. When those were done, I took the one bag of onions I kept out of the freezer, because it had a pinhole in it somewhere, and filled another baking sheet to dehydrate.
This is what those 4 trays of onions got us.
When level on the counter, the top is almost exactly between the 350ml and 450ml marks on the containers. This is after I crunched them up quite a bit, too.
This represents about 7 or 8 of the largest onions.
I’m considering processing them into a powder to use as is, or make onion salt. I figure I might get about a quarter cup if I put it through our spice grinder. I haven’t decided, yet.
Yes, all this time, the Red of Florence onions we harvested awhile back have been sitting on a screen in the old kitchen. With how cold it gets in there, they’ve been fine, and we’ve been using them as needed, but it’s starting to get too cold. Today, I was finally able to finish processing the last of them.
You should be able to go through the slide show of images above.
The first step was to cut away the shriveling green parts and the roots. When I was done, the bulbs filled my giant colander in a heap!
While I was working, the cats in the sun room were going nuts, trying to see what I was doing, so I opened the door and let them in with me. Quite a few came in to explore! One of the males is aggressively friendly. I was using the top of the chest freezer as a table. He jumped up onto it and was eager for pets. Thankfully, he was okay with head boops and arm rubs, because my hands were busy. If, however, I reached for the kitchen shears beside him instead of petting him, he would attack my arm! He even started biting, so I had to take him off the freezer repeatedly before he finally stopped.
Once the screen was clear, I had to figure out what to do with it. We made this as a barrier for the old basement door, so we could keep it open and allow cool air to circulate, while also keeping the cats out. It’s made with 1 inch wire mesh. I took it into the sun room and figured out a way to use it for the cats. It is now resting on one level of the shelf in front of the window on one side, and the cat cage on the other – though it did need propping up on the cat cage to make it level. Hopefully, it’ll stay. I then took a spare sheet of rigid insulation and cut it slightly longer than the screen. With how the frame and centre support is, I was able to fit the insulation under the screen, in between the long sides. The sheet was just narrow enough for that. Without support, of course, it started to sag, but this sheet had been used for something else and already had some holes in it. I was able to use one near the side and zip tie it to the screen, then made a couple more holes as far as I could reach on the other side and added another zip tie. Not that the cats’ weight would be on it, as the screen would hold them. It was just to keep it from sagging. The cats can walk on the wire, but there was another chunk of the insulation that I put on top, so it would be more comfortable. They’re probably scratch the heck out of it. They just love scratching at that insulation!
Before I set that up, though, I put the remains of another sheet against the window that’s missing the inner pane. It doesn’t fill it – we tried cutting pieces to fit before, but the insulation kept wanting to fall away, no matter how we tried to secure it – but it’s enough to reduce the chill from that window where it counts.
So now the cats have a sort of “cave” against that wall, covering the space we set up for them. It gives them another level to climb on that is under the shop lights. I have those set to turn on with the motion sensors, after dusk, and the insulation under the screen will help keep some of their own body heat in, underneath. Also, they won’t get blinded every time one of them moves. Yes, I have the lights set at their lowest level of brightness, but when it’s night, it still seems really bright!
Hopefully, the racoons won’t knock it off or something.
Once that was done, it was back to the onions.
The first batch of onions I cleaned up was for dehydrating in the oven. I have four baking sheets, but they are too big to fit side by side in my oven. This oven does not have an element on the bottom, though, so I was able to put a baking dish on the bottom for elevation, and that allowed me to fit three trays in.
For the first tray, I tried slicing the onions long ways and laying them out on a cooling rack in the baking tray. I could only fit about 1 1/2 larger onions on the tray that way. For the second one, I tried cutting them on the round and laying them out on another cooling rack, but they just fell through the openings. I ended up putting parchment paper down instead, the laid out the slices. The rings didn’t want to separate, so I cut the rest in half lengthwise, first, then sliced them. They still needed to be broken apart aggressively before the pieces could be spread out evenly. Still, I was able to fit about 3 larger onions on, that way. For the third tray (I didn’t bother taking a picture of that one), I just chopped the onions and spread them out. That was another 3 or 4 larger onions.
Those will take a while to dry, so the rest of the onions got chopped up for freezing. I would have wanted to dehydrate more, but chopping and freezing is a lot faster!
For that part, I tried out a trick I think I saw on Pinterest. Loading into freezer bags is a real pain. I’ve tried several different ways to support the bag, but the best I could come up with was to put it in a large measuring cup. It would still be floppy, but not as much.
This time, I got out our canning jar lifter. The slide lock part of the bags gets turned inside out, as I usually do to keep the locking parts clean. This lip then fits over the curved jar lifting end, while the flat handles act as a stand. The lifter can be opened as wide as the folded over part of the bag allows, and holds it tight. After filling the bag with the chopped onions – I fit 2 1/2 cups per size medium bag – the lifter can be squeezed together to free the top. After the flipped over part is flipped back again, the lifter can be opened wide, allowing plenty of room for the filled bag to be removed.
My goodness, I wish I’d known about this trick long ago! This was the easiest, fastest filling of freezer bags I’ve ever done!
I had to stop chopping part way through, as my back was starting to give out (yes, I even used a stool to raised one leg while I worked), which was a good time to have the supper my daughter made for me. Then it was back at it.
In the end, there were 14 freezer bags filled. All but one of them went into the big freezer. Before sealing the bags, I would close it most of the way, then stick in the short end of an elbow straw in the last gap and suck out the air to vacuum seal it. One of the bags lost its vacuum. I couldn’t see a hole, but there had to be one, somewhere. So that bag went into the fridge to use right away.
I’m quite happy with our onion haul this year. Even though one variety failed completely for some reason, we still have plenty of cured and braided onions, both yellow and red, to use throughout the winter, as well as some shallots, and now we have 13 bags of chopped onions in the freezer, 1 in the fridge, plus more dehydrating in the oven. It should be interesting to see how long this supply lasts us through the winter.
One thing about these Red of Florence onions; their shape makes them SO much easier to cut up! Plus, they taste good, so win-win!
First image is the Indigo Blue Chocolate tomatoes that have started to develop.
In the matching pots are the herbs. The single oregano transplant is in the middle of a pot, surrounded by the second variety of thyme we have. The second pot has all the spearmint. For the pot themselves, I put a few inches of grass clippings on the bottom to keep the soil from falling through the drainage holes. Most of the soil is actually recycled out of other plant pots, with only a bit of a top up of garden soil, then the transplants were carefully mulched with more clippings. Doing the transplants freed up a couple of metal trays, so they’re now being used as drain trays.
We had already transplanted a couple of rows of onions in between the spinach earlier. The remaining spinach that bolted was pulled up, and my daughters took care of harvesting the remaining leaves. They discovered the Susan really, really likes spinach! We had to check to make sure spinach is okay for cats, and once that was confirmed, my daughter would hand her a leaf every now and then, as she stripped them off the stalks. It was amazing to watch her gobble them down! Even Fenrir came over and tried stealing some leaves, and got a few given to her, too.
We definitely need to stick to this variety of spinach. As bolted as they were when the plants were pulled, the leaves are still not at all bitter!
Now, the bed that had the spinach is completely filled with Red of Florence onions. There were still onion transplants left, so I cleaned up a bit more of the spaces the lettuce and bok choy were planted, in the bed along the chain link fence. Much to my surprise, there are quite a few lettuces that survived the smothering drifts of elm seeds. As for the bok choy, we’ll be lucky if the three or four I found survive at all. The empty spaces in the rows got planted with the remaining onion transplants, including a few yellow onions, and the other variety of red onions we’ve got. There were enough Red of Florence onions left that, after transplanting from end to end between the remaining lettuce and bok choy, I made holes in the mulch along the outer edge of the bed and kept on transplanting, filling about half the length of the bed. By the time I was putting those in, only really tiny ones were left. If they survive and develop fully, great. If not, we’ll still have lots.
Next, I worked in the wattle weave bed, and noticed one of the Sweet Chocolate bell peppers is getting quite big! The plant is still blooming, as are the other plants, so I expect we may get a decent harvest over the summer.
The tiny strawberry plants grown from seed got transplanted out. One of the three bunches of winter thyme did not survive being transplanted, so that left a gap I could fit several strawberries in. I did take out the self-sown walking onion as I kept transplanting strawberries wherever there was space between the herbs and bell pepper. It was neat having that onion show up on its own, but I don’t want walking onions settling into this bed. The strawberries are planted pretty close together, but it’ll give them a chance to get bigger, before they get transplanted to somewhere else next year.
There was still one surviving squash that I’m about 95% sure is more luffa, so I transplanted that next to the other two, and transferred the protective plastic ring to the new one. Hopefully, it won’t get shaded out by the potatoes too much.
I didn’t get a picture, but there was one last tiny Spoon tomato that emerged from the only Jiffy pellet that hadn’t had anything germinate when I potted them up. One of the Spoon tomatoes that got transplanted into the retaining wall blocks got broken, and is just a stem with a single branch, now, so I planted the baby tomato plant in the same block with it. Hopefully, at least one will survive.
And that’s it. These are the last of the surviving transplants – though when I went to get the trays, I spotted a hulless pumpkin seedling show up in one of the trays! All the other trays left behind are with things that did not germinate at all, for some reason. The Cream of Saskatchewan watermelon. Both varieties of cucumbers. The Birds Egg and Apple gourds, and a few other things. I’m not sure what to make of a zero percent germination rate. Since so many things have this habit of suddenly germinating, later on, I am not quite ready to count them as a loss, but even if they did germinate, for most of them, it’s too late in the season for them to be able to reach full maturity by the end of the growing season.
While I was walking around, setting up to transplant the onions, I kept hearing a cracking sound from the spruce grove. The cracking really started to increase, so I stopped to watch as the one tree my brother cut down for me that got stuck on other trees, started to fall. It got hung up again, but there was enough wind that it fell further still. It’s still stuck on other trees, but is now at about a 40° angle, instead of an 80° or so angle! It should make it easier to finally get it down the rest of the way, I hope. That one tree is almost enough to build a complete bed in the size I’m after!
After so many delays and distractions, it felt so good to finally get progress done outside! The one thing I want to do before working on those trellis beds is re-sow some of the summer squash. Then, it’ll be time for some manual labour!
The girls and I are still trying to figure out the best place to set up grow bags for the potatoes, where they would get full sun, but also be closer to the house for watering. We don’t have a lot of the old feed bags left to use as grow bags, so we decided to use one of the Old Kitchen Garden beds that was recently fixed up.
The bed still needed topping up, so I started by adding some of the sheep manure I recently purchased. I didn’t add a lot, as this bed was filled with purchased garden soil, and it should still be pretty rich in nutrients. What’s missing is organic matter. This is a blend of compost and composted manure, so that will help a bit. This got worked in with a rake.
Also… do you see that bit of green poking out of the wattle weave bed?
It’s a stray onion!
I have no idea where that onion came from. This bed had never had onions planted in it.
I’m not going to complain, though!
Next, it was time to raid the garden soil pile and do some soil sifting.
Three wheelbarrow loads of the garden soil was brought over. The weeds are already starting to grow under the cover on that pile!
Some of the Irish Cobbler seed potatoes were very small, so to fit them all in the bed, I put some of the smaller ones together. Then they got buried as deep as I could, so they don’t need to be hilled.
As this area slopes away from the house, the far end of the bed is somewhat deeper than the end closer to the house, to level it off. Still, with this bed being newly rebuilt, and the layers of organic matter below, the top layer of soil still isn’t very deep.
Once the potatoes were planted, I scattered some stove pellets over the top, then began watering. Once the pellets had expanded into sawdust, I used a rake to spread it out evenly. This is not at all for the potatoes, but to protect the soil and help reduce soil compaction. Over time, we will continue to add grass clippings and wood chips as mulch. The potatoes will easily be able to grow through a mulch. With this bed being higher now, and not using straw for a mulch, hopefully, that will reduce the slug problems!
After spreading out the sawdust, I gave it a deep watering, and plan to water it again a couple more times, today. I want the water to go through all those bottom layers that were added, which will speed up their anaerobic breakdown, while also acting as a sponge to retain moisture. Once those bottom layers are good and moist, this bed should not need much watering at all.