My brother and his wife are amazing. Incredible. Awesome. Especially my brother, who took on a very physical, long and dangerous job that took about 6 hours.
Wow.
As for me, I wasn’t much help this time, even if I had been physically up to doing more. It really was a mostly one person job, but I was still recovering from a very rough night. I over did it yesterday, so my plans to start digging holes to plant the walnuts went out the window. I always take painkillers before bed, just to be able to sleep, but I also made sure to treat my legs and hips with Tei Fu lotion, and got a daughter to do my left arm, shoulder neck and back.
It wasn’t enough.
Aside from the usual stiffening of joints that happens whenever I am sitting or lying down for any length of time, I got hit with a Charlie Horse. I had just gotten up to go to the washroom when it hit. My left thigh went completely out of control. Very painfully so. I had no choice, though; I had to walk on it. I did manage to grab the tube of Tei Fu lotion, though. Thankfully, the way the house it laid out, I had a lot of things I could use to support myself as I made my way to the bathroom. The girls must have heard me struggling, because I soon heard a knock at the as my older daughter asked if I was okay. At that point, I was very carefully massaging the while sitting on the toilet – there are body parts you really don’t want this stuff to come in contact with! I told her what was happening, and she waited at the door for me.
As I was struggling to walk out of the bathroom, my thigh muscles suddenly released. Like some sort of spring giving out. It only lasted a few moments, but those few moments of relief were amazing. Then it was right back to struggling my way back to bed, this time with my daughter helping me along, then helping me get more painkillers – I couldn’t take any more of my prescription ones, so it was just extra strength Tylenol – before helping me get back into bed. She even made sure I have my phone close to hand so that I could message her for help, if I needed to. Thankfully, by then, the cramping had pretty much stopped. My left leg is still feeling weak from it, though, and it’s been almost 20 hours. Short but vicious! The rest of the night was heavily disrupted, but at least no more cramping.
Which meant any plans involving physical exertion today went out the window.
I still found myself getting up early, because the inside cats were getting rambunctious. So they got kicked out of my room so I could feed them, then feed Butterscotch and Freya separately in my room.
I wasn’t the only one who had a rough night. We have discovered another food that makes my daughter sick, but we can’t figure out why, since none of the ingredients are problematic. It’s just stuff chicken breasts. We’ve tried different fillings, and every one of them make her sick. So she was up all night in pain and wasn’t able to finally fall asleep until about the same time I was getting up – and she usually gets up earlier than I do!
Anyhow, I very slowly did my morning routine, which included lots of attention from these guys.
Kohl has forgiven me for the bad haircut!
My morning rounds now includes splitting a can of wet cat food between the extra little food and water bowls I got for the traps and setting them where the kittens can reach them. Even the bitty baby has started to eat, though I think she would much rather be nursing! Brussel has been leaving them more often, even if it’s just to hide on top of the cat cage, under the platform. The white and grey mama still hangs around, but won’t go in if I’m around – and we still have no idea where her third kitten is. Or if it’s even still alive, to be honest. I’m just assuming it is hidden away somewhere, and mama’s dividing her time between her secret next and the sun room.
While putting the transplants into the portable greenhouse – and leaving the door tied open, as it was already getting quite hot in there – I figured I could use the black garbage can heat sink to refill the watering cans.
Well, I now know why the heat sink wasn’t been working much.
There was just a couple of inches of water left in the can.
I don’t know where the leak it, but it’s obviously a very slow leak. I refilled the garbage can, along with the watering cans, then checked it later in the day, and it was still looking full.
Once my rounds outside were done, I managed a breakfast, and that was it. I knew my brother and his wife were planning to come out, but I just couldn’t stay awake. I figured I could lie down for an hour and be good.
Two hours later – just past noon – I finally woke up. I found a message from my SIL, letting me know they were here. I still needed to do a dump run, but made sure to go over to their trailer to say hello. My brother was already bringing tools and supplies to the tree on the outhouse.
I had one bit of a surprise, though. Before heading outside, I decided to test the septic ejector again. (I noticed we have water seeping into the old basement, and the sump pump reservoir is getting full. Time to set the fans and blowers up again, soon!) I turned the pump on manually and it seemed as if the fluid was swirling actively in the filter, as if it was actually draining. I couldn’t be absolutely sure, though, so I shut it off (making sure to set the valve back to the diverter) and went to check the ejector. I figured if it did start draining, it would be wet on the sheet of metal we have to divert the flow towards the low area.
What I found was the cap completely off of the ejector! Did it somehow get blown right off? I was sure my brother had screwed it back on after he’d added the thawing fluid.
Then I found them sitting on the old oil drum he’d set up nearby, so use as a table.
As I was heading back to the house, I saw my brother carrying a ladder from the barn and he came over. He told me he’d poured more of the thawing fluid in – after confirming the stand pipe and venturi pipe were still full of ice – and had left the cap off so the sun could warm it more. The fluid level had dropped from when he’d poured it in, though, which was a surprise. He topped it up again.
After that, he returned to setting up by the tree on the outhouse, while I brought the truck to the yard and loaded it up for a trip to the dump. I also grabbed our empty water jugs, so after going to the dump, I then went to town to refill them and pick up a few groceries, including the ingredients I needed to make a chili.
By the time I got back, they were both at the outhouse, setting up straps and trying things off around the tree. My brother wanted to cut the top of the tree free high enough above the roof that it wouldn’t hit the roof as it feel. It was secured at the top, so it wouldn’t hit the ground, either. He still had lots of set up to do, though.
After unloading the truck, I headed back out in time to see my brother was in the process of using a chainsaw to cut loose the top of the tree. This required cutting wedge shaped chunks out. There were ratchet straps and ropes all over to ensure the tree couldn’t fall onto the house, couldn’t roll to the side, and securing his ladder. Once he reached a certain point, the job was finished by pulling on some ropes to get it to crack the rest of the way, before it was finally free.
We did pause in between things for something else entirely, though. While I was in town, my brother got a carrier message notification. There’s only one person that this message could be from; someone who’s phone number is blocked on my brother’s phone.
Our vandal.
We took a break so my brother could play the message back for me.
Wow. Just… wow.
He had some new ones in this message. Apparently, my brother has broken some sort of dude code by letting us live here and not allowing our vandal to come onto the property. The code! He broke the code!!
He just wants to walk on the property, he said. Because he spilled his blood taking care of the place… Then he went on a rant about me and my daughters. He won’t use our names, even, but just calls us the “fatties”.
He hasn’t seen my daughters in years.
He had plenty more vile things to say about us. Nothing new in that part.
What caught all our attention, though, is his comment about my brother having sold their property. According to our vandal, that makes my brother a millionaire now. ???
The question is, how did our vandal find out about the property sale? The only person that could have told him is my mother – and we know he’s been dropping by her place unannounced a lot more frequently. It now seems like he goes there after every chemo session in the city? Which would explain some of the horrible things my mother said about my brother, the last time I was with her. Our vandal is poisoning her mind, and she’s letting him do it.
He brought up that he was dying of cancer, of course – then said that he was going to beat the cancer, and there would be retribution.
*sigh*
My SIL thought he sounded drunk again. Which wouldn’t surprise me. His mental state seems to be getting worse in general, though.
After that listening to the message, it was back to work. For me, that meant going inside and getting a chili going in the Instant Pot. It’s the first time I’ve used it that way; usually my daughters use the rice cooker function. Once it was set up, I was able to go out and give what little help I could. My brother had cleared away a number of branches, so I dragged those over to the burn pile – which we can’t burn, because of the seasonal fire ban. In the process, I found he’d cut away some of the poplar saplings that had sprung up since I’d last clear the area.
Some nice, straight and flexible lengths. I’d actually been eyeballing them before, and had intended to harvest them to use in wattle weaving.
I set those aside. After I’d cleaned up the rest, and there was nothing I could help my brother with, I pruned off all the twigs, trimmed them, then sat down with a knife to debark them. I noticed some of the poplar we used in the wattle weave bed actually started to grow, so I wanted to make sure that couldn’t happen again!
I didn’t finish stripping the bark on off of them, though.
By this time, my brother and his wife had gotten the top of the tree free, and it was hanging from the straps holding it near the top, where it was stuck on another tree that kept it from crushing the outhouse entirely. He had been trimming things and working to lower it down to fall in a certain directly, only for it to slip a bit – and catch the chain saw. It’s just a little battery operated chainsaw, so it stopped running on its own right away.
Getting it free, however, took at least another hour, a stack of old tires with their rims, and a jack-all to lift the weight.
Eventually, though, he got it free.
During this time, they did stop for a meal and hydration, at least, after they had gotten the bottom of the tree down to the ground.
A frustrating thing while doing on this is, we’ve spent the last year + dumping the stove pellet litter behind the outhouse to compost. I chose that location because it was out of the way and mostly out of view behind the outhouse. The tree that the fallen spruce was caught on is basically coming out of the middle of the pile. An older part of the pile, at least, so it was more compacted and starting to decompose, but it still meant my brother had to walk over, set ladders over, and work over, a big pile of sawdust full of cat mess.
*sigh*
Anyhow, after much effort, many trips up and down ladders, and much trying to figure out how to safely get things done – and this really was quite a dangerous job – it finally got done.
The tree is down.
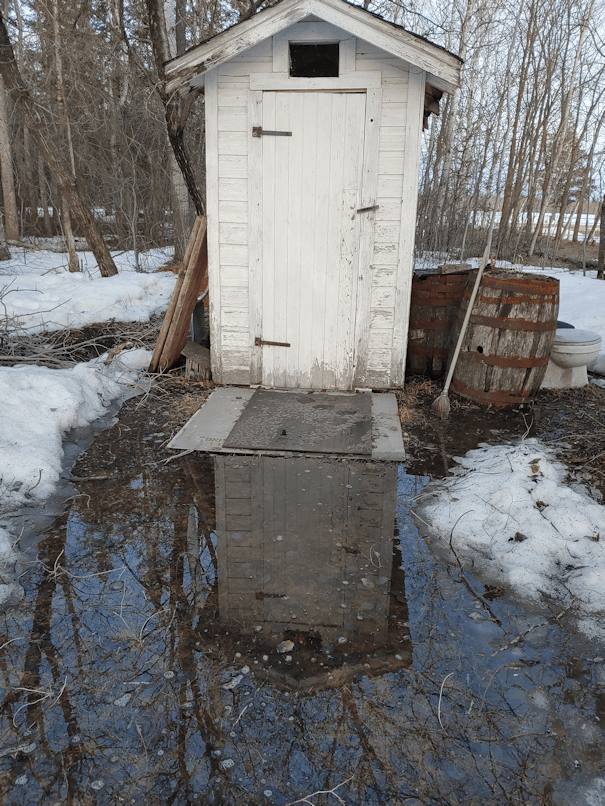
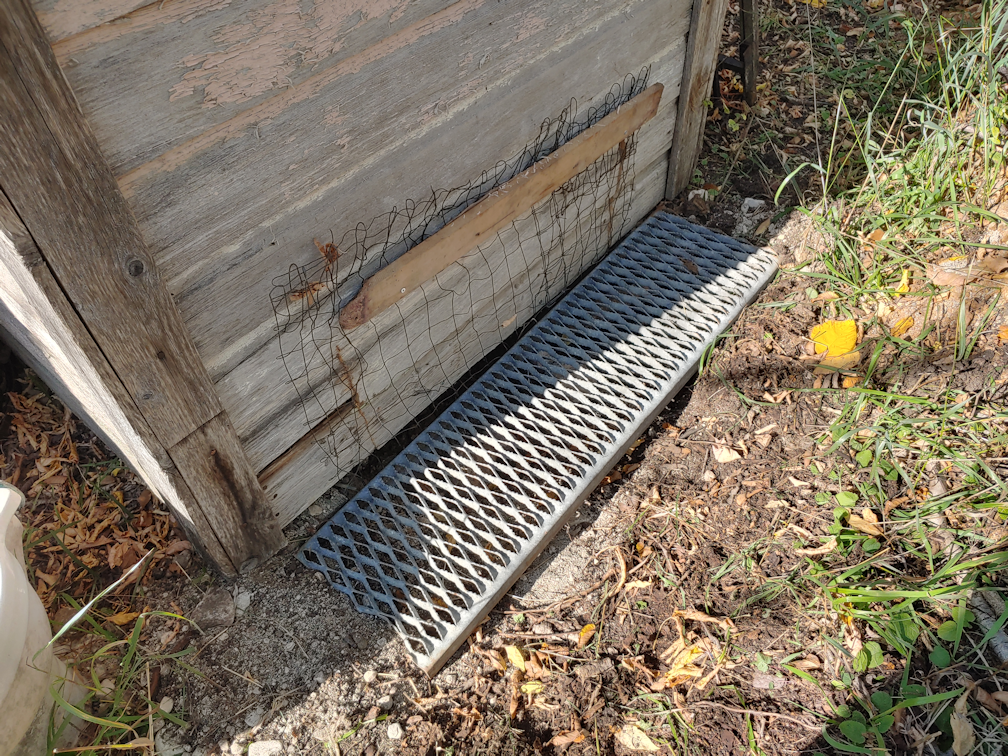
The first photo above is the part of the tree that was handing and took so very long to get safely down. It’s actually the middle of the tree – last weekend, my brother was able to cut the very top off, and it’s still standing on its end, leaning against another dead tree. Basically, it was brought down in roughly thirds.
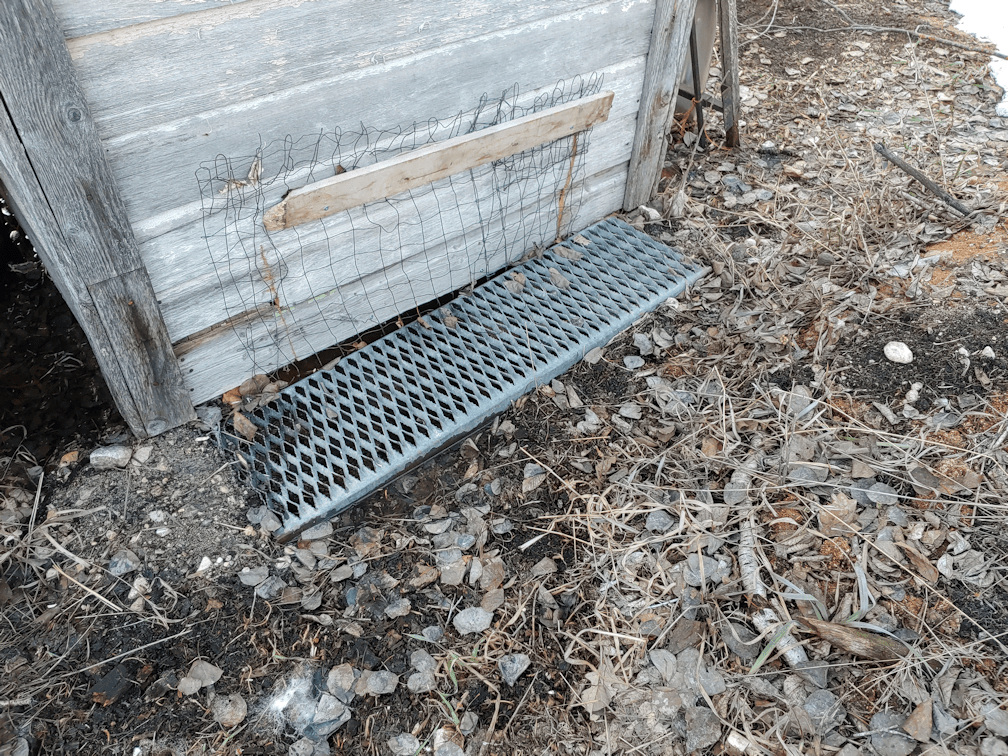
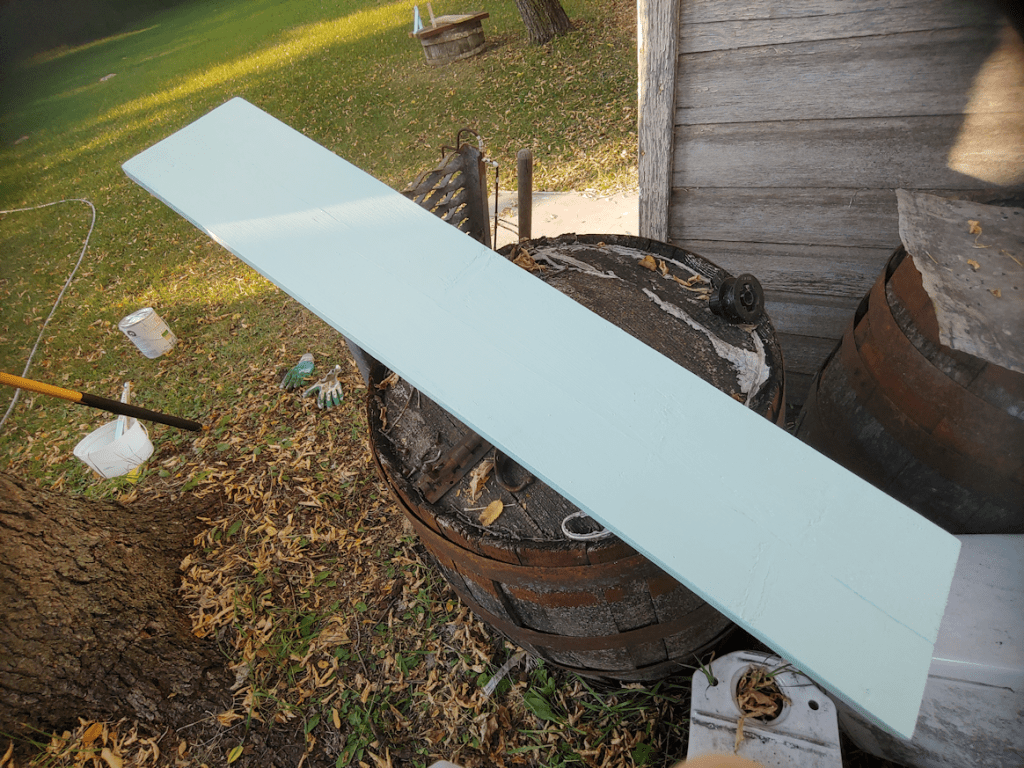
In the second picture, you can see the bottom of the tree. That section alone probably weighs about 300-350 pounds.
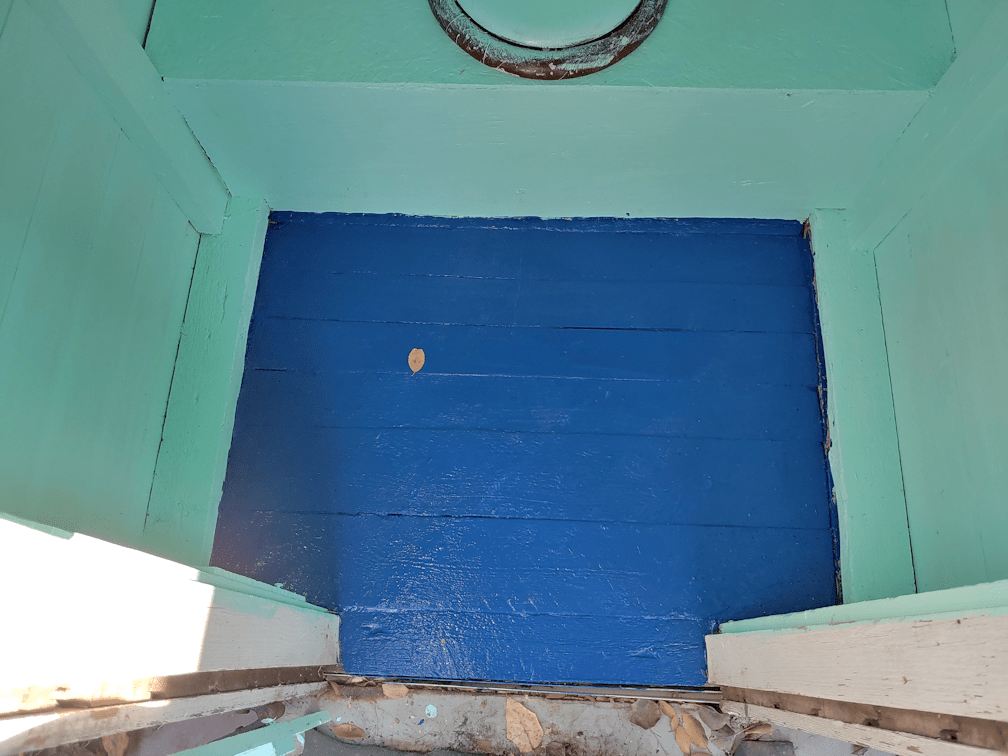
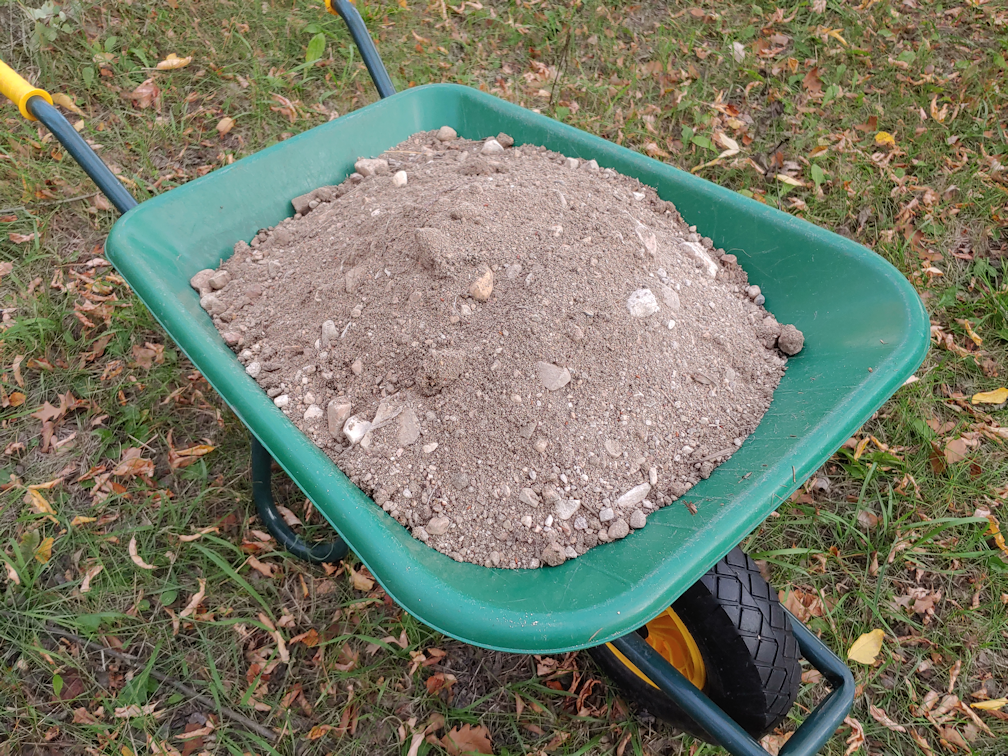
The last picture is what the inside of the trunk looks like. This tree has been dead for many years, so there was time for this rot to start hollowing out the trunk from the base. It took two very wet springs, which standing water flooding the area behind the garage and all around the outhouse, for it to weaken enough to get blown over in the wind.
Of course, now I’m thinking, what can I do with it? There must be something useful that can be done!
The trunk does have a crack running the length of it, though, so that limits things.
My original plan had been to have this tree taken down, leaving a stump tall enough to use to support a table and seats, like some of the stump benches I’ve already made. As we were cleaning up, my SIL and I took a break and found ourselves sitting on the trunk and I realized, having a bend there really would be very handy. I could use the wood to make a rustic bench. I’ve seen some photos of benches made from logs that might actually work. It depends on how bad that crack is, really.
All in good time, though.
I’m just to happy the tree is finally down – and we didn’t have to sacrifice the outhouse! We had intended to repair the roof before this happened, anyhow. Considering I was basically going to remove the moss covered and rotting shingles, then laying plywood down directly over the original roof surface to make a larger roof with more overhang, not a whole lot of my plan needs to be changed.
By the time they were done, it was coming up on 8pm, and they still had lots of packing up to do before heading home.
There are so many things they could have been doing on their weekend, but instead, they spent the last two weekends working on getting that tree down, without destroying the outhouse.
They are just so awesome!!!
I am so glad they are out “landlords”. 🩷🩷🩷
The Re-Farmer