Okay. Where do I start with today!
Well, first up, how about some cuteness?
As I was getting my coat to go feed the outside cats, I spotted movement in the distance. I had to zoom in quite a bit to get these shots, so they’re not the best.
Two white tail deer, beyond the outer yard, at the far side of the barn. Soon after, I saw one of them making its way through the outer yard to the driveway, heading for the gate. The deer are very, very active this time of year, and the population looks to be quite high this spring! I haven’t seen so many since we stopped feeding them outside the living room window.
After I did the outside cats’ food and water, I tried for a head count. I think I counted 24 in total. Possibly 25?
Adam was on the cat house roof, where she prefers to eat, and she enthusiastically allowed me to pet her. I was able to feel around her belly. She does not feel pregnant, and I don’t feel any active nips. Given how early I saw she’d gone into heat and the boys going after her, it’s entirely possible she’s had a litter and lost it. I am seeing the other feral females – Slick, Sprout and the white and grey we haven’t named – show up just long enough to eat, and then they disappear.
I managed to get a picture of this beauty, though.
Fluffy is so adorably fluffy!!
I’m glad we were able to catch her and get her spayed, because she very rarely allows me to touch her. Once I do, she stops and enjoys the pets, but otherwise, she just runs away.
Once the outside stuff was done, I headed out. My first stop was to the post office, then I planned to go to the feed store in my mother’s town, then visit her.
I had asked the owner of the general store if their feed supplier also carried cat food. She looked up their list and they did. That was a while ago, so when I came in to get the mail, I looked through their feed section and saw they had three 18kg (39.68lbs) bags of cat kibble! They were only $45, too. With the other brands we’ve been getting, they are in the $50-$55 range.
We’ve never had this brand before, so I got only one, to try it out. If the cats like it, it would make things much easier to pick them up in our own little hamlet than having to drive to the towns with feed stores. The only thing is that I would have to change how I budget it. Right now, I put the budgeted amount onto a credit card, so that when I buy them I get my cashback or Canadian Tire dollars. The general store doesn’t take credit cards, though. Just cash and debit. So if I’m going to be buying the big bags there more often, I have to make sure NOT to transfer the funds to a credit card.
So after I picked up our mail, I got the one bag of kibble – then picked up a couple of sausages for the Easter baskets. Something else that was on my list for the shopping I planned to do after visiting my mother.
Since I got the test bag of kibble, I skipped the feed store and went straight to my mother’s.
She was in her favourite armchair in the common room when I got there. She was pleasantly surprised to see me, which was nice for a change.
It was a pretty quiet visit. There wasn’t a lot new going on. My mother immediately started complaining, of course, but not as … energetically, shall we say, as usual. Her health isn’t good. She needs sleep. She needs a private room. (I don’t disagree!) Her room mate is terrible. (I’m sure her room mate thinks the same of my mother!) The regular doctor never comes to see her. The other doctors are from the city come in just for a day. I reminded her that she would need to make an appointment for the doctor to actually see her as a patient; otherwise, he’s just doing his rounds before going to his regular patient appointments at the clinic. To which she complained that it’s just about moneymoneymoney. Apparently, doctors shouldn’t get paid? I’m not quite sure what she’s getting at when she says that, but she says it quite often.
Hopefully, she won’t be here for very long, but there’s just no way to know when a bed will open up at the nursing home she wants to be in.
I remembered to ask if our vandal had shown up again, after his big act with his wife pushing him in with a borrowed wheelchair, then storming out when she refused to pay for his funeral. She said no, he hasn’t. I was not surprised. I told her, I knew there was a reason he was visiting so often. He wanted something from her. Now we know what it was. She started going on about how he’s wealthy, he has his farm. I told her, that’s not cash in the bank. He would have to sell it. Her response was, what else is he going to do with it? His wife isn’t going to farm it, and they have no kids. I told her, he doesn’t have to. He’s got so many vehicles and equipment scattered all over his property. Stuff he can’t use anymore. He could sell just a couple of things and more than cover the cost of his own funeral. That reminded her of the thousands of dollars she’d given him for the huge garage he had built to store his equipment in. All I know is, his vehicles and equipment are still all scattered all over his yard, fully visible from the road as I drive by, except for the Bobcat he stole from my mother, so who knows what all he’s got stored in there. My mother got the point, though; there is no reason for him to be going to her for money to pay for his own funeral. Which could be years from now, for all I know, based on how he appears the few times I’ve seen him since his diagnosis.
Overall, it was a good and relaxed visit. I stayed until her lunch tray was brought over – a grilled cheese sandwich with tomato soup and crackers, a pickled blend of legumes I recognize from Costco that is quite good, and canned fruit for desert. Her insulated tea cup was just hot water – at her request – to mix in with the glass of milk. One of her favourite things to drink. I stayed long enough to help her get set up and everything was in reach before saying my goodbyes.
From there, it was off to our regular local grocery store – and extra drive, but the difference in prices between that town and my mother’s made it worth it.
Once there, I got the last few things for the Easter baskets, including an extra flat of eggs. I’d asked my daughters to hard boil some eggs for me to start pickling after I got home. They ended up doing a flat and a half – roughly 45 eggs. The extras and the uglies would be used for egg salad. I got a paska for my mother, though it’s huge for a one person basket. Since she no longer has her own kitchen or utensils, my plan is to have everything for her basket all cut up and ready to eat without needing anything else. Plus, she could share the contents, if she finds it too much. We aren’t fans of paska ourselves, so I got a lovely fresh flax seed loaf for our own basket.
The shopping done, my only planned outing over the next while is to visit my mother and bring her the basket on either Saturday or Sunday.
I’m thinking Saturday.
There’s a reason for that.
The truck.
The truck has been running well. The stock up shopping trips have been fine. I have, of course, still been constantly checking the gauges. With the troubles we’ve been having for the past couple of years, I just can’t help myself.
Which is why I noticed something had changed.
The oil pressure gauge.
When we had the leaking seal replaced again, on warranty, and the oil sensor replaced, I got an oil change done at the same time. According to the mileage, we have a couple thousand kilometers before it needs to be changed again – which is about a month’s worth of driving, in the summer. Two months, in the winter.
After all that, the pressure gauge was right back where it was supposed to be and staying within a typical range.
As we were coming home from the Costco trip, though, it started to read on the low side of normal. Technically still okay, but at one point, it was pretty much on the line for low pressure.
It was reading normal again when I started out today, but when I got to the grocery store from my mother’s, the gauge had dropped down to the line again.
While I was on my way home, I kept checking it, and sure enough, it kept slowly dropping. As I was pulling into our driveway, it was touching the line again.
*sigh*
One thing I can say, though; the warranty differential is working fine. The 2 wheel and 4 wheel drive setting has been on auto, and it has had no problem kicking into 4 wheel drive as needed. Today got so warm, the hard packed snow under the tire tracks in our driveway started to soften and the truck starting to sink as I was driving, but I was able to get through with no problem! No getting stuck in our own driveway again!
We’ve been parking the truck in the yard for the past while, since my brother’s truck was half in our garage (as far as it could go without hitting the top of the door frame). My brother had phoned this morning and he suggested I just back it up into the lane towards the barn and leave it there, so we could park our own truck in the garage. So after the shopping was unloaded and I did an early feeding of the outside cats (they like the new kibble!), I moved his truck out.
His truck was having issues with sinking through the formerly hard packed snow, but it got through fine as well.
Driving our own truck into the garage, the oil gauge didn’t have a chance to drop like it did while driving, but it also never got to where it normally is.
The boxes for our chicken coop are still stored at the far end of the garage, so we can’t pull all the way in. Not a problem, since it means I had space to get out the step stool and check the oil levels.
It was low.
I had one last bottle of oil left, 3/4 full, and used that. The level seemed okay after that, but I’m never confident in what I’m seeing on the dip stick. The colour of the oil and the colour of the dip stick is pretty much the same, and the metal is always shiny, even after wiping it clean.
*sigh*
I made a point of checking, and there is no sign of an oil leak, but then I’ve never seen evidence of an oil leak even when it turned out to be leaking really badly, because of where the leak was. The only times I thought I did, it turned out to be from the differential, not engine oil.
Once I was settled inside, I called the garage. The owner answered. I made sure to first let him know that the warranty differential replacement has been doing fine, then explained about the oil pressure and being low on oil again. I mentioned, I’ve got a lot of driving to do in the next while!
He asked me if I could come in on Tuesday afternoon, so they can check it out. They are closed tomorrow and on Easter Monday, of course, so I was very happy that he could book me in so quickly.
For now, it should be fine for me to drive to my mother’s. I’ll do it on Saturday, when things are open, so I can pick up some extra oil to keep in the truck, now that I’ve just used the last of my stash.
This is getting so insane. I’ve either got another leak somewhere, or the truck is simply burning a lot of oil. Which I would expect to see evidence of in my exhaust, and I haven’t.
I just don’t get it.
I am so tired of vehicle troubles!
I can’t even say it’s been this particular truck, since the last two vehicles we’ve owned have also had weird problems. As my daughter told me during our Costco shop, and I was commenting about my own paranoia about the truck; with all the stuff that’s been going on, I have reason to be!!
Hopefully, it’s something minor that they can find and fix easily and quickly.
Hopefully.
On a completely different note, once I had my appointment made, I got to check out what I got in the mail.
My new soil thermometer has arrived.
The padded envelope had been opened, and the box it was in was crushed. That would have been customs. At least the thermometer itself was not damaged!
Once things thaw out, I want to use it in various beds to see how different the soil temperature is in, say, the high raised bed compared to the low raised beds. It might help explain why I had issues with my beans, melons, tomatoes and squash last summer.
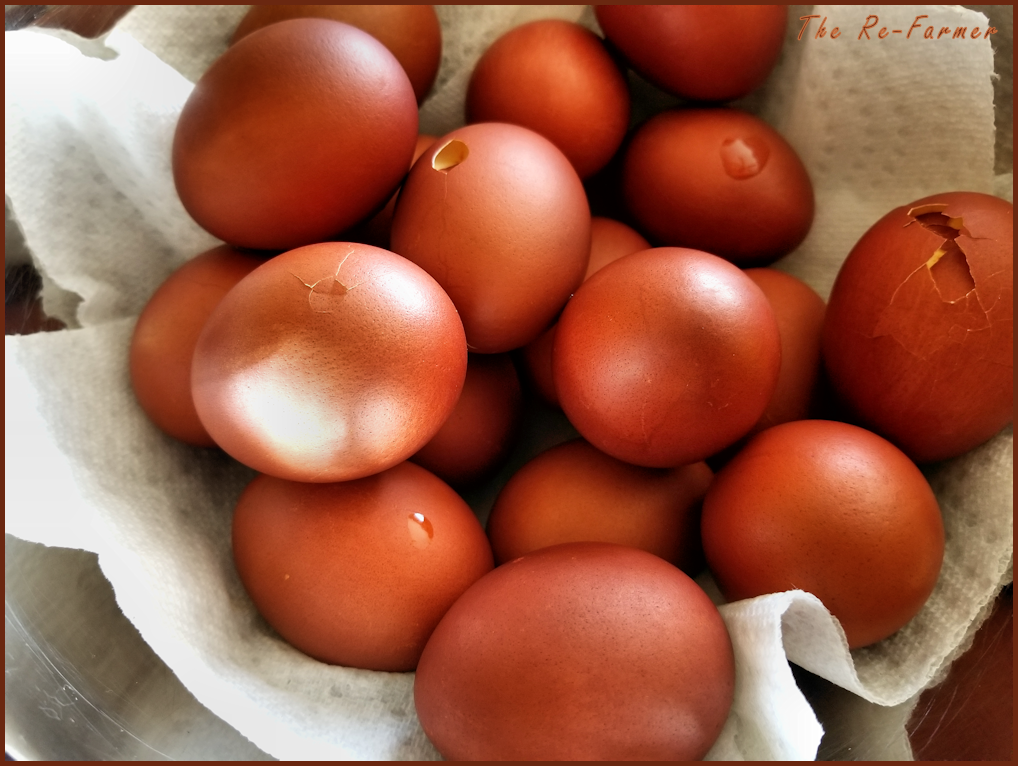
That all settled, the last goal of the day was to make three different types of brine to pickle eggs in, and start peeling the eggs that were hard boiled last night. I made beet, soy and turmeric brines, using the simplest recipes I could find online, so I had three little pots going at once. Then my younger daughter and I started peeling eggs.
It was a disaster.
The shells just did not want to separate from the eggs!
Now, it we were just making egg salad, I wouldn’t have cared, but I was after the most perfect eggs to brine and use in our Easter baskets, and we just weren’t getting any at all. After about a dozen eggs, I called a stop to trying.
Thankfully, I got a extra flat of eggs at the grocery store today.
The ugly eggs didn’t go to waste, though; they got eaten pretty much immediately. 😄
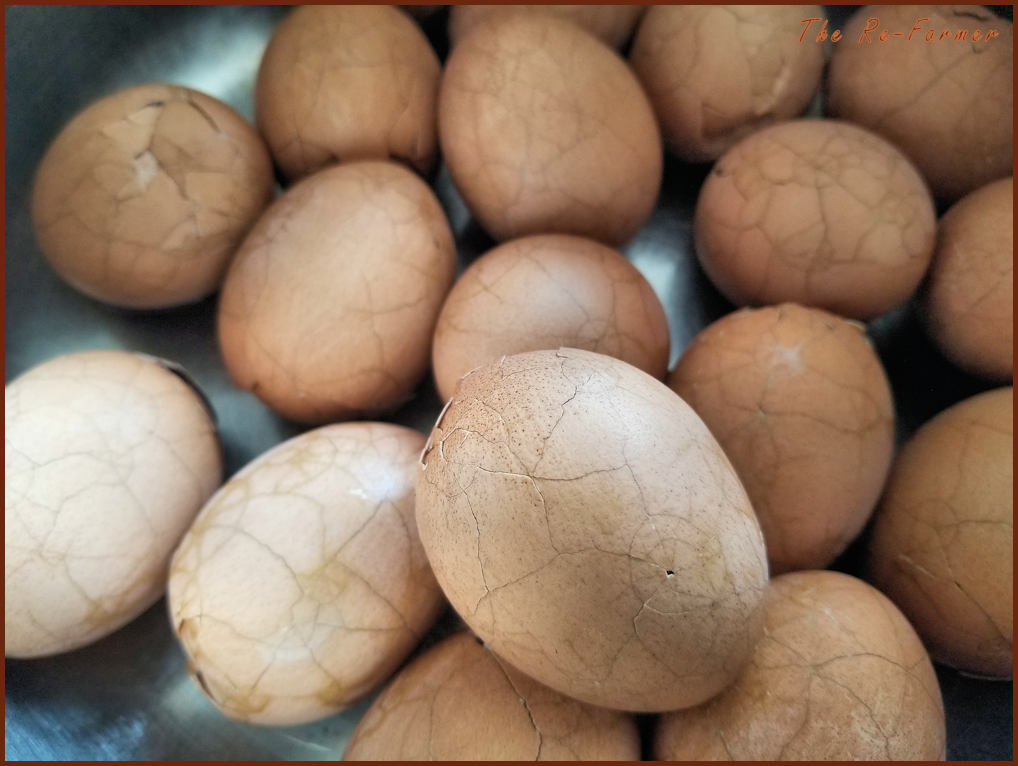
Meanwhile, I started on another batch to hard boil, using tips I’ve tried in the past, all combined.
It worked.
First, fill the pot with water and generous amount of baking soda, then bring it to a boil. The eggs were brought out of the fridge to warm up. Room temperature would have been ideal, but I at least didn’t want to have cold shells cracking on contact with boiling water.
Once the water was boiling, I used a wire basket type scoop – I don’t know the name of it – to lower the eggs into the boiling water in batched. I got 24 eggs into the pot. One did crack, but nothing leaked out of it.
I set the timer for 10 minutes, but it took a while for the water to go from a simmer to a full boil again, so it was really more like 7 minutes at a boil. When the time went off, I shut off the heat, but didn’t take them out right away, just in case. Then I transferred them to a bowl of cold water and left them there for another 10 minutes.
Every single egg peeled perfectly.
All 24 eggs.
Perfect. Including the one that cracked!
I was hoping to just have 6 eggs per jar or brine, but I was able to do 8 in each!
Gotta make sure to pass on the method to the girls. My younger daughter was pretty upset that the first batch wouldn’t peel and felt she had done something wrong. It’s not a problem, though. We’ll just have lots of eggs ready for snacking!
Tomorrow, we need to dig out a couple of baskets from storage, and I need to figure out how to do my mother’s basket, if I’m going to have everything pre-cut up for her. Normally, the baskets would get blessed on Saturday, then enjoyed on Easter morning, but I have not been able to find any times for basket blessing. I know it’s being done; just not which church or what time. For quite a few years now, we’ve just blessed them ourselves. I’ll take the chance to visit my mother on Saturday with her basket and get a bit of a visit in.
Then not go anywhere again until it’s time to take the truck in to the garage to get checked!
*sigh*
The Re-Farmer