Garden rain barrel, done!

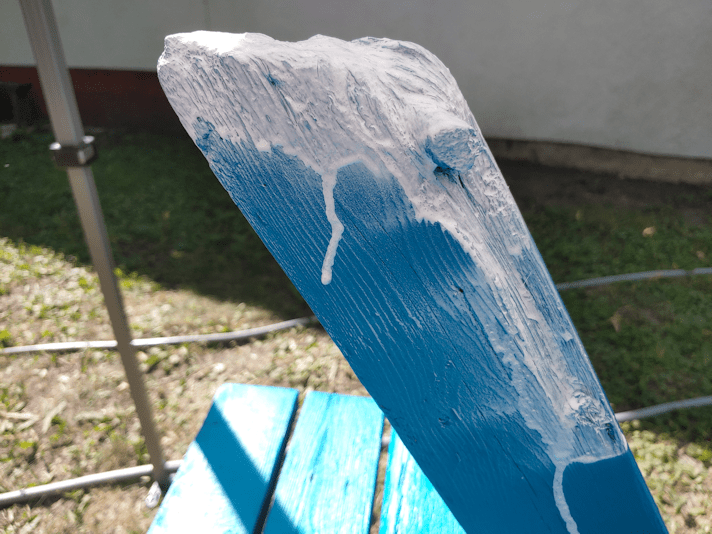
This morning, I emptied the can of Plasit Dip on the cracks in the rain barrel.

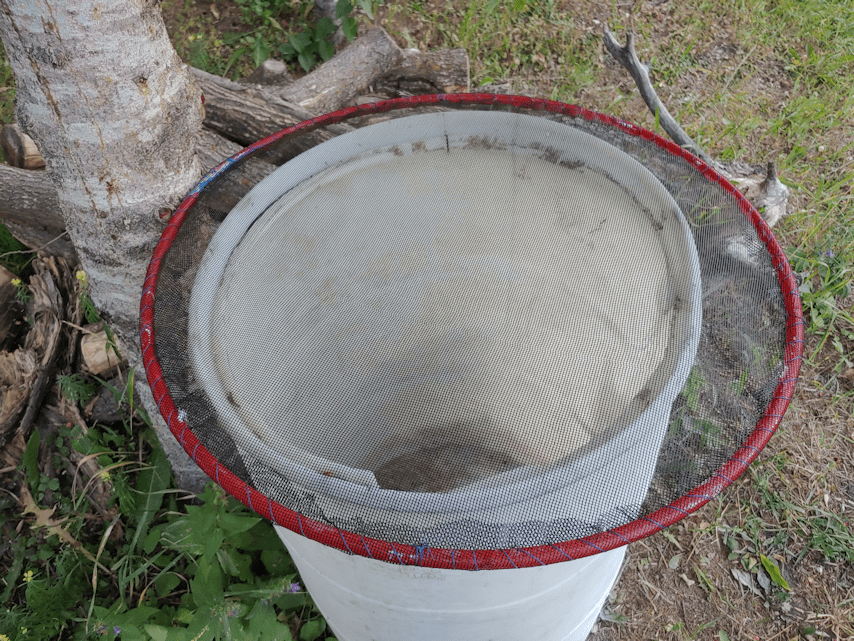
Yesterday, I found a couple of hoola hoops at a dollar store in town, and this afternoon, I dug out the role of window screen mesh we found while cleaning out the basement. I hadn’t quite figured out how I was going to attach the mesh to the hoops, and decided to just sew it on. The only problem with that was holding the mesh in place, so I ended up applying the WeldBond glue I’ve got to the hoop, then laying the mesh I’d cut to size on top of it.

Made a real mess on my hands, pressing it into place, but thankfully, the glue washes off easily.

After it had set long enough, I then just sewed the mesh on with a needle and thread.

It’s a bit on the light side and I want to figure out how to add weight to it. With the screen directly on the top of the barrel, any weight on the hoop could potentially tear the screen. I’ll probably just put a board across the top.

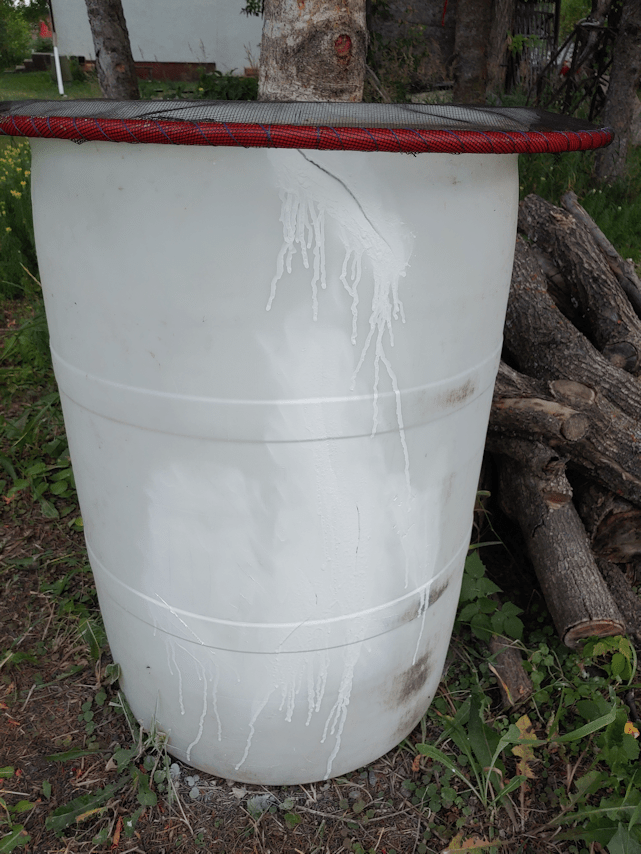
Here are the areas I sprayed with the Plasti Dip, both inside and out. I even sprayed areas that I wasn’t sure was cracked, or just a deep scratch, just in case.

That big crack at the top? It’s actually sealed. I didn’t think it would work, but with enough layers, it filled the gap! Most of the seal on that one is on the inside layers.

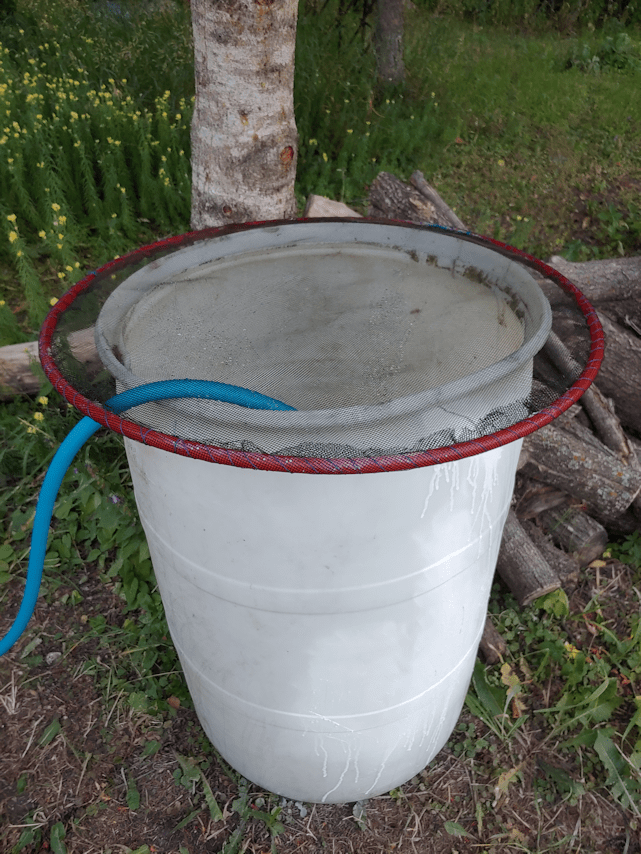
After giving the inside of the barrel a quick rinse, it was time to fill it and test out the seal.

As of tonight, it is completely waterproof. When I do my rounds in the morning, I’ll see if it held up through the night.

I’ll also be able to water the garden using water that has had a chance to warm up, instead of ice cold well water. :-D

The second hoop is currently sitting in the basement with the mesh and some glue. Tomorrow, I’ll use needle and thread to attach the screen securely, then put it over the rain barrel by the sun room. It’ll be nice to use the water from there, and not have my watering can’s head get clogged up with leaves and other debris. :-)

It took a while to get the garden rain barrel to the point it could be filled, but I think it was worth it to keep adding more layers to the cracks, with lots of time in between to cure.

It may not be pretty, but it’ll do the job! And that’s all that matters. :-)

The Re-Farmer

Picnic Table Progress

Over the past while, I’ve been adding another coat of Plasi Dip to the ends of the picnic table legs. I stopped adding more coats yesterday, but have continued to spray the cracks in the rain barrel. Basically, I plan to empty that can on those. :-D

This is about 5 or 6 coats. I lost track of how many, exactly. When I took the picture, it had at least 24 hours to cure since the final coat. It looks like it will do the job just fine, and help extend the life of the picnic table.

Earlier today, a daughter and I flipped the picnic table right side up, then checked the surface. Sure enough, there was a bit of damage. Some paint had come off when the bird feeder had been put on top of it – both surfaces hadn’t quite cured yet, and the feeder stuck to the table.

While upside down, the table was on the chimney inserts I’d used to raise it off the ground while painting. There were a few scratches from those, as well as dirt. My daughter hosed it off and scrubbed where needed.

Tomorrow, the bits of damage will get touched up before we move it to somewhere near the fire pit.

For something that is too far gone to repair, this should last quite a bit longer now. As long and nothing actually breaks. :-D

The Re-Farmer

First coat

This morning, I applied the first coat of spray-on rubber to the legs of the picnic table, and the cracks on the rain barrel.

This is the product I am using.

I have never used this stuff, or this brand, before. It was the only one on the shelf, so it’s not like I had a choice of brands or product versions. I think it will work just fine.

The first time we used a product like this, it was a can of liquid rubber deep enough to dip things directly onto. Like the handles of tools. Which is what we did at the time. Or it could be brushed onto a surface. The first time we tried a spray, it was basically the same product as an aerosol. My husband used it to coat the handle of one of his canes (made with aircraft grade aluminum, that could also be used for self defense), and to a cord wrapping he added to parts of his walker for extra support to hold the weight of the backpack he has hung on it. For the can, a dip version would have done a better job, but as a spray, it worked very well on the uneven surface created by the rope work. It’s still holding out, and it’s been about 5 years.

So that was basically what I was expecting. Black, spray on rubber.

Nope.

It’s white.

At least it looks white against the blue paint.

It’s also a lot lighter and thinner than I expected. Which I suppose is exactly what I need to fill in all those crevices. I added extra along the part where the most rotted wood had come off on the one leg.

I probably could have applied it more carefully to avoid drips, but there is no aesthetic requirement on this.

On the rain barrel, it looks a bit different. The barrel got sprayed both inside and out.

Here, you can see it has an almost blue tint to it. Depending on the angle, it looked a bit more purple than blue.

It should be interesting to see how it looks when it’s done.

How many layers we put on will depend on how well it coats. It requires at least 2 hours between coats. Depending on how often someone can get outside to add another coat, this may take a day or two! It then needs at least 4 hours of curing time after the final coat for the coated object can be used. Thankfully, these are not things we need to use, quickly.

The Re-Farmer