Back home, kibble math and some root cellaring

It’s been a wet and dreary day today. It started raining off and on last night, and has continued throughout the day. I was just getting the kibble ready for the outside cats when it started raining again! No surprise that many of the cats preferred to eat in the sun room. 😁

The squash we harvested was still on the table outside, so I brought it all in. I laid the winter squash out on the freezer in the old kitchen, but there wasn’t room for most of the squash from the compost pile. Those, at least, I could find room for in the sun room.

I left fairly early to get my daughter, since I wanted to make a couple of stops along the way, including a gas station, where I made sure to pick up an air freshener for the car! Having the garbage in the car from Thursday evening to Saturday morning was not a good thing. We can’t even leave windows open to air it out, since either critters or insects would get inside. The last thing we need is for a racoon to decide to get in and tear the inside apart, searching for the source of the smell.

I also wanted to stop at a Walmart long the way to pick up one more bag of kibble, as our supply was not going to make it to our first big shopping trip.

We have not been feeding the cats more than usual with the outside cats, and with the inside cats, we’ve been controlling their feeding a bit more. Instead of having dry cat food available throughout the day, and giving them wet cat food in the evenings, they are getting two feeding times with dry kibble, with a small feeding in between. At least we’re not running out of wet cat food, as I’d been buying extra for the kittens.

This is the first month I’ve really tried to keep track of how much kibble we’re buying. Usually, we’d buy 8 bags during the big shops, then just buy more near the end of the month a few times. This month, however, I got twelve 9kg bags of kibble from Costco. We thought that would be enough. This is, however, the second 10kg bag I’ve had to get.

That’s 14 bags, totalling 128kg of kibble for the month. Which is 282lbs.

With the Costco and Walmart prices, plus tax, that’s about $300 on just dry kibble, this month alone. Then there’s the canned cat food, plus the litter pellets. The litter pellets are cheap and the 40lb bags last a long time, so I’d say about $20 a month, on average. The canned cat food, between the large case we get at Costco, and the slightly smaller cases we get at Walmart, is about another $90

So we’re looking at $410 (US$304.18 at today’s exchange rate) we’re spending on the cats this month. On those months where we had to buy kibble in the middle of the month, wherever we could, it would probably be more expensive.

That would make one heck of a car payment.

Now, part of that can be blamed on inflation. The price of kibble has increased by almost 6% in the past couple of years. And that’s just going by Costco and Walmart prices. Other stores have seen steeper increases. Especially outside of the city.

It’s ridiculous, but the alternative would basically be to start putting cats down. With the outside cats, someone from the municipality would send someone over to shoot them.

I suppose we could just stop providing food for the outside cats, and they’d eventually go away, but considering how starved some of the cats look after they’ve disappeared for the summer, I don’t think there are a lot of options out there for them. More likely, the coyotes would get them. So… no. Not going to let that happen. Even if it means sometimes feeding skunks, racoons and blue jays in the process.

So, we keep feeding them, and looking for people willing to adopt. Thanks to the Cat Lady, we have actually managed to adopt out quite a few, though six of them are still with the Cat Lady, four of them permanently!

Ah, well. It is what it is!

Meanwhile…

When I got to my brother’s, I thought they’d be really tired and I would just be saying hello and good bye, but they were up for an actual visit. It was so wonderful to see them! We got caught up on how things went while they were gone, particularly with my mother. As we were leaving, I mentioned coming back to see their photos from the trip. My SIL told me she’s considering putting them together into a movie, like I used to do, years ago. Digital cameras were just starting to become affordable, and when we moved out of province, we started to basically document everything. Then, about once a year, I’d put them together into a DVD for my parents. Moving making software for home was also just starting to be affordable, but these were still little more than slide shows. Still, I had fun adding music and making captions, and sorting things into chapters. The idea was that these would be easy for my parents to see on the TV.

I did that for several years. Then I found out my parents never watched any of them. So I stopped.

Making DVDs, that is. I never stopped documenting things. It had become a habit by then, along with journaling. A habit that came in very handy when life suddenly got very complicated, and I found myself having to make witness statements, police reports and affidavits.

So glad to be away from all that now. Dealing with our vandal is small potatoes in comparison! It also made his attempts to intimidate me pretty comical, but that’s a whole other topic! 😂

But I digress!

I hope she does put something together. I’d love to see it!

After my daughter and I left, we made a couple of stops along the way, including to pick up the pizza order her sister made after we let her know we were leaving my brother’s. That was sweet of her to treat us!

We’ve had more take out this month than we’ve had in years!

My daughter enjoyed her time taking care of my brother’s place for them, but she was glad to be home.

Once at home, and before we settled in to eat, my older daughter and I were able to deal with the winter squash I’d left on top of the freezer. The first challenge was just to get through the old kitchen door, without any cats getting through. Then it was just getting them into the new part basement, where the root cellar is. Then it took the two of us to get them into the root cellar, but keep the cats out.
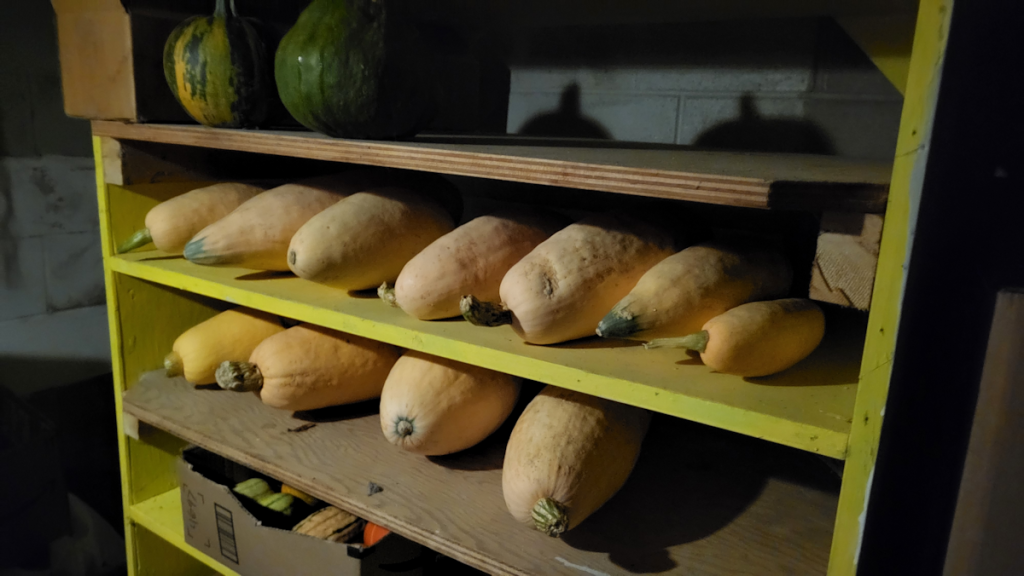
But we got it done!

The two round, green pumpkins at the top are from the compost heap squash. All the smallest winter squash fit into a carboard box. The rest are the candy roasters and Pink Banana.

The root cellar is not a very good one, to be honest. We had considered turning it into a cheese cave at one point, so I set up a thermometer and a hydrometer in there, and kept track of the temperature and humidity for a year. Both fluctuate too much to make a good cheese cave – or a good root cellar! Still, my parents used this as a root cellar for many years. It works well enough!

Not that any of these squash can be left there for long. With the frost killing off the plants before the squash could fully mature, they won’t last as long, so they’ll need to be eaten fairly quickly. We are most eager to try the big ones!

The main thing, however, will be to make sure we don’t forget about them. I avoid going into either basement – or even the upstairs – because my knees and stairs are sworn enemies. We go into the root cellar even less often. It’s where we store our Christmas decorations away from the cats! Heck, we still have a couple of cases of mead down there that we keep forgetting exists.

But it’s done, and the winter squash is put up for the season.

We’re still processing tomatoes, too. We have whole tomatoes in the freezer, plus I’ve got a couple more trays dehydrating in the oven right now, and there are still more under the old market tent, slowly ripening. We’ve just been bringing in the ripe ones every few days or so. Thankfully, those are out of the rain, and no critters seem interested in them at all!

I was just yawning and thinking how it’s so late and time to go to bed, but I’m seeing it’s not even 8:30pm yet. It’s full dark out there, and feels so much later! Especially after being such and overcast and dreary day to begin with.

I might try going to bed early for a change.

Ha! Who am I kidding? I’ll probably get started on something, then suddenly realize it’s 2am again. Because I’m silly that way!

The Re-Farmer

Trellis bed progress: first end cap done

Finally! I was able to bring over my tools and equipment, which I just keep in the utility wagon now, over to the garden and get a bit more done on the first trellis bed.

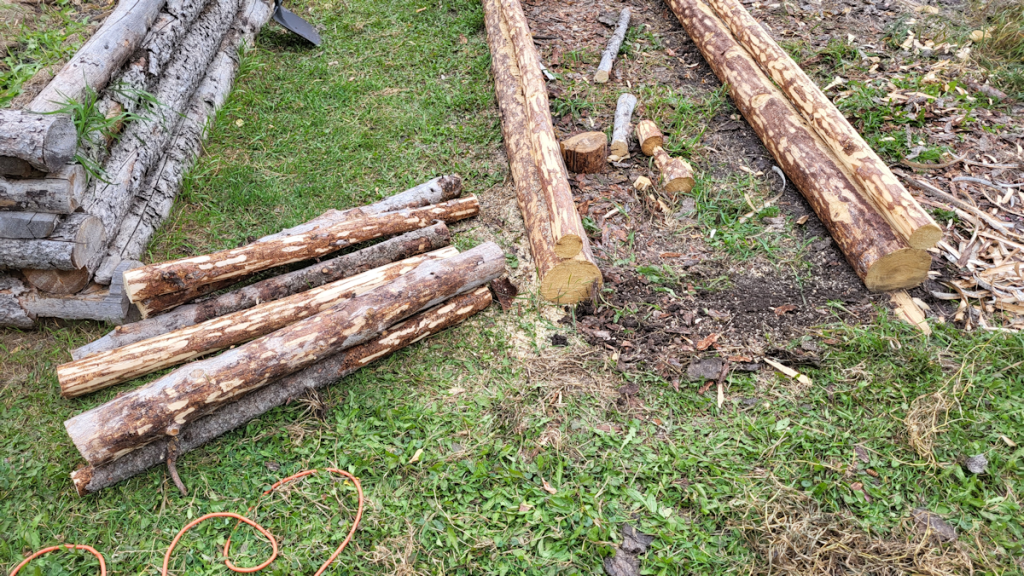
The first step was to cut the two logs set aside into 4′ long pieces. I know for sure I’ll need two per end, but these logs are thinner than the ones in the side walls, so I cut extra just in case.

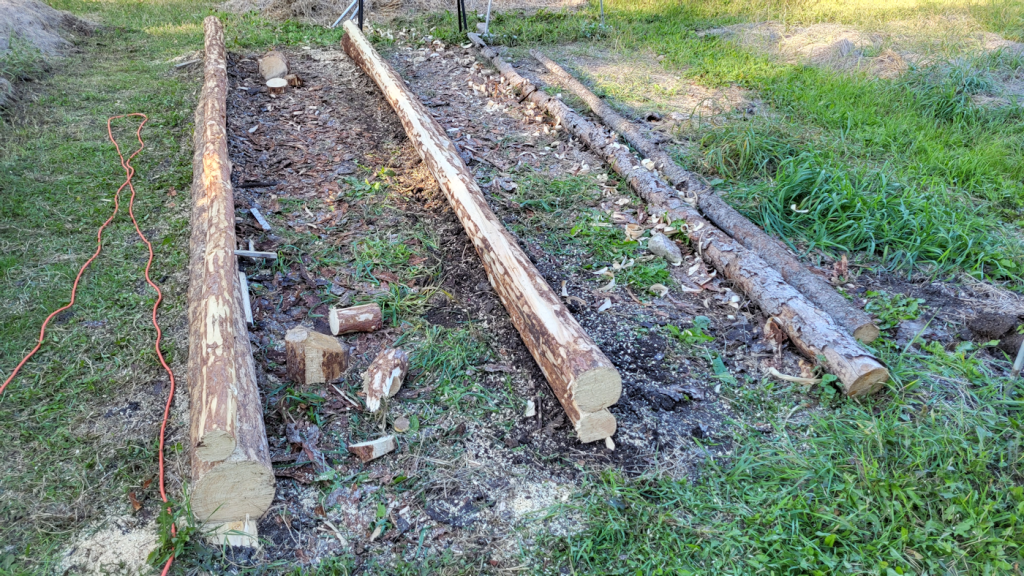
Before putting one of the end pieces down, I loosened up the soil where it would be lying and tried to level it off a bit, since there was a dip near the middle of the space. Because I want these beds to be 4′ wide on the outside, after laying down the first end piece and matching it to the outer edge on one side, I shifted the other side a bit to line up with the other end.

Steel toes boots are create for kicking logs and not breaking my toes!

I started with the thickest 4′ log for the base log on this end. Using the side wall logs to mark where I needed to cut, I removed wood from the ends to fit over the side wall logs.

What a pain.

For this job, I used the mini-chain saw, a hatchet and hammer to remove the bulk of the excess wood, and even the electric chain saw to remove the excess wood.

A pain, to be sure, but much faster and easier than when I started building the high raised bed and had only hand tools!

Once I was satisfied with how the end piece fit, it was time to secure it. A couple of years ago, I’d bought some plastic coated metal rods to use as supports in the garden. The rods were hollow, and they quickly bent and broke in our rocky soil. I’ve been using the broken pieces to secure things like hoops for garden beds, but I also used some to secure the corners of the tiny raised bed in the old kitchen garden.

I decided to use them to secure the end pieces on the trellis bed, much like I already used rebar to secure the side walls. I drilled matching holes through the end pieces into the side walls, then hammered the metal rods in place.

Then I went through the other 4′ lengths to find one that fit the best on top of the first log and repeated the process. This time, though, I was having to fit them over two very different sizes of log, so that required some extra angled cuts, as well as flattening the length of both logs a bit, so they’d fit against each other better. There’s still quite a gap in between them in one place, but that can be chinked later. Last of all, they were secured with more metal rods, though the top log was thin enough that I could break one of the rods in half and use the shorter pieces.

And here it is! The first finished end cap, viewed from inside the bed.

This all took quite a while to do, so once it was done, I stopped for the day. I’ve got too many other things that need to be worked on.

I’m quite happy with how it’s working out so far.

Since the vertical posts will be added to the outsides of the bed, not down the middle as I’d planned to do originally, I will fill the bed once the other end cap is done. That way the layers of material will have at least a bit more time to break down under the top layer of soil it will get. I may even decide to get more logs to build the next bed, first. We need beds to plant in next year, more than we need the trellis part of it. The trellis posts can even be added after planting, if necessary. The priority is to have more planting space. This year’s garden is so much smaller than I had planned on, simply because I ran out of prepared spaces to plant in. I don’t want to have that situation again, next year!

So, once this bed is built and filled, it’ll be time to cut logs to size from the two downs trees we have ready right now and drag them over. These trunks are so thick, the bottom 10′ will be set aside to be used as supports for the outdoor kitchen we will be building. Using such thick logs in the trellis beds would be a real waste of material.

The first day of fall is tomorrow, and time to get work done before things get too cold is running short!

The Re-Farmer

Trellis bed progress

I headed out to check the garden as the day warmed up, to get a better idea of how much frost damage there was. As things warm up, the damaged/dead parts turns a lot darker, which showed me that the tomato plants in the main garden area did get killed off. Not the ones in the old kitchen garden, though! The melon plants might make it. Lots of dead leaves, but not the entire plants.

Tonight, we’re looking at a low of 5 – 6C/41 – 43F which, if things go the way they have been, lately, may actually end up being 3 – 4C/37 – 39F.

The high for today ended up being 18C/64F. I took advantage of it and got some work done on the trellis bed. It was actually feeling too hot while I worked! This is where I stopped for the evening.

The first thing I needed to do was finish off the wall on the left. I rolled the top log off, then used a chain saw to try and smooth and flatten things a bit, mostly to get rid of odd lumps and bumps, then putting the top log back. I still ended up with some gaps, but those will be filled with pieces of wood from the inside

The next thing was to use an auger to match the size of the pieces of rebar I have. Thanks to my husband, I have a nice set of long auger bits for my drill. They’re a touch shorter than the rebar, so after drilling holes through both logs, I removed the top log again, then drilled further through the bottom log. Once that was done, the rebar got hammered through the holes in the top log until it came out the other end, which I could then use to position the top log back again before hammering the rebar flush with the top.

The base log for the other wall was already debarked, but needed some clean up to remove bits of branches and other lumps and bumps. Then I got out the garden fork and loosened the soil between the markers where the log would be positioned. I found a large rock in the process that would not move. Since it’s under a wall, I left it. Once the soil was loosened, and the worst of the weed roots removed, I spun the log around so that the wide end was facing the other way. The ground is a bit lower on that side. I should have laid the base log in the other wall that way, but didn’t think of it until I’d already positioned it.

This base log itself has a long bend in it. I made sure it was positioned to bow outwards. That will be taken advantage of later in the build. Once in place, I used the chain saw again to remove any parts that looked too uneven and lumpy, and trimmed a few branch stubs a bit more.

The top log then needed to be debarked and prepped. This wood actually took the knife a lot better, so I went ahead and shaved a flat strip, so it would lay flatter on the base long.

That didn’t quite work out!

While the top log is a lot straighter than the bottom one, when I put it in position, the narrow end of the top log, which is set above the wider end of the base log, was floating at least 8 inches above! After rotating the log until it finally set the most evenly, the shaved part was now on the top!

There were still some lumps and bumps in the way, though, mostly on the base log. The wood on that tree did not take to the draw knife well, so I used the chain saw to level it off some more, then made another matching flat area on the top log.

With the bend in the base log, though, the top log is lined up on each end, but almost completely off the bottom log at the bend! It wasn’t going anywhere, though, so I repeated the process for inserting the rebar, more or less matching where the ones in the other wall are set.

With the rebar holding the logs together, I used a board to line up and mark the ends for cutting, then removed the jagged ends of the logs. I had to be careful with the bottom logs, so as not to be cutting into the ground!

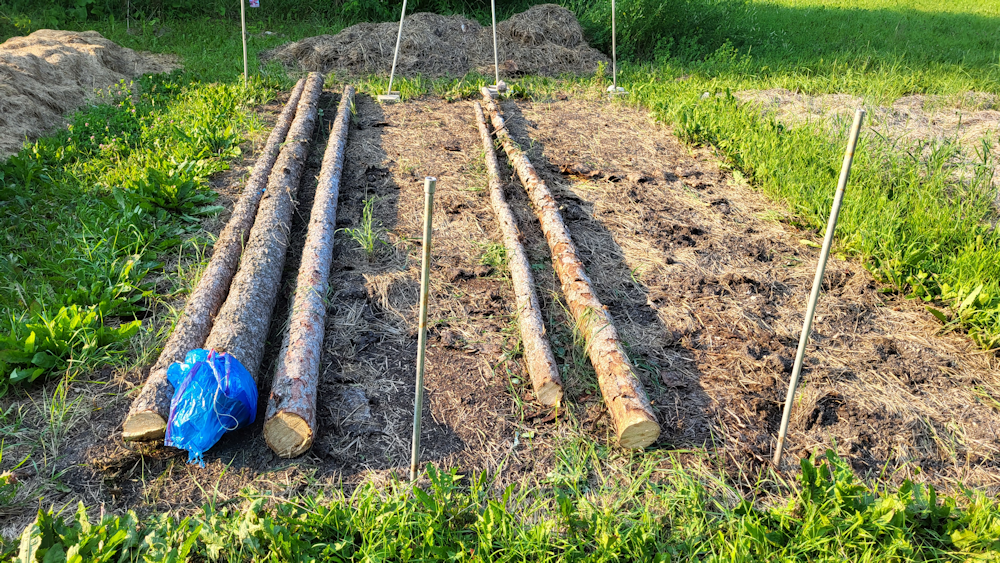
The two logs you can see set aside in the photo will at least partly be used to close up the ends of the beds. These beds are meant to be 18′ long and 4′ wide on the outside. With the ends trimmed, they are no longer 18′ long, but the end pieces will be used to make up the gap. It doesn’t have to be exact, but I’d rather they be a bit longer than shorter. With how the logs taper, I might have to find thicker pieces of logs to finish the ends and get that 18′.

Once the end pieces are in place and secure, I’ll start working on attaching the 4 vertical supports for the trellis, which will then get horizontal supports across their tops. They’ll be added after the verticals are in place. The ground is uneven, but I want the horizontals to be level. Since I’m not going to be digging post holes as originally intended, and just attaching them to the outside of a wall, I’m no longer going to be losing about a foot of height on these 7′ posts, so I will likely mount the horizontals at 6 1/2′ rather than 6′, then trimming off the excess height. When the second bed is built at the other markers, it will have matching trellis supports and, eventually, they will be joined at the top to create a tunnel.

If all goes well, we’ll make at least one more trellis tunnel set up in line with this one. My priority, however, is going to be making more high raised beds, once this is done. Mobility, reach and pain reduction while tending the beds are becoming more of an issue for me.

Not before this bed is finished, though, and that will include filling it and preparing it to plant in, next year. That means layers of carboard on the bottom, maybe some small branches, wood chips, fresh green material such as the frost bitten bush beans I pulled earlier today, grass clippings and topping it with some of that purchased garden soil we still have left. Last of all with be a grass clipping mulch to protect the soil over the winter.

The bed the Roma tomatoes were in needs to be prepared for the winter, and if I could at least make that into a high raised bed, that would make life easier for next year!

The Re-Farmer

So many kitties, and trellis bed progress

I headed out this afternoon, and got distracted by many adorable fluff balls.

I’ve only recently started using Instagram to upload my photos, since I’m running out of storage space on my WordPress account. WP does allow the purchase of extra storage space, without having to upgrade plans, but the cost for 50G is Cdn$68.54 PER MONTH!!!! – billed yearly. Which is insane. If I upgraded my plan to Business, it would cost Cdn$33/month, billed yearly, and that would come with 50G of storage.

So… uploading to Instagram it is.

The problem is, when I upload photos – especially groups of photos – the images are often corrupted. They seem fine right up until I hit “share”, and when I check them, there’s often something wrong with them. Some are so bad, most of the photo can’t even be made out. I thought the issue might be my computer, but when I double checked using my phone, the images were still corrupted. Today, I had to reload this next batch of photos three times before it worked, and even then, the third one is corrupted. At least it’s still visible, though!

These were my distractions.

That orange and white kitten is successfully socialized, and absolutely adorable. The tuxedo in Baby Jail is not socialized at all! I am happy that they are going in and out of the cage comfortably, though. If we ever need to suddenly keep a cat in there until we can take it somewhere, they will already be comfortable in the space.

Octomom’s babies are all over the place these days. The one using a brick as a pillow is just too adorable!

After I took those photos, I started walking slowly in between the cat shelters, and the orange and white kitten came over. I was able to pet him and pick him up, and he was purring up a storm. This made the littles very curious, and they started to come out from under the cat house to see what was going on. That they were willing to come within a couple of feet of me was quite encouraging.

I had to tear myself away from the kittens and get to work! It’s taken forever for me to get back to those poplars I cut for the vertical supports on the trellis beds.

I cut the logs to about 7’2″ lengths, in case the bottom ends need to be trimmed flat. In the first photo is the finished stack of 7′ lengths. I got three out of one log. Most of them got me two lengths. In the corner of the photo is the stack of log ends, or sections that were just too crooked to use.

It was as I was finishing up that I realized I was feeling really dizzy and getting the shakes. It was hot, yes, but “only” about 23C/73F Then I remembered.

I’d had a late breakfast, so when I lay down for a nap at about lunch time, I didn’t eat first. I forgot to eat something before heading outside.

Because I’m an idiot that way.

So I quickly cleaned up then headed in for some food.

When I came back out, I had to figure out the best way to get the logs to where the trellis beds are going to be. I got out the loppers and started clearing a path through the spruce grove. At one point, I had to get the baby chain saw to cut away a fallen tree that was half buried in the grass.

Once I was reasonably sure there weren’t any branches, bushes or small trees to get tangled on, I grabbed a log and carried it over. It was one of the bigger ones, but I could carry it on my shoulder easily enough. The problem was the distance. There was no way I was going to be able to carry them all out like that, without wearing myself out too quickly.

So for the other larger logs, I grabbed a rope to drag them with, which you can see in the second picture.

Of course, if I’m going to do this to make it easier on myself, I really need to make sure there are no stumps of branches to dig into the ground! I adjusted the rope to turn the log a couple of times. In the third photo, you can see all the grass that had been pulled up by what turned out to be two “anchors” on the log! After I got those facing up, the rest of the drag went much more smoothly!

I also took a video of it, to give an idea of just how far the logs need to be carried. For this, I chose a log light enough that I could carry it with one hand, while taking video with the other.

Also, my phone’s microphone really picks up the sound of my breathing! 😄

There’s a brief pause as I show were I had to clear the fallen tree. Just a little one, but too long to just move aside.

In the end, I was only able to move three lengths over. I used the rope to drag the third, bigger one over, after I took the video. It was just too hot for that kind of work. I can’t handle the heat like I used to!

I’m going to have to work on moving these early in the morning, before things get hot. I won’t be able to do much over the next couple of days. Tomorrow, not only am I going into the city for our first monthly stock up shop, but I’m losing a daughter for almost a month. She’ll be house sitting for my brother and his wife while they go on a trip of a lifetime, and going over early so they can show her what she needs to do and what to keep an eye on. So I’m losing one of the more able bodied members of our household!

Looking at the long range forecast, though, I see things have changed. We’re going to be getting hotter again. There’s even a forecast of 30C/86F on the weekend!

Which will be great for the garden. Especially for the squash and melons. The longer we have with warmer temperatures and no frost, the better our chances of having something to harvest.

Well, I’ll figure out what to do during the heat. We really need to get progress done on those beds! Plus, if I can get enough dead spruces cut down, I hope to get more high raised beds built, too, replacing some of the current low raised beds.

At the rate we’ve been going, though, I’ll be lucky to get just one trellis bed done!

The Re-Farmer

This and that

I seem to still be in recovery mode today, even after taking yesterday as a day of rest. I tend to forget just how draining it can be after spending time with my mother, even when she’s having one of her better days!

It’s also working out to be a hotter day. We’ve got a high of 26C/79F for today and tomorrow and, depending on what app I’m looking at, we’ll be hitting either 29C/84 or 31C/88F by the end of the week.

I did get at least one thing accomplished – finally! I cut away the web of roots and got the water pipe out from where I’d tried patching it, to the tap.

It took more digging and cutting to find the bottom of the tap and cut it free!

The only thing holding it upright was the web of roots, and that length of conduit pipe.

The short sections of rigid pipe were filled with dirt and roots. A couple of them had to be blasted with water before I could get them off the water pipe.

I did find where water can been coming out, when I did the patches and tested the tap. Quite a split in the pipe!

How the ground pipe was joined to the tap pipe was not what I expected. I thought there might be some sort of threaded connector. The metal pipe is jammed into the water pipe – and it is still very water tight, and very secure! I’ll probably have to cut it off, if I bother to at all.

I would like to use the original tap again. Even parts of the original metal pipe, too, if I can. However, my intended replacement for all this is to use an ordinary, heavy duty garden hose that can be easily removed, as needed. The dirt and roots in the short sections of pipe reinforce my plan to have a long pipe, from house to tap, to protect the hose.

For now, however, I will not remove the rest of the pipe, to the house. There are going to be much larger roots to cut through, plus it runs through a higher traffic area that gets regularly mowed, so I don’t want to dig a trench until I’m ready to put in the new system. I’m very interested in seeing how that hose end that comes out of the ground is attached to the water pipe!

So, for this project I need to get a long enough heavy duty hose, enough pipe, with drainage holes, to fit together and reach from house to tap, angled fittings for the ends that will get a removeable seal around the hose to prevent water, dirt or critters from getting in, and appropriate pipes and fittings to attach the hose to the tap assembly. For the tap itself, I want to build a box for the vertical pipe with the tap mounted on the garden side. I liked the original post’s little roof over the tap and will probably expand on that, to double as a shelf or something. The box will have a door at the back to access the hose and pipes, with room enough to store a few things, like the cord that will be used to pull the hose through the underground pipes, should it ever need to be removed, repaired or replaced.

Once this is installed and complete, I plan to make a vegetable washing station under the tap, using salvaged materials I’ve found around the property.

Hopefully, by the time it’s done, it’ll be good enough to last another 50 years or so.

After I finished up with the tap and hose set up, I headed towards the house and checked out the old kitchen garden. I was finally able to get a photo of one of the developing luffa.

I’ve been able to spot three of these. Hopefully, they have been pollinated and will develop into mature luffa gourds before we get frost. These are so high up, there’s no possibility of hand pollinating!

Before heading back to the house, I had an adorable surprise.

Tiny, familiar kittens.

Octomom had brought them to the house!

I only saw 4 of them, including this one.

They still can’t move very fast, so I was able to catch this one and hold it for a little while. This one is completely black. I saw the other black one, and it appears to have a white patch on its chest. I also saw the brown and the grey tabbies. Where the other 4 are, I could not see. Eventually, Octomom came around for them, but only two followed her across the yard. The rest were still hiding under the storage house.

While I was outside, I started to get some messages from the Cat Lady. She was at the vet with the kittens, and the prognosis is not good. They would have died within the week, she was told. As it is, they have a cat virus (calci), herpes, low glucose, low oxygen, pneumonia, infected ears and sores in their throats. The kittens have been at the vet all day, and the bill is getting high. I feel so bad about this. We were only going to pass on the one kitten, so now it’s double the expense for her, and we have no way to help out.

Priority is going to be spaying and neutering, because a lot of this is exacerbated by the sheer number of kittens.

Oh, wow!! Something just happened while I was writing this!

Two Toes is letting Tin Whistle nurse!

I had been expecting the kittens to at least try to nurse on her, since Decimus leaves the room once she’s done with nursing, and batting them away when they want to nurse more. They had not been trying, though, nor did Two Toes, until just moments ago!

Two Toes is doing really well. She seems quite happy, loves head pets, and gave me kisses today!

Whatever fight she was in that left her with a broken leg, the fur on her face and head is full of scabs that are healing well.

The only down side is poor Snarly Marlee! She does NOT like the kittens. The girls try to bring her into the living room for a while, so she can get a break, while they are there.

Hopefully, it won’t be for much longer. It would be fantastic if we could adopt them all out!

The Re-Farmer

Painting and log prep progress

My trip to pick up a parcel ended up taking longer than expected. It was a Purolator delivery, which now delivers to our post office, if we use their address, and we pick it up from there. Other times, we’ve had to go to town to pick it up, or to the slightly further town my mother lives in.

Not this time!

For some reason, they decided to drop it off at another, even further, town to the north of us.

Then didn’t tell us.

If the shipping address is just a box number, they call us and ask which depot to drop it off in. My husband got no such call. He didn’t even know it was coming by Purolator. When he placed the order, he thought it was coming by mail. They’re not very good about informing how things will be delivered!

Ah, well. It was just a bit of an extra drive. I still got to pick up the mail, where I found our seed packet arrived, in advance of the crocuses we ordered, as well as my subscription shipment of lysine for the outside cats.

Once I got home, I was soon heading outside to get ready to paint the stump bench and folding table, which included hosing them down and giving them a scrub. I left them to dry while setting up the paint supplies, only to hear a strange noise in the leaves above me.

It was starting to rain!

Of course… 😄

It wasn’t much, but that was okay. I was planning to work on the trellis bed logs while the bench and table dried, anyhow.

I’ll start with the logs.

I wanted to start with the largest log that is going to be a bottom log in the bed. The other large one we recently cut might be an issue. It has a bend in it that I’m either going to have to work around, or find a straighter dead tree of the right size.

I brought over one of our saw horses to make debarking easier. I love that draw knife! The hard part was at the wide end. It just did not want to roll over and stay put, so I could do the underside! It took some fighting, and a handy wedge shaped rock to keep it from rolling back, but eventually, I got it all done.

The next step will be to hose it down, then trim away the branch nubs and other lumps, before moving on to the next log.

Ideally, I would char this before setting it in the ground, but to char a log this size all over, I would need a torch of some kind, and I don’t have one. Still, just debarking it will help, and all the bits of bark will be part of the garden bed layers.

By the time this was done, what little rain we had was long gone, and the bench and table were dry. Here are the before and after pictures.

I debarked the stump supporting the bench, too, then pressure sprayed it with the hose. It really should have been debarked when the bench was first made. I found sawdust and ant damage under the bark. Not enough to affect the stability of the stump, yet. It’ll hold that bench for a few more years!

I did not paint the stump or the end supports. Once all the greenery grows back, it should look like the bench is just floating.

These will get at least one more coat of paint before they’re done. If the forecasts are at all accurate, I should be able to do that tomorrow afternoon, then more rain supposed to hit our area.

It feels good to finally get at least a bit more progress on those trellis bed logs! This project is taking so much longer than it should have. 😕

The Re-Farmer

Our 2023 garden: how does the garden grow?

I had a couple of surprised while going my rounds this morning. The first were these…

Two more volunteer potatoes have popped up!

The one in the straw would be from the All Blue potatoes we planted there last year. The one by the log would be from the Bridget we planted last year.

I also found some ladies!

Plant ladies, that is.

I don’t know why Instagram doesn’t sort the pictures in the order I upload them. I also don’t know why some of the files end up corrupted. They look fine when I upload them, but after I hit publish, I’ll find one with issues. Ah, well.

In the above slideshow are:

Caveman’s Club gourd: There have been male flowers for a while, so if these female flower buds survive long enough to bloom, there should be male flowers around to pollinate them.

Montana Morado corn silk: Finally! The tassels have been up and many already dropping pollen, but this is the first – and, so far, only – corn silk that has shown up. I was really starting to wonder. The Tom Thumb popcorn has tassels, too, but also had silk show up not long after. With the purple corn, there’s a much larger gap in time between them!

Goldy Zucchini: This one little yellow zucchini has been here for a few days now. It doesn’t seem to be getting any bigger, but the other flower buds seem to be at the same stage. This is the only surviving yellow zucchini plant, and the slugs are just all over it, so it’s not thriving. There had been a second one that germinated in the same hill and was starting to develop its true leaves, but there’s very little left of it anymore. I don’t know why the slugs like this one plant so much!

Honeyboat Delicata: Finding a female flower in full bloom was a very nice surprise! Unfortunately, there are zero male flowers on any of the other Honeyboat Delicata. I ended up taking a male flower from another squash to pollinate it by hand. That should be good enough for the fruit to actually develop, but we won’t be able to save seeds from it, as they would be a hybrid. Mind you, maybe we want a Delicata/hulless pumpkin hybrid. 😄

It looks like we may actually get winter squash this year. Because they are all planted near each other, any squash we get will be cross pollinated. I’m hoping we will at least be able to have mature squash to taste, and see which ones we like the most. After that, we can focus on just growing one or two varieties we like, in such a way that we can save seed.

And finally, one more nice little surprise.

Our first beans are starting to form.

These are volunteers in the compost heap!

I have no idea what kind they are. There are no beans that we planted last year that could have ended up with viable seeds in the compost pile. Also, no beans that we planted last year had green beans with pink flowers.

I am very curious about what we will get out of these, and will probably leave at least one plant unharvested, so we can see what the dry seed looks like.

Oh, and one last little update. We had the Irish Cobbler and Red Thumb baby potatoes with supper last night, and both were delicious. I just love how the Red Thumb potatoes are pink, all the way through! We’ll be leaving the rest to harvest in the fall, but at least we know they are good, and worth growing again.

We’re past the middle of July and not having the sort of harvests we expected, had we been able to plant everything we intended to, but we will have something, at least. Looking back at garden pictures for this time last year, I can at least say we’re not “behind”. It just feels like we’re behind, because I’m seeing so many people in my Zone 3 gardening groups, posting pictures of their harvests and gardens. There are very few people in those groups that are as far north as we are, it seems.

We are definitely having good progress, though. It’s been a good growing year so far, with plenty of heat, sunshine and rain – but not too much of any of those! It’s been juuuust right.

For now! 😄

The Re-Farmer

Our 2023 garden: progress, and first harvest

I got to see some nice progress in the garden this morning.

First, the tomatoes.

The first Roma VF tomatoes that showed up are now starting to change colour from green to yellowish and now kinda orange.

I still am not sure how we’ll be able to tell when the Black Beauty and Indigo Blue Chocolates are ready to pick. They practically started out at the colours they’re supposed to be, when ripe. I guess it’ll come down to how soft they feel, and how easily they come off the vine. The very first Black Beauty tomato that showed up is getting quite large, so that’s another thing to use as a guide, I guess.

We also have squash and gourds developing – I hope!

The G-Star patty pan squash are looking big and healthy – the slugs don’t seem to like them! Here, the first flower buds are forming, with both male and females forming at the same time! With everything else, we’ve just been seeing male flowers. There is one exception. We have one yellow zucchini plant that the slugs seem to just love, but it’s surviving. There is a single female flower bud, with a bright yellow baby squash under the flower, but the male flower buds are just barely emerging. It’s unlikely the female flower will have any male flowers to pollinate it when it finally opens.

The second photo is of our very first female African Drum gourd flower bud!

I was not expecting it to be fuzzy.

A few other winter squash are also starting to show female flower buds, including the Crespo squash. Hopefully, the buds will actually reach the blooming stage. With the Crespo squash in particular, the only ones that showed up before now, dried up and fell off long before they got big enough to start blooming. They sure have a lot of male flowers, though! More than any other squash that has started blooming.

It was thundering and threatening rain while I was checking the garden beds, but I went ahead and made a first harvest, before heading in.

I dug around and gathered our first Irish Cobbler potatoes. These are from under 2 plants. There were still tiny potatoes among the roots, so I left the plants in the ground to hopefully keep growing.

I just picked enough for one meal. We’ll leave the rest to fully mature before we pick them again; there just aren’t that many plants, so the longer we leave them be, hopefully the better the harvest in the fall. We’ll likely try the Red Thumb potatoes too, but with the Purple Peruvian growing in feed bags, we’ll probably not bother with those. We’ve grown them before, anyhow, so we know what they taste like.

We had quite a lot of rain last night. Enough to refill the barrel by the sunroom to overflowing! With all the thunder I was hearing while checking the garden, I didn’t start any outdoor jobs. Instead, a daughter and I went into town to refill some water jugs and pick up a few things, including kitten kibble. I ran out of that last night. The storm I was hearing passed us by, though, so we should be able to get at least one of those frames done this evening.

For all that our garden ended up much smaller than intended for this year, I’m happy with how things have been turning out.

The Re-Farmer

Today’s progress

Last night was another chilly one, as we went down to 9C/48F – but not chilly enough for the furnace to turn on this time! The thermostat was turned down to 10C/50F for the summer, but we never expected it to actually get lower than that!

Today we hit 26C/79F. We keep getting storm warnings, but I can’t rely in them hitting us, so I made sure to water the garden. Starting by hooking up the soaker hose and just leaving it while I made a run into town to pick up some prescription refills for myself, refill a couple of our 18.9L water jugs, and fill the tank on my mother’s car. Thankfully, the gas prices in town have not gone up with the new tax, though it has in other parts of the province, including the city. Rather backwards on that, but I’m certainly not going to complain!

I haven’t heard from the garage about our van, yet, which means he hasn’t had a chance to look at it. Thankfully, we have access to my mother’s car, so it’s no hurry.

I wasn’t going to do any heavy stuff in the heat of the day – the rest of the week is supposed to be much more reasonable! – but that just meant catching up on smaller things. While moving the hose to the different beds with sprinkler hoses, I went ahead and planted some of the Red Swan beans we have so much of, in with the purple corn. These beans are both a fresh eating and dry bean, but this late in the year, I think we can only reasonable expect to have fresh beans in what’s left of the growing season. Hopefully, they will work out with the corn to climb. I considered planting bush beans, instead, but I’d rather pick beans from higher up!

After finding the newly sprouted summer squash eaten by slugs already, I sprinkled fresh corn meal around all the squash mounds. I spotted another seedling in the next mound over, and I didn’t want that one eaten, too! I also sowed more summer squash again. If this third planting doesn’t take, that’ll be it for trying to sow them. I just came back from checking the garden beds while there was still enough light, and I did find a few slugs around a couple of squash, but that’s it. Hopefully, this new application of corn meal will be enough to keep them from returning.

Along with watering the main garden with the hose, it was time to refill the old rain barrel out by the Crespo squash and new raspberries. I’m trying to make sure the squash out there get extra water, because that corner gets so dry and sun baked. For the garden beds in the south yards, I used water from the full rain barrel by the sun room, then left the diverter off so that, if we do get more rain, it’ll get refilled.

While watering the old kitchen garden, I took the time to take the cover off the shallot bed and do a thorough weeding. The first of the poppies in there has started to open, and I can tell these are more of the Double Scarlet, not the Giant Rattle poppies we grew there before. Darn. Still, these do seem to be an eating poppy, not an ornamental one, so that’s okay.

The shallot greens were starting to get too tall for the wire cover – a problem I did not anticipate! – and were falling over too soon, so I harvested enough of the greens to take some of that weight off. Then I decided to harvest some of that mint that’s been invading our paths; it’s much taller than the ones I transplanted into the retaining wall blocks! My younger daughter might try some of the mint to flavour a panna cotta. Sounds good to me!

I also spotted our can of marking paint when I got back inside, which reminded me to head back out again and use it to mark the rocks and high roots in the southeast yard, so we can see them when mowing the lawn. We’ll have to get more of that marking paint. I finished off the can, and it has been very handy.

I made sure the kibble was topped up for the evening – I don’t want to do it too late in the day, or we’re just feeding skunks and racoons. Of course, I still saw a skunk before coming back in, just a little while ago. The kittens were also out and playing. I was able to catch and pick up another of the white and greys, and give it a cuddle. It didn’t like being picked up and put down, but it tolerated being held and snuggled just fine!

I was happy to see the tiny tuxedo enjoying the bed and stuffy the Cat Lady donated to the yard cats. There are other beds in the cat house, but these are in the water bowl shelter. Even the littlest kittens have figured out how to use the board leaning on the edge as a ramp, to drink water in there. Of course, we have water bowls at their height, but it’s good that they can get at the ones in the shelter, too.

Among the two litters that now spend so much time in the sun room, there are a couple that are white and black, very much like their mother, but one of them is most definitely a tuxedo, even tinier than the singleton! I spotted the two tuxedos playing together, and can see that it’s going to get hard to tell them apart, once they’re both adult sized!

I think I managed to get a decent amount of stuff done today, even if it wasn’t the big stuff that needs to be done, too, just yet.

The Re-Farmer

Trellis bed progress

Finally!

With last night’s storm, I was happy to see the tree my brother cut down that got hung up on other trees had fallen closer to the ground. It’s not going to drop any further, though. It’s now hung up between the trunks of a group of trees. We can, at least, reach most of it better, though, so we’ll be able to work on it eventually.

With today’s slightly cooler weather and a nice, clear day, I started working on getting those dead spruce trees my brother cut down for me, out of the bushes.

I took photos and will eventually put it all together in a video but, for now, this is what I managed to get done today.

Gosh. That doesn’t look like much, now that it’s done! 😄 It did, however, take a LOT of prep work before these logs could finally be dragged over.

The two trees that were on the ground were almost completely hidden by underbrush. I used the weed trimmer to clear a path to them first, then did a bit around the trees themselves. There were too many hidden branches, though, so I had to shift gears.

The top of the first tree extended a lot more than I thought it did. I used the little mini-chainsaw pruner to clear the branches, then remove the most crooked section of the top, before working my way down the trunk. I had the wagon nearby to put the branches in, and made a few trips to the branch pile near the fire pit, cleaning up as I went along.

Once I got it clear enough, I was able to pull the entire trunk out from under the stuck tree, then continue removing a few more branch stubs. Next, I measured 18 feet from the thick end of the trunk, and used the electric chain saw to cut it. I used a rope to drag the top part through the trees and into the garden, which was harder than it should have been. I neglected to roll it over and check it, first. There turned out to be a stub of a broken branch at the end, acting like an anchor!

Needless to say, I made sure to check the 18′ piece before I dragged that away, too!

The top of the tree is around 16-17′ long. Too short and thin to make the long walls of the beds, but it will do nicely, cut into 4′ lengths, to create the end walls.

The other tree that was flat on the ground was looking very crooked – spruces tend to be like that at their tops – and I thought it was shorter than the first one. As I cleared more dead branches and tried pulling it out from under the stuck tree trunk, I realized it was a lot longer, and thicker! In fact, when I finished clearing the branches and measured out 18′ from the end, I was still at the far side of the stuck tree! It was simply too big to pull out first, like I could with the first tree.

The top was moved first. I hadn’t bothered to measure it, since I figured it would be too short, but when I dragged it between the posts that are 18′ apart, it almost reached, end to end! The thinner top, though is still pretty crooked, so it will likely not be used as a side wall.

Then it was time to drag out the rest of it. I rolled it around to cut away any branch stubs that might cause problems, but the trunk was quite a bit larger and heavier, and getting caught on things. While I was working, I was constantly finding very old and rotting branches and pieces of tree trunks hidden in the undergrowth, that have clearly been there for many years. They made for a rough surface to drag on. I ended up tying a plastic bag around the end of the trunk, to reduce friction. It helped a lot but, by then, I was getting pretty hot and tired, so I got a daughter to pause making supper to come help me drag it out.

While working on this tree trunk, I found the fourth tree my brother had cut down. It is another big one, and he felled it in the opposite direction. It’s almost completely hidden, not just by undergrown, but other trees, and I’m honestly not sure how I’m going to get at it.

As for the tree that’s stuck, that one is even bigger. This is one that’s going to have the thickest 10′ cut off and taken to where we plan to build the shelter for the outdoor kitchen we plan to build. These trunks are far too thick to use for raised beds, as they would take up a lot of growing space. Rather than cut them in half or something, we will instead use them as vertical supports for the shelter.

But I was not about to work on either of those logs, today.

I started to put things away, but I really wasn’t happy with having done only two trees. Especially when there were other thinner dead trees, right there.

Yup. I ended up cutting down another tree.

Gosh, that thing felt so light, after fighting with the big one! Even though I used a hinge cut, it still fell off to one side and got a bit hung up on other trees. It was easy to get loose. I just put the rope around the trunk near the stump and pulled it until it fell the rest of the way. It also fell across the stuck tree, which made it much easier to work around.

Then it was just a matter of clearing a few branches – there weren’t very many at the bottom half – measuring out and cutting 18′ and dragging it out.

The top of the tree is resting on top of undergrowth, and I left it there for now. I am not sure how much of it will be useable. It won’t be useable for the walls on the raised bed, but it might be useful in other ways.

I’m still going to have to cut down one more smaller tree for this bed. There’s one that looks like it’s similar in girth as the log with the plastic bag on the end. I’m planning to make these beds 2 logs high, but I want the bottom logs to be the bigger, thicker ones.

This time I have the draw knife, so I want to de-bark the logs and cut away any remaining branch nubs, lumps and bumps. I didn’t do that for the high raised bed, and I can see that it would be much better to do it than not.

I want to get at least one bed built, with the vertical trellis supports in place, before cutting down more trees for the second one. Ideally, I’d put in the vertical supports for both beds, along with the horizontal supports to make a trellis tunnel, right from the start, but we’re going to have to work on things piecemeal for now. Plus, we will be building at least one, probably two, more of these, so this one is the learning experience!

I’m happy with the progress, and I’m paying for it now, but I’m actually not having as much trouble as I’ve had in the past. Of course, tomorrow might prove me wrong, but it seems my body is finally starting to handle things better. Yes, I’m stiff, my left knee tried to make an escape, and a thigh tried to go into a conniption fit, but I’ve certainly had far worse pain, stiffness and joint instability after far less work.

It just feels so good to finally be able to work on this!

The Re-Farmer