Our 2025 Garden: baby baked potatoes, and garden path progress

While doing my rounds today, I noticed some really huge squash and pumpkin flowers were open. There was even one among the zucchini that I made sure to hand pollinate, since no male flowers were open.

In checking the winter squash, though, I had my first find of potential Baked Potato squash. Two little female flowers were finally forming.

Once those blossoms open, I will be sure to hand pollinate them, just to be on the safe side.

Not that it’s likely we’ll get anything from them. We’re well into the second half of August right now. These are shorter season varieties, but even if these female flowers get properly pollinated and start to grow, it’s unlikely we have enough season left for full maturity.

Once I was done my rounds, I grabbed the wheelbarrow and started bringing wood chips over to cover some garden paths. I forgot to get a “before” picture of the first one I started on, so I instead have a “half way done” picture.

That first picture is after three wheelbarrow loads. Some of the wood chips were also spread around the north ends of the two beds.

The second picture shows that path finished, including the ends of the two beds, with a total of five wheelbarrow loads. I especially wanted to make sure there was a thick, stamped down layer right up against the walls of the raised beds.

The only down side is that, while loading the wheelbarrow from the wood chip pile, I broke up an ant hill. Which means that, along with the wood chips, I also brought over a whole bunch of red ants and their eggs.

I’ll need to pick up some ant traps soon.

Once this was done, I headed inside for breakfast. By the time I came out again, it was just starting to almost, kinda, sorta rain. More of a misting than a rain. I was already soaked with sweat from the humidity, so I figured I may as well keep at it.

For the second path, I remembered to get a proper “before” picture.

For this one, I tried to load the wheelbarrow as much as I could, without losing woodchips along the way. It still took five loads, but I had enough to add to the ends, as well as more to put along the sides of the flower bed. That bed will get walls eventually, and the wood chips are where the walls would go, but that’s okay. As it is now, if I’m not careful while watering, the soil mound the flowers are planted in starts to erode, and the wood chips will reduce that.

The high raised bed already had its own ant colony in one corner, so I just added more ants… 🫤

Definitely need to get ant traps.

Here is how it looked from the north end.

Those bricks at the end of the flower bed were added because the cats were digging there to use the soil as a littler box.

The Cosmos are getting nice and tall, and looking really healthy! Hopefully, they aren’t shading out the memorial asters too much.

I did finally remove the hoops that were still over that section. I’d left them after removing the netting simply because they weren’t in the way of anything, and it was as good a place to store them as any.

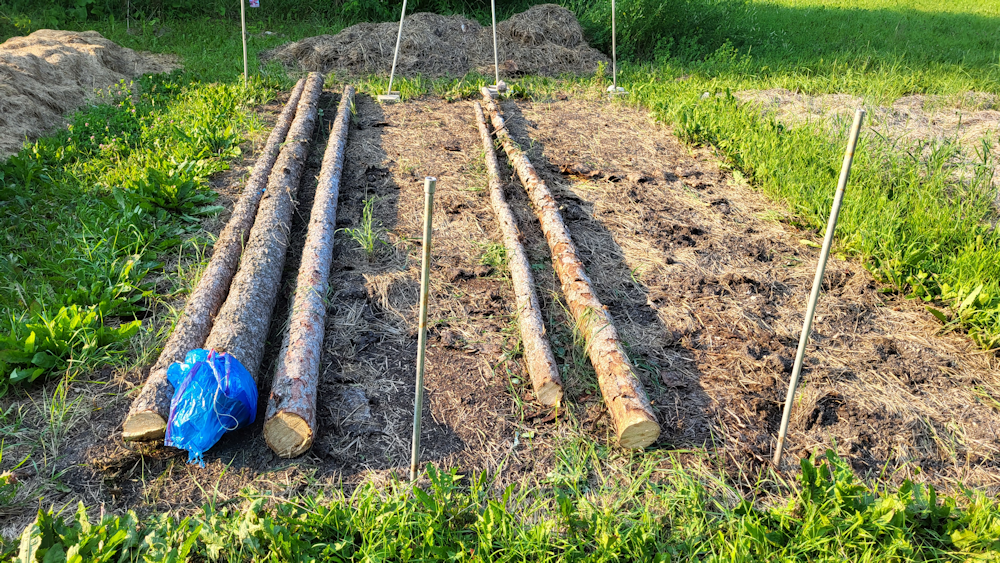
Eventually, this end will have a more developed 4′ wide path, but that will happen after we get rid of those killer trees and build more beds to reclaim the space they’ve taken over. For now, I just need a narrower mulched path to keep the weeds down.

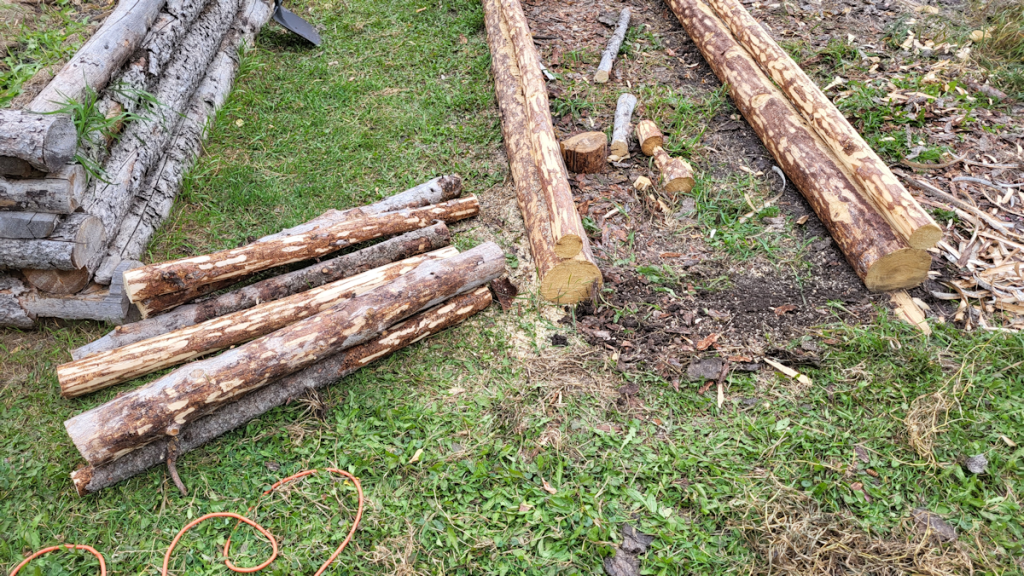
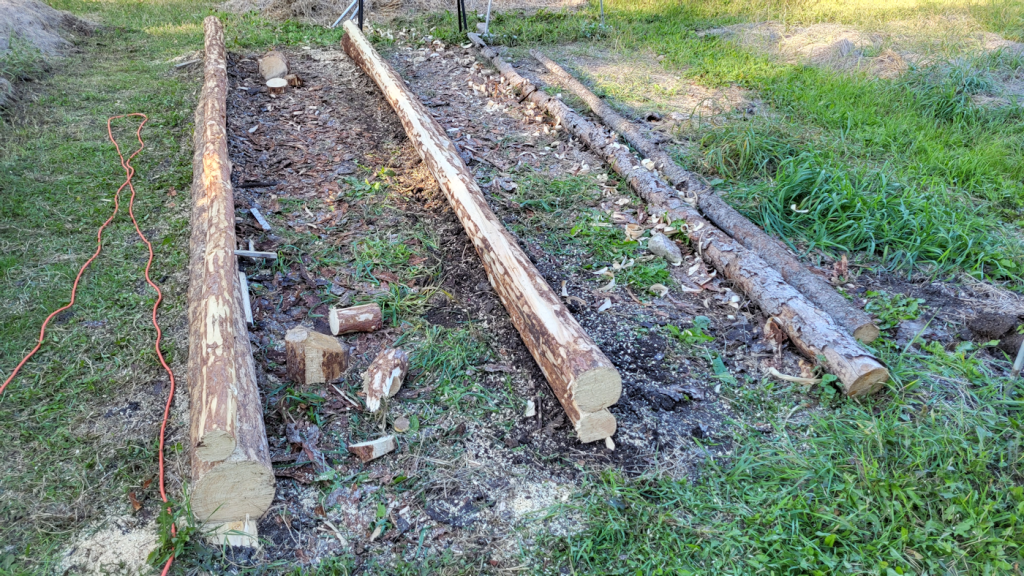
Once this was done, it had gone from misting to raining, so it was time to stop. This area won’t get more wood chips for a while, as I’m adding that after the raised beds on either side of a path are permanently framed with logs.

I did use up a decent chunk of the wood chip pile!

Not only was there a big ant nest in it, but poplar roots were working their way through it, too. It’s been there a few years, now. Where I’m standing to take the picture is how far it extended when the tree company we hired to get rid of the big branch pile for us dumped it there. This area is meant to be kept open, wide enough to drive through, if needed, so it’ll be good to use up that pile. We’ll need to go over with with the landscape rake when we’ve cleared as much as we can, just so we can mow over it without the lawnmower blades doing much crunching and munching, and potentially getting damaged.

The next areas I’ll be adding wood chips to are around the raised beds in the east yard, and around the newest food forest additions.

Which I might actually get some progress on, as it seems to have stopped raining. We’re getting into the hottest part of the day, though, so I might work on another project, instead.

I’m so enjoying finally getting some stuff done out there!

The Re-Farmer

Trellis build progress

I wasn’t sure how much we could get done on the trellis build today, and it turns out to be just two vertical supports. Which is actually pretty good, all things considering!

Here’s the start.

I selected and de-barked logs for the verticals something like a year ago, and that was about as far as things got for quite some time. Having been sitting out over the bed like that all winter, I went over them and took one out completely, as it cracked too badly to be used. After going through the others, I debated whether I wanted to do four or five verticals, and decided to go ahead and with five. The two largest would go on each corner.

We had debated various ways of setting these up, including digging holes and sinking them, but decided to just attach them directly to the frame of the raised bed. The one last minute decision we made was to set them on scrap bricks, so that the bases wouldn’t be in contact with the soil. We went through the pile of bricks from the old chimney that was removed when the new roof was done and found several chunks that seemed suitable.

The first thing to do was to trim all the bottoms so that they’d be straight. Then, we needed to create flattish, straight-ish surfaces on the sides where they would come in contact with the frame.

With the first corner, the bottom log of the end cap got trimmed a fair bit. With the brick in place, we worked out where we needed to trim the vertical. We still ended up needing to cut extra out near the bottom to fit over that bottom end cap log. Once it was snug enough, we used 3 inch screws to secure it. For now, there’s just two of them. We’ll secure it more, later in the build.

The opposite corner needed a lot more work. We had to cut away more from the frame itself, to create more of a surface to attach to. Then there was cutting away the excess on the vertical. In the end, though, the vertical log was still too thick for our 3″ screws, and we didn’t have anything longer, so we used metal strapping to hold it in place. After using shorter screws to secure the strapping in place, we used a few 3″ screws to tighten it up even more at the gaps.

We weren’t after perfection, by any means. Which is good, because cutting away the excess wood was quite a pain. We mostly used the mini-chainsaw (a Stihl pruning saw) until we drained both batteries, as well as using whatever other tools we had on hand, including a hatchet, a chisel and even the draw knife.

We had “help” while we were working!

Syndol was especially eager to “help” any time I bent over, wanting to jump onto my back! Then, while using the drill or driver, he kept trying to get in on things. My daughter and I had our hands full either of tools or holding the vertical post, and he took full advantage of the fact that we couldn’t really stop him from getting in the way!

In the end, it took us about 2 hours to get just those two verticals up. This is how it looks now.

We reached our high of 16C/61F today, and we were working in full sun, so it got really hot out there.

After this, we’ll measure out where to put the remaining three verticals, with each on top of a piece of brick. They are not as thick, so it shouldn’t take as long. They can only be attached to the top log, though, as the bottom one bows inward quite a bit.

Once those are in place, we will measure and mark the tops and trim them to all the same height. One those are leveled, horizontals will be put across the top. I’m still not decided on whether I want to put the horizontals directly on top, or on what will be the inside of the trellis tunnel, when the matching bed is built. Probably directly on top. Once that’s in place, support pieces at 45° angles will be added.

With the end posts, I am thinking to add angled posts reaching from the opposite corners of the raised bed to the top of the verticals to secure them more.

Eventually, more horizontals will be added – much thinner horizontals – from vertical to vertical, near the bottom. For now, we will probably use plastic trellis netting, but these will eventually be used to create squash tunnels. They will eventually need to hold quite a bit of weight, so more durable material will be used over time. At this point, I just want something up and useable! It will probably be used to support pole beans or peas this year.

We still have a pile of posts meant for verticals as we build more of these beds and, eventually, join them in pairs to create trellis tunnels. Many are completely hidden in the tall grass! We’ll have to dig them out and see how many are still usable. There was more cracking and splitting in these ones than I expected.

I’d gone walking out to the gravel pit and pond beyond the outer yard the other day and one thing I noticed was that there are a lot of nice, straight poplars that we can potentially harvest for projects like this. It’s the “straight” part that’s harder to find. It was good to see that, if some of the logs I’d already cut for posts are too weather damaged, I can replace them fairly easily.

For now, I’m happy with what we got done today. I’m not sure when we’ll be able to work on it next. Tomorrow there is a homesteader’s show near the city that my daughter and I want to go to, and we might be able to do our first stock up shopping trip at the same time. CPP disability is due to come in on a Monday this month, which means it might show up in our account tomorrow, instead, so if I can save a trip by doing both tomorrow, I will! I doubt either my daughter and I would be physically up to working on the trellis for 2 days in a row, anyhow. I’ve already started to stiffen up quite painfully, and I’m sure she is, too. I don’t plan to work on it on Sunday, since I try to keep that my regular day of rest, but Monday is supposed to be much colder and very windy, so Sunday might be my only chance for quite a while.

Working around our physical limitations, plus the weather, can get complicated at times!

I’m going to go take some pain killers now, while I can still move.

The Re-Farmer

Learning something new…

While winding down for the night, I’ve been watching some videos, including this new one from MI Gardener; a resource I have recommended before.

This is an interesting video, since I fairly regularly see these concrete blocks being recommended to make raised beds. He lists the reasons he believes they should not be used.

I found it really interesting, and wanted to talk about some of them.

One of the first things he brought up was the weight. The ones he uses in the video are 8″x8″x16″ This is the size of most of the blocks we’ve been finding all over the place, though I think I’ve found some that are 10″x8″x16″

He also adds that they are cheap, and says they cost about $2 each.

So, of course, I had to look it up!

It turns out, one of these concrete blocks weighs about 30-35 pounds. The ones he’s using has flat ends. Some have shaped ends, and from what I found on the Canadian Home Depot page, they weight 42 pounds (19kg). The 10″ ones weigh 45 pounds (20.4kg).

I’d never really thought about how much they weighed. I found them heavy to carry around, but not that bad, really.

As for being cheap, interestingly, the 8″ ones are listed as just under $5 each – and are more expensive than the 10″ ones, which are just over $4 each. The last time I looked at their prices, at an actual store, not online, was a few years ago, and one 8″ block was priced at over $8 each, which shocked me. This was before inflation went nuts, too. Very odd.

This got me wondering, since we are using concrete chimney blocks as planters. So I had to look those up, too. I found plenty of links, but not one of them included a price. The closest I could find was an old image with a price on it, but the link was no longer active. Other than that, I found some on FB Marketplace were someone lists a whole bunch of things, not just chimney blocks, with a $4 each price listed. I don’t think that price was the same for all the wide variety of items listed, so I still don’t know how much they sell for here.

The chimney blocks we have are the standard square size of 16.75″x16.75″x7.62″

That measurement is so odd, I thought it would make more sense in metric, but not really. That works out to 42.5cmx42.5cmx19.35cm

What caught my attention was the weight.

Each one of those chimney blocks weighs 68 pounds (30.8kg)

So… I was lugging almost 70 pound blocks around the yard when I built the retaining wall and the chain link fence planters.

Okay, so weight was one of his reasons not to use them, but the other was height. They’re only 8″ high (slightly higher than our chimney blocks), making only 8″ of growing space.

I found that curious. His sample concrete block raised bed is on top of soil. Granted, it looks like the area was just leveled and has been driven over, so it might be compacted, but it’s still open soil, not a concrete pad or something. Any plants could send it’s roots lower. We have maybe 8″ of top soil – 10″ in a really good spot – before we hit gravel, clay and rocks. An 8″ high bed gives us about 16″ of growing space. We have been using modified hügelkultur, so the first couple of years would have sticks and branches at the bottom, so we don’t plant root vegetables in them right away.

I would find 8″ too low for accessibility reasons, and when I see people doing raised beds with concrete blocks, they are often two, three or even four blocks high. He talks about adding a second level, and demonstrates how easily the block spins around, since the base row is not perfectly level. He mentioned that people have suggested rebar to hold them in place.

I agree with him on the rebar. It seems almost counterproductive.

I’d just use concrete glue. AKA construction adhesive. It’s really cheap, one tube goes a long way, and can be applied using a caulking gun. Granted, that makes it permanent, but most raised beds don’t get moved around once they’re built, anyhow.

He makes a point about breakage being a problem, but not in the way he talks about. Where we are, we have temperature extremes. Pretty much all the concrete blocks we’ve been finding have been outdoors. Most of the chimney blocks we’ve used were stored outdoors since my parents bought this farm in 1964. Yeah, they have dings and chips, but they are still sound. The only blocks we’ve had actually crack and split where the two we put into the fire pit to hold old oven racks over the coals to cook on. It was exposure to high heat that lead to them cracking, not outdoor temperature fluctuations.

He mentioned that concrete is very porous, and that the edges of beds would need extra watering. True enough, though with our chimney blocks, there isn’t any centre space that would hold water longer than the edges. We still watered them as often as the other beds. We just have them more water. It’s been a few winters now for the retaining wall blocks long the old kitchen garden, and not one of them has cracked due to water absorption and the fresh thaw cycle. I’m not saying it can’t or won’t happen. Just that is hasn’t happened to us.

He then mentions that concrete absorbs a lot of heat. More so than even metal raised beds.

That may indeed be a problem in a lot of places.

Where we are, that’s a selling point! Even in the heat of our summers, it just makes them better for heat loving plants that might normally not grow well here.

There is another element to using concrete blocks he doesn’t mention, and that is the effect on soil pH. I’d read before that concrete can help lower the pH, which would be great for our alkaline soil.

As I was looking it up just now, though, I found one article that said concrete can lower the pH, but that was it. Other articles, however, said that concrete will increase the pH.

Which is the last thing we need!

Given the smallish growing space inside our chimney block planters, it wouldn’t take much to affect the pH in the soil there. Granted, I did amend the soil with sulphur this past year, as well as with peat, but with our pH already at 8 or higher, it’s going to take a long time to adjust the pH even slightly lower. Getting it to be slightly acidic, which most of the things we want to grow do better in, will take years. Looking up what vegetables grow well in alkaline soil, the list is pretty long, but most of them have an upper limit of 7.5. If we can get our soil at least down to that, it would be good, but it is harder to lower the pH than it is to increase it.

Well, the mint I transplanted into some of the retaining wall blocks seems to be handling the high pH quite well, as are the chives. Our biggest issue, however, is roots growing in from below. With the blocks at the chain link fence, it’s the nearby elms that took over the soil in the blocks. In the retaining wall, it’s some sort of invasive flower we haven’t been able to get rid of. It’s almost killing off the mint, in some blocks!

So when it comes down to it, whether using concrete blocks for raised beds is a good idea or not really depends on a lot of things. Stuff he saw as negatives, are positives for us, or non-issues.

Would I use concrete blocks for a raised bed?

Probably not.

We’ve got all those dead spruce trees that need to be cut down that can be used. For other raised beds, I’m liking the wattle weave idea and want to build more, though it’s surprisingly hard to gather enough suitable branches to use for the weaving. If we did happen to have enough concrete blocks to make raised beds, there are other things I’d much prefer to use them for.

When it comes to gardening, it is such an individual thing. We all just have to figure out what will work for our own gardens in our own regional area and microclimate, and use what materials we have access to.

Hearing what works or doesn’t work for others and why can still be a huge help. Which is why I like videos like this one. Not only did I find what he had to say very interesting, it got me checking things out and looking things up to learn more.

And now I know how much those chimney blocks weigh, too!

The Re-Farmer

Put to bed: garden progress. Also, Butterscotch is “home”!

We have reached a lovely 16C/61F today, with wonderful sunshine. You know what that means!

Time to get work done outside!

Today, I focused on using the last of the soil in the kiddie pool the melons were grown in and soil from the grow bags, to top up our first trellis bed. The potato bags were already emptied and the soil all in a pile, so that was nice and quick to transfer over. Between that and the soil from the kiddie pool, more than half the trellis bed was covered.

Then I started on the grow bags the bell peppers were in.

I think I discovered why the peppers never thrived in those.

I had two shallow “raised beds” from the dollar store, plus two deeper, higher quality bags. As soon as I started trying to break up the soil with the spade, I found it to be remarkably solid and hard to cut through. That bag in the photo was the last of these fabric grow bags. It flipped inside out as I tried to empty the soil, and was still stuck.

Those are tree roots.

It turns out those horrible elms from the self seeded row of trees my mother allowed to grow not only release millions of seeds every spring, their roots will actually grow up into the grow bags and smother whatever else is growing there! The only bags where this was not a problem were the potatoes. Those had a thick layer of straw on their bottoms. I did see a few roots here and there, but nothing in the soil layer like this. These fabric grow bags had some grass clippings added to their bottoms. Those were completely decomposed. I didn’t do the feed bags the hot peppers were in until later. Those had straw on their bottoms, too, but not as deep a layer as the potatoes.

So most of my time ended up being spent trying to break up the soil enough that I could finally shake it from the roots, before it could be dumped into the trellis bed. The four bags the bell peppers were in were just enough to finish topping up the trellis bed.

That left five feed bags; four that had the hot peppers and onions in them, and one that had just onions. I left those and shifted to the high raised bed. The grass clipping mulch was moved and the bed was weeded – leaving two little onions to keep growing.

It’s really amazing, how deep dandelion tap roots can grow!

I found what looked like a couple of mouse tunnels in two of the corners. Grass clippings were used to fill in gaps in the corners, and all along the edges, as well as to chink some gaps on the logs that I found. I also debarked it a fair bit. That’s to keep insects and moisture from the logs, so they’ll last longer.

Once that was all cleaned up, I leveled the soil, pushing some of it up against the grass clippings around the edges. Once that was done, I went back to the remaining grow bags and de-rooted them. All five ended up in the high raised bed.

Last of all, the soil was topped with a light sprinkling of grass clippings before both beds got a thorough soaking. I want the water to soak through all the layers, but don’t want to compact the soil layer, and the grass clippings will help with that at least a little bit.

The beds have now been put to bed for the winter!

When adding soil to the trellis bed, I could see it bouncing! I did stomp on them, but the layers of grass clippings, leaves, kitchen compostables, straw, wood chips and bark, all still have quite a bit of space in them. By spring, I expect the whole thing to have sunk and settled at least 4 inches. The main thing, though, is that it is ready for planting in the spring, even if it takes longer to build the trellis part of the trellis beds!

Now for my happy Butterscotch news!

She’s back indoors!

I’d gone out to feed the cats a bit early, yesterday evening. Butterscotch came around and I got to pet her and cuddle her. She still wouldn’t go near the other cats, and if they came close, she would leave, even from the food I’d put near the storage house for her. Shop Towel in particular was interested in that.

After trying – and failing – to bring her to the kibble house to eat, I tried a different tactic. I’d seen a kitten running around around the front of the house, so I left a pile of kibble on the concrete steps for it. Butterscotch let me pick her up again, and I walked around the back of the house, avoiding all the cats, to bring her to the lone pile of kibble.

I almost got there, too.

It just happened that the girls decided to come outside, and as soon as the doors started rattling, Butterscotch got spooked, and I couldn’t hang onto her anymore. Once the girls realized what happened, they worked with me to encourage Butterscotch to come to them at the steps, and got her eating.

My younger daughter stayed with her while her sister and I played interference with the other cats. Several of them suddenly decided they needed to check out what she was doing at the steps!

Including Shop Towel.

Shop Towel has become an enigma. He’s been hanging around and eating with the other cats, and they are mostly okay with that. Driver and Judgement have not been targeted by him, nor have any of the other males. Mind you, he’s clearly the father of most of the adult males, but I don’t know how much of a difference that would make.

The problem starts when he seed Butterscotch and Nosencrantz.

He hasn’t really targeted Nozencrantz, but he has in the past, and she’s clearly nervous around him. When he goes for the food, she leaves. At least she’s not running up a tree anymore, but it means she doesn’t eat. This morning, I left kibble on the red bench for her, just so she could have something!

Butterscotch, however, has his attention, and he wants to chase her.

Between him, and her not wanting to go near any of the other cats, this was a problem. If only we could get her inside, but she wouldn’t let us take her close to the house!

Well, we found a way.

It started with my younger daughter going over to Shop Towel as he was milling around the storage house. She squatted down (oh, to have functional knees like hers!), held her hand out – and he came right over! She was able to pet him as he purred and rubbed against her legs! We were all pretty stunned by this.

That gave us an opportunity.

The cat carrier was in the sun room, in hopes we’d be able to catch one of the adult females for spaying and adoption. While my younger daughter kept Shop Towel distracted, I got the carrier and her sister and I managed to get Butterscotch in.

She was not happy about that.

The carrier also allowed me to get her past all the indoor cats and bring her into my room.

She was not happy with the kittens. She snarls at them, and spent the night hiding under my printer table. She still came out for pets and cuddled, though, and she was very happy to have wet cat food!

The kittens are curious, but we let the big ones in and out, so she’s not overwhelmed by them. The three tiny ones are still too small to let out.

After I finished up in the garden, had a shower and came into my room, I was able to persuade her to come out for pets, and even go up onto my bed for cuddles. The kittens still in the room were all asleep, so there was no snarling involved.

As I write this, she is still on my bed, curled up and having a nap!

I feel much better having her inside. She probably would have been fine outside, but that whole thing with her not being able to get food because she wouldn’t come closer to the house or other cats was a concern. Plus, she’s one of the originals that my late father cared for. Grandma deserves a warm and comfortable retirement!

I really hope this works out for her.

Once we get some of those kittens to the clinic for spays then adoption next month, I’m hoping we can convince Nosencrantz to come back in, too. I miss her nightly cuddles!

The Re-Farmer

Prepare and repair

Yesterday evening, I was able to work on one of the three raised beds in the south east yard, where we grew popcorn this year. Aside from weeding and preparing the soil for next year, I wanted to see if I could do something about the bowed out sides.

In the first picture of the slide show above, you can see I had a line across, already. That was enough to keep it from bowing out more, but not to pull it in. For that, I needed to move the soil more than I had, when I put the line in, in the spring.

The first thing to do was dig through the entire bed, removing all the weed roots I could. Once that was done, I shovelled soil away from the side walls, then redid the line. The original line actually broke while I was working with it, so I brought the roll of mason’s line and did it again. This time, instead of just doubling the line, I took used enough to fold it three times, making for 8 strands. After opening up the metal thing I can’t remember the name of, I put the lines on and pulled the sides in. One side was worse than the other (on the left, in the photos), so I focused on that one more.

Slight problem, though.

This is built out of scrap wood I found in the barn. One of the corners was already deteriorating more and, when I pulled the side in, I think I snapped the screws in the top board!

The corner is still holding, though. I’ll add more screws later.

Once the line was secured, I also tightened the metal thing (why can’t I remember what it’s called?? 😂), using a nail for leverage. That pulled the sides in a little more, too. I didn’t want to pull it in too much, though, because things would start breaking.

The next step was to level the soil again. By that time, I was losing light, too. To get a good idea of how well the sides had been straightened, I took the cover off the carrot bed, which isn’t needed there, and popped it over the prepared bed.

I had to come back today to get a picture, though, because the one I took last night did not turn out in the low light!

All these beds, and all the covers, are 9′ x 3′ (technically, 9′ 1″, counting the width of the end pieces). Which means the covers should fit exactly over the bed frames.

Well… it almost does!

The side walls now match the sides of the cover, but the corners, not so much! The corners on the bed have shifted. The one that broke is actually lower than the others, too! No surprise, considering there was so much flooding in the paths last year. However, it’s all close enough that it doesn’t matter much.

So this bed is now ready for next year’s garden!

Now, if we can just get to the others, and finish the trellis beds, before things start to freeze. Today is supposed to be the last rainy day for a while, so I should be able to break out the power tools and extension cords again. Current forecast also calls for lows of 1C/34F, 2C/36F, 1C/34F, then -1C/30F, over the next few days. Which means that, tomorrow, we need to either bring in the last of the stuff outside that isn’t frost hardy, or cover them for the night. Tonight, at least, is only supposed to go down to 6C/43F. We’re also supposed to get more heavy rains. Right now, it’s a damp and chill 12C/54F.

I’m glad we got the septic tank done yesterday, that’s for sure!

Lots of work to do out there, and time is running out. It all comes down to the weather.

The Re-Farmer

Trellis bed progress: first end cap done

Finally! I was able to bring over my tools and equipment, which I just keep in the utility wagon now, over to the garden and get a bit more done on the first trellis bed.

The first step was to cut the two logs set aside into 4′ long pieces. I know for sure I’ll need two per end, but these logs are thinner than the ones in the side walls, so I cut extra just in case.

Before putting one of the end pieces down, I loosened up the soil where it would be lying and tried to level it off a bit, since there was a dip near the middle of the space. Because I want these beds to be 4′ wide on the outside, after laying down the first end piece and matching it to the outer edge on one side, I shifted the other side a bit to line up with the other end.

Steel toes boots are create for kicking logs and not breaking my toes!

I started with the thickest 4′ log for the base log on this end. Using the side wall logs to mark where I needed to cut, I removed wood from the ends to fit over the side wall logs.

What a pain.

For this job, I used the mini-chain saw, a hatchet and hammer to remove the bulk of the excess wood, and even the electric chain saw to remove the excess wood.

A pain, to be sure, but much faster and easier than when I started building the high raised bed and had only hand tools!

Once I was satisfied with how the end piece fit, it was time to secure it. A couple of years ago, I’d bought some plastic coated metal rods to use as supports in the garden. The rods were hollow, and they quickly bent and broke in our rocky soil. I’ve been using the broken pieces to secure things like hoops for garden beds, but I also used some to secure the corners of the tiny raised bed in the old kitchen garden.

I decided to use them to secure the end pieces on the trellis bed, much like I already used rebar to secure the side walls. I drilled matching holes through the end pieces into the side walls, then hammered the metal rods in place.

Then I went through the other 4′ lengths to find one that fit the best on top of the first log and repeated the process. This time, though, I was having to fit them over two very different sizes of log, so that required some extra angled cuts, as well as flattening the length of both logs a bit, so they’d fit against each other better. There’s still quite a gap in between them in one place, but that can be chinked later. Last of all, they were secured with more metal rods, though the top log was thin enough that I could break one of the rods in half and use the shorter pieces.

And here it is! The first finished end cap, viewed from inside the bed.

This all took quite a while to do, so once it was done, I stopped for the day. I’ve got too many other things that need to be worked on.

I’m quite happy with how it’s working out so far.

Since the vertical posts will be added to the outsides of the bed, not down the middle as I’d planned to do originally, I will fill the bed once the other end cap is done. That way the layers of material will have at least a bit more time to break down under the top layer of soil it will get. I may even decide to get more logs to build the next bed, first. We need beds to plant in next year, more than we need the trellis part of it. The trellis posts can even be added after planting, if necessary. The priority is to have more planting space. This year’s garden is so much smaller than I had planned on, simply because I ran out of prepared spaces to plant in. I don’t want to have that situation again, next year!

So, once this bed is built and filled, it’ll be time to cut logs to size from the two downs trees we have ready right now and drag them over. These trunks are so thick, the bottom 10′ will be set aside to be used as supports for the outdoor kitchen we will be building. Using such thick logs in the trellis beds would be a real waste of material.

The first day of fall is tomorrow, and time to get work done before things get too cold is running short!

The Re-Farmer

Trellis bed progress: stripping

The plan for today had been to get the ends onto the trellis bed. Just before I headed outside, however, the power went out.

All I’ve got is an electric chainsaw, so cutting logs to size was out.

Which was fine. I needed to strip the logs of bark, first. I can see into the house from where I’m working, so I could keep an eye out for any lights back on again, letting me know the power was back.

Three hours later…

I started with the 2 dead spruces intended for the end pieces, one of which you can see on the saw horse. Then I started stripping the poplar that will be the vertical supports.

The poplar was much easier to work with, for the most part. The spruces have been dead for quite a while, so much of the barks is dried stuck to the wood. The poplar is still quite green. The draw knife could slide between the bark and the wood quite nicely, and just glide through.

Except for the branch nubs and damaged bits!

I ended up stripping them completely, as I could see critters were already getting under the bark and causing damage. The shorter lengths made them easier to handle, too, though I ended up putting the larger of the spruce logs back on the saw horse, just to stabilize it. With the lighter logs, there wasn’t enough weight to counter using the draw knife, and the darn thing kept rocking back and forth, and threatening to tip over.

Once stripped of bark, I lay them across the log walls to stay dry. Some of the logs I picked up were so damp from the grass, the undersides were covered with slugs!

After I got 9 of them done, my back was telling me it was time to do something else. So I grabbed a rope and dragged over the last 3 posts, then went back for the odd pieces. Those were light enough that I could drag 2 or 3 at a time, so that was done faster. These odd ones may or may not be usable as part of the trellis. If not, they will go into the bases of the trellis beds and buried, to break down over time.

I had just finished dragging over the last pair of odd sized logs when I saw a light on in the house. By then, I was done with this job for the day. I’ll continue tomorrow.

As for the power outage, it was likely due to high winds. Not long after ours was back on, my house sitting daughter let us know the power went out at my brother’s place, too. He’s got multiple back up generators, though, so she is just fine!

The power loss was just for 3 hours this time, but it’s a reminder on how we need to get our back ups done. Like the outdoor kitchen. With the high winds we had today, we could not have done any outdoor cooking, if it came to that. The outdoor kitchen we have planned will allow us to cook outdoors in pretty much any weather conditions.

The other thing is to get that old well checked. If all we need is new leathers for the hand pump, we’re set for water, too. Plus the outhouse will do until we build the more comfortable outdoor bathroom with a composting toilet we have planned.

Little by little, it’ll get done!

The Re-Farmer

Trellis bed progress

I headed out to check the garden as the day warmed up, to get a better idea of how much frost damage there was. As things warm up, the damaged/dead parts turns a lot darker, which showed me that the tomato plants in the main garden area did get killed off. Not the ones in the old kitchen garden, though! The melon plants might make it. Lots of dead leaves, but not the entire plants.

Tonight, we’re looking at a low of 5 – 6C/41 – 43F which, if things go the way they have been, lately, may actually end up being 3 – 4C/37 – 39F.

The high for today ended up being 18C/64F. I took advantage of it and got some work done on the trellis bed. It was actually feeling too hot while I worked! This is where I stopped for the evening.

The first thing I needed to do was finish off the wall on the left. I rolled the top log off, then used a chain saw to try and smooth and flatten things a bit, mostly to get rid of odd lumps and bumps, then putting the top log back. I still ended up with some gaps, but those will be filled with pieces of wood from the inside

The next thing was to use an auger to match the size of the pieces of rebar I have. Thanks to my husband, I have a nice set of long auger bits for my drill. They’re a touch shorter than the rebar, so after drilling holes through both logs, I removed the top log again, then drilled further through the bottom log. Once that was done, the rebar got hammered through the holes in the top log until it came out the other end, which I could then use to position the top log back again before hammering the rebar flush with the top.

The base log for the other wall was already debarked, but needed some clean up to remove bits of branches and other lumps and bumps. Then I got out the garden fork and loosened the soil between the markers where the log would be positioned. I found a large rock in the process that would not move. Since it’s under a wall, I left it. Once the soil was loosened, and the worst of the weed roots removed, I spun the log around so that the wide end was facing the other way. The ground is a bit lower on that side. I should have laid the base log in the other wall that way, but didn’t think of it until I’d already positioned it.

This base log itself has a long bend in it. I made sure it was positioned to bow outwards. That will be taken advantage of later in the build. Once in place, I used the chain saw again to remove any parts that looked too uneven and lumpy, and trimmed a few branch stubs a bit more.

The top log then needed to be debarked and prepped. This wood actually took the knife a lot better, so I went ahead and shaved a flat strip, so it would lay flatter on the base long.

That didn’t quite work out!

While the top log is a lot straighter than the bottom one, when I put it in position, the narrow end of the top log, which is set above the wider end of the base log, was floating at least 8 inches above! After rotating the log until it finally set the most evenly, the shaved part was now on the top!

There were still some lumps and bumps in the way, though, mostly on the base log. The wood on that tree did not take to the draw knife well, so I used the chain saw to level it off some more, then made another matching flat area on the top log.

With the bend in the base log, though, the top log is lined up on each end, but almost completely off the bottom log at the bend! It wasn’t going anywhere, though, so I repeated the process for inserting the rebar, more or less matching where the ones in the other wall are set.

With the rebar holding the logs together, I used a board to line up and mark the ends for cutting, then removed the jagged ends of the logs. I had to be careful with the bottom logs, so as not to be cutting into the ground!

The two logs you can see set aside in the photo will at least partly be used to close up the ends of the beds. These beds are meant to be 18′ long and 4′ wide on the outside. With the ends trimmed, they are no longer 18′ long, but the end pieces will be used to make up the gap. It doesn’t have to be exact, but I’d rather they be a bit longer than shorter. With how the logs taper, I might have to find thicker pieces of logs to finish the ends and get that 18′.

Once the end pieces are in place and secure, I’ll start working on attaching the 4 vertical supports for the trellis, which will then get horizontal supports across their tops. They’ll be added after the verticals are in place. The ground is uneven, but I want the horizontals to be level. Since I’m not going to be digging post holes as originally intended, and just attaching them to the outside of a wall, I’m no longer going to be losing about a foot of height on these 7′ posts, so I will likely mount the horizontals at 6 1/2′ rather than 6′, then trimming off the excess height. When the second bed is built at the other markers, it will have matching trellis supports and, eventually, they will be joined at the top to create a tunnel.

If all goes well, we’ll make at least one more trellis tunnel set up in line with this one. My priority, however, is going to be making more high raised beds, once this is done. Mobility, reach and pain reduction while tending the beds are becoming more of an issue for me.

Not before this bed is finished, though, and that will include filling it and preparing it to plant in, next year. That means layers of carboard on the bottom, maybe some small branches, wood chips, fresh green material such as the frost bitten bush beans I pulled earlier today, grass clippings and topping it with some of that purchased garden soil we still have left. Last of all with be a grass clipping mulch to protect the soil over the winter.

The bed the Roma tomatoes were in needs to be prepared for the winter, and if I could at least make that into a high raised bed, that would make life easier for next year!

The Re-Farmer

Trellis bed progress

Finally!

With last night’s storm, I was happy to see the tree my brother cut down that got hung up on other trees had fallen closer to the ground. It’s not going to drop any further, though. It’s now hung up between the trunks of a group of trees. We can, at least, reach most of it better, though, so we’ll be able to work on it eventually.

With today’s slightly cooler weather and a nice, clear day, I started working on getting those dead spruce trees my brother cut down for me, out of the bushes.

I took photos and will eventually put it all together in a video but, for now, this is what I managed to get done today.

Gosh. That doesn’t look like much, now that it’s done! 😄 It did, however, take a LOT of prep work before these logs could finally be dragged over.

The two trees that were on the ground were almost completely hidden by underbrush. I used the weed trimmer to clear a path to them first, then did a bit around the trees themselves. There were too many hidden branches, though, so I had to shift gears.

The top of the first tree extended a lot more than I thought it did. I used the little mini-chainsaw pruner to clear the branches, then remove the most crooked section of the top, before working my way down the trunk. I had the wagon nearby to put the branches in, and made a few trips to the branch pile near the fire pit, cleaning up as I went along.

Once I got it clear enough, I was able to pull the entire trunk out from under the stuck tree, then continue removing a few more branch stubs. Next, I measured 18 feet from the thick end of the trunk, and used the electric chain saw to cut it. I used a rope to drag the top part through the trees and into the garden, which was harder than it should have been. I neglected to roll it over and check it, first. There turned out to be a stub of a broken branch at the end, acting like an anchor!

Needless to say, I made sure to check the 18′ piece before I dragged that away, too!

The top of the tree is around 16-17′ long. Too short and thin to make the long walls of the beds, but it will do nicely, cut into 4′ lengths, to create the end walls.

The other tree that was flat on the ground was looking very crooked – spruces tend to be like that at their tops – and I thought it was shorter than the first one. As I cleared more dead branches and tried pulling it out from under the stuck tree trunk, I realized it was a lot longer, and thicker! In fact, when I finished clearing the branches and measured out 18′ from the end, I was still at the far side of the stuck tree! It was simply too big to pull out first, like I could with the first tree.

The top was moved first. I hadn’t bothered to measure it, since I figured it would be too short, but when I dragged it between the posts that are 18′ apart, it almost reached, end to end! The thinner top, though is still pretty crooked, so it will likely not be used as a side wall.

Then it was time to drag out the rest of it. I rolled it around to cut away any branch stubs that might cause problems, but the trunk was quite a bit larger and heavier, and getting caught on things. While I was working, I was constantly finding very old and rotting branches and pieces of tree trunks hidden in the undergrowth, that have clearly been there for many years. They made for a rough surface to drag on. I ended up tying a plastic bag around the end of the trunk, to reduce friction. It helped a lot but, by then, I was getting pretty hot and tired, so I got a daughter to pause making supper to come help me drag it out.

While working on this tree trunk, I found the fourth tree my brother had cut down. It is another big one, and he felled it in the opposite direction. It’s almost completely hidden, not just by undergrown, but other trees, and I’m honestly not sure how I’m going to get at it.

As for the tree that’s stuck, that one is even bigger. This is one that’s going to have the thickest 10′ cut off and taken to where we plan to build the shelter for the outdoor kitchen we plan to build. These trunks are far too thick to use for raised beds, as they would take up a lot of growing space. Rather than cut them in half or something, we will instead use them as vertical supports for the shelter.

But I was not about to work on either of those logs, today.

I started to put things away, but I really wasn’t happy with having done only two trees. Especially when there were other thinner dead trees, right there.

Yup. I ended up cutting down another tree.

Gosh, that thing felt so light, after fighting with the big one! Even though I used a hinge cut, it still fell off to one side and got a bit hung up on other trees. It was easy to get loose. I just put the rope around the trunk near the stump and pulled it until it fell the rest of the way. It also fell across the stuck tree, which made it much easier to work around.

Then it was just a matter of clearing a few branches – there weren’t very many at the bottom half – measuring out and cutting 18′ and dragging it out.

The top of the tree is resting on top of undergrowth, and I left it there for now. I am not sure how much of it will be useable. It won’t be useable for the walls on the raised bed, but it might be useful in other ways.

I’m still going to have to cut down one more smaller tree for this bed. There’s one that looks like it’s similar in girth as the log with the plastic bag on the end. I’m planning to make these beds 2 logs high, but I want the bottom logs to be the bigger, thicker ones.

This time I have the draw knife, so I want to de-bark the logs and cut away any remaining branch nubs, lumps and bumps. I didn’t do that for the high raised bed, and I can see that it would be much better to do it than not.

I want to get at least one bed built, with the vertical trellis supports in place, before cutting down more trees for the second one. Ideally, I’d put in the vertical supports for both beds, along with the horizontal supports to make a trellis tunnel, right from the start, but we’re going to have to work on things piecemeal for now. Plus, we will be building at least one, probably two, more of these, so this one is the learning experience!

I’m happy with the progress, and I’m paying for it now, but I’m actually not having as much trouble as I’ve had in the past. Of course, tomorrow might prove me wrong, but it seems my body is finally starting to handle things better. Yes, I’m stiff, my left knee tried to make an escape, and a thigh tried to go into a conniption fit, but I’ve certainly had far worse pain, stiffness and joint instability after far less work.

It just feels so good to finally be able to work on this!

The Re-Farmer

Tiny steps, and tiny snips got it off!

Well, we’re not going to hit our predicted high of 30C/86F, but got close enough to not matter!

I took this screen shot after my daughter and I got back from the city. Last night, my older daughter asked when I had time to go in, and since today was going to be basically heat stroke weather, I figured a trip to the city in an air conditioned car would not be a bad thing! Since my younger daughter had their shopping list, in preparation for joint Father’s Day and birthday celebrating, I went ahead and got a few things, too.

While today’s heat is not conducive to debranching and dragging out dead trees, I did manage to get some tiny steps done yesterday evening.

I marked out where the first pair of mid-height raised beds, with a permanent trellis tunnel, will be. I’m rather impressed with how close it matched the Ruth Stout potato and melon bed. That was determined by the size of the black tarp we lay down to start killing of the grass, first. The posts at the far end are just a few inches longer than the straw bed.

The posts across the ends are all 4 ft apart. There will be a path down the middle, and the logs for the walls of the beds will be placed inside the markers, so that they will be 4 ft wide on the outside. Yes, we will loose some growing space; especially once the vertical posts for the trellis tunnel are put in, but the width is for reach and accessibility, not growing space.

The beds will be 18 ft long – twice the length of the high raised bed beside it. I used the high raised bed to first mark out the south end and the middle of the first bed, then I could use those markers to help make a straight line to 18 ft at the north end.

My tape measure only goes to 16 ft. 😄 Not a problem, but it was funny! Once I had the corners of the first bed marked out, I used them to mark out the second bed.

I must say, trying to place those old conduit pipes I was using to mark the corners, really illustrated how much we need to make raised bed. I was able to use a piece of board to hammer most of them in, just enough that they could hold themselves up, but with some of them, they simply would not go into the ground. I ended up using a hoe to loose the top couple of inches, only for it to still not go into the ground. So I’d use the hoe again, until I could finally get the post to stay up. It wasn’t just that I was hitting rocks, but the ground in places were just as hard as the rocks! The only exception was when I pushed a post to mark in the middle, lined up with the north end of the high raised bed. That one post was in the middle of the amended garden space, and I was able to push it easily into the soil. The other posts were just along the edges of the amended soil.

The next step will be to remove the straw mulch from where the beds will be, and make a shallow trench were the long logs will rest on the ground, so they don’t roll away. For these beds, we’ll use salvaged shorter logs – we still have lots of 4 ft lengths from getting the chipping done available to use – and screw them into the ends of the long logs to hold them in place.

Once the vertical supports for the trellis are installed and the walls and ends secured, we’ll do some layering of organic material – the straw we took out, wood chips and whatever else we have available – before topping the space with garden soil.

Then I can finally transplant those melons we have waiting, and maybe even have space to do some direct sowing. At this point, anything we direct sow has to have a growing season of under 90 days, including the time needed to germinate. Under 80 days would be better.

If we can manage to get two beds with trellises done this spring, I will be very happy. We’ll be dropping quite a few things that I hoped to plant this year, simply because it’s taking so long for us to get these beds ready. Still, we did manage to get quite a few things in, among the various garden beds we have spread out around the inner yard.

Over time, we still plan to have garden beds built in the outer yard. With those, we can focus on having things that get harvested all at once in the fall in the outer yard, while things that get harvested throughout the summer will be planted closer to the house.

We’ll see how the timeline works out! I do see that we’re going to need at least another truck load of garden soil before then. That probably won’t be purchased until next year, though, at the earliest.

In the time it took me to write this, we are now past 4pm, and we’re still at 29C/84F, so we’re not going to be heading out to work on the garden beds tonight. Hopefully, we’ll be able to get out early in the morning, before things start getting too hot.

Meanwhile, my younger daughter and I got a big job, done in tiny snips, done this afternoon.

We decided to work on Decimus’ matted fur.

What we ended up doing was laying a towel on my bed, then putting all her kittens on it, then getting her out of the cat cage – a space she clearly considered her safety zone! – and putting her with her kittens. While one of us comforted her by stroking her head and neck, and holding her in place, the other worked on snip snip snipping away. We got a burr buried in fur off of one of her legs, and another off her back, before focusing on the big mat covering her back.

It was even bigger than we thought.

It was easily as big as my daughter’s hand.

While Decimus did try to get away or squirm around a few times, I think she could feel improvement, and became much more patient. As we took turns snipping away, depending on who could get the best angle at the time, I could see that her skin was pulled up and even twisted in places. You could see folds of skin dropping down, bit by bit, as we snipped the fur away. There was a lot of cat dandruff stuck in there, too, and we even found a smothered bug! No signs of any other insects or lice, thankfully. It easily took at least 10 minutes to get that one mat off.

Once we finally got the piece free, we let her go. She had been so patient! Her back is pretty much completely shorn now. There is another large mat on her back end, but we will give her a break before working on that one. Then there are all the little ones, all over.

As soon as we let her go, she ran straight back into the cat cage and lay down on the baby nest! Her little grublings, meanwhile, had been squirming all around while she was getting trimmed, trying to find some nip. They were very happy to be back in the cage with Mom!

I think Mom is a lot happier now, too.

As for me… I think I need to go wash my bedding and certain towel, now!

The Re-Farmer