Trellis bed progress

Finally!

With last night’s storm, I was happy to see the tree my brother cut down that got hung up on other trees had fallen closer to the ground. It’s not going to drop any further, though. It’s now hung up between the trunks of a group of trees. We can, at least, reach most of it better, though, so we’ll be able to work on it eventually.

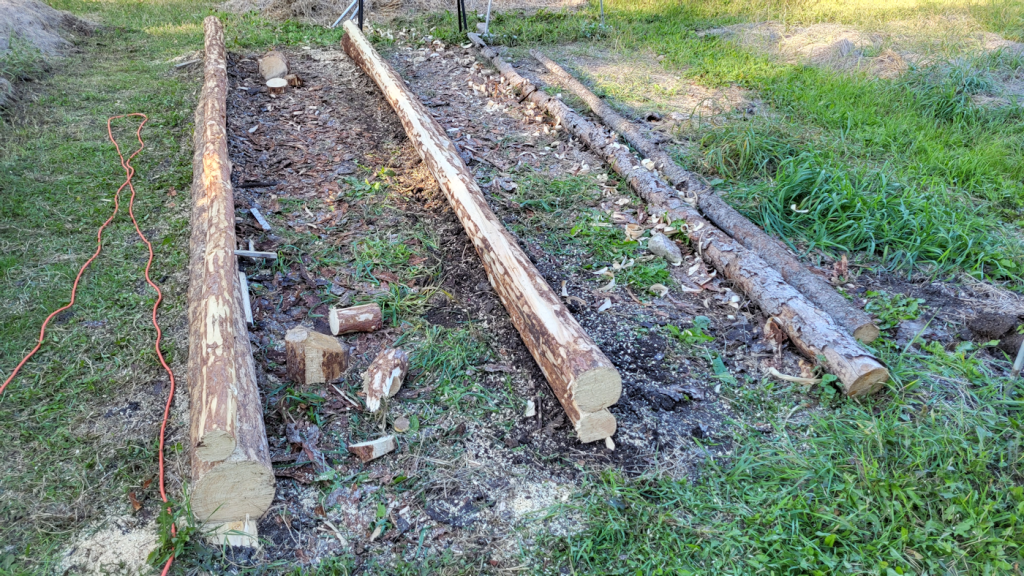
With today’s slightly cooler weather and a nice, clear day, I started working on getting those dead spruce trees my brother cut down for me, out of the bushes.

I took photos and will eventually put it all together in a video but, for now, this is what I managed to get done today.

Gosh. That doesn’t look like much, now that it’s done! 😄 It did, however, take a LOT of prep work before these logs could finally be dragged over.

The two trees that were on the ground were almost completely hidden by underbrush. I used the weed trimmer to clear a path to them first, then did a bit around the trees themselves. There were too many hidden branches, though, so I had to shift gears.

The top of the first tree extended a lot more than I thought it did. I used the little mini-chainsaw pruner to clear the branches, then remove the most crooked section of the top, before working my way down the trunk. I had the wagon nearby to put the branches in, and made a few trips to the branch pile near the fire pit, cleaning up as I went along.

Once I got it clear enough, I was able to pull the entire trunk out from under the stuck tree, then continue removing a few more branch stubs. Next, I measured 18 feet from the thick end of the trunk, and used the electric chain saw to cut it. I used a rope to drag the top part through the trees and into the garden, which was harder than it should have been. I neglected to roll it over and check it, first. There turned out to be a stub of a broken branch at the end, acting like an anchor!

Needless to say, I made sure to check the 18′ piece before I dragged that away, too!

The top of the tree is around 16-17′ long. Too short and thin to make the long walls of the beds, but it will do nicely, cut into 4′ lengths, to create the end walls.

The other tree that was flat on the ground was looking very crooked – spruces tend to be like that at their tops – and I thought it was shorter than the first one. As I cleared more dead branches and tried pulling it out from under the stuck tree trunk, I realized it was a lot longer, and thicker! In fact, when I finished clearing the branches and measured out 18′ from the end, I was still at the far side of the stuck tree! It was simply too big to pull out first, like I could with the first tree.

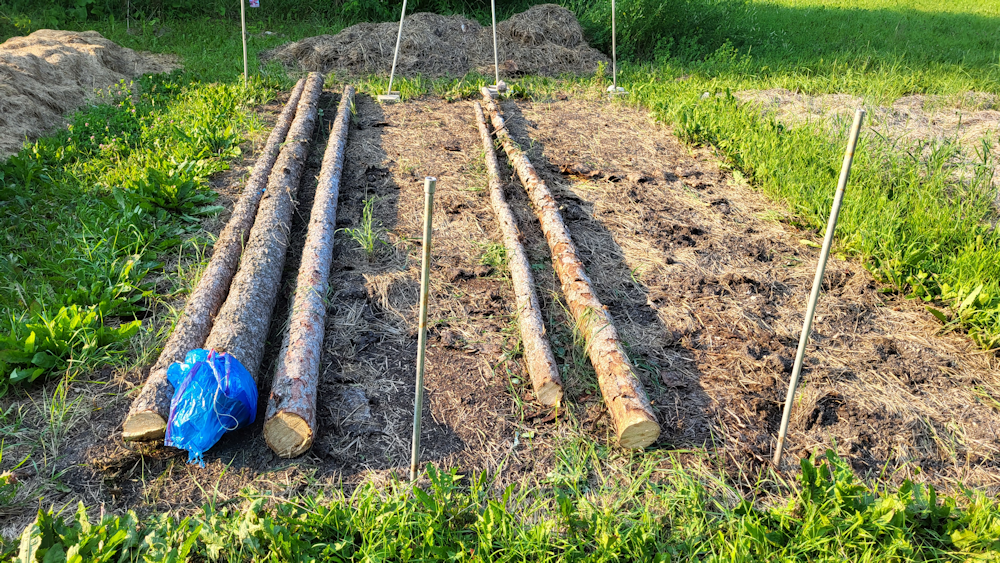
The top was moved first. I hadn’t bothered to measure it, since I figured it would be too short, but when I dragged it between the posts that are 18′ apart, it almost reached, end to end! The thinner top, though is still pretty crooked, so it will likely not be used as a side wall.

Then it was time to drag out the rest of it. I rolled it around to cut away any branch stubs that might cause problems, but the trunk was quite a bit larger and heavier, and getting caught on things. While I was working, I was constantly finding very old and rotting branches and pieces of tree trunks hidden in the undergrowth, that have clearly been there for many years. They made for a rough surface to drag on. I ended up tying a plastic bag around the end of the trunk, to reduce friction. It helped a lot but, by then, I was getting pretty hot and tired, so I got a daughter to pause making supper to come help me drag it out.

While working on this tree trunk, I found the fourth tree my brother had cut down. It is another big one, and he felled it in the opposite direction. It’s almost completely hidden, not just by undergrown, but other trees, and I’m honestly not sure how I’m going to get at it.

As for the tree that’s stuck, that one is even bigger. This is one that’s going to have the thickest 10′ cut off and taken to where we plan to build the shelter for the outdoor kitchen we plan to build. These trunks are far too thick to use for raised beds, as they would take up a lot of growing space. Rather than cut them in half or something, we will instead use them as vertical supports for the shelter.

But I was not about to work on either of those logs, today.

I started to put things away, but I really wasn’t happy with having done only two trees. Especially when there were other thinner dead trees, right there.

Yup. I ended up cutting down another tree.

Gosh, that thing felt so light, after fighting with the big one! Even though I used a hinge cut, it still fell off to one side and got a bit hung up on other trees. It was easy to get loose. I just put the rope around the trunk near the stump and pulled it until it fell the rest of the way. It also fell across the stuck tree, which made it much easier to work around.

Then it was just a matter of clearing a few branches – there weren’t very many at the bottom half – measuring out and cutting 18′ and dragging it out.

The top of the tree is resting on top of undergrowth, and I left it there for now. I am not sure how much of it will be useable. It won’t be useable for the walls on the raised bed, but it might be useful in other ways.

I’m still going to have to cut down one more smaller tree for this bed. There’s one that looks like it’s similar in girth as the log with the plastic bag on the end. I’m planning to make these beds 2 logs high, but I want the bottom logs to be the bigger, thicker ones.

This time I have the draw knife, so I want to de-bark the logs and cut away any remaining branch nubs, lumps and bumps. I didn’t do that for the high raised bed, and I can see that it would be much better to do it than not.

I want to get at least one bed built, with the vertical trellis supports in place, before cutting down more trees for the second one. Ideally, I’d put in the vertical supports for both beds, along with the horizontal supports to make a trellis tunnel, right from the start, but we’re going to have to work on things piecemeal for now. Plus, we will be building at least one, probably two, more of these, so this one is the learning experience!

I’m happy with the progress, and I’m paying for it now, but I’m actually not having as much trouble as I’ve had in the past. Of course, tomorrow might prove me wrong, but it seems my body is finally starting to handle things better. Yes, I’m stiff, my left knee tried to make an escape, and a thigh tried to go into a conniption fit, but I’ve certainly had far worse pain, stiffness and joint instability after far less work.

It just feels so good to finally be able to work on this!

The Re-Farmer

Tiny steps, and tiny snips got it off!

Well, we’re not going to hit our predicted high of 30C/86F, but got close enough to not matter!

I took this screen shot after my daughter and I got back from the city. Last night, my older daughter asked when I had time to go in, and since today was going to be basically heat stroke weather, I figured a trip to the city in an air conditioned car would not be a bad thing! Since my younger daughter had their shopping list, in preparation for joint Father’s Day and birthday celebrating, I went ahead and got a few things, too.

While today’s heat is not conducive to debranching and dragging out dead trees, I did manage to get some tiny steps done yesterday evening.

I marked out where the first pair of mid-height raised beds, with a permanent trellis tunnel, will be. I’m rather impressed with how close it matched the Ruth Stout potato and melon bed. That was determined by the size of the black tarp we lay down to start killing of the grass, first. The posts at the far end are just a few inches longer than the straw bed.

The posts across the ends are all 4 ft apart. There will be a path down the middle, and the logs for the walls of the beds will be placed inside the markers, so that they will be 4 ft wide on the outside. Yes, we will loose some growing space; especially once the vertical posts for the trellis tunnel are put in, but the width is for reach and accessibility, not growing space.

The beds will be 18 ft long – twice the length of the high raised bed beside it. I used the high raised bed to first mark out the south end and the middle of the first bed, then I could use those markers to help make a straight line to 18 ft at the north end.

My tape measure only goes to 16 ft. 😄 Not a problem, but it was funny! Once I had the corners of the first bed marked out, I used them to mark out the second bed.

I must say, trying to place those old conduit pipes I was using to mark the corners, really illustrated how much we need to make raised bed. I was able to use a piece of board to hammer most of them in, just enough that they could hold themselves up, but with some of them, they simply would not go into the ground. I ended up using a hoe to loose the top couple of inches, only for it to still not go into the ground. So I’d use the hoe again, until I could finally get the post to stay up. It wasn’t just that I was hitting rocks, but the ground in places were just as hard as the rocks! The only exception was when I pushed a post to mark in the middle, lined up with the north end of the high raised bed. That one post was in the middle of the amended garden space, and I was able to push it easily into the soil. The other posts were just along the edges of the amended soil.

The next step will be to remove the straw mulch from where the beds will be, and make a shallow trench were the long logs will rest on the ground, so they don’t roll away. For these beds, we’ll use salvaged shorter logs – we still have lots of 4 ft lengths from getting the chipping done available to use – and screw them into the ends of the long logs to hold them in place.

Once the vertical supports for the trellis are installed and the walls and ends secured, we’ll do some layering of organic material – the straw we took out, wood chips and whatever else we have available – before topping the space with garden soil.

Then I can finally transplant those melons we have waiting, and maybe even have space to do some direct sowing. At this point, anything we direct sow has to have a growing season of under 90 days, including the time needed to germinate. Under 80 days would be better.

If we can manage to get two beds with trellises done this spring, I will be very happy. We’ll be dropping quite a few things that I hoped to plant this year, simply because it’s taking so long for us to get these beds ready. Still, we did manage to get quite a few things in, among the various garden beds we have spread out around the inner yard.

Over time, we still plan to have garden beds built in the outer yard. With those, we can focus on having things that get harvested all at once in the fall in the outer yard, while things that get harvested throughout the summer will be planted closer to the house.

We’ll see how the timeline works out! I do see that we’re going to need at least another truck load of garden soil before then. That probably won’t be purchased until next year, though, at the earliest.

In the time it took me to write this, we are now past 4pm, and we’re still at 29C/84F, so we’re not going to be heading out to work on the garden beds tonight. Hopefully, we’ll be able to get out early in the morning, before things start getting too hot.

Meanwhile, my younger daughter and I got a big job, done in tiny snips, done this afternoon.

We decided to work on Decimus’ matted fur.

What we ended up doing was laying a towel on my bed, then putting all her kittens on it, then getting her out of the cat cage – a space she clearly considered her safety zone! – and putting her with her kittens. While one of us comforted her by stroking her head and neck, and holding her in place, the other worked on snip snip snipping away. We got a burr buried in fur off of one of her legs, and another off her back, before focusing on the big mat covering her back.

It was even bigger than we thought.

It was easily as big as my daughter’s hand.

While Decimus did try to get away or squirm around a few times, I think she could feel improvement, and became much more patient. As we took turns snipping away, depending on who could get the best angle at the time, I could see that her skin was pulled up and even twisted in places. You could see folds of skin dropping down, bit by bit, as we snipped the fur away. There was a lot of cat dandruff stuck in there, too, and we even found a smothered bug! No signs of any other insects or lice, thankfully. It easily took at least 10 minutes to get that one mat off.

Once we finally got the piece free, we let her go. She had been so patient! Her back is pretty much completely shorn now. There is another large mat on her back end, but we will give her a break before working on that one. Then there are all the little ones, all over.

As soon as we let her go, she ran straight back into the cat cage and lay down on the baby nest! Her little grublings, meanwhile, had been squirming all around while she was getting trimmed, trying to find some nip. They were very happy to be back in the cage with Mom!

I think Mom is a lot happier now, too.

As for me… I think I need to go wash my bedding and certain towel, now!

The Re-Farmer

Sneak peak, and I am such a friggin’ idiot

I spent much of the day working on the old kitchen garden. We reached highs of 16C/61F, almost no wind, bright and sunny. It got ridiculously hot, and I had to stop for a couple of breaks in the middle of it. That, and my phone kept going off with notifications that I wanted to check.

More on that later.

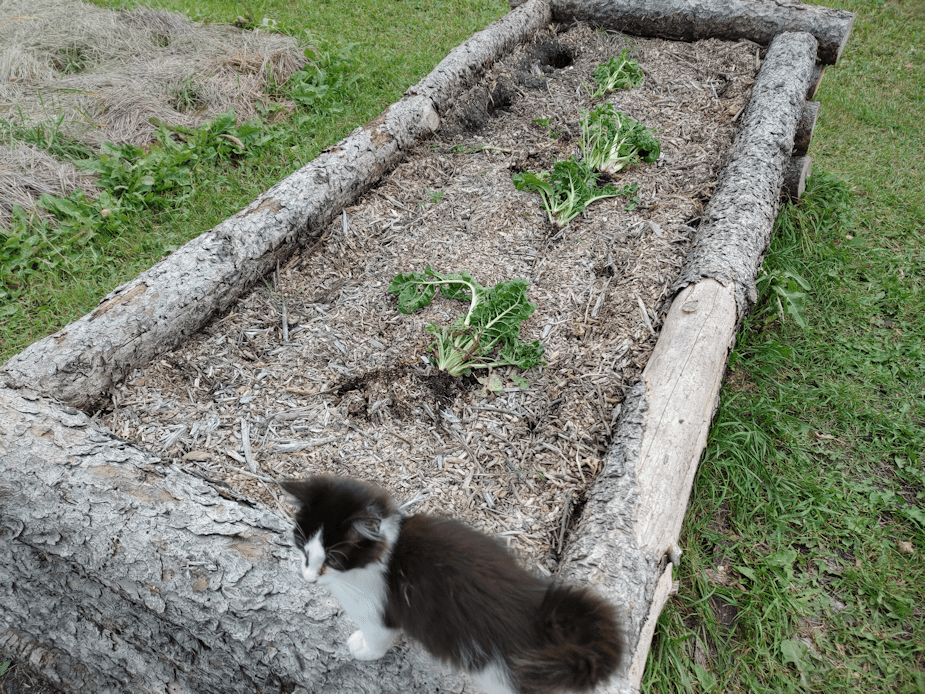
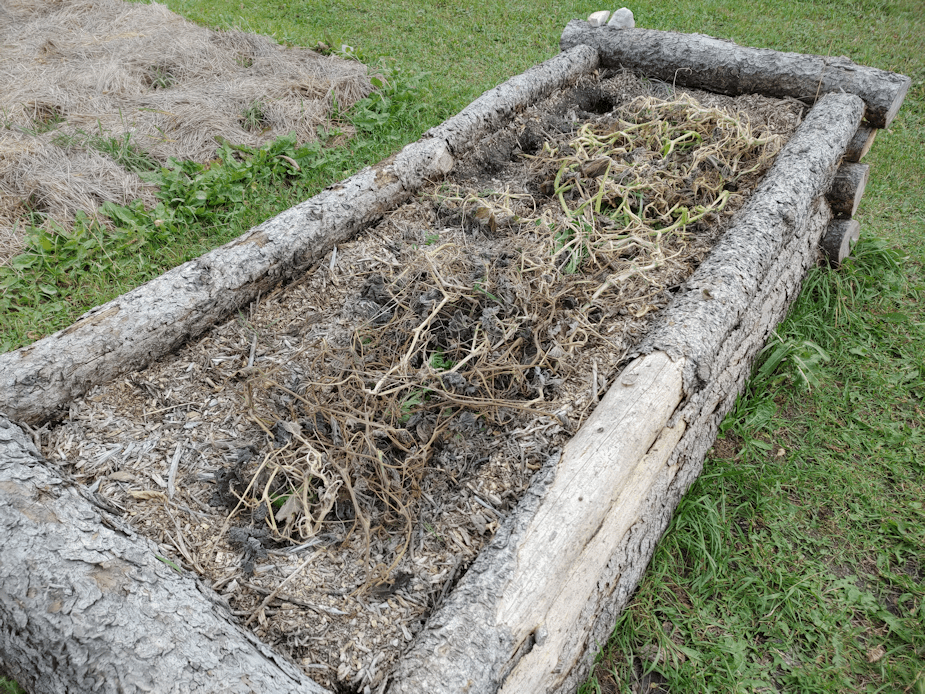
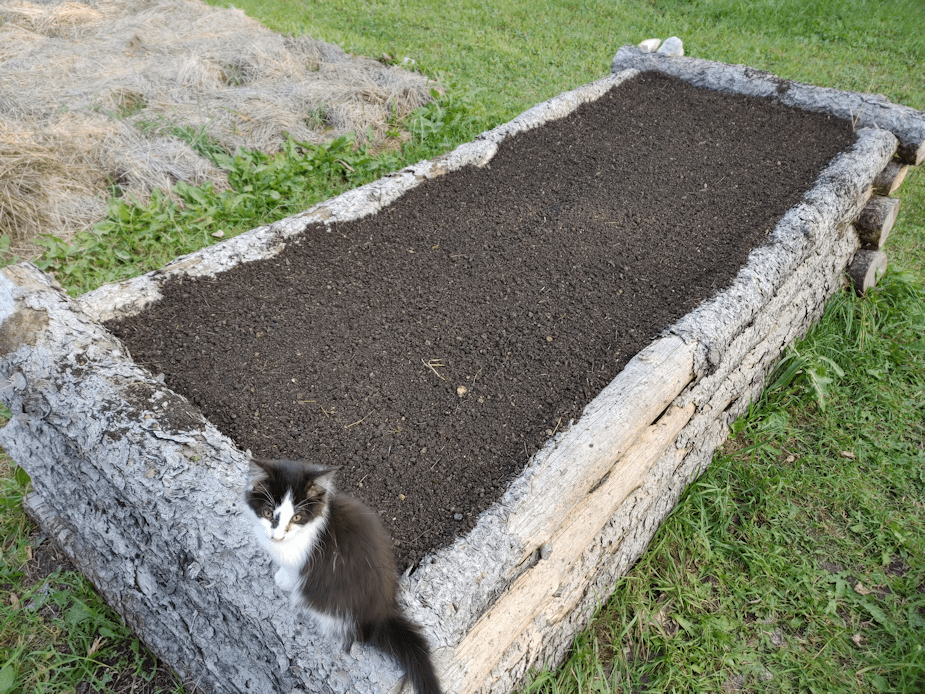
I was set up to do a time lapse video, and I’ll be continuing in another bed tomorrow, so this is a sneak peak of the first finished bed.

I ended up building it one level higher than I was originally expecting to, which means I’ll need to find another tree or two to work on the other one! I might add more garden soil to this later but, at this point, I’m calling it done.

Now for the idiot part.

One of the notifications I got was from a friend from high school that we’re connected with on Facebook, saying hello using Messenger. When I took a hydration and lunch break, I responded. By the time I finished up and was ready to go back outside, I could see she hadn’t looked at my responses yet, so out I went again.

When the heat started to get to me, I headed back inside and found she had responded. She was having some issues logging in with her Facebook, and was asking for my help. I knew of a security feature that allowed for approved friends to help with that. Still, I did check, scrolling up the message feed and confirming that there were past conversations. After all, I’ve had people message me from cloned accounts before. The past messages were there, and it seemed legit, so I helped out.

Then, like and idiot, I accidentally gave the person access to my own personal Facebook account, allowing them to log in with a new password. I was actually using my Facebook account at the same time and, suddenly, both my Facebook and my Messenger were logged out, and I realized what happened.

I could still log into my Re-Farmer account, and promptly changed the password. It was only later that I saw emails to my personal email, my backup email, and even my Re-Farmer email, telling me my password was changed and that my personal email had been removed as the primary email from my personal Facebook account. At least that one sent me the email address that it was changed to. The first part of it matched my back up email for my personal account.

On the plus side, other security features has ensured my other accounts were not compromised. I was able to find where to report the theft, so now it’s up to Facebook.

If I hadn’t been in the middle of things as I was, I probably would have caught on, but then again, maybe not. It’s hard to say.

Meanwhile, my Facebook, Messenger (which I used a lot) and Instagram (which I have pretty much stopped using), are now controlled by someone else.

I was able to let some people know about it. My husband was able to post a comment about my page, which is still up and unchanged, as of this writing, saying that my profile had been stolen.

What a pain. The good thing is, I don’t have anything of value as far as personal information on there. The one thing that is of value is my friends list, so I’m trying to warn as many people as I can, in case they start getting message from me like the one I got that I thought was from my friend.

We shall see how that plays out.

Until then, there isn’t much I can do but wait and see what Facebook does.

So tomorrow, it’s back to work.

Considering how much time I tend to be on Facebook, I might just end up being more productive because of this! 😄😄

The Re-Farmer

Analysing our 2022 garden: final thoughts

Okay, it’s that time! I’ll be working on a serious of posts, going over how our 2022 garden went, what worked, what didn’t, and what didn’t even happen at all. This is help give us an idea of what we want to do in the future, what we don’t want to do in the future, and what changes need to be made.

Okay, so I’ve gone over how things went for our 2022 gardening year. We expanded our garden so much this year – and it was still less than we intended – I decided I need to do one last post to wrap it all together.

In a nutshell, though, I could probably just say this.

It was a terrible growing year.

In 2021, we got hit with drought and heat waves. For the longest time, we were out there watering the garden twice a day, just to keep it alive. With all that, things produced way better than I excepted, even when much of it did not thrive, or got eaten by groundhogs repeatedly, or got chomped on by deer.

I never thought that this year would be worse!

A lot of the failures can be attributed to things outside of our control. Winter dragged on long, as we got walloped with blizzards and large amounts of snow. I couldn’t complain about the snow, since we needed that moisture badly. Unfortunately, snow melts faster than ground thaws, and when the temperatures rose, the ground just couldn’t absorb it fast enough.

Even growing up here as a kid, I don’t remember ever having standing water in these areas!

The sad thing is, even with all this water, it would not have been enough to replenish the water table after years of drought.

Where, last year, we had things produce far better than expected, this year, it was the other way around. It turns out our garden handles drought and heat waves better than flooding and average temperatures.

Gotta look for that silver lining, though. We’ve had the two extremes, which gave us a lot of information to help us decide on our next steps.

The goal is to grow and produce as much of our own food, and be as self sufficient as possible. When we get animals, we want to grow their food as much as possible, too. How we get to that point can be changed or modified as much as it needs to be!

A lot of what we grew this year will be grown again in 2023, though not necessarily the same varieties.

As we expand our main garden area, we’ll be moving away from the distant garden beds, where we are now starting to build up our food forest. That’s what those beds where there to help prepare the soil for.

Which means that 2023 will have pretty much all the garden beds closer to the house, and we will be building more permanent structures. The temporary trellises have come down and, in the spring, we will be taking down the trellis tunnel, saving the wire to be reused.

We plan to start building permanent trellis tunnels where some of the newest, deep mulched garden beds were started. We will also focus on building more high raised beds – the challenge is to safely harvest the dead spruces to build them with, since we don’t have the funds to hire a company to take them down for us. I don’t begrudge them the cost at all; it would be worth every penny. We just have too many other things pulling at those pennies that are a higher priority, when we can do most of this work ourselves.

The low raised beds were enough to keep some things from getting drowned out, but in other areas, it still wasn’t enough. So while I do want to keep some beds low, the majority of our beds will be high raised beds.

The one high raised bed that is complete, filled hügelkultur style, did very well. By the end of the season, it had settled quite a bit and needed a top up, which was to be expected. At this point, I think the bed’s “topsoil” is deep enough that it could be used to grow longer root vegetables now. This is definitely the way we will continue to build and fill our high raised beds, though we might tweak a few details, such as finding better ways to join the logs in the walls. We have a few more and better tools to help us now, and will continue to acquire more.

Since a major component of building our permanent beds is accessibility and mobility, as we build the permanent structures, we will make sure that the paths will be at minimum 4 ft wide – wide enough for a walker or wheelchair to turn around in. That will include the trellis tunnels we will be building. Now that we are aware of how much water can accumulate where we plan to build them, we intend to build probably middle height beds on the outside of the tunnels. Those beds will be 2 ft wide, since they will be accessible from only one side. I figure we should shoot for building at least three or four of these in the main garden area (not all in one year!), along with the 9′ x 4′ high raised beds we will be making. We will be sticking to 9′ x 4′ as much as possible, regardless of how tall the bed is, so that any covers we build for them can be interchangeable. Obviously, the narrower beds we plan to build at the trellis tunnels will be the exception, but the things planted in there would need different types of protection – if any at all.

Even aside from the trellis tunnels, we will want to built quite a few other trellises that can be moved around to wherever they are needed. Among the things that actually started to grow well (if too late), I noticed that the hulless pumpkins really, really wanted to climb. The melons we want to plant are also climbers, as are some of the gourds we want to grow. These would need support that can hold the weight of their fruit, so they will need the strength of the permanent tunnel trellises. Lighter climbers, like peas and pole beans, would be fine with portable trellises.

While we will be focusing on permanent structures in the main garden area, we are also needing to plan ahead to when we build permanent garden beds in the outer yard, where there is better sunlight. We are also working on plans for an outdoor, off-grid kitchen in that general area. That’s on top of the shed we need to dismantle, so that we can salvage the lumber for other projects, like the mobile chicken coop I want to build.

We’ve got a lot of building and heavy labour ahead of us, and none of us are quite able bodied, so it might take a while to get it done!

As terrible of a growing year it was in 2022, it provided us with much useful data, and will actually help us in planning our next steps.

Little by little, it’ll get done!

The Re-Farmer

I made a video

I put together images of the wattle woven raised bed and made a video out of it. This time, I borrowed my daughter’s microphone for the narration, and WOW was it better! I didn’t have to use background music to camouflage the background noises my headset microphone always made.

Something got glitchy when I saved it. I had to save it several times to get rid of some strange coloured stripes that showed up. They were only visible after I saved the file and checked it, never in the editing software. I uploaded the video, only to find the glitch had simply moved to the very beginning of the video. I had to re-save it and re-upload it, and I think this one worked.

Please let me know if you can view it all right!

The Re-Farmer

Wattle weave bed – it’s finally done! Next!

I was going to post progress pictures, but I need to conserve storage space on WordPress until I go back and resize more old photos. I might do a start-to-finish photo video, instead. Until then, here it is! The L shaped wattle weave bed in the old kitchen garden is DONE!!

The insides of the woven walls were first lined with grass clippings. It turned out to be a very windy day, which made that job more challenging then it should have been!

Next, I used a hoe to make a trench down the middle, pushing the soil up against the grass clippings. The cardboard from the sun room I’d set aside for the burn barrel came in handy, as it was suitable for lining the bottom of the trench. With the bed being so narrow, the size of the boxes didn’t matter as much, since I had to cut them to fit, anyhow. The cardboard then got a soaking.

Next came a layer of corn stalks reserved from the garden clean up, which got a soaking. I raided the compost pile of half rotted kitchen scraps to put on top of the corn stalks, followed by a soaking. Then I raked some leaves off the grass nearby and added that on top, which then got a soaking. At this point, I climbed in and walked back and forth over it, to crush the organic materials. Whatever we decide to plant here next year, I don’t want the roots to be finding big gaps in the soil and drying out.

Finally, I headed out and uncovered the pile of garden soil we bought a couple of years ago. The cover kept the pile from washing away, but didn’t keep the light out, so the pile was covered with a matt of weeds!

I also realized the “tarp” I’d found to cover the pile had channels in it. We’d noticed them when we first dug it out, but only recently did I find the carport support peaces my brother said was in the hay loft. Some time after that, I’d dug out a tarp I thought we might be able to use to cover the hole in a shed roof, but when I unrolled it, I saw it was part of the carport. I figured it was a roof sheet or something, since it isn’t that big. Now I realize that this piece was part of it, too. So I dragged it off and lay it out on the lawn, with weights to keep it from blowing away. We’ll hose it down and see what we can do with it. The first sheet I’d found had a row of tears in it. This one does not.

I’ll have to find something else to cover the garden soil pile with.

It took 4 1/2 wheelbarrow loads of sifted soil (to get as many weed roots out as I could!) to cover the whole thing. In the process, I had to stuff more grass clippings higher up the wattles, so the soil wouldn’t fall through the gaps.

No, this time I did NOT give it a soaking! I didn’t want to compact the soil.

By this time, several hours had passed, so I took a break for a lunch the girls prepared for me, then it was back to work. There was a little bit of grass clippings left, so that got scattered over the soil – at least what the wind didn’t blow away while I was trying to spread it evenly! I then raked up and added a mulch of leaves. That did get a soaking, to keep the wind from blowing it away. Finally, I grabbed the wagon and filled it with as much wood chips as it would hold without spilling as I pulled it back. It turned out to be just barely enough to cover the entire bed with a thin layer.

Once that was done, the entire bed got a very thorough soaking. I wanted all the layers to be good and damp. I might even soak it a couple more times, before our highs start dropping below freezing. We hit a high of 18C/64F today (though with that wind, it didn’t feel like it!), but tomorrow our high is expected to be only 6C/43F, and that’s the warmest day we’ve got left. We are expected to have less than a week with highs above freezing. Which isn’t too bad, for November.

Anyhow. The more the bed gets moistened before things start to freeze, the better it will be for spring. With all the layers, the bed got filled to the top of the shortest walls. My intention was to have it a bit lower, and that will happen as the layers settle and the organic matter decomposes. I expect it to drop at least a couple of inches over time.

While working on this bed, I spent a lot of time going over and around the rectangular bed we’d planted beets in. Once the L shaped bed was done, I decided to work on that one, too. It is framed with logs, and I’d like to raise it a bit higher. This is how it looked, at the start.

The first year we had a bed in this space, it was a sort of triangle shape that was too wide at the end near the house. My daughter and I changed the shape of it, then grabbed some pieces of smaller dead spruces that had been cleaned up, to frame it on three sides and keep the soil in place. We planted carrots here last year, which the groundhogs decimated repeatedly. Amazingly, we still got a crop out of it. This year, we planted beets, which failed. Sort of. I’ll talk about that in a separate post!

There is a pink rosebush on the left, and this year – after pruning away more branches from the ornamental apple trees – it finally had substantial growth and huge numbers of flowers.

It’s amazing what a little sunlight will do!

This year, when we covered the rectangular bed, I had a board across the end by the rose bush to hold the mesh down, but otherwise, there’s nothing there. The ground slopes downwards from the house, so that end is lower than the end closer to the house.

That will be built up.

The first thing I did was dig a shallow trench across the bed near the rose bush. I still had some short logs I’d brought over for tiny log bed and border that didn’t get used (you can read about that here, here and here. Links will open in new tabs, so you don’t lose your place. 😊) I placed one of the shorter logs across, in the trench. Then I pounded in three stakes at each corner, to create upright supports. When I find logs long enough, they will be placed between the stakes. I want the long sides to go on top of the cross piece closer to the house, with a second cross piece to fit in between them, but have it the opposite way on the low side. One of the current side logs is a fair bit shorter than the other, but I think I find find something to fill the gap.

Though I plan to make the bed only one log higher, with the rose bush getting so big, the wall beside it is probably going to be three or four logs high to keep the branches out of the garden bed. I forgot to take a picture, but I’ve already added another log to that end. It’s slightly longer than the one in the photo, so that it is overlapping the longer side log. When I find a gap filling piece for the bottom, it will be tucked under that second log. The second log isn’t as thick as the bottom one, so I tied off the pair of uprights on either side of the ends, to secure them, and will do the same with each log that gets added. I made sure those pairs of upright supports where the tallest and strongest, since they’ll be holding the most logs.

And that was enough for today! I need to go hunting for long enough logs for those sides. If I can’t find any that are suitable, we might add more of those support stakes and use shorter logs instead. We have plenty of short ones that couldn’t be chipped, that were cut to roughly four foot lengths. The bed, however, is about nine feet long, so that might not work. We’ll see.

That done, I had time to work on emptying the rain barrel, which had enough water still in it to do the Korean Pine and Ash tree seedlings in the outer yard, as well as the haskaps and a currant bush in the south yards. So that’s now empty and ready for winter. Usually, I tuck it away in the old kitchen garden for the winter, but I think this time I’ll leave it where it is. It’ll get snow in it, which should be fine. I just don’t want to be chipping it out of the ice and snow again, to set it up to catch the snow melting off the roof in the spring.

While I was doing all this, I had the attention of so many yard cats! Even the ones that don’t like people, like to hang around while I work.

While I was putting things away for the night, I spotted this…

He was napping in the wheelbarrow at first, but I interrupted him while taking a picture. 😊

What a handsome boy! We have managed to pet him every now and then, but he isn’t a fan of attention.

I did get to give the bitty baby a cuddle, though! He came out to explore, and after several attempts, I was able to cat him. He put up quite a fight until I got him into snuggle position and started scritching his ears and he finally calmed down. I hung on to him for quite a while before putting him down, and he didn’t run away. Hopefully, he will become more accepting of cuddles as time goes by. We’ve had others that became less accepting of cuddles and attention over time. Ah, well. We do what we can!

The Re-Farmer

Old Kitchen Garden, wattle weaving progress

Oh, I am so happy!!! It’s almost completely done!

I went and borrowed my husband’s phone to take a picture. It’s my old phone, but of course he’s set it up to how he wants it – which turns out to include fingerprint scan to unlock it. I really hate that function. I find they don’t scan fingerprints well, and the last thing I’d want is to get locked out of my own phone because the thing can’t recognize my fingerprint. It could well be because my hands are so rough, it messes up my fingerprints. Either way, it looks like I won’t be borrowing his phone when I got into the city after all. It’s changed so much, I had to get him to tell me where the camera icon was! He does love his funky themes and designs. 😁

Anyhow…

Here it is!

I had enough long poles that I could do the back without having to overlap any. The only problem came when it was time to do just the taller posts. It wasn’t too bad when I was weaving around seven of them, but when it came to just the three at the turn, it was more difficult. I had the shorter pieces for it, but three poles just isn’t really enough to hold the wattles in place, though for some of them, I could push the more flexible tips into the previous wattles to lock them down.

There was lots left over when the inside of the L shape was done, and I wanted to use them while they were still green and flexible, so I went ahead and did the outside. The first thing that needed to be done was to hoe the soil out of the path and back into the bed, while also clearing and leveling where I estimated the uprights would go. Once that was done, I measured two feet from that long pole right in the corner, marking three places; the left and right are lined up with the back walls, while the center one is in the middle.

Knowing I would be working with much thicker poles, I spaced the uprights further apart along the sides, compared to the previous ones. That left me with four extra prepared posts. After using the pencil point bar and a sledge hammer to make holes for the posts, then sledge hammering the posts in place, I could see I wouldn’t be able to use the uprights at the ends, so I added another post at each end, just inside the posts supporting the end wattles.

When it came time to weave the wattles in, I used the longest poles first, with the thickest parts at the ends, so that the more flexible tops would go around the curve. Some of the posts were long enough to actually bend all the way around the curve! When I put in the second side, I was able to wrap the ends around the wattle in the first side. I was able to do this for the first several layers before I found myself having to weave a shorter third pole around the curve. Unfortunately, a few of the poles just couldn’t go around the curve without breaking.

With the more flexible ends going around the curve, this meant the ends built up higher, faster. Which I’m okay with. For the last few pieces, they weren’t long enough to go around the curve at all.

I will need more material to build up the curve, but I also want to build that corner higher, too. So what I need to look for now is a lot of thinner and flexible, pieces. If I can find enough of them, I might be able to not only build up the corner and the curve, but wrap a nice edging along the top, all the way around.

Finding appropriate materials to do this was surprisingly difficult, but I’m really happy with how it’s turning out. By the time this is finished, though, we probably won’t be able to accumulate enough materials to do it again anytime soon, except perhaps for some very small beds.

Once the walls are done, we can add amendments and more soil to this bed to build it up, and it will be MUCH easier on the back to work in it.

The Re-Farmer

Some chilly morning progress

At some point, I’m going to have to borrow my husband’s phone or something, just to have handy to take some progress pictures!

And kitty pictures.

I counted 26 this morning. !! And I didn’t see Rosencrantz until much later, nor did I see Rolando Moon, who seems to have moved on again.

My new phone is expected to arrive on the 28th, which is the day I’m taking my mother’s car in to get the tire fixed. The shipping notice originally said the 27th, which I would have preferred, since that meant I could have the phone set up and ready before going in for our first city shopping trip for next month. I’ll definitely borrow my husband’s phone for that trip, at least.

Once I was done my morning rounds, I grabbed the loppers and went into the south side of the spruce grow. We haven’t done any clean up in there for quite some time. Much of that area was under water this spring, anyhow.

This area has been mostly taken over by poplars, and that was what I was after. As we clean out the spruce grove, one of the things I want to do is cut back a lot of the poplars and plant more spruces. I want it to stay a spruce grove, not turn into a poplar grow. Spruces are better for cutting the wind and snow year round.

What I was looking for were tall, straight poplars small enough to cut with the loppers. At that thickness, they should still be flexible enough to bend as I weave them around the uprights. If it’s too thick to cut with the loppers, it’s too thick for the wattle weaving.

While I was doing that, I found myself working around the apple trees we’ve been uncovering out there. I asked my mother about them, and these were trees she’s planted herself, mostly from seed. My mother still has a hard time understanding that you don’t get the same type of apples from seeds at the tree they came from (as far as I know, there is only one type of apple that grows true from seed). We have no idea what kind of apples these can produce. The area is so overgrown, the much shorter apple trees barely had enough sunlight to start blooming. I was even cutting poplars that were growing through the branches of an apple tree!

Since I was there anyhow, I went ahead and pruned several of the apple trees, cutting away dead branches, and opening them up to more light. With the number of poplars I cut away from around them, that will be a help, too. We will need to come back with other tools to cut away the ones that were too big for the loppers to cut through, as well as other bushes I can’t identify at this point. I was happy to spot little spruces trying to grow through the tall grass and fallen trees and branches, which also need to be cleared away. I was also very thrilled to find a single Tamarack tree. There were three others planted closer to the house, in between some spruces, that are way too crowded together. I’m hoping to save them, but that might require cutting down the spruces next to them, and I don’t want to do that if I don’t have to. This Tamarack, however, as all on its own and would not have been deliberately planted there. I really like Tamarack, and would like to eventually plant more of them.

Anyhow.

I kept finding more of these apple trees, but I couldn’t get at most of them. Of the ones that I was able to prune, though, I’m hoping they will finally get enough light to bloom and produce. I did see some flowers on one of them for the first time last spring, but no apples developed.

I am quite happy with how many small, straight poplar I was able to get at and harvest. Once I was done, it took several trips to drag the piles of them I’d made, over to where the burn barrel is. The branch pile may be chipped, but I’m already adding more to the remains that need to be burned! The next while was spent trimming all the branches and twigs off, adding those to the burn pile, then sorting the remaining poles more or less by length. Then they all got dragged over to the old kitchen garden.

I should actually have enough to finish wattle weaving the inside of the L shaped bed, and even start on the outside of it. What I think I will do for the outside is not have a 90 degree corner, like there is around the double lilac, but to have a curve, instead. I haven’t quite decided yet, but if I think having a curve would actually make things easier, and more even.

By the time the poles were dragged over to the old kitchen garden, I had to go inside to warm up! I don’t know what the temperature was outside at the time, but the thermometer in the sun room was at only about 3C/37F. Which is what our high of the day is supposed to be. It’s almost 2pm as I write this, and we finally reached that temperature outside. Tomorrow’s high is expected to be only 4C/40F, but after that, we’re supposed to have three days with highs of 13C/55F.

I have to get back at work with the poles I cut this morning, though, while they are still at their most pliable. It’s definitely going to be chilly work!

The Re-Farmer

Old Kitchen Garden: Wattle weaving progress

After finishing up my morning rounds, I did as much as I could with the wattle fence, using what materials we had been able to gather. There wasn’t much I could do with the longer sections. With the shorter part of the L shape, I was able to use a few single lengths, but even there I had to start combining them in pairs.

The girls had gathered some really nice, even pieces of maple suckers, though, and they were the perfect length for the wider end bit.

The red barked lengths are the maple the girls had gathered. When I used those up, I went to the pile of small willow branches I’d set aside and brought over the pieces that were close in size to the maple. Those are the greenish coloured branches. Last of all, I topped it with two thicker pieces of maple that I’d pruned from the nearby maples that are now clear of the branch piles. Those are are lot tighter, and will lock everything in place. I didn’t trim the top one to size yet, as I might need to move it out while the other section of wall is worked on. However, as it is now, that is as high as I intend to go for most of the bed.

It would be great if the whole thing could have been done like this! It looks so much prettier, with smaller gaps and more consistent sizes. The only down side is that such small pieces will also break down faster than the larger ones. It will likely still take a few years, but it’s something to be aware of.

I used more of the maple suckers I had gathered at this end, along with more willow that was left, and locked it down at the top with two thicker pieces of maple.

This corner looks a mess right now! It will be built up, end to end, until they are the same height as the walls at the ends. After that, it will be build up higher to match the heights of the debarked posts. By time I’m working on just the three tallest posts, I’ll be working with much shorter pieces, and should be able to tidy up the whole thing a lot more. Right now, it’s looking quite the mess!

That piece of 2×4 is my mallet.

At this point, I am out of useable materials. I think I will go hunting around the spruce grove for more material, before I start wandering father afield. The Red Osier Dogwood that we have would make excellent, flexible pieces, but that’s something I’m trying to encourage as undergrowth. I might still be able to harvest some, though. There might even be some young poplar I can harvest. Mostly, I just want to find enough material to finish this back wall. The remaining sections can wait until spring, if we have to. Once the back wall is done, the soil that has eroded into the paths can be hoed back into the bed and tidied up. I will likely use grass clippings that we still have all along the bottom of the wattle wall to keep the soil from falling into the gaps. Slowly, this bed will be built up to the height of the lowest sections of wattle, which will make growing in it MUCH easier on the back!

That’s about all I’ll be able to get done today, though. We’ve had another change in plans, with company coming tomorrow. We’re hoping to be able to have a bonfire with the remains of the big branch pile that got chipped, but it will depend on the weather. The forecasts keep changing. Just in case, we need to be prepared to move indoors, so we’re going to have to start moving things like our canning supplies back into storage, and all that other stuff that just sort of takes over every flat surface! We’ll need to be able to expand the dining table, too, which will take up twice the space.

We are terrible house keepers. 😂

But I’m really looking forward to seeing my BIL and his family, and really appreciate that they are willing to make the long drive out here, knowing that my husband can no longer go to their place. It’s going to be awesome!

The Re-Farmer

Well, it’s a start

Since I wanted to keep an eye on the kitties anyway, I decided to see what I could do with the willow branches. After sorting the longest ones out, I started weaving.

This is all of the branches I have so far.

Minus one that was too bent to use. At least here. When we’re ready to weave the ends, we only need pieces less than 3 feet long, so I could probably salvage it.

As we get more branches to weave in, they’ll get pounded as low as we can, with each layer added keeping everything below in place. Right now, some of them just sort of pop back up a bit after they’ve been pushed down. Until it’s all tighter together, it won’t be holding much soil in place! One more layer along the short wall, and I think we can get away with no longer debarking the branches.

I really hope those maple posts that still have their bark won’t start growing.

I’m just itching to get back out there and cut more willow branches for this, but the weather out there really sucks.

I want to keep an eye on the bitty kitties, though, so maybe…

(glances out the window and tries to convince myself the wind isn’t that bad, and it’s not that cold out…)

The Re-Farmer