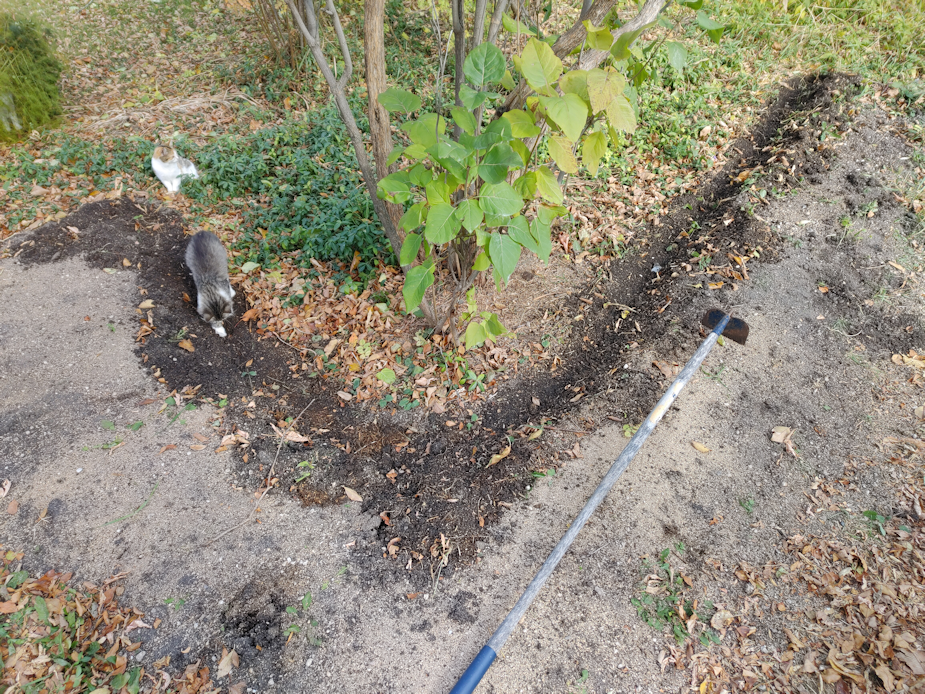
Since I wanted to keep an eye on the kitties anyway, I decided to see what I could do with the willow branches. After sorting the longest ones out, I started weaving.
This is all of the branches I have so far.
Minus one that was too bent to use. At least here. When we’re ready to weave the ends, we only need pieces less than 3 feet long, so I could probably salvage it.
As we get more branches to weave in, they’ll get pounded as low as we can, with each layer added keeping everything below in place. Right now, some of them just sort of pop back up a bit after they’ve been pushed down. Until it’s all tighter together, it won’t be holding much soil in place! One more layer along the short wall, and I think we can get away with no longer debarking the branches.
I really hope those maple posts that still have their bark won’t start growing.
I’m just itching to get back out there and cut more willow branches for this, but the weather out there really sucks.
I want to keep an eye on the bitty kitties, though, so maybe…
(glances out the window and tries to convince myself the wind isn’t that bad, and it’s not that cold out…)
Today’s high was supposed to be 19C/66F. I don’t know if we reached it, but with the blustery winds, it never felt that warm. I’ve been keeping a close eye on the weather, and my app on my desktop includes historical data for each day, including 30 year record highs and lows for various data. I noticed that today had a record high for snow of 14cm/5.5in in 2019. In fact, we set record highs for snow on the 10th, 11th and 12th, all in 2019. We were just coming to the end of our second year here, so I went looking at my blog posts for those dates.
Ah, yes. I remember that blizzard!
The amazing thing is that, just days later, all that snow was gone, and while we were still cleaning up storm damage, everything was back to green and sunny!
Depending on which app I look at, however, we might be getting a mix of snow and rain starting tomorrow night, and by Friday afternoon, we’re expected to get between 3-6cm (roughly 1-2 inches) of snow.
That meant my focus was preparing to build up walls around the L shaped bed in the old kitchen garden.
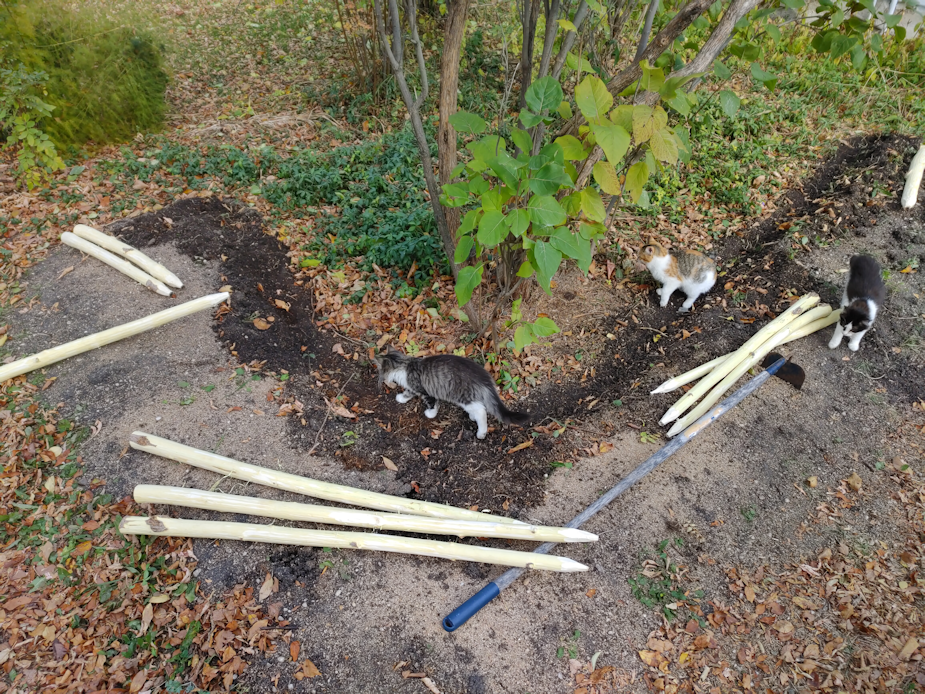
I went through the maple pieces I’d cut yesterday and started cutting them to size, cutting points on them, and debarking some of them.
I had lots of furry help. So much help, one of the kitties got plumb tuckered out!
From the longest, straightest pieces of maple, I cut three into 4 foot lengths. Then I went through some of the strongest pieces to cut four 3 foot lengths, then four 2 1/2 foot lengths. After that, I just cut as many 2 1/2 foot lengths from the thinner straight pieces as I could get out of them.
I used a hatchet to cut the points on all of them. That was probably the most unpleasant part of the job. Not so much for the thinner pieces, but for all the thicker ones. I’m ambidextrous for most things, left handed when it comes to fine motor control, but for some things, I am completely right handed.
Using a hatchet is one of those things, and my right hand has been in terrible shape lately. I had difficulty gripping the hatchet, and had to stop frequently to give my hand a break.
The draw knife was awesome for debarking the wood. It’s still quite green and came off easily. I don’t have a way to secure the pieces I’m working on well, so there were quite a few times when I was pushing instead of drawing the blade – and it works just as well that was, too. For some of the thinner pieces, though, it was easier to just use a knife to debark them.
Also, no, that is not rust on the blade of the draw knife. It’s stained with tree sap.
The stack of the thinnest pieces did not get debarked. It would have taken forever and, at their sizes, it would have been awkward. The pieces that will be taking the most stress, however, have been debarked.
That all took a few hours.
Then it was time to get to the garden bed. I pulled the lettuce I’d left to go to seed (it looks like we’ll get seed from just one of them) and got ready to prep the bed. Without walls, soil was falling into the path and the inside of the L shape, and I don’t like wasting good soil!
I used a hoe to draw some of that soil back into the bed, and level off the edge, where the uprights will be going.
The three longest pieces will form a triangle at the inside of the bend. When we start weaving branches through the posts, these will be taking the most stress. Working out from there, one 3 ft piece will go along the short end, and three down the long end. If I have enough materials to do it, I plan to build up the wall higher at these posts, as much to wall around the lilac as to create a wall for the bed.
The four 2 1/2 ft pieces are for the corners at the ends of the bed.
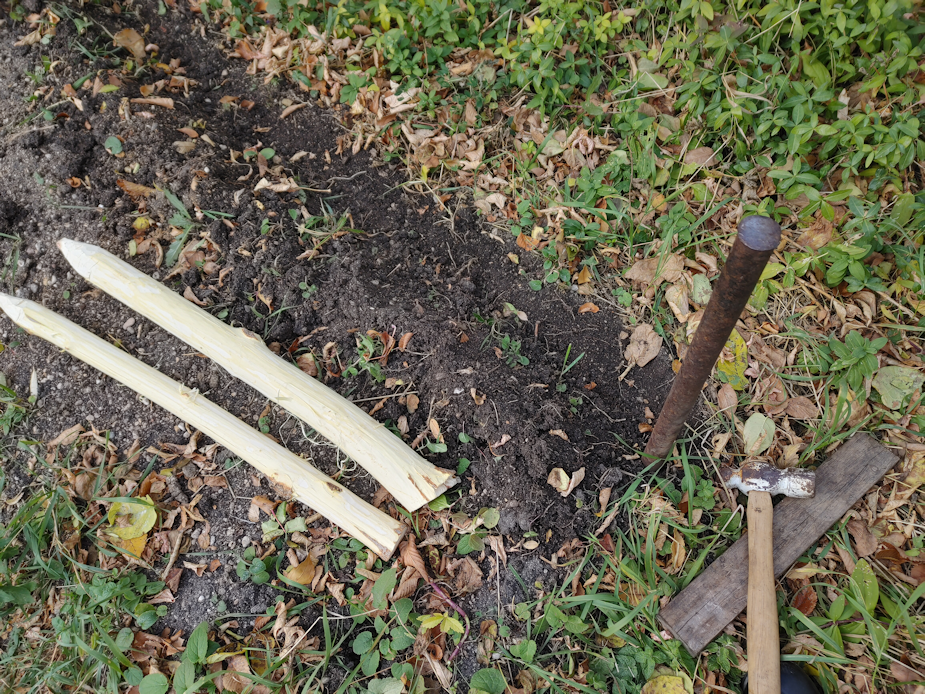
To install the posts, I used the pencil point bar and hammered it into the ground.
Unfortunately, that old hammer doesn’t have the right handle on it, and the head fell off again. I had to switch to a sledge hammer.
I really didn’t want to switch to the sledge hammer.
Ah, well. It worked better. I’m just going to be in a world of hurt, tonight!
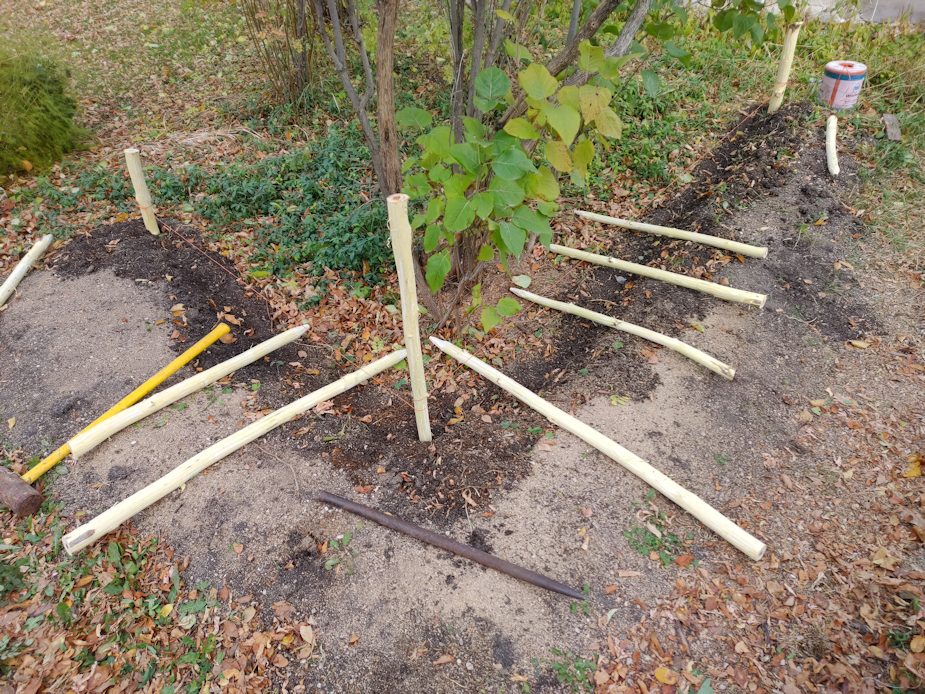
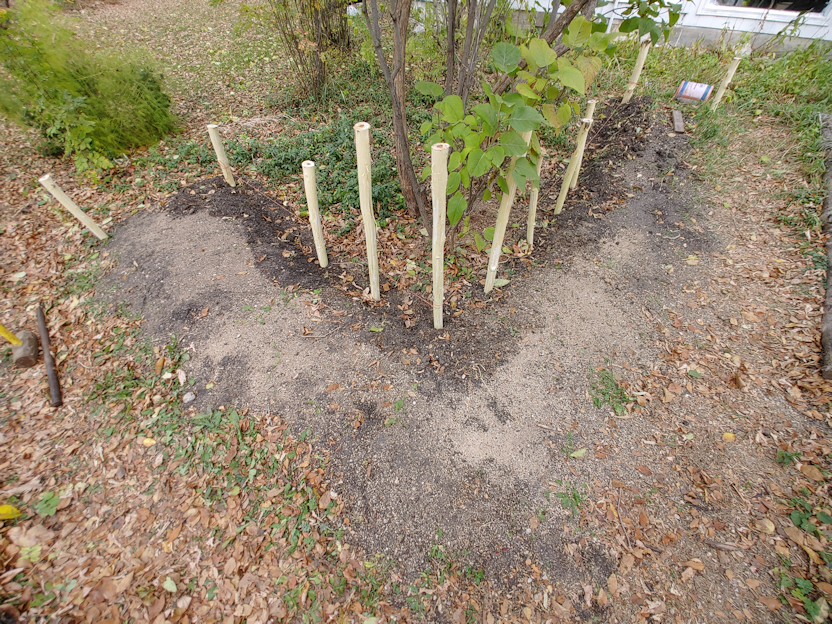
I started by placing three posts in, then tied twine between them as guides for the rest of the posts. Then I laid out the spacing for the remaining two 4 ft posts, and the four 3 ft posts.
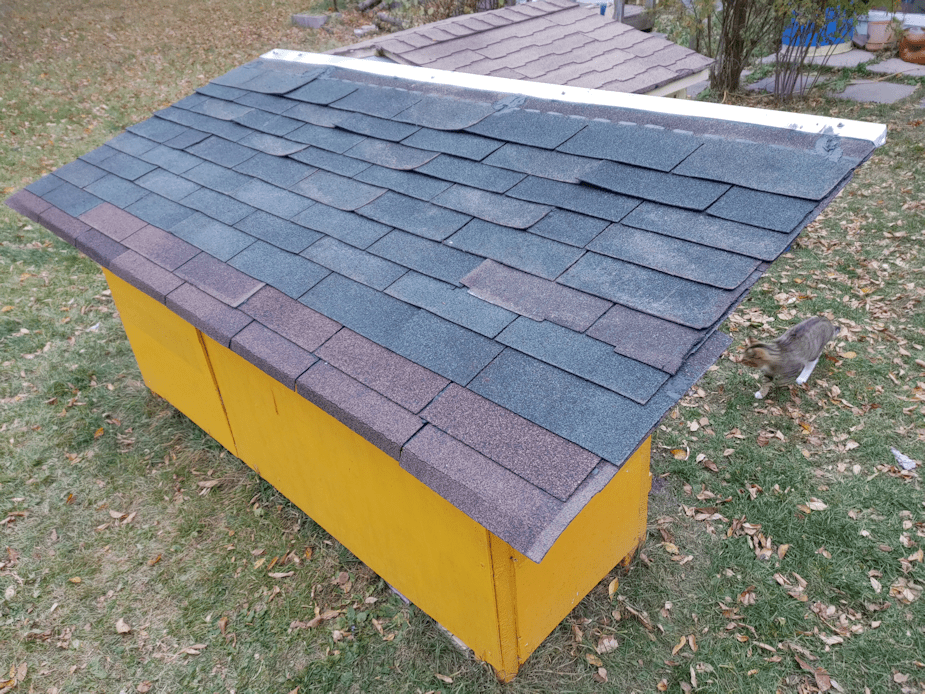
At this point my daughter, who had been working on putting salvaged shingles on the kibble house, ran out of roofing tar. I’d only picked up a small can for patch jobs, never expecting to need more.
So I left my daughter to continue pounding in the posts while I went into town to pick up more tar, and a few other things while I was there. When I came back, I found my daughter lying on a tarp on the ground surrounded by kittens. She is having much more success at socializing than I am!
She had even pounded the other two corner posts at the ends of the L shape.
The weather was starting to get worse, so I quickly filled in the gaps with the smaller 2 1/2 ft posts.
The long end of the L shape will be only 2 feet wide, so the end posts needed just one more added in between them, plus three more along the north side. The short end of the L shape needed only 2 more to fill the gap. Since this end can be accessed from three sides, we’re okay with it being wider than 2 feet, so the end posts there got two more in between. The rest of the posts will be for the outside of the L shape.
From the looks of it, I’m going to need to find more pieces to be able to finish the outside of the bed, but I’m not concerned about that right now. It’s the inside of the L shape that I need to get done first.
By this time, however, dark clouds were rolling in and it was starting to look like rain, so I left the job at this point and focused on cleaning up and putting away anything that might blow away. My daughter, meanwhile, finished the roof of the kibble house.
The green shingles are almost 50 years old and are in pretty rough shape. The brown ones are better, but they’re almost 30 years old.
The water bowl house roof is thinner plywood, so we’ll be using pieces of metal roofing that we’ve been scavenging for various things since we’ve moved here. If we used shingles, the nails we have would go right through by nearly half an inch, and that would be a problem! I dragged a piece of metal roofing out from the barn that we can cut in half and lay side by side to cover the roof of the water bowl house, but I also spotted a stack of corner pieces. I brought one over, and helped my daughter put it on the edge of the shingles on the kibble house. I found a bin of metal roofing screws in the warehouse, so I grabbed a bunch for when the water bowl house is done, and my daughter used a few of those to install the metal cap on the edge of the roof, using the screw holes that were already in the metal – after making sure to put some tar under each hole, first.
Almost everything about the kibble and water bowl houses has been done using scavenged bits and pieces we’ve found around the property, and a lot of it is pretty old and starting to rot. We don’t expect these to last long, but using paint and even decades old shingles will help them last longer. At some point, it’ll be nice to be able to build versions using new materials, all well measured and cut and leveled, etc. But this will do for now.
Once this was done, I set up a longer extension cord I found that was in good shape, and was able to plug in the cat’s house. We lifted the roof and put in the high density rubber mats I’d dragged out of the barn, which will help insulate the floor. There’s a thick scrap yarn crocheted blanket that is laid out on top of the mats, too. We will not be using straw this year. As much care as we have taken with the terrarium heater bulb, I would much rather not have straw in there! The heat bulb is working fine, with the heat shield still in place, and the timer is set to light sensor, so it will turn on when it gets dark, then off again when it gets light. The smoke detector was tested, too, and it’s working fine.
Once the water bowl house is done and set up where it will go, we’ll be able to plug in the heated water bowl through the cat’s house entry, too.
Tonight, the cats will have a warm and cozy place to stay if they start feeling too chilly. I especially hope the tiniest kittens will start using it!
As for me, I’ve pain killered up and hope I’ll be able to continue in the old kitchen garden tomorrow. For the weaving, I plan to cut the willow branches and use them right away, while they are still very green and flexible.
I really hope this works out. Otherwise, that’s a lot of work for nothing! Well. Not for nothing. Now that those posts are in, even if wattle weaving doesn’t work, I could still use them to hold whatever we find to use instead. It’s all fly-by-the-seat-of-our-pants work, anyhow!
There are some things I wanted to try with the old kitchen garden, but kept getting distracted. So today I gave the girls a to-do list for the main garden beds, and got started.
This is the main area that I wanted to make changes to.
The areas surrounded by red lines are where we currently have stepping stones. The long red line on the bottom is the border outside of where my daughter planted her irises. You can see the one walking onion, now laying flat on the ground, that has been coming up every year since we moved here. This year, it actually produced a head that, hopefully, has planted itself now. To the right of the onion is where my daughter’s daffodils are planted. We currently have a couple of boards on the outside of this area, but we’ve had issues with people completely ignoring them and stepping on the onion. So one of the things we want to do is build some kind of low wall along that red line, with openings to the stepping stones, just to keep wayward feet out of there.
Where I wanted to work on today, though, is the area marked in orange. That is where we planted our bread seed poppies, using seed collected from last year. They never got to their full size, and the area was way too full of weeds. There was just no way to pull the weeds without damaging the poppies.
So I decided to make a low raised bed in that spot. The first thing that needed to be done, though, was to get rid of those weeds and their root systems, as best as possible.
That meant breaking out the wheel barrow and soil sifter.
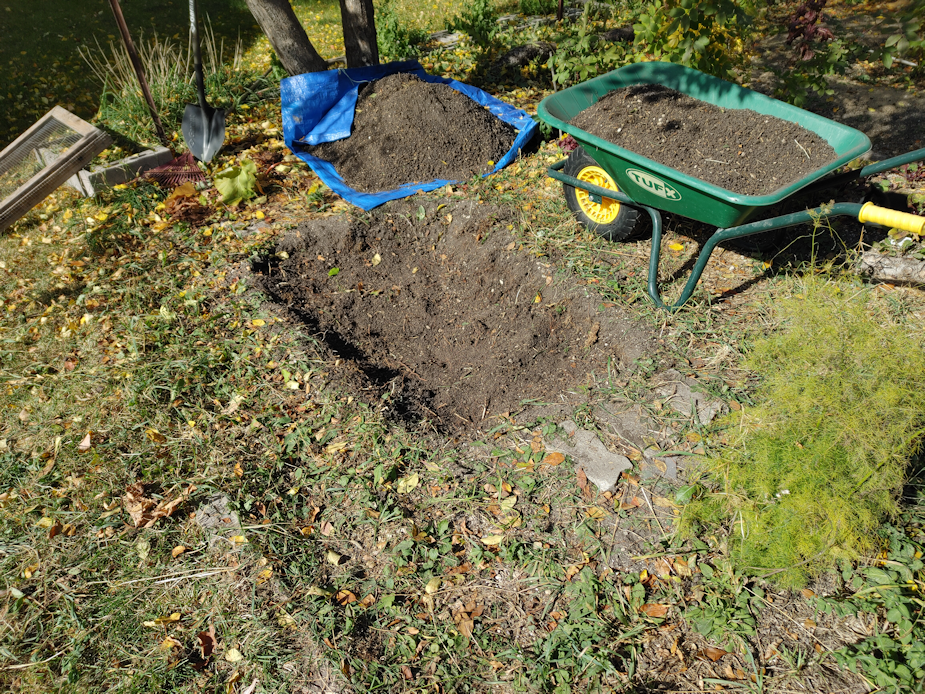
For such a small area, it took a long time to remove the soil and sift out the roots and weeds.
Some of the roots, from the nearby ornamental apple trees, needed loppers to clear them out. I ended up digging out a lot more of the soil than expected.
The tarp has two wheel barrow loads of sifted soil on it. I didn’t want to go too deep, so I loosened the soil on the bottom to try and pull up more roots, but there’s no way to get them all out. At least I got the bulk of them out.
I hope.
While sifting the soil, I pulled most of the roots out and tossed them onto the grass for later clean up, then whatever was left on the screen after sifting got dumped near some trees behind the storage house, where it will be used to fill in and level some low spots.
We’ve been building up the soil in this garden since our first summer here, and it really showed. Unlike other areas, I never hit the sand and gravel that is so close to the surface in our area.
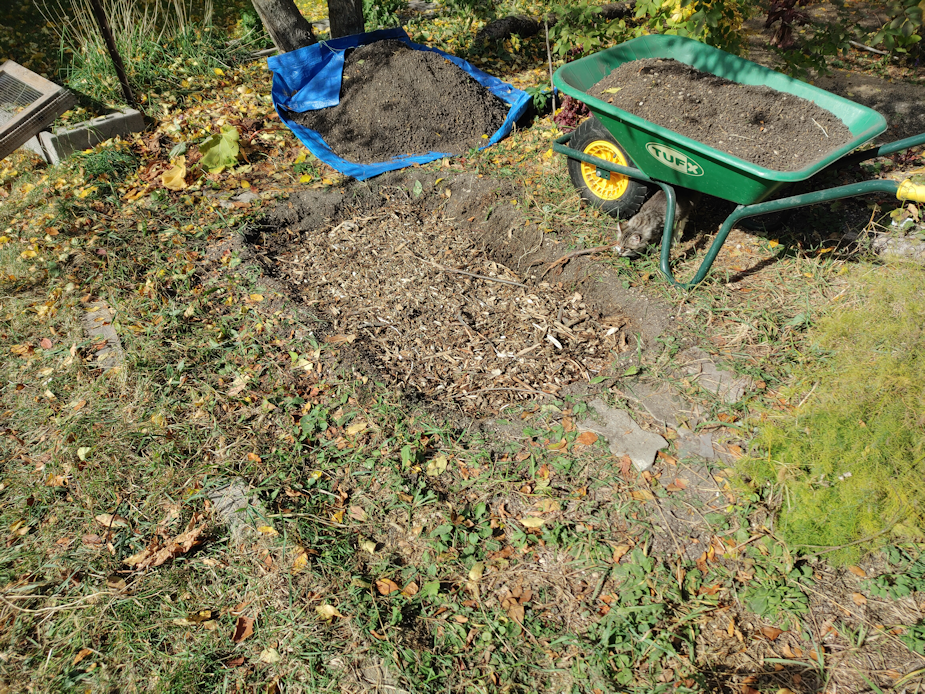
The soil was really, really dry, though, so my first amendment was a layer of wood chips, to act as moisture absorbing sponges as they break down. I’ll be adding other layers of organic material before putting the soil back, but first I wanted to build walls.
My initial thought was to drive strong stakes into the soil, then weave a wattle wall. I need to clear the suckers out from around the maples. Especially where the branch piles used to be. With those piles gone now, I can finally reach them. As I took a closer look at the suckers, though, I realized they were not straight enough, or long enough, to be suitable for weaving around the uprights, even for such a small bed.
There were, however, those lengths of wood that couldn’t be chipped, neatly stacked nearby.
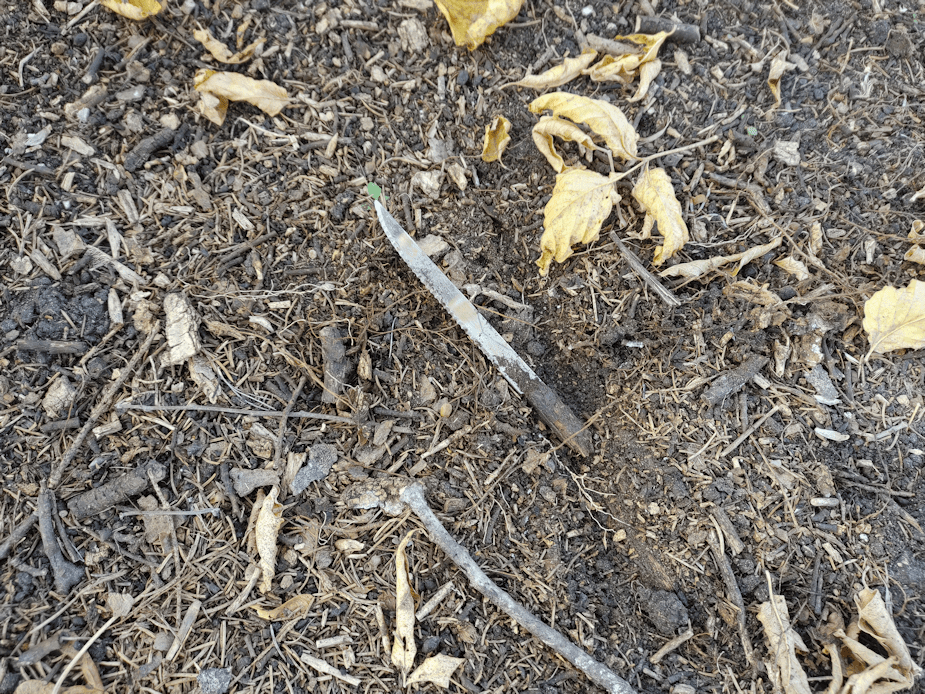
So I went through the pile and chose a whole bunch of the straightest ones and loaded them on the wagon. As I was taking them to the old kitchen garden, I went through where one of the branch piles used to be. It’s just bare ground, which is why I was able to see something reflecting in the sunlight.
Something pointy looking, and very bright.
Oh, the things we find around here!
Why on earth would there be an old steak knife buried in the soil here? It’s been here long enough that most of the wooden handle rotted away and broke off.
I’m glad I spotted that, because just the point was sticking out, and it would have been a pretty nasty thing to step on!
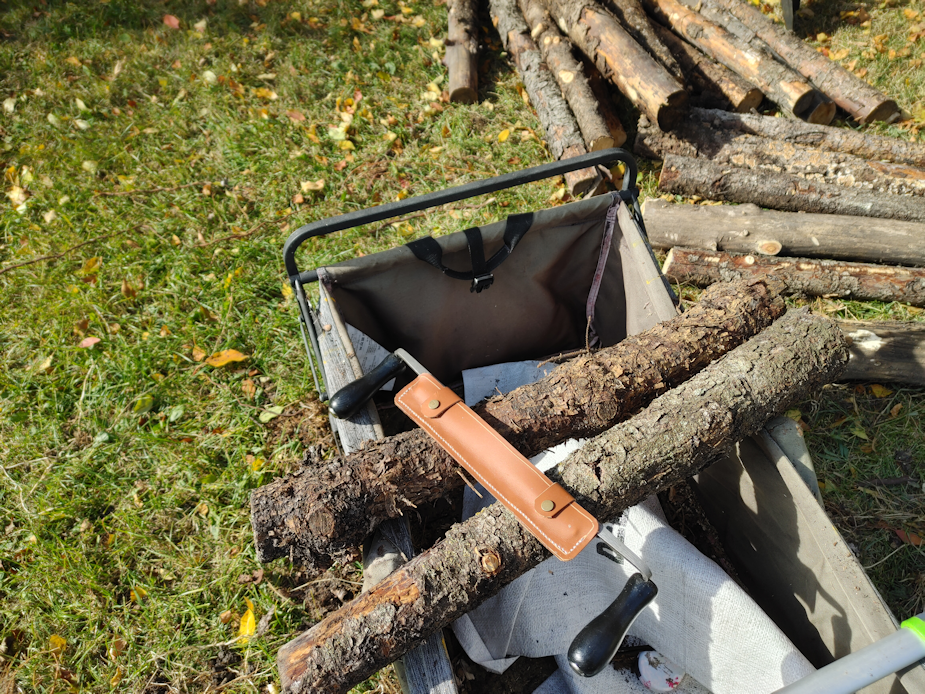
I brought more logs than I thought I would need, including shorter ones for the ends of the bed. When I made our high raised bed, the wood was not debarked, but I have a draw knife now, so I wanted to do that with these.
Isn’t the leather cover my husband made for it awesome? It fits perfectly, and he made sure the stitching is super strong.
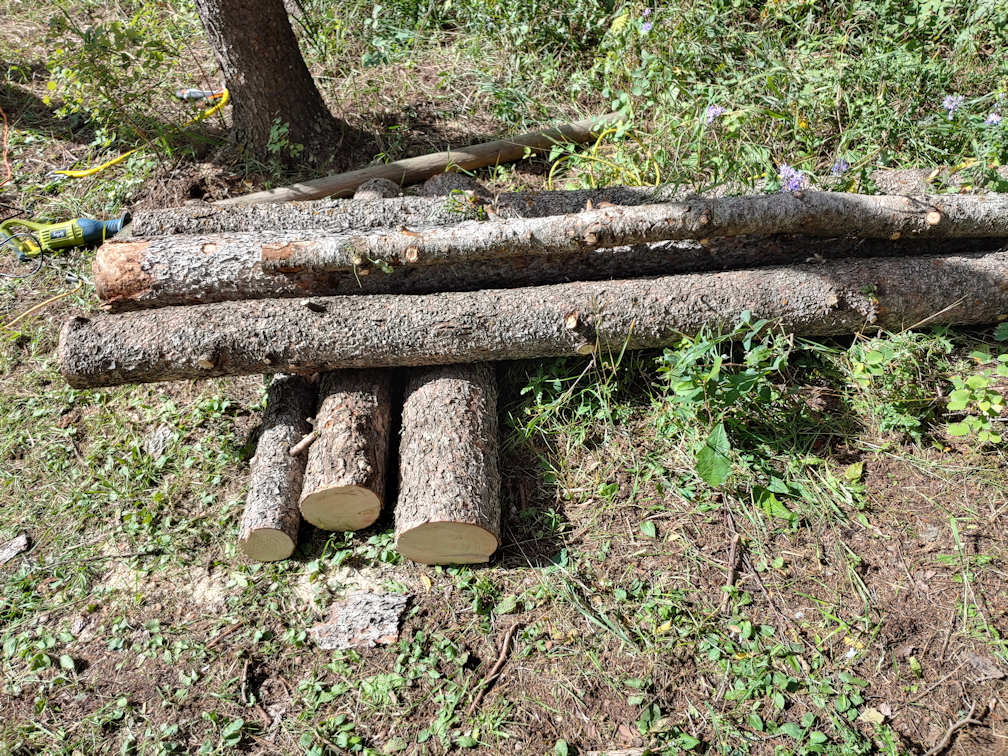
I measured the space I’d dug out, and it was almost exactly 2′ x 4′. Conveniently, the tree guys cut these log pieces to a maximum about 4′ in length. I used my baby chainsaw (pruner) to cut pieces to length. I’m glad I got that extra battery, because I went through both of them to get it done! I also used it to remove the nubs of branches on some of them. I’ll let the batteries recharge before I finish that part of the job.
I cut enough to make the bed three logs high. As the soil slopes and is quite a bit lower on the outside, I plan to use the thicker logs on the outside and try and level it off a bit. Or I might have three logs on the outside, and only two on the inside. We’ll see.
It took me almost 3 hours to get to this point, and I was done for the day. Once all that was prepared, I cleaned up the log ends, bark pieces and the roots and weeds. Those went into the burn pile, where we also burn the sawdust from the used stove pellets in the litter boxes (sure beats hauling it all to the dump, like we did with the clay litter!), and our burnable garbage. The garden bed will have to wait until tomorrow to finish. There wasn’t much wind today, so I did a much needed burn.
While I was tending that, the girls headed out to the trellises to start salvaging the netting and bamboo stakes. It took them forever to free up the netting the pole beans were on! Those beans were well wrapped around it. They salvaged the netting and the bamboo stakes that joined the A frame supports across the bottoms. The A frame supports were left for now, as they are currently holding up the trellis frame! Those are going to all come down, eventually, but after it took so long to free up the netting, that got left for another day. Those trellises weren’t built to last more than a year, and we got two years out of them, so I’m impressed that they lasted as long as they did! The next ones we build will be much more permanent.
While they worked on that, and I was tending the fire, I started getting messages from the cat lady. She will be able to book three more spays and neuters for us soon. We pick which ones need to be done first. It’ll be in a town further out, so she will pick up the cats, keep them for their recovery period, then bring them back. There are still problems with too many surrendered cats in the adoption system, and she’s had virtually no progress with adopting any cats out at all, but she is still able to get donated spays and neuters at various vets around the area. Adoption will be easier with cats that are fixed.
We still have Big Rig and Tissue that need to be done, since they got into food while they should have been fasting and their previous appointments had to be cancelled. I was thinking we might want to start doing outside cats, though, as population control, but the kittens we’ve socialized enough may still be too young.
We have made socialization progress, though! Not with the black and white one in the back, looking at the camera. We still can’t touch that one. The three at the peak of the cat shelter roof are the most socialized – they LOVE attention! Those four are siblings from the same litter. The fuzzy grey tabby is a female.
The muted calico on the far left has been allowing us to pet it regularly now, though it’s not quite as socialized as the littler litter. It’s sibling, the brown tabby starting at the camera, is male. The girls have been able to pet him but today, for the first time, I was able to not only pet him, but even pick him up! He wasn’t too comfortable with the picking up thing, but loved the ear skritches, so after I put him down again, he came back for more!
If we are going to get the two indoor females fixed, we can also choose one male from among the outside cats. The girls were thinking one of the smaller ones. The thing is, once we’ve got an outside cat fixed, then being kept indoors with the cat lady during recovery before coming back to us, it’s not going to go back outside. Especially not with the weather changes right now. Plus, once fixed, chances of adoption are higher, and we’d have to made sure we can actually get at it, if a permanent home is found.
If all goes well, though, the cat lady will be able to find homes for several cats over the winter!
Today was dry enough that I could work on cutting up the dead tree that had finally fallen, thanks to recent high winds.
This time, I could use power tools! I used my baby chainsaw (aka: cordless pruner), with it’s 4″ blade, to trim off branches, then a reciprocating saw, with a 12″ blade to cut the measured lengths. Unfortunately, my reciprocating saw is giving up the ghost. It cuts, but it doesn’t stop. Sometimes, it’ll slow down when I release the trigger, but other times it would just keep right on going. I had to unplug it to turn it off!
At the last minute, I changed my mind on the longer lengths I would be cutting. These will be used to make high raised beds in the main garden area, and I had been thinking of building them at 10 feet long. As I was measuring, however, I decided to make them 9 feet long. The boxes we built for the beds where the garlic had been planted are 9′ x 3′. I figured if I did these at 9 feet long, any future cover frames we build will fit on both. I kept the short ends at 4 feet, though. With the width of the wood, the inside of the beds will be roughly 3 feet wide, so any covers would still be interchangeable.
So here we have two 4′ and two 9′ lengths. Enough to make one course of logs to frame a high raised bed.
By the time I cut these, the rest of the tree was light enough that I could drag it closer to cut a couple more pieces.
That gave me another 9′ and another 4′ piece. At the top of the long pieces is the remaining top of the tree, which is about 7 or 8 feet. I set that aside for potential future use. When I was trimming the branches off, I found another 6 or 7 feet of the top had broken off and was dangling from a nearby tree. With three 9′ lengths, three 4′ lengths, plus another, say, 7 feet of trunk, and 6 feet for the top that broke off, we’re looking at a tree trunk that was roughly 52 feet. Add in the roughly 3 feet of stump left behind, we’re looking at a dead tree that was about 55 feet tall when I cut it down.
The one that’s still stuck on another tree was a bit taller.
At this point, I had salvaged logs to do 1 1/2 courses to build a raised garden bed. I needed two more pieces.
I didn’t have to cut down another tree, though. I still had the trunk of the dead tree I’d cut down and used the stump to make a bench.
After I finished trimming the branches, the trunk was eventually rolled up against the patch on the right, where there is a currant bush, chokecherry tree, raspberries, some flowers and a crab apple tree that died this spring. So after dragging/carrying the first pieces over to where the garden bed will be built, I cut a couple more lengths from this tree trunk, then set the remaining top piece aside with the top of the other tree, for potential future use.
You can see that the new raised bed will be quite a bit shorter than the low raised beds we had this year. Those are about 13 feet long. We will be losing planting space, but we should also be able to plant more densely, once they are at a more accessible height. For now, I want to make these at least 3 logs high, then see how they work. I expect to finish them off at 4 logs high.
Which would translate to roughly 3 or 4 trees to harvest, per bed. In this area, there are six low raised beds that will be converted to high raised beds, so that means as many as 12 trees to replace all the low raised beds with high raised beds.
Considering that we have more than 20 dead trees that need to be cut down, having enough logs won’t be a problem, even if some of them turn out to be too rotten to use. Some of those trees are thicker and taller than the two I used today, so I’ll probably need even fewer. With the new beds being several feet shorter than the current beds, we could potentially have a double row of beds. That will depend on the space for paths. These are meant to be accessible raised beds, with room for a walker or wheelchair in between, so the paths need to be 4′ wide.
The one thing we do have is the luxury of space. While we are starting with raised beds in this area we are already gardening in, as time goes by we will be adding more beds in this area. Not a lot more, though, as there are too many tall trees on the south side casting shadows. The plan is to build more permanent raised beds in the outer yard, where they will get full sun.
But that is for after we’ve done a lot more logging of dead trees in the spruce grove!
Once the last of the logs were dragged over, I took advantage of having the tools handy and finally took down the dead crab apple tree.
For this job, I was able to use the baby chain saw, and didn’t need anything else. I love that thing!
In the photo, you can somewhat see where the bark as split off the trunk at the bottom. This tree had started to get leaves in the spring, but then just died off, and seeing that damage sure explains why. The tree itself was showing signs of disease, even last year, so all this wood is for burning, not the chipping piles. I noticed that even the raspberry plants near it were also showing signs of disease, so what we will likely have to do is remove any plants growing around the tree and not plant anything at all here for a few years. That should be time enough for whatever disease has gotten into the soil to die off.
Once cutting and clearing away to the base, I could see that this tree was actually the sucker of a larger tree that had died, long ago! The inside of the old stump was so rotted out, I could brush it aside with my hands.
I kept cutting and breaking up bits and pieces for a while, but what I will ultimately do is bring a small metal ring I found and have been using as a portable fire ring, and light a fire on top of the remains of the tree. That will prevent any suckers from trying to start growing and, hopefully, sterilize the soil of whatever disease has gotten into it, at least a bit.
It was good to finally get this cleared up. There are a few other dead and dying crab apple trees that will need to be cleaned up, too. Over time, once enough time has passed, I hope to replace them with other fruit trees that are more disease resistant. This spot, however, will not get anything tall planted in it. There are already too many tall trees shading the area. An awful lot of garden space was lost to shade because my parents planted so many new trees on the south side of the garden, instead of the north! Most frustrating is that they also planted them too close together, so none of them thrived, and quite a few died. I removed a lot of these when I cleaned up the maple grove, our first summer here, but I think I will have to take out an entire row of crab apple trees I discovered in the process. They simply aren’t getting enough light to bloom and produce, even after I cleaned the area up. That’s not a priority right now, though.
But I digress!
I’m happy to have gotten as much done as I did today. Tomorrow, the girls and I have an outing with my mother planned, so we won’t be able to get more done then. I’ll have to use Sunday to take down another tree and hopefully get enough wood to start on the first permanent high raised bed before winter. With several days of rain predicted next week, we shall see how far we will be able to get on that!