It may be the end of November, and I may still be sick, but I can still do at least some garden things!
I got two seed orders in today. This first one is from Heritage Harvest Seed. We ordered from them last year, and I was very happy with them. Plus, they grow their own seeds, and are located even further north than we are, so we can be assured that, barring unusual circumstances (like the flooding we got in 2022!), anything we order there should be able to grow where we are.
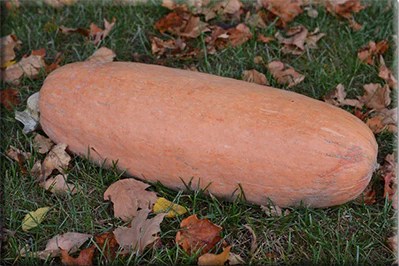
Though we do still have seeds leftover for some things, I went ahead and ordered a number of things we ordered last year. Among the things I have re-ordered are: Tom Thumb popcorn seeds (we got none last summer, due to flooding, so for 2023, these will be planted in a completely different location, in a raised bed), Little Finger Eggplant, Canteen, Apple and Yakteen gourds, and Zucca melon (because I’m a sucker for punishment and determined to grow more gourds), Styrian hulless pumpkins and Boston Marrow. I am also getting Georgia Candy Roaster. Last year, we ordered those from Veseys, but I want to try Heritage Harvest’s seeds this time.
Gotta love that name! I wanted to order these last year, but they were out of stock when I was placing my orders. I wanted to make sure I had some seeds for this year. According to the description, they are great for soups and roasting.
My older daughter requested we try salsify, because it apparently tastes like seafood. More specifically, according to the description, this variety tastes like oysters. Apparently, they can be very difficult to harvest and break easily, so she plans to grow them in something deep, like garbage cans (we have a remarkable number of garbage cans around here), so they can be just dumped out to harvest.
Last year, I was torn between ordering these or another type, so I’m trying these ones for 2023. They are noted as being a good storage variety. There are only 50 seeds per packet, so I ordered two.
We’ll be ordering a lot of different onions for 2023. We just can’t seem to grow enough of them!
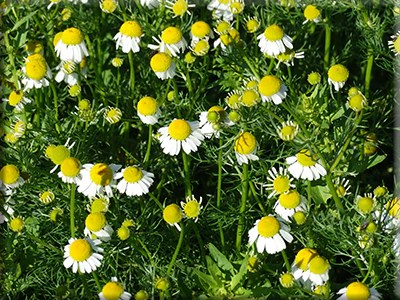
Lawn chamomile grows wild where we are, but this is the larger type that is what you would find in the chamomile teas you buy in stores. Over time, we will be planting a tea garden, and this is our first start!
I’ll be doing an assessment of our 2022 garden later, but we had a lot of failures, especially with the squash. It is unlikely we will have the level of spring flooding we had this past spring again next year, so I hope things will have a better chance of surviving. I was really looking forward to trying the different varieties of winter squash we’d planted, but we’ll just have to try again!
We haven’t even done a thorough assessment of our 2022 garden, nor fully decided what we plan to grow next year, but I’ve gone ahead and made our first order for next year’s garden, today.
The main reason is, there are things I wanted to order before they have a chance to be out of stock. Particularly with trees for the food forest we are slowly developing. These will be shipped in the spring, and we won’t be billed until they are shipped. I ordered seeds as well, because I used a sponsor promo code from Maritime Gardening, which gives free shipping if there is at least one package of seeds in the order.
This is what I ordered today. All images belong to Veseys, and links will open in new tabs, so you don’t lose your place. 😊
The new Trader Everbearing Mulberry is the main reason I wanted to place an order right away. We tried a different variety before, that promptly got killed by an unusually cold night shortly after it was planted. Cold enough that even if we had this variety, it likely would not have survived, so soon after being planted.
Here is the description from the site (in case you’re reading this years later, and the link is dead).
Morus alba x rubra. There are so many things to love about ‘Trader’ Everbearing Mulberry! First, the tree itself is absolutely beautiful and can be grown as a single trunk or multi-stemmed shrub. Big, glossy black fruit are present throughout the summer and are an irresistible blend of sweet and tart. Even the leaves are starting to be considered a super-food and can be made into a powerfully healing tea. ‘Trader’ is winter hardy (Zone 3-4), vigorous, long-lived and disease and pest resistant. We ship 8-12″ non-grafted tree.
Please note: Due to a crop shortage, we are not able to supply the Mulberry in a 3.5″ pot. We can supply in a 2.5″ pot. Since these are smaller, we will send 2 of the smaller size for spring 2023.
That last bit about pot sizes is another reason we wanted to order the mulberry right away. They may be smaller, but we’ll be getting two trees for the price of one. Which means chances are better for at least one of them to survive!
The other tree we ordered was Liberty Apple. From the website:
Malus. Superlative variety resistant to a host of diseases. This apple has outstanding flavour and is aromatic and juicy. The conical red fruit is among the very best and as an added bonus is excellent for cider. Crispy, juicy apples right in your back yard. Good Scab resistance, making them much easier to look after. For best results, two varieties should be planted. We are offering 1 yr. whips. approximately 18-24″ in height which have been grafted onto hardy rootstock. They should mature to about 15-18 ft. Hardy to zone 4.
Yes, it says zone 4 and we are zone 3, but we will just have to take extra care in where it’s planted, and to protect it while it’s small. We have crab apple trees, but no regular apples. One apple tree should be enough to provide for our needs, and the crab apples will be the second variety pollinator.
Then there are the seeds.
While we didn’t have much to show for peppers this past summer, that had more to do with our horrible growing year in general. My pepper loving daughter had thought we would be ordering several varieties for this past year, but I’d only ordered the one type. I think we learned enough about growing them to order more varieties, so I ordered a sweet bell pepper combo.
Early Sunsation: Bright yellow and big. Very heavy yielding with thick, juicy walls. This variety stays nice and crisp even when fully yellow. 3 lobed fruit. Resistant to Bacterial Leaf Spot races 1-3. 65 days to green; 80 days to yellow from transplanting.
Early Summer: Elite, early and extra large! Early summer is an early maturing, yellow bell pepper. The fruit are large at 5″ and an elite disease resistance package gives Early Summer a winning combination.
Dragonfly: Sweet and colourful. Dragonfly’s early production was a standout for our trial staff. Fruit emerges green and turns deep purple when mature. Dragonfly continues to produce fruit into the fall even after temperatures have dropped.
The Early Summer is new to Veseys for the 2023 growing season.
There was another new for 2023 item I just had to order.
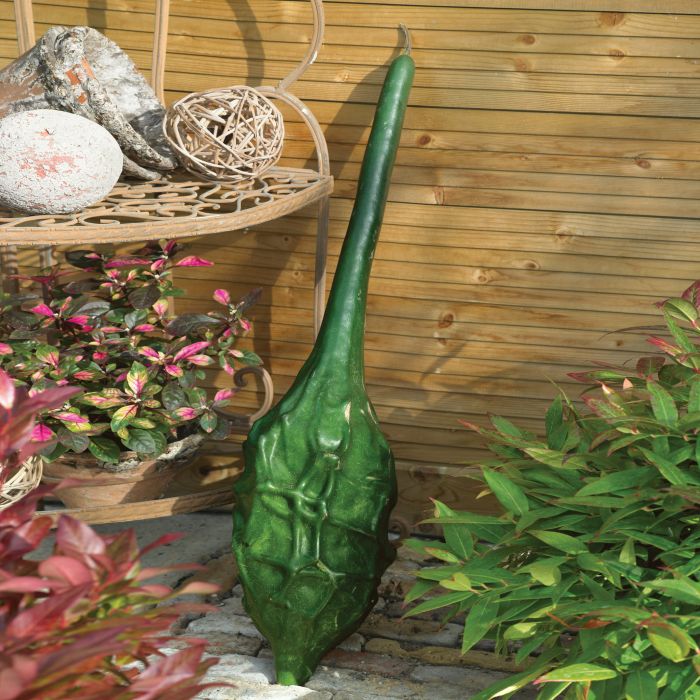
The Caveman’s Club Gourd! This is definitely something for the “just for fun” list. 😁
Truly different! This 12-16″ gourd produces a dark green, ridged, alien-like, bulbous fruit that are not like anything we have seen before! Growing them on a trellis ensures a straight neck. Plant early for best results. Matures in 120 days. Approx. 15 seeds/pkg.
I just couldn’t resist. This will be an ideal thing to try growing on the new trellis tunnels we will be building in the spring.
After we’ve taken the time to assess things from our 2022 garden, then gone through what seeds we still have, we’ll start making final decisions about what else we want to order for the 2023 growing season. One thing we will almost certainly be ordering are different raspberry bushes, that mature at different times. Any raspberries we order won’t start producing until their second year, so what we order to plant in 2023 will be to have raspberries in 2024. As we add to our perennial food producers, while still staying in budget, it’s a balancing act between ordering things that will take years before they start producing, like the apple and mulberry trees, and things that will start producing more quickly, like the raspberries.
Yes, here we are, Oct. 9, and there’s still things to harvest!
Well… half a harvest.
I’d been leaving the sunchokes along, and this is how they look after being hit by frost, then rain, then more frost. This being Thanksgiving weekend here in Canada, I decided to go ahead and harvest some of them to include in our meal. There were ten of them planted, and I decided to only harvest the nearer five.
I was a bit surprised by how they looked. A lot whiter than I expected, but that may be because they never got to reach their full size during this crazy growing year we had. This bed is right next to where some of the longest lasting flooded areas in the yard this spring. The bed was slightly raised, which was probably the only thing that saved them.
There wasn’t a lot to harvest, and I also made sure to rebury at least one of the largest tubers under each plant, for next year.
As for the plants, I did a chop and drop. I’ll add more mulch to this bed before things freeze over, too.
To prepare them, since they were so fresh, I basically just scrubbed them. I’ve never tasted sunchokes before. These are supposed to be edible raw, so I made sure to try a piece. I don’t know how to describe the taste, other than “mild”. There’s nothing else I can compare it to in flavour.
I added them to the other vegetables that I tossed with olive oil and seasonings. I liked them better roasted. They take on other flavours very well. Roasted, they have a very smooth texture. All four of us liked them, which seems to be a rare thing!
If all goes well, we will have a larger harvest of them next year. 😊
It was a chilly night last night, with temperatures dipping below freezing. As I write this, we’re at 3C/37F – just under our predicted high of the day.
It was actually very pleasant out there!
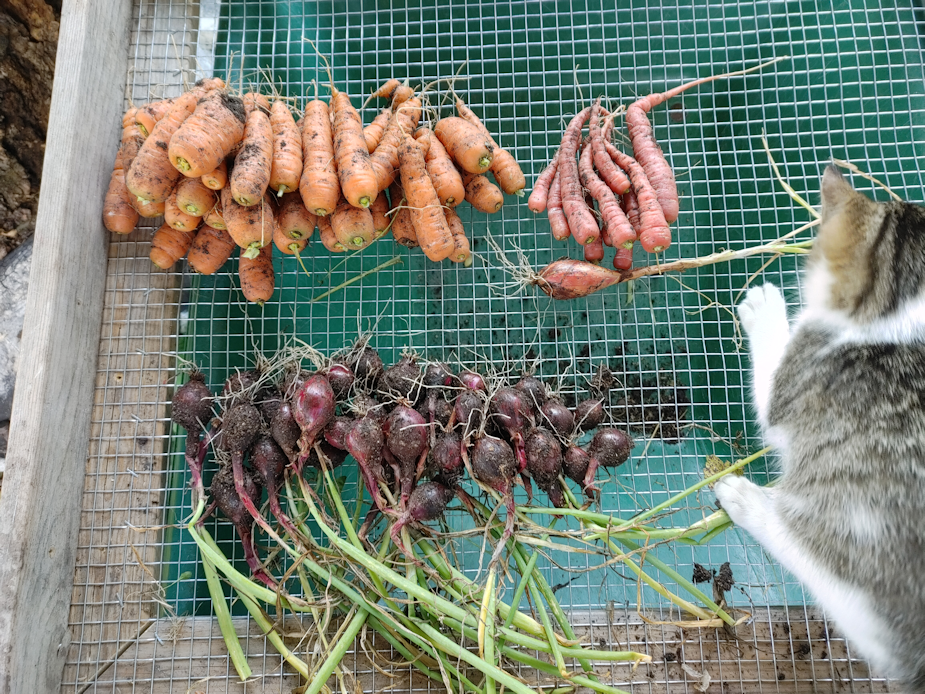
With a few frosts already past, I decided it was time to harvest the carrots.
This is all of them.
Plus the Purple Prince turnips – the only turnip variety of the three we planted this spring, that survived. Barely. Their greens were constantly munched on by insects. I’m not sure why I even bothered to harvest them. They’re so small, a lot of them got left behind in the bed, then still more went into compost when I trimmed their greens. Not much of a harvest there.
I’m surprised by the Uzbek Golden carrots, which were from a free seed packet. A lot of them were much larger than I expected.
The Black Nebula carrots where more difficult to harvest. Even with several years of amendments, the soil still gets pretty compacted, and these guys get long. It took quite a bit to dig them out!
Well, that didn’t take long… 😅
We are expected to dip to -4C/25F tonight, so these needed to be set up indoors to cure – and the only place we had available in the sun room was covered with tomatoes, still.
Thankfully, they are all laid out on screens.
I was able to stack the screens with the tomatoes and gourds, then lay out the trimmed carrots. After a day or two, we’ll brush the dirt off and go over them. Several of the biggest Uzbek Golden carrots have split, but the Black Nebula look like they were a slug favorite. Quite a few had damage at their tops. The size variety among them is pretty surprising. Quite a few of them are really big around! From the photos, I expected long and narrow.
Once we’ve assessed their condition, we’ll decide how best to store or preserve them. I suspect blanching and freezing will be the best option for most of the Black Nebula carrots, while the Uzbeck golden will be kept in the kitchen for fresh eating first.
I haven’t actually tasted any of these yet! We did harvest a few Uzbeck golden for meals over the summer, but almost no Black Nebula, because even the little ones were hard to pull. I hope they taste as good!
A lot of the tomatoes we set up in the sun room are slowly ripening. There isn’t enough to bother cooking them into a sauce or whatever, but more than we can conveniently eat, so I’ve started dehydrating them in the oven.
It’s mostly Yellow Pear tomatoes that we have, and they are so small, I am dehydrating them on parchment paper. I had two baking sheets full, but when they were mostly dry and quite shrunken, I combined them into one.
That jar is all of them!
Once I’d combined the Yellow Pear tomatoes, I set up a cooling rack and started dehydrating some Cup of Moldova tomatoes. Once the Yellow Pear tomatoes were done, I filled the baking sheet again with more of them. That finished off what I’d picked earlier, but this morning I gathered more ripe tomatoes!
I am considering powdering the yellow tomatoes, and doing some of the red ones in olive oil. Or just powdering the whole lot of them. They’ll take up less space that way. It’ll be a while before they’re all dehydrated, so I have time to decide.
As I’m writing this, I am hearing the wind pick up outside, and the trees are starting to get whipped about. While today’s high is supposed to be 17C/63F, tomorrow is supposed to have a high of only 3C/37F. Tonight’s low is supposed to be 1C/34F, but tomorrow night we’re supposed to drop to -3C/27F.
Earlier today, I made a trip into town to hit the hardware store. I found the screws in the size I needed, though the cost was insane. A box with only 100 screws was $12.99 – about $4 more than the last time I got a 100 count box! Still, we’ll be able to finish the water bowl shelter now.
I also picked up a glass cutter. We have one somewhere, but I have no idea what happened to it. While I was in the city yesterday, the girls worked on clearing the broken glass from the inner pane of one of the sun room windows. There are still pieces that are firmly attached at the sides. Until that’s done, we can’t let the cats into the sun room. Hopefully, we’ll be able to get that cleaned up soon.
I was really happy to find the lever type door handle I was looking for. Just a simple, inexpensive handle for an interior door. It was easy to install, and it now no longer hurts to open my door!
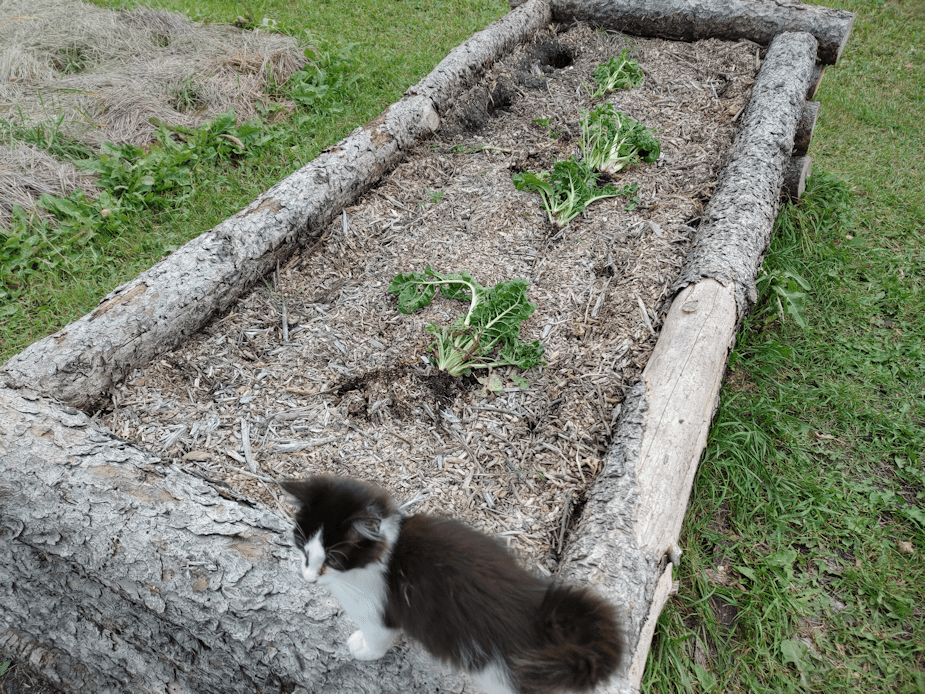
Later on, my older daughter and I headed out to do some work in the garden, including planting these.
The Nootka Rose garlic on the left are a soft neck garlic. On the right, above the cloves, you can see the hard necks from the middle of the bulbs. They do make it easier to break the cloves apart! The cloves are larger, and there are fewer of them. Of the four bulbs, one of them had only three cloves!
The soft neck garlic has nothing like that in the middle. Just smaller and smaller cloves. I’ve never planted soft neck garlic before. While the hard neck garlic should be planted in the fall, in our climate zone, we can plant soft neck garlic in the spring – but we’re planting both now.
We moved the mulch aside and planted them the same way as the first row we planted a few days ago. The row in the middle of the bed got the hard neck Music variety, because there are fewer of them. Less reaching needed when it’s time to harvest!
After laying out the cloves to see how to space them, the kittens absolutely would not leave them alone! They also really, really wanted to dig in those freshly uncovered rows!
After planting, the rows were lightly covered to reduce compaction while watering – and protect from kitties.
Which didn’t work very well. Several of them started digging in to them to poop! One wouldn’t stop even while being directly spayed with the hose!
*sigh*
We did eventually persuade them to go elsewhere.
With the Nootka Rose garlic, there were enough that we planted only the largest cloves.
The remaining smaller cloves are now in the kitchen for us to taste test. 😊
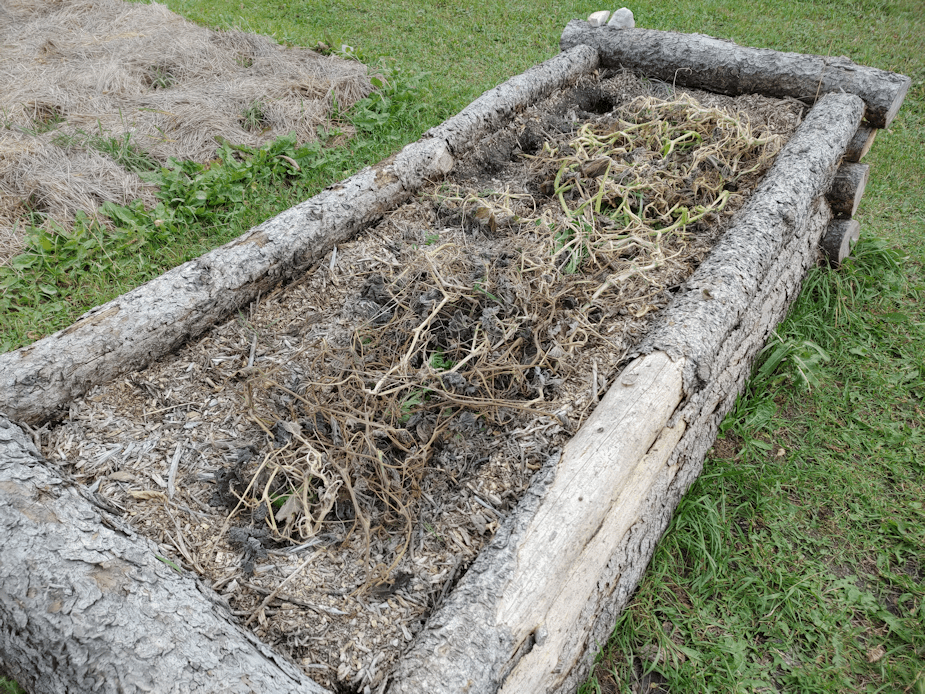
That done, my daughter did some other clean up and gathering of support poles, while I turned my attention to the high raised bed.
The chard remains were pulled. They’re actually looking better after several frosts then they have all summer, now that there are no longer grasshoppers eating them. We were never able to eat any of it!
As expected, the soil level has dropped a fair bit, as the organic material buried in layers below, settle. It looks like some mice may have been trying to tunnel in one corner.
I have no doubt Rolando Moon has taken care of that problem for us already.
The last of the vines from the squash patch were added for more organic material – then smashed as flat as I could get it before adding fresh soil. The remaining soil sifted from what is now the garlic bed came in quite handy!
It had settled enough that it took three large wheelbarrows full of soil to top it up! I probably could have gotten away with two and a half, but it’s going to continue to settle, so a little extra is fine.
It then got a light, thin mulch of grass clippings before I gave the whole thing a thorough watering. I just want to protect the soil surface, not insulate it. In the spring, the mulch will be removed so the soil can warm up and thaw out faster.
We haven’t decided what to plant here next year, yet, but I think we should give it at least one more year for the upper layers to break down before we try to plant any deep root vegetables in it.
I feel like I’m really behind on preparing the beds for the winter. The girls aren’t able to help as much as usual, either. My younger daughter has been having knee issues to the point that she’s now using a cane to get around the house. She did try to go to a doctor about it, about 2 years ago, but it wasn’t taken seriously because she’s so young. It was already a battle to get her to see a doctor in the first place, so that certainly didn’t help. Anyhow, she does the best she can but, right now I’m actually the most able bodied person in our household. Which is kinda scary, considering how much I’m hurting this year! I didn’t expect my hands to be the main problem, though. Usually it’s my wrecked knees and feet. They’ve actually been relatively good, lately. Either that or the pain in my hands is making it seem like they are better.
Ah, well. We do what we can. It won’t be the end of the world if some beds don’t get weeded before winter and need to be done in the spring. There are other things that are higher on the necessity list.
I knew making the tomato paste would take a long time, but my goodness, it did drag on!
The girls and I had a sort of assembly line set up. At one end of the kitchen counter we had the electric kettle going, then space for the container used to bring batches of frozen tomatoes. Then there was the giant bowl we used to blanch them, a bowl with a colander for the skins, a cutting board and compost bag for final prep, a kettle on the stove to boil more water, and finally my giant stock pot.
I even remembered to check what size that thing is.
This thing was an excellent investment. We originally got it for when we were making tourtierre regularly, and would be browning more than 30 pounds of ground meat at a time – then adding the rest of the filling ingredients. That was once a year, though. We’ve used it more often just this summer than we have since we bought it!
We did the tomatoes in fairly small batches. The electric kettle and the stove top kettle took very different lengths of time to boil, which worked out.
One kettle was enough to cover one batch of tomatoes. After they had time to blanch, they’d be transferred to a colander over a bowl, where I would remove the skins, then cut them up (and remove the rest of the stem ends, if needed), and pop them into the stock pot. A daughter would get another batch of tomatoes from the freezer, and by the time we were ready to blanch those, the second kettle would be boiling and ready to go.
It took many batches. I figure there were maybe a couple hundred tomatoes, in a variety of sizes.
The cooking was started as soon as the first batch went in, which cut the time down quite a bit, I’m sure. By the time all the tomatoes were blanched and added, the stock pot was about half full – roughly 11 quarts or about 10L.
It took about 2 hours of cooking before I felt it was ready for straining through a sieve.
Our giant sieve has a very fine mesh. Great for straining out the seeds and any bits of skin that got left. Some of the tomatoes turned out to still be a bit green, so there were pieces that never got soft enough to be pushed through the mesh.
If we end up doing this regularly, it’ll be worth the investment to get a food mill.
The tomato sauce was strained a bit at a time, while the cooking continued. By the time I got to the bottom of the pot, it was getting pretty thick, and there was a lot less pulp left behind in the strainer.
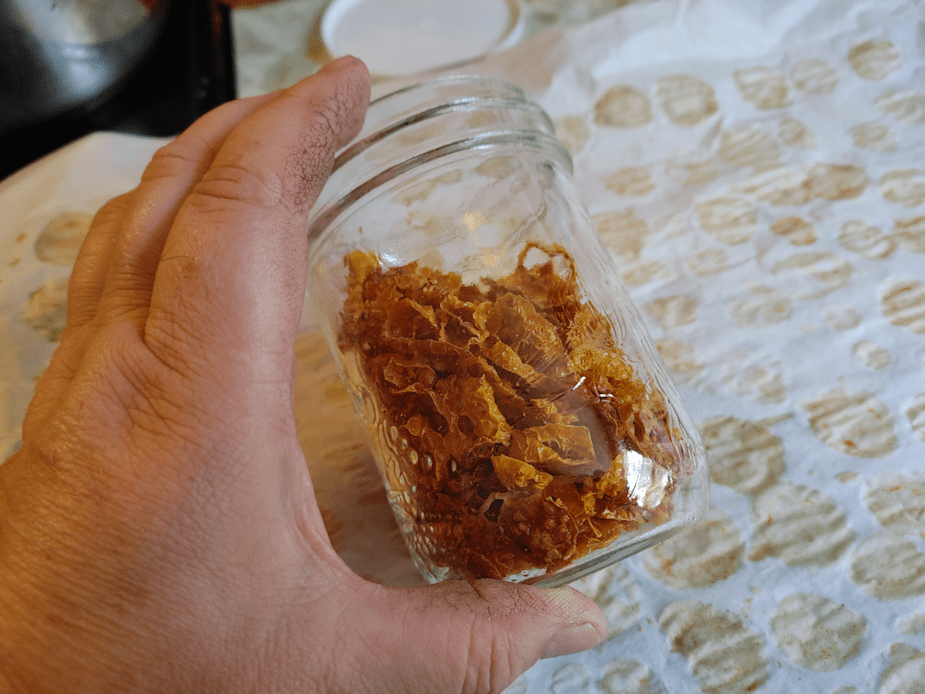
This is all the seeds, cores, green bits and fibrous pulp that was strained out.
The strained puree was very thin. Can you imagine if we were not using a paste tomato for this! It would have been more like tomato juice, than tomato puree!
The stock pot I strained into has a very handy feature.
Measurements on the inside!
We went from roughly 11 quarts of blanched tomatoes, to just under 5 quarts of strained tomato puree. This was what I used to calculate how much lemon juice to use, later on. I had wanted to use citric acid, but couldn’t find any. Lemon juice will work, but does affect the flavour, too. If I were just canning the puree at this point, I could have added the lemon juice (and salt, if I wanted) directly to the jars, but that can’t work with tomato paste.
At this point, I took a break for a while.
For the rest of the cooking time, we set up the hot plate at the dining room table, to free up the kitchen, because I knew it would take hours to reduce this to a paste.
I could have cooked down the puree on its own, with just the lemon juice to increase the acidity. After looking at many different instructions for making and canning tomato paste, I decided to include a couple of large, crushed garlic cloves, a big bay leaf, and some canning salt.
The hot plate worked out really well. Once the puree was up to temperature, however, it stayed very hot and quick to splatter all over, even with the hot plate set quite low.
Another benefit to having a pot with measurements on the inside. I could see progress, even when it didn’t feel like any was being made!
As it reduced in volume, I also had to keep reducing the temperature. I only needed to stir it enough to keep it from bubbling and spattering. The more it reduced, the more often it needed to be stirred, and the lower the temperature needed to be turned. At first, I could just sit on a chair to stir every once in a while. After several hours, I was having to stand at the table, holding the pot to keep it from being knocked about as I stirred vigorously. Once it started getting quite thick, I removed the bay leaf. The garlic cloves were completely disintegrated by then.
I must say, towards the end, it was SO tempting to stop earlier because… it’s thick enough now, right? Right?
Not quite.
In the end, it took somewhere around 6 or 7 hours to get the puree into a good, thick paste.
When the spoon could scrape along the bottom, and the paste wouldn’t fill the gap right away, it was finally ready.
At this point, one of my daughters had taken over the stirring while I got the giant stock pot, which they had washed out for me while I stirred for hours, and sterilized the jars.
But how many jars would I need?
The measurement in the pot starts at 2 quarts and, at this point, the paste was well below that. I estimated around 1 quart, perhaps.
Because the paste is so thick, it has to be canned in small jars. The instructions I’d been reading were from the US and talked about “half pint” jars. I didn’t stop to convert that and was thinking the jars I had were probably half pints. Usually I get 750ml or 500ml wide mouth jars. Though the measurements don’t match, what sells as quart jars in the US are 1L jars here. A pint is 500ml so a half pint would be 250ml – or about 1 cup.
The jars I have are 125ml. So, a quarter pint, not a half pint! 😁
Which meant that if there was about a quart of paste in the pot, I would need 8 jars. I had two cases of twelve, so I sterilized one case. With the jars being to tiny, I could use both canning racks and stack them.
It still takes long time for the water to boil! I almost forgot to add vinegar to the water, to prevent the jars from clouding on the outside from our very hard well water.
Much to my surprise, I was able to fill every jar! Granted, for the last one, I was scraping the sides quite a bit, but I still got my half inch head space!
By the time I finished canning the tomato paste, it was well past 1am. I gotta say, I was quite happy to be able to finally leave them to cool for the night!
When I checked them this morning, I found 2 jars had not sealed properly. Which I’m just fine with! They went straight into the fridge to use right away.
I just love those adorable little jars.
We’ve been out of tomato paste for a while. I typically buy cases of them at Costco. The problem is that we usually only use a small amount at a time. Just adding a spoonful into a dish for extra flavour, for example, leaving us with aluminum cans partly filled with paste, that can’t be resealed well. Then we’d be rushing to use the rest up before it went bad. It will be much handier to have it in sealable jars!
I’ve already had some today, adding a spoonful to some leftover pasta I had for lunch, adding a bit of cream to make a bit of a sauce. As my daughter had mentioned when taste testing the fresh tomatoes for me, the Cup of Moldova tomatoes are very mild in flavour, so the resulting paste is not as strongly flavoured as the tinned paste we would buy. Which I don’t mind at all.
The question will be, is all the time end effort that goes into making and canning the paste worthwhile? There are lots of other ways to can tomatoes that take a lot less time. It’s the time that’s the kicker. I have seen some instructions that use the oven to make the paste – basically, dehydrating the puree – but while that might require less supervision, it means not being able to use the oven for anything else for a very long time.
That’s something we’ll have to talk about and decide after we’ve used this batch up, I think.
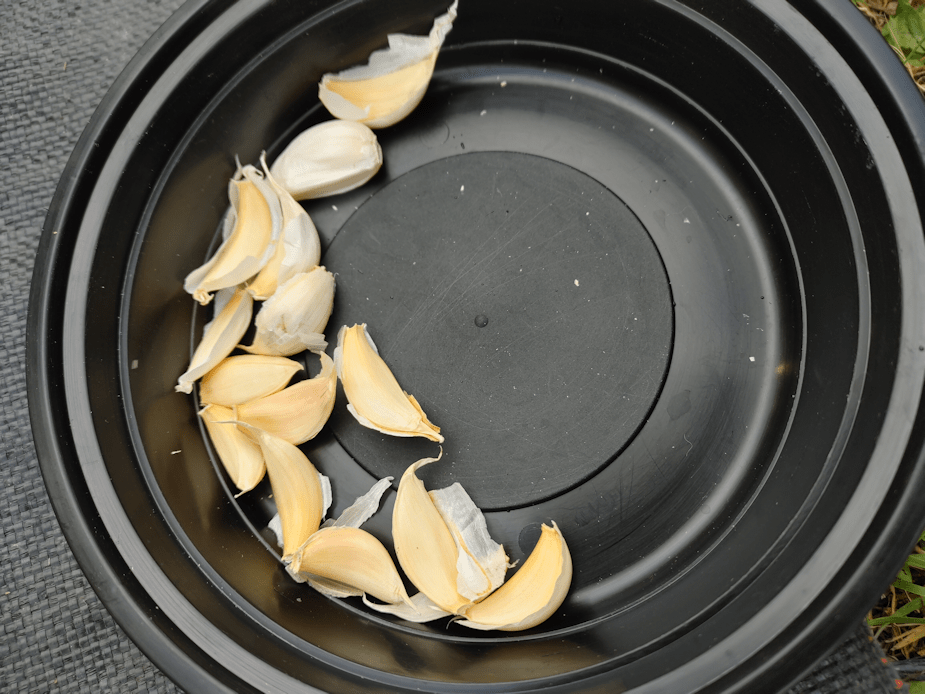
No, that’s not a typo in the title. Today, I FINALLY planted our garlic for next year.
This morning I first headed out to get my mother checked out of her hotel room, then took her out for brunch – she hadn’t had a proper meal since our take out Chinese food lunch, yesterday! – before taking her home. She did not have the energy to do anything else. I stayed long enough to make her bed up again with fresh sheets and blankets, and push some of the stuff back against the walls, before my mother sent me home. She would not allow me to run any errands for her, even!
Which works out. As soon as could after I got home, I worked on the garlic. The first thing to do was break up the bulbs I’d set aside from our harvest this year.
Would you look at this giant clove!
I had set aside six of the biggest bulbs of garlic we harvested.
Out of those six bulbs, we got a whole 24 cloves.
Twentyfour big cloves, but still… we’re going to need a lot more garlic!
I used broken pieces of bamboo stakes to mark the ends of a row along one side of the prepared bed, then pushed aside the mulch. The soil is loose enough that I could just use a weeding tool to scrape a trough from one end to the other, then deepened it using the jet setting on the garden hose.
Which the kittens were absolutely fascinated by.
Once the garlic was planted evenly spaced down the row and covered, I pulled back a little bit of the mulch. Once things start to get colder, more mulch will be pulled over to cover it for the winter. For now, it’s just enough to protect the row.
From this guy.
This guy and several other little “helpers” that were so determined to dig in the fresh dirt, they ignored the hose I was watering with, until they got sprayed!
Silly things.
Anyhow. Our first garlic for our 2023 garden is in.
I am now going to start making tomato paste for canning, freeing up freezer space for our next stock-up shopping trip.
I took advantage of the lovely temperatures (and being in less pain) to do some more clean up in the garden. Earlier in the day, my daughter and I drove into town so she could get a new photo to renew her driver’s license, while I popped across the street to pick up a few things at the grocery store. I was thinking of making a cream of chicken soup and was about to buy some carrots, when I remembered…
We have carrots. They’re just still in the dirt.
So I went over to where the chocolate cherry tomatoes had been planted, and pulled up the Napoli (orange) and Kyoto Red (dark orange) carrots – and a single shallot! I also dug up the red onions from sets that were planted with the yellow pear tomatoes.
The new soil sifter came in handy! 😁
I’m actually surprised that we got so many decent sized carrots. The Kyoto Red were pretty small – there were two I left behind because they’re blooming, and I hope to collect some seeds. I used up the last of the Kyoto Red seeds, but I think I still have some Napoli pelleted seeds left. Those really did far better than I expected.
Then there’s that single, solitary shallot!
There were actually two more, but they also bloomed, and I’m waiting for the seed heads to dry before collection.
As for the red onions…
Most of them aren’t any bigger than the sets we planted in the first place. Given how spindly the greens were, I thought they might be rotted out, or at least soft, but nope: they are quite firm. They’re just really tiny. I think they were simply too shaded by how massive the yellow pear tomatoes got.
I was going to take them in and was trying to figure out where I could lay them out to dry a bit, until I thought to check the weather again.
We’ll be having at least a couple relatively warm nights, and no rain is expected. I just spread them out on the soil sifter and will leave them out overnight. Tomorrow, I should be able to brush the dirt off more easily, before bringing them inside.
With that in mind, I think I’ll soak some of those blue grey speckled tepary beans overnight, to include with some our garden’s carrots and onions in my soup!
Once these were gathered, I worked on taking down the hoops in the main garden area, as well as the mesh and supports over the spinach in the old kitchen garden. The spinach is a loss. They germinated, and then got mostly yellow and stopped growing.
With the mesh and netting, I laid them out as straight as I could on the ground, then rolled them up around whatever straight sticks I had that were long enough.
You wouldn’t believe how difficult that is with a yard full of kittens!
The twine I used got salvaged, too, and the shorter pieces came in very handy to tie off bundles of netting, mesh, supports and hoops.
We have a few more warmer days, and my priority right now is to get the empty bed in the main garden area prepped, and then plant our fall garlic. When we go into the city next for our stock-up shopping, I hope to pick up more hardneck garlic to plant. It’s a bit too late to order them like we have for the past couple of years.
Once that is done, I plan to work on building up some of the beds in the old kitchen garden. I have ideas for those that I hope will work. If I get at least one of those done over the next few days, that will give us a prepared bed to plant any garlic I pick up later on. There’s still the beets to harvest from that garden, but I suspect those will be going straight to compost.
Change of plans for the day. I’m just in too much pain to be outside in a cold wind, doing manual labour. Of course, there’s no shortage of things to do inside!
The shelling beans I’d harvested a while ago, then set aside to dry, needed to be retrieved and shelled. There were a few pods that were still too green and got set aside, but this is the total haul of shelled Blue Grey Tepary beans.
I think there’s maybe 2 cups – certainly not more – in there! They are so very pretty!
And very tiny.
Now, I planted these, and I vaguely remember being surprised by how small they were when I took them out of the package, but I honestly can’t remember if they were this small. I even went back through my photos, but hadn’t taken one of the seeds, so I went to where I bought them from. There is nothing to give any perspective of the size.
Ah, well.
Later on, I’ll go pick over the beans, then select the biggest and brightest (which would be the ripest) ones to plant next year. The packet came with 50 seeds, so I figure we would need at least twice that. Assuming we actually like them. I’ll try them out in a soup or something. It won’t take much to use them all up! Especially after I take out the ones for seed saving.
Next year, we will change up where we plant things quite a bit, mostly because we won’t be using the trellises we have now again. When we built them, it was expecting to use them just one year, not two! Right now, I’m thinking that we can plant peas or beans at the chain link fence, where we planted the chocolate cherry this year. Wherever we went up planting them, it’ll be very different conditions. Hopefully, between that and a better growing year, we’ll find ourselves with more robust plants, and higher yields!