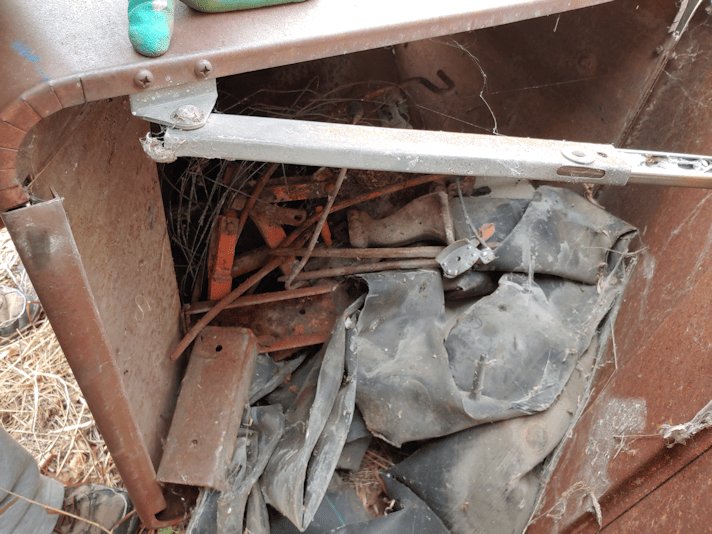
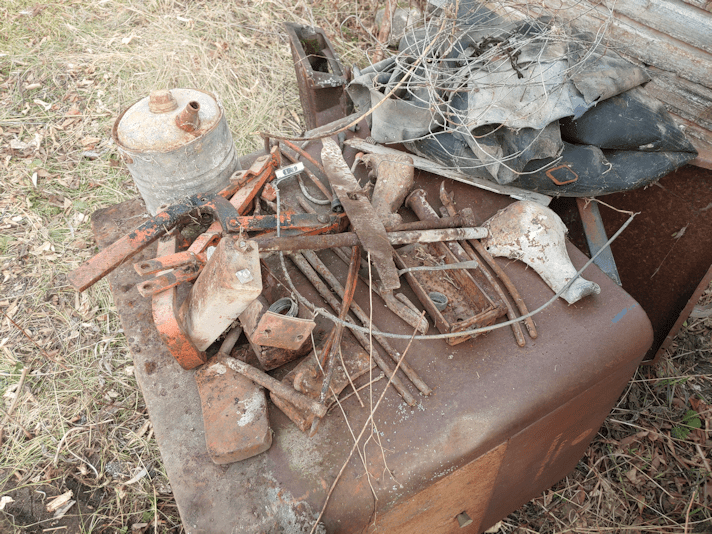
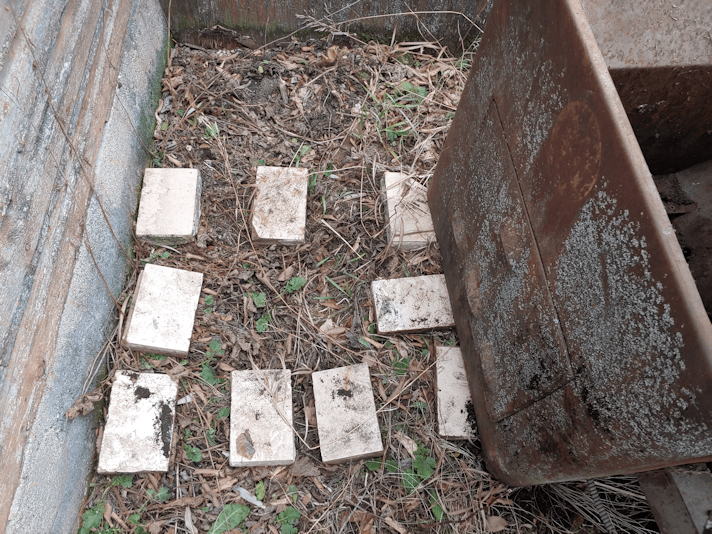
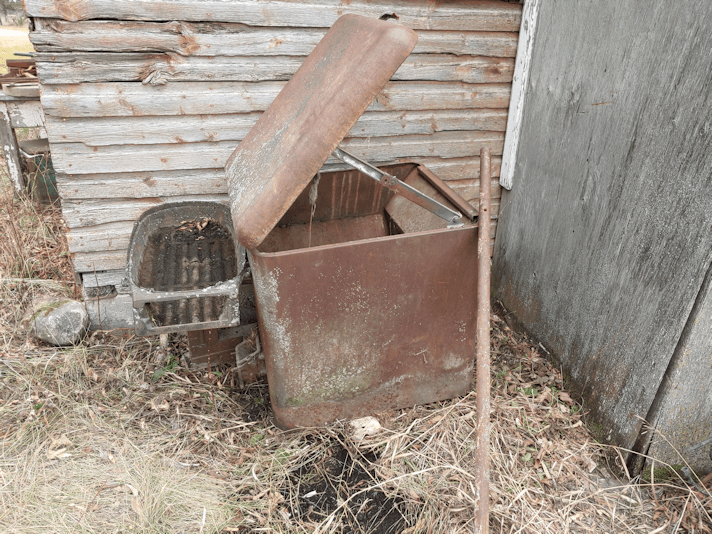
Cat shelter winterization

Today started off chilly and damp, but by the afternoon, things were quite pleasant out there. A good day to work outside.

Not a good day to get to the dump. It opens in the morning on Tuesdays, and we didn’t make it. It opens in the evening on Thursdays, so we’ll do our dump run, then.

My priority for the day was to get the cat shelters set up for the winter. Since the isolation shelter was going to go under the kitchen window, the first thing that needed to be done was to move the catio out of that spot.

The problem is, now that the roof is on, the overhang makes it difficult to grab the sides to move it, without face planting into the edge of the roof.

The solution: make handles for it, using paracord.

The first image in the slideshow above shows how I was able to get the paracord around the corner frame pieces. The end was threaded through the mesh on one side, into the loop of a garden twist tie, until it could be pulled through to the other side.

In the next image, you can see how the rope was tied to itself first, then the knot moved inside the catio before a another knot was made as close to the frame as I could, on the outside.

I admit, part of the reason I chose an overhand knot with some excess cord and put it on the inside, is because it’s right above the platforms. I expect the cats will play with the ends.

The next image shows how long of a loop was left for the handle. There is one of these on each corner.

This worked out quite well and allowed me to drag it easily across the yard. In retrospect, I should have put them lower down. Due to my own height, I can use them to drag across the yard, but I can’t lift it off the ground. If I had a second person using the other two handles, we could carry the catio that way, but my daughters aren’t any taller than I am, so it’ll still be mostly dragged on the ground. If it really is an issue, I can just undo the knots and lower the handles by a few inches.

In the next image, the catio is set up where I decided it will be for the winter. I wanted to make sure it was where it needed to be, because once it was wrapped in plastic for the winter, the handles would be covered and it would be more difficult to move again.

The roll of plastic I used is one of the sheets that was wrapped around the hot pepper and eggplant bed. It’s two vinyl table protectors from the dollar store, taped end to end.

I started at the door, making sure that it could still be latched and opened and closed without interference, then kept going. The vinyl is slightly wider than the height of the catio, but the excess can be tucked under the bottom.

It wasn’t long enough, though. I do have another roll, but it’s the same length, and I don’t want to double up so much. I do have one more table protector from the dollar store in the house, though, so I’ll use that.

Tomorrow.

The next thing to do was move the cat isolation shelter to a more open space.

Which is when I discovered a bit of a problem.

The whole thing is so heavy, and the ground is so soft right now, after all that rain, the wheels kept sinking into the soil! I had to wrestle with it, pausing to lift wheels out of the soil every now and then, to get it over the sidewalk, where I could work on it.

Where it had been sitting was not level, so the sloped roof ended up level. That meant rain didn’t drain off very well. I left the roof open and cleaned the seam out as best I could. I have an adhesive sealant to use on the seam later on, but the seam will need more cleaning, and be completely dry, because it can be used.

I then went digging through the scrap lumber my brother gave me to see if there was something I could use to put across the middle, to attach the clamp lamp to.

I found the perfect piece.

It was just long enough to fit across the top, lengthwise.

I could see it had been cut from a larger piece, but that’s just fine. I needed something narrow for the clamp lamp.

While getting ready to attach it to the underside of the frame, Stinky came to help. 😄

So did my daughter. She held it in place for me while I drilled pilot holes to screw it in place.

I am so glad I was able to make those sliding doors! It would have been much more difficult to access the underside of the frame to attach this. Even so, my daughter ended up taking over and finished the last two screws for me.

The cross piece was installed slightly towards the front, over the cat hammock. The clamp was also mounted sideways, with the lamp angled down, making it even closer to the front, and higher up than if it were just hanging straight now. I did not want to take any chance that a cat might burn themselves on it.

Once the lamp was in place, it was time to wrap the bottom of the shelter in plastic. I had a sheet of dollar store dining table protector, cut it in half, lengthwise. It took both halves to wrap all the way around, with maybe a foot and a half of excess that got folded under.

For both the catio and the isolation shelter, the vinyl was tacked in place with push pins. I decided on push pins because they can be removed easily. I want to use the vinyl again in the garden next year, so I wanted to avoid making larger holes. Pin pricks along the edges should be fine.

After the bottom was wrapped up, I set up a heated water bowl on one side of the upper level, and a food bowl on the other. A litter box, with litter in it this time, was put back into the bottom level.

Once that was done, I finished clearing the patio blocks under the kitchen window and set up the insulation we put over the basement walls and windows for the winter. In the past, we used an old bench and a bin against the insulation to hold it in place. This winter, the isolation shelter will serve that purpose for most of it.

Once the insulation was in, the shelter had to be wrestled over to the patio blocks. It didn’t have for to go, but there was always at least one wheel that would end up sunk into the ground!

The patio blocks are not at all level, either, with some of them heaved out of place by the roots of the elm tree in front of the kitchen window. That, at least, was easier to maneuver around, once all the wheels were on the blocks.

The next while was spent working out the safest way to set up the extension cord to power the heated water bowl and heater. The new cross piece came in quite handy, to wrap excess cord around.

In the last image of the slideshow, you can see the final result. It was getting pretty dark by then, so I did the evening feeding. Before I left, I could see some kittens checking out the bottom of the shelter, where there used to be a food bowl. It shouldn’t take long for them to figure out where it is now – and discover that there is heat up there!

My only concern is if the racoons discover it. We haven’t been seeing them as much, lately, as the temperatures drop. The sun room, at least, has the critter cam, and we can check it every now and then. We have no such option now. Even if we look out the kitchen window, it’s hard to see things directly below.

In time, we will get a smoke detector to put in there, like we have in the cat house. I’d like to put a thermometer in there, too, though one that’s mounted directly to the frame. The one we set up on a holder inside the cat house kept getting pulled down as the cats would play with it!

Right now, there are only two things left that need to be done. One is to get a carabiner for the latch; I think I have one available, but I’m not sure where it is right now. The other is to get some colour matched paint for the exposed wood. With the bottom wrapped in plastic for the winter, though, that will wait until spring!

I’m quite happy with how this has turned out. The Cat Lady has contacted the vet clinic about getting spays done and should hear back soon. Once she has it confirmed, she’ll let me know the date – and for how many! The isolation shelter is now ready for them to be in for their two week recovery period. Since we will likely be doing mostly, if not all, kittens, it could easily shelter three or four at once. With adult cats, I wouldn’t want to have more than two in there at once.

There is the insulated box nest in there right now, plus the hammock, but we will add more cat blankets or beds as well, once we know how many will be in there.

Next, we need to open up the cat house, clean it out and get it plugged in and ready for the winter. That will be a two person, job, as the roof is quite heavy, and the wood is starting to crack. It has to be opened very carefully, so it doesn’t twist.

I haven’t been seeing the cats use lately. The insides of the windows are so dirty, I can’t see inside very well. I’m a bit afraid of what we’ll find in there, after having to bury so many kittens this year. It could simply be because the sun room is warm, and the cat house isn’t, but they seemed to stop using it before things started getting chilly.

Well, we’ll find what we find. Hopefully, just a lot of cat poop or something benign like that! 😄😄

The Re-Farmer

Winterizing the sunroom, and cheeky kitties!

Today has been gorgeous and sunny, with almost no wind. The weather apps say we’re at 13C/55F, but feeling like 10C/50F.

The thermometer in the shelf shelter, which was getting hit with full sun, was reading almost 30C/86! 😄

My daughter took on the very messy job of starting to scrub the walls around the tub, as we let the rotten parts we found under the tub surround, dry a bit. There is very little room to assist, so I took advantage of the pleasant day to start winterizing the sun room, as well as making some changes in the old kitchen.

Last winter, we set things up for the cats on one side, while the other side was used to store our tools and supplies.

Unfortunately, the cats knocked so many things off the shelves and all over the floor. Then, because it’s darn cold out there in the winter, they used all sorts of corners to do their business in.

The girls started cleaning it up in the spring, but it never quite got finished.

So I got it mostly done today, which included moving some things out of the old kitchen.

The first thing was to get the broken pieces of tub surround and get that onto the junk pile for later hauling to the dump. Once those were out of the way, I could get at a rocking chair that was here when we moved in. We can’t use it in the main part of the house – too many creatures with tails! – and it’s just taking up space in the old kitchen, so I ended up putting it in the storage house. That gave me access to the small shelf I wanted to move to the sun room. It was meant to be used to hold things like extra packages of toilet paper or paper towel, cases of canning jars and the like. It ended up getting blocked off, and not just by the rocking chair! There were cases of canning jars on it that we never opened. Last year, we didn’t have enough produce to make it worthwhile to can, and this year will be much the same. I just moved those over to a plastic couch for now.

The old kitchen had been cleaned out and set up to be someplace we could sit and relax in, but that didn’t work out, either. We had to move the kibble into the old kitchen because the racoons kept knocking the bin over and spilling it onto the floor. Then we found ourselves having to use it to store our garbage until we could make a dump run. That basically took up most of the space.

I’d like to get that couch moved out, too, but there really isn’t any room for it in the storage house, either.

Still, once I cleared out the rocking chair and the shelf, I could move my late father’s walker in the space where the shelf was. Now we have all sorts of room in the old kitchen again!

I’m keeping the walker handy, because I see the day coming when I will need to be using it myself.

As for the sun room, I didn’t have to empty it entirely, which was nice. I started off cleaning and clearing around the cat cage until I could move the cage, and the interlocking floor mat it sits on, towards the middle of the west facing windows, then clean up the corner where it had been. The collection of cat carriers we keep in there got taken outside and dismantled to varying degrees, depending on the design, before getting scrubbed down and left to dry in the sun. Basically it was clear a spot, clean up under it, clear a spot, clean up under it…

The cats may use the great outdoors to do their business in the summer, but the skunks and racoons will drop their messes anywhere and any time!

Ew.

Then I had to take out a whole lot of stuff on the storage and tools side of the sunroom, and empty the matching shelf that needed to be moved into the other corner.

Quite a bit of stuff ended up getting thrown away due to cat damage.

Other stuff got moved to the garage for storage, including all the paint supplies I could find. Others got tucked into the counter shelf, where the cats can’t get at them.

Finally, the shelf itself got taken outside, where I could hose it down.

Once the shelf was out, I had to mop the floor several times to get the messes that were uncovered in the process.

Ew, again!

Finally, I was able to shift over the wooden shelf that was under the bathroom window, and move it into the corner. That cleared enough space to be able to open one of the doors under the counter shelf all the way. The floor isn’t level, so I had to put scrap pieces of rigid insulation under it, so it can’t fall forward. Then the small shelf from the old kitchen was set in place, and I could finally start putting things away again. This shelf got mostly gardening supplies, plus the critter cam was set up on to top of it, too. I ended up getting a piece of scrap 2×4 to raise the camera up a bit higher, with pieces of Alien Tape to hold them in place.

Eventually, I was able to bring the big shelf back in and set it up in the corner across from the one in the window. I had to get creative to work around the shop lights we’ve got hanging across there. These are set to turn on with motion activation after dusk.

Once the lights were adjusted for the new shelf, I was able to set up a folding closet door we found while cleaning up after moving here, and have found so many uses for! It is long enough to create a platform between the shelves, with enough space above the cat cage for the cats to still use the top as a bed.

With the cooler temperatures, we no longer have the wire mesh door we made to keep the cats out of the old basement, allowing us to keep the door open and let cool air circulate. Last year, we set that up between the shelf in the window and the top of the cat cage, with a box on top to level it. We then had to use some scrap 2x4s to support the wire mesh door, since it was bending under the weight of cats, plus we put a sheet of rigid insulation under it, partly to keep things warmer below, where the heat lamp was, partly so the cats could walk over the wire mesh without their paws falling through. We still put cat beds and another piece of scrap insulation on top.

The folding closet door I set up between the shelves is narrow enough to fit inside the wire mesh door frame, so that can now be stored and used for the cats at the same time again – and the closet door is far more solid! The wire mesh door is longer, too, making the entire platform more secure.

Then I could start putting some things back on the shelf for storage, including the cat carriers.

This is how the cat side of the sunroom looks now.

There are two small cat carriers on the bottom, and larger ones in the next two shelves above. Hopefully, the cats will just use them and not knock them about!

The platform now has a couple of cat beds, plus the self warming mat, on it. Two of the shelves against the window have the canopy and walls from the broken market tents on them for the cats to use as beds.

We have a number of other cat blankets that need to be washed, and then they’ll be set up inside the cat carriers or draped over the shelves of the mini greenhouse frame, though those will need cardboard or something laid on the wire shelves, first.

The sun room kibble trays were then returned to the sun room and, last of all, I got the critter cam positioned were I wanted it.

I have the live feed running as I write this. I can see cats in the cat beds and self warming mat on the platform, and more on the shelves in front of the window. I can’t see into the cat carriers to know of they are being used or now right now.

Later on, we will set up the heat lamp, clamped to the platform, and the heated water bowl near the small shelf that’s now in there, where it can be plugged into the same cord that powers the critter cam.

Aside from little things like that, the sunroom is ready for the winter, and moving things to the garage has given us a lot more open floor space, too.

One thing I’ve been considering it setting up the canopy tent I got on clearance, somewhere close to the house, as an extra shelter in the winter. Perhaps in the corner, where it could be over the window to the old basement, if I could find a way to secure it. For now, though, the tent is in its package, on the shelf between two windows.

It has been claimed by these cheeky little buggers!

Quite a few cats have decided it is an excellent bed. Especially the kitten in the foreground of the photo above!

At least they’re not trying to knock it off the shelf!

This was not the job I planned on working on today, but it was one that needed pleasant weather to do, so the other stuff will just have to wait a bit longer. This was a big and messy job, and I’m glad it’s over with!

Meanwhile, my daughter scrubbed at the bathroom walls until her arms gave out – it was so bad under that tub surround, she only got half of it done. My other daughter made supper for all of us, then cleaned detritus out the tub as best as can be done right now.

All in all, it was a productive day.

I’ll have to leave productiveness to the girls for the next couple of days, though. I will need to help my mother with groceries tomorrow because, the day after, my husband has to be at the hospital in the nearer city for an 8:30am CT scan. Which means we need to leave here by 7:30am at the latest.

Time to go call my mother and work out what time I’m coming over!

Until then, thanks for reading all my blathering, and I hope you have an awesome night!

The Re-Farmer

Last day

It’s 2C/36F as I write this. The projected high of the day is supposed to be 4C/39F. This will probably be the last day above 0C/32F for the year.

I counted possibly 31 cats this morning. Even the little bitty baby toodled out of the cats’ house to check things out, even though he could have stayed inside to eat. When I checked later on, he was back in his favourite corner by the window – and even played with me through the window, trying to “catch” my fingers as I moved them around against the glass. (Actually, I think it’s Lexan, not plexiglass.)

In the above picture, you can just see the scrap pieces of insulation I added yesterday, under the water bowls, and the kibble trays under the water bowl house.

With the temperatures, we’ve done as much as we can in the garden beds, so this morning I went around gathering any remaining tools to bring into the sun room, where they can be cleaned, oiled, sharpened, etc. at leisure. When things warmed up briefly, we brought the hoses back out so we could give the trees and bushes we planted this year, one last thorough watering. It’s not too cold to roll the hoses up again, so they’re going to be laid out in the maple grove. As long as the ends are open, they’ll be fine. There are just the hoses at the front of the house left. We have enough hoses now that we were able to use them from the front tap and still be able to reach every transplanted tree and bush, including the Korean Pine in the outer yard.

I brought the poles for the carport into the yard, and we’re going to try putting it together with one or both of the covers we found, and see if it’s something we can use somehow. I was able to use the snow and a broom to sort of clean off the cover that’s on the ground, since we never had the right conditions to hose it down.

I’m a bit frustrated with how little we got done this year. Yeah, we got progress with things like the wattle bed in the old kitchen garden, but there was so much that needed to be done, and it just didn’t happen. Half the beds never got weeded and mulched properly. We have trellis tunnels to build and I’d hoped to get that started this fall, but that didn’t happen at all. I wasn’t even able to cut down dead spruces that I wanted to use to build more high raised beds. We were also supposed to dismantle the shed with the collapsed roof, and hopefully salvage materials to build a chicken cook, and we got very little progress on that at all. This entire year felt like I was constantly behind on getting things done.

On another note, I heard from the cat lady yesterday evening. Cabbages is doing great, and so are the bitties!

We talked a bit about the lysine. She says it takes about 6 weeks for the results to be noticed. The first thing we’ll probably see is that their coats will start looking shinier and healthier. The coughing and sneezing should be reduced by then, too. A study done by a humane society she was working at at the time found the lysine resulted in an 80% reduction in respiratory issues. She has one cat that has continuous respiratory issues, and the lysine has saved her many vet visits.

I must say, this woman is amazing. She has a house full of cats right now that no one is willing to adopt because of health issues. She has one cat that was literally thrown onto the road by her house. Another was a rescue that had been dumped by a closed gas station in the winter. This is the one that needs continuous lysine treatment due to respiratory problems. When she found it, it was unconscious and frostbitten. It had to have its tail and a foot amputated, and lost its ear tips. Worse, there was evidence of substantial abuse, from a broken pelvis that didn’t heal right and can’t be fixed anymore, to cigarette burns, and even trachea damage. After he eats, they have to hold him up so the food will go down. The vet thinks that damage is from abuse, too. This cat is the worst case she’s ever seen. She and her amazing family are giving all these high needs cats their best life now. I’m just blown away. They are such awesome, amazing people. They’ve given up renovations on their house, to be able to give cats the medical care they need. And that’s on top of having her own health problems to deal with! I’m so glad to have connected with them.

The Re-Farmer

First snow

Overnight, we got our first real snowfall. From what the live feed on the security camera showed, it looked like we had a storm, but it was just high winds blowing around a small amount of snow – just enough to cover the ground and stay.

Tomorrow, we’re supposed to reach a high around 5C/41F, so it should all by gone soon.

It made for a new adventure with the kittens! While I tried to do a head count, I found quite a few didn’t even bother coming out of the cats’ house, including the bitty baby. I do wish they wouldn’t knock the water bowl out of reach. I’d love to make it so that they could have water along with food in there.

I think I counted 29 in total, but I’m not completely sure.

When I was done my morning rounds, I checked on them again. I could see them balancing along the edges of the water bowls, and doing the cold toes dance at the food trays below. They don’t do that in the kibble house, thanks to the sheet of insulation under the floor.

The water levels were still low, so I heated up some more water to finish topping them up. I also raided the bin with scrap pieces of rigid insulation. There was one that just fit the length of the water shelter, and three water bowls could fit on that. Another piece went under the big heated water bowl that doesn’t work, next to the ramp. There’s an old crocheted blanket in the corner that used to be inside the cats’ house. I’d tossed it into there to get it out of the weather, then left it when I found the cats were using it. A couple more scrap pieces of insulation went against the walls in the corner, held in place by the blanket, for a bit more shelter. More pieces went under the kibble trays on the ground below. The trays will keep them from blowing away. I’d have added more, but at the time I didn’t have anything handy to weight them down without getting in the way of the cats.

Before I did all that, I had fixing to do. The tarp on the far side of the shed we’d covered had come completely loose from their nails, and some of the nails had even fallen out. No surprise, with the high winds we had last night. The only thing that kept the tarp from being blown off entirely was the weight from the length of PEX pipe that had been tied along the end! The only thing I had to improve the situation was a box of large cup hooks. After straightening out the tarp as best I could (it had bunched up along the pipe), I screwed in the hooks and tied the tarp down more thoroughly than before – I hope. It would be good to replace those with stronger eye hooks later but, to be honest, I don’t know how much good that would do. The cup hooks are not very strong and are likely to break if the winds are high enough, but the wood is so weakened with age that stronger hooks would get torn right out of the wood.

We really need new sheds to replace these old ones. Or one large building to replace them all, including the barn. One of those would probably cost less than multiple sheds.

Something else for the list, after we pick up our lotto winnings!

Oh. I suppose that would require buying a ticket, eh? 😉

It was about -5 or -6C (23 or 21F) at the time. Not particularly cold, but chilly to be in for as long as it took to get that tarp tied down again! Of course, I’m always fretting about the littlest kittens, so I made sure to check on them again.

Yeah… I think they’re good.

The Re-Farmer

Re-covered

When we first moved here, one of the things we noticed was the junk pile near the house, at the edge of the spruce grove. It’s one of the places mama cats would hide their litter of kittens, which is how Junk Pile got her name.

When we finally got around to cleaning it up, it turned out to not be a junk pile at all. It was a pile of salvaged boards, very carefully and neatly stacked. Some of the “junk” we found were the remains of tarps that used to cover it.

Years of exposure left the top board pretty rotten, and being salvaged from who knows where, a lot were full of nails. Still, we’ve been able to make use of them and, as we work our way deeper into the stack, the less rotten the boards.

After cleaning off the junk, we did use the original tarps to cover it up, and weighed it down with various things.

Then the groundhog that made a den under the stack decided the tarps would make good nesting material. Tore them to shreds!

With the horrible spring we had this year, we didn’t keep the yard as clear and mowed as we wanted, which meant one side of the stack got completely engulfed in thistles that reached nearly 5 ft tall in places.

Today, I finally got around to cleaning it up, so I could access the stack.

The kittens were very interested in what I was doing!

That groundhog did not leave much of those traps left at all. There was a blue one in there, as well as the orange one!

The grey tarp on the side is covering a pile of boards too rotten or full of nails to use; they’re laid over an old metal bed frame I found in the maple grove (there are still two more in there!) to keep them off the ground. I also found some old children’s toys, so I tucked those underneath, then covered the whole thing with yet another old tarp I found among the junk. This gives the yard cats yet another place they can tuck into for shelter, until we finally clean it out properly.

The hill the thistles are growing on is a bit of a mystery to me. It is one of those things that showed up in between our rare visits to the farm over the years. I think it might be where the ashes from the furnace got dumped, until the electric furnace was installed. It would take a lot of years of ashes to make a hill that big!

Also, I need better quality garden gloves. Thistles go right through them!!!

The next step was to take everything off the top for a few layers. There’s a lot of spruce debris in there. I would have to take the whole pile apart to get it all out, but I just wanted to get the worst of it near the top removed. Then the boards went back more neatly, making sure that any with nails in them had their nails facing down!

The stack itself is built up on some pallets, and there are more pallets, and other miscellaneous things, on the far side of the stack. They’re all pretty rotten, but only one of them was also in the way. I had to fight to get it out, as it kept getting stuck on the other two pallets one corner was in between, but it was so rotten, I could just tear it apart and drag it out! That went into our own junk pile that is waiting until we can hire someone to haul it to the dump.

Once that was all cleaned up and ready, I grabbed an 8’x10′ tarp from the 3 pack I bought at Costco a few months ago and brought it over to cover the stack. I’ve already used another one of them to replace the tarp I’d found in the barn to cover the post pounder by the garage. It was a huge tarp, but the wind tore it to shreds. An 8’x10′ tarp doesn’t cover it completely, but they’re heavier duty tarps, and I tied it down like crazy. I can see it on the security camera live feed, and absolutely nothing flaps around on that thing! With the stack of boards, I needed to do the same thing. I had to make sure the wind could not get ahold of it, once it was over the stack.

My goodness, the kittens went nuts while I was going that! They just could not get enough of running around and playing on it!

Which made tying it down a real challenge!

I think I spent twice as much time tying down the tarp as it took me to clear away the thistles and clean up the top of the pile! Thanks to all the leftover pieces of wood that I brought over to do the wattle woven raised bed, I had plenty of sticks I could use for pegs.

At the far end, the tarp is tied to the old pallet still back there, and even the dead trees. In a few places where the tarp was tight around corners of boards, I added some bits of pool noodle foam (we used scrap bits on supports around some garden beds, to protect the netting they were holding up, and the last of the netting was removed today) and even some paper towel from a roll kept in the garage. I didn’t want the corners of the boards to rub their way through the tarp in the wind. The remaining three sides were pegged to the ground. While probably not needed, I returned the stuff we were using as weights before, just in case. I can easily imagine kittens playing with the twine and pulling pegs out of the ground. 😄

The boards may be old, but at least now they won’t get any worse over the winter. I have no idea what we might use them for – there is no consistency in lengths, thicknesses or even how the ends are cut – but better to have it and not need it, than need it and not have it!

By the time I finished putting everything away and got inside, it was full dark. It was very disorienting to look at the time and realize it wasn’t even 7pm yet! At least it was a more productive day today. The pile of garden soil is once again covered, and since I was out near the barn anyhow, I brought the frame pieces for the carport to the yard. I’m sure we’re still missing a cover piece, but even if we are, I’d like to find a way to set it up near the house, over where the old basement window is. It was warm enough to do one final watering of the Korean Pine; my daughter got the sliver buffaloberry and sea buckthorn done yesterday. We’ll have to be careful putting the hoses away, so they don’t crack in the cold. We even got a dump run in.

The next couple of days are supposed to reach highs of just above freezing, then a couple of days of slightly warmer temperatures. After that, our highs are going to be below freezing, and staying there. At least that’s what one app is telling me. Another weather app is a bit different – and forecasting colder temperatures. About the only thing that really needs to get done in the next few days, though, is to cover the hole in that shed roof with the large tarp I got for it. Getting it up and over is not going to be easy, never mind fastening it down. What we could really use is scaffolding! Ah, well. I’ll just add that to the list… 😉 Anyhow, we’re looking at possible rain and snow a few days from now, so we really need to get that taken care of. There are too many things in that shed that are useful. I don’t want the roof to collapse, if I can avoid it!

Little by little, it’ll get done!

The Re-Farmer
Medicated kitties, and the sunroom is basically done

I’m planning to do our final (hopefully) trip into the city for a Costco stock up shop for this month, so I would normally not have gone anywhere today. Especially with it being Halloween, and I would expect the stores to be filled with last minute shoppers.

I did, however, want to pick up some lysine for the outside cats, to use until the powder I ordered comes in. Since I was going to be in town anyhow, I remembered to grab the empty 5 gallon water jugs for refilling. We have four of these for our drinking water, and try to never go less than one on the go, and one full one waiting, though sometimes that doesn’t quite work out.

Once at home and my daughter took care of hauling the water jugs inside, I started getting ready to give the outside cats some lysine with their evening kibble top up.

*sigh*

I got my daughter to bring me a mortar and pestle. I was expecting to be opening up gel caps with powder in them, like the cat lady was telling me she does.

I even got the same brand she gets!

As for getting it on the amount of kibble I put out at once, which almost fills a gallon sized container, I stole one of the bins we used for taking transplants outside for hardening off in the spring. I put the measured amount of kibble in the bin, ground the tablets into powder and sprinkled that on top, then tossed it until I was sure all the kibble was coated.

I think, the next time I do this, I’ll give the kibble a very light spray of water first, so the powder will stick to it better.

Then the treated kibble got poured back into the gallon container, and I fed the kitties.

They didn’t seem to notice any difference with the kibble, and ate it without any hesitation.

The kittens are already mostly improving with all their leaky eyes, stuffy noses, coughing and sneezing, but this should help them get better faster, and hopefully prevent them from getting sick again. It’s especially dangerous if they get sick in the winter, and with so many really young kittens this year, they are the most at risk.

Speaking of kittens…

I couldn’t get a photo, but when I headed out to town I could see a ludicrously big pile of kittens on the new cat bed I’d put in front of the east facing window. It was hilarious! With the other cat bed at the corner by the south facing window, that entire side would have been packed with babies! They all started moving around and looking to come outside when they saw me, so I hurried away. The last thing I wanted was to have kittens following me to the garage, when I can’t see them while backing out.

After adding the lysine to the kibble, I stayed out and worked on the sun room. This meant leaving the doors open, much to the joy of many kittens. Not all of the kittens are interesting in exploring the sun room, though. At least not yet, but I was very happy to see this!

The bitty baby was out! He was hunting leaves and making friends with some of the cattens. Aside form the one time I saw Junk Pile nursing the bitty, along with her own kittens, we still have yet to see an adult cat mothering this little spitfire. Yet, clearly mothering is happening. He does look bigger, and he’s getting more active, exploratory and playful. All good signs.

I had quite a bit of furry company while working on the sun room. They were into everything!

One of the first things I had to do was clear the wall under the bathroom window, then clean the cube shelf and set it up. Because there’s the possibility of water getting onto the floor, I made sure to put it on some scrap pieces of rigid insulation. Once that was in place, I could start working on the other side.

I’m still debating putting rigid insulation against that big window in the corner. These are double pane windows, but the inner pane on that one has been gone since before we moved here, so it gets covered in frost in the winter. I do want to let the light in, though, so maybe we’ll get one of those clear plastic window kits, instead.

This half is mostly garden related stuff and, of course, having a place to sit.

We used to have a large cardboard moving box behind the door for tall stuff. After digging around, I found a tall aluminum garbage can I could replace it with. It had been sitting outside for who knows how many years, and the bottom of the inside needed to be scraped of… something. After cleaning it as best I could, I cut a piece of insulation to fit the bottom. That way, it’ll be quieter if we drop something hard or metallic inside. Eventually, we’ll have more garden tools stored in there for the winter. Another piece went on the floor under it, for those times when the floor gets wet.

It’s not quite finished, of course. Some things, like the tool box, will be moved out of the sun room completely, when it’s no longer needed for outside stuff. We found a set of legs to make a folding table, and I’ve got those behind the swing bench until we can find and cut a piece of plywood to size and attach them. The folding chairs get stored in the old kitchen.

This side… still looks like a disaster! *sigh*

When I found the metal garbage can to use for storing tall things, I also found a smaller plastic garbage can inside it. It was intact, so I gave it a cleaning, and now it’s sitting upside down by the walker to dry. I’m not sure where it’ll finally go, but this room does need a garbage can. There’s a bucket to catch drips if we get rain and the roof starts leaking again (still no word on when the roofers will be coming out). I had some square buckets on the counter shelf I was using for small hand tools, only to discover water in the bottom of one of them, and the tools inside were starting to rust. *sigh* So I cleaned the tools as best I could, then left the bucket to catch drips. We don’t have rain in the forecast anymore, but it did start raining a bit while I was in town, so until the roof gets done, we’ll just leave the drip catchers where they are.

I would love to find a better place to store the bin of insulation pieces. They come in so handy, though, I want to keep them accessible. There’s a few other things that need to be organized better, but that can wait. The main thing is that everything that was outside is now inside, the room is more useable, and it’s easier to get at things like the table and miter saws. Even the electric chainsaw now has a spot on a shelf. However that, and the battery powered mini chainsaw, will be going into the house for the winter, though. Things get too cold for batteries or chainsaw oil in the winter.

So there we have it! The sun room is pretty much done, and mostly winterized. At some point we’ll set the food and water bowls and a litter box up in there, for when we need to use it as a kitty recover room again, but aside from little things like that, it’s finally done.

Now I can get back to working on garden beds again! 😁

The Re-Farmer

Have I mentioned I’m a suck for the cats?

It was a gorgeous afternoon and evening yesterday. Not only a pleasant temperature, but even the mosquitoes weren’t as bad. I didn’t want to go back inside when I was done what I needed to do!

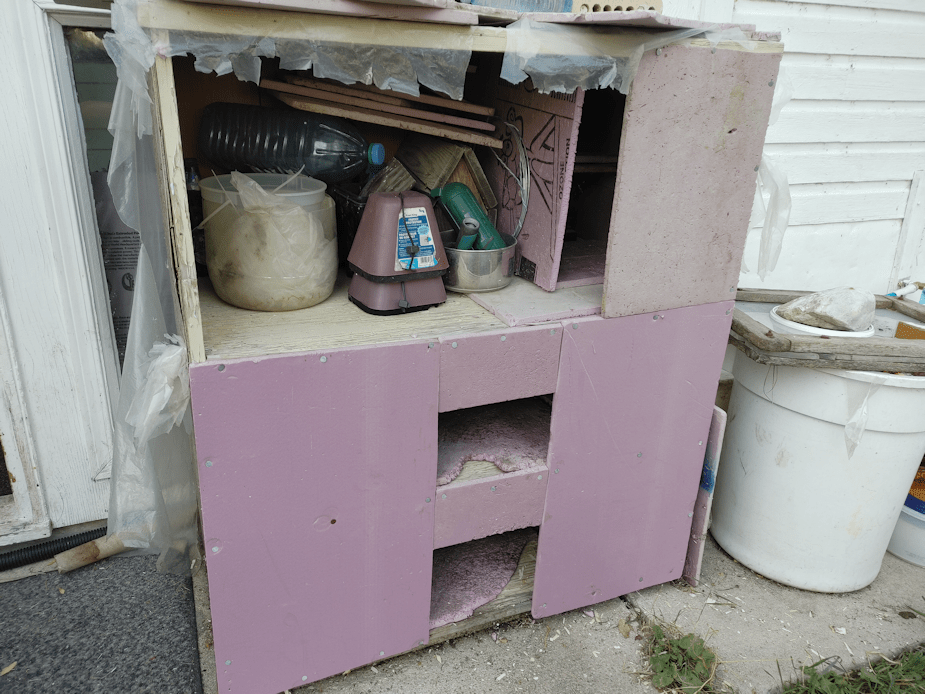
One of the things I did was re-do the shelf shelter for the cats. I noticed that the little kittens have been climbing all the way to the top shelf, which was actually use to store stuff, and have been snoozing in a corner, where I’d stacked some smaller pieces of rigid insulation.

The insulation over the bottom two shelves were getting ratty, so I decided to empty the whole thing, give it – and some of the insulation pieces – a hose-down and redo it.

Including making a next in the corner of the top shelf for the kittens, even though it meant not being able to fit everything back in again!

The sheets of insulation lining the bottom shelves were used again, since they fit the best and, aside from a few edges, still intact. When covering the fronts, I left the openings wider than before. When startled, the cats would dash out, catching on the edges of the insulation, sometimes hitting them hard enough to pull them right off the nails holding them to the shelf. I decided to try reducing the height of the openings. I want it open enough for them to easily get in and out, but small enough to let less of the weather in. Hopefully, they won’t get ripped right out by a startled cat!

As for the top shelf, I tucked a small pedestal plant stand in the corner and used it to support two levels with the rigid insulation for the kittens to lie on. There’s more space in front with an insulated floor, and there is insulation along the side and back walls, too. An extra piece across the front, and the kittens have their own little cubby hole to settle in.

Now I just need to clean up and redo the outside of the shelf. It had been wrapped in plastic to protect the wood from snow and rain, with an extended “roof” of rigid insulation, but the wind tore the plastic to shreds, and the cats have broken up the insulation. I’d like to find something sturdier to replace them with.

After I had emptied, swept and hosed down the inside, I had to give it time to dry before continuing, so I started another project.

A new cover for the rain barrel.

A couple of years ago, we made covers for the rain barrels out of window screen mesh and hula hoops. One for the barrel at the corner by the sun room, and the other for the barrel we fill with the host, at the far corner of the garden. The covers were partly to keep debris out, but also to make sure no critters fell into the barrels.

After a couple of years, however, the plastic hula hoops became brittle and started to crack. The cover for the garden barrel had been stored in the old garden shed for the winter, and it looks like something chewed holes in the mesh, too.

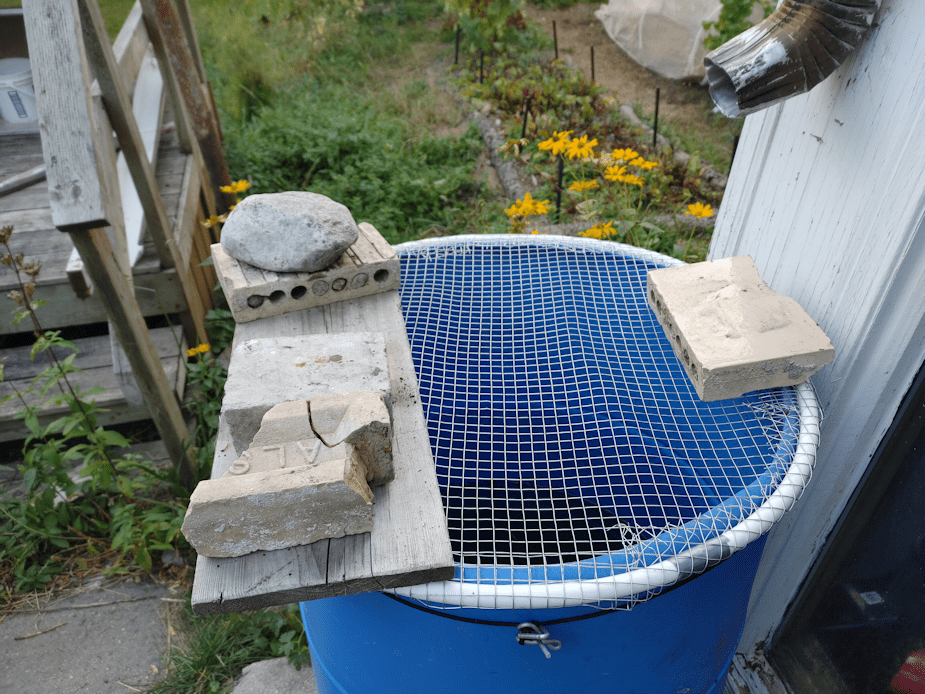
The sun room barrel’s cover is held in place with a board weighed down with bricks. When the barrel is getting full enough that more rain would cause it to overflow, the board and bricks hold the rain diverter in place.

Not long ago, I found the cover and its mesh broken up. Something had jumped onto it or something. The mesh had torn, but thankfully whatever did it, did not end up trapped in the water. Then we heard a commotion one night, and I came out to find the board and its weights, and the rain diverter, all knocked off the barrel, and the cover damaged even further. I put the board and its weights back, then found some pieces of rigid insulation to cover the rest of the barrel, with weights to hold them in place, to ensure no critter could access the water, until a new cover could be made. Even that ended up being pusher around a bit, as if some critter was trying to get at the water below – even though we have several bowls of fresh water critters can drink from. A new cover had to be made quickly.

Which is what I did while the shelf shelter was drying.

The materials used are much sturdier!

I considered using some chicken wire, but the openings are too large and the wire too easily broken. I went with some half inch hardware cloth I had, instead. The hoop is the same PEXX tubing I used to make arches to support netting over the old kitchen garden beds you can see in the background.

I used the barrel itself to measure the size needed to make the hoop, then cut a square of the hardware cloth to size, removing excess mesh from the corners to make it closer to “round”. The hardware cloth is a lot stiffer than chicken wire, but the extra strength is, I think, well worth it being such a pain to wrap around the hoop. Definitely glad for gardening gloves! The last step was to use a hammer on the underside to get the mesh right up against the hoop as tightly as I could.

There was, however, one problem.

The top of the barrel is not round. It’s more of an oval shape, and a wonky oval at that. The old hula hoop I’d used before was quite a bit larger than the top of the barrel, so it didn’t matter, but this hoop was cut for a more snug fit. The less sticking out, the less likely a critter will knock it off, even with the weights. I thought I’d still made it large enough to fit over, but the barrel’s shape was just too wonky.

I ended up tying some paracord around it as tight as I could, then used a metal tent peg to twist the cord even tigher.

Yeah. That bend up piece of metal was a tent peg.

Between the paracord pulling the top of the barrel into a more round shape, and the hammering of the hardware cloth tight against the hoop, I was finally able to get it in place. The board and weights were added to support the diverter when we need it, and the extra brick at the back, just in case something knocks the board off again, so the whole thing doesn’t flip off.

I might still add window screen mesh to this, since things like small frogs or insects, as well as small debris, can get through the half inch mesh. As it is right now, a cat – or even a racoon – could jump onto the cover and it’ll hold their weight without issue. The PEXX tubing will also last a lot longer, too.

All in all, I think it worked out rather well for using stuff I got for other projects! 😁 It didn’t even take that long to do. It took long enough for the washed out shelf to dry, at least.

So we now have a shelf shelter for the cats all cleaned out and ready for winter – on the inside, at least – and a cat and other critter proof cover for the rain barrel.

Ah, the things I do for the kitties!

The Re-Farmer

Scrambling to catch up, and a court update

Today turned out to be a lovely day. Sunny, and at a high of 8C/46F, warmer than predicted. It made it very hard to believe that there is a storm and blizzard coming our way, starting tomorrow! While my phone’s weather app has been saying a blizzard was coming since yesterday, it was only until early this afternoon that my desktop app changed its forecast and began giving weather alerts.

After losing so much time yesterday, today was a day to scramble and get the essentials done. The rest will wait until spring.

Last night, the girls lifted the roof on the cat’s house, cleaned it out and replaced the old straw with fresh. Unfortunately, the heated water bowl had to be removed; the cord’s sheath had cracked, right where it contacted the bowl itself, exposing wire. That is unfortunate, as the heated water bowl made a huge difference last winter! So far, however, we are still expected to have mild temperatures, so we won’t need to plug in the electricity to the shelter. Which is good, because I forgot to buy a new 9V battery for the fire alarm we have in there. The ceramic terrarium bulb we have in there for warmth is well shielded, but we still want to have the alarm functional as a safety precaution.

I don’t know of the cats are happy with the clean up. I haven’t seen them in there, yet!

When I headed out this morning to do my rounds, I counted 20 cats.

But only Nosencrantz was willing to pause for a photo! :-D

One of the things I took care of while doing my rounds was to finally scatter some wildflower seeds.

I had two packages of wildflower seeds that were meant for the area outside the yard, in front of where the new sign is. Eventually, I want that entire strip to be filled with wildflowers for the pollinators – and so I don’t have to mow it anymore! I used a bulk sized spice shaker and some soil to scatter the seeds evenly.

This was something I expected to do in the middle of September, but it was just too warm. I didn’t want to risk the seeds germinating too early, and getting killed off when winter temperatures arrived. With the storm coming, these will get covered with snow and should be good to lie dormant until things melt in the spring.

Last night, the girls also used the insulated tarp we found in the garage a while back and used that to cover the septic tank, instead of straw. It’s large enough that it could be used, folded in half. It was full dark by then, so they just weighted it down with some fence posts. This morning, I shifted it a bit to get it right up against the house, then pegged it down.

As you can see by the two pegs on the right, I hit some rocks in the process!

By the time I pegged that down, I was done my rounds and headed inside to go through the trail cam files while eating breakfast. It was rather funny to see all the files of my mother and I, when I took pictures of her at the new sign. It feels so weird to see myself on video! :-D

By the afternoon, things had started to warm up nicely, so I headed outside.

The first thing I wanted to get done was scatter a different wildflower seed mix in the yard.

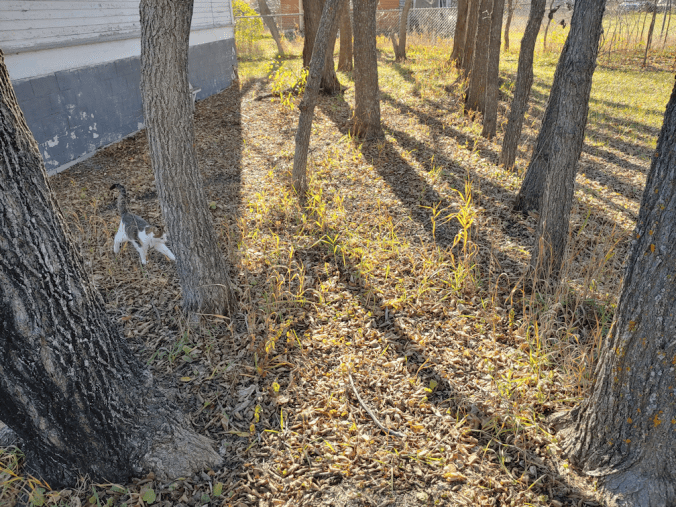
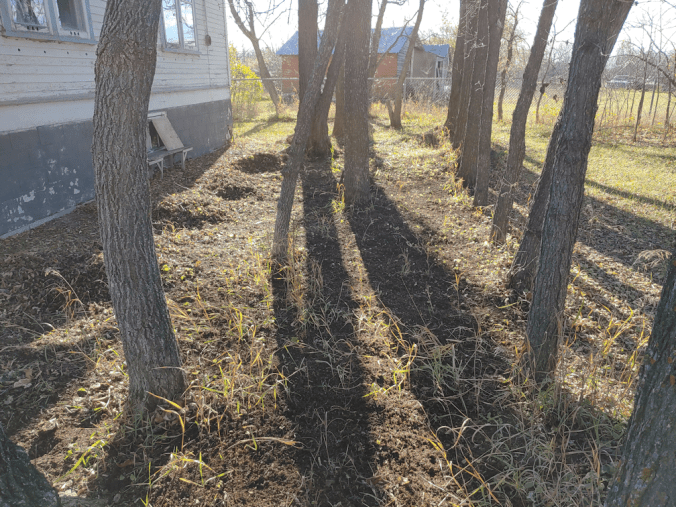
This one was an alternative lawn mix, for shade and partial shade, of flowers native to Western Canada. This double row of trees is really hard to tend, so I settled on this as the location for the seeds. Unlike the area in front of the sign, though, this one needed to be raked, first.

The first raking was to remove the leaves and debris, then it got raked again to loosen the soil surface a bit. There were some maple and willow suckers coming out of old stumps that needed to be pruned as well.

Then the packet – one larger packet of seeds – got added to the shaker with some soil and thoroughly mixed before being scattered on the raked ground.

Then, the leaves got raked back, as a mulch.
I look forward to seeing if this works in the spring!

One of the priorities on our to-do list was to finally repot our house plants. They’ve been hit with overnight frost, but amazingly, the aloe vera was still alive! They were overgrowing their post, though, so most of them ended up in the trench of the third low raised bed, to break down, except the biggest one that was too big to be buried in there, so it went to compost. I ended up transplanting 4 or 5 strong, healthy little aloe vera for the girls to bring inside later. The umbrella tree looked dead, but I pruned it back and repotted it, because it does actually seem to still have life to it! I would hate to have lost that thing. It had been doing so well, even with the cats constantly trying to get into it!

One of my daughters was working on commissions, so she could only come out to help briefly. My other daughter tried to help, but she was feeling sick and looked so horrible, I sent her inside. Poor thing felt so bad! She did, however, get the last hose put away for me, and was kind enough to run into the basement to shut off the water to the taps.

Once the water was shut off, I opened the back tap and put one of the new insulated hard covers for the taps on it, then finished putting up the rest of the insulation we put around the bottom of the house. This area had been left until we were done with using the taps, and the septic was covered. The front tap still needs its cover, but it is much more convenient to get at, so it can wait a bit.

Along with some other clean up, I did finally make it to the squash tunnel to prepare it for next year, but was only able to do one side before I had to go in for an expected phone call. The rain barrel was turned on its side and weighted down, the long tools and rolling seat went into the old garden shed, and the storage bin we kept to hold shorter tools and various other things we might find handy, went into the sun room. The things we have left undone are all things that will be okay if they wait until spring. It was just time to finally put the tools away!

Then I made a quick run into town to get a few things we thought we might run out of. The predicted storm is supposed to hit the south of our province, but it’s hard to know if we’ll get hit by it as well, or just catch the edges of it. At the very least, we expect to lose internet more often. That happens any time there is bad weather to the south of us. Though it is supposed to start with rain, we might get about a foot of snow, over two days, at which point we won’t be going anywhere for a while! I had already planned on tomorrow to be a baking day, and the last thing I wanted was to runout of ingredients in the middle of something!

Meanwhile…

I got an email from our vandal’s lawyer asking if I were available for the case management session on Monday. That went back and forth for a while. It turns out it will not be with just me, him and our vandal. It will be with the same judge that we’ve been in front of, this whole time.

My brother will not be able to make it, but we don’t want to delay this any more, so I took it. I feel more confident knowing that the judge will be there. The unfortunate thing is that it is going to be at 9am – in the big city, not the closer, small one we’ve been going to all this time. Worse; the court offices are downtown. So not only will I have to leave unfortunately early, just to make sure I have time to get lost among all those one way streets, but it’s going to cost more in fuel, and I’ll have to pay for parking. Minor things, but with costs going up, there just isn’t much wiggle room in the budget! Very annoying. But, it’s that, or wait a year for a trial. :-/

So that has been confirmed.

I am both looking forward to getting it done so quickly, and dreading it.

At least, by then, wherever snowfall we get from the storm will no longer be an issue. There will be plenty of time for any road clearing needed to be done by then!

As for our scramble to get stuff done, no, we weren’t able to finish it all, but the essentials are done, and the rest should be all right to wait until next year.

Speaking of next year, we’re made progress there, today, but that will be the topic of my next post! :-)

The Re-Farmer

Clean up and… there are no quick and easy jobs here!

Photo heavy post ahead! :-D

Today is supposed to be our last warmish day in quite some time, and we are very fortunate to have it. Just yesterday, a major system passed through. To the north of us, they had near blizzard conditions. To the south, it was rain instead of snow. Yet, there on the weather radar, was a clear spot in the system, passing over our area!

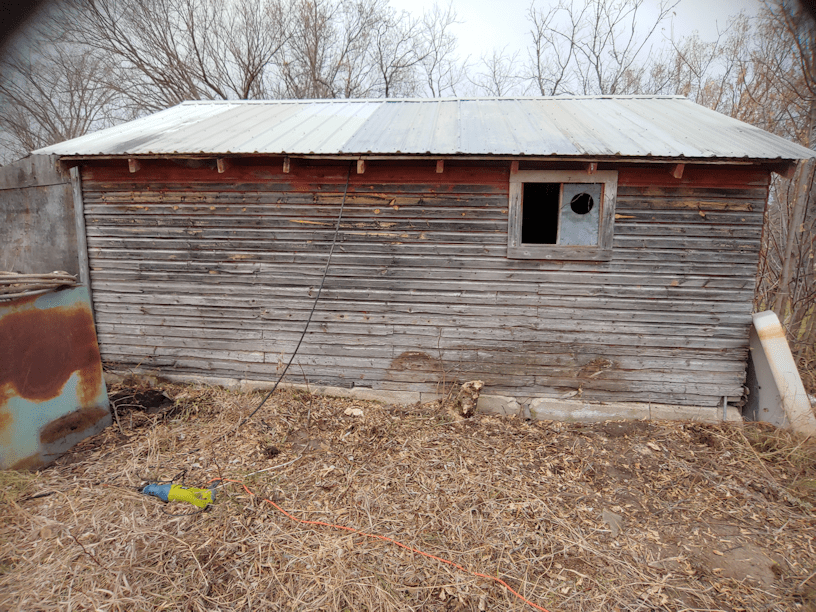
I am quite grateful for out continued mild weather! It gave me one last day to patch the other window in the pump shack.

Here is how it looked before I started.

In the forefront is an old forge my dad made. My brother told me he’d cobbled it together using an old blower that the tray of coals is attached to.

I’d already cut away the bigger saplings that had self sown in the area. Before I could start, I had to cut away some more, move the steel bars and that flat piece of metal with a slight curved shape to it (it turned out to be partly buried), out of the way.

I also pulled this out of the grass.

I don’t know what it is, but it’s in the pump shack now. My brother had said something about it in passing, but I just can’t remember. I understood that he felt it was worth salvaging and protecting, so that’s what I’m going.

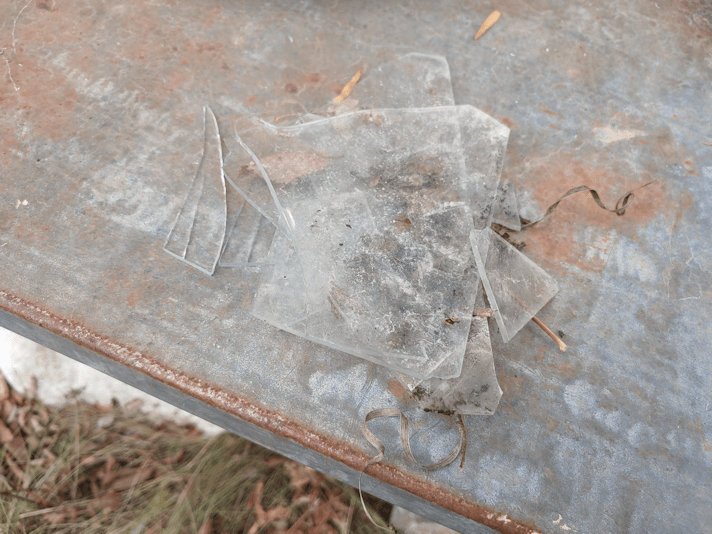
After clearing things away, I was able to pick up all the broken pieces of glass.

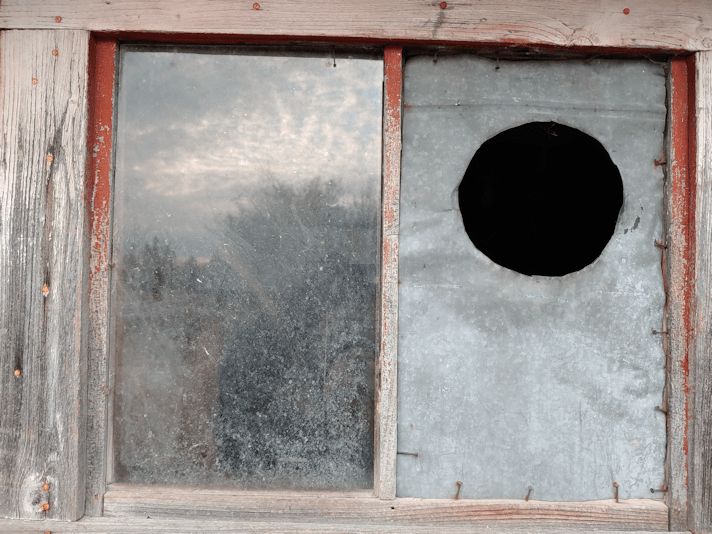
As I looked more closely at the window itself, I realized it was just held in place with three bent nails. All I had to do was rotate them, and I could take out the whole thing!

So I did.

It’d hard to see, but each piece of glass has tiny little metal things holding the panes in place. They have pointed ends driven into the wood frame. The glass was then caulked to the frame, but most of that has long since fallen off, revealing those metal bits in the process.

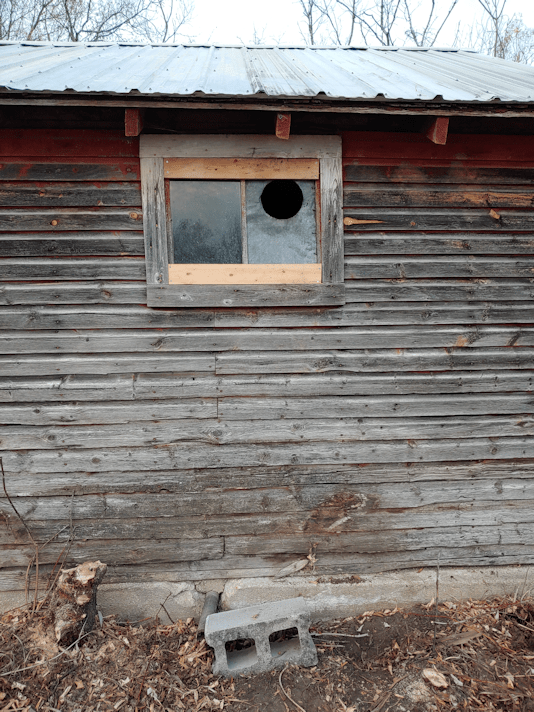
I decided to use some rigid foam insulation to fill in the hole, as well as support the wooden pieces that were holding the remaining glass in place. I trimmed the inside edges of the insulation so it would fit more flush into the recesses of the wood.

Everything was very loose. Even the corner joins. Though the thickness of the piece of insulation would help keep things from moving around, there was still a pretty high chance other pieces of glass could fall out.

So, I got out the silicone caulking I had left and caulked it all, then put the window back in place.

It looks horrible, but it’ll do the job for now.

Here is how it looks from the inside.

Any work done on this building is just keeping it going as long as possible. It really needs to be replaced completely. Even the concrete floor is cracked and heaving. But it still keeps things inside dry, and it isn’t collapsing, like other buildings, so it’s worth it to keep patching things.

That done, I turned my attention to the old forge. Now that things were cleared away under the window, I wanted to move it next to the wall, for a bit more protection from the elements.

It had sunk into the ground and, as I was looking around to see what I had to work with, I found the plug for it! :-D

I tried lifting and shifting, and while I could move it a fair bit on one end, the end with the coal tray was much heavier. The tray itself has only two screws holding it to the metal, so I couldn’t even use that as a grip to lift.

I ended up grabbing one of the steel bars I’d set aside, using it as a lever. The ground was pretty soft, so I also tried using bricks, as well as another, shorter, bar I found in the grass, as support.

I was having a hard time getting things under it, though. There was something blocking me.

Did this thing have legs?

No!

Are those… wheels???

By now, I realized I would need to tip it over onto its side, because I just could not lever the heavy side out of the dirt and over the overgrown grass.

The coal tray had stuff on it, though, so I took that off.

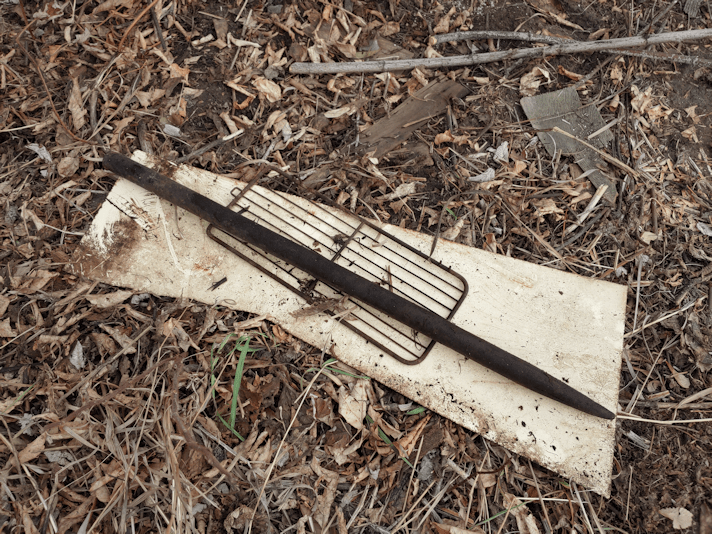
It was asphalt shingles, covering the coal. The yellow metal piece was on top, but the round metal piece was something I found under the shingles, lying on top of the coal bits.

I then tried to use the bar to lever it around some more. There was really just one place solid enough to put the bar. The piece you can see under the coal tray is hollow, which I discovered when it started crumbling when I pushed the bar against it.

I did, eventually, manage to get it on its side.

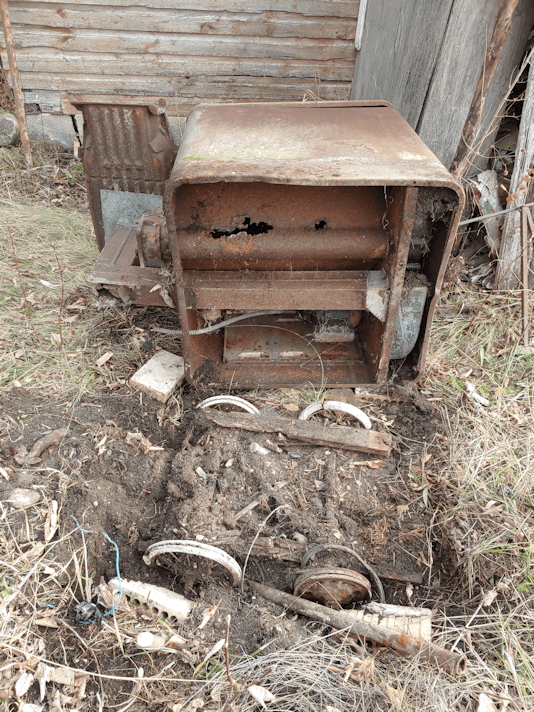
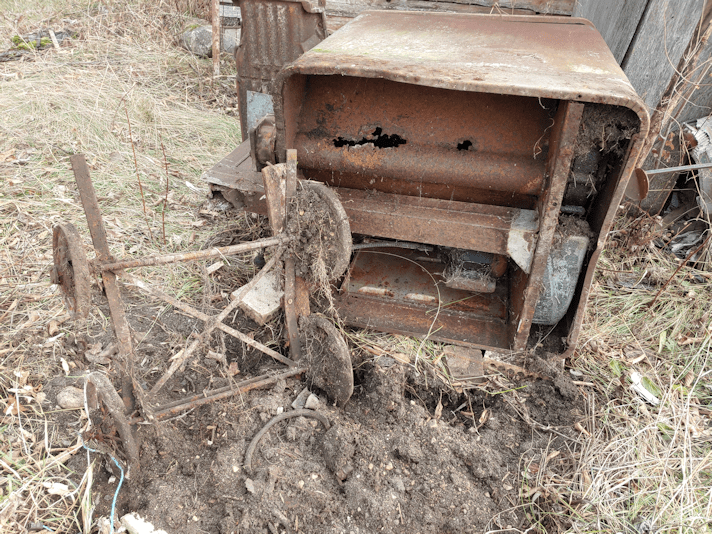
Yup. Those were wheels! But they weren’t attached to the forge!

There was still some rotted wood attached. It was like a little wheeled scooter that the whole thing was resting on.

It wasn’t until I uploaded the pictures that I realized where the motor was. It is on the light end!

I kept trying to shift the forge, but the weight on one side made it very awkward to do anything.

I’d opened it before and saw someone had stuffed some inner tubes inside. Maybe I could take the blower pieces out or something, and lighten it?

There… is no blower in there.

What on earth was I seeing in there? Hidden away, under the inner tubes?!!

Dear Lord in Heaven.

It’s a grinding wheel.

Why on earth did someone put a grinding wheel in there?

Not that I mind too much. This might be the one I remember as I child. The log building it was in had been burned to the ground to get rid of it, and as far as I knew, none of the stuff inside had been removed, first. So I’m actually very happy to see this.

After moving it away, I started pulling other things out.

There was just so much stuff!!

I found 4 inner tubes, a gas can, a lawnmower blade, the throttle cable from a lawn mower, and even a spoon.

There are also blacksmith tongs, though one has the handle broken off. A couple of objects with lots of pivoting pieces on it. A couple of old metal legs, like off an old-style bathtub. Two ax heads, and more odds and ends

Two things in there really excited me. I don’t know what they are called, but from videos I’ve watched of people using carving benches, I recognize them. One end goes into a hole drilled into the carving bench, and the other holds the item being carved in place. It was something I realized I could really use, if I plan to extend my carving repertoire. I just had no idea where to find them – a hard thing to do when you don’t know the name of what you’re looking for – and some of the carvers whose videos I watched, commented on how expensive they are They’d made their own, instead.

Now I have two!

So I’m pretty excited about that!

Once empty, I was able to right the forge again.

After seeing the remains of the wheels it was on, I decided to take some of the glazed bricks I’ve been finding and put them under the forge.

Even empty, it was still hard to move! The light end, I could grasp and lift, but the heavy end was harder to get a grip on. I ended up using the bar to lever and shift that end, to get it onto the bricks.

I did finally get it in place!

You can see the bar I used to lever it.

The coal tray looked like it was cracked, but I think it was there for a purpose. The “crack” extends to some holes in the middle of the coal tray. Under the holes is the squared pipe. The air from the blower was directed under the coals through there.

I considered throwing away the wheels, but the frame they’re attached to looks like it might actually be salvageable, so I am keeping it for now. I just knocked the dirt and roots out of the spokes, first.

After that, it was time to clean up where the forge had been sitting.

I’d found a few metal bits and wires. Then some nails.

Then more nails. And screws.

And more nails!

I think a container full of nails, screws and other odd bits had spilled there. The last thing I wanted was for someone to step on them and get sepsis or something.

So I dug out what I think is the original lid for our septic tank, to use as a tray, and magnets.

Along with the nails, I found bits of spark plugs, a gas cap, the tooth of a hay mower, and miscellaneous other bits!

Once that was done, and my younger daughter helped me tuck the keepers I’d found into the pump shack, I enlisted her help to move the other thing I don’t know the name off. One of the pictures below is from when I first dug it out from beside the fuel tank, yesterday. This is another of those things my brother said was worth salvaging and protecting, so I wanted to move it into the pump shack.

In the older photo, you can see what looks like a completely sheered piece of steel, in the middle.

There was dirt and roots jamming one of the pieces sticking out the narrow side – in the first picture, it is completely hidden by grass. It now rotates freely again.

Between the two of us, we could not lift it! Not without risking injury, anyhow (and I think my daughter might have hurt her back trying, but isn’t telling me, so I won’t worry. :-( ). I’m astounded by how heavy this thing is.

One thing we noticed after trying is that some ?oil? leaked out.

I ended up rolling and flipping it, end over end, until it was under the coal tray of the forge.

We could hear fluid sloshing inside!

So that’s tucked away as much as it can be, for now.

My goodness, what a lot more work there turned out to be! But it’s done now, and we don’t have to worry about this stuff as winter comes in.

The Re-Farmer

Clean Up and Winterizing: fixing the pump shack window

Today, my goal was to board up at least one of the broken windows in our old pump shack.

Which was not an easy job. (Photo heavy post ahead!)

You see, in order to fix the window, I needed to be able to reach the window.
In order to reach the window, I had to cut back some self-sown maples growing in the way.

To be able to reach the trees, I had to clean up this.

You can see part of an old freezer, over on the left. Next to the old furnace is a partially dismantled modern washing machine, next to part of an old wringer washer, and beyond that, a second fuel tank.

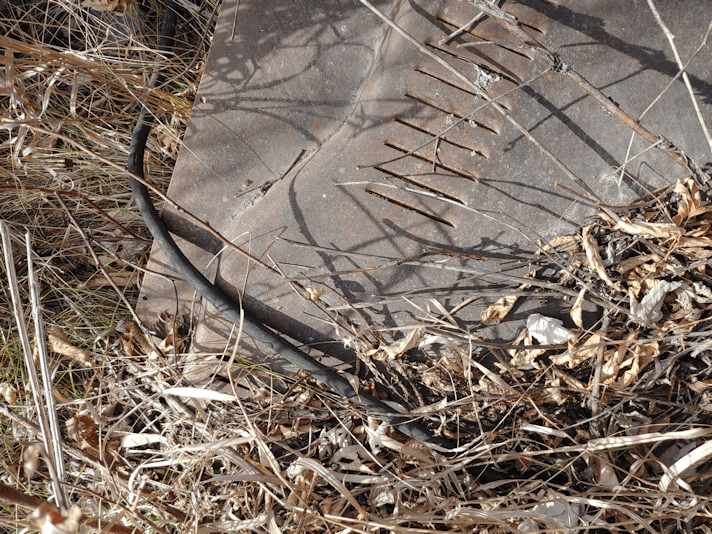
It’s hard to see in the above photo, but there is a black electrical cord coming out of a hole under the eaves, about in the middle.

This cord is eventually buried, and extends to the storage shed, which used to be my late brother’s workshop. Though the cord is plugged in inside the pump shack, it was actually easier to plug my extension cord into the other end of this cord, in the storage shed!

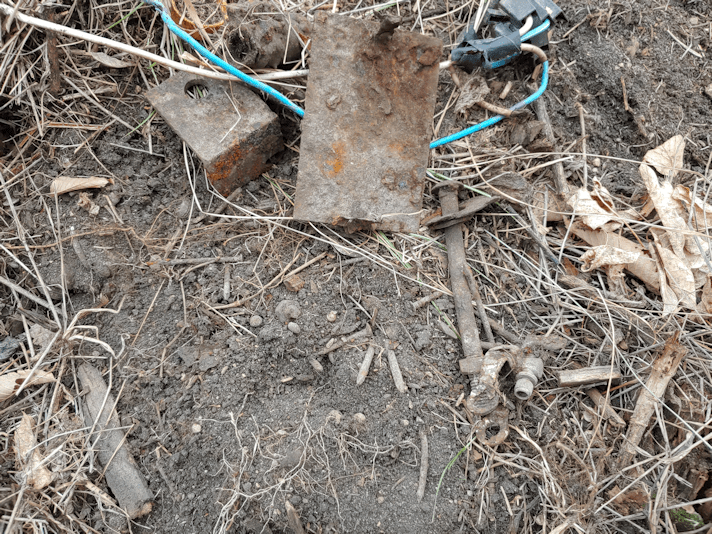
I… don’t know what this is.

I’d moved it aside, only to realize I needed to clean out the stuff I’d just put it on top of. It’s quite heavy, so I just moved it by the old freezer for now.

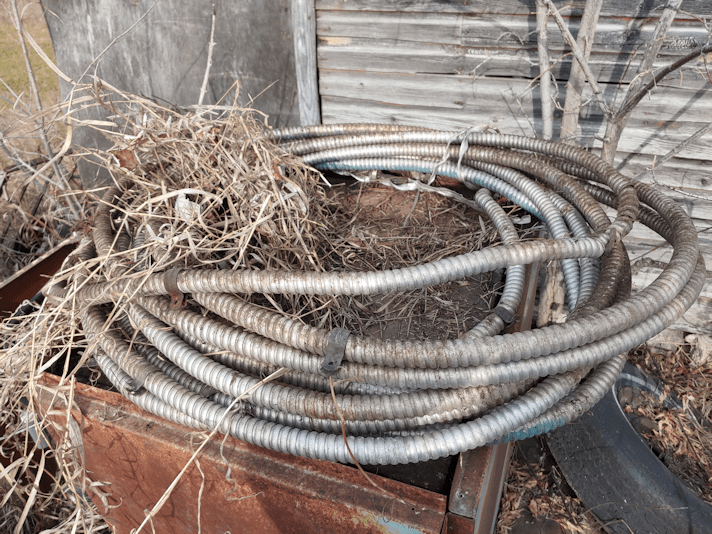
While following the cord until it was buried, I found all sorts of things. Including this old wiring, which I just put on top of the old furnace for now.

I went to move one of the tanks, and found another mystery item was propped against it. No clue what it is, but it says “Ohio” on it. :-D

I also discovered the electrical cable was not actually buried where I thought, and was still on the surface, under the tank!

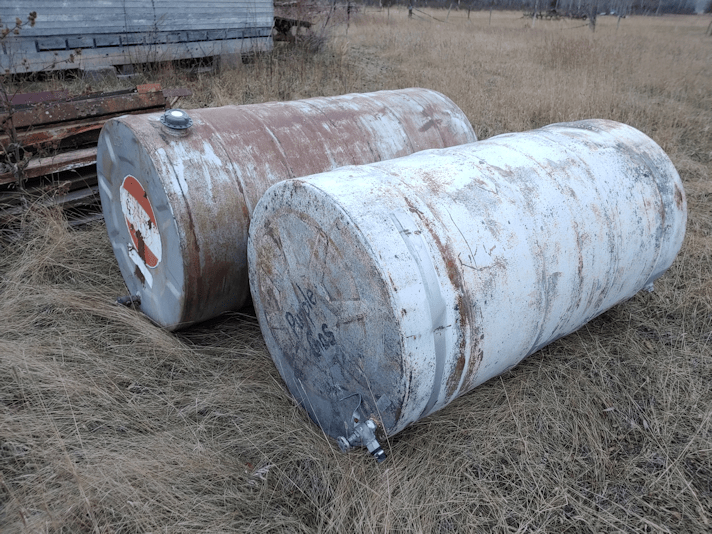
The tanks were quite light, so I rolled them completely away, near the storage shed.

Under the big white tank labeled “purple gas”, I found this.

It was on top of those two tires flat on the ground, and propped up by the other stuff.

While cleaning up around the tires, I found the window pane! It had simply fallen out and didn’t break!

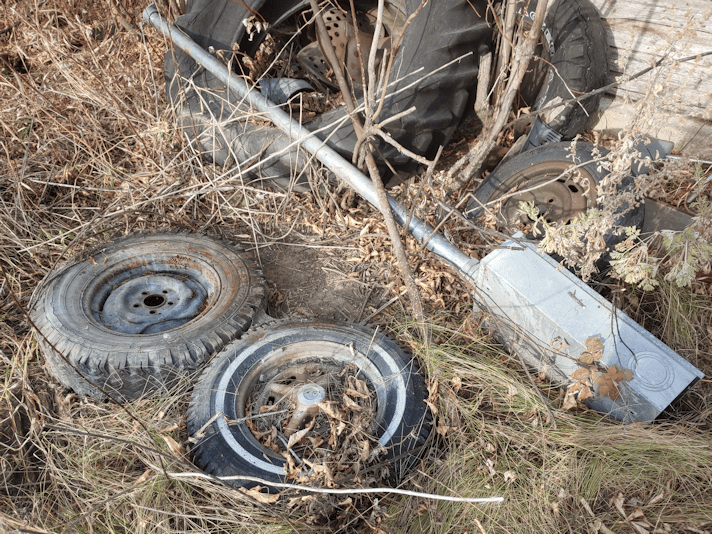
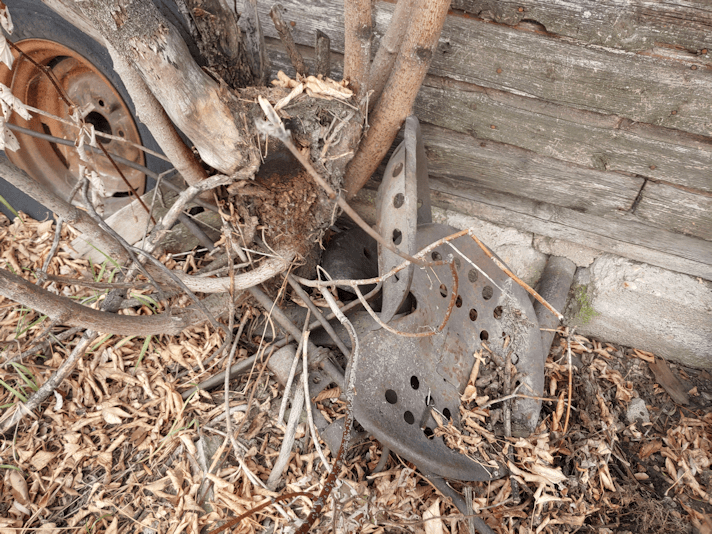
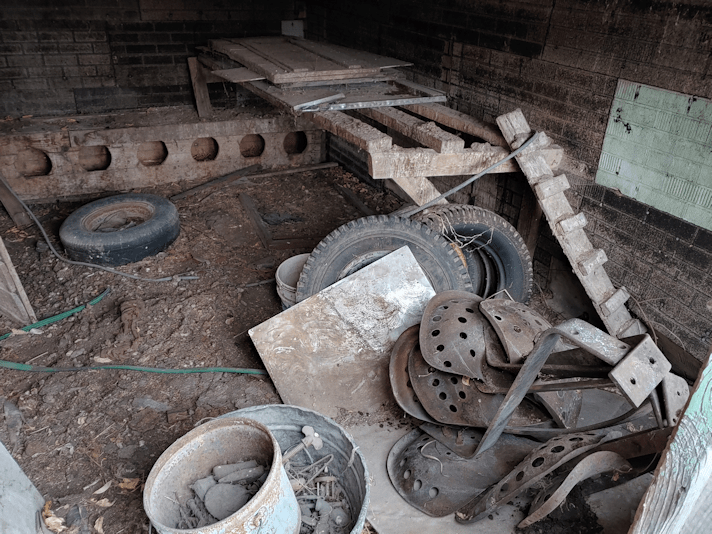
Once I moved the big tractor tire, I found a collection of seats from old farm equipment under it.

I ended up having to cut away that tree to get them out, because it had grown around some of the metal pieces.

I decided they could be salvaged and wanted to put them somewhere out of the elements. I decided the old chicken coop was the best bet for now.

I am not looking forward to cleaning this thing out! But, if we have any chance of salvaging the building, it has to be done. The beam across the doorway is sinking, and a board that used to be above the door is now over the door. There’s room enough I can move the door to one side, but it can no longer be closed fully.

Also, there is another maple at the corner that needs to be cleared away.

To get to the old coop door, I had to first clear away a forest of burrs with the loppers.

They attacked me.

Actually, just one of them. Once it caught on my sleeve, that was it. Before I knew it, I had burrs all over the front of my jacket, both sleeves, my pant legs, my butt, and even my hair!

I had to ask my daughters to help get the burrs out of my hair! The burrs did NOT want to let go!

That tractor in the background is another thing I need to clear. It has trees growing through it. :-(

As I was getting the old seats out, I found…

… a cast iron frying pan!

I ended up putting it in the pump shack. Where the wood burning stove used to be, there is a tiny electric stove (I doubt it works) that has only 2 elements on it. I just had to put the pan on it! :-D

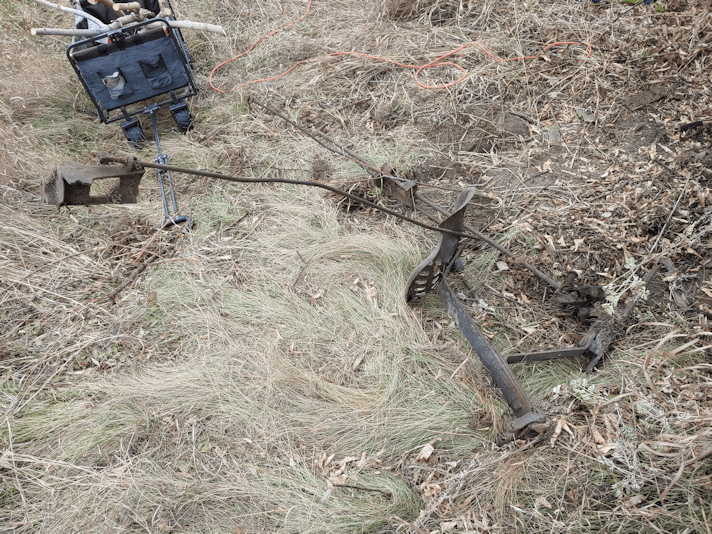
There was one last seat I was struggling with. It was still attached to something, which was buried, and part of it was stuck in the tree I had to cut away, and other parts stretched out further.

I was eventually able to drag it all out.

I… have no idea what this is. Or was, I should say.

There was no way that was fitting through the old coop door, so it got set aside elsewhere.

Once it was cleared enough, I took a look at the old kitchen sink, leaning against the corner of the pump shack.

I love this thing!!! I have got to find some way to use it somewhere. :-D

For now, I just tucked it closer to the building. I don’t dare move it until I have someone to help. I don’t want to chance breaking it.

After clearing more stuff away, I found this bar sticking out of the ground.

I don’t know what it’s attached to underground, but it was not moving. It could turn a bit, and I could wobble it a bit, but that’s it. I could not pull it out,

No clue why it’s there.

I made my way to the old furnace, moved another tire and found and an old kettle! LOL Then I went to move the old steel… container of some sort, and found more stuff in it. It doesn’t show in the photo, but at the very bottom, there was a roaster lid.

Just the lid. :-D

As I pulled more stuff out from under the dirt and leaves behind the old furnace, I found some other odds and sots.

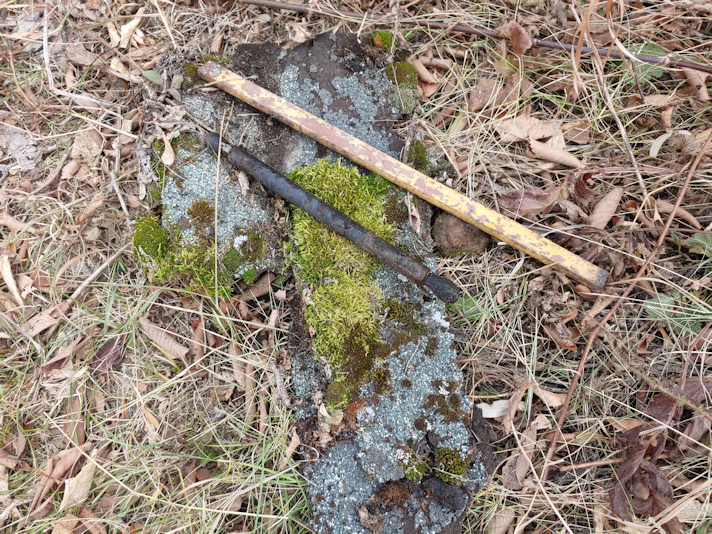
Score!!!!! Oh, I was so excited! That bar with a point at one end is solid steel and very heavy for its size. I could have used something like that in the past few years! There used to be a bar like this, except more like 4 or 5 feet long, but it is among the things that disappeared. This is a bit short, but it’ll still be very handy.

The other stuff joined the hub caps and other weird scraps on the junk pile.

This is as far as I could go, though. That metal is under the old furnace. I’ll have to, at the very least, tip the furnace to be able to get it out.

Not today.

This is as far as I got today!

Under the window, coming through the concrete, you can just see a pipe. That is a drain pipe. Back when we were still using the well under this shack, and had no running water in the house, we had a claw footed bath tub in here. We would heat water on the wood stove for our baths, and this is where the bath water would drain out. I have no memory if there was more pipe, so it wouldn’t drain right at the foundation.

There’s a bit of stump in the middle that I am leaving for now. My poor little reciprocating saw was really starting to struggle by this point!

I could finally fix the window!

The glass pane fit perfectly in a recess in the frame. It looks like it was held in place by a single nail at the top! The metal side, where a stove pipe used to go through, has about a dozen nails holding it!

As the cats go through that hole, I screwed scrap boards across both halves to hold them in place.

Also, I’m short. I found the cinder block by the storage shed to stand on, so I could reach the top of the window. When cleaning up later, it joined the 5 or 6 glazed bricks that I’d also uncovered by the old furnace.

I keep finding those, absolutely everywhere! I would not be the least surprised if I move the old furnace, and find more of them under it.

One of these days, I need to remember to ask my brother if he knows where they all came from, and why my parents got them! Or maybe my mother might remember.

Now, what am I to do with all the tires I dragged out?

Why, drag them back again, of course. :-D

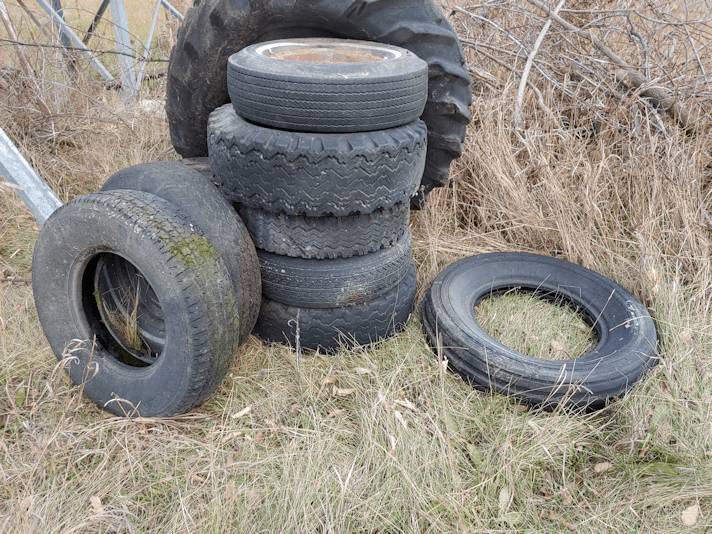
The stack on the left is covering that bar that’s sticking out of the ground, so no one will accidentally hurt themselves on it. Those tires all have rims. The others are by the window so the cats can still get in through the opening. The ones lying flat have no rims, so they can potentially provide critter shelter.

Yeah. I’m a suck.

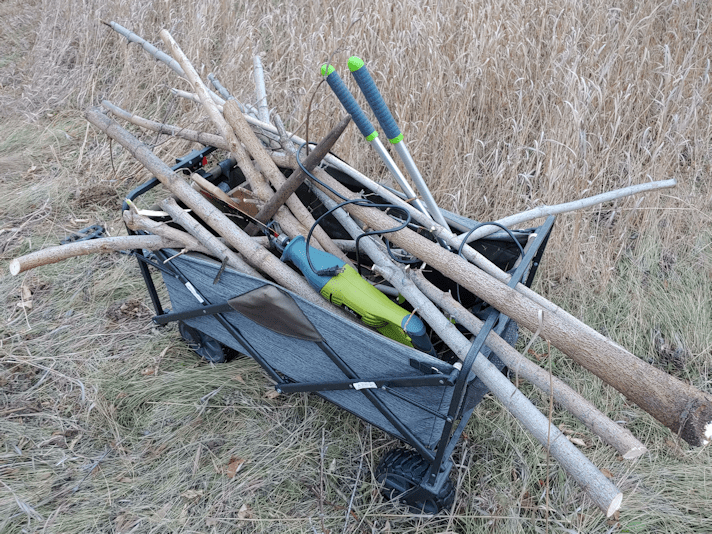
I am keeping a fair bit of the maple I cut. I’m sure I will be able to find something I can make with them! :-)

There is still a small window at the end of the shack that needs to be fixed. It’s made up of 4 squares of glass, framed by a + of wood in the middle. One of the three squares is gone, but I have yet to find it on the ground, so I don’t know if it has broken or not. I’m just assuming it’s broken, since I saw the cat that jumped through it.

Tomorrow is going to be our last warmish day for quite some time, so I’m hoping to be able to get that done. I might end up just boarding that one up completely. We’ll see.

That’s assuming my body is up to it. I’m feeling pretty sore right now! :-D

The Re-Farmer