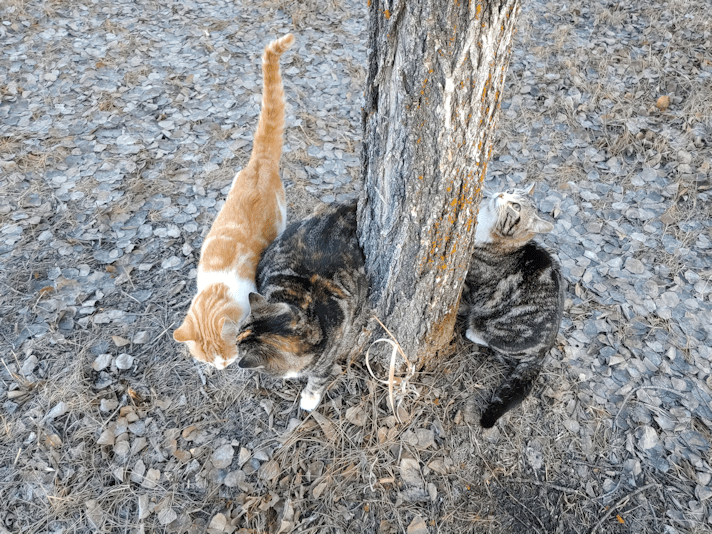
I did not expect Butterscotch to come waddling over to catch up with me. Gosh, she is getting so big! She even let me carry her for a while.
Her boys will be a year old at the start of next month, if I remember correctly.
After dropping my daughter off at work and, if all goes well, dropping off a little Easter care package for my mother, I hope to find more dry cat kibble. We’re starting to run low faster than we should. Several mornings now, I’ve not only found all the cats’ food bowls, inside and out, completely empty, but the lid on the kibble bin has been opened. Something – not necessarily a cat – has figured out how to get the lid off and been eating kibble right out of the bin! From the lingering smell, we know that Stinky has been visiting during the night, but do skunks have that sort of paw control? It could also be raccoons, but we’ve never seen any here, since we moved in.
There isn’t a shortage of cat kibble, exactly. It’s just that the only big bags left are brands that the cats really don’t like. When even the outside cats won’t eat something, you know it’s pretty awful stuff. Outside cats are not normally picky eaters! We had talked about making another trip into the city this month for stuff like this, but the way things have been going, I am just not seeing that happening. Which sucks, because stuff like cat kibble is so much more expensive out here. If the only thing I can find are the smaller bags, though, the cost difference at that point, to get the amount we need, would make it much more economical to make the trip to the city. That wouldn’t be until after Easter, though, and we’re going to run out by tomorrow morning.
For those new to this blog (welcome! Thanks for stopping by! :-) ) we have made a couple of attempts at making mead. If you want to read more about how that went, you can visit here for the first attempt, and here for the second. Both links are for bottling day, but have links to the entire process as well.
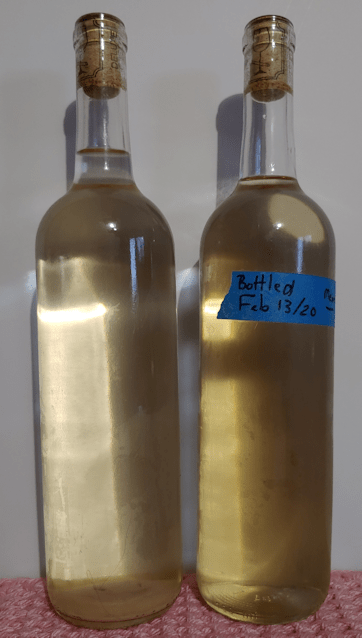
Today, I decided to open a bottle of each batch to compare them. Both of these bottles were kept in the fridge, so no additional fermentation would happen.
Both meads are very clear (any cloudiness in the photo is of condensation on the outside of the bottles), but the one on the left, bottled 6 months ago, has sediment – lees – on the bottom. All the bottles from this batch do. This means that it, potentially, could continue to ferment. Given that these are corked bottles, we don’t want that. There is a potential for bottles to explode, which is why they are being kept cold.
Mead Baby 2.0, bottled almost 2 months ago, is clear on the bottom.
The older mead is lighter in colour, too. This is likely because the honey to water ratio was lower in this batch, which was made in a 5 gallon carboy, while Mead Baby 2.0 was a 1 gallon batch. We had a 5 kilo bucket of honey for the first batch; about 11 pounds. We probably should have added 15 pounds of honey for the big carboy, but didn’t have that much. For the 1 gallon batch, we weighed out 3 pounds of honey for it.
I decided to take a hydrometer reading of both. I still don’t quite understand what it’s telling me, though the fact that these were both refrigerator cold would likely have affected the reading, too.
In pouring the mead into the test cylinder to get a reading, both meads were effervescent, bubbling up as though lightly carbonated. By the time I poured the tested mead into glasses, though, there was no carbonation left.
My hydrometer has 3 readings on it, and part of my confusion is that the scales on the hydrometer don’t match what’s on the printout it came with.
When we bottled the first batch, the Potential Alcohol by Volume reading was at only 1%. Today, it’s at 4%, which put the specific gravity reading was 1.032, and the Balling/Brix reading at 8. (My hydrometer says Balling, the printout says Brix)
Mead Baby 2.0 had an AVB reading of 8% on bottling day, and today it’s at…
…8%.
Specific gravity is at 1.062 and Balling at 15.
I should probably test them again after they reach room temperature, but… I just don’t feel like it. LOL Still, the fact that the reading changed for one, but not the other… it might mean fermentation is still happening, albeit very slowly.
So how do they taste?
The first batch has a light, almost crisp flavour and an aftertaste that I would definitely attribute to our using bread yeast. Also, it doesn’t taste like something with 4% AVB. I would think it’s closer to that 1% when we bottled it.
I don’t really like it.
Mead Baby 2.0 is REALLY sweet, almost syrupy, and much smoother. It tastes a lot like Port.
I like it better than the first batch, but… not by much.
Keep in mind, though, I don’t really like alcohol in the first place. I’m far more interested in the making of it, than the drinking of it. :-D
The flavours should continue to change with time, however. There are 2 bottles of Mead Baby 2.0 in the root cellar. One will be opened at 6 months, the other at 12 months, so I will likely do another comparison, then.
The next time we get a bucket of honey, we plan to make a batch using fruit. Hopefully, that will help resolve some of the fermentation problems we’ve had.
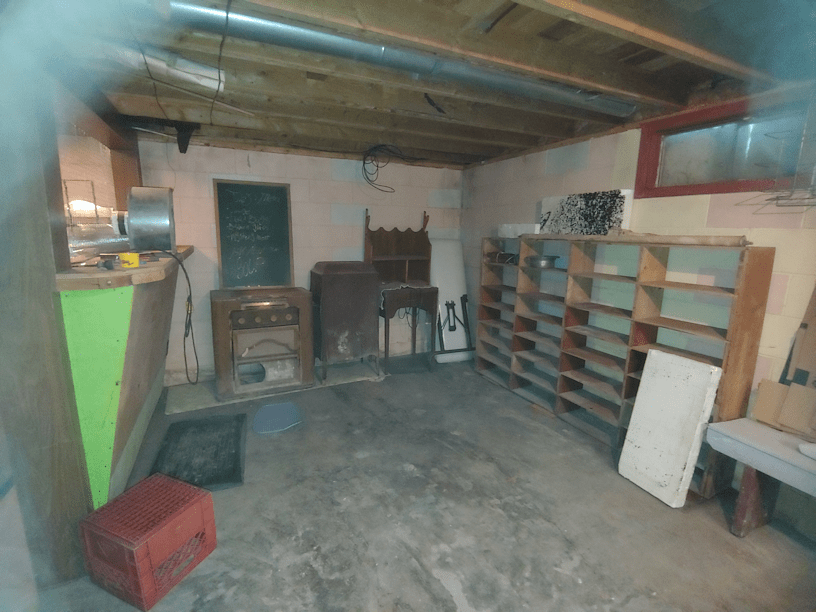
The girls did a wonderful job in the basement, while I was baking bread! They got the big stuff moved back to the now-bleached and dry corner, the wire mesh over the counter to the unfinished bar, and a lot more cleaning, sweeping, scrubbing and vacuuming of cobwebs. :-D
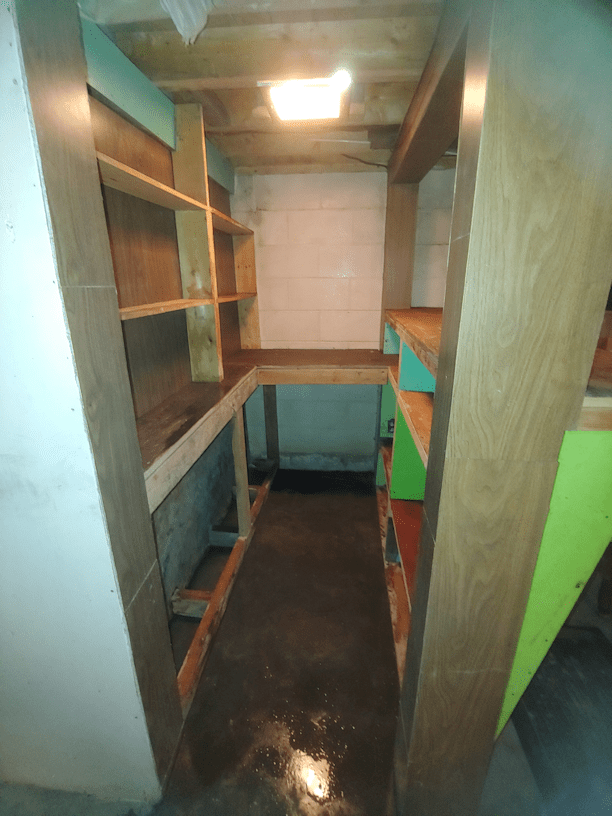
Here are the before and after shots.
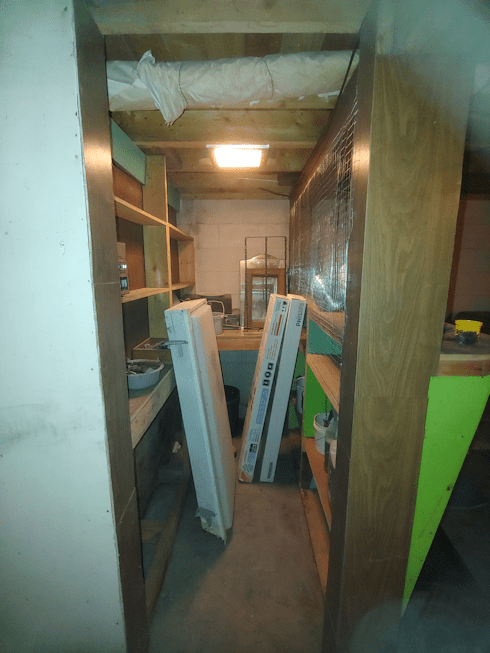
The wire mesh is up, and the more fragile items, and things potentially harmful to cats, are starting to be put into here. Eventually, a door of some sort will be rigged up, so the cat’s won’t be able to get in.
The pieces of Styrofoam at that long shelf were taken out of the windows. They were put in for the winter, before we moved here. They are cut to fit so snugly – and so much stuff was in the way – that we hadn’t been able to get them out before. Now, when the insulation around the outside of the house it moved away until next winter, there will be natural light in the basement.
Also, my daughters are hilarious.
Too funny!
Also, I guess I don’t have to ask what they found while cleaning.
I don’t want to know what the “mystery meat” or “soup” was. :-D
The table, shelves and cabinet are now all cleaned up and usable again.
They also started to haul stuff outside, including all the garbage bags.
A trip to the dump soon is definitely in order!!
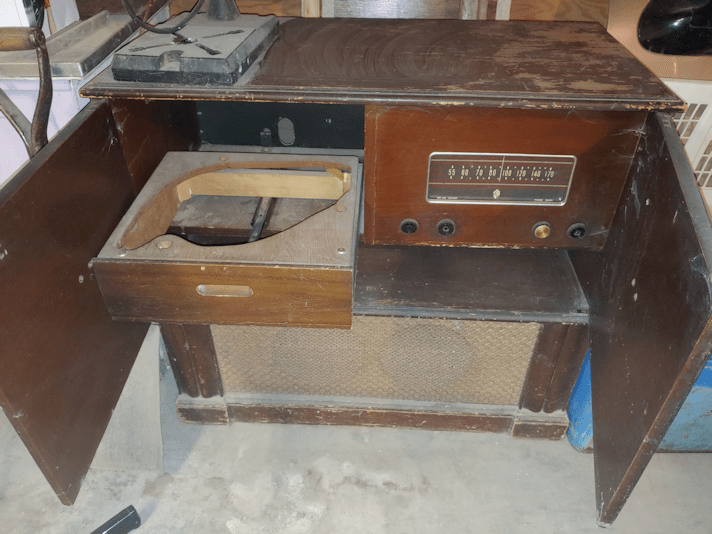
Since I was down there anyhow, I checked out an old radio/record player that’s against another wall.
Except the record player part is gutted.
What about the radio? I was curious, so I stuck my phone around the back and took a blind shot.
Huh. Amazing. It hasn’t been completely gutted!
I have no idea what this is supposed to look like, but I’m sure there are parts and pieces missing.
For now, we have no plans to move this thing anywhere. I admit, for me, it’s more because I don’t want to deal with all the stuff shoved behind it.
Today, while the girls continued to work on the basement (I have yet to go down to see their progress!), I worked on baking our Easter bread.
Then, since I was baking anyway, I made some sourdough soda bread, and another double batch of what has become my usual standby, a basic bread recipe modified by the addition of rolls oats and various seeds. This recipe, plus chia seeds and minus the rye flour. Lately, I’ve also included hemp hearts as well, which adds a really nice flavour and texture. Thanks to my dear friend, I even had yeast to use for the non-sourdough recipes. :-)
In this photo, the braided loaf is for our Easter basket, and I made 4 mini loaves with the other half of the recipe. In the back, left, are the loaves of sourdough soda bread. Which did NOT want to rise today. The house was a bit too chilly today, even though it has been warming up again, outside.
In between batches and rising times, I also made a soup using one of my meals in a jar mixes with sausage. The mix had brown lentils, red lentils, orzo pasta, turmeric cous cous, dehydrated vegetables, dehydrated onions, mushroom ketchup powder, 1 cube of vegetable bouillon and 1 cube of chicken bouillon.
The seedy bread was shaped into mini-loaves that made excellent bread bowls.
This was soooo good to break my Good Friday fast (for health reasons, I do not do a total fast).
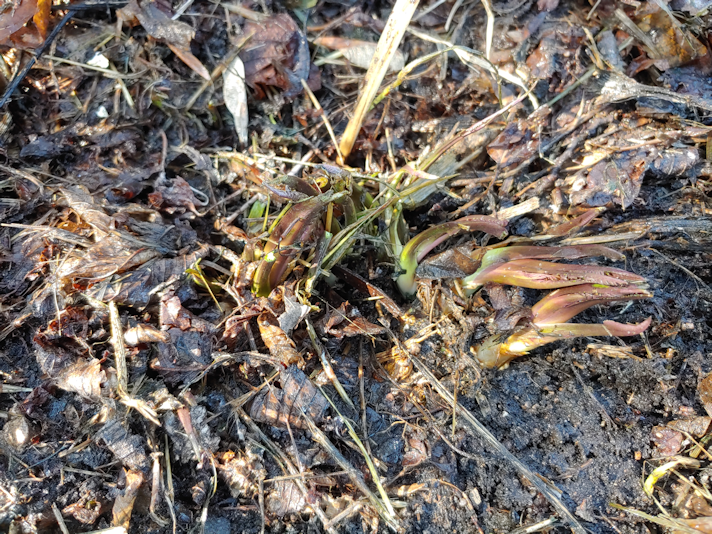
While doing my rounds this morning, I checked the ground near the power pole in the old garden, where there is horseradish planted. It was rock hard, but I hoped that things would have warmed enough to dig some up by this evening.
After scraping aside last year’s leaves, I found the horseradish has already been trying to grow.
The ground was certainly starting to thaw out by this time, but the soil here is so full of rocks, it didn’t make that much of a difference. I can’t understand why my mother planted these here. For a plant that is grown for its roots, rocky ground would have been something to avoid. The area has always been much rockier than the rest of the garden; so much so, my parents eventually stopped using it completely. The base of the power pole, however, has rocks and gravel packed around it, so it’s even worse than anywhere else.
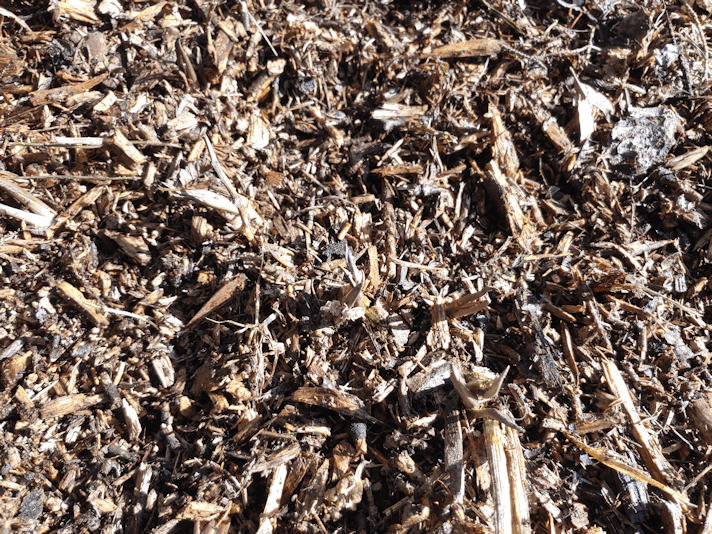
I did manage to break off a couple of pieces, then decided to see what I could find in the other spot my mother had planted horseradish; at the base of a spruce tree near our feeding station. I had hoped that, between the wood chip mulch and possibly a bit more sunlight, the ground would be thawed out more.
The horseradish here isn’t as big or prolific, but I could see where it was starting to grow.
I did scrape away the wood chips, but it’s still pretty hard to see.
There isn’t as much growing here, and they’re much smaller, but the ground was indeed a bit softer, so I got a couple of decent chunks out. The ground isn’t rocky here, but of course, there’s plenty of tree roots. Again, I don’t understand why my mother chose this location.
After much washing, then scrubbing with an old tooth brush to get into the crevices, I now have several chunks to use.
That big piece with three sprouts? I could potentially plant each of those, and have three fresh plants.
I think the two little ones will be enough for my mother. If all goes to plan, I hope to swing by her place tomorrow with a care package for her. I’ll leave these as is, so she can prepare them as she wishes – or plant them in her own little garden plot outside her window. :-)
We only need a bit for our own basket. I have been thinking of planting horseradish in softer ground; perhaps in a raised bed or planter. Something that will allow a straighter root to develop. If I can think of a good spot for that, I might do that with the big piece. My mother always kept a piece of horseradish, with the green parts still attached, in the basket to be blessed with the rest of the food, specifically to share with friends to transplant, or to transplant herself. I’ve tried it myself a few times, but the only one that succeeded (and didn’t get dug up by squirrels) was the one I’d included with our Easter basket the last time we were able to visit with my father, 5 years ago. I took it back with us to plant when we got home, and it actually survived. It got left behind when we moved, of course.
Normally, we would finished putting all our basket contents together tonight, in preparation for taking it to church for the blessing tomorrow morning, but since there is no church blessing, we’ll finish arranging the basket tomorrow and do our own blessing whenever we’re ready. I still want to do onion skin dyed and tea dyed eggs, which will be the last things that require any cooking.
For now, I think I’ll head down into the basement and see how things are looking after all my daughters’ hard work! :-)
My daughter and I got a whole bunch of progress done in the basement. Unfortunately, we’re at that stage were, in order to work on new areas, we have to shove things into areas we’d already done a lot of clearing. Which means that, other than the area we worked on, the rest of the basement now looks like something exploded! :-D
The unfinished bar area is now dry, but we sprayed areas with an anti-mold agent, just to be on the safe side. So nothing has been put into there yet. I was also able to stop at the hardware store after dropping my other daughter off at work, and was able to get a roll of 1/4 inch wire mesh that we will use to block off the counter opening of the bar area. That will be put in before we do anything else in there.
Meanwhile, we emptied the back wall and opposite corner.
This is what it looked like, not long ago.
Right now, the entire middle area is almost completely blocked off with stuff we’ve set aside, including the long shelf against the wall.
We also moved the old, gutted phonograph and ancient radio, which are quite water damaged.
They are in such terrible shape!
The phonograph cabinet is at least still fairly solid, We might be able to just remove the veneer that’s peeling off and be able to restore it. The old radio… I have no idea. I’m pretty sure it’s gutted, too.
This damage would have happened shortly before we moved here, when my older brother discovered flooding in the basement from a rain barrel at the corner that was left to overflow for months of rain. The corner had even started to mold, and he’d had to move things away from the walls so he could scrub and bleach the area.
While emptying that shelf against the wall, tucked away in a corner at the very bottom, I found this.
I had hoped this was the missing filter my brother had installed the last time there were problems with the septic system. It hadn’t worked, so he took it off and set it aside, but it disappeared. It turns out to not be the one my brother had bought, but very similar. So… we’re still missing a filter that likely grew legs and walked away, along with so many other things over the years. :-(
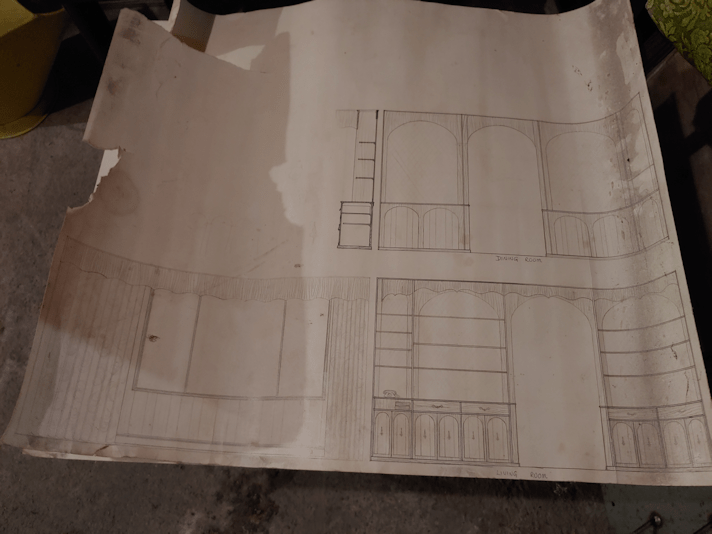
Another thing we found was a “hidden in plain sight” sort of thing. These were sitting on top of the old phonograph.
Nothing special about these – until we flipped them over.
I’m guessing my sister drew these plans. I think she still freelances plans and blueprints for people, but these days, she uses a computer. :-D I think these might be the original plans for the shelves that now divide the living and dining rooms! The end result wasn’t quite so fancy (I love the addition of a little rotary dial telephone), but I can see how what we have now could have developed from these plans.
Once the corner was emptied, swept and cobwebs vacuumed away, my daughter worked on scrubbing and bleaching, while I worked on emptying a pair of shelves in the middle of the basement. Our boxes and bins of Christmas decorations have been temporarily moved to the root cellar, just to make space. The pile of stuff that needs to be hauled out, either to the barn, junk pile or dump, has grown quite a lot.
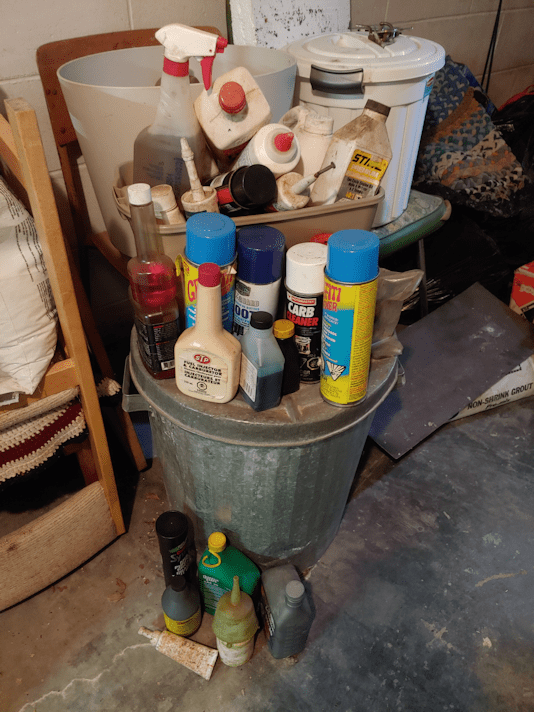
Once I emptied the shelves (including taking out 2 cases of paint cans that have never been opened, but are so old, the boxes are disintegrating), I worked on a tool chest that’s basically just a big box with a front panel that swings down, clearing off the stuff accumulated at the top. I’m not going to try and go through it’s contents, but I did check out the cabinet it was resting on.
Where I found it full of various liquids, gels, greases and… mystery liquid. I’ve been putting all the small containers in a small bin I found, only to find it was nowhere near large enough.
Some of these have been barely used. I would guess they were things my late brother had made use of, which would mean they have been sitting in that cabinet for 10 years for, at the very least, 10 years.
It’s a shame to have to throw out the braided rug that’s visible in the back. I remember helping my mother make rugs like this, using strips of cloth made from old clothes and other fabric items that were to worn out for their intended use. Unfortunately, the two braided rugs I have now found in the basements had been down there so long, they got moist, and look like they started to mold.
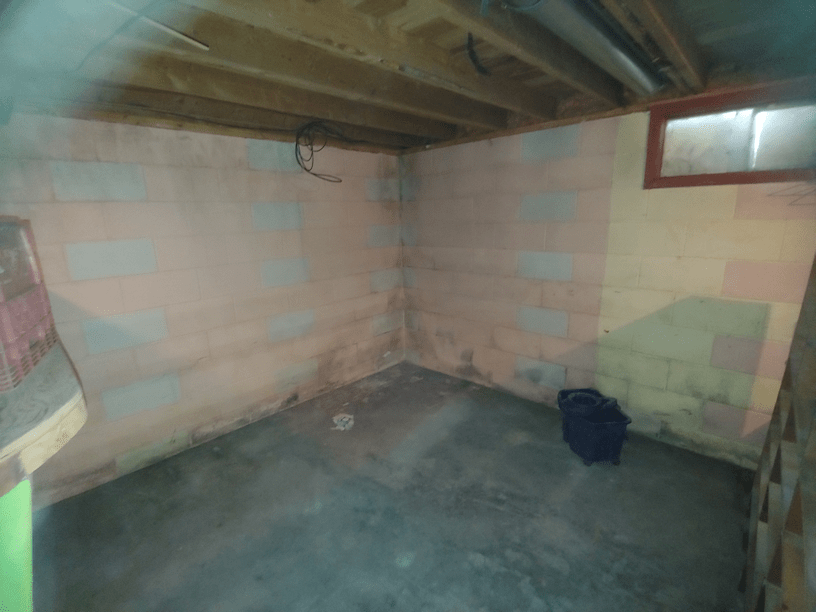
Here is what the basement corner looks like now, before and after washing.
It’s really kind of hard to see the difference between washed and unwashed walls, but it’s there! You can still see where the mold my brother scrubbed away has stained the corner. :-(
While cleaning up, we found another outlet, on the outside of the bar counter. An outlet that we could plug in the big blower fan! So that is now set up facing the corner to help dry it.
I have to remind myself that the rest of the basement looks far worse than it really is! Once these areas are dry and we can start moving things back into their more permanent places, it will get cleaned up and organized rather quickly. The hard part is going to be hauling out all the stuff that needs to be gotten ride of, one way or another.
One of the bonuses of our move to the farm I grew up on is that we could take part in a childhood tradition; the blessing of our Easter baskets. It was many moves and many years before we were able to find a Polish church that did basket blessings, and be able to take ours in.
That didn’t stop us from doing our traditional baskets. It was one of my favorite traditions, growing up, and even when we stopped going to church for many years (for a variety of reasons), we still did our baskets and simply blessed them ourselves.
Which is what we’ll have to do this year, since none of the churches are holding any sort of services during the lockdown, other than online.
We did start some of our preparations already. For the cheese portion of our basket, we decided to do marinated goat cheese again. I made up two 250ml canning jars for our basket (I’m hoping to get one of them to my mother, along with some fresh horseradish), plus two 500ml ones, just for regular eating.
Tomorrow, I hope to make some fancy bread for the basket. Probably a Braided Egg Bread again, though I haven’t completely decided yet.
Today, I started pink pickled eggs; one of three ways we like to do eggs for our basket. The recipe for pink pickled eggs that I followed before is here. This year we, strangely, had a hard time finding anything other than shredded beets at the grocery store, so I modified the recipe a bit. I found 1 small jar of tiny pickled beets and used the juice from that to colour the liquid, plus sliced some of the beets and included them in with the eggs. With so little beet juice, I figured the addition of the beets themselves would help add colour. The other change I made was to include the fresh herbs I had left over from making the marinated goat cheese; thyme and rosemary.
When preparing eggs for the basket, we always cook way more than we need, so that we can use only the most perfect eggs for the basket.
Which is difficult, when the eggs need to be peeled first. There have been times when we’ve boiled a dozen eggs, and not a single one could be peeled without tearing apart!
So today, I tried a combination of “hacks” to get the job done.
The first is to add baking soda to the cooking water. Yes, it does make a difference.
The next is to cool the cooked eggs down as quickly as possible. Putting the eggs into an ice bath is one way to do it, but our well water gets so cold, we can get away with using tap water.
The final one is something I tried for the first time today, and it worked beautifully!
Shaking them in a jar.
Okay, so it wasn’t quite that simple. :-D
I grabbed a small canning jar, though any jar (with a lid) just a bit bigger than an egg would work. Theoretically, you can use a small glass and cover the top with your fingers, but that would get pretty messy. The first jar I tried was a 500ml (pint) size, and I found it a bit too big and ended up using a 250ml jar instead.
Leaving the eggs in their cold water soak, take one egg and put it in the jar, along with enough water to fill the jar about half full or a bit more. It can be helpful to crack the shell a bit before putting it in the jar.
Then, put on the lid and start shaking. Vigorously, but not too violently!
The shaking does a few things. The most obvious is, it cracks the shell quite thoroughly. This is where you have to find a balance on how much water is in the jar when you shake it. Too much, and the water protects the egg from cracking as much. Too little, and the egg can get bashed apart.
The shaking also separates the membrane from the white of the eggs – which would have already been spurred along by the addition of baking soda to the cooking water, and the quick cool down. And finally, it lets water work its way between the membrane and the egg white, making it much easier to remove the shell.
After a thorough shaking, dump the contents back into the water with the rest of the eggs. While holding the cracked egg under water, start peeling away the shell. If it still sticks, do the shake again. :-)
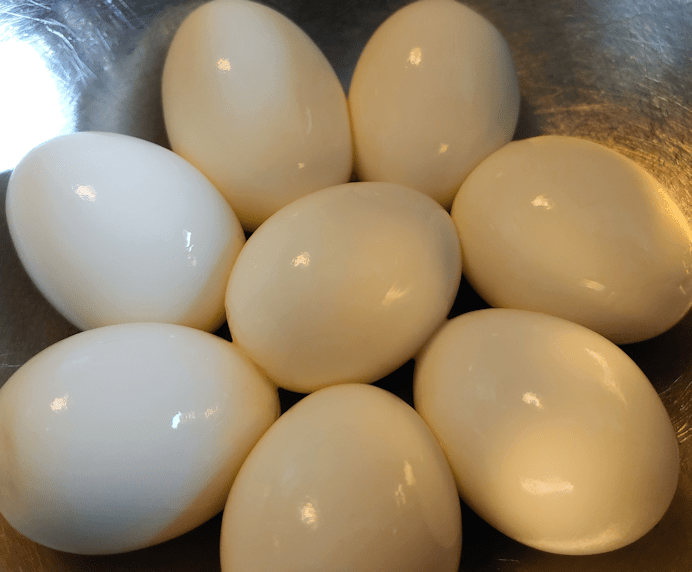
Out of the package of 18 eggs I cooked, I got 8 that were perfect enough for the basket; two for each of us.
This is what happens when an egg is shaken up too vigorously.
Here are the best eggs, ready for the fridge.
They should have at least 3 days to marinade in the pickling liquid, which is just in time for Easter.
Of the remaining eggs, there was one that broke during cooking, which left another 8 eggs suitable for pickling. I did up another container the same way, minus the beet juice. It still has beet slices with the eggs, so it will have just a hint of pink. That one will be for regular eating.
It is going to be a delicious Easter celebration this Sunday! :-)
The girls and I were able to get quite a lot of progress in the new part basement yesterday, and I was able to get into a particular area of concern today.
Here is our progress from yesterday.
The biggest progress isn’t even visible. We were able to get all the cans of paint and other… stuff… out from some cupboards. Some of them were leaking. I got another 2 wheelbarrow loads of cans of paint, stains, and mystery tines to the barn.
We found another 6 motors of varying sizes and condition to move to the barn. There’s an unopened back of grout compound that will need to be thrown away. Moisture got to it, and it’s a brick now. We found a snowmobile suit shoved into a garbage can. Now that I think about it, judging from the size, it may have belonged to my late brother. If it did, it may have been there for more than 10 years! These things are rather expensive, and it seems a shame to throw it away, but I just don’t see how it could be safe to use after being in the basement for even just a couple of years. Dust, mold mildew… still, we just hung it up on the wall for now.
Stuff that’s going to the barn are being set by the stairs for now, as well as a growing collection of garbage bags, with stuff for the junk pile or burn barrel in the shopping cart, and broken/damaged glass in a box, so we can haul it all out at once. That is always a challenge, since we need one person to lug stuff up the stairs, one person at the doors to grab stuff and stick it outside, and one person with a spray bottle on cat duty! LOL I look forward to not having to worry about keeping the cats out of this basement anymore!
Of course, we found all sorts of things in the process of cleaning, including…
…a collection of hammers, among other tools. I also moved the hand saw collection to the other basement, to join the ax collection. :-D
Today, I focused on the “bar” my late brother had started to build when he was still in his teens, but never finished. It had been mostly cleared out yesterday, but there were still a few things to take out so I could clean the area.
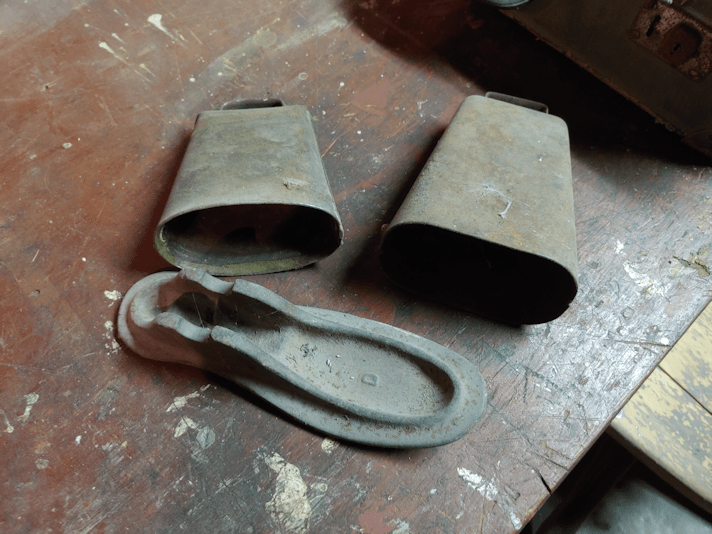
Some cow bells. Because, of course. Another shoe form.
A very old racking cane and siphon hose. We’d earlier found a box with wine making chemicals and supplies, all of which had to be thrown out.
I have no idea why there are so many wine making supplies around here. My parents didn’t use them, and the only members of my family that make their own wine, do it in their own homes.
An old, beat up suitcase full of light fixtures and electrical bits and pieces. Because where else would you put what is likely broken, unusable bits and pieces?
This next case makes me quite sad.
What the labels don’t tell you is that this is a portable screen printing kit.
On the right is where ink would be spread. The roller would be loaded with in there, then rolled over the screen on the other side, which would have the design on it.
Under the screen is the surface that would hold the paper being printed.
You can see how torn the screen it – and the tape that was put around it.
This thing was in pristine condition when we acquired it. It was one of many things that were left behind in the old house my parents got – I believe for the cost of moving it – and moved into the yard, where it is now being used for storage. I made the mistake of taking this case, and a box full of wrapped up printing blocks, to the Industrial Arts teacher in high school. He is the one that put the tape around the screen, and “cleaned” it with whatever solvents they had in the class (there was an old style block printer that we used to make “business cards” as a class assignment). As for the printing blocks, they were covered in grease that he cleaned up, then wrapped them in paper. Well, it turned out that grease was protecting the surface of those blocks, and they have since degraded horribly. I doubt they can be restored. I doubt this screen print kit can be restored fully, either. :-(
Another item I had to clear out turned out to be a surprise. I knew it was there, but…
… what I didn’t expect that 1) it hadn’t been cleaned since it was last used and 2) that it would still be full.
That’s right. When I tried to move it, I found it unexpectedly heavy. Then it started to slosh.
*shudder*
I don’t know how many years this has been sitting here.
I’m really hoping the liquid is just water or something, to serve as weight to keep is steady, because that’s just a hole on the bottom. It doesn’t lead to a basin or reservoir.
At least it is still sealed shut. There’s no smell or leakage.
We’ve found some pretty icky stuff since we moved in and started cleaning up. The worst so far had been old cat poop in a corner of what was my mother’s bedroom, and cat litter on the floor under a dresser. My dad hadn’t had a cat indoors for years before he went into the nursing home. The girls had also found a mouse skeleton behind a shelf upstairs. I think a used, dirty portable toilet filled with liquid now joins the list of most horrifying things we’ve found in the house since moving in.
*shudder*
There were many other things found as well, including glass lamp shades – one still in the box it was bought in – more paint cans and various other odd bits and pieces.
This is what the bar looked like, after I emptied it.
Yes, I was wearing a mask and gloves!
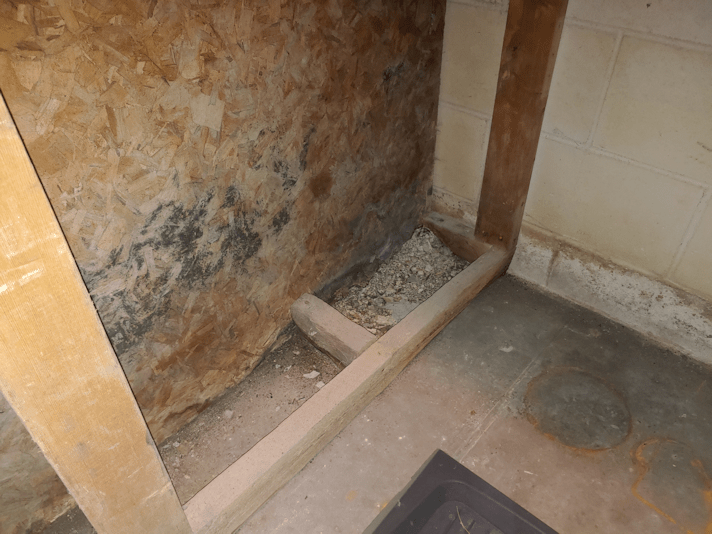
This was the main area of concern.
There is water damage. The wall the plywood is covering is the wall to the old part basement, so this would be from when it had flooded in the past, soaking through to this side. This is also one of the few areas where we found mouse feces.
Which meant extra care needed to be taken to clean up this area. Brushing and sweeping, vacuuming and finally a cleaning with bleach.
Here is how it looked when I stopped.
I now have a fan set up to dry it.
We have a moldicide spray that we’ll use on that plywood wall, too.
Once it’s all dry, we’ll use this to store things we want to protect from the cats, but don’t want to store in the old part basement. We’ll be making a “door” across the front, and I hope to pick up some wire mesh tomorrow, that we can use to cover the counter area to keep the cats out.
If all goes well, we will finish this tomorrow, set up some “nesting boxes” and a litter box, then bring in Butterscotch and Beep Beep.
I saw Butterscotch while I was doing my rounds this morning. She even allowed me to pick her up and carry her over the muddy areas. She is still pregnant, so we might be able to get this done in time, after all!
Just a little bit closer to being done!
The Re-Farmer
addendum: The girls and I talked about the portable toilet, and the two things behind the lid; one of which is an opening, the other looks like it can be squeezed down on. We thought it might actually be a flusher, so I went down to check the status of the floor, and stopped to read the label on that portable toilet. Sure enough, this is a flushing toilet top. It’s missing a part; there is supposed to be a chamber under it.
Which would actually have come in handy when our septic backed up. More comfortable than a honey pot!
If only it had been cleaned and emptied after its last use…
I love how he’s got his face smooshed into his own leg.
And no, he’s not as soft and fluffy as he looks. He’s even softer and fluffier!
I was also finally able to get to the mail today and found a gift from a dear friend.
She sent me yeast!
The top packets are from the one time I was able to find some locally. I’m not a fan of the quick rise instant yeast. It may be more convenient, since it doesn’t need proofing and can be added in with the flour, but I’m a bit more old fashioned about that. Traditional, you might even say. Teehee. I made a funny. Well… I made myself laugh, at least. I’m a goof. I know it. :-D
My dear friend actually found some traditional active dry yeast. These have the larger granules and require proofing. I can’t even really say exactly what I’m seeing or tasting different about using this yeast, compared to the instant yeast. It’s a combination of feeling slightly different while working the dough, a difference in how it rises, and subtle differences in taste and texture in the end result. I just like it better.
One of these days, I want to try the even older style wet yeast. No hurry on that. From what I’ve seen, they come in bricks the size of a pound of butter. I’d have to be planning on a whole lot of baking, to use it up quickly, before I even consider picking any up.
So now we have a bit of a buffer in case, for some reason, we can’t use our sourdough.
M, you are such a sweetheart! I miss you dearly. <3
Welcome to my “Recommended” series of posts. These will be weekly – for now – posts about resources I have found over the past while that I found so excellent, I want to share them with you, my dear readers. 🙂 Whether or not I continue to post these, and how often they are posted, will depend on feedback. Please feel free to comment below, and if you have a favorite resource of your own, do share, and I will review them for possible future posts.
I hope you find these recommendations as useful and enjoyable as I have!
This week’s recommendation is a US based permaculture vlog by Justin Rhodes and family.
Now, I grew up here on the farm, in conditions I affectionately refer to as “two sticks ahead of the stone ages”. We were subsistence farmers. We grew enough to feed ourselves and our animals, we sold beef cows at auction once a year for money, and if things got tight, my parents got odd jobs to pay the bills. We had chickens and cows for as long as I can remember, plus we, at various times, had sheep (I think my parents got rid of them before I was born), horses (they came with the farm; my dad upgraded to tractors, and the horses were eventually sold) pigs, geese, turkeys, bantam chickens, and probably other critters I don’t remember. We also had a huge garden where we grew and preserved most of our food, we butchered our own meat and, of course, we had our own eggs.
So basically, I grew up in the “back to the land” environment so many say we should all be going back to. There are many positive things to say about this life, but I find that most of the people who say such things have no clue just how difficult it is, and unreliable it can be.
Then there are people who are doing it for real, and they have no illusions about such a life. They’re also making it work in creative ways.
These days, they don’t call is subsistence farming anymore, but “homesteading.” As far as I can tell, it’s the same thing, really. There are some significant differences in some things, though, and this is one of the resources I’m learning a lot from.
I stumbled onto Justin Rhodes videos through something called a “chickshaw.” It was a variation on a concept I’d never heard of before.
The chicken tractor.
Our chicken coop was an old log cabin that was previously used as a summer kitchen. The idea of having a chicken coop you could move was quite novel to me. Why would anyone even want to?
Well, it turns out there are all sorts of advantages to moving them around! Not just with chickens, but pigs, too.
Man, that would have saved us SO much work, when I was growing up on the farm!
After watching some of his videos, I now really want chickens again. Our soil could really, really use them.
There are a lot of permaculture resources out there, but I find I really enjoy this one. Part of what I like about it is that a lot of what’s covered is that, while the channel has been going since 2012 (the earliest videos start in 2015), it’s still very much a learning experience for the entire family. He talks about their failures as well as their successes, and they don’t shy away from some of the harsh realities of raising animals for food. He really gets into the hows and whys of the things they do, and his enthusiasm is contagious. They also share their knowledge, and while some is available to members only, they also have things like a free course at their Abundant Permaculture website.
There is a LOT available on their channel, on a variety of topics.
There are quite a lot of well organized playlists to follow as well.
I think that, even for those who aren’t planning to do any homesteading, it would still be useful for those interested in maybe growing more of their own food, or having a few backyard chickens. If you are thinking of homesteading some day, I definitely recommend checking this resource out.
On top of all this, now that so many people are affected by the Wuhan virus lock downs, there has been a sudden increase in people wanting to know how to grow their own food. Fast. That call is being answered, as new videos are coming out to directly address how people who may never had had gardens before can find ways to grow food for themselves and their family quickly.
First, you may have noticed a change in the menu at the top. I now have a separate tab for sourdough. If you’re looking for information on making a sourdough starter, or trying some of the recipes we’ve been using, that’s where you’ll find quick links to all the relevant posts.
There’s a reason I’ve done this. :-D
We have long been the sort of family to keep a pantry stocked of basics and do a lot of “from scratch” cooking. Part of it was because that’s what we wanted to do, but there was many a time when finances left us with little choice.
Since we’ve been living on my husband’s long term disability income, which comes in once a month, we’ve also been in the practice of stocking up once a month, long before we found ourselves living out in the boonies.
Which means that many of the things people are being called to do, with the Wuhan virus lockdowns, are things we were already doing. Now, however, there are more people doing it, which means we’re suddenly having a harder time finding things that have never been an issue before.
Like yeast.
Now, to be honest, I did have troubles finding the type of yeast I wanted. It was far easier to find super quick acting or bread machine yeast, than the slower acting yeasts I preferred. But that’s just me being picky. :-D Right now, there just isn’t any type of yeast to be found, even as supplies of flour and sugar have been restocked in many places; at least in the cities.
I have given up Facebook for Lent, which is probably an extra blessing this year, as I’m missing out on all the social media crazy that I’m sure is going around right now. I still use their messenger, as I can use it on my phone without logging into Facebook, so I sometimes get people sending me information that way, but beyond that, I’m pretty much out of the social media loop.
With so many people suddenly stuck at home and having to learn how to cook and bake, plenty have turned to social media to discuss and share. Since I’ve mentioned to a few friends and family members about my inability to find yeast, I had someone message me with something they found.
It was instructions on how to “make your own yeast.”
Now, right off the bat, I knew things were off. That’s not how yeast works. You don’t “make” yeast. Yeast is a living thing, and wild yeast floats in the air around us all the time. Now, it could have meant instructions on how to make something like commercial yeast, but that’s not what was in the photo.
What it really was, was instructions on how to make a sourdough starter.
Which was great. As a recipe, it could have made a very nice sourdough.
The reason I say “could” instead of “would” is because how it turns out depends on the wild yeast that finds a home in the mixture and starts colonizing it. It’s entirely possible for a nasty strain to take hold, and instead of getting a nice, bubbly mixture that smells wonderful, you get something that’s black or red or otherwise nasty, and it needs to be thrown out. That’s why even some sourdough starter recipes include adding a bit of commercial yeast. This is to ensure that a strain of yeast that is known to be safe is established.
There are lots of reasons people so readily adopted commercial yeast.
Even if it was colonized by a lovely strain of yeast, sourdough starter is not something you can substitute 2:1 with commercial yeast. It doesn’t work that way. Starter is a living thing that needs to be tended and fed and stored properly if it’s not going to be used very often. It also behaves differently than commercial yeast, typically taking much longer to rise (unless your recipe calls for something like baking soda which triggers a chemical reaction… do feel free to visit the sourdough tab to learn more). That slow rise is one of the attractions of sourdough baking, as it allows all sorts of lovely flavours to develop.
Oh, and the Pinterest worthy photo of a mason jar full to the top with lovely, bubbly sourdough starter?
Don’t do it. It may not be as aesthetically pleasing, but this is what it should look like.
A starter needs lots of room to bubble and expand. Put it in a little mason jar, and you’re going to have a mess to clean up before long! Also, if you’re going to be doing any serious level of baking with sourdough, you’re going to need more than a tiny jar will give you. We keep ours in a giant plastic bowl (no metal!). Some of our recipes call for 4 cups of starter, so we keep a fairly large amount of starter bubbling away.
Having yeast is really handy. That’s why, even though we have a sourdough starter we’ve managed to keep alive for a year and a half now, I still like to have commercial yeast.
I recently spoke to my mother about not being able to find yeast. She told me how, in her younger years, no one used yeast. She’s shared memories of her childhood before, so I already knew that part. When bread baking, her mother would set aside a piece of the dough for the next baking day. I knew that part, too, as it was a common technique at the time, and my dad has also shared memories of his family doing the same. Her mother would bury the set aside piece of dough into the flour.
Wait… I didn’t know that part!
In fact, this was a method I’d never heard of before. My grandmother would bury the piece of dough in the flour. A dry crust would form on the outside, and it would need to be soaked before it could be used in the next batch of bread.
I think I might have to try that!
So what’s my point about all this?
Well, for those who are new to baking and wondering what to do about not having commercial yeast, you’ll be fine. You can make a sourdough starter. Just know that this is something that takes time to get established. Or you can make flatbread, with no leavening at all. There are options. The trick will be to sift through the misinformation that’s out there. It’s not as hard as some make it out to be, but it’s not as “easy” as others make it out to be, either.
I supposed it comes down to, if it sounds too good to be true, it probably isn’t!