Okay, here we go!
Yesterday, we were finally able to pick up some bottles and bottle our first attempt at making mead.
Here are the previous posts of the process. Each link will open in a new tab.
The mead was left in its second fermentation for longer than 4 weeks, but it seemed to have stopped fermenting much earlier. It’s really hard to see the airlock where we kept it – we basically had to shine a light at it – but there didn’t seem to be any bubbles in the water.
This being our first attempt, we didn’t want to mess with it and just let it be.
Before going in to town to pick up 3 cases of bottles, however, we did take the carboy out to check it.
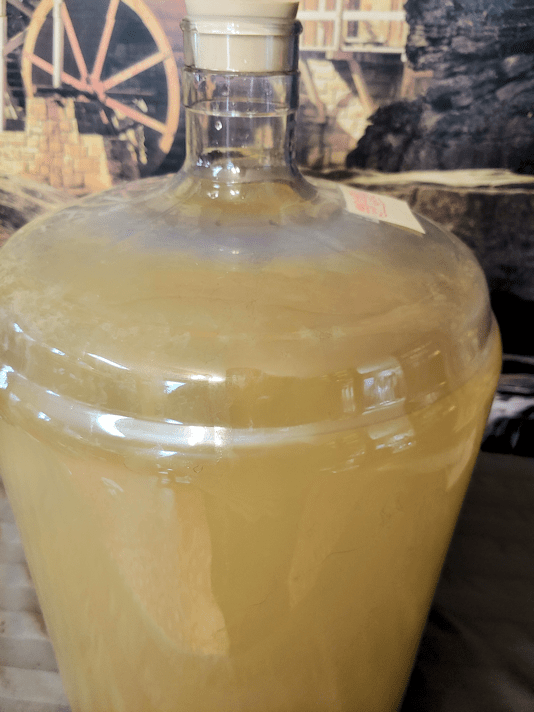
One of the other things we wondered about was what appeared to be a coating on the top of the carboy. Looking closely, I’m guessing it was yeast sediment, like what settled on the bottom. It’s possible that at some point, it bubbled up enough to touch the top, leaving the residue behind. Since we didn’t actually see this, though, it’s a complete guess on my part.
The other thing to watch out for is if a film had developed at the top of the liquid, which would be a sign that it might have gone bad. There was no film.
So we used the wine thief that came with our fermentation kit and got a sample.
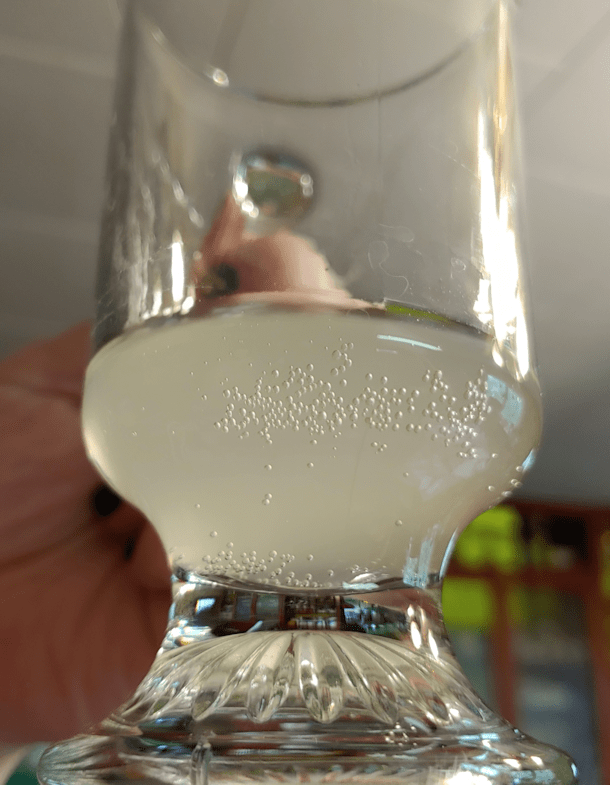
We may not have seen bubbles in the air lock, but there are definitely bubbles in the mead. It was ever so lightly self-carbonated. We tasted it, and I felt it had a fruity, slightly beer-like flavour. Definitely tasty.
Which meant it was worth going into town and buying the bottles and corks.
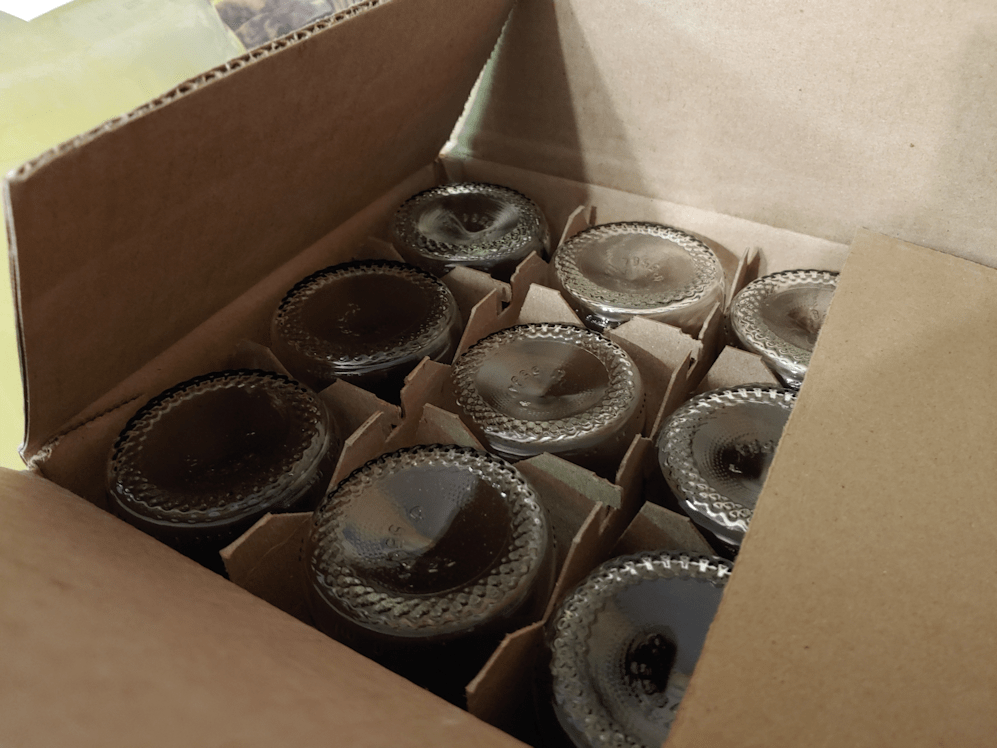
For 1 carboy, the lady at the shop said 30 of these 750ml bottles would be enough, which would have been 2 1/2 cases. We got 3 full cases, because extra is always nice. The corks came in a pack of 30, so there were no extras there.
The next step was to start cleaning and sanitizing.
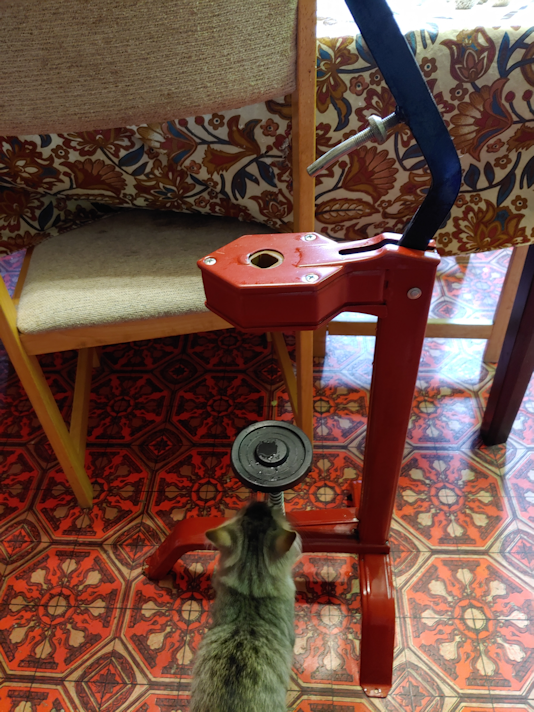
We even took the corker I found in the basement outside, to hose it down and scrub it there. Later, I took an old toothbrush and soap to scrub the areas that the mouth of the bottles would be touching, and cleaned inside where the cork would go.
How the corker works is, a bottle is placed on the base, where Dave is sniffing. It’s on a spring, so it can be pushed down to fit the bottle under the corker. The underside has a curved metal plate as a guide, and a slightly indented area the bottle top fits in. The cork is then dropped into the hole at the top. As the lever is brought down, the cork is compressed and the bottle is locked in place, then the cork is pushed down into the bottle. The depth of the cork can be adjusted via a screw on the metal piece that pushes the cork down.
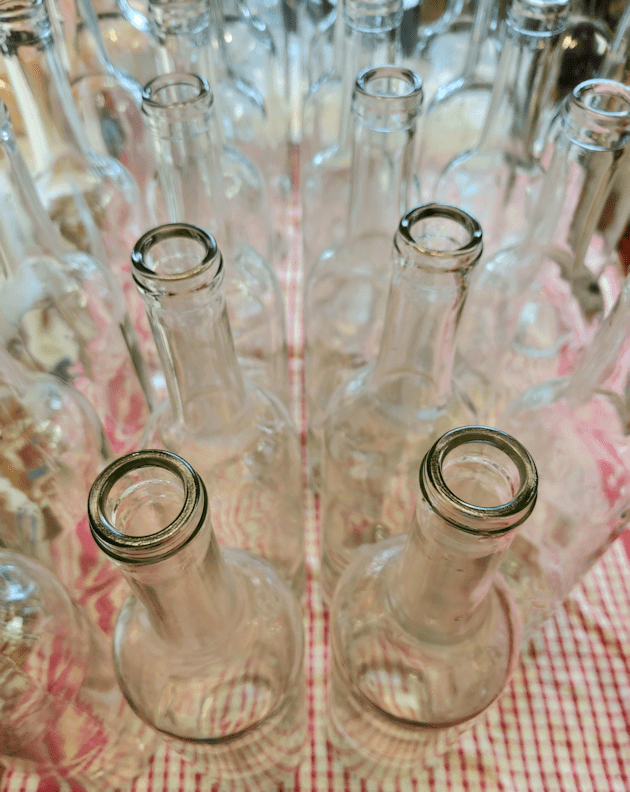
The girls then sanitized and rinsed 30 bottles. The same sanitizer that is used on the fermentation bucket and carboy is used here, and the sanitation liquid can be poured from bottle to bottle, after a vigorous shaking. The bottles can then be rinsed in cold water.
With our well water, that meant my poor daughter’s hands were freezing by the time all 30 bottles were done!!
The next step was to get the siphon going, fill the bottles and cork them.
This took all three of us and was rather messy, so I didn’t get any pictures.
The main problem is switching the siphon from bottle to bottle. One daughter had to hold the racking cane in the carboy, so make sure it didn’t touch the bottom, where the sediment is. My other daughter was controlling the siphon at the bottles, but she couldn’t just lift it from one to the other; once the liquid starts to flow, it flows fast, and mead would end up pouring all over before the end could be put into the next bottle. The best she could do was kink the hose to stop the flow. These hoses are not easy to kink! Of course, there is still the liquid in the end of the hose that drains, which meant she had to try and time folding the kink at just the right height of liquid in the bottle, so the remaining fluid would finish filling the bottle, but not over fill it.
Like I said: it got messy!
I was going to pass fresh bottles and cork filled ones while they did that, but the bottles were filling so fast, I just put them aside and passed empties over. When the space started to get full of filled bottles, my daughter would kink the hose and stop filling bottles long enough for me to cork what was ready and make more space.

I finally got a picture after the carboy was empty. You can see the sediment at the bottom, after the last dregs were poured off.

We were able to fill two cases of corked bottles.

After 2 cases, we had almost 4 more bottles, using 28 bottles instead of 30.
The bottles should have been filled to just into the neck, so the fullest one is the closest to where it should be. There was no way to be consistent with the racking system we have, though.
We also broke out the hydrometer to test the alcohol content.

Which turned out to be about 1%.
Of course, the girls and I had to have glasses of it to test it out, though with an alcohol content this low, even my husband, with all his medications, could probably have had some!
So how did it taste?
Sweet and very fruity. Which is interesting, since there is no fruit in it.
The general consensus was, it’s quite tasty. I liked the slight effervescence, too.
For our very first attempt at making mead, the end result is that it was both a success and a failure.
It’s a success, in that we have a very tasty beverage on our hands.
It’s a failure, in that mead is supposed to be an alcoholic drink, with an alcohol content ranging anywhere from 3.5% to 22%, and this has almost no alcohol content. Alcohol acts as a preservative, so these will have to be kept in the root cellar or the refrigerator.
Of course, we then did some research on it.
The first thing is to identify why the fermentation stopped so quickly. This is apparently not unusual with mead, because honey can be quite varied and has a low pH. Honey has both simple and complex sugars. During fermentation, the yeasts will first eat up the simple sugars. Once those are used up, it will slowly start to work on the complex sugars.
This might explain why there was residue at the top of the carboy interior. While the yeast was eating those simple sugars, it would have been bubbling away and could have reached the top.
As for solutions, one thing we could have done was to have just left it alone to continue slowly fermenting. It might have taken months, but the little yeasty-beasties would eventually have converted the remaining sugars into alcohol. We would be taking samples to test with the hydrometer regularly, so assess when it was finally done.
There are also a couple of things we could have added to the carboy to get the fermentation process going again. One is to add some magnesium sulfate. The other is to add a yeast nutrient.
There are other possible reasons the fermentation could have stopped. These range from the yeast we used being too old, to something in our very hard, iron heavy well water, or even temperatures that are too hot or too cold.
This is definitely a learning experience!
As for what we can do differently for next time:
We can make a point of picking up a wine yeast, instead of the bread yeast we used this time. It would be fresher, and a different type of yeast, so that might solve the fermentation problem all on its own.
If the fermentation still seems to have stopped, we can find some magnesium sulfate or yeast nutrient to add.
I definitely want to upgrade our siphon. The racking cane shouldn’t need to be replaced, but if we can find a stop valve kit, or a siphon system with one built in, that would make a huge difference. Less mess, and less wasted mead!
The next time we’re at the place we bought our bottles from, I’ll have to ask what they have available.
The next batch we’ll be making, we’re going to try adding some chokecherries to the first fermentation. Those might even add more simple sugars to the must for the yeast to munch on, improving the fermentation process.
I’m rather looking forward to our next attempt! :-)
The Re-Farmer


Very interesting read. :)
LikeLiked by 1 person
Thanks!
LikeLike
Pingback: Fail, times three! | The Re-Farmer
Pingback: Mead Baby, redux | The Re-Farmer
Pingback: Another taste test, for comparison | The Re-Farmer