For the next while, as I remove part of the dough from one batch to use in the next batch, I will be taking out slightly larger pieces of dough, to make larger batches of bread with it, next time.
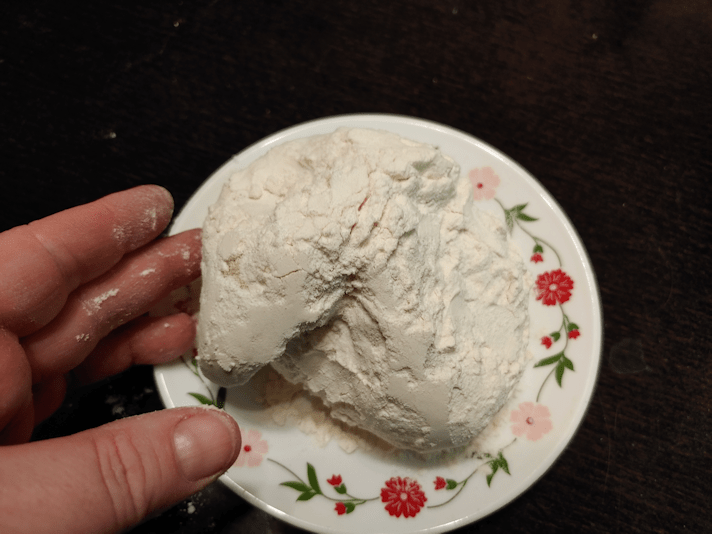
Our flour canister is tall and narrow, so I’ve made a point of flattening the dough baby a bit before burying it in the flour. When I opened the canister last night, I found the dough baby had grown enough to emerge from the flour like a mushroom!
I think today’s dough baby will the the last one I can fit into the canister! I’ll have to start burying them directly in the flour bag. They get so big! Which is encouraging, since that shows how lively the yeast is, so it’s a good problem to have. :-D
The dough baby was light, with a slightly crunchy dry shell, and a thick bubbly interior. The larger size made it a bit harder to tear apart to put in the little crock to soak overnight, so the pieces were a bit on the large size. That did not seem to make a difference to how it looked in the morning.
I soaked it in 2 cups of warm water overnight then, because I wanted to increase the amount of dough I was making, I cheated a bit and let maybe a tablespoon of commercial yeast proof in another cup of warm water. Right now, I’m getting enough to make the equivalent of 4 small loaves, and I eventually want to be making the equivalent of 4 large loaves. I don’t plan to get to my Babcia’s level of a dozen loaves at a time! :-D Making enough for 6 or 8 loaves, maybe, but not a dozen!
Once again, I used a mix of all purpose and Durum wheat flour, and let it rise only once before shaping. When I am no longer using commercial yeast, I’ll add an extra rising again. I also split it to do one half plain, and one half fancy. For the first half, I made it into 4 knotted buns and used a cast iron pan to bake them in again, which is working out very well.
The second half got divided again, to make a pair of rolled loaves.
Each piece was rolled out, then small pieces of leftover ham were scattered evenly, followed by generous amounts of shredded sharp cheddar, mozzarella and Monterey Jack cheese.
Before rolling them up, I did dampen the edges with water, but I did not try to seal the dough.
Once rolled up, the ends were tucked under, and they were left to rise.
The knotted buns were baked first, and turned out quite adorable.
The ham and cheese rolls, as expected, did leak out the bottom seam!
That’s okay. It just got crispy on the bottom of the pan, for some extra deliciousness. :-)
I would not recommend doing this without using parchment paper. :-D
A huge bubble formed under the top, as the cheese melted and the layers collapsed below. That did make it a bit hard to cut through! :-D
The ends that were tucked under were a lot more substantial. I the slices where the large bubble formed, the top crust was almost like a fancy chip! :-D
We had them for supper with tomato soup. It was a very nice combination! :-D The crispy cheese bits made for a lovely little treat, too.
For those of you who have been following this blog for a while, you may be wondering what happened with our cider vinegar.
Yeah. The stuff we were supposed to taste test 2 months ago, to see if it was done!
It’s been sitting in the old kitchen all this time.
Given how cold it gets in there, I wasn’t too worried about it.
For those who are new to this blog (welcome! Happy to see you!), you can check these posts out. All the links will open in a new tab, so you won’t lose your place here. :-)
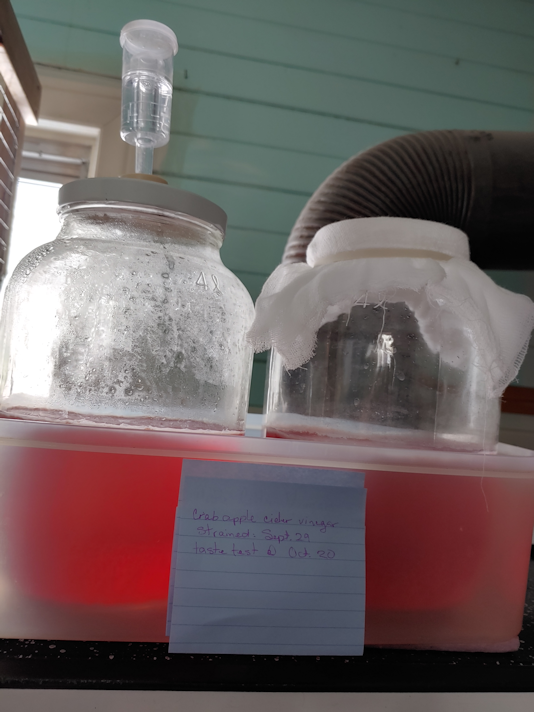
One of the issues I had was, what to store the vinegar in? The last time I made it, I could just use a quart jar. What did I have that was big enough, easy to pour from, and that I could close? I discovered that one of our 1 gallon (4L) glass jug that we have for making mead has a top that fits the same caps from the 3L jugs currently holding hard apple cider vinegar (which is also ready for bottling), so I was able to use that.
Once I had the bread dough rising, I brought the ACV in out of the cold!
Both of them had visible mothers, floating on top. There was very little visual difference between the airlock and the cheesecloth jars. The airlock one had some condensation near the top of the jar, and that was about it.
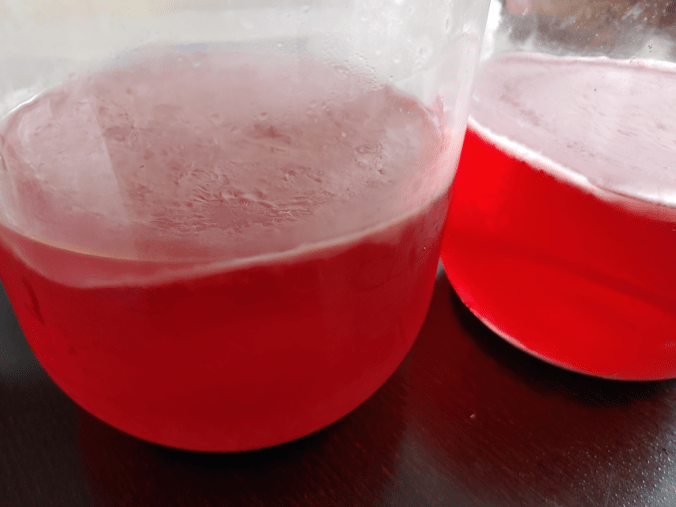
I drew some out of each jar, using a turkey baster, to taste test.
Both of them had a mild, vinegar smell to them. Both of them were also had a VERY strong vinegar taste!
The girls taste tested them, too, and we all agreed that there was a slight difference in taste between them. The cheesecloth one (the girls did not know which glass was from which jar when they tasted them) has a slightly milder, more pleasant taste.
Meanwhile, I did a bit of research on what to do with the mother. We won’t be making this again until next fall. Can the mothers be kept for that long?
It turns out they can.
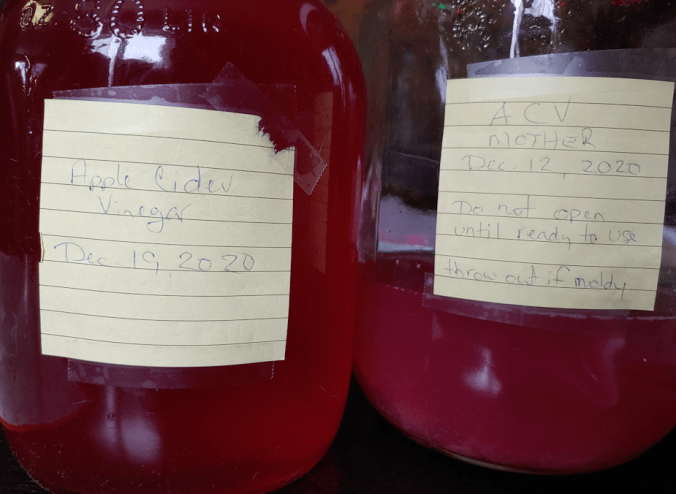
I was able to remove the mother from the cheesecloth jar before pouring, but didn’t have as much lock with the airlock jar. :-D So I put a small strainer over my funnel when I poured the vinegar into the cleaned and scalded jug. There wasn’t enough room for both jars in the jug, though. Yes, I mixed them together. I’d have kept them separate, if I’d had another small jug, but I did not.
Which was okay. I read that the mother has to be immersed in vinegar, and kept air tight, for storage. So the remaining vinegar was left in the jar, along with both mothers.
The gallon jug of ACV will go into the fridge for later use.
The jar with the mothers was sealed, and is now back in the old kitchen for storage.
I am quite happy with how this turned out. Having left it for so long, it’s a lot stronger than if we’d bottled it back in October, like we originally intended, but that’s okay. Using our own crab apples, from the one tree with the best, sweetest apples, not only resulted in a gorgeous colour, but it’s own unique flavour.
We will definitely be doing this again! Next time, though, we will just use cheesecloth and skip the airlock.
Now we just have to do a hydrometer test on the hard apple cider and see how it is. It would be awesome to have some of our own hard crab apple cider to enjoy with Christmas dinner! :-) Hopefully, I can get that done in the next day or two.
That -12C (10F) isn’t too bad. It’s the -21C (-5F) wind chill!
Actually, I’m pretty sure that in our yard, the wind chill is more severe than that!
The amazing thing is that we are supposed to reach 0C (32F) by this evening.
The winds are driving into our yard from the south/southeast. One thing we have noticed since moving here is that it’s those south winds that are the worst! When it comes time to plant more shelter belt trees, that is where we will need to focus on.
With the cat house and kibble house, the winds are driving right into the active areas. There isn’t much we can do about it. Even shifting the kibble house to more of a 90 degree angle with the cat house, wouldn’t do much with these winds. The good thing is, when my brother built the shelter for his dogs, he added on that “porch”, and the entry has two layers of carpet strips. Without those strips, the wind would be blowing straight into the opening, even with the kibble house sheltering it more. Any wind that does get in is going into the “porch” area, and not affecting the main part of the shelter very much, so the kitties are still cozy inside.
The kibble house is working out very well, though. The inside is sheltered from the wind almost completely, so the cats can eat in peace. Even the gap under the kibble house is quite sheltered. The sheet of insulation I put under there (the photo is from when that was done; it was too cold to take photos this morning!) actually blocks spaces where the wind would be getting in from the south, since it fits under the support pieces.
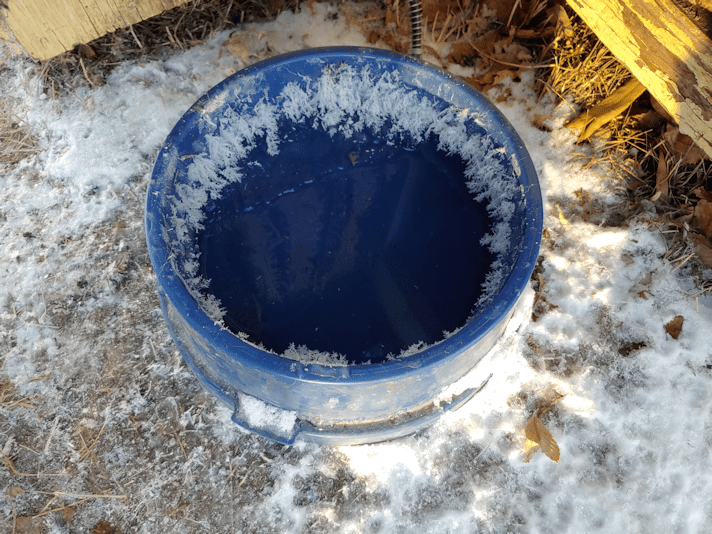
The water bowls are not sheltered, though. The heated bowl near the entrance – which had ice forming across the top, again! – has some shelter, but the others along the side of the cat house are getting the full brunt of the wind.
I think, next year, we should build another small shelter for the non-heated water bowls. Depending on how it’s positioned, it can act as a wind break, while still allowing sunlight to reach the one window of the cat house they love to sit in so much! :-)
Amazingly, I still had cats following me around while I was switching out the memory cards on the trail cams. Poor Potato Beetle was shivering when I picked him up and carried him back to the house. The silly boy had been up on the roof, earlier. No shelter up there!
I am so glad we don’t need to go anywhere today.
Doing bread baking and laundry sounds really good right now! :-D
Hmmm. Our internet is cutting in and out like crazy today, so I’m hoping I’ll be able to post this right away!
Today, our first batch of seeds from Veseys came in. Yay! There are more that will be shipped later, but even so, that little box was just jam packed! You can read about all that we ordered, and why we chose what we did, here (link will open in new tab).
This is what we got in today.
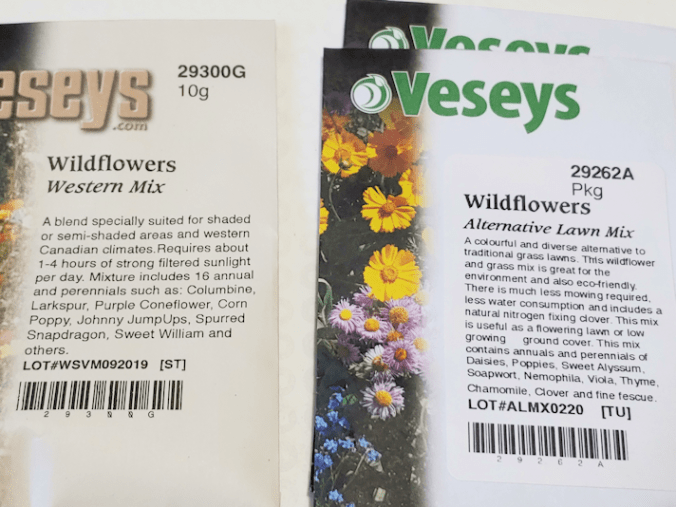
First, the wildflower mixes. These are both for planting in the fall, so we will have the summer to prepare the locations we intend to plant them in. The Western mix is intended for outside the yard, between the fence and the road, to attract pollinators. We have not yet decided exactly where the Alertnative Lawn mix will go, other than well away from the house. My husband is allergic to bee stings, so anything like these needs to be planted away from any doors, the path towards the garage, and the firepit.
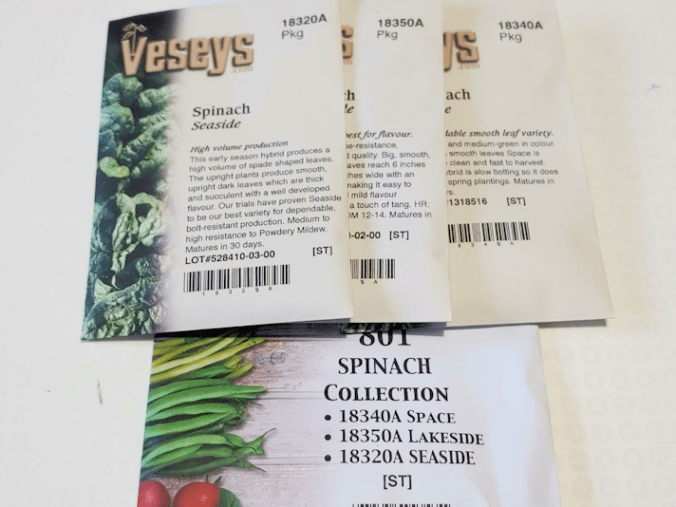
Spinach is among the items we will have to ensure are protected from deer. In talking about it, the girls and I are leaning towards building simple box frames with wire mesh that will fit over the beds.
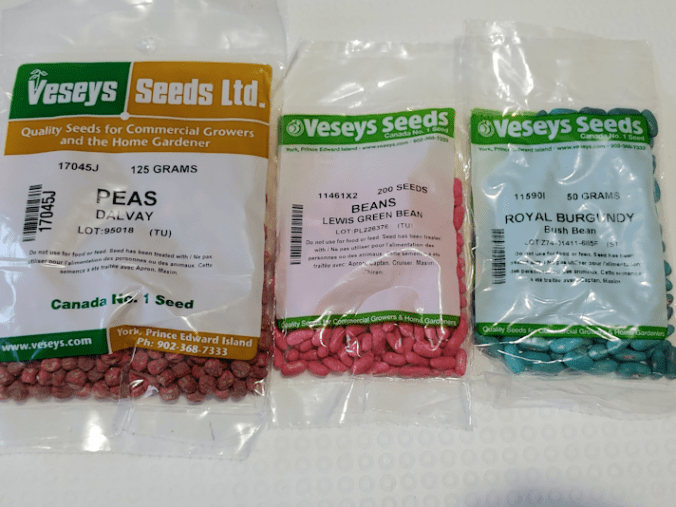
Here are 2 of the 3 varieties of beans we orders; a yellow variety will be shipped later, plus the peas. The collection I’d intended to order for peas suddenly went out of stock, so I ordered these as an alternative, and I’m still seriously considering ordering another variety or two. I like peas more than I like beans! :-D
The girls and I are looking into various trellis designs for these. Yes, I know, bush beans aren’t supposed to need them, but we are looking to grow as many things vertically as we can.
We already have 2 varieties of corn from Baker Creek Rare Seeds, so we might not actually plant these at all this year. It all depends on how well we are able to prepare growing spaces. The Rare Seeds varieties are priority, and we have to keep in mind that we don’t want them to cross pollinate.
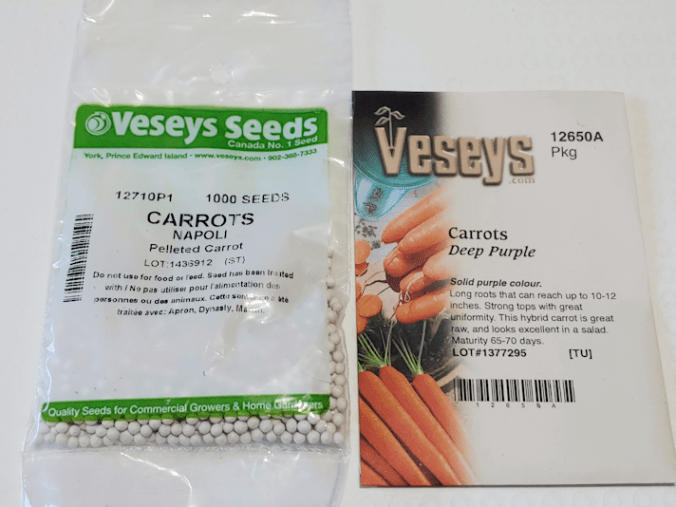
The pelleted seeds will be much easier to plant!
We now have 4 varieties of carrots, and I will happily plant them all. Carrots are a favorite vegetable in our household. The challenge will be creating the soft, deep soil they need. We have space to create one more bed in the soft soil where the wood pile used to be, and that’s it. Our topsoil is shallow, and we have a lot of rocks. My mother always successfully grew carrots in the old garden bed area, but I don’t think the soil has been amended since my parents sold off the cows and retired from farming. Raised beds would be the solution. At this point, the girls and I are thinking we’re going to have to order in a dump truck load of garden soil. We have not yet decided where we will build permanent raised beds, so any beds we do build this year will likely be temporary.
At least we don’t have to worry about the deer going after the carrots.
Three of the 4 varieties of onions are in; the 4th variety are sets that will be shipped at planting time in the spring. I’m hoping to plant these in the old kitchen garden, near the house.
The beets are intended for the additional bed we’ll be preparing next to where the garlic is currently planted, where the old wood pile used to be. My daughters had wanted to get another variety as well, but they were sold out. These might be enough. Like the spinach, we are thinking of protecting these from the deer with a wire mesh box.
We got extra cucamelons, just in case the tubers I dug up and currently have stored in the old kitchen, where it’s not quite as cold as outside, don’t make it. We intend to plant these along the chain link fence bordering the south yard. The melons will be trellised, elsewhere. Possibly near…
…the squashes we will be trellising. :-) I am hoping to build squash arches for those.
The summer squash will, hopefully, be trained up stakes. We could get away with letting them spread on the ground, like we did last year, but it’s supposed to be healthier for the plants to train them up, while pruning off the lower leaves.
Speaking of summer squash…
Last summer we ordered a summer squash mix, with extra sunburst squash. We enjoyed them enough to order the same thing again for next year. I was a bit confused as I unpacked them from the box, however…
Somehow, I accidentally ordered three collections!
Totally my goof on that one.
I’ve offered the extras to my siblings. I don’t even know if they like squash. If they don’t want them, we’ll just keep them for next year! :-)
In the spring, along with the onion sets, cherry tomato mix, yellow beans and mulberry tree, we will be getting 4 varieties of potatoes. While using the Ruth Stout, no-till, heavy mulch method did work last summer, we are thinking of using grow bags or something similar, next year. Those would give us more flexibility and, hopefully, higher yields.
The more I think about the condition of our soil, and the spaces we will be working with, the more I think getting a truckload of garden soil is going to be the best thing we can do at this point. I would much rather build up the soil over time, but I simply did not expect the soil condition to have deteriorated as much as it did, over the years. Plus, given how much my planned timeline for cleaning up the yards has been pushed back, anything that we can to do make up for that will be good.
We just have to find a local source and see how much it costs. I think it’ll be worth it, in the long term.
We tried to be creative with the Christmas tree, with so many kittens in the house. The older cats are not as much of a concern, but the little ones are another story!
Well, after several days of cat caused disasters, today I came into the dining room to find they’d trashed the tree. For the past few morning, I’d come out and find the tree skirt askew, ornaments on the floor, and branches bent. Clearly, they knew enough to wait until we were in bed to wreck havoc. However, this time, they’d gone in while we were all busy and done even more damage than what I’d already fixed in the morning. The tree was tied to the wall, so they couldn’t knock it over, but they clearly were climbing it as high as the ceiling, and trying to get into the shelves beside it, as even things from there were on floor. Nothing fragile, thankfully, but still…
After finding the last mess, I gave up.
I took the tree down completely – which only took a few minutes, considering we’d already decorated it sparsely.
My older daughter, who lent us her little tree to begin with, saved the day.
It turns out this tree can be flattened, without damaging it. She found a way to hang it flat against the door, then redecorated it.
She even used wrapping paper to hide the base, where the legs would normally be attached.
I think it looks even better now!
Later, I actually caught some cats under it, looking up forlornly.
After yesterday morning’s cat disaster, the girls were kind enough to drop their own projects and take over cleaning up.
While I was doing my rounds outside, the furry little monsters created another mess. One of the jade plant posts I’d managed to shield from their digging got knocked to the floor. *sigh* I was able to repot the plant. Not sure if it will survive. Once again, the girls took over the clean up so I could take care of other things. At least I wasn’t bread baking today!
The one down side of using my grandmother’s method to bake bread is, once I take the dough ball out of the flour and start it soaking overnight, it must be used the next day. There’s no way to postpone it if other things happen!
By the time we were doing cleaning up and putting things away, I started the bread baking much later than planned.
I did, however, cheat a bit. I wanted to mix up more dough, so I could take off more to set aside, for larger batches in the future. As it was, the overnight soak was not looking as active as I would have liked, so I did end up adding some yeast and a touch of sugar, and let that bubble up some more.
Then, since I have it, I used half all purpose flour, half durum wheat flour.
This is after it had about an hour to rise.
I notice a definite difference in the dough, when using the durum wheat flour. The dough feels smoother and more elastic. It was very noticeable when making the pasta, but even at half-and-half, for the bread, it is much nicer to knead.
My grandmother would have used whatever flour they had, so mixing it up like this is probably not all that different from how she did it.
After removing a portion to set aside for the next batch, I split the dough in half. The first half was left plain, though I did have some fun with it, anyhow.
I split the dough into 4 pieces (because there’s 4 of us), and made knots.
The resulting bread was a bit denser and chewier with the durum wheat flour in it. We all like our bread on the toothsome side, so we quite enjoyed it.
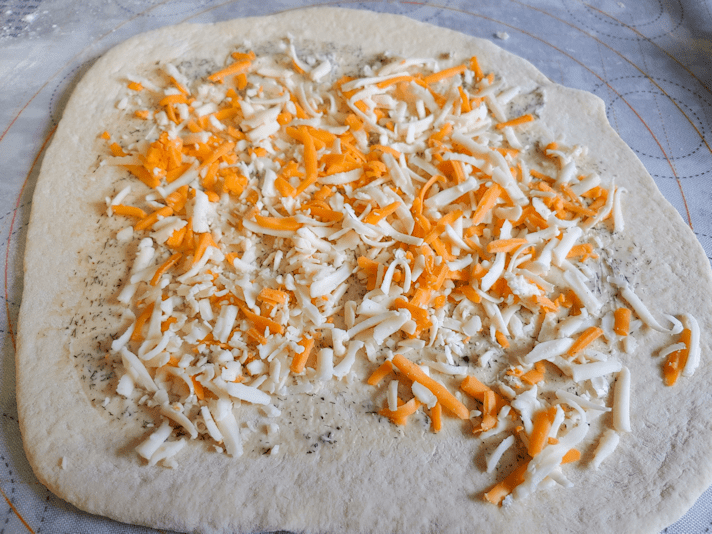
For the other half, I was going to do a cheese roll, but my daughter suggested rolling and folding it. With the extra gluten in the durum wheat flour, it could actually handle that, so I have it a try! This time, I made two loaves.
After rolling the dough out flat and as thin as I could, I used some of the herb butter my husband had made. I don’t know what all he included in there, other than a LOT of dill (the container slipped…), some caraway seeds, and a touch of lemon juice.
Then I added some shredded cheese. It’s a mix of sharp cheddar, mozzarella and Havarti.
Then I folded it in on itself.
It then got rolled out slightly and folded again, before final shaping. I had to use a touch of water to get the edges to stick closed.
Once in the pan, I flattened them out a bit more with my hands, before leaving them to rise.
Of course, some of the cheese did make its way through the dough as it baked, but my goodness, it looked and smelled wonderful!
It was quite flaky on the outside. On the inside, the dough absorbed much of the butter, leaving cheesy little pockets all over!
It was quite enjoyable! I don’t know that I would go so far as to do the folding method again (though it would be awesome to do that again with some sliced green onions, to make a version of green onion cakes!), but I definitely do it as a cheese roll in the future.
Until then, I am not going to have some with my lunch!
When I picked up my mother to take her to the doctor yesterday, she came out with a big bucket riding on her walker, full of Christmas decorations. She didn’t want them anymore, and there’s lots of room on the farm, so…
*sigh*
We aren’t using even a quarter of our own decorations this year!
So last night, I went through the bucket – which turned out to be 2 of them, and they were fermentation buckets from wine making kits. I’m finding them all over the place! Now I have two more… *sigh*
What I found was one full sized sparkly garland, some smaller lengths, and bits and pieces that are so small or so messed up, they’re not even worth keeping for crafting. I filled a basket of baubles, most of which were newer, but a few of which I am sure I remember from my childhood. There were some random pine cones, some still glued together. Then there was a … garland “cake” with small red ornaments as the “cherries”. I have no other way to describe it! I believe it’s supposed to be a centerpiece? I don’t know.
The cats, of course, were extremely curious. As these were on the dining table until I could figure out what to do with them, I covered the whole thing with a shiny gold vinyl tablecloth that was in the one bin of Christmas decorations we brought up. The girls still ended up having to tuck it under and weight it down, because of course, as soon as the room was empty, the started jumping on it.
That was not part of the disaster this morning.
With my husband’s pain levels, he has very different hours than we do. It’s not unusual for him to be forced out of bed in the wee hours. He tries to help as much as he can, though, so he took over the job of topping up the cat kibble and refreshing their water in the basement – going up and down the stairs is painful, but it’s about the most exercise he can handle right now, so he does it. Then he fills a jug of water for the outside cats and leaves it for me, so I’m not having to run water while one of the girls is in the shower or something. He leaves that on the counter between the kitchen and dining room.
On the kitchen side of that counter, there’s the sink in the middle with counters and cupboards on either side. On the dining room side is a floating counter that’s about a foot higher than the sink. Very handy to reach from both sides. It’s also the perfect length and height that we fit a pair of cube shelved under it; a 9 cube shelf for dishes, bowls and platters, and a 6 cube shelf with cube storage boxes holding our hats and scarves, mitts and ear warmers, etc. Yes, all 6 of them are full of winter gear.
There’s enough space between the tops of these shelves and the underside of the counter to hold my many tiny bowls, jars and pinch pots, among other things.
The counter top has our advent wreath on it, as well as things like a fruit bowl, paper towel roll and other odds and ends. You know how it is. All flat surfaces immediately get filled! I’ve manage to keep it pretty open, lately.
Unfortunately, the cats do jump up on there, when we are not around, so I have been finding the candles askew on the advent wreath, and things knocked over.
This morning, I was awakened by some very unhappy exclamations from my husband – and more than a little blue language.
Coming out, I discovered him desperately trying to find something to soak up what turned out to be almost a gallon of water, while also chasing away cats.
One of them had knocked over the jug of water he’d prepped for me to give to the outside cats. Nearly a gallon of water.
My husband unrolled the remains the paper towel roll (which was already partially wet from the water hitting it on the way by) while I dashed (okay, hobbled…) for a mop.
The next while was spent mopping up and moving things. My husband’s back soon gave out and he had to leave.
The cube shelves are open in the front, of course, and water not only got into the shelf – and the stuff in it – but under the shelf before flowing around the counter and puddling all along the front of the sink. We’ve got a couple of those interlocking foam mats there, partly to make it easier on the back while doing dishes, partly to cover the damaged worn out floor, so that had to be removed, too.
Once the bulk of the water was cleaned up, I had to empty the 9 cub shelf and pull it out, to get there rest of the water out from under it. The cube shelf itself has water damage, but as I emptied it, I noticed more damage on the bottom shelves. The stuff we use the most off is kept at the top, the least often at the bottom, so we don’t have a lot of cause to see this. It seems that things the cats play with have been getting in there, and they’ve been digging to try and reach them. Enough that one cube actually has a hole scratched into it! How long that’s been there, I have no idea!
So right now, I’ve got the shelf out and drying. Then I had to do the outside rounds and feeding of critters. I’ve since cut some pieces of wood that will be placed under both shelves to lift them a couple of inches off the ground, so that if there is another spill, it won’t damage the shelves even more. Every single dish, bowl and platter will need to be washed before we can put them back.
Only then can I deal with the dining table and do the old dough bread baking I had planned for today.
*sigh*
At least it was just water, and nothing was broken.
I am now going to go investigate the unfortunate noises I’m hearing…
… the heated water bowl is starting to freeze over.
A few of the outside cats were out, but I didn’t get that morning rush that I usually do, that’s for sure! They were far more interested in the fresh, relatively warm, water than the kibble. No kitties followed me while I switched out the memory cards on the trail cams!
We have been spoiled by a very mild winter, so far. (Yes, I know: winter doesn’t officially start for another week.) We had been hovering around freezing temperatures. Some days, the weather didn’t know if it was raining, snowing or fogging.
Last night, the temperatures dropped significantly. When doing my rounds this morning, we were at -27C/-16F with a humidex of -32C/-25F. That’s about a 15 – 20 degree C drop within half a day!
We’re supposed to warm up to -12C/10F (man, Fahrenheit is weird….) by this afternoon, but I made sure to plug in my mother’s car this morning. We’re supposed to have this one cold day, and then it’ll warm back up to above -10C/14F range again so I didn’t bother plugging in our van as well.
Of course, the one cold day we get is the day I’m taking my mother in for a medical appointment, and to do some much needed grocery shopping. Much needed for her, I mean. She keeps telling me the social workers can pick things up for her, and get paid while doing it, but she doesn’t seem to be taking advantage of this at all. She also has to pick up her prescriptions and hit the post office as well (she told me just last night, that the mail box outside the post office got stolen! I think she meant the incoming package drop off box, not the outgoing mail box). It’s going to be a long day for her. I’ll have to make sure to bring along our folding wagon again, to make bringing her stuff in easier, since her building is still locked down. She even asked me to be sure to meet her at the side door, instead of the main doors by the lobby, because of all the nosy people that might give her grief.
She had talked about moving to another building in town. I do hope she can get into there (or at least get on the waiting list). She really needs to get out of this place. It’s actually ideal for her in many ways, but the people are just toxic!
Oh, look! It’s warmed up to -24C/-11F and the humidex is -28C/-18F. At least that’s what the weather on my desktop says. My phone app says it’s warmed up to -23C/-9F, humidex -21C/-5F.
Either way, it’s trending up. By the time I’m up and about with my mother, it should be a few degrees warmer. That will make things easier on her.
Look what I found on the dining table this morning…
This was after I was awakened by a storage cube falling off the top of the wall shelf above my bed, landing right next to my head. :-( I’m not too worried about the cubes; they’re just filled with small blankets. I am more concerned about my parents’ antique lamp that I’ve got stored up there, specifically to keep it safe from the cats!
Today, we got to use our pasta machine for the first time, while making pasta for the first time. :-)
Granted, I have made pasta-like noodles before, before, but nothing quite like this.
Of course, I did some research first. I wanted something really basic for a recipe. This turned out to be just flour and eggs. Most places I found went with a ratio of 2 eggs per 1 cup of flour. I did find one that used a ratio of 2 eggs per 3/4 cup of flour. As for quantities, it was recommended 1 egg per person.
Based on that, we could have gone with 4 eggs and 2 cups of flour, but I went ahead and did 6 eggs with 3 cups of flour.
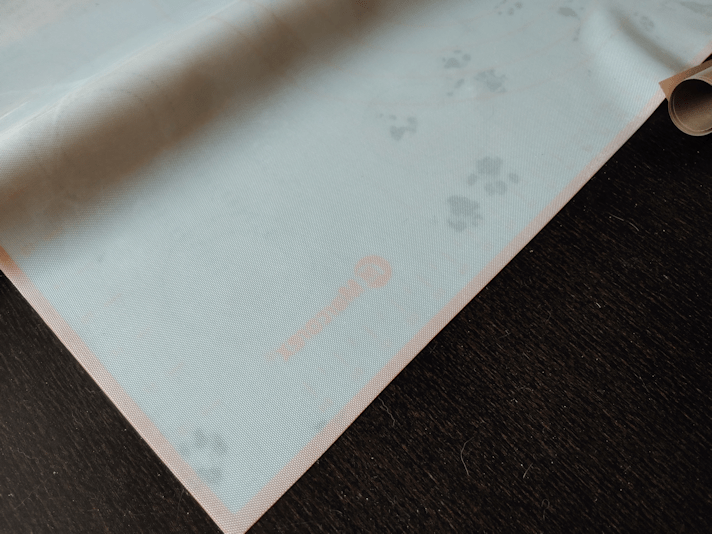
I worked the dough in a bowl until the dough was well formed, then turned it onto our kneading mat.
This turned out to be waaaayyy too dry! I would expect relative humidity would affect the dough, like it does with bread, and we are very dry right now. I simply could not knead in the rest of the flour.
The flour had bits of dough in it, though, and I wasn’t about to let that go to waste.
If you are a pasta aficionado, you may want to look away right now… ;-)
I remembered that one resource I found that used the 2 eggs: 3/4 cup flour ratio. It had a recipe calling for 7 eggs to 3 cups of flour.
I decided to add an egg.
Of course, I couldn’t just knead in an egg, so I beat it in a bowl first, then beat in the flour that I couldn’t work into the dough. I even broke off some pieces of the dough and mixed that in, to get it thicker.
I then opened up the dough so I could add the additional egg mixture into the middle, then fold the dough over it.
Kneading that in was pretty messy, anyhow!
Once it was thoroughly worked in, I only needed to add perhaps a tablespoon of flour onto the mat to clean up the stickiness, then I kneaded it for 10 minutes.
I’m sure I broke all sorts of rules or committed some terrible faux pas in doing this, but hey – it worked! The dough was wonderfully smooth and elastic, and just barely sticky.
At this point, I covered it with some plastic wrap and let it sit for 20 minutes.
While I was looking things up, there were a few points I kept seeing repeated. One was that the pasta cooked extremely quickly, so before I even started it, I made a use-watcha-got meat sauce. The other thing I kept seeing was to use extra salt in the water the pasta would be boiled in. Since they cook so quickly, they don’t have the chance to absorb salt from the water, if the usual amount was used.
So while the pasta was resting, I made a few final touches on the meat sauce, then prepped a pot of salted water. No one mentioned how much more salt to add, so I winged it. :-D
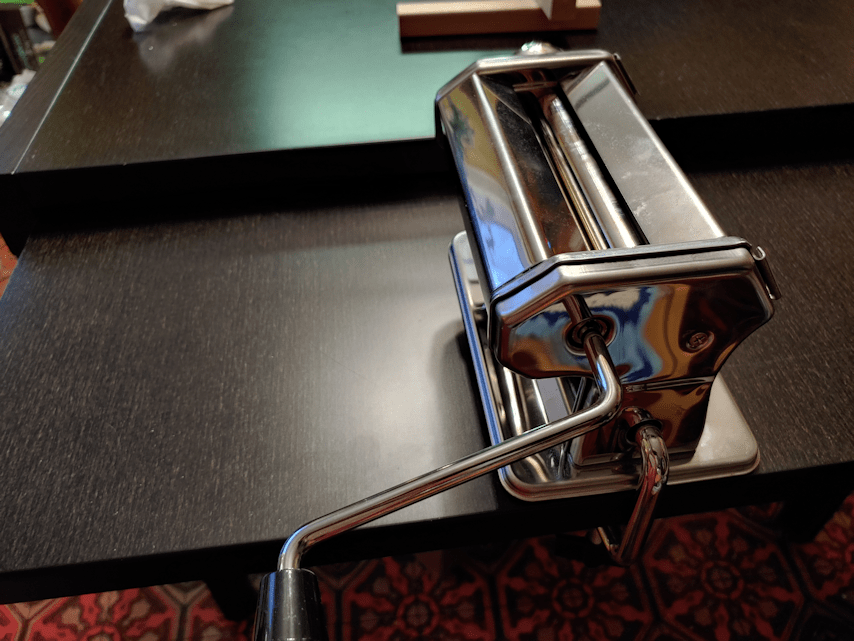
The next thing to do was set up the pasta machine.
What’s hilarious is that the first image has the pasta photoshopped onto the machine completely wrong. It shows cut pasta coming out of the flat rollers. :-D
The machine comes with a clamp to attach it to a table, but our table has a different design. It can expand to twice its size. The two halves of the table top slide one over the other when it’s closed, with a support piece running under them at each end. The whole thing is about 6 inches wide – way too much for the clamp to fit around.
It worked out though.
I was able to partially slide out the extension, and still have a stable surface to clamp on to.
When it was time to start rolling the dough, I started with only half of it. The first time I rolled it through the machine, though…
It just tore apart!
I spent some time going through the instruction manual to figure out why. I ended up using a rolling pin to thin it out more, first, and dusted more flour on each side. That seemed to do the trick.
Another thing I kept reading was to make sure to roll the dough thin enough to see through. I kept reading that the pasta will thicken as it cooks, so it’s better to roll it thinner.
In reading the instructions, it said to set the machine at 1, for the widest setting, rolling the dough through, folding it in half, rolling it again, about 5 or 6 times, then working it thinner and thinner until about 3.
There was one problem with that.
The numbers on the machine are backwards from the numbers in the instructions! The widest setting is 7, not 1. :-D Which doesn’t really matter, as long as it works, but I did find that funny.
It took a while to get the hang of it. One problem I encountered was that the crank handle kept falling off! The pasta also tended to go off to one side. After a while, a daughter was able to come give me a hand, too, which made things much easier to handle.
The pasta sheets kept getting longer and longer, and I ended up having to cut them in half. Then do it again! In this photo, we have the 4 sheets draped on the pasta drier, ready for us to put the cutter attachment on and start cutting them.
I have to add that I’m really glad I waited until we found Durum flour for this. We could really feel the difference in how well the pasta held out to all the stretching and handling.
The first ones we cut were still hilariously long, so we cut the remaining sheets in half again.
Their widths might have been consistent, but their lengths certainly weren’t! :-D
After finishing the first batch, they got to dry while the second half of the dough was prepped. This half went much faster, now that we knew what we were doing! Also, we split the second batch of dough in half, right from the start.
Once they were done, it was time to get the water boiling. After a while, I took the longest pasta pieces and broke them in half, to make them a more reasonable length!
Just before the water was boiling, I took them all off the drying rack, to make them easier to handle and carry and break any really long pieces that got missed..
Don’t they look pretty?
And yes. I did cook the whole lot!
Here, I have pretty much just added them to the water. It hasn’t even come back to a boil, yet, and already the pasta is half cooked!
I boiled them for 2 minutes, but that was probably at least half a minute too long! :-D
After draining them, I tossed them in some herbed butter my husband made earlier in the day.
There was have it! Fresh made pasta, with meat sauce.
So, how did it taste?
Many of the sites I found with recipes raved about how good they were, and how you’ll never want to eat store bought pasta again, and so on.
It was good, but I don’t know that I would say it was that good! At least, not when considering the amount of physical labor involved. The family did all really enjoy it, though.
I actually found the pasta a bit thin. I like a toothsome pasta. In rolling it out, I went to the recommended “3” on the knob, based on what I’d read (the instructions with the machine suggested going to 3, but with the numbers reversed on the knob, that actually meant 4). It was certainly thin enough to see through, but I think that, next time, I’ll just bring it down to 4 on the machine.
It does use a lot of eggs, though. We’ll have to buy more, before we can do this again! Or we could make it with just water. The instruction manual has a recipe, too.
We definitely can do some experimenting! :-D
All in all, I’d say this was a success, and I am quite glad we got the machine to make the job easier! Even with the handle falling off so often! :-D