The second one was much faster to build than the first. :-D
For those who are new to this blog *waves hello* you can catch up on the project with part one and part two. Links will open in new tabs, so you don’t lose your place here. :-)
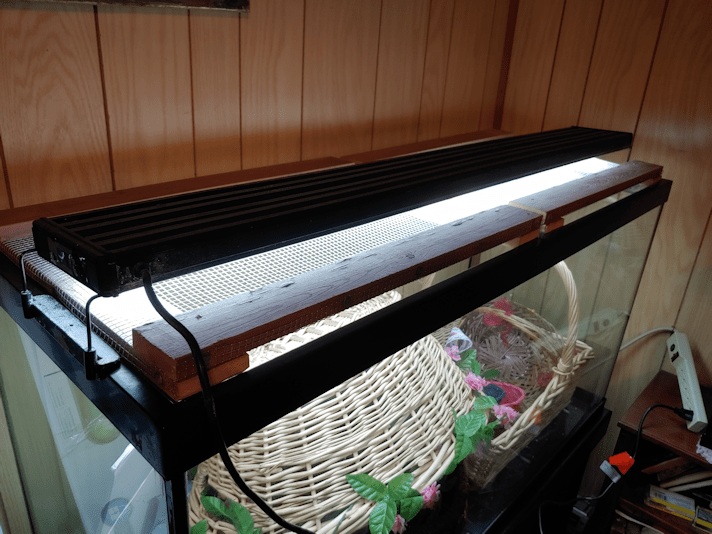
Once the second cover was done, I unpacked the light fixture, which has been sitting in its box next to the tank since the move, and tested it out. Considering what a disaster the movers were, I would not have been surprised to find the bulbs shattered or something.
It worked just fine! :-)
Of course, as soon the covers were on, cats were on it! So far, they have not tried to climb on the light fixture, but there is no doubt that they will, at some point. Hopefully, it will hold up okay.
I was concerned that the frame would create shadows in the tank, but that does not seem to be an issue at all!
Now I have to figure out how to set the time and program it to turn on and off. It’s been years since it was last done! There is time to look that up, though.
We still need to cover the sharp edges of the wire mesh, and I still want to put felt pads in the corners to protect the tank a bit, but other than that, the covers are done.
We still have the original light that came with the tank, which rested right on top of the original covers. The tanks will only hold so many seed trays. With things like the onion seeds needing to be started so much earlier than anything else, I can see us rotating trays out from the tanks and into the sun room (which should be warm enough, by the time the next groups of seeds need to be started), and using the second light there.
Now I need to figure out where to store my baskets, then line the inside of the tank with foil to reflect more light. Since this room is rather chilly, I plan to use pieces of rigid insulation on the bottom and around the sides, too. We will likely cover the insulation with foil on one side to make it easier to take it in and out, but I will see how the seed trays fit inside, first. If the insulation takes up too much space, I’ll put them on the outside of the tank.
Progress has been made! :-)
I am so looking forward to gardening this year! :-)
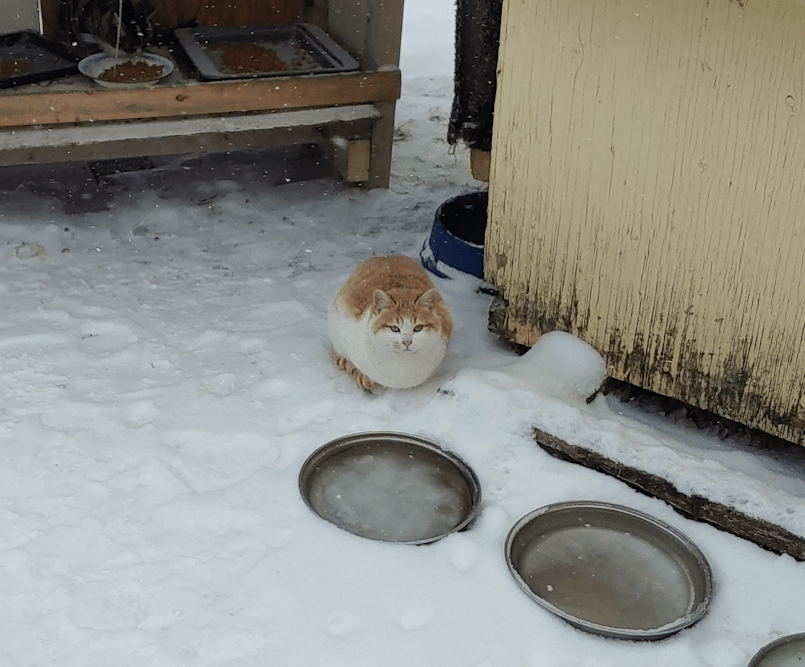
We’ve had ourselves a chillier morning today! Light snow, and bitterly cold winds from the south is what greeted me this morning, when I went out to do my rounds.
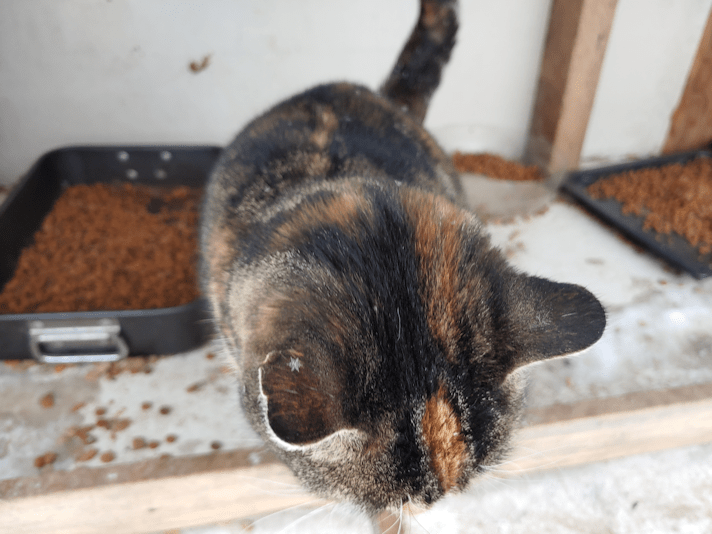
Kitty loaf is not impressed.
It does look pretty, though!
Switching out the micro disk cards on the new trail cam has gotten somewhat easier. The micro disk itself has become easier to take in and out; it isn’t as “sticky” as it was at the start. As long as I have enough of a thumbnail to push the card in, to either latch of unlatch it, it’s not too bad. :-D
When I open up the camera, I switch it from On to Set Up, first. The screen turns on, and that’s when I can see if the cold is an issue. If the screen is mostly blank and barely lit up, the camera is too cold. I’ve found I can use my hands to warm it up enough that the screen will start working. Which, on days like today, can be rather hard on the hands! Thankfully, it only takes about half a minute. Then I can switch the memory card and see if there are any issues.
When I got the camera, I got 2 micro discs along with it. I just ordered the recommended ones, not really noticing that one of them was actually a pack of 2. Those are the ones I’ve been using. The problem is, when I switch cards, the camera wants me to format the new card, every time, after giving me a message that the card is “incompatible.” So all those days when I found nothing on the card, it was partly because I couldn’t see the screen and missed these messages. Once the card was formatted in the camera, it worked fine. It didn’t matter if I’d already formatted it on my computer.
I shouldn’t have to do that every morning.
Last night, I dug up the extra card, formatted it on my computer, and used that, this morning.
The camera had no problem with it. No messages, and no need to format the card in the camera!
The cheaper cards were the problem.
On mentioning this to my husband, he dug around and gave me one of his extra Micro SD cards to use. It’s a 64 gig card. WAY more than needed. The other cards were 32 gigs, and even at highest resolution while set to take both photo and video, I could probably leave the card for a week and still have room to spare. The main thing is that the card won’t need to be formatted every morning. It’s even the same brand as the new one I put in this morning, so it should be fine. I’ll know for sure when I switch cards tomorrow morning.
It still doesn’t solve the problem of the camera not really working when the temperatures dip. Once it gets cold enough, it simply stops recording. It does start up again on its own, when the temperatures rise. This is frustrating, because in all other respects, I really love this new camera! But all the features I love about it are useless if the camera simply stops working when it’s cold. At least we have the second camera that keeps working. With that one, the cold is only an issue for the batteries, not the camera itself. As long as it can get any juice out of the batteries, it will keep chugging along.
Ah, the things we have to put up with, because of one person we can’t trust.
A few days ago, my husband got a phone call. There were two things odd about this. First, the call went to his cell phone. Being in a dead zone, any time a cell phone rings is downright startling. Second, the call turned out to be from Fed Ex. They had a package for him, and needed our physical address.
As near as we can figure, this was something my husband ordered back in November. After all this time, he’s actually already got a refund on it. He had been expecting it in the mail, too. Fed Ex doesn’t do box numbers!
So he called the number back using the land line and, after being on hold for about 45 minutes, finally got through to someone. After giving our physical address, he gave them precise directions on how to find us. The person he talked to even looked us up on Google maps and did eventually figure out where we were. Just inputting our physical address hadn’t worked! He then let them know about the locked gate, so they said they would send an email in advance, letting us know the package was on the way from the city.
We got that email, telling us delivery would be made yesterday. So when I went out to do my rounds, I unlocked the gate and left it open.
The last time we did that for the washing machine repairman, the gate was open only half an hour, and our vandal showed up and tried to break it again. So we were pretty uncomfortable having that gate open, but we also didn’t want the package to just be left in the snow in the driveway, either. We kept a close eye on the security camera’s live feed!
Then my husband let me know that we could close the gate up again. He just received an email. Apparently, FedEx couldn’t find us, so they weren’t going to deliver the package. They wanted us to call about getting it.
Which means, they would expect us to drive to wherever their warehouse is in the city, to pick up a package they’ve been paid to deliver to us.
I don’t think my husband plans to call back. There is no way we’re going to make the trip. UPS found us, no problem. FedEx can figure it out, too. Even when we were living in the city, we’ve had issues with them. They would actually leave notices on our door, saying no one answered when they knocked, but we had been home and no one knocked.
I was just happy to be able to close and lock the gate. No sign of our vandal, either!
Later in the afternoon, I did take advantage of the slightly warmer day to go get the mail and pick up some more deer feed and bird seed. We’d run out of both, that morning.
One of the things I’ve noticed when heading outside to do my rounds, is that our door has been making an increasingly horrible noise. The inner doors in the “new” part of the house are still the originals, and they are wooden, hollow core doors, not insulated steel doors, as are available today. These doors are heavier than interior doors, so I do think they have some sort of insulation inside them, but I really don’t know.
The “front” door, facing the spruce grove, almost never gets used, so aside from needing to put insulation between it and the storm door in the winter, to keep frost from building up at the bottom, inside the house, it’s fine. The door we actually use all the time is not doing so well! The house shifts with the seasons, so it’s not really a surprise that the door is scrapping the door jam now, and we can hear the wood of the door splitting and cracking at the bottom. So I’ve taken to lifting the door as I close it, to reduce the noise.
How much the door lifts was quite a surprise, so when I had the chance, I took a closer look.
*sigh*
The door is coming off its hinges.
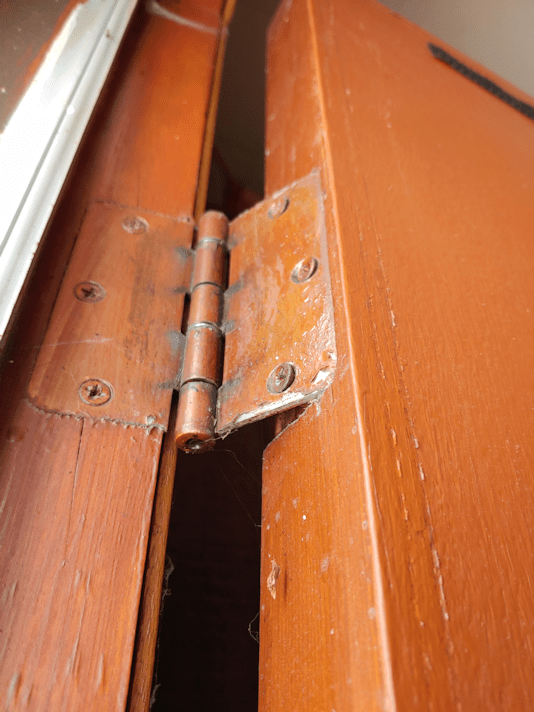
This morning, I snagged my husband to help me tighten the hinges. This is the top one.
It’s hard to see in the picture, but the screw heads are even slightly bent!
Of course, with the top hinge being so loose, the middle one is, too.
Thankfully, the bottom one is still solid, but that won’t last long if these ones get any worse.
There is a built in closest near the door, so it can’t be opened all the way. My husband held it open as much as he could for me to be able to fit the screwdriver in place. Normally, I would just open the storm door, but between the cold and the cats, that wasn’t an option. While my husband lifted the door and held it in place, I tightened the screws.
As I did so, I could tell this wasn’t going to work. The screws were barely catching on anything. Still, I hoped to at least get it a bit tighter than before.
*sigh*
As soon as my husband released the door, not only did it drop, but some of the wood split above the top hinge.
I reached up with my phone to get this picture.
In the photos, you can see there are cracks in the wood of the door frame, too.
We knew the front door needed to be replaced, and were already thinking we would replace the entire frame, too. I just didn’t think we’d need to do it because the door is falling right off the hinges!
Theoretically, we can install hinges in different locations, and that would tide us over until we can replace the door and frame completely. Given how loose the door is, we might not have a choice. Even if we had the money for a door kit now, we wouldn’t want to install it in the winter. Because you just KNOW something will do wrong and it’ll take forever to do! :-D My brother recently replaced one of the doors of his house, and he used a door kit, with two doors and the frame, as we would be doing here. Everything was standard sized, so it should have been a simple switch. It wasn’t, and it took him days to get it installed properly! I don’t think our doors are standard sized, so I don’t expect anything to do smoothly.
This is something were I would much rather hire someone to install it, rather than doing it ourselves. It would cost more, of course, but would be worth every penny.
*sigh*
Another thing on the list that just became a higher priority.
A while back, we tried a recipe for overnight bread, which you can read about here, and find a link to the original recipe we used.
I then tried an “over day” version, using the dough baby from my Babcia’s bread experiment. It was fantastically successful!
We’ve made it again, as a pretty basic no-knead bread and, once again, it turned out awesome!
If you are new to this blog and don’t know the background to this, you can read the story behind my experiment to try and recreate the bread my grandmother made in pre-WWII Poland, as my mother remembers it. Or you can check out all the posts about it at this link. All links will open in new tabs, so you don’t lose your place here!
Here is how we made No-knead bread, using the old dough method.
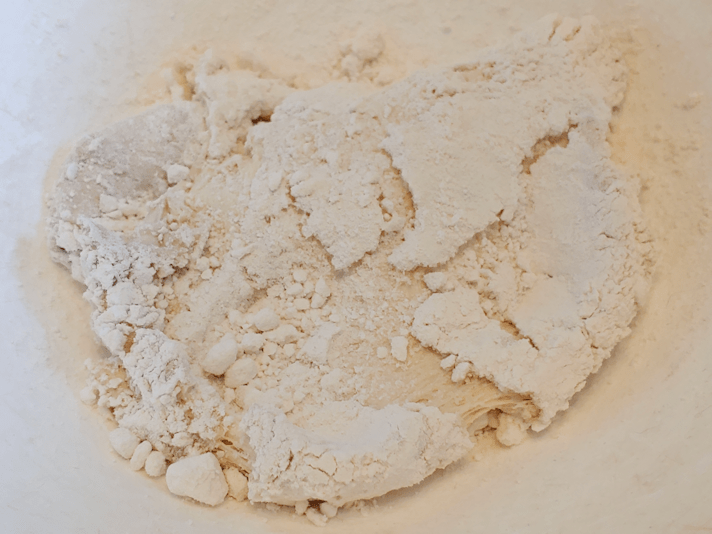
The first step is to dig the dough baby out of the flour it sleeps in.
My Babcia did bread baking once a week, and when the old dough sits that long, it tends to be dry enough to break apart into pieces before reconstituting it. This time, the dough baby had not been sleeping in its bed of flour for that long, and it was still quite… doughy! :-D
So I just pulled it apart a bit and placed it in the bottom of a very large bowl.
I don’t know how much that is. Maybe about 2 cups, including the flour stuck to it? The dough baby rises and collapses while stored in the flour, and I made no effort to measure the quantity.
I also pre-measured 2 Tbsp each of course salt and sugar, and 1 Tbsp of yeast.
The yeast would be optional. The dough would need more time to rise without it, which would give more of a sourdough flavour.
Four cups of very warm water was added to the dough baby. Since it wasn’t dry enough to break into pieces, I spent some time stirring it and breaking it up in the water.
Then, the sugar and yeast was added and mixed in, the bowl loosely covered, and it was left for about 10 minutes.
I like to use traditional active dry yeast, rather than quick or instant dry yeast, but that’s just me. The traditional yeast needs more time to proof in the liquid compared to the quick yeast, and the instant yeast wouldn’t need to be added at all at this point, but would be mixed in with the flour.
If I were not using yeast, I would leave the water, dough baby and sugar mixture in a warm place for much longer, checking regularly to see how active it was.
Here is how it looked after 10 minutes. I stirred it again to break up the dough baby a bit more.
Then it was time to add some flour.
I started by adding 3 cups of flour. It’s easier to mix in that amount compared to starting with just one cup.
I decided to use Durum wheat flour at this point, just because I have it. Use whatever flour, or mix of flours, you like best!
After the first 3 cups was thoroughly beaten in, I added another cup of flour and the salt.
More flour was beaten in, about a cup at a time at first, then a half up at a time.
How much flour to use is something I’ve never been precise about. I know there are bread bakers that weigh and measure precise amounts, but in my experience, that just doesn’t work. The amount of flour needed can depend on things like how fresh the flour itself is, to how much humidity there is in the air.
With 4 cups of water, I would have expected to work in at least 8 cups of flour for this recipe (with my usual kneaded bread, I typically used 5 or 6 cups of flour to 2 1/2 cups liquid).
We are very, very dry right now.
Today, I worked in 7 1/2 cups of flour, and probably could have done with a bit less.
By this point, I was working the flour in with my hand rather than trying to stir it with a spoon. If you have an electric mixer with a dough hook, go ahead and use it!
Before setting it aside to rise, right in the same bowl, I sprinkled some flour over the top and sides, in case it rose high enough to touch the bottom of the bowl’s lid.
Lightly cover the bowl, then set it in a warm place for about an hour. With our chilly our kitchen is in the winter, I heated our oven to its lowest setting (145F on “warm”), then shut it off before I started mixing the flour into the dough. The covered bowl is left in the warm oven, with the light on, to rise. Anywhere that is warm and draft free will do.
Here it is, after an hour. It just barely touched the bottom of the lid! :-D
The dough it then pushed down and worked a bit to incorporate the flour that had been dredged on top.
Next is a very, very important step.
A piece of the dough needs to be removed and set aside for the next batch of bread!
I dumped some flour on a container and plopped about a cup of dough onto it.
Once the new dough baby was set aside, the rest of the dough was dumped onto a 9×13 inch baking sheet that was lined with parchment paper. The last time I made this, I used a parchment paper lined lasagna pan, but I could also have split it into two parchment paper lined loaf pans.
If I didn’t have parchment paper, I would have well oiled the pan, first.
Speaking of oil…
After spreading the dough out to fill the bottom of the pan, I stabbed at the dough with my fingers to create “dimples”, then topped it with oil, course salt and dried parsley flakes.
I happened to still have some fake truffle oil that I used, but an olive or avocado oil would work just was well.
The pan was then set aside for the dough to rise again. Since this batch is so flat and thin, I started preheating the oven for 450F right away. Had I used loaf pans or the lasagna pan again, I would have let it rise longer before preheating the oven. If I had used no yeast at all, it would be left in a warm place until doubled in size.
While the shaped loaf was waiting to go in the oven, there is this to deal with…
The bottom of the bowl still has quite a bit of dough stuck to it!
We can’t let that go to waste!
Into the bowl went the new dough baby, and the flour it had been resting on.
While working the flour dregs into the dough baby, scrape as much of the dough stuck to the sides and incorporate it into the dough baby.
You probably won’t get all of it off the sides, which is okay.
The dough baby is now ready for a nap. I have a canister of flour that I bury it in, but it can also be buried right in a bag of flour, as long as you’re not planning to use the flour for anything else in between bread baking!
After the dough baby has been buried, it will rise quite a bit before collapsing in on itself, breaking through the surface of the flour. Remember to check on the dough baby later on, to make sure it is still covered in flour.
Once the oven is ready, place the pan of bread into oven and bake. If you wish, place a container with about a cup of water on the rack under the bread pan, to add some steam to the oven as it bakes.
For a very flat loaf like what I made today, it took about 25 minutes. A deeper loaf, or a pair of loaf pans will likely need 30-40 minutes. Bake it until it looks like this.
With the oil added to the surface, it will have a deep, golden colour when it’s ready.
When baked, remove from the oven and left to cool for a few minutes. Once it is safe to do so, remove the bread from the pan and onto a cooling rack (parchment paper makes that job a LOT easier!).
I really like the big, flat slab of bread, but it is a bit hard to cut a slice off! :-D
Here is how it looks on the inside.
The crumb is light and fluffy, yet still wonderfully chewy. The star of the show, however, is that golden, flavorful top crust! It’s just a lovely and delicious combination of textures and flavours.
The only problem with this bread is how difficult it is, not to just scarf it all down right away! :-D
Here is the recipe.
Old Dough No Knead Bread
Ingredients:
old dough set aside from previous bread baking
4 cups warm water
2 Tbsp sugar
1 Tbsp traditional active dry yeast (optional, or use 2 Tbsp if you don’t have old dough)
2 Tbsp course salt
about 7 or 8 cups of flour
small amount of good quality oil (olive oil, avocado oil, etc.)
small amount of dried parsley and course salt
Break up the old dough into a large bowl. Pour water over the old dough and stir. Add the sugar and yeast and leave to proof for about 10 minutes. If you do not have old dough, use the larger amount of yeast and proof it in the sugar water. If using only the old dough and no added yeast, leave the bowl in a warm place until the mixture is bubbly.
After the yeast and old dough has proofed, add 3 cups of flour and mix thoroughly until it forms a very smooth batter. (An electric mixer can be used at this stage.)
Add the salt and 1 cup of flour, mixing thoroughly.
Add more flour a little at a time, mixing thoroughly after each addition, until it reaches a thick but sticky consistency. Use your hands to mix in the last of the flour. (If you have an electric mixer with dough hook attachments, switch to the dough hooks at this point.)
Leaving the dough in the bowl, dust the top of the dough with flour and cover loosely. Place in a warm spot to rise until doubled in size.
Prepare baking pans by lining with parchment paper or oiling thoroughly.
When the dough has risen, punch it down again, folding it into itself to incorporate the flour dusted on top.
Dust some flour on a small plate or bowl. Remove about a cup of dough for the next batch of bread, setting it aside on the floured container until later.
Pour the remaining dough into the prepared baking pan(s). Using your hands, press the dough to fill the pan to the edges and corners, then stab into the surface with your fingers to create dimples in the dough.
Carefully sprinkle oil across the surface of the dough, then use your hand to spread it evenly across the surface.
Sprinkle the oiled surface with course salt and dried parsley.
Set aside in a warm place to rise.
While the bread is rising, return the dough set aside earlier to the mixing bowl, along with any flour in the plate or bowl. Use the flour and the dough ball to scrape off any remaining dough stuck to the surface of the bowl, working the dough ball until smooth. Shape the dough into a ball, then bury it in a container of flour, for use in the next batch of bread.
When the pan of rising bread is almost doubled in size, preheat the oven to 450F.
Place the bread in the centre rack of the preheated oven; if desired, place about a cup of water in an oven proof container on the lower rack to create steam.
Bake until the bread is a deep, golden colour – about 25 minutes when using a 9″x13″ baking sheet, about 30-35 minutes if using loaf pans, or a cake or lasagna pan. The finished loaf should sound hollow when the bottom is tapped.
Set aside to cool in the pan for a few minutes, then transfer the bread to a rack to finish cooling.
I took advantage of yesterday’s warmth with a trip into town. At one point, on the way back, I was driving through precipitation that couldn’t make up it’s mind if it was snow or rain! LOL We actually hit 3C/37.4F, which was a couple of degrees warmer than forecast.
Then the temperatures plummeted overnight. While the actual temperatures remained above -20C/-4F, the wind chills brought things down colder than -30C/-22F Apparently, there was even a storm last night, though it seemed to be well to the south of where we are. We got hit with high winds, mostly.
As I write this, we are at -17C/1.4F with a wind chill of -28C/-18.4F
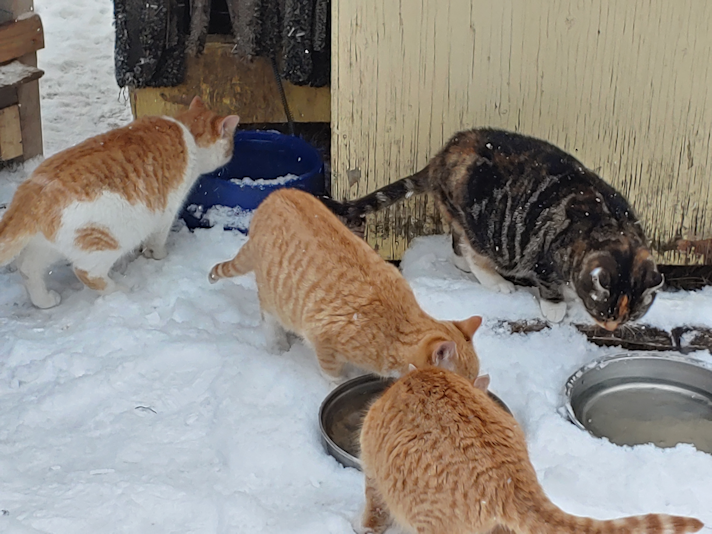
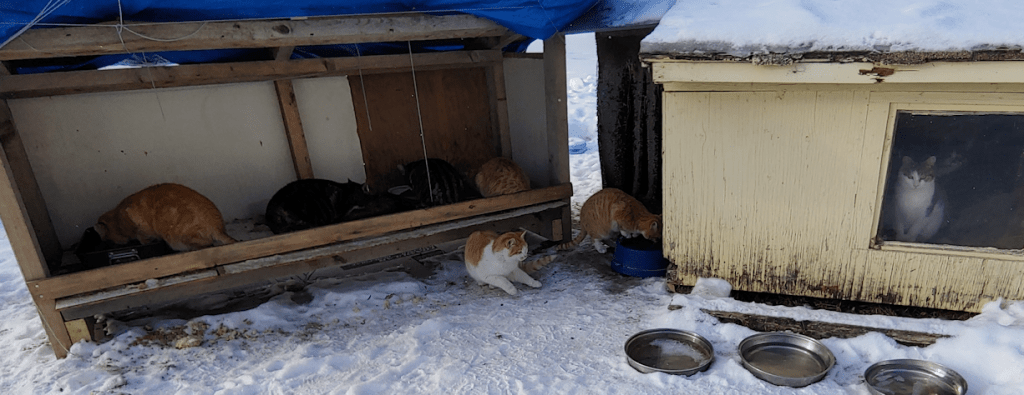
While I was doing the cat stuff outside, most of them just stayed in the cat shelter and watched me though the windows. They still had lots of food in the kibble house, but I also toss some inside the entry of the cat house, where I have another food bowl. I don’t put much in there, since I don’t want to encourage other critters going in there. That food bowl was empty.
Some of the cats did come out for some warm water; the heated water bowl does the job, but when it’s cold like this, I like to give them water that is actually warm, and they really seem to appreciate it.
Then they all just disappeared! Not into the cat house, but running off around it, with some running under the storage house.
I discovered why when I turned around as saw we had a visitor!
My younger brother’s dog had come for a visit!
He just thrives in these temperatures! The colder it is, the more he loves it.
They have yard cats too, of course, so when he comes here, he expects to be able to come right up to ours and play! Butterscotch and Rolando Moon (and Beep Beep, if she were still outside) are more familiar with him, as he used to visit my late father all the time, but the other cats where born after we moved here, and the sudden appearance of a fluffy giant is rather frightening for them! Meanwhile, he just wants to play. :-D
As I was finishing my rounds, I managed to get him to follow me down the driveway and start heading home, but as I came back, he was suddenly bounding beside me, leaping and jumping in the snow, trying to get me to play with him!
Unfortunately, the winds made staying outside any longer than I had to, out of the question.
My goodness. I just glanced at my weather icon on my computer and noticed we’ve already started to drop in temperature. Looking out my window, it’s a clear and sunny day and looks like it should be quite pleasant out there, but we’re now -18C/-0.4F, with the wind chill down to -31C/-23.8F We’ve already hit the high of the day, and it is expected to keep slowly dropping from now on until tomorrow. We’ll have one more mild day tomorrow, then temperatures are supposed to plummet for a few days before getting mild again. With concerns over the vehicles, we plan any outings around the forecasts, which means quick run to check the mail and pick up more bird seed and deer feed will be done tomorrow.
Unlike our furry visitor, we do NOT thrive in this cold, and neither do the vehicles! :-D
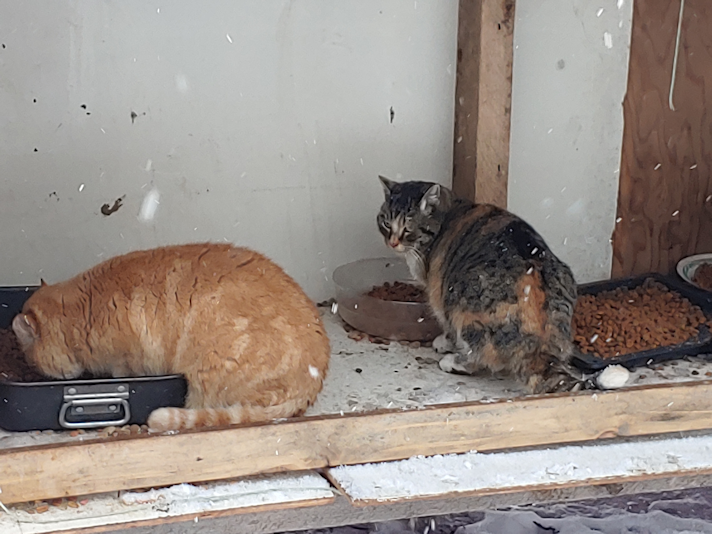
The temperatures have gone up quite a bit today, and the outside cats are quite appreciating it!
I was very happy to see Rosencrantz this morning! I haven’t seen her in a couple of weeks.
Butterscotch also made an appearance this morning. I didn’t see her yesterday.
Her babies were just loving the new snow, running around a chasing each other in it. :-)
Butterscotch, however, would not come anywhere near me this morning, so I wasn’t able to check her wound at all. She seemed to be moving around fine, though, so that’s a good sign.
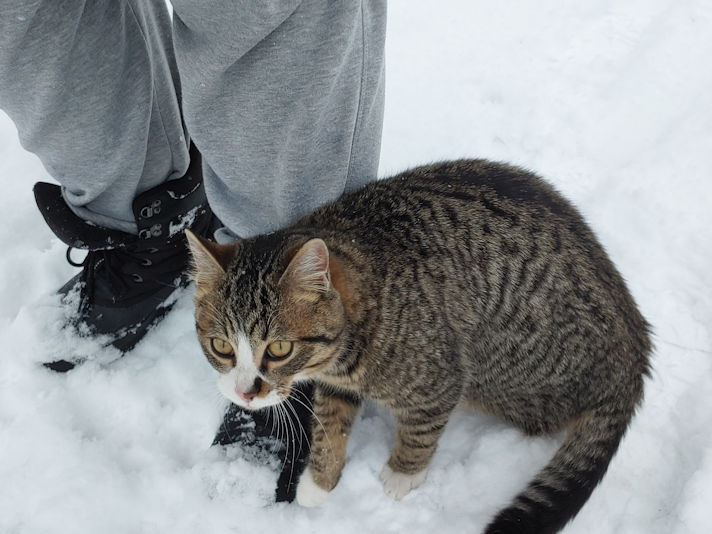
Nostildamus made up for her lack of interest, wanting all sorts of pets and attention!
He has such soft fur.
Today was a day when everything looked soft and fluffy. Even the trees.
The warmer temperatures brought with them the softest, fluffiest of snow. We got about 2 inches of it by this morning; two inches of mostly air!
The Potato Beetle is not amused. The kittens might be enjoying the snow of their first winter, but the adult cats seem much more ticked off about the whole thing! :-D
We’re supposed to drop to more normal, chilly temperatures after today, so I think I will take advantage of the day and make a trip into town to pick up a few things we are starting to running low on.
Just glancing at my weather icon on my toolbar as I write this, and see that we have reached 0C! (32F) The wind chill is at -6C/21F, which is still quite balmy! A wonderful day to get outside. :-)
Yesterday, I got started on making covers for our big fish tank, to keep the cats out. Today, I assembled the first one.
Of course, things did not go to plan.
Does anything ever? :-D
One of the things I needed to figure out was how to secure the hardware cloth to the frame pieces, for those inevitable times when a cat jumps on them. All I’ve got for materials is whatever we can find lying around the farm. While doing my rounds this morning, I went digging in the side of the garage where we store the lawnmowers and snow blowers. I knew there were some roofing nails in there, so I grabbed a while bunch and brought them inside.
Here is the first problem.
All of the nails were huge. There was only a single smaller size, and it was still too large. What I wanted to do was secure the mesh to the tops/bottoms of the boards making up the frame. Previously, we’ve used a staple gun to do that, but these were not for things where the wire mesh was expected to hold weight. Particularly not the sudden weight of a cat leaping onto it from above.
The mesh was going to have to be secured along the sides.
That meant cutting it with a half inch overlap on all sides.
I’m getting closer to the end of my roll of 1/8 inch mesh, and it really does not want to unroll at this stage! :-D I had all the boards on there to hold it down, and it still kept rolling itself back up again!
Once the mesh was cut to side and flattened, I affixed it to one side.
Normally, I would have used the staple gun to tack it in place, but I couldn’t find it anywhere. Which is really weird, because I’m the only person who uses it!
So it had to be tacked in place by screwing in the cross piece, holding the wire as taught as I could in the process.
Then I took out one of the screws in each corner.
I had placed the wood in place on the tank and marked each one with pencil, but once the hardware cloth was in place, I couldn’t really see my marks anymore. Plus, with the cross pieces a fraction too long, I had to make sure I didn’t line the side pieces up to the other end, or the while thing would be to big.
So I quickly drilled a pilot hole in each of the other corners of the cross pieces, then went back to the tank.
This way, I could place the long pieces where they were meant to sit, line everything up, then add a couple of screws through the pilot holes to hold them in place.
Then it was back to the basement to continue.
Once each corner was secured with a pair of screws, it was time to bend the wire mesh. Since the sides would be bent in one direction, and the ends in the other direction, I first cut out the corners.
The wood pieces may have been lined up to the tank, but no matter how careful I tried to be, the wire mesh ended up uneven.
Ah, well.
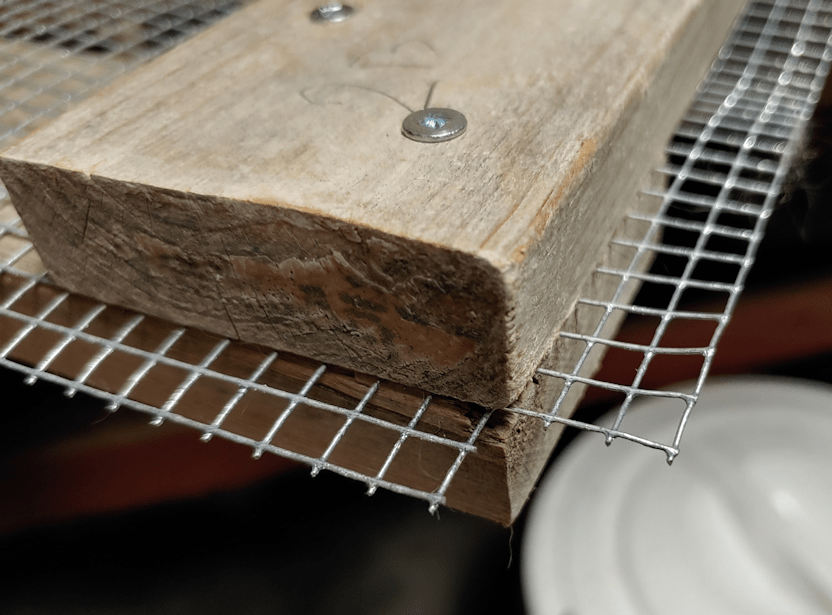
Once the mesh was bent, I drilled pilot holes for each nail (to prevent the wood from splitting) and hammered them in. The flat tops of the roofing nails were perfect for securing the mesh. Very different from how I had to do it with the larger mesh on the screen “door” we made to keep the cats out of the old basement.
Time to test it out again!
Oh, dear.
The addition of mesh and nails – especially the nails – made it wider. It wasn’t so much that it no longer fit. I could have let it just rest on the nail heads, I suppose. They would, however, damage the tank’s frame.
There was a very easy solution to this problem.
Flip it upside down.
With the cross pieces being every so slight too long, I used my Dremel to take off the corners at roughly a 45 degree angle.
It now fits!
Unfortunately, the wood is a bit warped, so it doesn’t sit flat, but it should still do the job.
There are still a couple of things I need to do. One is to find some way to cover the edges of the hardware cloth, for safety reasons. I’ll probably just use Gorilla Tape, if we still have some.
The other is to find my self-adhesive felt pads. The kind that’s meant to go on the bottoms of chair legs or the like, to protect floors. Since the bottom is now the top, the screw heads are facing down, and each corner screw is sitting on the plastic ledge in the corners of the tank. It wouldn’t be an issue, if I weren’t expecting cats to jump on it, so a bit of padding would be a good thing. I haven’t seen them since we packed for the move, though. :-/
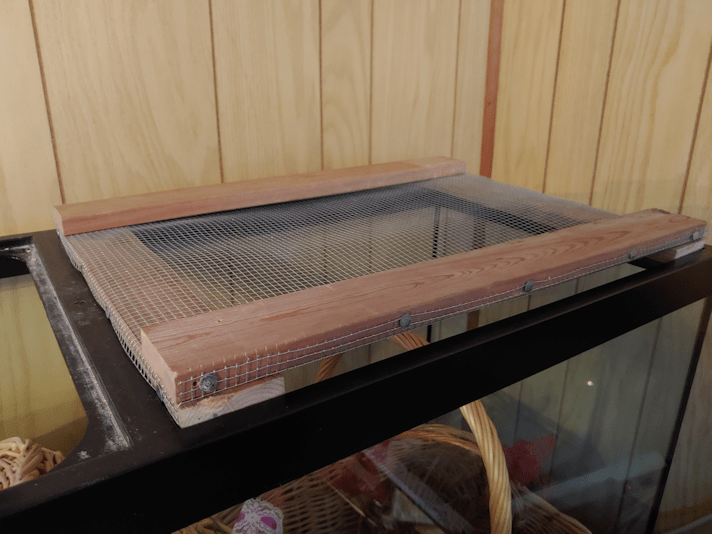
Aside from those 2 things, this cover is done.
The other one will wait for another day! :-D The earliest we should be starting any seeds is in late March, so we have time! :-)
I have spent some time thinking about how we can convert our big fish tank into a greenhouse to start seeds in, while also making sure the cats couldn’t jump in.
The original covers the tank came with would have been ideal, but the hinges on those broke long ago.
Since a piece of the filtration system broke during the move, it’s just been sitting in a corner. To keep the cats out, we cut pieces of foam core to fit across the top, then covered the whole thing with a huge table cloth. It turned out to be a great place to store baskets in, and the top became a favorite place for the cats to hang out.
Until they broke through.
We ended up cutting some rigid insulation to fit and taping it in place, which worked much better. With their jumping from the piano onto the top of the tank, though, they’ve knocked even that right off!
What this means is that the cats are used to having access to the top of this tank. If I set it up as a greenhouse to start seeds, they’re just going to jump in, unless I find a way to cover it.
The tank has a bar across the centre and, after thinking about it for a while, I decided to make a pair of wood frames with hardware cloth, that will fit on each side of that centre bar. That way, if I need to get at the seed trays inside, I just need to lift one smaller cover at a time, rather than struggling with one large cover.
I fully expect the cats to jump on while I try to do anything in there!
Today, I got started.
The first thing was to take a tape measure to the inside of each half of the top, as well as the lip the original covers used to sit on. Each side is 16 3/4 inches by 22 3/4 inches. The ends and centre bar have a 1/2 inch lip, while the sides have a 1/4 inch lip.
I then grabbed a couple of pieces of wood I’d salvaged from a shed and started by cutting the long sides. Once I had 4 of them cut, I double checked that they fit properly.
They fit just fine, with a little bit of play that will make putting them in and taking them out easier.
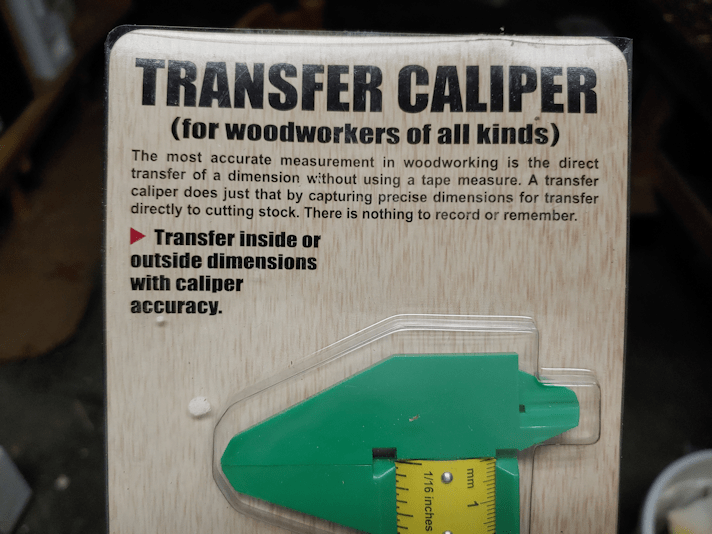
While I was checking the fit, my daughter came by. As we were talking, she reminded me of one of her Christmas gifts to me.
I wish I’d remembered them before I took the measurements! This thing is MUCH easier for me to read than the tiny lines and numbers on my tape measure. It made marking the distance to cut the short pieces a lot easier, too.
Another reason I wish I’d remembered them before I took the measurements.
When I checked the short pieces, they were just a hair too long! The difference is so slight, I could probably sand it to size.
But I shouldn’t need to.
This is how the frame will be laid out. The hardware cloth will be sandwiched between the top and bottom pieces at the corners. I haven’t figure out what I can use to secure the hardware cloth best. Ideally, the wire mesh would be sandwiched between wood all the way around, not just at the corners, but I just don’t have the wood to do that. Nor can I think of anything we have that could be used in a similar way. Whatever I come up with will have to not just support the weight of a cat that’s decided to lie on it, but the force of a cat jumping onto it from the top of the piano. All sorts of ideas some to mind, and get discarded just as quickly. :-/
The thing I’m holding in place in the photo is one of the supports for the light fixture. The L bars insert into ports at the bottom of the light’s frame, so where they are is where the bottom of the light fixture will be.
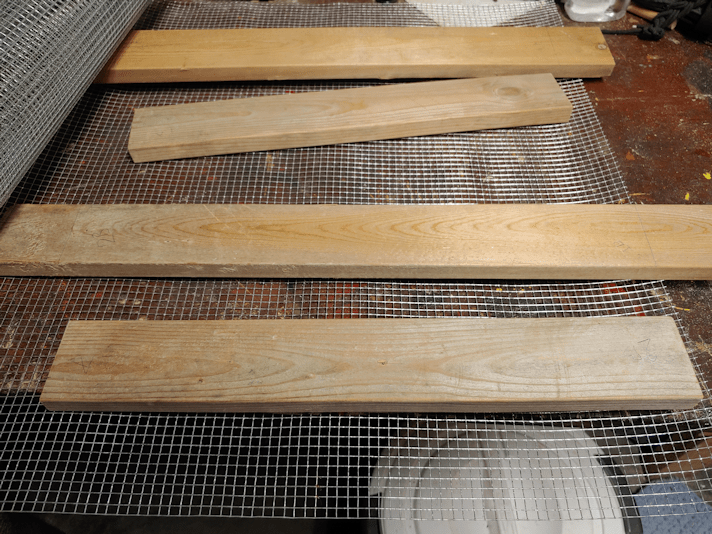
Once I double checked how everything was going to fit together, I moved on to the next step.
Washing the pieces of wood.
They were probably sitting in the shed I found them in for more than 10 years. My mother tells me that shed was full of lumber when she moved off the farm, some 7 years ago, so what little we found in there was the junk that wasn’t worth stealing, I guess. :-/ Still better than nothing, I suppose. Anyhow. There was a whole lot of grime on them, so I gave the pieces of wood a quick scrub. They don’t need to be really clean. I just need to be able to handle them without getting filthy, and trying to scrub them after the hardware cloth is in place is just not a good idea! :-D
So they are now all laid out in the basement with a fan on them, do dry. I will continue to work on the frames tomorrow!
One of the recommendations for using grow lights to start seeds is to have the lights very close to the soil, and gradually increase the distance as the seedlings grow.
That won’t be an option with this set up.
I’m thinking of lining the inside of the tank with aluminum foil to reflect more light onto the seedlings. It doesn’t need to be from top to bottom; just at seed tray height. Which means I could probably get away with lining all 4 sides with foil in the big tank. I will probably line 3 sides of the 20 gallon tank, too.
The other thing to consider is warmth. We don’t have grow mats, and it’s unlikely we will be able to get any. We do, however, have more pieces of rigid insulation that we can put under the trays, or even along the sides closest to the walls. The LED lights won’t generate heat, but I’m sure we could find some way to warm up the tanks enough for seeds to germinate.
Progress on the set up has, at least, finally begun!
I experimented with the no-knead, overnight dough recipe I’d made before, using the old dough bread baby from my Babcia’s bread experiment.
I didn’t take any process photos this time, since I was winging it. The “overnight” dough became an “over day” dough, for starters! :-D
Instead of making a pair of loaves, I made one giant loaf in a parchment paper lined lasagna pan.
As I was spreading the dough out as evenly as I could, I found myself thinking it was looking a bit like a focaccia. Too bad we’re out of olive oil.
Then I remembered… we still have some fake truffle oil (the only kind we can find, or afford!) left.
I ended up drizzling the top with the fake truffle oil, spreading the oil around evenly, then stabbing the dough with my fingers to make lots of little holes, which also helped even the dough out in the pan more, before sprinkling on some coarse salt and dried parsley.
Of course, it wasn’t real a focaccia recipe, and it rose quite a bit. This is how it turned out.
This turned out to be, hands down, the best bread I have ever baked! Definitely a winner!!
I think the next time I try this, I’ll use a baking sheet instead of the lasagna pan, to make a thinner bread. Mostly, because I think it’ll be easier to slice than this was, but it’ll also give a larger surface for the oil and salt crust. The texture and flavour it gave was amazing!
Next time, I will definitely take process shots and share the details here!
Once again, Butterscotch simply would NOT let me check her out. I barely even got to pet her, never mind check her wound!
I did manage to accidentally get a picture of a perfect snowflake on her ear, though!
Doesn’t she look so elegant and calm here?
The photo lies! :-D
The best I could get was a glance of her wound as she walked away from me, and I saw nothing out of the ordinary, so I hope that means everything is healing well. She doesn’t seem to be favoring the leg, except I think where the fur is shaved off is cold. I’ve seen her coming out of the shelf shelter we made, which has rigid insulation lining the empty bottom shelves, and more rigid insulation to block the wind and snow. She can sit in there and her bald spot will be nice and warm.
She does not go into the cat shelter. I don’t know where her hiding place is, but it is not in the inner yard. I think it’s somewhere in one of the collapsing sheds in the outer yard. :-/
Seeing two of her kittens peaking at me from between the kibble house and cat house was adorable.
I missed Nostrildamus going into the cat house; you can just barely see his tail tip through the strips of carpet. :-)
Rolando Moon is such a loaf! She is quite prepared to drive away any kitties that dare come close!
In other things, this blog hit a milestone yesterday.
We reached 500 followers!
It was rather funny when I got the notification from WordPress. In the time it took me to actually look at it, the number had gone back down to 499. Then it jumped up over 500 by the end of the day and stayed there.
This is really amazing to me. One thing that always surprises me is that anyone is finding it in the first place! That anyone is actually interested in our crazy little corner of the world is greatly appreciated, and I’ve been getting to know some really amazing people in the process. You guys are awesome! :-)
To all our new followers, thank you so much for joining us for the ride. Welcome! :-)
Today was a nice and quiet day, so maybe it was as close to the life of our cats as we humans can manage! :-D
Just look at Keith!
He is such a calm and quiet cat. We brought him indoors to better treat his eyes; they were never as bad as his brother David’s, but they were not really getting better. Even as a kitten, we could tell he would have a sweet and calm disposition as an adult. We probably would have brought him in much earlier, if his cousin Cheddar hadn’t impaled himself with a stick through his armpit and needed to recover indoors from surgery.
I still have that cheese stick, in it’s vacuum sealed container. LOL
One thing out of the ordinary happened today. I had a conference call with my siblings and mother – a technical feat my brother pulled off involving cell phones, land lines and speaker phones – to get us all on at the same time, and able to hear each other!
The topic of conversation was our vandal.
A few days ago, while I happened to still be near the end of our driveway while doing my rounds, I saw a vehicle turn onto the road. As I usually do, I waved at the driver as he went by. Only then did I realize it was our vandal, driving one of his other vehicles, so I didn’t recognize it at first.
He very studiously looked away from me as he drove by.
I thought nothing of it, but I should have made a point of calling my mother to let her know. Sometimes, when he sees me, he ends up calling her and going off on a rant. He hadn’t done it the last few times I saw him, though, so I didn’t think of it.
The next day, I got a call from my mother, asking me if anything had happened – if I got anything else in the mail regarding our vandal’s ridiculous suit against me, or something. I told her no, I only saw him drive by the previous morning, then immediately asked what happened.
He had called just her. She made the mistake of answering without checking call display first. He, as usual, launched into a tirade. He kept asking her things like, why is she trying to put him in jail (he’s been saying that since I laid charges against him, after catching him damaging our gate), but never giving her a chance to speak. She finally hung up on him. He called back immediately, and she answered again, quickly said that he was putting himself in jail, then hung up again.
The whole thing left her quite rattled and it took her quite a while to calm down.
So today, my siblings talked about what happened, and a few other things that have gone on over the years. I found out that, among the things ranted about at my mother, our vandal told her that I said – to him – that my mother shouldn’t attend her sister’s funeral.
My aunt is living but, as you can imagine, that freaked my mother out a bit, since she is in a nursing home.
Of course, I haven’t spoken to our vandal since I laid charges against him, two years ago, so this claim of his was just another thing he invented, like so many other things.
I learned today that when he had called my brother at work a few months ago, he ranted so loudly, everyone in the office could hear him!
The question is, what do we do about it?
Unfortunately, not much. I’m already doing the only things I can. Anything he does to my mother, she has to do herself. We can help her, but we can’t do it for her. The only way someone else could do it for her is if she were medically declared not of sound mind, and she is still far from that.
The frustrating thing is that, with our province extending the lock down again, my restraining order application’s court date will likely be delayed, yet again. I need to phone the court office closer to the date they gave me when I last called about it, so I will be calling next week. His civil suit against me is by teleconference, so there’s no delay in that. As you can imagine, it is extremely frustrating that a criminal matter is being delayed in the courts because of government shut downs, but civil cases can go ahead by phone. For us, so far, he’s only tried to destroy property and screamed verbal abuse as us, but what about people who applied for protection orders that fear for their personal safety? These lock downs have already caused a spike in domestic abuse, as so many tried to warn about. It’s hard enough for people to get the protections they need to begin with. Now, with the courts closed, they can’t get any at all.
The other frustrating thing is that our vandal is angry at me, for being here on the farm and actually standing up to his abusive behaviour, but it’s my mother that he takes it out on. He seems to still think he can get her to give the property to him, even though she no longer owns it, while at the same time, still seems to think she has given it to me. So… he thinks she can “take back” ownership from me, when I don’t own it, and give it to him?
That this makes sense to him is just a reflection of his state of mind. What is more confusing is how he managed to convince other people that this makes sense, and willing to even leave anonymous notes on my mother’s door – in spite of her building being locked down to visitors – telling her to give the farm “back” to him.
Bizarre.
On the plus side, my siblings, mother and I are being a lot more communicative and drawing around my mother to protect her as best we can. That we have to do it at all is just sad.