I managed to get a few things done before the heat finally drove me indoors. I had my lunch and a break in the blessedly air conditioned living room, then went back out again.
Alas, I was defeated, but not just by the heat.
As I write this, my computer tells me it’s 29C/84F out there. This is what the sun room thermometer shows.

Yeah, that reads 36C/97F. That’s with shade and the ceiling fan going. It felt cooler to go into the sun room than being outside.
Before it got too hot, though, the first thing I managed to do was complete our third raised bed cover. Here is how it looks, over our carrots.

I have to admit, it’s the best looking cover I’ve made so far! Appearances aside, there things I would both do, and not do, again.
The first is, I won’t use that plastic hardware cloth again. Aside from the “rigid” plastic being not rigid at all and needing support, the plastic mesh is thick enough to actually cast shade. Which would be great for a day like today over, say, a bed of lettuce or something. However, we don’t have lettuce growing in full sun right now and, as you can see, those carrots don’t need any more shade! However, it will protect them significantly. For more complete protection, I would close off the ends, too.
The second is, those hoops I took off the high raised bed worked MUCH better than the ones I tried using before. These were cut to length from a roll of PEX pipe, and I would definitely use more of this in the future. Once the hoops were secured and holding the plastic mesh taught, the excess was cut off, which was easy to do with just pruning shears. The pruning shears also turned out to be the best tool to cut the steal strapping I used to secure the mesh and the hoops to the wood. An added bonus with having the hoops is that, if this cover were used over a larger bed or directly on the soil, the ends of the hoops could be put over stakes to secure them.
The next thing I decided to do was see if I could assemble the parts and pieces for the carport thingy we found in the barn. The metal pieces had been stored in the hay loft, but the cover piece(s) were in the main area of the barn.
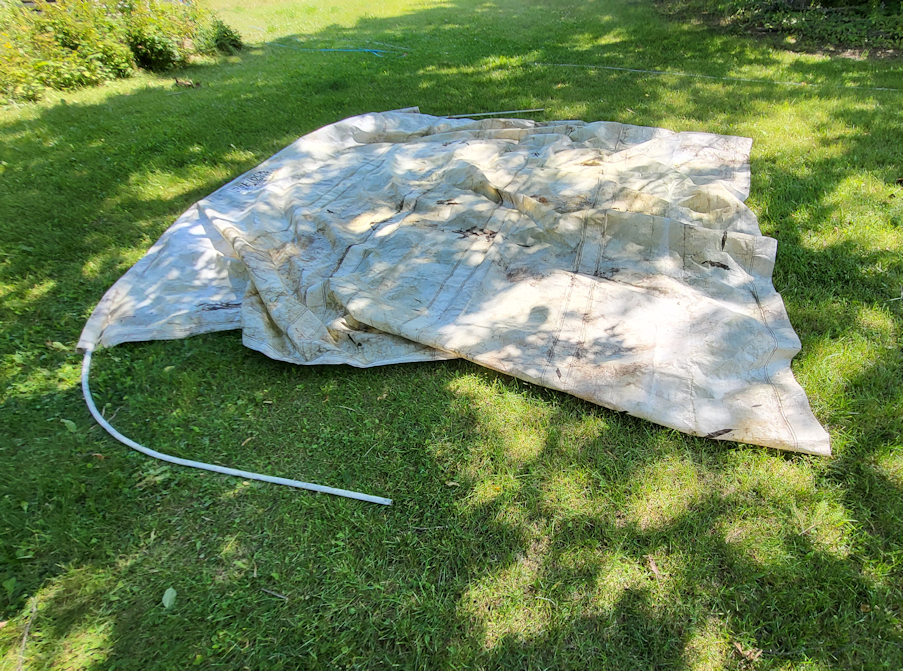
I didn’t realize what they were and used one of them to cover the pile of garden soil by the barn, which is why it’s so dirty in the photo. It wasn’t until I saw that the metal supports had no horizontals that I realized what the pockets in the “tarps” I found were for. Once I figured it out, I took it off the garden soil pile and tried to clean it, but it’s still pretty stained.
Each of the supports is in three pieces. Two side pieces that are hollow aluminum tubes, and one top piece that is the same material, with steel inserts at the ends to join with the side pieces. I tested it out with one set of supports, first, scrubbing the rust off the steel and wrestling the pieces together, then sliding it through a channel in the cover.
As expected, the support was far longer than the cover is wide, which would make for open sides. Which I am good with, but it does make me wonder if that’s how it’s supposed to be, or if the second cover is supposed to be used at the same time. That doesn’t make sense to me, since it would have an open “seam” at the top, from end to end. I’ve never seen this thing assembled, so I’m just guessing.
The test done, I brought the other pieces over. I plan to set it up above the tree stump bench by the main garden area, so I can paint it and not worry about it being rained on. There will be room enough to bring the folding table over for painting, too.
All the pieces got scrubbed down, removing rust and dust (at least I hope it was dust). To assemble it, I worked most of a side piece into one of the channels in the cover, then attached a top piece.
What a pain that turned out to be.
After more scrubbing, liberal use of WD40 and, in some cases, flipping the top piece to use the other end, I got them together.

Maybe not perfectly snug in places, but close enough.
After that, the pieces were long enough to push the rest of the way through the channels in the cover, and still have a couple of feet sticking out to add the other side pieces.
After much fighting, I got them together.
Excpet for one.
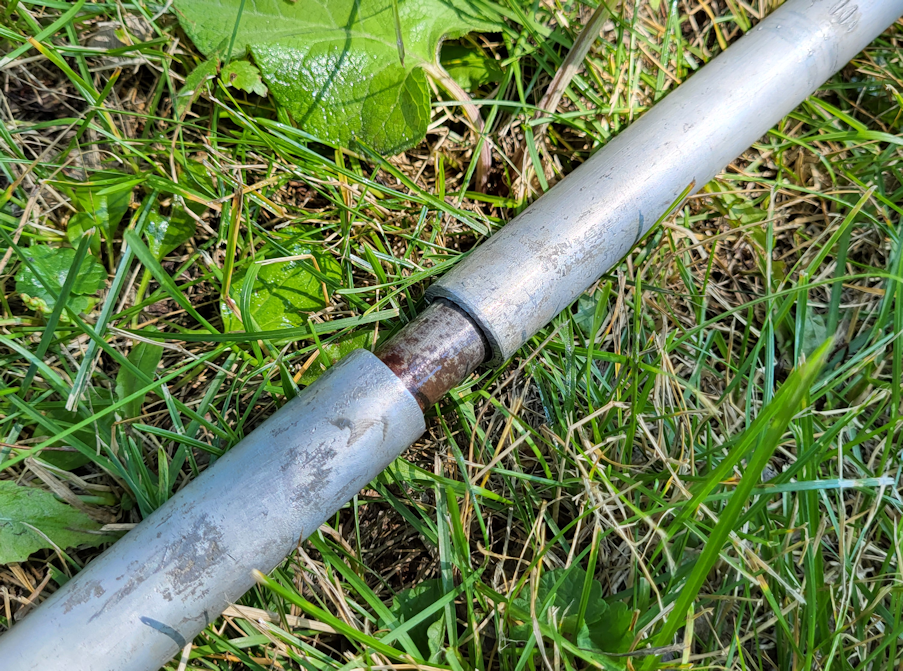
I fought with this long enough that I had to get out of the heat and take a break before going back out and fighting with it some more, but I just can’t get it any farther than this. I’ve scrubbed both the top piece insert and inside the side piece tube. I scraped around, and there is nothing blocking it. I even found a tire iron that fit in the tube and tried using it to scrape and possibly widen the opening. I checked to see if the side piece had been flattened in any way, and it was not.
It simply will. Not. Go all the way in.
I finally had to go in to get out of the heat for the rest of the afternoon, and will likely try again later. It’s possible that, as the day cools, the metal will shrink enough for the pieces to finally slide together.
Part of the frustration is that, aside from the straight section where the pieces join, the tupes have bends in them, so I can’t even hammer them together from the other side!
Oh, and one more thing. There are six sets of supports.
I got 10 short lengths of coated rebar to hammer in the ground to secure the supports. I’m short two! Dangit! While I was at the store, I considered getting two more, just in case, but figured I already had two extra. For some reason, I thought there were only 4 supports for the canopy, maybe 5.
Ah, well. As long as the ends are secured, it shouldn’t matter if a set in the middle is not.
It’s starting to cool down outside. I’m going to go feed the outside cats and do my evening rounds, then fight with it again.
The Re-Farmer

