We have quite a lot of fresh onions, on top of the ones we dehydrated (half of which I powdered) and froze. Mostly the Red of Florence onions.
Which have started to grow! Not all of them, but enough that we had to do something about it.
So I made a version of this historical onion soup using all red onions, to use up the ones that were sprouting.
I made a few other changes, too, of course.
This is how it turned out.
I sliced all the onions that were starting to sprout, saving the greens to use fresh, some of which I used to garnish my bowl. We’d done a pork roast yesterday, and there was just a bit left, along with the pot juices and rendered fat from the roast. I used the fat from the roast, as well as bacon drippings, to caramelize the onions, instead of butter. Part way through the caramelization process, I added the leftover bits of pork, finely chopped – there is no meat in the version in the video.
For the liquid, I use the juices from the pork roast, which had jelled quite nicely overnight, plus water. They used just water in the video. A vinegar I had on hand I chose to add to the beaten egg yolks was a fancy, barrel aged apple cider vinegar.
My daughters had made a loaf in the bread machine yesterday, and that was used for the bread portion. The video specifically stated to use the outside of a crusty loaf, not the soft insides (which would just turn to mush in the soup!), so I sliced off the crust on the bread machine bread. The bread machine makes a relatively dense bread, particularly around the edges, so I was able to cut quite thick slices off all sides for this, and cut them into fairly even cubes. They stood up well to being cooked in all that liquid!
The only other thing I did a differently was to add a splash of vinegar to the soup stock, even though there was vinegar in the beaten egg yolks. After tasting it, I just felt it needed that extra bit of bite.
The only down side to making this soup was the length of time it took to slice the onions, then caramelize them. By the time the soup was simmering and the cubed bread added, my back was giving out and I had to sit down in between doing the other stuff. Not an issue for people who aren’t broken, like me! 😁
As for the soup, it was quite tasty. Even my husband went for seconds, and he’s not a soup person! I think it would have tasted even better with yellow onions, but that’s just me. If all goes well, we’ll have a lot more of those in our garden next year!
This is definitely a soup I’d make again, with any type of onion.
I might be getting my daughters to do the chopping or caramelizing next time, though! 😄
I’m happy to say, they are recovering nicely. You’d never know they’d all just undergone surgery!
In this photo, you’re being looked at by Shadow in the Dark. The boys definitely seemed to get more energetic faster, which makes sense, since they didn’t have open surgery like the ladies.
The other kitten is Pom Pom, who is just getting big enough to be done. He’s quite a bit bigger than his siblings, The Beast and Soot Sprite! Hard to believe they’re from the same litter.
Also, he is getting some very distinctive white fur on his sides. I’ve noticed that in some of the outside kittens, too. Pointy Baby was the first cat we’d see to develop that pattern, which suggests there’s some paternal genetic connection between them.
Anyhow. All is good with the post-op kitties, and they are so very happy to be allowed out of the room again!
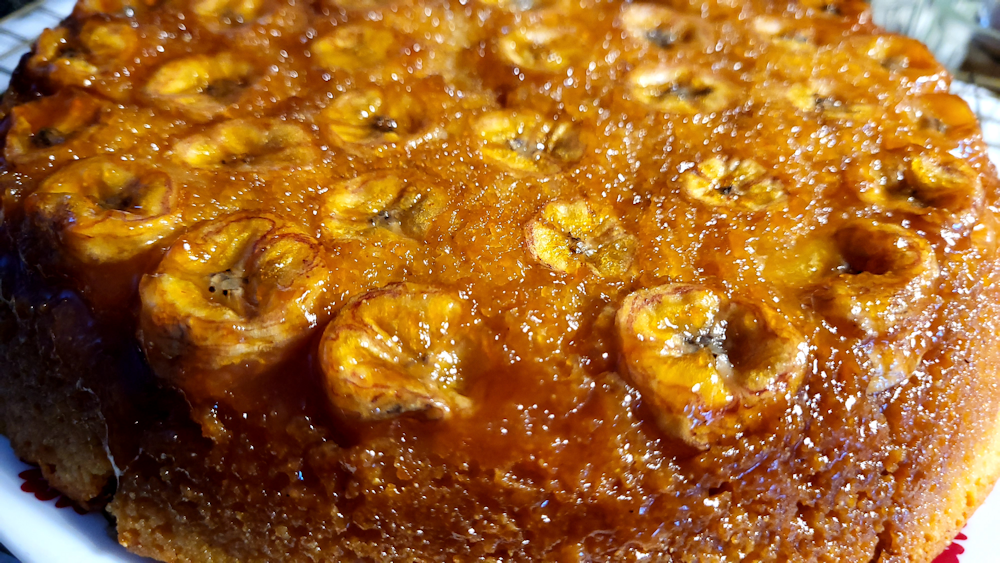
Today, I had a chance to experiment with cornbread again. Last time, I did a strawberry version. This time, I did the exact same thing, except with bananas.
It’s still cooling as I write this and oh, my, does it look good! I can’t wait to try it! This time, we have enough extra that if it goes over well, we can make another one.
Next time I experiment, I think I’ll try apple.
On a completely different note, as we come up to our 6 year anniversary of all 4 of us finally together again, here at the farm, I went looking at some of my posts from back then.
Oh, my.
My husband and younger daughter were already here, and today was the last day my older daughter and I had to get things done, before the movers arrived in the morning.
We had no idea just how bad that would turn out.
Reading over those old posts again makes me shudder.
I know at some point, my husband and I will likely have to move somewhere that is more accessible for limited mobility, but at this point, I’m still thinking, I never want to move again!!!!
Thank God my brother now owns the property. If my mother were still our “landlord”, we probably would have thrown in the towel and found a way to move out, years ago.
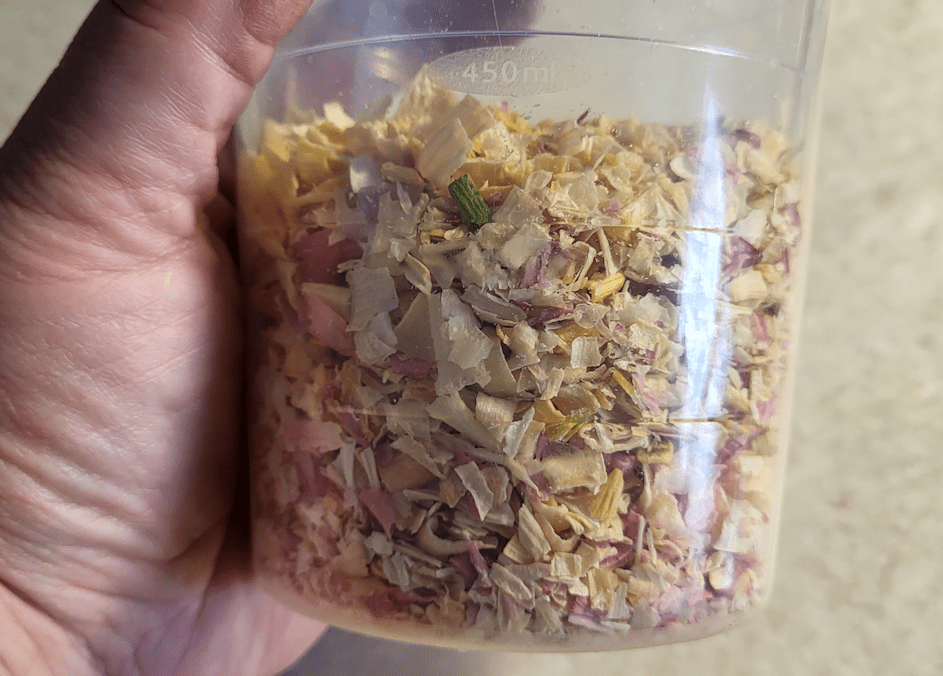
When the last of our Red of Florence onions got processed, I set up three 9×13 baking sheets in the oven to dehydrate some. When those were done, I took the one bag of onions I kept out of the freezer, because it had a pinhole in it somewhere, and filled another baking sheet to dehydrate.
This is what those 4 trays of onions got us.
When level on the counter, the top is almost exactly between the 350ml and 450ml marks on the containers. This is after I crunched them up quite a bit, too.
This represents about 7 or 8 of the largest onions.
I’m considering processing them into a powder to use as is, or make onion salt. I figure I might get about a quarter cup if I put it through our spice grinder. I haven’t decided, yet.
It’s been a long time since I posted anything recipe and cooking related!
Not long ago, I took advantage of an excellent sale, and picked up a whole bunch of fresh strawberries. A couple of clamshells needed to be used up quickly, as they were starting to get past their prime, so I decided to experiment.
I took our basic cast iron skillet corn bread recipe and modified it to make an upside down strawberry cornbread.
It turned out rather well!
First, I’ll give our basic recipe, then explain the modifications. We rarely make it without some sort of modification, so I’ll include those as well.
Basic Cast Iron Skillet Corn Bread
Ingredients:
3/4 cup cornmeal
1 cup flour
1/3 cup sugar
1Tbsp baking powder
1 1/4 cup milk
4 Tbsp butter, melted, plus extra for the pan
Optional:
add seasonings to the dry ingredients, such as paprika, garlic granules or whatever herbs you feel like, to taste.
there is no salt in this recipe, but I sometimes like to add a small amount of course or rock salt that would normally go into our salt grinder, which leaves some nice little crunchy chunks to discover while eating it!
add savoury ingredients like a semi-soft or semi-hard cheese (mozza, cheddar, gouda, havarti, feta, etc.) cut into small cubes (shredded cheese will just disappear), or leftover ham cut into cubes, to the dry ingredients.
instead of butter, you can use oil or melted ghee. We like using ghee quite a bit!
substitute part of the milk for an equal amount of cream, sour cream or yoghurt. You could also try using buttermilk instead of milk, or even use reconstituted powdered milk.
Instructions:
preheat oven to 425F
place cast iron pan with some butter in it into the oven until the butter is melted. Spread the melted butter evenly around the pan, including the sides.
combine dry ingredients into a medium bowl, including any optional ingredients
add the wet ingredients and mix until just combined.
pour the batter into the pan
bake for 20 minutes or until golden brown and pulling away from the sides, or a toothpick stuck into the middle comes out clean
flip onto a rack to cool. Can be served warm with melted butter.
Modification: We start the oven preheating, prepare the cast iron pan, mix the batter, pour it into the pan, place it into the still preheating oven, then set the timer for 25-30 minutes. Basically, it’s because it takes a long time for our oven to preheat to 425F and we’re impatient. It has always worked just fine.
Upside Down Strawberry Corn Bread modifications
Extra Ingredients:
fresh strawberries, cleaned and hulled
butter
brown sugar
Place the clean cast iron pan on the stove and melt a generous amount of butter into it. I used a couple of tablespoons, maybe a bit more, for our 10 inch pan.
After the butter is melted, use some to oil the sides of the pan
Add enough brown sugar to cover the bottom of the pan evenly
Cut the strawberries into enough slices to cover the bottom of the pan; lay them on top of the brown sugar
Chop more strawberries into small cubes and add them to the dry ingredients of the corn bread batter.
Once the batter is ready, gently pour it over the strawberry slices, so as not to disturb them. If there is a chance that the butter and brown sugar might bubble up the sides of your pan, place it on a baking sheet in the oven, or have a baking sheet on the rack below.
Bake for 25-30 minutes, or until the cornbread is golden brown and starting to pull away from the sides
When done, turn off the oven and let it rest in the oven for a few minutes, then remove and cool, still in the pan, outside the oven for a few minutes more. The heat from the cast iron pan will continue to crisp up the edges and caramelize the brown sugar base.
slide a knife around the edges of the pan to make sure it’s not sticking. Take a plate larger than the top of your pan and put it upside down over the cornbread. Carefully flip the pan upside down and remove the pan.
can be served served warm with a touch of cream poured over the top, or completely cooled – if you’re willing to wait that long!
As I wrote this post, my daughters made another batch. It’s out of the oven now, and I can’t wait to have some!
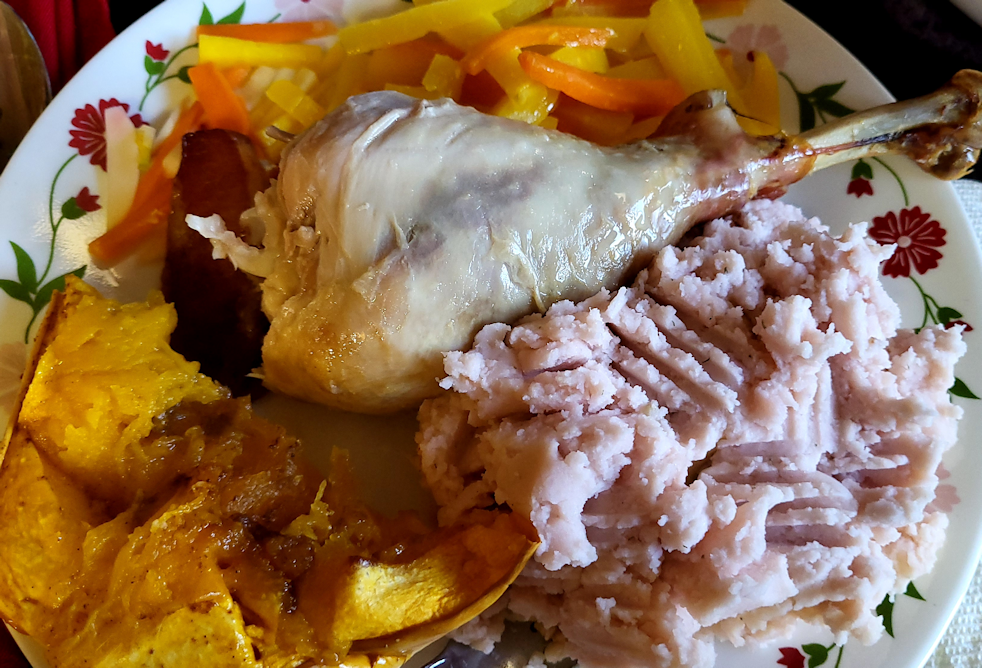
Well, I’m quite happy with how our Thanksgiving dinner turned out yesterday. The main reason is, just about everything on our plate was from our garden!
Starting from the top, going clockwise:
Uzbek Golden and Naval carrots, steamed, then tossed with butter, salt and pepper, and a touch of brown sugar.
Red Thumb fingerling potatoes – these are most definitely a mashing potato! – with butter, cream cheese, mayo mashed in, seasons with dill, salt and pepper.
North Georgia Candy Roaster squash. The squash was quartered and the cavity was coated with a mixture of ghee, brown sugar, cinnamon, cloves and a touch of salt, and roasted with the spatchcocked turkey. If we’d done the turkey without spatchcocking it, we wouldn’t have had room for both! 😄
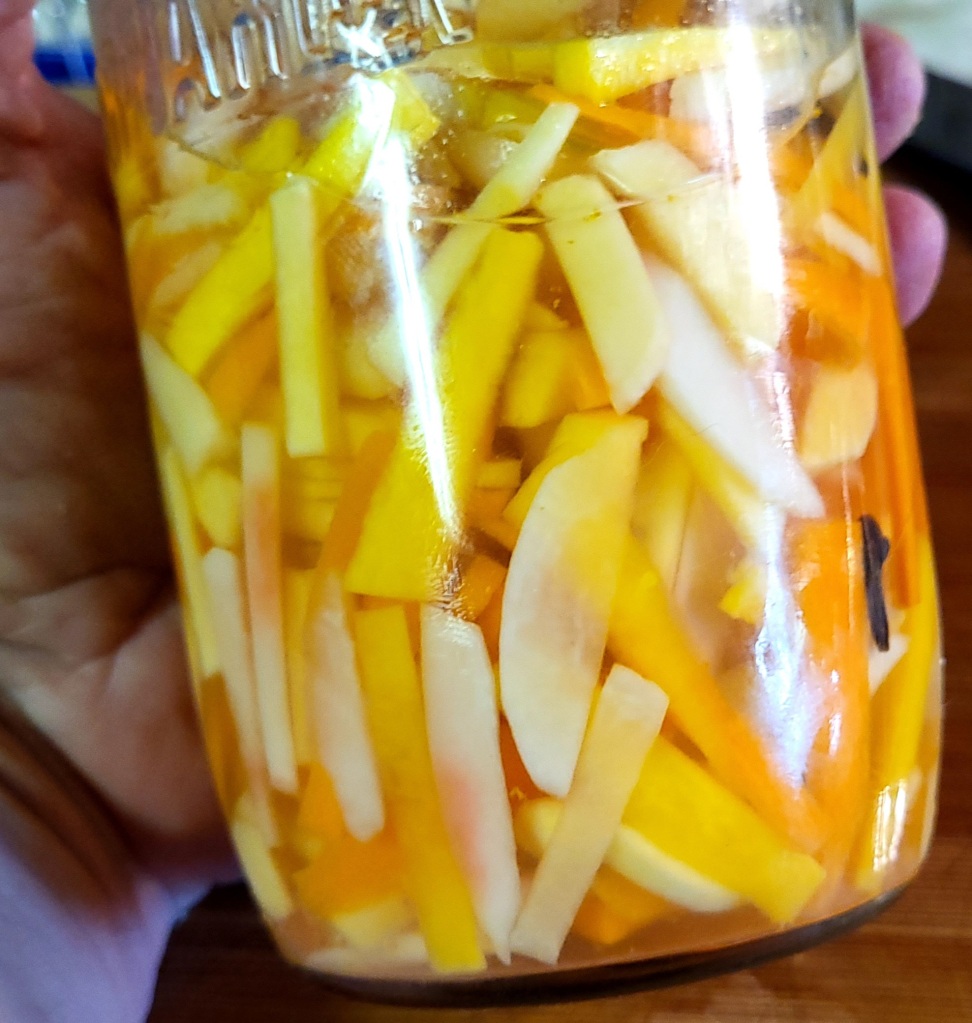
Finally, at the top left, is the quick pickle of both types of carrots, turnip, radish and garlic, spiced with whole cloves and whole cardamom seeds.
I look forward to a time when the meat is also from our own animals.
Unfortunately, I completely forgot to cover the peppers and eggplant yesterday evening. By the time I remembered, it was past midnight and we already reached freezing temperatures, though of course, none of my weather apps agreed. When my daughter and I went out with the covers, there was already frost just starting to glitter on the ground. It was chilly, but the stars were incredible! So many, and so very bright!
Heading out this morning, the frost was still heavy on the ground. At the last minute, I decided to take video for another garden tour. It will probably be the last one for the year. I’ll start putting that together in a bit, as I wait for things to warm up a bit more before going back outside. The forecasts for a milder October have all changed, though we’re still expected to get a few days at 10C/50F and above – though again, that depends on which app I’m looking at. It’s still nothing to complain about. After all, we could be having snow right now!
The turkey is almost ready, so I thought I’d make a quick post.
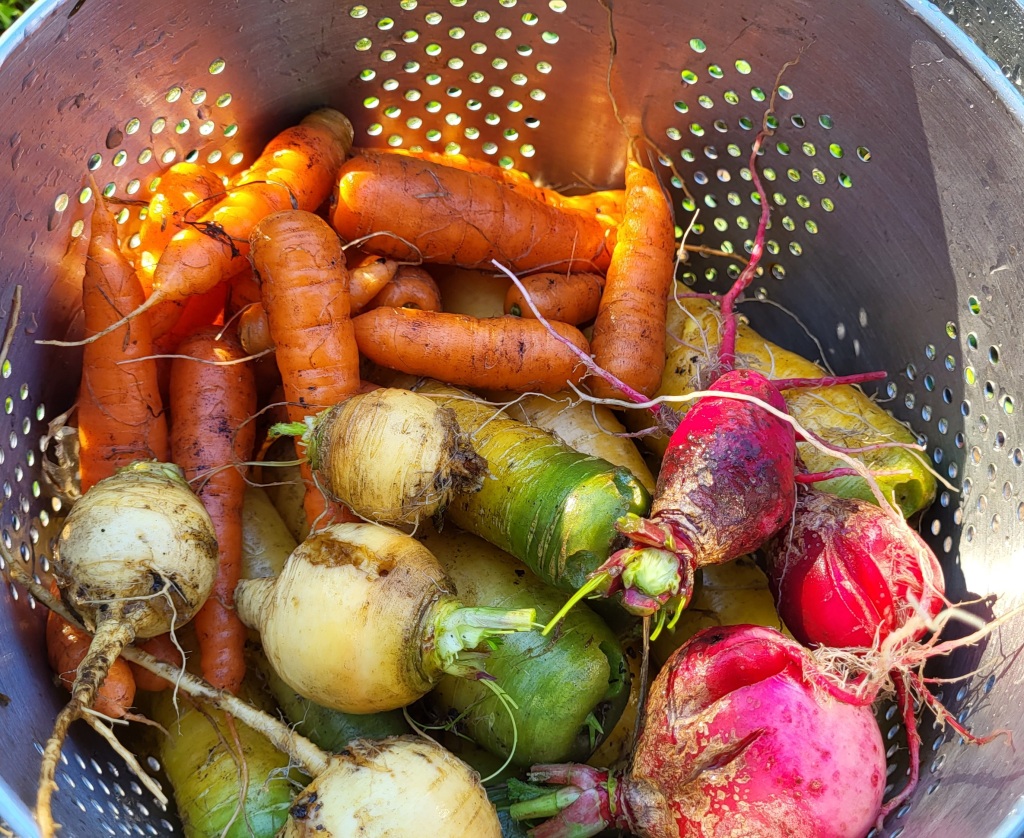
It’s not the only thing that’s quick today. From this morning’s harvest…
… of orange and yellow carrots, turnips and radishes to…
… a quick pickle! A few carrots, turnips, radishes, garlic, whole cloves and whole cardamom. I made this first thing, so it would have a few hours to pickle before being included in our dinner.
I hope it’s good. 😆 I am no fan of radishes, but I will try it.
And a lovely morning, with faces like this, saying hello.
Unfortunately, he was just in some sort of altercation – I never heard a thing, but my daughter went running outside, earlier. There’s a puncture wound on the paw, but he wasn’t favouring it in any way.
I tried doing a head count this morning. I counted 37! Then I counted again and got 34. So I counted again and got… 34. This count included Nosencrantz (yay!), Rolando Moon (yay!) and Shop Towel (boooooooo!!!). Shop Towel is the likely cause of that puncture wound.
We had a fantastic time, yesterday! Having company for a cook out gave us the excuse to do things that tend to slide, when it’s just for ourselves. One of those things was to empty the fire pit of ashes, level the bottom as much as we could, then re-set the concrete blocks that are there to hold the old oven racks we saved for fire pit cooking, as well as solidly setting up the four fire bricks we found here and there around the property, to set the Dutch Oven on, so the legs won’t sink into the ground. The ashes were dumped near the garden, to later be used in garden beds.
My younger daughter took on the job of getting a fire going, then burning it down to get the coals needed for the Dutch Oven. Since the set up for it is right near the fire itself, one side would be really hot, so she set a timer to rotate the oven every 15 minutes or soo.
It turned out awesome!
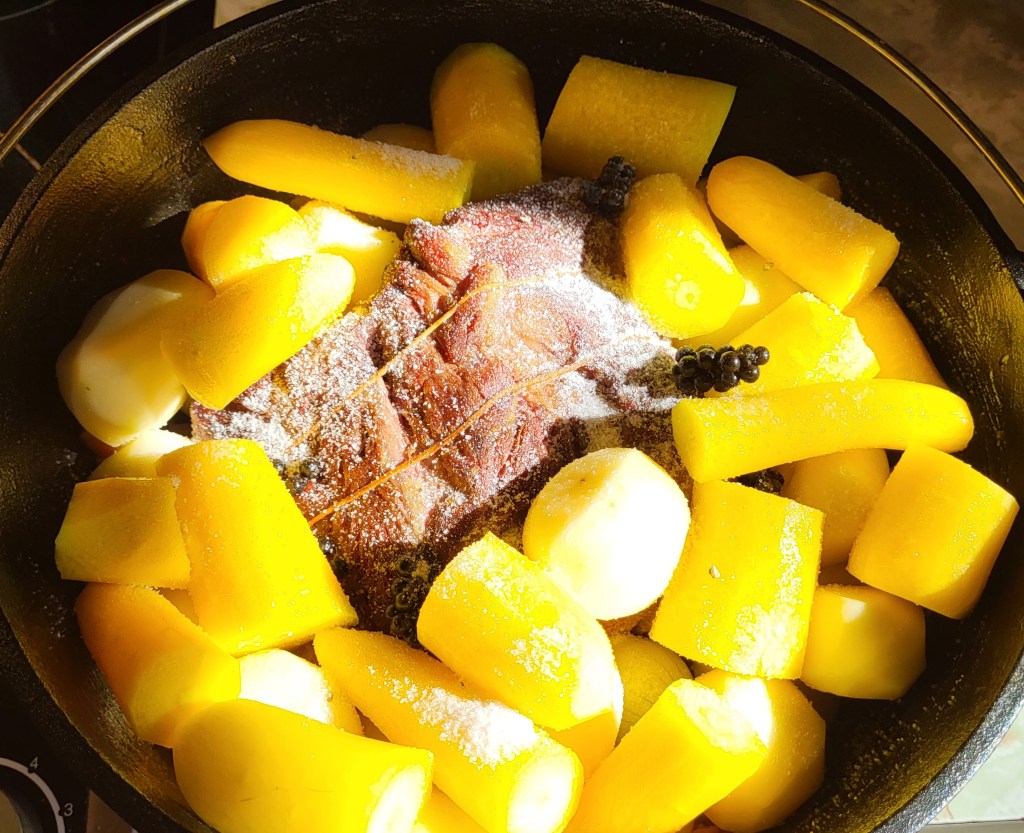
The inside of the pot was first rubbed with ghee, which can handle the hot temperatures better than, say, olive oil or normal butter. Some slices of bacon went on the bottom. The beef was seared in a pan before going into the pot – with the legs on the Dutch oven, we can’t do a sear in the pot itself unless it’s been heated over a fire/coals.
Since the meat would need quite a long time to cook, I used whole small onions from the ones we had to harvest early, because they’ve been cat crushed, whole Irish Cobbler potatoes, and big chunks of Uzbek Golden carrots. When we grew the Uzbek carrots last year, like so many other things, they did not grow to their full size. This year, they did much better! The ones I dug up for the pot were big, thick buggers! There are still plenty in the garden.
There’s a whole bulb of garlic in there – all three massive cloves of it! 😄
For seasoning, I used the truffle salt we were gifted with, and I cut up one of the sprigs of fresh pepper and scattered them about. Last off all, I added about a litre of water.
In the future, I’ll have to make sure to add more water. The photo was taken right after the pot was removed from the coals. The cast iron stays hot for a long time, and by the time we were eating, it was getting pretty black against the iron!
I neglected to take a picture of the roasted Pink Banana squash.
We also had hot dog fixings, if anyone wanted to roast some wienies, and if we were really into it, we had burger patties ready and waiting in the fridge, so there was plenty for everyone when company arrived. Especially since they brought pizzas, pie and ice cream! They also were incredibly generous and brought us FOUR big bags of kibble! 9.1kg size bags. Between that and a generous cash donation we received from a dear friend, it’s going to be a huge help with stocking up for the kitties for October.
Oh, and it looks like we have a new favourite local pizza place. They tried a place that opened in a new location recently. They’ve been around for a while, but I had no idea. I’ve walked past the previous location many times, but it was such a hole in the wall, I thought it was somehow part of the Greek restaurant, next door! There were no signs to say it was anything else. I think this new location will be much better for them. People will actually be able to see they exist!
We had a fantastic evening. We even managed to do a walk around the inner yard and garden beds before it got too dark to see.
It gets dark so fast, this time of year!
My husband was able to join us for the cook out for quite a long time. The longest I’ve ever seen him manage in ages. Of course, he then had to go inside and medicate to the gills, and he’s paying for it today, but he got to spent time with his family, and he really, really misses that. We’ve had to turn down invitations to see family simply because it’s so painful for him to travel, and he’d have to leave so quickly. So for us to have some of his family be able to make a last minute visit to our place is really, really special for him.
It was such a perfect night for it, too. Things got pretty hot during the day – our predicted 22C/72F turned out to be 25C/77F – but the evening temperatures were just ideal. Even after our company left, my daughters and I stayed out to tend the fire and let it burn itself down (leaving the most perfect cooking coals, and nothing we needed to cook anymore! 😂), because we just did not want to go inside. I felt ready to go to bed outside, it was so gorgeous! This, on the last day of September, too!
It was a bit disorienting when we did finally make it inside. After hauling everything in, putting things away, I finally started my computer, settled in and…
It was barely past 10:30pm.
It felt like it should have been at least midnight!
We did end up getting a solid rain last night, starting at maybe 4 or 5 am. The forecasts were predicting a thunderstorm today… or maybe tomorrow. Now, I’m seeing more rain in the forecast, but no storms. I’m also now seeing predictions for overnight lows of 0C/32F on Friday, when earlier long range forecasts weren’t expecting anything that low for another couple of weeks. It changed, every time I look a tthe forecasts, it seems!
We shall see.
Anyhow.
We had an absolutely fantastic day yesterday, and such a great visit. I’m so glad they were able to come out!
I let the tomato sauce we made yesterday cool over night – with the current overnight temperatures we are getting right now, the kitchen gets really cold, so there were no concerns there!
This morning, I ladled it into some size medium Ziploc bags.
We did use some of it last night, while it was still hot. I still ended up with 6 bags for the freezer.
I left them on the baking sheet in the freezer, so they’d stay nice and flat while freezing.
Once this was done, I prepped more pans, then washed and sliced some Black Beauty tomatoes to dehydrate. Only 2 pans fit in the oven. I should look into getting extra oven racks. With enough oven racks, we could use all our 9×13 baking pans at the same time, and have room to spare for air circulation.
Something to keep in mind over the next while.
Anyhow, those went into the oven on the lowest “warm” setting, which on our new oven is 145F. I left the oven door propped open slightly with a wooden spoon to let the moisture out. It’ll still take a long time, though. Some of the slices ended up a bit on the thick side.
I also completely forgot to take any photos!
I’ll be sure to take some when it’s time to flip them.
The main thing is, these could stay in the oven to dry out, and I could go do other things. I was intending to get to the trellis bed again, but that didn’t happen. You’ll see why in my next post! I’m pretty excited about it. 😊