Well, I’m quite happy with how our Thanksgiving dinner turned out yesterday. The main reason is, just about everything on our plate was from our garden!
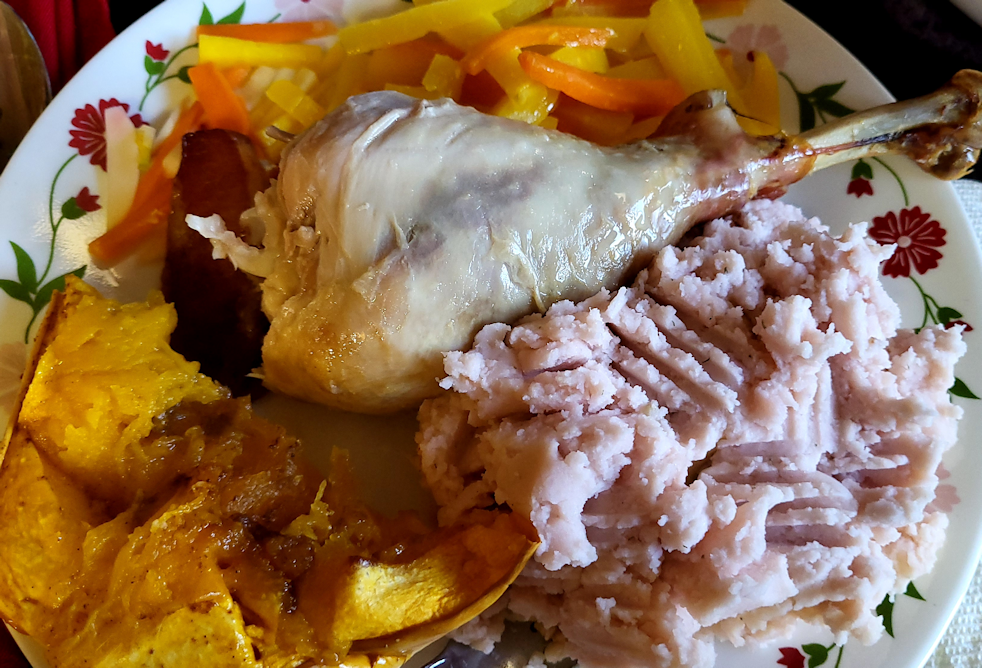
Starting from the top, going clockwise:
Uzbek Golden and Naval carrots, steamed, then tossed with butter, salt and pepper, and a touch of brown sugar.
Red Thumb fingerling potatoes – these are most definitely a mashing potato! – with butter, cream cheese, mayo mashed in, seasons with dill, salt and pepper.
North Georgia Candy Roaster squash. The squash was quartered and the cavity was coated with a mixture of ghee, brown sugar, cinnamon, cloves and a touch of salt, and roasted with the spatchcocked turkey. If we’d done the turkey without spatchcocking it, we wouldn’t have had room for both! 😄
Finally, at the top left, is the quick pickle of both types of carrots, turnip, radish and garlic, spiced with whole cloves and whole cardamom seeds.
I look forward to a time when the meat is also from our own animals.
Unfortunately, I completely forgot to cover the peppers and eggplant yesterday evening. By the time I remembered, it was past midnight and we already reached freezing temperatures, though of course, none of my weather apps agreed. When my daughter and I went out with the covers, there was already frost just starting to glitter on the ground. It was chilly, but the stars were incredible! So many, and so very bright!
Heading out this morning, the frost was still heavy on the ground. At the last minute, I decided to take video for another garden tour. It will probably be the last one for the year. I’ll start putting that together in a bit, as I wait for things to warm up a bit more before going back outside. The forecasts for a milder October have all changed, though we’re still expected to get a few days at 10C/50F and above – though again, that depends on which app I’m looking at. It’s still nothing to complain about. After all, we could be having snow right now!
The turkey is almost ready, so I thought I’d make a quick post.
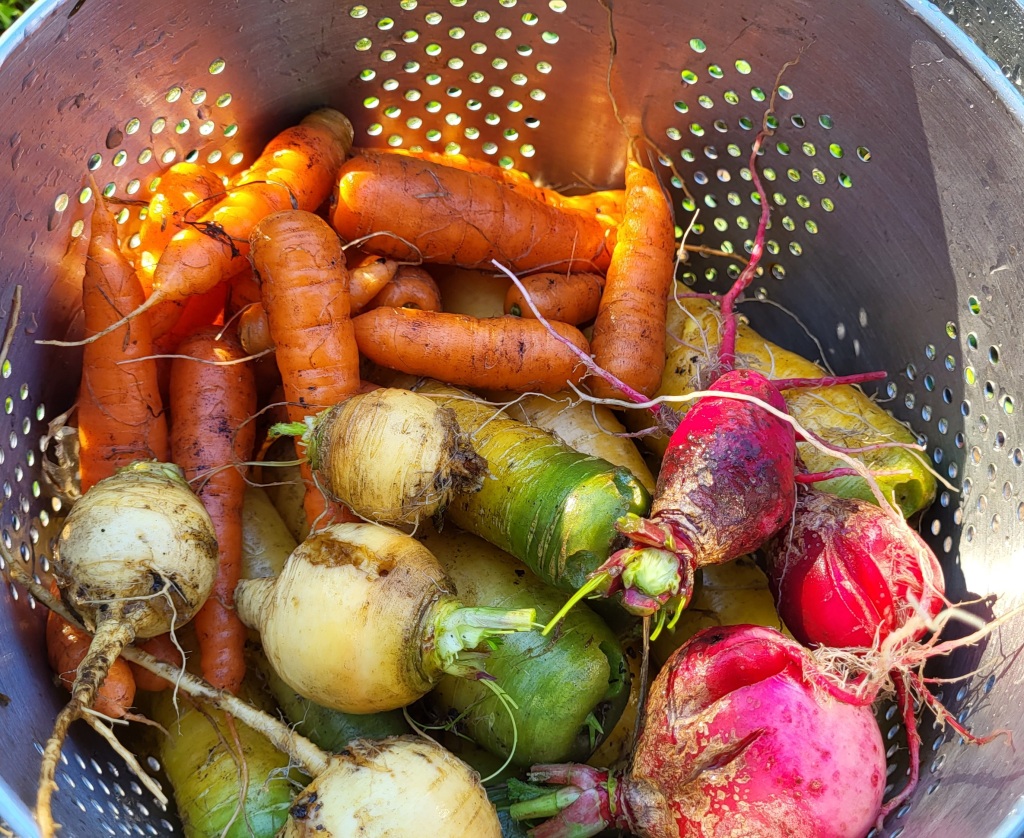
It’s not the only thing that’s quick today. From this morning’s harvest…
… of orange and yellow carrots, turnips and radishes to…
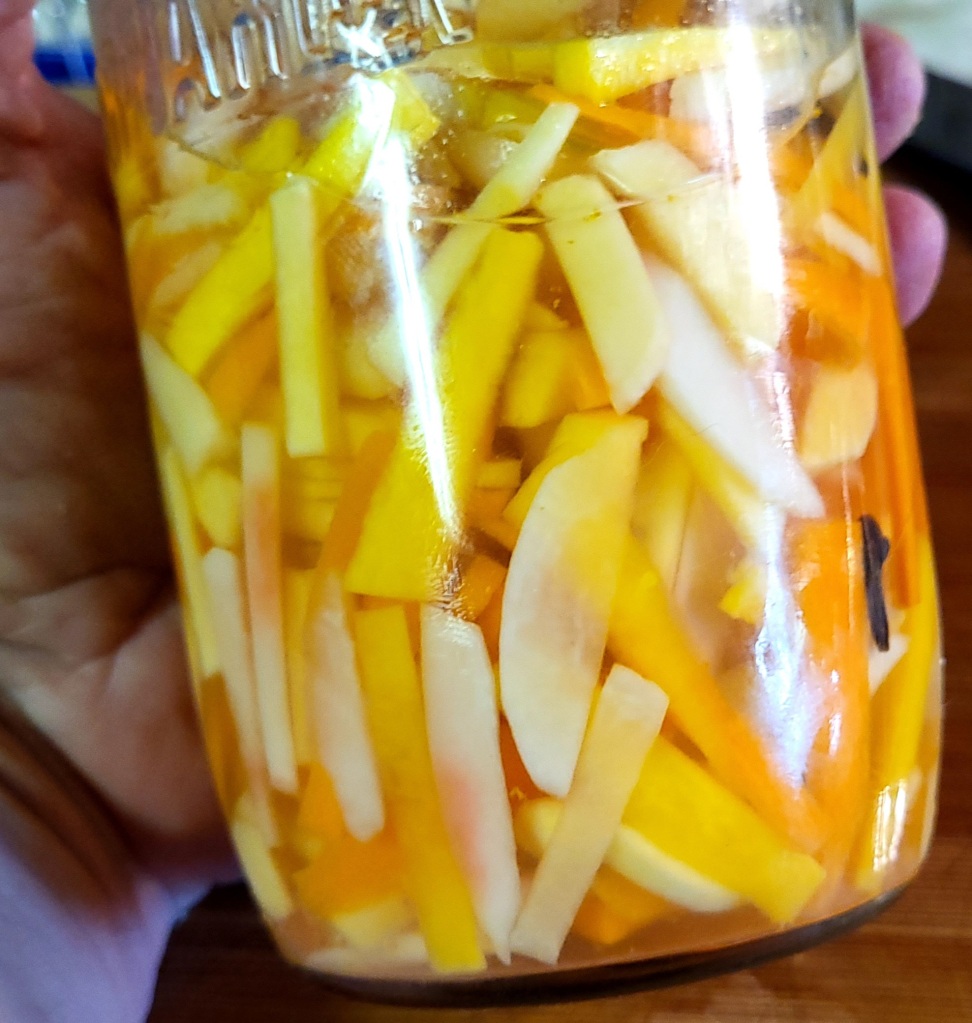
… a quick pickle! A few carrots, turnips, radishes, garlic, whole cloves and whole cardamom. I made this first thing, so it would have a few hours to pickle before being included in our dinner.
I hope it’s good. 😆 I am no fan of radishes, but I will try it.
And a lovely morning, with faces like this, saying hello.
Unfortunately, he was just in some sort of altercation – I never heard a thing, but my daughter went running outside, earlier. There’s a puncture wound on the paw, but he wasn’t favouring it in any way.
I tried doing a head count this morning. I counted 37! Then I counted again and got 34. So I counted again and got… 34. This count included Nosencrantz (yay!), Rolando Moon (yay!) and Shop Towel (boooooooo!!!). Shop Towel is the likely cause of that puncture wound.
We had a fantastic time, yesterday! Having company for a cook out gave us the excuse to do things that tend to slide, when it’s just for ourselves. One of those things was to empty the fire pit of ashes, level the bottom as much as we could, then re-set the concrete blocks that are there to hold the old oven racks we saved for fire pit cooking, as well as solidly setting up the four fire bricks we found here and there around the property, to set the Dutch Oven on, so the legs won’t sink into the ground. The ashes were dumped near the garden, to later be used in garden beds.
My younger daughter took on the job of getting a fire going, then burning it down to get the coals needed for the Dutch Oven. Since the set up for it is right near the fire itself, one side would be really hot, so she set a timer to rotate the oven every 15 minutes or soo.
It turned out awesome!
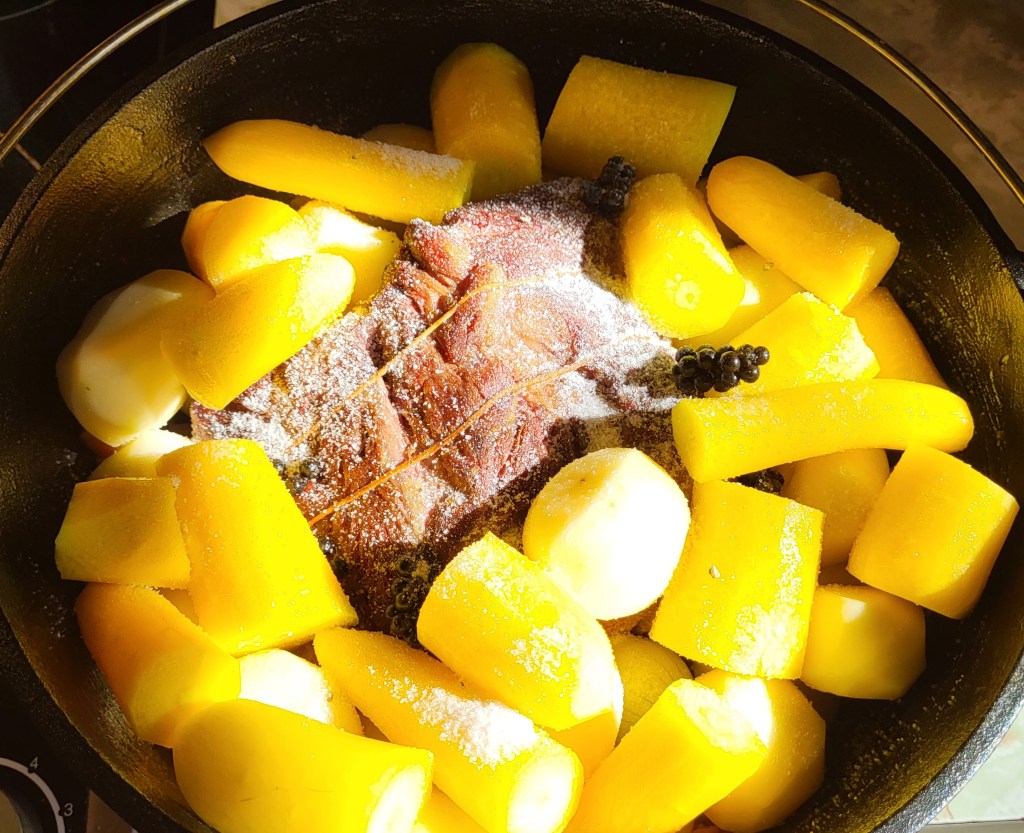
The inside of the pot was first rubbed with ghee, which can handle the hot temperatures better than, say, olive oil or normal butter. Some slices of bacon went on the bottom. The beef was seared in a pan before going into the pot – with the legs on the Dutch oven, we can’t do a sear in the pot itself unless it’s been heated over a fire/coals.
Since the meat would need quite a long time to cook, I used whole small onions from the ones we had to harvest early, because they’ve been cat crushed, whole Irish Cobbler potatoes, and big chunks of Uzbek Golden carrots. When we grew the Uzbek carrots last year, like so many other things, they did not grow to their full size. This year, they did much better! The ones I dug up for the pot were big, thick buggers! There are still plenty in the garden.
There’s a whole bulb of garlic in there – all three massive cloves of it! 😄
For seasoning, I used the truffle salt we were gifted with, and I cut up one of the sprigs of fresh pepper and scattered them about. Last off all, I added about a litre of water.
In the future, I’ll have to make sure to add more water. The photo was taken right after the pot was removed from the coals. The cast iron stays hot for a long time, and by the time we were eating, it was getting pretty black against the iron!
I neglected to take a picture of the roasted Pink Banana squash.
We also had hot dog fixings, if anyone wanted to roast some wienies, and if we were really into it, we had burger patties ready and waiting in the fridge, so there was plenty for everyone when company arrived. Especially since they brought pizzas, pie and ice cream! They also were incredibly generous and brought us FOUR big bags of kibble! 9.1kg size bags. Between that and a generous cash donation we received from a dear friend, it’s going to be a huge help with stocking up for the kitties for October.
Oh, and it looks like we have a new favourite local pizza place. They tried a place that opened in a new location recently. They’ve been around for a while, but I had no idea. I’ve walked past the previous location many times, but it was such a hole in the wall, I thought it was somehow part of the Greek restaurant, next door! There were no signs to say it was anything else. I think this new location will be much better for them. People will actually be able to see they exist!
We had a fantastic evening. We even managed to do a walk around the inner yard and garden beds before it got too dark to see.
It gets dark so fast, this time of year!
My husband was able to join us for the cook out for quite a long time. The longest I’ve ever seen him manage in ages. Of course, he then had to go inside and medicate to the gills, and he’s paying for it today, but he got to spent time with his family, and he really, really misses that. We’ve had to turn down invitations to see family simply because it’s so painful for him to travel, and he’d have to leave so quickly. So for us to have some of his family be able to make a last minute visit to our place is really, really special for him.
It was such a perfect night for it, too. Things got pretty hot during the day – our predicted 22C/72F turned out to be 25C/77F – but the evening temperatures were just ideal. Even after our company left, my daughters and I stayed out to tend the fire and let it burn itself down (leaving the most perfect cooking coals, and nothing we needed to cook anymore! 😂), because we just did not want to go inside. I felt ready to go to bed outside, it was so gorgeous! This, on the last day of September, too!
It was a bit disorienting when we did finally make it inside. After hauling everything in, putting things away, I finally started my computer, settled in and…
It was barely past 10:30pm.
It felt like it should have been at least midnight!
We did end up getting a solid rain last night, starting at maybe 4 or 5 am. The forecasts were predicting a thunderstorm today… or maybe tomorrow. Now, I’m seeing more rain in the forecast, but no storms. I’m also now seeing predictions for overnight lows of 0C/32F on Friday, when earlier long range forecasts weren’t expecting anything that low for another couple of weeks. It changed, every time I look a tthe forecasts, it seems!
We shall see.
Anyhow.
We had an absolutely fantastic day yesterday, and such a great visit. I’m so glad they were able to come out!
I let the tomato sauce we made yesterday cool over night – with the current overnight temperatures we are getting right now, the kitchen gets really cold, so there were no concerns there!
This morning, I ladled it into some size medium Ziploc bags.
We did use some of it last night, while it was still hot. I still ended up with 6 bags for the freezer.
I left them on the baking sheet in the freezer, so they’d stay nice and flat while freezing.
Once this was done, I prepped more pans, then washed and sliced some Black Beauty tomatoes to dehydrate. Only 2 pans fit in the oven. I should look into getting extra oven racks. With enough oven racks, we could use all our 9×13 baking pans at the same time, and have room to spare for air circulation.
Something to keep in mind over the next while.
Anyhow, those went into the oven on the lowest “warm” setting, which on our new oven is 145F. I left the oven door propped open slightly with a wooden spoon to let the moisture out. It’ll still take a long time, though. Some of the slices ended up a bit on the thick side.
I also completely forgot to take any photos!
I’ll be sure to take some when it’s time to flip them.
The main thing is, these could stay in the oven to dry out, and I could go do other things. I was intending to get to the trellis bed again, but that didn’t happen. You’ll see why in my next post! I’m pretty excited about it. 😊
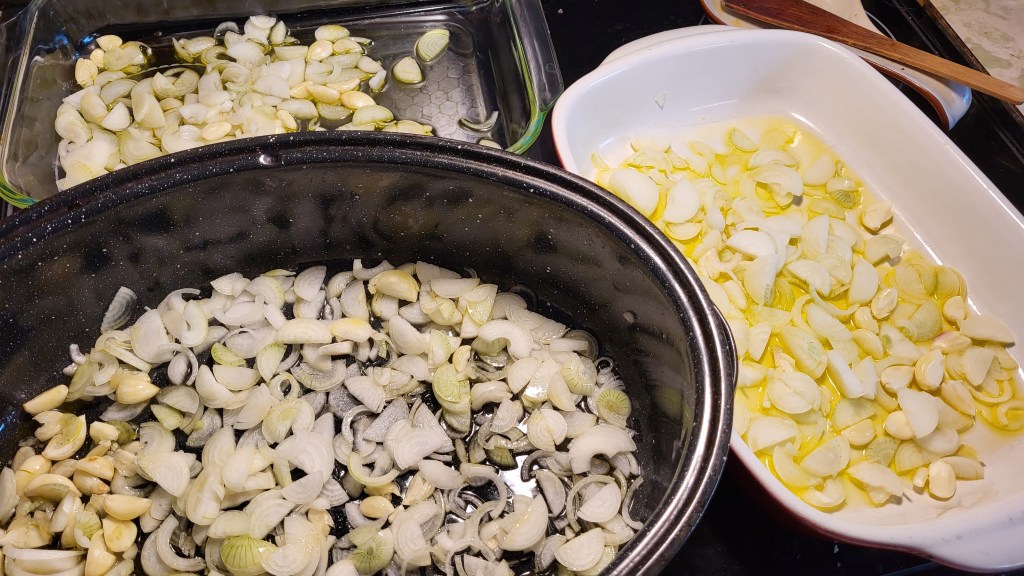
After selecting the ripest Roma VF tomatoes, I gave them a wash and left them in the water while working on the onions and garlic. I wanted those on the bottom of the roasting pans to make sure they would get completely immersed in any liquid released by the tomatoes. I wanted them to cook until they were so soft, they’d disappear into the sauce.
When it came time to process the tomatoes, things went a lot faster than fighting with those little onions and garlic! I was going to leave the skins on, so I only needed to cut the stem ends off (and any damaged bits), then give them a squeeze. With the shape of the Roma, it was easy to do it sort of assembly line style, cutting the ends off and lining them up on the cutting board, cut side down, until the board was mostly full, then squeezing the seeds out into a bucket for the compost.
A handy tip to make things easier: place a cutting board inside a baking pan with low sides. I have a whole bunch of 9×13 baking pans that are perfect for this. They are large enough to fit a cutting board with room to spare to catch liquids or keep items handy, and the sides are low enough to not get in the way of my hand or the knife as I cut.
All the recipes I found had the amount of tomatoes by weight – usually 4 lbs. I had no idea how many pounds of tomatoes I had, so I just winged the quantities for the other ingredients, and split everything between the three pans.
After all the tomatoes were cut and seeded, I added more olive oil and carefully turned the tomatoes to coat them, while trying not to move the onions and garlic on the bottom too much.
The recipes I found had oven temperatures ranging from 300F to 425F, and while some had cooking times, most were “until the skins start to blister”.
I decided to go lower and slower. I put the three roasting pans into a 325F oven. I checked them at about 40 minutes, then added another half an hour.
While they were roasting, I went and got some fresh oregano and thyme. I didn’t get a lot of oregano, because the plant is mostly blooming right now, and the bees were loving the flowers. So I just found a few smaller stems. I picked about the same amount of the thyme sharing a pot with the oregano. We have German Winter Thyme in the old kitchen garden, but the seed pack for these ones didn’t include a variety name.
This gave me a chance to try out the herb chopper I picked up at a Dollarama not long ago. It came with a cutting board with a recess matching the curve of the blades. It did a pretty good job, though with the slightly larger oregano leaves, they sort of got caught between the blades while just rocking it, so it needed to be lifted and shifted with each cut. That was not as much of an issue with the thyme leaves.
I like it.
When the timer went off on the oven, the kitchen needed to be used for other cooking, so I just shut it off and left the pans in the oven. Then, before I started on the final cooking, I made sure to do all my outside stuff and other little things, so they were in the oven for probably 2 or 3 hours. They were still quite warm when I took them out!
When transferring them into my big stock pot, I was very happy to see how softened the onions and garlic were! Exactly what I was after. All three roasting pans really filled that pot!
At this point, I added the chopped herbs and salt. Sea salt, because we happen to have some at the moment. After stirring that in, I turned on the heat, then used the immersion blender on it. Not for long, but that things is very efficient, so there were just a few larger pieces that got missed.
After that, I kept it at a simmer for about another couple of hours, stirring frequently. I tasted it a few times and ended up adding more salt (twice), some pepper, some dried sage, a bay leaf and a splash of lemon juice.
Towards the end, I removed the bay leaf and took the immersion blender to it again. This time I kept it going for longer, so make sure there weren’t any big pieces of tomato skins anywhere.
I like that this pot has a measurement scale inside it. After the first blending, the sauce reached just under the 7L mark. When it was done, it was at the 6L mark. I could have cooked it down further, but I think it’ll be good enough.
For now, the sauce is cooling down. I plan to put it into freezer bags and freeze them, though we will probably use some of it with a meal, first.
I think the next processing I will do is to dehydrate slices of the Black Beauty and Indigo Blue tomatoes. Those can be left in a warm oven, unattended, while I get other work done.
A dehydrator would be a useful gadget, but we really don’t have the space for one. At least not where we also have access to an outlet.
For now, the oven will do just fine, and tomorrow, I hope to get some work done outside at the same time!
Finally, I am home for the day and can start the tomato sauce. We have tomatoes all over the place, and I gathered all the ripest Roma VF, leaving the Black Beauty and Indigo Blue, for now.
It was enough to fill a kitchen sink.
After going over numerous recipes for roasted tomato sauce, I decided on how I would make these.
I have 3 roasting pans and can fit them all in the oven together.
To start, the bottoms got a generous splash of olive oil. I then took advantage of this and used the smaller onions and garlic. I finished off an entire small braid of onions, which gave me the equivalent of maybe 2 large onions. 😁 I also smashed and peeled cloves from about a dozen small garlic bulbs. That gave me the equivalent of about 2 large bulbs.
I wasn’t too concerned about the proportions in each roasting pan. They will all go into one pot, later. That’s when I will be adding fresh herbs and seasonings.
The down side of using the smallest bulbs is that it took a really long time standing at the counter, prepping them.
My back is killing me, and I took painkillers before I started.
So I am taking a break now.
Next step is to trim and deseed the tomatoes. That’s going to be another long time, standing at the counter!
I plan on leaving the skins, though, as I will be using the immersion blender as a final step.
As for the black tomatoes, once the sauce is done in the oven, I think I will slice the ripest ones and dehydrate them. As much as I can fit on baking pans, at least. There are more Romas ripening, so there will likely be more sauce or paste to make, later.
I filled my large colander with the ripest of the Roma VF we have laying on a screen in the cat free zone, as well as the ripest Indigo Blue Chocolate and Black Beauties, filling the colander to almost overflowing.
After going through a number of recipes, I decided to not blanch them first. The Roma got topped, halved and seeded first, then went into my larger stock pot. I considered doing the other tomatoes separately, but didn’t want to mess with more pots and just mixed them all together.
When we processed tomatoes last year, we blanched and cooked them, before running them through a sieve, so any seeds were no longer viable by the time they went into the compost heap. This time, I seeded them first. I expect we’ll be having some volunteers in the compost pile, next year! 😄
For the seasoning, I kept things simple. I harvested some fresh yellow onions, picking ones the cats rolled on and broke the stems, since those were not going to be getting any bigger. They were a decent size, though, and I only used three of the bunch I picked. The rest got braided and are now hanging in the cat free zone (the living room) with the garlic to cure.
I grabbed a garlic bulb that turned out to have two huge cloves, as well as a bunch of fresh thyme from the pot in the living room. Along with that, I added some freshly ground salt; my husband picked up new salt and pepper grinders to replace our old and breaking ones, and got a container of Himalayan pink salt chunks for the salt grinder, too. I also added a bit of sugar and lemon juice.
Once the tomatoes had stewed long enough that the skins could be easily removed, I sautéed the onions and whole garlic cloves in some ghee until the onions were translucent. I was going to strain the tomatoes through a fine colander I have, but I couldn’t find it, so it went through a large sieve, instead. This sieve has a quite fine mesh on it. I don’t know how much difference it would have made if I’d used the colander, since there really wasn’t a lot of pulp in there, but the end result was more like tomato juice than tomato sauce!
Which is why it ended up taking much longer than expected to cook it down to a more sauce like consistency.
All those tomatoes had filled my larger stock pot. By the time I strained out the skins, it barely filled half of my smaller stock pot. I cooked it down until it seemed thick enough, then poured the sauce into sterilized 750ml canning jars. I was able to fill two, plus maybe a third of the last jar. That one got a twist off lid. In the photo, the whitish chunks are the broken up pieces of garlic cloves. Mmmmm….
They are now sitting out to cool over night, and then they’re going into the fridge. There isn’t enough there to bother actually canning the sauce.
I think with the next batch, though, I might take the time to make tomato paste again – this time on the hot plate on the dining table, to free up the kitchen, like we did last year. I don’t expect to be making as much as we did last year, and we only got a dozen 125ml jars of paste at the time. They went over so very well, though, they didn’t last long. That’s why my original intention had been to grow so many paste tomatoes this year, and it just didn’t happen. Hopefully, we’ll be more prepared, next year!
Altogether, this took about 5 or 6 hours to finish. If we’d been working with more tomatoes, I would have broken out our giant stock pot – the one that’s big enough to brine a turkey, with room to spare – to cook down the tomatoes. That’s what I used to make the paste last year.
We still have plenty of tomatoes resting on the screen in the living room and, of course, lots more on the vines, so we will be doing this again, probably a couple more times.
I did get a bit of a nap in before I started, but I am still so very tired. I’ll expect I’ll be sleeping on the couch again tonight, too. The family did keep checking on my room, and my husband even had Snarly Marlee in the living room to give her a break from the kittens for a while, and there were no new messes. Hopefully, things will stay that way, but my mattress is still damp from the previous ones.
I so look forward to getting cats and kittens adopted out!
Speaking of which, still no sign of The Phantom. The Cat Lady and I have been discussing alternatives if she doesn’t show up, and tomorrow she plans to drop off a trap for us.
Still no interest in the kittens she shared photos of.
Since they are friendlier and easier to catch, she’s going to see about booking us to get a bunch of males fixed, next.
As much as I’d like to get the outside cats fixed and adopted out, we really need to adopt out more inside cats. Some of them are inside only because they were going to get taken and adopted out, and it just didn’t end up happening.
One of the odd things about our garden plans not panning out this year is that, while we are harvesting more of some things faster than we can conveniently eat, it’s not enough to make it worth canning or freezing.
Today, I decided to take most of what’s been slowly building up to make a large soup. We roasted a couple of chickens yesterday, so that was my main protein.
Since I was using whatever was on hand, I measured nothing. I just chopped everything so that they would finish cooking at about the same time.
So here’s my not-a-recipe.
First, a couple of shallots and a small onion that got accidentally harvested while weeding, were sautéed in butter along with some Uzbek golden carrots and a few Gold Ball turnips, and the one tiny Honeyboat Delicata squash that got accidentally harvested when the stem broke off while in was checking on it. All of those needed the longest time to cook. A small handful of Spoon tomatoes went in, then green and yellow beans, and finally some green and yellow patty pan squash. A whole bulb of garlic went in, too – all 2 cloves that were so big, I was able to dice them. After those sautéed for a while, I took the pan juices from the chicken roasting pan and ran them through a sieve into the pot, along with just enough water to barely cover all the vegetables, bringing it to a boil, adding a big spoon full of chicken stock powder as well. I didn’t need to add any other seasoning. Last of all went some Irish Cobbler potatoes. These were the small ones I’d brought in, leaving the larger ones to continue curing, that had gotten a thorough scrubbing last night. I picked out the smallest ones, most of which didn’t need any chopping at all. More water was added until it seemed like enough, and it was brought to a boil.
At that point, my daughter too over for me so I could make a quick run to get more kibble. With the running around I have to do over the next while, I wanted to get more while I had the time.
My daughter simmered the soup until the potatoes were soft, then added some diced roasted chicken. For the final creamy touch, she also added an 8oz block of cream cheese and took the immersion blender to the whole thing!
It definitely went over well. By the time I got home, there was just over a bowl of soup left for me to try!
It was delicious.
Even the parsley I sprinkled on top was dehydrated from our own parsley we grew a few years ago. We dehydrated so much, we still have some!
I had it with a couple of slices of bread. The girls have been making at least a loaf every day, then sometimes starting another one during the night. I’m really glad we picked up that bread machine!
Meanwhile, on a less cheerful note…
I got an email from my sister letting me know she wasn’t going to be able to visit my mother tomorrow as planned, asking me to go over instead, as her car is in the shop. Turns out that knocking noise in the back was a loose wheel! TTT is getting her staples out tomorrow, but not until 3, so I would be able to go, but earlier than I normally do. I called my mother and the first thing I asked was if she’d talked to the pharmacist about the T3s she’s refusing to take. She said no; my sister was coming over tomorrow, and she was going to get her to drive her to the pharmacy so she could talk to the pharmacist in person. Not just any pharmacist, though, but the new store manager. I told her about my sister’s email about her car, and said I could come in to drive her around, but since I had an appointment, it had to be earlier. I suggested 11. In reality, 10 would have been better, but I didn’t think my mother would accept that. Well, she didn’t like 11, either, and asked if we could make it 12. I said no, I wouldn’t have time for that. Oh, so I’m always in a hurry…
???
Long story short…
I’m always in a rush and never spend time with her. My sister’s car troubles were just an excuse she made up, and now my mother’s entire day’s plans have to change (as if ours didn’t change as well!) Also, my brother is dropping the responsibility of taking care of her on me and my sister. None of us call her or spend enough time with her, we’re all terrible people who don’t go to church and don’t know right from wrong, my brother should practically be her slave because she “gave” the farm to him, and she paid for “everything”, so we should all be doing whatever she wants us to do, no matter how badly she treats us, because she needs our help. Oh, and I don’t allow her on the farm anymore, but when I do, I don’t serve her tea.
When I finally said, if I’m so bad, maybe I should stop coming over to help her completely. Did she still want me to come over tomorrow? Of course, she twisted that around and said that, if I didn’t want to come over, she would just find a way to walk over.
To the bank, the pharmacy and the grocery store?
I called her on the manipulation and guilt tripping, then simply told her I’d be there for 11, while she kept insisting she would walk. Her knees are so bad, she is starting to have trouble navigating her tiny apartment, never mind the half block to the grocery store. The pharmacy is something like 6 blocks away.
Of course, she’d have an easier time of it if she would take the T3s, but she sure as heck wouldn’t want that!
Do I sound a bit frustrated?
Yes. I’m frustrated.
I’m especially ticked off over how she is about my brother. No one has bent over backwards for her more than he has. Now he has the burden of this property on his shoulders – we are helping him by being here, but the place has problems well beyond either of our abilities or finances to fix, plus he still has the headache of dealing with property taxes and insurance for a place companies don’t even want to insure! She has no understanding that she didn’t do him a massive favour in signing the property over to home now, rather than in her will, but saddled him with a white elephant. Then she turned around and stabbed him in the back, and still can’t understand how badly she hurt him. He has pulled her butt out of the fire so many times over the decades, with zero gratitude or appreciation, it’s mind boggling he hasn’t cut her off completely.
He’s a much better man than I am, that’s for sure!
Well, we’ll see how it goes. She may act as if nothing happened at all. Or she may decide to be vindictive. Either way, she’s going to be ticked off that I will have to leave early enough to drive back home, pick up TTT and take her to the vet in time for her appointment to get her staples removed. I certainly didn’t tell my mother is was an appointment for a cat. She would have completely lost it, if I did. She’s always hated having pets in the house (my father loved them), and cats in particular. Dogs were accepted only because they helped with the cattle. They never took a dog to a vet. Not even when one of them got kicked in the heat by a horse and lost its eye. That dog lived to a grand old age, with a very messy, untreated eye. As a child, I had no understanding that this was not a good thing. Heck, I didn’t even understand that there was such a thing as a vet when it happened. So you can probably imagine that she would not be happy that we took a cat to a vet at all, even if it meant the cat living outdoors with a dangling broken leg. For us to be taking a cat to a vet on a day when she wanted me to devote my time entirely and slavishly to her would be just that much worse.
*sigh*
We’ll see how it turns out.
I’ll go back to thinking about how good that soup turned out!
Okay, so I made this video a while ago, but had all sorts of problems exporting the finished video into a file format that I could upload to YouTube that worked. After trying for days and having it fail, suddenly it worked. Nothing had changed on my computer, and there was no software update. Just, one day no-worky, another day, yes-worky.
Frustrating!
No matter!
Normally, I would have done a long, photo heavy post on making this, but I don’t have the media storage space, so I’m trying to make more videos. I’d found a video on how to make a Tuscan beef stew that looked really good, but I didn’t have the exact ingredients.
So I made it with what I had on hand.
Here is not-quite Tuscan style beef stew, made with mead.
Let me know what you think, and if you have any suggestions to improve things!