Last night, I finally got around to making some butter, using whipping cream. It’s been ages since I’ve made butter! I decided to try it again when I was picking up butter at the local grocery store, and the cheap, house brand butter had gone up in price so much, it was actually more expensive than whipping cream.
Making butter is easy and relatively fast when using an electric mixer. It can also be made by putting the cream in a well sealed jar and shaking it. Hopefully, with someone that can take turns shaking it with you!
To make butter with an electric mixer, a fairly large bowl is needed, since it will be in the fluffy, whipped cream stage for quite a while. It feels like it’s taking so long, whipping and scraping the sides and whipping and scraping and whipping and scraping some more, when then suddenly it “breaks” and you’ve got butter!
Also, even with a deep bowl, you’ll get cream splattering all over! You are forewarned! 😄
One thing about using a mixer is that the churned butter’s initial texture is very different. You don’t get a lump of butter. Instead, you get this.
The beaters keep the butter from forming larger pieces, so you get lots of very little pieces, instead. This photo was taken after the butter had been drained of buttermilk, then rinsed with cold running water. The smaller pieces made it easier to gently turn it while it drained, being very careful not to push the butter through the sieve.
Once drained through the sieve, there’s still water in the butter than needs to be removed as much as possible. That’s actually the part I find most difficult. It might be easier if we had one of those old style butter presses, but I just had my flat wooden spatula to squeeze and mash the butter in a bowl. I’d press it, drain the liquid, press it again, drain the liquid, and when I thought I was done, I’d press it a bit more and get even more liquid out! Finally, I got to the point where I could mix in a bit of salt to taste. Then, I pressed the butter into a small bowl with a lid, and put it in the fridge to sit until we use it today.
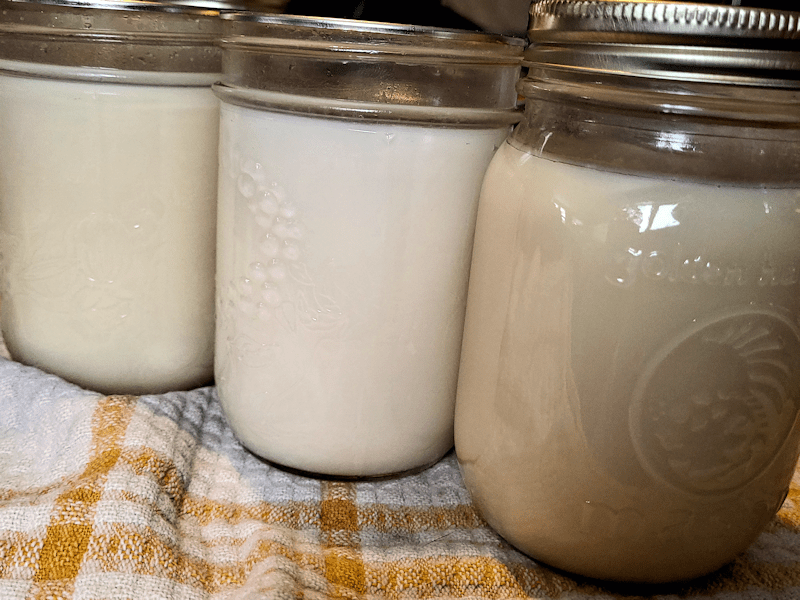
In the end, I estimate I got about 1 3/4 cups of butter, and about the same volume of buttermilk. A pound of butter is 2 cups, so there’s less butter from 1L of whipping cream, but we also got two products out of it. That buttermilk will be very nice in baking!
Whether or not it’s worth making butter with whipping cream is debateable. At least if price is your measurement. Whether it’s the cream or the butter that’s more expensive seems to change rather quickly. About a year ago, I remember whipping cream selling for over $8 for 1L, while butter was still under $4 a pound. The next time I went shopping, the price of whipping cream had gone down again, though still higher than butter was at the time. If you consider being able to control the amount of salt, the flavour, and getting buttermilk as well, the benefits do add up.
If the price of butter keeps going up, while the price of whipping cream remains more stable, it may well become the most cost effective way to get butter!
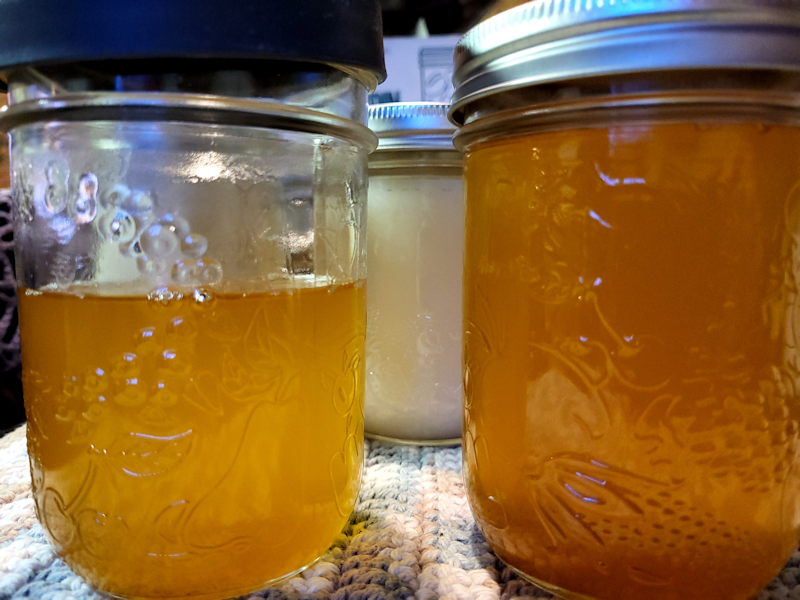
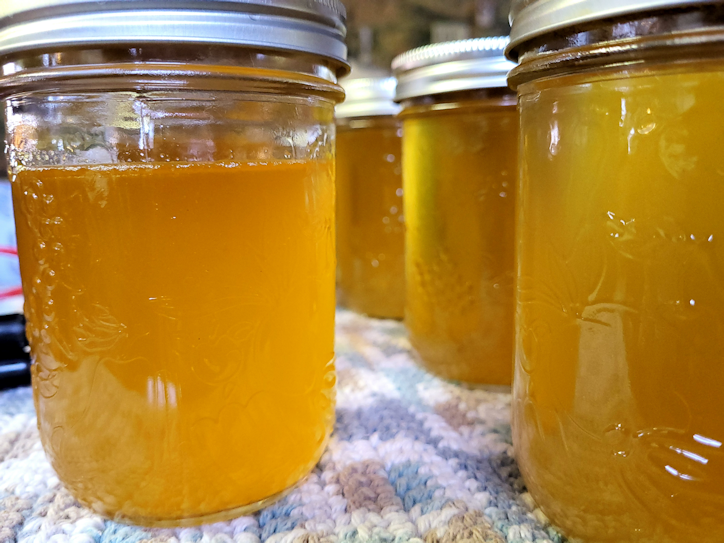
While putting the jars of rendered lard into boxes, I remembered to take a picture of jars from each batch, together.
The batches are in order, with the first batch on the left, and the third batch on the right. My younger daughter ended up doing most of the work for the third batch, as I was not feeling well enough. I just got to jar it up the next day.
The third batch turned out smaller than I expected, with only 5 full jars – and I filled them only to the top of the “shoulders” of the regular mouth jars – and a 6th that was not quite fill. The fat was so thoroughly rendered that when I did the cracklings, there was only an extra couple of tablespoons out of them, so that didn’t even make it into a jar.
Also, I much, much prefer the wide mouth jars.
You can see the second batch is noticeably lighter than the other two. The second batch had less time in the slow cooker, and also got the most fat rendered off the cracklings.
Altogether, we got 22 500ml jars of lard, including the crackling lard and partial jars, out of 3 batches.
I was going to start the third and (hopefully!) last batch tonight, but it’s coming up on 5pm, and I just finished jarring up the second batch a little while ago. It can wait until tomorrow!
At times like this, I really appreciate the uninsulated old kitchen. This time of year, it’s basically a walk in freezer or refrigerator, depending on how cold things are outside. The remaining leaf lard is the thickest chunk we got and was still really frozen when I worked on the rest, yesterday, but as it sits in the old kitchen, it will soften more, yet still be frozen. That makes is a lot easier to chop, but also gives me a bit of flexibility in time for getting it processed. Yesterday evening, I had to get the girls to take over some stuff because my hips suddenly decided to go crunchy on me (they were fine by morning!), while my shoulders have started to really hurt from all the chopping. I’m doing it while sitting at the dining table, since there’s no way I can stand at a counter long enough to do it all, but the height while sitting isn’t very good, resulting in a lot of pain and stiffness right in the muscles where the neck and shoulder join. Which still hurts now, so I’m going to take an evening off from chopping.
I didn’t render the second batch in the slow cooker quite as long as the first batch; I’m curious to see if there is a noticeable difference in the colour of the lard. I might have had a touch less chopped fat in the second batch, but since I only have the depth in the slow cooker to go by, I can’t say for sure. Taking the solids out earlier did mean less liquid fat to jar up, and more volume to turn into cracklings later.
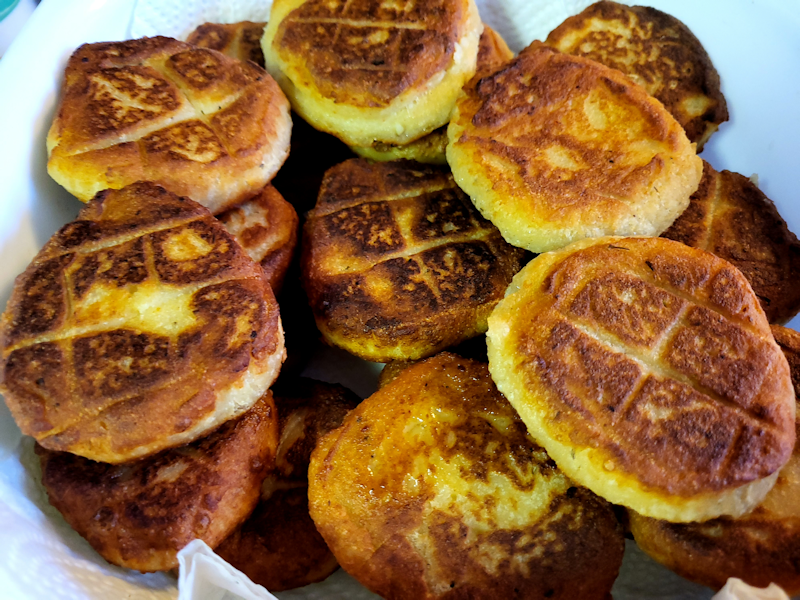
After removing the cracklings, I was able to fill six 500ml jars, with such a small amount left in the slow cooker, I just dumped the rest into the pan with the solids. After taking a break so the girls could use the kitchen, I started rendering the last of the fat out of the cracklings. While that was slowly heating up, I decided to take some leftover mashed potatoes and make them into potato patties. I just kneaded flour to the mashed potatoes until I got an dough somewhat thicker than bread dough, but not as dense as pasta dough. After breaking of sections and making them into rolls, I cut them into rounds, then pan fried them in some of the first batch cracklings lard. Enough to cover the bottom of the pan by about half an inch.
Lard has a high smoke point, so I could do these at almost deep fryer temperature. The higher the temperature, the less fat gets absorbed by the food. After cooking, they got laid out on a paper towel lined dish. They came out nice and crispy on the outside, with a smooth texture on the inside, and not at all greasy.
The lines that you see are because I set the cut rounds on a cooling rack until the pan was ready. If I’d laid them out on a plate, I would have had to flour the outsides to keep them from sticking, and I didn’t want to have burnt flour in the hot oil.
Here is the second batch of lard.
The first 6 jars were almost solid by the time the cracklings lard was done! I got another 1 1/2 pint size (500ml) jars out of the cracklings, making for a total of about 7 1/2 jars. The first batch was just under 8 jars total, so it came out very close.
The cracklings are once again laid out between paper towels, sandwiched between 9×13 baking trays and weighted down, so that cats can’t get at it!
One thing about handling all this fat for the past several days; even with constantly having to wash my hands with lots of soap, they haven’t been this soft in years!
Before I headed out to do my rounds this morning, I checked on the sun room kitties though the bathroom window.
I saw this, looking back at me.
That’s Sad Face, aka Shop Towel, on the bottom.
His face is looking rough and even more beat up than usual!
I want to feel sympathy for him, but yesterday I had to chase him off from attacking Junk Pile, repeatedly. Even when I managed to come in between them enough that Junk Pile ran off towards the house, he actually ran past me to try and get at her, and attacked her again, near the kibble house!
He doesn’t seem to have a problem with the kittens. Does he recognise that many of them (there are more, outside the photo) are clearly his progeny?
I really want to love on this cat, but he can be so aggressive towards some of the other cats! He’s one of the reasons I was worried about Potato Beetle being outside after he got fixed. He’d be more of a target and less prone to defend himself.
I can’t say how Potato Beetle is doing inside right now. Once we let him out of the carrier, he explored the house… and then disappeared. He found some hidey hole to sleep in, and I’ve yet to see him. I’ll have to ask the girls if he came out when they did the evening feeding in the basement.
While I was doing my rounds and coming back from switching out the memory card in the driveway trail cam, Pointy Baby came running up the driveway towards me, as if he hasn’t seen me in ages and was excited by my return from beyond. 😂
Then he gave me nose kisses when I picked him up!
Such a sweet little baby he is!
Once back inside, I started putting the solidified lard into the jar box for storage, remembering to get a picture, first.
I find it interesting that the darker coloured cracklings lard became so much lighter as it solidified, while the pale yellow fat became darker. I think if I’d taken the fat off earlier, it would have been more white than yellow. The solidified fat on the spoon rest I used when stirring the crock pot was certainly much lighter in colour. It should still be pretty neutral in flavour, though, compared to the cracklings’ lard.
Or, as my daughters call it, the pure, sweet fat of the hog.
Which is apparently something that became quite the viral meme on reddit and Tumblr. You can even get T-shirts with it.
I don’t recommend looking it up, though. Some of the people who ran with it went a bit… creepy on the theme. One of the t-shirt designs is funny, though.
Anyhow…
While putting the jars with canning lids on them away, I took the rings off and tested the lids. All of them are sealed tightly. I’m still keeping the one with the plastic lid, and the not-quite-full one aside to use right away.
I made a cast iron skillet corn bread with breakfast this morning. I added some of the cracklings to the dry ingredients. They want to clump together, of course, but I broke up the clumps while stirring them into the dry ingredients. They tasted really good in the corn bread!
Later today, I’ll start cutting up more of the leaf lard so I can run the slow cooker overnight. It should be interesting to see what the final tally is, when all the fat has been rendered.
Here is what the slow cooker looked like this morning.
I stirred it, breaking up the clumps of fat, several times, adding a bit of time to make up for the heat lost while the lid was off, each time. In total, this picture was taken after about 10 or 11 hours.
I added more time.
By the time I was ready for the next step, it was at about 13 hours on low, plus whatever length of time it ended up being on warm, because I couldn’t get back to it right away, and needed time to sanitize the canning supplies.
It’s hard to tell in the photos, but those extra hours did render out and clarify the liquid fat more.
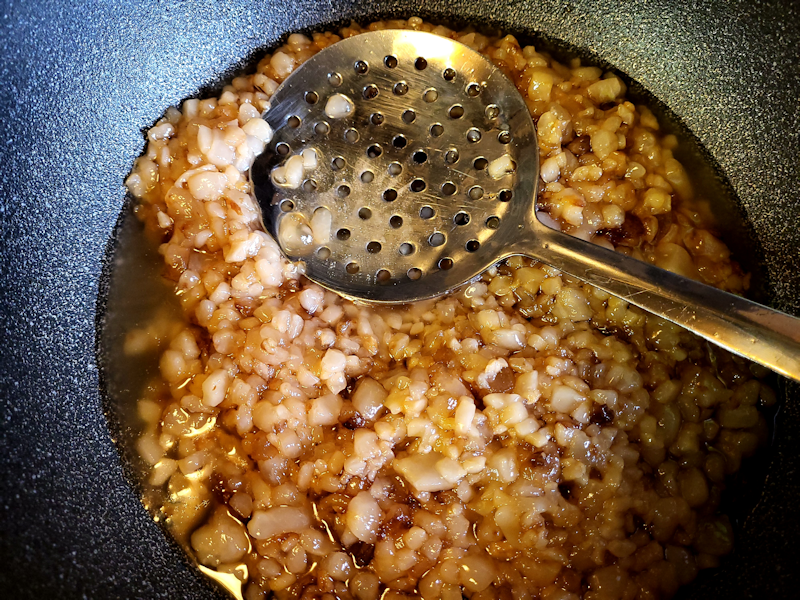
The next step was to scoop out the solids.
Those went straight into a wok-style frying pan.
Not all of the solid bits can be scooped out, with some being small enough to go through the holes. Various sites I’d looked up suggested straining the fat through a coffee filter while pouring it into the jars.
Tip: if you use a coffee filter over your canning funnel, make sure there is a small sieve under it, or the weight of the fat will pull it right into the jar.
Ask me how I know that? Go ahead! 😂
Seriously, though, don’t use a coffee filter. It takes forever for the fat to drain through. Things would start cooling down too much, and the fat needs to still be hot or it’ll all clog up.
Use a small sieve with a very fine mesh. That will work much better!
I had sanitized a full dozen 500ml/pint jars, just in case. Once all the solids were filtered out, though, I filled almost 7 jars.
While these will not be processed in a canner, I still did all the things I normally would if I were going to process them, including wiping the edges with vinegar, and finger tightening the rings.
Once those were done and set aside to cool, it was time to work on the cracklings. These were cooked at medium low heat for several hours.
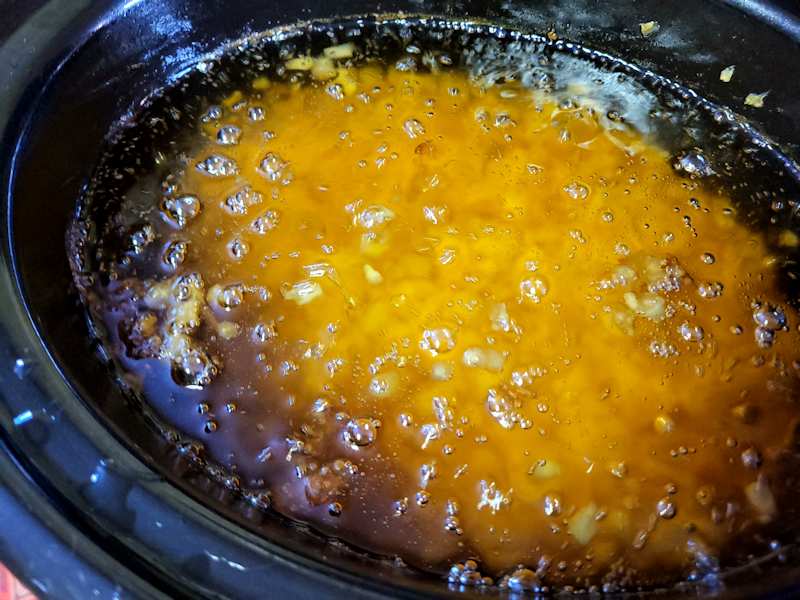
As more fat was rendered out, it would start to foam up like this.
This picture was taken about about half way through the cooking process. I set up a chair in the kitchen while doing this, since it needed to be watched over and stirred so often.
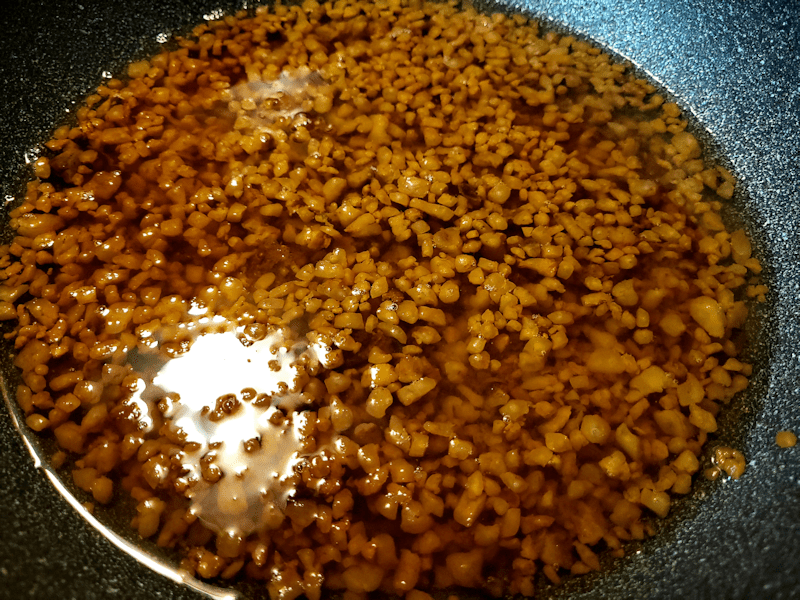
I cooked it down until it looked like this. Deciding when to stop was pretty much based on scent. Once things started to smell like things were starting to char a bit (the tiniest pieces could potentially start burning), I figured it was good enough!
The cracklings were then scooped out, as much as possible, onto a baking tray lined with paper towels. Then the last of it was strained into another 500ml jar.
Look at that difference in colour!
The last jar was filled more than I normally would, but I didn’t want to leave such a small amount in the pan. It didn’t need as much of a head space, as it got a twist lid, instead of a canning lid and ring. While it’s cooling down, the lid is simply resting on top, to keep the dust (and cat hair!) out. As the other jars cooled, I even heard some of them pinging, but I didn’t want that with the plastic twist off lid.
The jar from the cracklings will be used first, and then the one that has the least in it – which you can see in the photo is cooling down quite a bit faster than the others! Lard is a neutral flavoured fat, but that last jar will likely have more of a flavour to it. It should be interesting to try it out and compare.
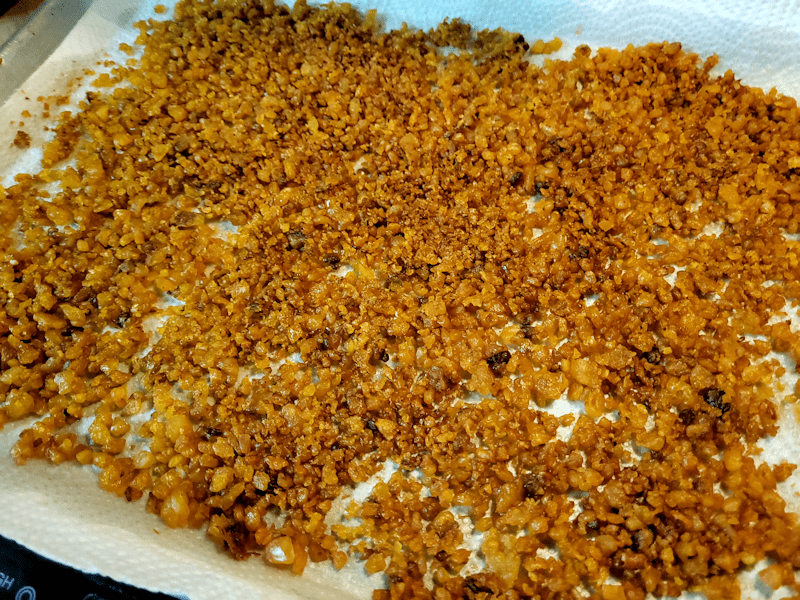
Here are the cracklings – after being flipped. It was too messy to try and take photos of the process. I have several of these 9×13 baking trays, so to flip it, I covered the top of the cracklings with more paper towel, put another baking tray on top, upside down, then carefully flipped the whole thing. Once flipped, the grease soaked paper towel was removed, scraping off as much of the stuck cracklings as I could, and thrown away.
More paper towel was added over the top.
Then, because we have cats, I added another layer of paper towel, set a clean baking tray on top, then weighted that down with the slow cooker (cleaned and washed, of course, ready for the next batch!).
Tomorrow, I’ll salt the cracklings and put it in a jar, to be added to as the other batches are finished.
I will stick to doing just one slow cooker batch at a time. It’ll just be easier that way, even though it’ll take longer. Each batch is a 2 day process! I’m pretty sure I can do the rest of the fat in two more batches. We might start running out of pint jars that aren’t still sealed in their packages. I want to save those for when we’re actually processing things in a canner. We can move up to the 750ml jars if we have to, though.
This one batch, which started with enough cubed fat to fill the slow cooker, gave us 7 pint jars of white lard, plus one pint of golden crackling lard. If the other two batches end up similar in size, we could have the equivalent of 21 pints of white lard, and 3 of the crackling lard.
We don’t normally buy lard. It really came down to the budget. Now that we’ve got it, it should be interesting to see how much we actually use it. That will help us decide if it’s worth doing this again, in the future!
I started working on the pork fat well before it was thawed out, as it’s much easier to cut it while it’s partially frozen. I have two large slow cookers, and I was planning to use both of them to render the fat out. It should be done over low heat for a long time, and I wasn’t about to monitor a pot on the stove all night.
Thinking back, my mother never rendered lard on low heat. She didn’t have the time for that. I remember it being quite hot by the time she scooped the crispy cracklings out. I’m pretty sure I’m remembering burned bits, too! 😄
Having a large slow cooker or two would have made the job much easier for her!
Part way through cutting the fat up, I changed my mind.
I wasn’t going to do two slow cooker’s worth!
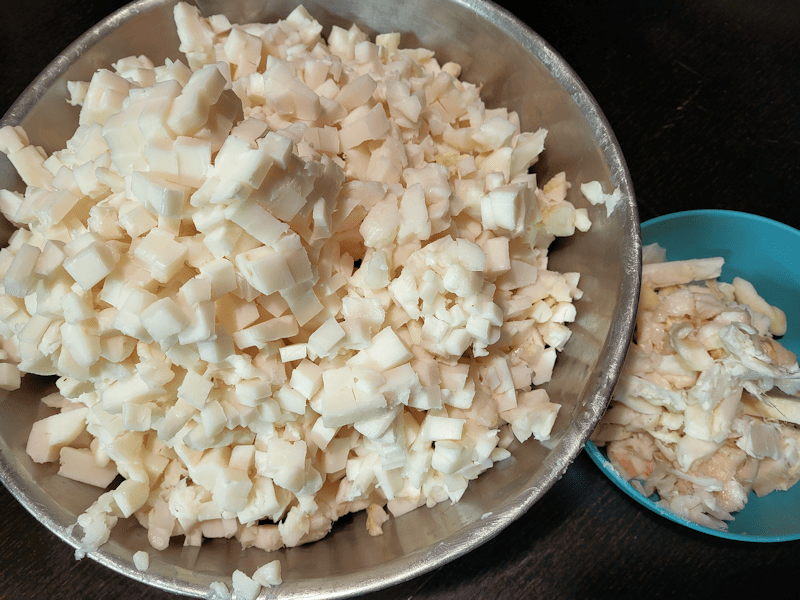
To fill this bowl, I finished off all the smaller pieces I could find. All three of them. 😄 I started cutting into the larger pieces, but they were still too frozen. Plus, I didn’t want to push my hands too far. They’ve been relatively pain free of late, and I would rather they stayed that way!
The small bowl on the side is the janky bits, with blood vessels or meat and the sliver skin. That was saved as a treat for the outside cats, which they were very happy to get!
There was enough pork fat left in the giant bowl that the lid still didn’t quite fit all the way closed, and I had to use the foil to cover it completely again. It’s now sitting on top of the freezer in the old kitchen. It’s going to be a very slow thaw in there! Which is okay. While I was cutting, the outside of the fat would be getting too soft to cut easily, while the inside of the bigger pieces were still too hard. A slow thaw won’t have the two extremes, and it should be easier to continue cutting up tomorrow.
They kinda look like cheese curds in there! 😄🧀
For a moment, while filling the slow cooker, I thought I’d have to dig out the second one, after all! I squished it just flat enough to make sure nothing would touch the underside of the lid. As it renders, it’ll get lower.
The slow cooker is now set on low for 8 hours, and then it’ll automatically switch to warm. It might need more time, so I’ll be checking it off an on throughout the night. I did add a small amount of water to get it going, and make sure it the bits don’t start burning before the fat starts rendering out.
Once it’s getting close to done, we’ll sterilize some jars – probably in 500ml sizes (pints) – to store the lard in. If we do decide to go with a larger size, I’d go with the 750ml jars, rather than the 1L/quart jars. I don’t see us using it fast enough to warrant that large of a jar.
Based on how much is left that needs to be cut up, we might actually be doing two more batches! It’s a shame the meat grinder I found while cleaning out the old kitchen has parts missing. A grinder would make the job much easier, and more fat would render out of the smaller pieces, too.
No matter! The job is getting done, and we’ll have a good supply of shelf stable, high smoke point, flavour neutral fat for our pantry.
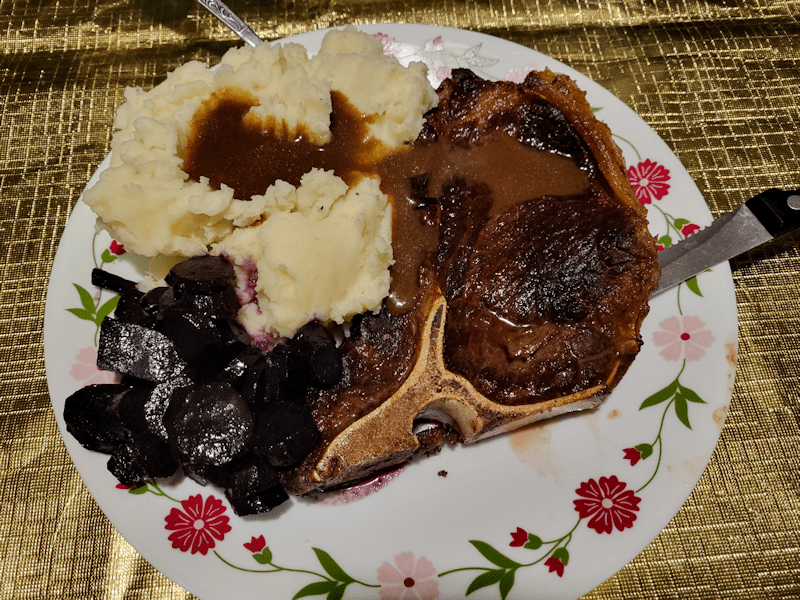
It occurred to me that I have yet to post a picture of what the Black Nebula carrots look like, cooked! So I thought I’d share this photo with you, while we still have some left.
My daughters did the mashed potatoes and ginger carrots. At the last minute, I cooked up four HUGE t-bones from our quarter beef order, and made a pan gravy. The steaks were so big, I could barely fit them in our largest pans. I was able to cook all of them at one time, though, and made the pan gravy while they rested.
I am so full right now!
As for the Black Nebula carrots, they are so dramatically dark! A very beautiful dish. As for flavour… they’re really not any different from any other carrot. They were sweet and tasty, but not outstanding in any way. I am glad we grew them. We had the most seeds for the Black Nebula, and they shared a bed with the Uzbek Golden carrots, in the main garden area. The Napoli and Kyoto Red carrots we grew along the chain link fence did not do well with how much flooding that area got, even being in a slightly raised bed. If we had not had carrots growing in two completely different areas, we would not have had enough to last us beyond a couple of meals. Something to keep in mind, when we grow carrots next year! I’d be willing to grow them again some day, but I want to try a few other types before we settle into one or two varieties.
I can’t help it. I feel like I’ve wasted a day. I got a stock going and tended it, off and on, for much of the day. While I didn’t have to be there constantly, I was checking on it often enough that I didn’t want to start anything that took too much of my focus or was too distracting. I ended up actually *gasp* watching TV, binge watching DS9 on Prime. I could use each the status bar on the episodes as my timer to go check the stove. Normally, I’d at least do something like crochet at the same time, but a summer in the garden has left my fingertips so rough, most yarns stick to them like Velrco, and I ended up pulling the loops right off the hook! 😆
Ah, well. I suppose it’s good to have a break every now and then.
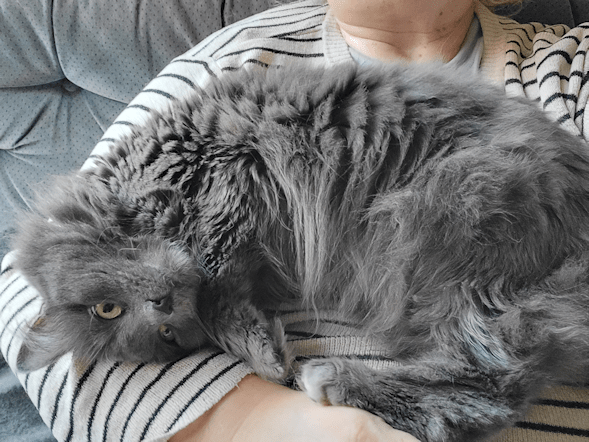
One thing I discovered while sitting on the couch watching the show.
Fenrir missed me!
Before Butterscotch and Nosencrantz came indoors, she used to spend as much time as she could like this, while I was at my computer.
Which made it very difficult to type.
Unfortunately, Fenrir is one of the cats that will come in and immediately launch an attack at Nosencrantz if allowed in my room. Butterscotch, too, if she’s in view. I have no idea why she is so aggressive towards them. Especially Butterscotch. Butterscotch and Beep Beep took her in, along with their own kittens, when she showed up at our place as a kitten, our first summer here. Now, she will spend hours just outside my bedroom door, watching it and, if I’m not careful, she’ll teleport herself into my room as soon as the door opens, and attack Nosencrantz. She’s amazingly fast! Given the opportunity, however, she will climb onto me, curl up on my chest, and nap, as she did several times, today. She was not impressed by my frequently getting up to tend the stove. 😁
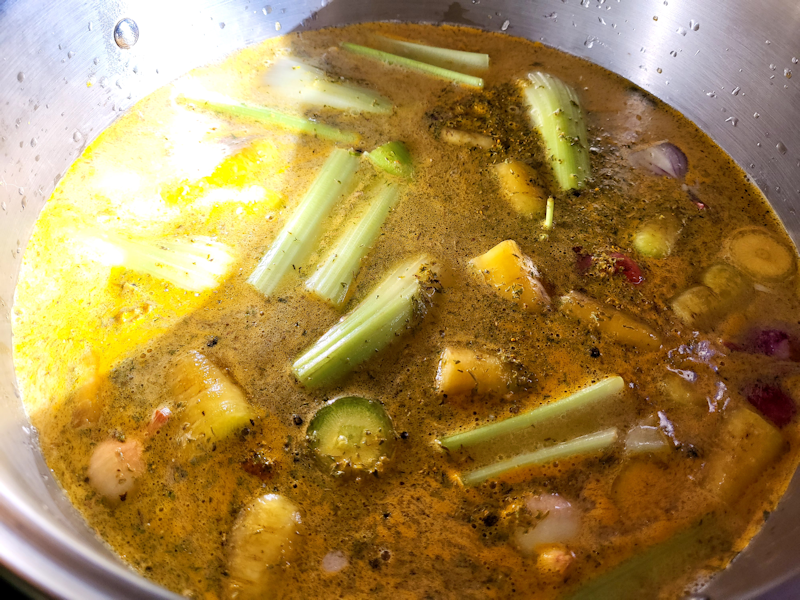
Our fridge freezer had quite a few bags of carcasses waiting, mostly from chickens, but also some turkey. I roasted them first, and they completely filled my roasting pan. There was enough that I used my giant stock pot, that I’ve also been using for water bath canning, to fit it all.
Into the pot went most of our remaining Uzbek Golden carrots.
I admit. I’m a coward.
I could have used at least a couple of Black Nebula carrots, too. That would have changed the colour significantly! But I decided that might not look too appetizing. 😂
Along with the carrots I added crushed garlic cloves, yellow and red onions – the little ones from our garden – plus celery. For seasonings, I added course salt, whole peppercorns, turmeric powder, dried thyme leaves and dried parsley, then covered it all with water. Later on, I added a generous splash of our crab apple cider vinegar, too.
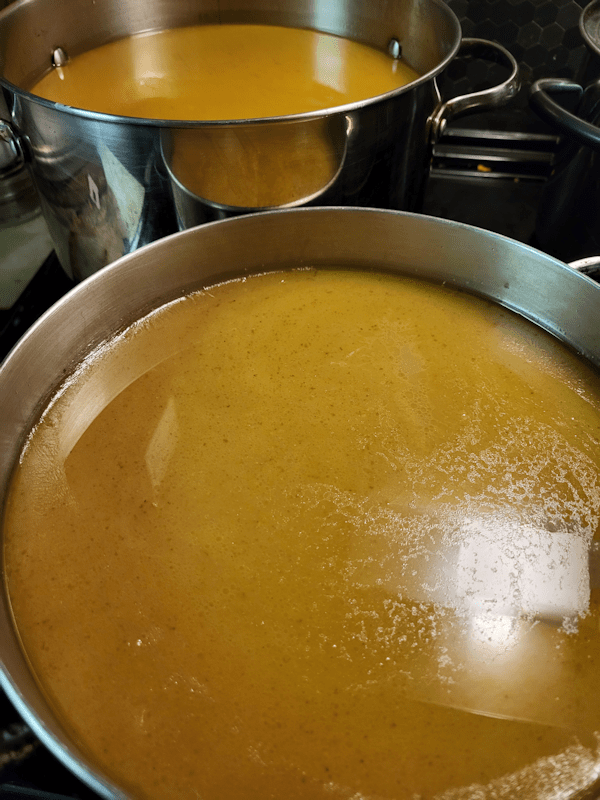
After bringing it to a boil I let it simmer for about 7 hours adding more water to the pot part way through. After that, I used a hot pot soup strainer spoon that I find very handy, to take out as many of the bones and vegetables as I could, then a small sieve to strain out more, before finally ladling it through a fine mesh strainer into my other two stock pots.
The larger pot, with the measurements on the inside, shows a little under the 6 quart line. In total, I would say there’s about 10, maybe 11, quarts (11 to 12 1/2 litres).
For now, the pots are covered and cooling, as is the bowl of carcasses and vegetables. I’m debating what to do with it next. I could just pour it into freezer bags and freeze them, as is. Or I could cook it down to make a more concentrated stock. I’m kind of leaning towards cooking it down more. I’ll see how it looks in the morning.
It’s Thanksgiving weekend, here in Canada. Thanksgiving is officially tomorrow (the second Monday of October), but we had our dinner today.
We did pretty much everything different this time! Including the turkey. I had hoped to brine the turkey overnight, but didn’t have the energy for it. Well. Mostly, my hands were hurting too much. Either way, we normally would just roast the turkey, covered in bacon. To keep the turkey from sticking to the bottom of the roaster, I would put a layer of some vegetable under it, depending on what I have at the time. An onion sliced into rings, long stripes of carrot, pieces of celery, that sort of thing.
Turkey takes a long time to roast, though, so I decided to try something different.
I spatchcocked it. Something I’ve done with chicken, before, but not turkey.
It’s surprisingly easy to cut that spine out, even with the pain in my hands.
Once spatchcocked, however, it no longer fit in my roaster. Using a baking sheet meant I could use a rack under the turkey. I still added some thick slices of the Tropeana Lunga onions we need to use up first, under the turkey.
For the bacon, I would normally weave the sliced right on top of the bird, but tried something different there, too.
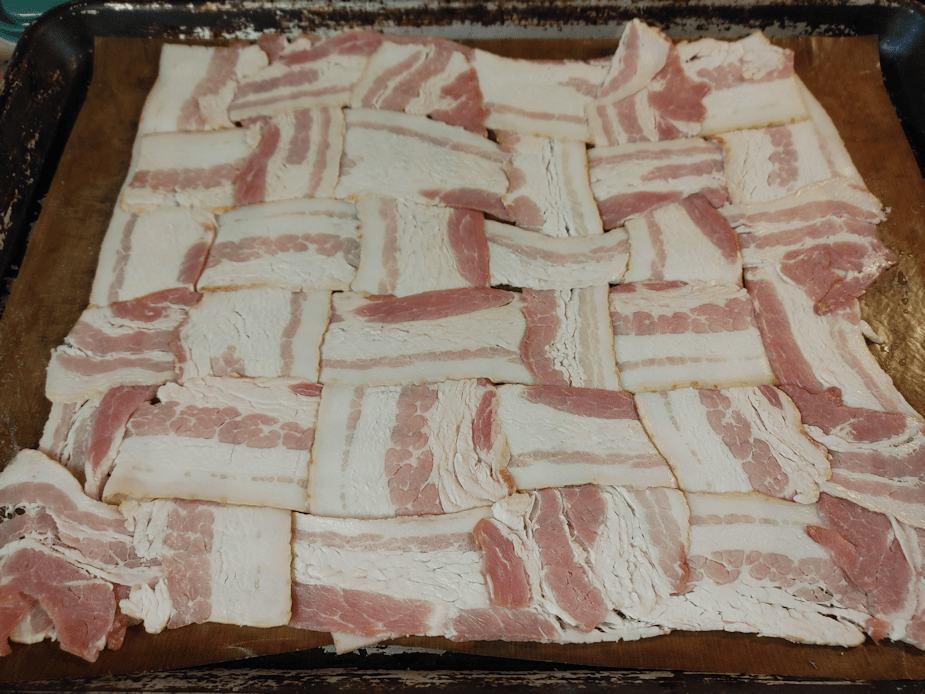
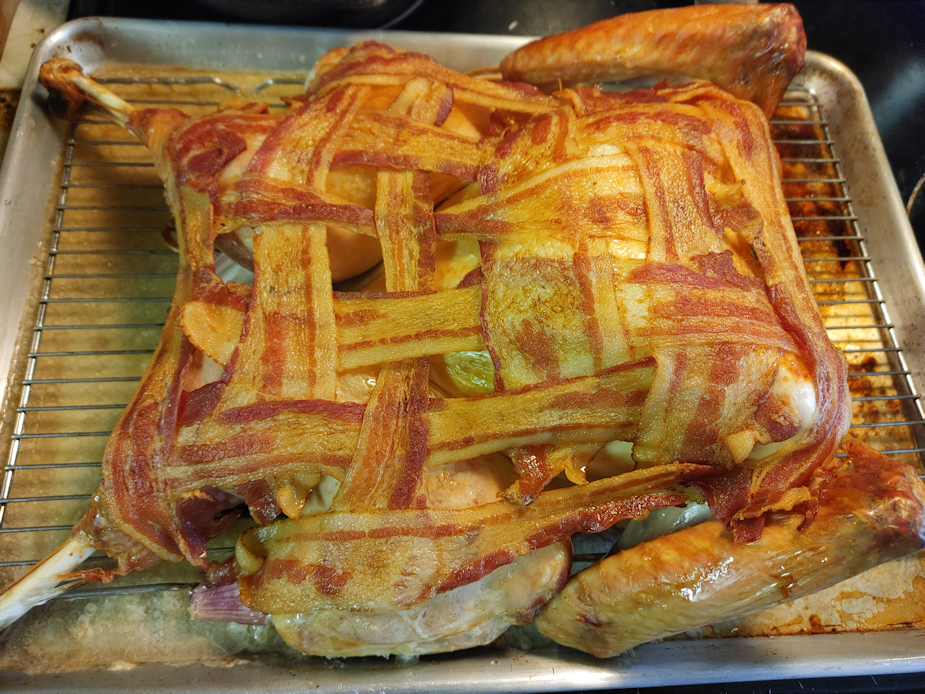
In another baking tray, lined with a silicone baking sheet (parchment paper would have worked, too), I wove the slices from an entire package of bacon. That got topped with another silicone baking sheet, and then I used a heavy marble rolling pin to flatten it out. After removing the top sheet, I used the bottom one to transfer the bacon mat to the top of the turkey. The final step was to add some water to the bottom of the pan.
I forgot to take a “before” picture, but this is how the turkey come out after it was done.
It took a lot less time to roast it, too.
After the turkey was in the oven, I got the mixed vegetables prepared, then spread out on another baking tray and added to the oven about 40 minutes into the turkey’s roasting time.
The mixed vegetables included some Uzbeck Golden carrots (I didn’t want to use the Black Nebula carrots, as they’d discover the entire dish!), more Tropean Lunga onions, the last of our own potatoes, plus a few store bought potatoes, some Red Kuri squash, sweet potatoes and, of course, the sunchokes. That all got tossed with some salt, pepper, garlic granules, paprika and olive oil. It turned out awesome.
When the turkey and vegetables were getting close to done, we made a soup as well. Something else I’ve never done before…
Peanut soup.
When I was able to visit my brother not long ago, we had peanut soup for lunch. I’d never tasted peanut soup before! My SIL had spent a long time trying to recreate one that she’d had at a restaurant. A recipe for West African Peanut Soup was the closest recipe she found, and she modified it to get the flavour she was after. I was able to take a picture of the recipe she used, along with her own notes for the things she changed.
What we made was a mix of the original recipe, plus some of her modifications, and it turned out really well. Among the optional ingredients was shredded chicken, which we skipped this time. The instructions also suggested one way to serve it was over rice. My younger daughter helped me make it, and we both found it funny when, after her sister had some of the soup, she commented on how it seemed a bit like a curry, and that she was tempted to put it over her turkey, adding that it would probably be great over a bed of rice!
Once the idea was brought up, both girls did use the last of it over their turkey, and decreed it delicious.
This is definitely something we will make again!
By the time we were done our dinner, none of us had room for desert, so that waited a few hours. For that, we just had a purchased pumpkin pie and some butterscotch swirl ice cream.
Meanwhile, I’ve also set aside a turkey dinner, including the soup, to bring to my mother tomorrow. She should have enough to last her a couple of days. 😊
If she’s willing to eat it, of course. No mashed potatoes and gravy, this year. 😉
I knew making the tomato paste would take a long time, but my goodness, it did drag on!
The girls and I had a sort of assembly line set up. At one end of the kitchen counter we had the electric kettle going, then space for the container used to bring batches of frozen tomatoes. Then there was the giant bowl we used to blanch them, a bowl with a colander for the skins, a cutting board and compost bag for final prep, a kettle on the stove to boil more water, and finally my giant stock pot.
I even remembered to check what size that thing is.
This thing was an excellent investment. We originally got it for when we were making tourtierre regularly, and would be browning more than 30 pounds of ground meat at a time – then adding the rest of the filling ingredients. That was once a year, though. We’ve used it more often just this summer than we have since we bought it!
We did the tomatoes in fairly small batches. The electric kettle and the stove top kettle took very different lengths of time to boil, which worked out.
One kettle was enough to cover one batch of tomatoes. After they had time to blanch, they’d be transferred to a colander over a bowl, where I would remove the skins, then cut them up (and remove the rest of the stem ends, if needed), and pop them into the stock pot. A daughter would get another batch of tomatoes from the freezer, and by the time we were ready to blanch those, the second kettle would be boiling and ready to go.
It took many batches. I figure there were maybe a couple hundred tomatoes, in a variety of sizes.
The cooking was started as soon as the first batch went in, which cut the time down quite a bit, I’m sure. By the time all the tomatoes were blanched and added, the stock pot was about half full – roughly 11 quarts or about 10L.
It took about 2 hours of cooking before I felt it was ready for straining through a sieve.
Our giant sieve has a very fine mesh. Great for straining out the seeds and any bits of skin that got left. Some of the tomatoes turned out to still be a bit green, so there were pieces that never got soft enough to be pushed through the mesh.
If we end up doing this regularly, it’ll be worth the investment to get a food mill.
The tomato sauce was strained a bit at a time, while the cooking continued. By the time I got to the bottom of the pot, it was getting pretty thick, and there was a lot less pulp left behind in the strainer.
This is all the seeds, cores, green bits and fibrous pulp that was strained out.
The strained puree was very thin. Can you imagine if we were not using a paste tomato for this! It would have been more like tomato juice, than tomato puree!
The stock pot I strained into has a very handy feature.
Measurements on the inside!
We went from roughly 11 quarts of blanched tomatoes, to just under 5 quarts of strained tomato puree. This was what I used to calculate how much lemon juice to use, later on. I had wanted to use citric acid, but couldn’t find any. Lemon juice will work, but does affect the flavour, too. If I were just canning the puree at this point, I could have added the lemon juice (and salt, if I wanted) directly to the jars, but that can’t work with tomato paste.
At this point, I took a break for a while.
For the rest of the cooking time, we set up the hot plate at the dining room table, to free up the kitchen, because I knew it would take hours to reduce this to a paste.
I could have cooked down the puree on its own, with just the lemon juice to increase the acidity. After looking at many different instructions for making and canning tomato paste, I decided to include a couple of large, crushed garlic cloves, a big bay leaf, and some canning salt.
The hot plate worked out really well. Once the puree was up to temperature, however, it stayed very hot and quick to splatter all over, even with the hot plate set quite low.
Another benefit to having a pot with measurements on the inside. I could see progress, even when it didn’t feel like any was being made!
As it reduced in volume, I also had to keep reducing the temperature. I only needed to stir it enough to keep it from bubbling and spattering. The more it reduced, the more often it needed to be stirred, and the lower the temperature needed to be turned. At first, I could just sit on a chair to stir every once in a while. After several hours, I was having to stand at the table, holding the pot to keep it from being knocked about as I stirred vigorously. Once it started getting quite thick, I removed the bay leaf. The garlic cloves were completely disintegrated by then.
I must say, towards the end, it was SO tempting to stop earlier because… it’s thick enough now, right? Right?
Not quite.
In the end, it took somewhere around 6 or 7 hours to get the puree into a good, thick paste.
When the spoon could scrape along the bottom, and the paste wouldn’t fill the gap right away, it was finally ready.
At this point, one of my daughters had taken over the stirring while I got the giant stock pot, which they had washed out for me while I stirred for hours, and sterilized the jars.
But how many jars would I need?
The measurement in the pot starts at 2 quarts and, at this point, the paste was well below that. I estimated around 1 quart, perhaps.
Because the paste is so thick, it has to be canned in small jars. The instructions I’d been reading were from the US and talked about “half pint” jars. I didn’t stop to convert that and was thinking the jars I had were probably half pints. Usually I get 750ml or 500ml wide mouth jars. Though the measurements don’t match, what sells as quart jars in the US are 1L jars here. A pint is 500ml so a half pint would be 250ml – or about 1 cup.
The jars I have are 125ml. So, a quarter pint, not a half pint! 😁
Which meant that if there was about a quart of paste in the pot, I would need 8 jars. I had two cases of twelve, so I sterilized one case. With the jars being to tiny, I could use both canning racks and stack them.
It still takes long time for the water to boil! I almost forgot to add vinegar to the water, to prevent the jars from clouding on the outside from our very hard well water.
Much to my surprise, I was able to fill every jar! Granted, for the last one, I was scraping the sides quite a bit, but I still got my half inch head space!
By the time I finished canning the tomato paste, it was well past 1am. I gotta say, I was quite happy to be able to finally leave them to cool for the night!
When I checked them this morning, I found 2 jars had not sealed properly. Which I’m just fine with! They went straight into the fridge to use right away.
I just love those adorable little jars.
We’ve been out of tomato paste for a while. I typically buy cases of them at Costco. The problem is that we usually only use a small amount at a time. Just adding a spoonful into a dish for extra flavour, for example, leaving us with aluminum cans partly filled with paste, that can’t be resealed well. Then we’d be rushing to use the rest up before it went bad. It will be much handier to have it in sealable jars!
I’ve already had some today, adding a spoonful to some leftover pasta I had for lunch, adding a bit of cream to make a bit of a sauce. As my daughter had mentioned when taste testing the fresh tomatoes for me, the Cup of Moldova tomatoes are very mild in flavour, so the resulting paste is not as strongly flavoured as the tinned paste we would buy. Which I don’t mind at all.
The question will be, is all the time end effort that goes into making and canning the paste worthwhile? There are lots of other ways to can tomatoes that take a lot less time. It’s the time that’s the kicker. I have seen some instructions that use the oven to make the paste – basically, dehydrating the puree – but while that might require less supervision, it means not being able to use the oven for anything else for a very long time.
That’s something we’ll have to talk about and decide after we’ve used this batch up, I think.