Have I mentioned just how glad I am we were able to get that quarter beef this winter?
Thanks to paying the same price per pound for the whole thing, regardless of cut, last night we got to enjoy a rare indulgence.
T-bone steak!
In our younger days, when it was just my husband and I, and we had fewer expenses, we would *gasp* go to restaurants and order things like steak. My husband would order a T-bone, but he didn’t like the bone, so he’d give it to me. That’s the best part! I would happily gnaw every last bit off the bone, much to his amusement.
I’m sure the other patrons were not to impressed. ;-)
That was a long time ago. When the BSE, or “mad cow disease”, crisis hit our cattle industry, restaurants stopped selling bone-in beef. Even grocery stores stopped selling any bone-in beef, though for a while, getting any beef at all was difficult. Today, restaurants, with few exceptions, still don’t sell bone in beef, and even grocery stores never returned to pre-BSE levels of inventory, and that happened back in… 2003? Quite a long time ago. What is available in grocery stores is so insanely expensive, we could never afford it.
Which means, we haven’t had a T-bone steak in decades, and I’ve never cooked one before in my life!
So there I was, with 4 beautiful steaks and not sure what to do with them!
Ideally, I would have grilled them, but it’s freezing out, and the BBQ is buried in snow. I decided to go with pan searing them (after seasoning them with only coarse salt and freshly ground pepper), then transferring them to a baking sheet to finish them in the oven, at 450F, to finish. What that was happening, I used the pan drippings to make a gravy.
They came out looking amazing!
They tasted amazing, too. Even though I ended up over cooking them. I probably could have skipped the oven part completely and just pan seared them.
Best of all, I got to gnaw on some delicious, delicious bones!
I’m thinking we really need to find a way to fit a half beef next year, instead of a quarter beef, because having cuts like this is just amazing. :-D
I decided to make some little beef pies in muffin tins.
This is something I’ve made before – the first time, in Home Ec class! My experiment was with the dough. We’ve been trying to find ways to use less butter in our cooking. We don’t use margarine or shortening, so when it comes to cooking and baking, it’s either liquid oil or butter. With oil, it’s easy to have a variety. Not so much with solid fats.
So for the meat pie, I wanted to make a hot water dough (which is sturdier, for heavier fillings like meat), using oil instead of butter or shortening.
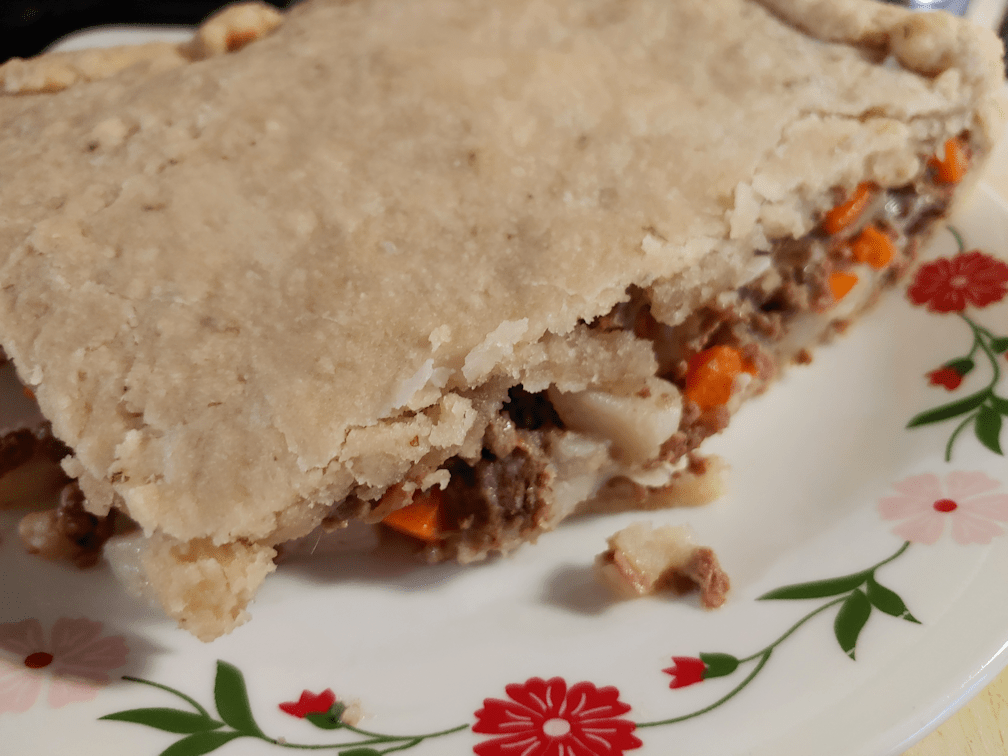
This is the finished result.
As you can tell, the muffin tins didn’t happen!
The dough simply would not hold together and was very difficult to roll out. I think I added too much flour, but the oil made it so slippery! In the end, I had to put half of the dough in the pie pan and roll it as thin as I could, right in the pan. After the filling was added, with about an inch and a half of space around the edges, I rolled out the other half of the dough as best I could, then brought it over, wrapped around the rolling pin, to cover the filling. Some repairs were needed, as the top was spread over and tucked around the filling. Then the edges of the bottom crust were pulled up to seal it more.
It actually turned our really delicious. I didn’t get the hand pies I was after, but that’s okay!
The filling was ground beef, browned (in butter, of course), adding onions and garlic early on, then cubed carrots half way through. The last thing added was the cubed potatoes, along with some beef stock. It was left to cook, covered, until the potatoes were just barely done, then uncovered and stirred until the liquid was all evaporated. A touch of flour was added to absorb any remaining liquid and thicken it. I ended up with more filling than fit in the pie, but it tastes good all on its own, too.
I have some hot water dough recipes that include things like egg that I might try. Maybe that will work better.
The good thing about experimenting like this is that, even when it doesn’t work, it still tastes good!
Aw, man, it’s all I can do not to go all Cookie Monster on the muffins I just finished baking!
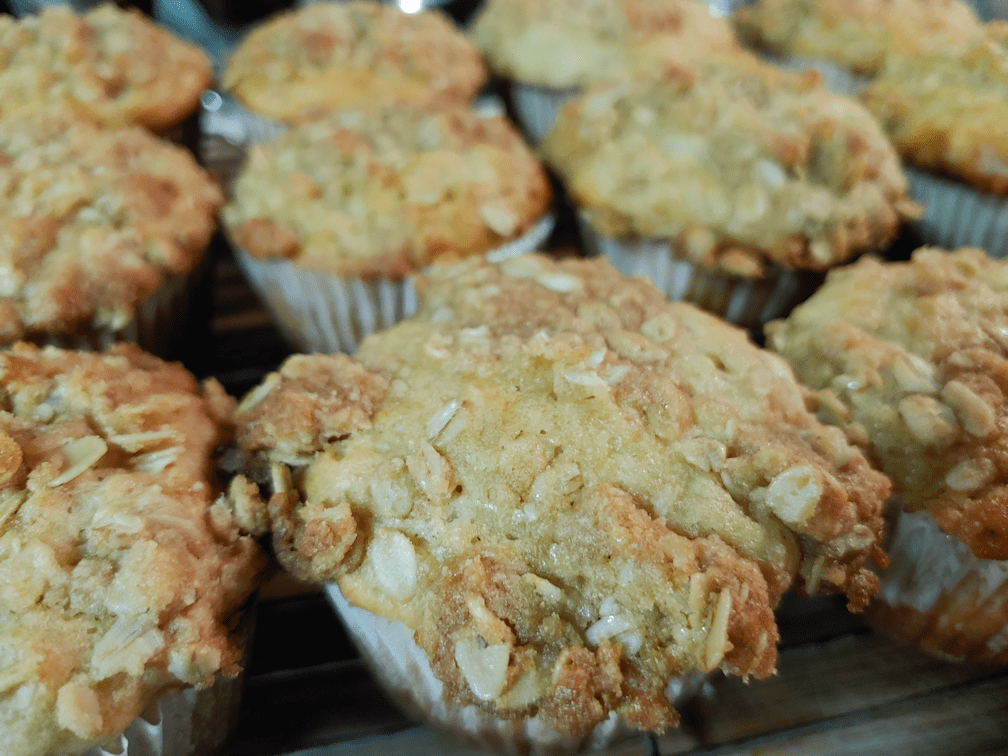
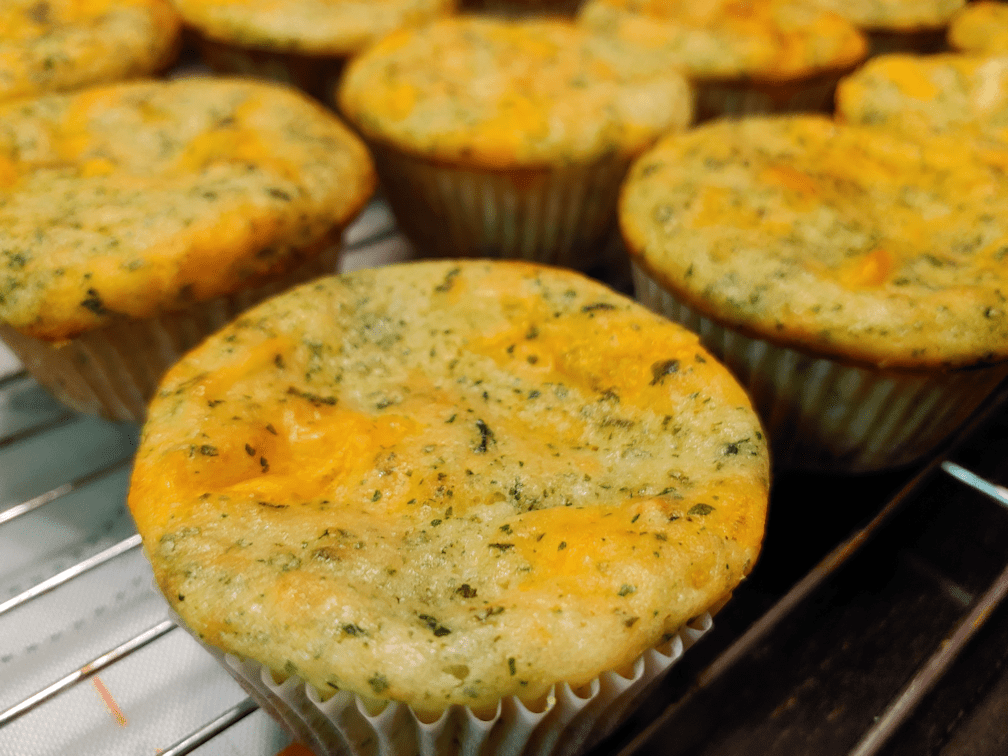
I ended up making a dozen each of three kinds.
The cornmeal muffins were a basic recipe, though I added a bit of sour cream to the milk, for extra flavour.
Oatmeal muffins with a streusel topping, from the simplest recipe I found online.
Spinach and cheese muffins! I spotted a recipe online, but it used frozen spinach, which we don’t have. So I just used a basic muffin recipe, adding some of our dried spinach to the liquid mixture to reconstitute for a while, and added shredded cheese to the dry ingredients. We had some small pieces of Havarti and Old cheddar left over, so I finished off both.
The girls made supper while these were cooling, so I’m being good and waiting until after I have a meal before having any muffins.
But it is soooo tempting to have “dessert” first! :-D
The Re-Farmer
Update: Taste test is done!
Spinach and cheese: I think I didn’t have enough flour or over mixed these. They were almost like a quiche in texture! Still very tasty.
Oatmeal with struedel topping: not as sweet as I expected! Nice, but of the three, these were my least favorite.
Corn meal: these were awesome. The touch of sour cream gave a surprisingly big flavour boost. Corn meal muffins are my favorite, so no surprise I liked these best!
Ah, what a day! As I sit here, I am watching the garage cam’s live feed, as blowing snow covers my daughter’s footprints, from when she closed the gate just a little while go. At least it’s still getting warmer!
FedEx never did show up with our Starlink system.
*sigh*
Hopefully, we’ll get a call or email tomorrow to tell us what happened.
We did, however finish making the pierogi!
Gosh, it’s been so long since I’ve made these, they are the ugliest pierogi, ever! :-D
We also have a huge amount of potato filling left over, even though I made a double recipe of dough. I keep forgetting just how little stuffing fits inside a pierog. We did make extra deliberately, though, and as I write this, the girls are using some of it to make supper.
No, we’re not having pierogi for supper today. Those are cooling off in containers for the fridge. I had thought I’d have enough for the freezer, but it turns out I would have needed to quadruple the dough, and I won’t be doing that. I was in enough pain by the end of it, with just the double batch!
Anyhow, this is how we make our loaded filling.
The potatoes are basically our usual mashed potatoes, except on the dry side. They can be completely plain, too, or maybe seasoned with just salt, but we to include butter, milk and sour cream, and whatever else we have on hand and strikes our fancy. My daughter added a dash of hot sauce to it this time; just a tiny bit, because she knows I have no tolerance for spicy foods.
While she worked on the potatoes, I cut bacon into very small pieces, then cooked them over medium low heat in a frying pan until crispy and the fat was rendered out. The bacon pieces then got removed with a slotted spoon onto paper towel to drain and cool down.
I then added a bunch of mushrooms, cut into little pieces, to the bacon grease and cooked those on medium heat until almost crispy. That can take a while, as they release quite a bit of moisture as they cook. I used white button mushrooms this time, but usually use crimini. Any fresh mushroom would work, I’m sure.
Once done, the mushrooms were removed with a slotted spoon onto paper towel to drain and cool, just like the bacon.
After that, I poured off some of the bacon grease, until there was only about 1 or 2 tablespoons left in the pan. To that, I added about the same amount of butter, then added onions, chopped fine. The onions can be cooked until translucent, but I decided to caramelize them this time. Near the end of their cooking time, I added a bunch of garlic I’d put through a garlic press.
All of that got mixed in with the mashed potatoes, then the entire pot was put into the old kitchen, which is at freezing temperatures these days, to cool down.
The filling didn’t need to be completely cold before I added the cheese, but I did want it cooled enough that it wouldn’t melt the cheese. Here, I’ve got some old cheddar and goat cheese. I’ve made these using Montery Jack, which worked out very well. Any sharp cheese can be used. A mild cheese would just disappear among the other flavours.
The dough was made using a basic recipe I found online. I like a dough that uses sour cream, but we didn’t have enough for a single recipe, never mind a double, so I used one that was just flour, salt and butter melted into boiled water. The fun part is kneading it. Pierogi dough has such a wonderful texture!
When it was time to start making the pierogi, I just made a mess of things! LOL The first ones I made were massive. I was shooting for three inches square, but I was probably closer to four.
Yes, I do squares folded into triangles, instead of cutting rounds. It’s faster that way, and there’s less dough left over that has to be rolled out again.
The next batch I did went the opposite way, and were far too small. Some of the squares were more rectangles and ended up being folded into smaller rectangles instead of triangles. :-D
My daughter started boiling the first couple of batches while I finished up the last ones. At the very end, when there was just enough dough to make three pierogi, I made three balls and rolled them out individually, so we got a few half-circle ones, along with the triangles and rectangles! LOL
After they were cooked and drained, we tossed them in olive oil, salt and pepper, then I split them up into take-out containers to finish cooling down.
I suppose I should have tasted one, but I was so focused on getting them ready to put away in the fridge, I didn’t think of it!
Let me remedy that.
Oh, my goodness! They turned out great!
The main reason I chop everything that goes into the potatoes so small is so that each pierog will have a bit of everything in it, and you can really taste each ingredient in there. Of course, with the onions and mushrooms fried in the bacon grease, the bacon flavour runs through it all, but without being too dominant.
The dough is nice and toothsome. I like a good, thick dough. Not too thick, of course, but I remember that even as a kid, eating my mother’s pierogi, my favourite part was the outer edge of dough. I would have liked a sour cream dough better, but the plain dough is still excellent. When we eat these later, they will be pan fried in butter, and that will make them even better!
Who cares if they are all weird sizes and shapes? They taste great!
The link should open in a new tab, so you won’t lose your place here. :-) Also, the photo at the link is completely different from what the recipe results in!
Of course, I had to do some modifications, so here, I will talk about what I changed.
In the ingredients:
It called for 1 cup of dark honey. I didn’t have dark honey. In fact, I didn’t even have a cup of liquid honey. What I had was some of my cousin’s creamed honey. I have no doubt using it will change a few things, from the colour to the moisture to the flavour, but I don’t expect them to be a big deal, and considering how my cousin makes his creamed honey, with a hint of maple syrup, I expect tasty results.
The next change was the 8oz, or 2 sticks, of unsalted butter.
I honestly don’t get the “sticks” of butter thing. I mean, yeah, I do see them in the stores, but my goodness, it costs more to buy butter in sticks than in pounds.
One stick equals a quarter pound of butter, or half a cup, so the recipe is calling for a cup of unsalted butter.
I don’t have unsalted butter. Just salted butter.
Usually, when I see a recipe that calls for unsalted butter, and I use salted butter, I would reduce the amount of salt elsewhere in the recipe.
This recipe doesn’t call for salt at all.
I’m not concerned. A touch of salt can wake up sweet things, and for the amount of salt in the batter, with no other salt in the recipe, we’re not going to have a salty cake or anything.
We were pretty much out of ground cloves, so for the 1 tsp in the recipe, about 3/4 of it was from whole cloves I ground in a coffee grinder.
The recipe also called for dark brown sugar. We have just plain brown sugar, or “golden” sugar.
The instructions mentioned beating mixtures at low speed, so it assumed an electric mixer would be used, but I didn’t want to fuss with it and did it by hand.
The instructions said to pour the batter into prepared loaf pans and bake at 350F for 45-55 minutes, or until a toothpick comes out pretty much clean. All ovens are different, so I set the timer to 50 minutes, then checked it with a steel chopstick. Because of course, I don’t have toothpicks.
It came out with batter stuck to it, so I added 10 minutes, then tested again.
Then I added another 10 minutes and tested again.
Then I added another 5 minutes and tested again!
Finally, the chopstick came out clean!
I don’t know why this took so much longer to bake than the recipe stated. Going from 45-50 minutes to 75 minutes can’t be completely put to differences in ovens. Whatever the reason, if you try this recipe, make sure to do the toothpick test (or chopstick, as the case may be) to ensure it’s done!
Doesn’t that look pretty? And the smell while baking was wonderful.
After letting it cool, I just had to taste test it for this post. :-D
As far as texture goes, it’s more “banana bread” than “cake”. It has a slightly crisp crust outside, with a lightly dense, spongey inside. The combination did make it a bit harder to cut! :-D
While sweet, is it nowhere near as sweet as I expected it to be! Not with so much sugar and honey in it. Using the salted butter was fine; there was no noticeable salty taste. I also don’t really notice a coffee taste, either, even though there was quite a bit of strong coffee in there. All the flavours blended together quite nicely, and no one flavour stands out more than the others. I found spreading a little bit of butter on my slice brought out the flavours, more.
It’s also drier than I would expect either a cake or most quick breads to be, though it is definitely moist.
From what I’ve read in other recipes, they can become moister with time.
I don’t expect these to last long enough for us to find out. :-D
Well, here it is! The final product in trying to make my mother’s baking soda cheese.
Did it work?
Well… sort of.
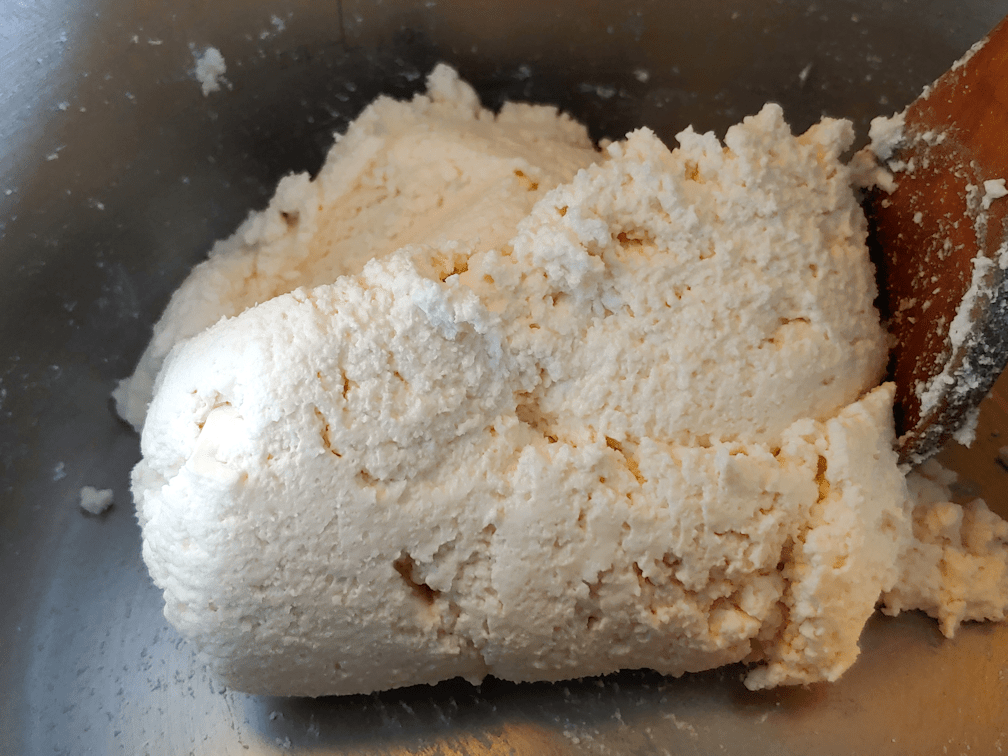
First of all, this is not at all like what I remember my mother’s cheese looked like. That was a semi-hard cheese that could be sliced. This… is not. It’s more like a cream cheese in texture, but it wants to crumble more than spread. It can, however, be spread.
As for the taste… I have a really hard time describing it. It’s a young cheese so, of course, the flavour is very mild. Which means it would lend itself very well to the addition of herbs and spices and other flavours. As it is now, with just salt, there is a sort of tanginess to it that I can’t put my finger on. It somehow manages to be both mild and bold tasting, at the same time!
All four of us have had a taste, and we do have a consensus.
It’s very good. Delicious, even.
In fact, as I write this, I’m enjoying it on a slice of oatmeal bread, with a cup of Irish Breakfast tea.
What I should probably do is take some to my mother, so she can try it and tell me how it compares to what she made. After all, I only ever saw the finished product once, and that was many years ago. Based on my memory of it, I did not succeed in recreating it. However, the finished product is very good.
With the cost of milk these days, compared to a container of Boursin cheese at the grocery store, we’re not really saving any money by making it ourselves. If I were to compare to the cost of a block of plain cream cheese, we’d be losing money by making it ourselves.
Is it worth making again?
Absolutely. And we will, probably in larger quantities.
It may not be as I remember my mother’s soda cheese looked like (I can’t compare the taste too much, since hers had been flavoured with caraway seeds), but that’s just more reason to keep trying!
The Overview
Okay, so let’s look at why it might not have turned out like my mothers. What differences were there?
First up, quantity of milk. I’m now convinced that my original notes, which said “about 5 gallons” of milk was accurate. My parents still had a few cows at the time I visited and saw this cheese, and it was just the two of them, so they would have had a LOT of excess milk.
Second, she used raw, skim milk. My parents always ran the milk through the separator. While I’m sure they must have done it once in a while, I don’t remember my parents ever setting aside whole milk. Until it finally closed, my parents sold their cream to a local creamery for a bit of extra cash (though they sometimes took payment in butter!). Skim milk was for home use. Cream was for selling. I used the type of milk we usually buy; homo milk (3%). We never, ever buy skim, because we all find it incredibly disgusting. So what I made has a higher fat content than hers would have, plus our milk was pasteurized and homogenized. Hers would not have been.
Other differences include my hanging the cheese to drain, when my mother had just set it aside; my curds may have been drier than hers. She melted her curds in a frying pan before pouring it into a mold. Chances are, the frying pan she used was cast iron. If so, that too would have made a difference. She would have made hers in the summer, when the milk would have soured much more quickly. Even the natural yeasts in the air might have made a difference, and while my mother would have ensured everything was clean, she could not have sanitized things to the extent that home cheese makers can, now. The salt I used also would have been different. She would have used ordinary table salt, which would be iodized. I used non-iodized coarse salt that had been run through a coffee grinder to powder it.
There’s also the fact that she may not even remember some details, or had not thought to mention some because, to her, they were just so obvious she couldn’t imagine them not being done.
There are so many little things that could have made a difference, but until I actually take some to my mother to try, I don’t even know just how different ours is from hers! For all I know, I could be remembering her cheese completely wrong, or the cheese I remember is not the one she remembered and gave me her instructions for. We could have been talking about two different cheeses completely, and not known it.
I guess that’s just how it can be. I’ve had an interest in recreating ancient recipes for many, many years, and this sort of reminds me of that. When the ancient recipes were written down, they weren’t at all like modern recipes. Often, they were little more than a list of ingredients, with no or few quantities. The writer assumed the reader would already know the details. My mother just used what she had, in the quantities she had, done in the ways she knew.
I’m just fortunate I can still actually ask her for details, even if she can’t always remember them.
After sitting overnight, tucked away in the oven, it was time to take out the cheese and do the final steps.
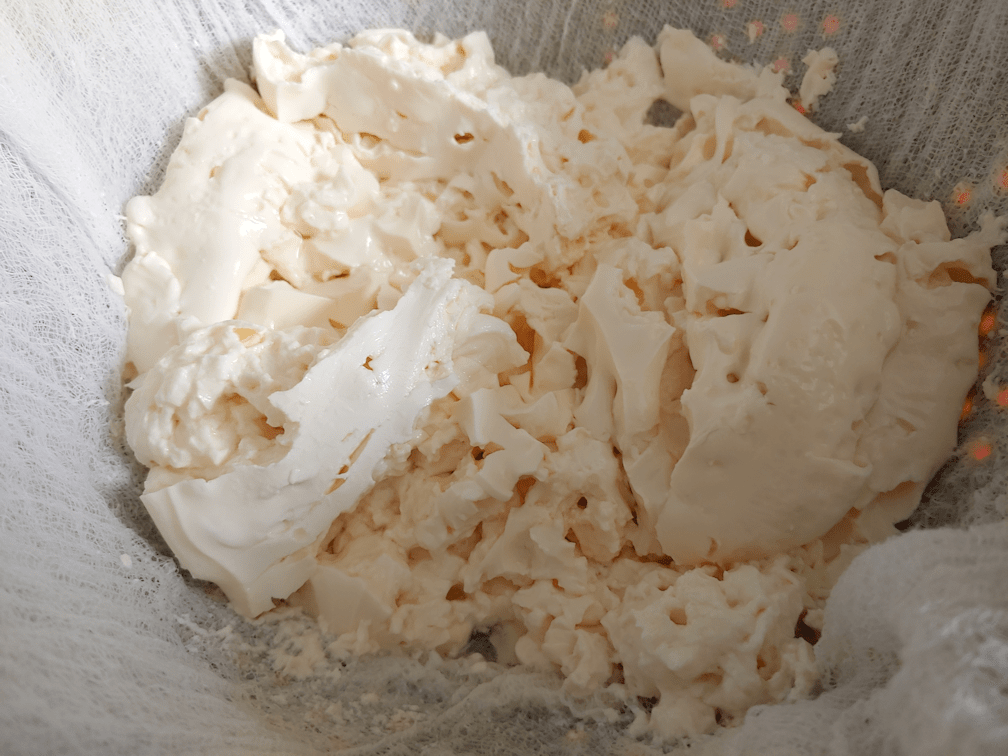
This is what it looks like this morning, after stirring.
It… looks like dry cottage cheese.
The next instructions were:
Add salt to taste, if desired. Add colour if desired. Add herbs/spices, if desired.
For this first attempt, I am only adding salt.
If you look closely, you can see the salt on the curds in front of the spoon. My mother would have just plain table salt, since that’s what she would have had. I stole some of the powdered salt my daughters use in the popcorn pot. It’s just coarse salt that has been run through a coffee grinder, so it can be added to the oil that popcorn is popped in, and actually stick to the popcorn as it pops. That got very thoroughly mixed in while I started the next step.
Put to frying pan on low heat, in batches, and heat. Mix while heating.
The more the curd got mixed, the more dough-like it got in consistency.
Then, it actually started to melt!
I know that’s what my mother said, but I still felt surprised by it!
I even had to change spoons. By this stage, the texture was a bit like cake batter.
When melted completely, pour into form.
I didn’t know how long it needed to be stirred, but my mom said to pour it, so I just kept going.
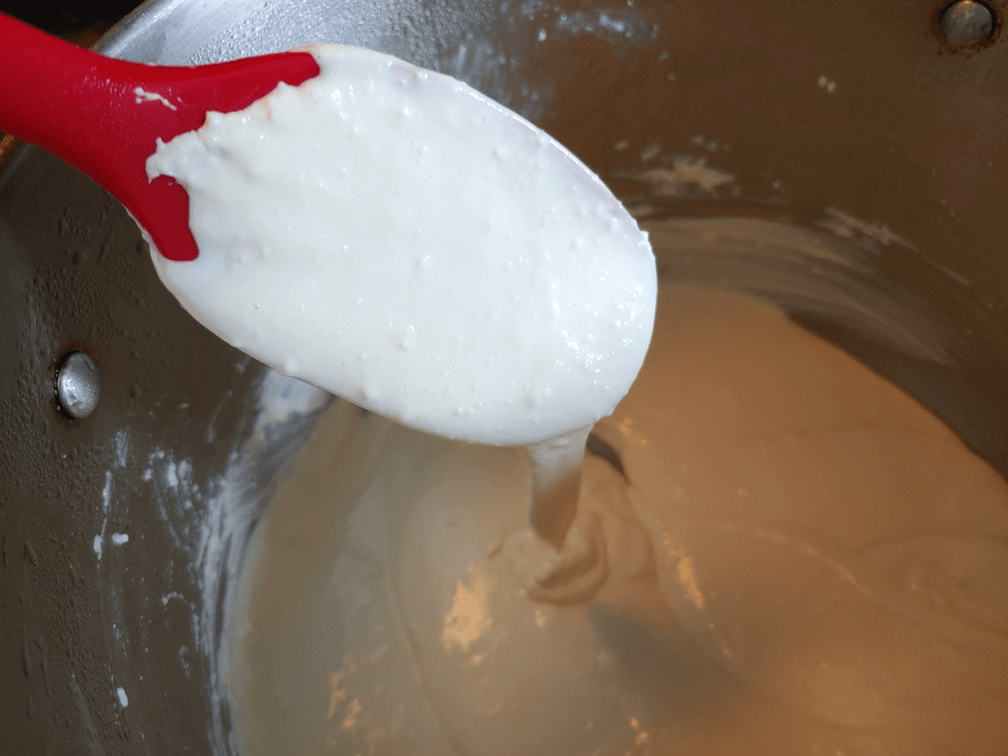
Just look at this! It really did get to a pour-able consistency, unlike any other cheese I’ve ever worked with! At this stage, it was like well stirred sour cream in consistency.
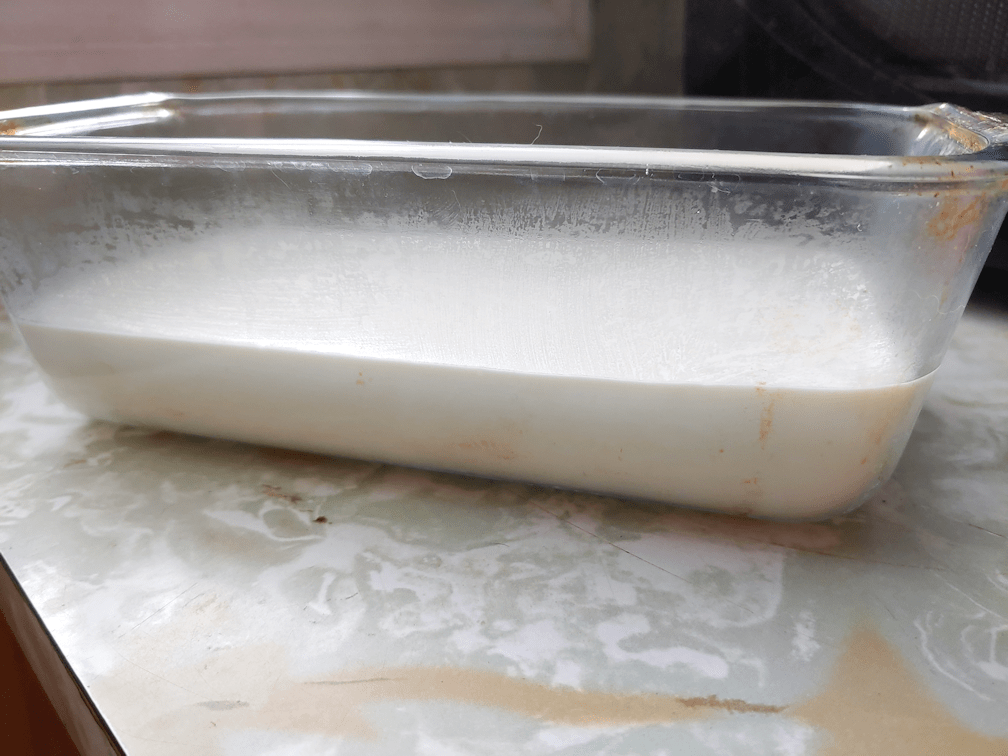
I then poured it into a loaf pan I’d scalded and had ready. This level if what 1 gallon of milk was reduced to.
Leave to rest until cool. When cool, ready to slice.
This is the stage we are at now. I covered the loaf pan with a narrow wooden cutting board I have. I considered covering it with plastic wrap, but I wasn’t sure I wanted the condensation build up, and the board would keep the dust off while also allowing a bit of air.
I’m hoping that, as it cools, it shrinks a bit, so it’ll be easier to remove from the loaf pan.
I did taste it after pouring it into the mold (I admit it. I licked the spoon!). The salt definitely improves the otherwise bland flavour. There is another flavour in there that I just can’t identify or describe. I’m hoping after we do a taste test, later, someone in the household will be able to describe it!
Okay, so the curds have been hanging for about 5 1/2 hours, and I’ve moved on to the next steps in trying to recreate my mom’s cheese.
Now, my Mom had said to just set it aside for a few hours, or overnight, so hanging it may have changed things a bit. I don’t know. But this is what it looks like after hanging for most of the day.
Also, it’s a good thing I covered the whole set up with another cheesecloth, because the cats REALLY wanted to get at this!
The next instructions are:
Put solids into large pot. Add about 1 tsp baking soda and mix thoroughly. Leave overnight. Will rise like bread.
Hmmm.
Looking at how little there is in here, I’m starting to think that my original notes, saying about 5 gallons of milk, was accurate. There is not a lot in here, and when I saw my mother’s cheese, it filled an ice cream bucket, so there’s no way it was only 1 gallon.
Which means I’ve been using the quantities for vinegar and baking soda for 5 gallons, not 1 gallon. Yet, 1 tsp of vinegar to sour 5 gallons seems like way too little. Mind you, she would have been making this in the summer, and the milk probably would have soured quickly, with no vinegar at all. Knowing she was pretty loosey-goosey on the quantities to begin with, it’s really hard to know. Considering how long it took to sour using 1 tsp of vinegar to 1 gallon of milk, I suspect it’s actually the correct amount, and that I would have needed more, if I were using more milk.
This is after very thoroughly mixing in the baking soda. Yes, I used 1 tsp for this amount.
The curds feel like a cross between cream cheese and cottage cheese. I spent quite a bit of time mixing it, because I wanted that baking soda to be worked in as much as possible.
My mom said to leave it overnight, which means she would have just left it on a counter, but I have put the covered pot into a warm oven, because of how chilly that part of the house gets.
She commented that it will “rise like bread.” That makes sense, since we should be seeing a chemical reaction between the acidic milk soured with vinegar, and the alkaline baking soda. It’s something I’m used to when working with sourdough, but with cheese? I did get the sense that the curds were starting to feel “fluffier” by the time I finished stirring in the soda, but that could be just my imagination because I am expecting something like that.
I did taste the curds before and after adding the soda. As I mentioned before, it has very little flavour right now, but I did feel that the baking soda … softened… the flavour, if that makes sense.
After it has sat for the night, salt, colours and herbs and spices can be added. For this first attempt, I will be adding some salt, but that’s it. If we make it again, we’ll experiment with adding herbs and spices or whatever.
I am incredibly curious to see what it looks like by morning!
Growing up here, as a subsistence farm, we had cows for milking and for beef. Even with 7 of us, we were milking enough cows to have excess milk. I remember my mother making cottage cheese (which I did NOT like), but that was the only type of cheese I saw her make until some years after I’d moved off the farm. I’d come out to visit, and saw some semi-hard cheese in an old ice cream bucket for a form. It was slightly harder than a cheddar, sort of tannish yellow in colour, with caraway seeds in it. It was quite tasty. I asked my mother about it, and she said she had made it.
A few years ago, I asked my mother about how she made this cheese I remembered. Unfortunately, she thought I was talking about cottage cheese, and the more I described it, the more perplexed she was.
After moving here, I was having a conversation with my mother about making and preserving food, when she mentioned a cheese she’d made. It was the one I remembered! I quickly took advantage of the moment, and got her to describe to me how she made it. I knew it had to be different, because my mother did not have access to rennet or any of the bacterial starters. She didn’t have a food thermometer, either.
Getting any sort of information like this from my mother has always been difficult. I remember the first time I tried to get a recipe for a soup she made. I remembered some of the ingredients, and asked her if she remembered how she made it. Instead of answering me, she started mocking me for not knowing how to cook and not knowing how to make soup. Never mind that I was already married and a child, by then, and had been feeding the family just fine.
I never did find out how she made that soup.
This time, I did manage to get the information down then, after I got off the phone with her, re-wrote it into more cohesive instructions, since the conversation bounced all over the place. When I was finally ready to try it, I was perplexed by some of the quantities, so I called her to clarify. Did she really start with 5 gallons of milk, or did I make a mistake writing it down?
Finding out was like pulling teeth! She kept avoiding answering the question, and kept saying, “you mean you’ve never made cheese before?” in total shock. Then giving me instructions on how to do different parts. I kept going back to the quantity, and asked her if she had used 5 gallons, only to be told how I should just use one gallon, because 5 gallons is such a lot… *facepalm* Then she talked about how she’d never made it using milk from a store, and how I could use lemon juice instead of vinegar, and on and on. It took a while, but I managed to explain that I have made cheese before, I did only want to use 1 gallon, and if the instructions I had was for 5 gallons, I’d have to know that, so I could adjust the other quantities.
What it came down to is, my mother never measured. She used whatever amount of milk she had, and went from there. I did know that. What I needed was some sort of approximation, because there is a heck of a big difference in quantities involved.
Finally, she told me she used about 1 gallon.
*sigh*
Once I had that clarified, I finally got a batch started. Here are the instructions I got from her, highlighted in blue, with my own commentary.
Milk – about a gallon Add 1 tsp vinegar to make sour. May take all night.
This part actually ended up taking almost two days. The milk was supposed to rest at room temperature, but with how cold our house is – especially the kitchen – I put it in a warm oven.
When sour, put in pot/roaster into oven to warm (lowest heat) until forms curds and whey.
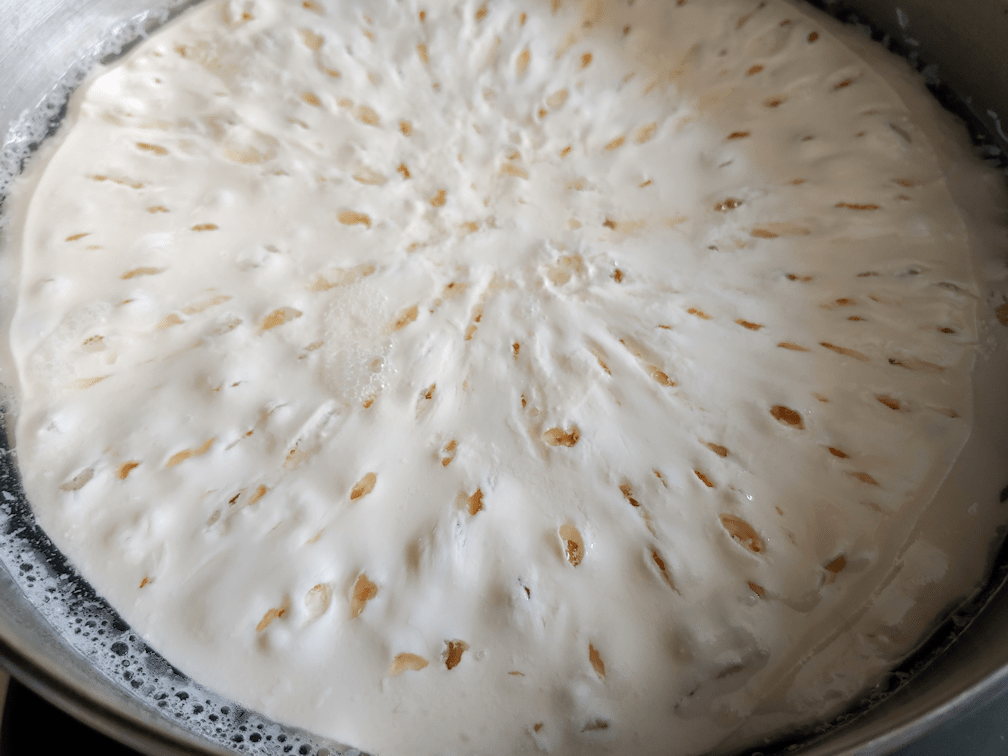
We finally reached that stage this morning.
This is how it looked.
I have no idea if this is how it’s supposed to look.
Drain through cheesecloth.
There is nothing about cutting the curds or anything like that, first. Just to drain it.
I did give it a taste at this point. It doesn’t have much flavour to speak of. The texture was a lot denser than I expected it to be, considering how it broke apart.
Set aside for a few hours or, preferable, overnight.
This is the stage we’re at now, though I’m cheating a bit. I dug out the stand I made to hang jelly bags or drain yogurt cheese, tied off the cheesecloth and hung it.
After taking this photo, I covered the whole stand and bowl with another cheesecloth, to keep out the dust and cat fur – and cats!
Since I got to this point so early in the day, I will likely continue after a few hours, rather than leaving it overnight, because…
Put solids into large pot. Add about 1 tsp baking soda and mix thoroughly. Leave overnight. Will rise like bread.
… it will sit overnight again, after this stage.
As for the whey, I think it’s time to do some more bread baking! I love using whey as the liquid. It adds so much flavour!
The next instructions have me wondering.
Add salt to taste, if desired. Add colour if desired. Add herbs/spices, if desired.
This is all stuff that’s supposed to be added after the baking soda gets added, and after it rests overnight. Which seems odd to me, but that’s how she did it, so that’s how I’ll try it!
Put to frying pan on low heat, in batches, and heat. Mix while heating. When melted completely, pour into form.
… melted?
It can melt at this stage?
I am really perplexed by this.
I’m not sure what I’ll use as a form just yet. It will depend on what I see when the time comes
Leave to rest until cool. When cool, ready to slice.
If I hadn’t see my mother’s cheese, I would never guess that these instructions would get that result. As it is, I am still unsure of what I’ll actually get!
So this should be an interesting experiment. I hope it works, because it’s really easy to make, even if it does get spread out over several days.
It was a lovely morning, as I did my rounds, with nothing at all to suggest we were going to be hit by a storm, later today!
As is now usual, I had a whole crowd of kitties waiting outside the door for breakfast. :-D
I counted 19, but it’s possible I missed one of the ‘icouses. They were milling about so much! I did get to pet a few furry butts, including several of the kittens that normally would have run off already, plus our newcomer.
Creamsicle Baby was battling it out with Agnoos for special attention. :-D
Butterscotch followed me while I was doing my rounds. She really likes that I now go to the corner of the property to check if the new sign has been vandalized yet, and switch out the memory card on the camera. She has taken advantage of the set up and uses the various posts to climb up and jump onto me, making it very hard to switch out the memory card!
While going through the yard, I spotted a few summer yard tools we missed putting things away, and brought a couple of our snow shovels closer to the sun room door. They are normally kept by the main entry, but we are avoiding using that door until we can get the door and frame replace; something we’d hoped to get done before this winter, but the budget for it just didn’t happen. I wasn’t even able to get the estimate done; I was going to call the same company that did the windows here, before we moved in, but I can’t find them! I do hope they haven’t gone out of business, like so many others have done in the past year and a half. :-(
When I was ready to come inside, I found this handsome fella waiting for me.
He even let me pet him and scritch his ears!
I think this one is Chadicous, but I’m not sure.
I love that pink little nose!
The general store the post office is in closes at noon on Wednesdays, so I headed out shortly after they opened. I wanted to get the battery we needed for the cat’s house smoke detector that I forgot to pick up yesterday. While there, I picked up another bag of flour, just in case.
I had a few general things planned for baking today. One of them was muffins, but I hadn’t settled on any recipes. After doing some searching, I found a couple of savory recipes I wanted to try.
The whole day of baking was about timing! The first thing I did was cook a package of bacon in the oven, until dry and crumbly, for one of the muffin recipes. Once that was cool and crumbled, I started a double batch of bread. I didn’t use our dough baby, because I forgot to set it to soak overnight. Instead, I used our basic bread recipe, which gets modified with whatever we have on hand. This time, it included oatmeal and chia seeds, with molasses for the sweetener.
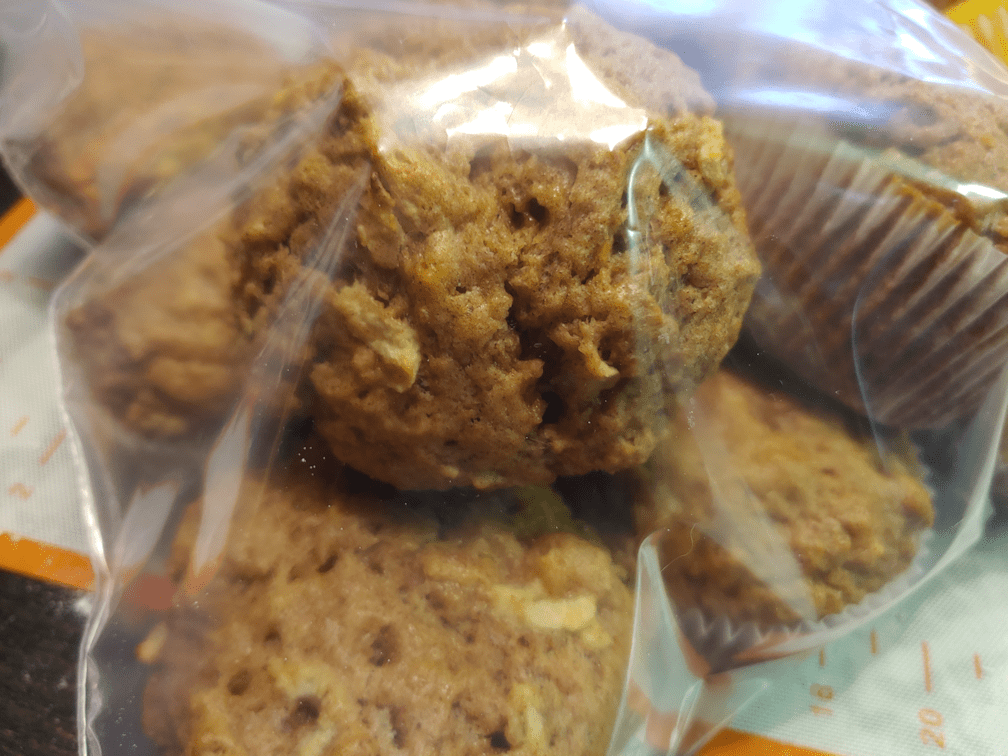
While that was sitting for its first rise, I had time to make a double batch of apple bacon muffins.
Half of them were for the freezer, and half to have on hand. This recipe as a surprising amount of cinnamon in it, which accounts for the darker colour.
There is an entire package of bacon and two Granny Smiths in that double batch! The recipe sounded amazing, but it didn’t live up to expectations. Don’t get me wrong; they were quite tasty. However, I really expected to at least taste all that bacon! The predominant flavour was the apple. I’d definitely make them again, even if they didn’t life up to their hype. ;-)
When the muffins where done and cooling, the girls quickly took over the kitchen to make lunch for everyone. That gave me a chance to take a break – and see that the snow had finally arrived!
It has just changed from rain to snow when I took this photo. They’re hard to see, but there is at least one chickadee going for the sunflowers as they disappeared under the snow!
By the time we finished lunch, the bread was ready to be shaped into loaves and left for a second rising, which gave me time to make another double batch of muffins.
This time, they were cheddar cheese muffins. They were supposed to be smoked cheddar, but what we had on hand was sharp cheddar. The recipe included cornmeal and cayenne pepper. For a double batch, it would have been 1/2 to 1 tsp of cayenne, but there was no way I could use that much. I enjoy the flavour of spice, but have no tolerance for the heat. Still, I did add some. These turned out very nice. Better than the apple bacon, I’d say. Another keeper. Especially for the next time we get smoked cheddar. :-)
Once these were done, the bread loaves were ready to go into the oven. While they were baking, I started another double batch of bread. This one had oatmeal in it, too, (more specifically, rolled oats, softened in boiling water for a few minutes) and some hemp hearts I had left.
Also, I’m glad I got that extra bag of flour. We had just started a new bag, and I’ve already gone through half of it!
These are the oatmeal, molasses and chia seed loaves. I’m rather pleased with how they turned out! I’m a terrible one for using too much flour, and taking them out of the oven too soon, but I’ve gotten better. ;-)
Then, while the second batch of bread was rising, I made a batch of double chocolate cookies. Double as in, it has two kinds of chocolate (cocoa and chocolate chips), not a double recipe. A single recipe was enough to fill four baking trays. For so many, I had to get a daughter to tend the oven, as they baked very quickly, while I had to start shaping the bread for their second rising. This time, I made them into large buns instead of loaves. The timing turned out perfect. By the time the last cookies were coming out of the oven, the buns had risen enough to go into the oven.
I didn’t bother taking photos of the second batch of bread, nor the cookies. The cookie batter was the kind you drop onto an ungreased pan by spoonfuls, then they spread flat while in the oven. I ended up having to increase the cooking time, and they also turned out to be very fragile. Which is okay. Broken cookies taste just as good as not broken one! They just don’t look pretty. ;-) As for the buns, even with the oatmeal and hemp hearts, they just look like white bread. :-D Those were the ones we started on tonight. While two of the loaves of the first batch went to the freezer, along with half the muffins, I decided not to bother freezing any of the buns. Those are going to disappear very quickly!
In the middle of all this baking, I got a call from my mother. She was wanting to know if we had snow, too. By this time, it was coming down pretty heavily. She sounded so excited, and started going on about what a good thing it was we got her shopping done when we did. I agreed, mentioning that unfortunately, we didn’t get all the things we wanted to get done finished. She was completely oblivious. Instead, she started saying that, as long as the septic was covered, it was fine. She had seen the insulated tarp we had ready to cover it, the day she came out here, so she started giving me instructions on making sure it was weighted down so it wouldn’t blow away. I told her it was pegged to the ground. Apparently, she didn’t know that tarps have grommets on them, than can be used to fasten them down. She kept on going, telling me about how important it was to cover the septic tank. I ended up asking her, how long have we been living here? She thought three years. I said four, and we’ve been covering the septic every year we’ve been here. I know my mother thinks I’m stupid, but you’d think she would have noticed that the winterizing has been getting done, every year.
What I find strange, though, it that she was also talking about covering the well. In fact, she was talking about the septic tank and the well interchangeably, and then saying that if the well freezes, we’d have no water, and how terrible that would be. This was something she brought up last year. She insisted that the well cap had been covered with straw, every year, just like the septic tank. Which has never been done. Not only was it never covered with straw, but I know that even the accumulated snow was removed, likely with the Bobcat our vandal stole, as evidenced by the chips in the concrete, and one of the handles on the cover being broken right off, while the remaining one has been bent flat. Hidden by snow, it’s been hit and run over. Plus, the well cap is at least 12 feet down. It’s never been a problem in the almost 50 years since it’s been dug. She also had nothing to do with any of this sort of maintenance, so I don’t know where she is coming from on this.
It was a short phone call. I mentioned I was in the middle of baking, and she happily let me go. She just wanted to talk to me about the snow. It felt so weird. She’d been so nasty to me when she was here two days ago, and she has no awareness at all about it. I’d talked to my brother last night. My mother had just called him. I had filled my siblings in on how things went when she came out here, so he was in the loop. When my mother started talking about coming to see the sign, she was going on and on about how great it looked, how great everything looked here at the farm, and what a great visit it was. To which he said, no it wasn’t! He spent time time trying to encourage her to be kind and build people up instead of always tearing them down, to which she replied, “I’m not going to lie.” Apparently, the opposite of being cruel is to lie? She had said something about not saying that everything looked beautiful. Which isn’t what anyone is expecting and has nothing to do with simply treating people nicely. I’m grateful my brother stuck up for me, but we are both left rather perplexed by her inability to understand what it means to treat people kindly.
We may not have caught up completely, yesterday, but we did get the essentials necessary for winter, at least. This is our first real snowfall of the year, and while we will continue to be relatively mild, this is a snowfall that will stay. It is still coming down, and now the forecast says the snow will continue to fall through to Saturday, too. Our temperatures remain above freezing, so sleet is a major concern on the highways right now. We’re expected to get 10-15 cm of snow today (4-6 inches), with another 10-15 cm tomorrow, though the weather alerts say that our area might actually get more, due to the lake effect. It’s past 9pm as I write this, and we haven’t reached anywhere near the predicted levels, so who knows what will actually happen.
The forecasts do still say that today’s storm will become tomorrow’s blizzard. I was just looking at our weather history, and the record high for today was 13C/55F, in 2016, while our record low was -20C/4F, in 1991 – but our average high is 0C/32F and average low is -7C/19F, so the temperatures we’re having right now are not at all unusual. It just feels like it! Funny how that works.
Either way, it turned out to be the perfect day to stay inside and do a whole bunch of baking!