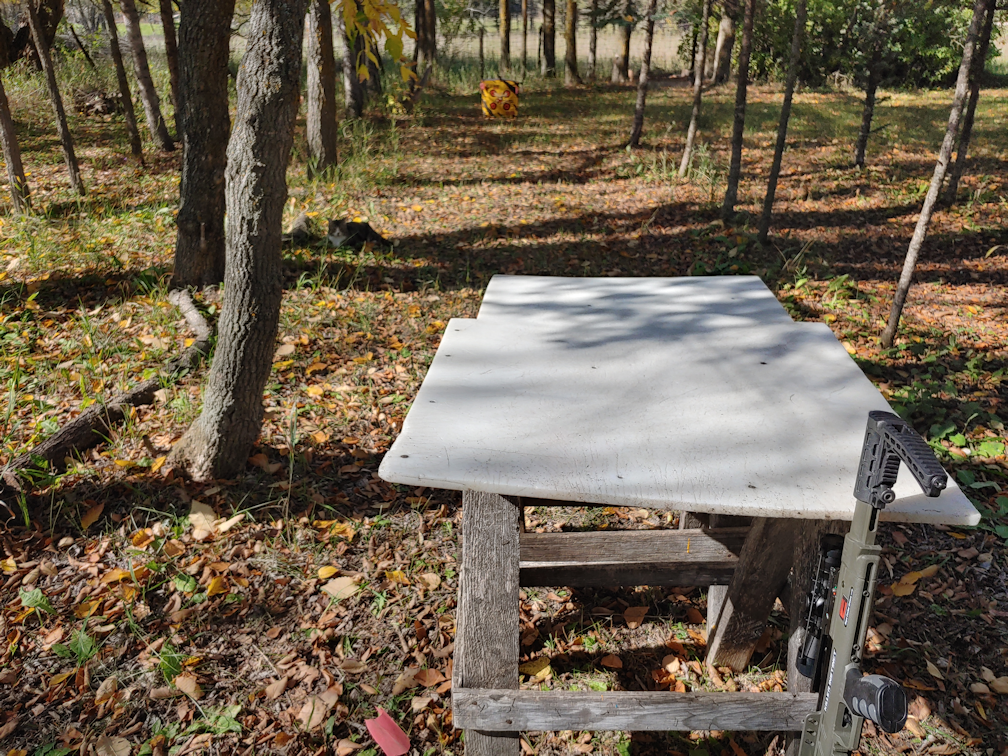
Today, my husband was finally up to heading outside to help me sight the crossbow. I found an excellent spot for a shooting range and got us set up.
The instructions said to sight at 10 yards, then micro adjust at 20 yards. I pre-measured the distance on some paracord, then used flags to mark where the target was placed, at 10 yards, then 20 yards. In the photo, we are set up at at 10 yards.
I did try to use the cocking cable myself, first, but even after my husband shortened the cable, I’m just too short! He had to do it for me.
Unfortunately, cocking the bow turned out to be very hard on him. To cock the bow, you lean over the bow, hook the cord up in the appropriate spots, grab the handles, pull and straighten up at the same time.
Which is really, really painful for someone with a lower back injury.
He did it a few times, took a few shots and adjusted the sight. When it comes time to micro adjust, we’ll have to take into account that he shoots left handed, and I shoot right handed. I quickly called it a day, though. I did not want him to injure his back even more.
I did, however, get one shot in, myself, before we packed up. Here is my first ever shot with the crossbow!
I was aiming for that centre target. The holes above, right, were my husband’s shots while adjusting the sight. The other holes were from when my brother in law was adjusting the sight at 20 yards.
The crossbow has an adjustable stock, and I didn’t noticed my husband had shortened it while cocking the bow, because it was digging into his abdomen uncomfortably, then didn’t return it to where it was. So when I fired, I was a bit too close to the sight. There’s just enough recoil that the sight smacked me in the glasses. Oops.
We definitely need to get a crank. Unfortunately, Cabelas, where I bought it, doesn’t seem to carry them anymore, and Killer Instinct, the manufacturer, doesn’t seem to make them anymore. The only one my husband has been able to find has been on eBay, and it’s pretty expensive.
I may have to just shorten the cord even more and try again. Even if I do get it to a length that works for me, I still want a crank. The crank is silent. The pulleys on the cocking cord squeak. If I’m going to be hunting, I need to be able to cock it silently!
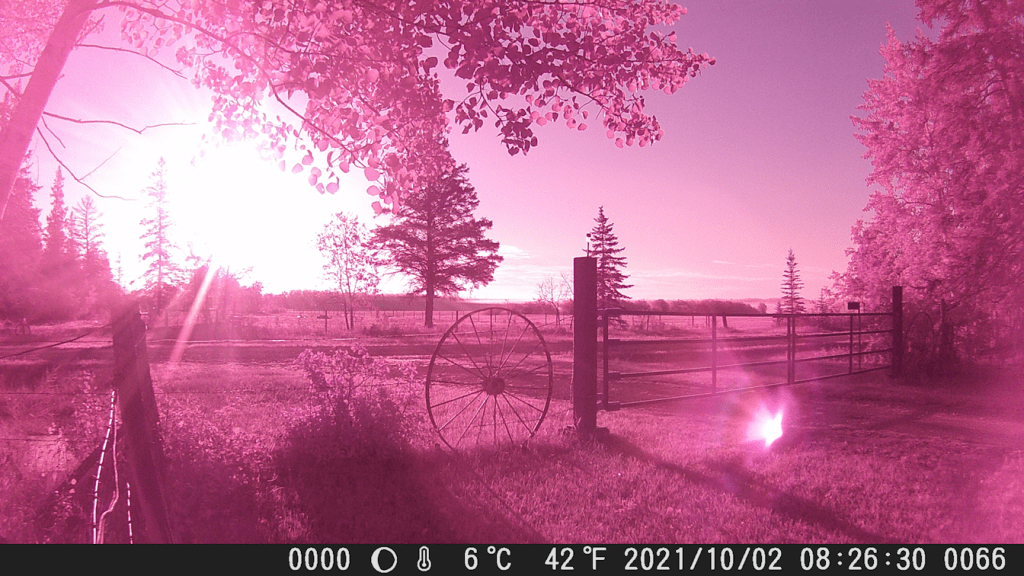
Well, this is one way to tell the temperature are getting chilly at night.
And that I need to change the batteries in the newer trail cam.
Until the camera warms up enough, it starts recording things in pink!
Also, during night shots, the infrared flash stops working and the files have a red law battery warning across the bottom. I’ve taken down the white string lights that had been along the top barbed wire on the fence, as they were getting pretty damaged and burnt out. There is now a solar powered string of lights long enough to reach from the gate to the corner fence post. When the infrared flash doesn’t turn on, they are quite nice and bright! :-)
I’ll have to head back out later with some fresh batteries. :-)
After a quick run out to hit the farmer’s market, and then town, I decided to finish painting the inside of the outhouse while there was still enough light.
I’m glad I did. :-)
Here are the “before” pictures.
I had a few drips, while working on the top and ceiling. :-D
It was a bit tight to get photos of the inside, front!
There are a LOT of nooks and crannies around that door frame.
I actually started with the door. I figured I should get that done first, just in case it needed to get closed at the end of the day, so it would have more time to dry.
Then I worked on the most difficult areas around the door. For such a small amount of square footage, it took quite a while to get that done! Painting the inside of the door frame turned out to take quite a while, too, as there are a lot of gaps that I needed to squeeze the brush into.
Once the front was done, I methodically worked my way to the back. Of course, I found more staples and tacks that I missed! :-D
Since I wasn’t planning on taking off the toilet seat, once the sides were done, I painted the seat box under the toilet seat first. The lid leans against the back wall when it’s open, so I wanted to give the paint at least a little while to dry before having to close the lid again. On the plus side, there are only 2 points of contact under the seat, so even if still wet, closing the lid wouldn’t mess the paint up too badly.
Here are the “after” shots.
This time, I remembered my phone has a “panorama” setting. LOL
Yeah, I painted the toilet lid. Sort of. It had so many drips on it, I just went ahead and used the lid to get excess paint off the brush. :-D
And here it is, with the painted door.
While doing a second coat will take a lot less paint, I suspect we will need to buy another can. Those nooks and crannies took a lot more paint to cover than expected. Especially when I came across wood that had pieces fall out, or had a very rough finish. One of the beams supporting the corner still had bark on it, and winding gouges on the surface from insects. All of this ended up needing extra paint to get into the various holes and surfaces
What a difference!
One of the things we’ll have to do is put some sort of non-slip… something… on the metal sheet in front of the outhouse. It can get slippery when it’s wet.
After a second coat of paint, we’ll put the mirror cabinet back in – my daughter suggested just putting the old one back, rather than digging out the one in the basement, because then we’d just have to find somewhere to store the old one, anyhow! :-D Also, she noticed we had a chain latch, still in its package, that we can use on the inside, so we don’t have to buy a new latch. It will be mounted on the top cross piece of the door, so I won’t be trying to mount a latch where old screw holes have already damaged the wood. I’ve decided that, for a light, I will pick up another one of those LED, battery operated light switches. We have two of them in the house that come in very handy; one is set up in the bathroom to use at night instead of turning on the very bright main lights, and another is set up in a very dark corner where one of the upstairs litter boxes is kept. When we get one for the outhouse, I want to mount it across from the mirror, to take full advantage of reflected light. We’ll need some sort of dust, critter and insect proof container to keep toilet paper in, and maybe some wet wipes or something. The girls plan to put art on the walls. :-D
The next time something happens and we can’t use our indoor bathroom again, we will at least have someplace pleasant to go! :-D The only other thing is, we now have to empty the pit of all that gravel the groundhog dug up. It will be important to get that done before winter, because if we get any normal amount of snow, when it melts in the spring, we’ll have a big puddle in front of the outhouse, and the back of the garage, and water will drain into the pit again. The gravel is high enough in there, that there is no longer room for it, which would force the water above the floor boards. Mind you, it would probably end up draining into the groundhog’s den, but there is nothing we can do about that.
The main thing was getting at least this first coat of paint done, then digging out the pit. If we don’t have a chance to fix the roof before winter, I want to at least put a tarp or something over it. The rest can be done slowly, as we find the time.
Hopefully, I’ll be able to continue later today, but if not, there is at least some progress in painting the inside of the outhouse.
This is the colour my daughter chose. Personally, I would have gone for a pale blue instead of a pale mint, but honestly, I don’t really care that much. We just needed a light colour to brighten things up on the inside, that wasn’t institutional white. :-D
I almost forgot to take the before photos!
The angle is bad because I was already standing on the seat box when I took these, and I wasn’t about to clamber down, just to take pictures. ;-)
My main goal for today was to do everything that needed me to be standing on the seat box to reach. The only exception was one side of a roof joist, right in the middle. For that, I made use of the thick boards we’d found stored in here when we cleaned it out. The three of them together gave me 6 inches in height, and that was enough.
This is probably the most difficult part to do, with all the corners and tight areas. After this, things should go a lot faster.
The opening at the top is covered with wire mesh window screen, stapled in place. It did not occur to me that the mesh was not flush with the surface when I started trying to paint over it. I didn’t want to take it off, though. I think we will pick up some more wire mesh window screen in the future for other projects, and when we do, I’ll look at replacing this screen. Then the frame can be painted properly. No hurry, though. Depending on how long before we can do that, we could paint the frame in the same colour as the outside. We haven’t decided what that colour will be.
For now, though, I’m off to the Farmer’s Market. I’ve discovered that organic humans are being allowed in, and I want to pick up some pork from our neighbour. :-) We’ve emailed briefly and I might be able to check their homestead out over the weekend, too. :-) I’m looking forward to it!
While it was incredibly handy that the old outhouse had been made safe and cleaned up inside, when we found ourselves unable to use our indoor bathroom, the reality is, it was still pretty… unpleasant… using it.
So now that we have the scrubbable, high traffic paint, I decided it was time to work on the inside of the outhouse. Because the way things seem to go in this house, we never know when we’re going to have to use it again!
Which means that today, I worked on preparing the inside for paint, starting with removing the remaining stuff stuck to the walls, after taking down all the colourful paper my mother had put up.
Thumb tacks, nails, staples, bits of paper, and bits of packing tape. Some of those tacks, I’m sure a hammer was used to put them in! I found myself using a staple remover, a screwdriver small enough to lever under the thumb tacks, and even a wrench, to yank out the most stubborn bits. They were all over the walls, on the top and front of the seat box, and the inside of the door.
Of course, I found more that I’d missed, after I took the photo, too!
My mother was very through in covering those walls! :-D
I also removed the mirrored medicine cabinet, then used a broom and brushes of different sizes to get as much dust and dirt off the walls, ceiling and floor, and out of the corners, as I could. The inside latch on the door was also removed. It was held in place with two very rusty screws, and a bent roofing nail!
The final step was to power wash the inside with the house. Remembering how difficult it was to go the front of the inside, before, that was where I started this time. By standing on the seat box, I was able to get at the cracks and crevices fairly well, without being splashed with water too badly! :-D Even doing the underside of the roof worked out all right. Once the front was done, I could get down and do the rest from the doorway.
Now it needs to dry overnight. It will be ready for painting, tomorrow!
I am happy to note that the floor is a lot sturdier than I thought it was. I had still been wanting to reinforce it by adding more boards on top. However, the seat box is pretty low. If we add any more height on the floor, it will make using the seat pretty hard on the knees. So I will have to rethink what to use to reinforce the floor. A sheet of metal could be thin enough, and strong enough, to do it. We have more like what is now in front of the outhouse, but they are huge pieces and I don’t have the tools to cut them with. Not that I would want to. I have no doubt that, some time in the future, I’m going to be thankful to have such large sheets of metal for some project! :-D There is no hurry, though. After it is painted, we can poke around the barn and the sheds and see what we can find.
After it is painted, I am thinking it would be good to replace the inside latch with a new one, as well as adding a handle or latch to the outside. Right now, it is kept closed with a piece of wood nailed loosely to the frame.
I should probably pick up new hinges. The door is starting to sag and I want to straighten it out, too. And if I’m going to do that, I may as well get matching handles and latches for the outside, too. There is not as much of a hurry on that, though, as the outside needs to be scraped and painted, and that likely won’t happen until next year. Fixing the roof is more of a priority, and I still hope to get that done this year. For now, I’ll just replace the inside latch with a new one.
Hmm. Now that I’m thinking about it, there is another medicine cabinet with a mirrored door in the basement. I think it’s in better shape than the one I took off. If it is, I’ll use that one, instead.
It may be just an old outhouse, but if we’re going to have to use it, we’re going to make that thing as pretty and pleasant as possible! The girls already have ideas for decorating it inside. :-D
I’d posted about being able to get our blocked pipe to the septic tank open, at least enough for things to finally drain. I thought we would be good for a while.
I was wrong.
Things were fine, at first. I got my shower in, no problem. Then my daughters took their showers.
By the third shower, I decided to check the basement.
There was more water on the floor again.
It took me a while to figure out where it was coming from. It turned out to be the laundry sink. Water was backing up into the sink, but this sink isn’t properly attached, and the drain opening leaks around the drain itself, so it was trying to fill and drain from the same area, at the same time. As a result, not only was the bucket under the U bend filling, but water was missing it entirely and splashing onto the concrete floor. I let my daughter know, so she could quickly finish her shower, then started bailing water into the floor drain. The water was slowly draining, but the volume from the shower was just too fast.
Which meant we had to call a plumber right away.
Well. Almost.
Since we had no way to do dishes or use the kitchen sinks, my older daughter offered to buy us supper, so my younger daughter and I made a trip into town where she could run do some errands she needed, then we picked up some fried chicken for supper. We even picked up a couple of things at the grocery store, just in case I couldn’t make the trip to the city for our monthly shop tomorrow.
Once at home, I started making calls. I first tried one of the plumbers that had come out to check our well. They were very apologetic, but were so busy, they would not be able to come out for at least a couple of weeks. !! I asked if he could recommend anyone, and he gave me the name of a plumber he thought would have an auger, in another town. I called them, but they were also booked solid. I asked for another recommendation, and got the name of a third plumber they thought had an auger.
Third time’s the charm!
After explaining what was going on, he hemmed and hawed a bit, then said that the earliest he’d be able to come out was 9:30.
Tonight.
!!!
I was ecstatic! We were prepared to have to wait until morning. We spoke a bit more, then he said he would call me back about an hour before he would be able to come out and get directions to our place.
When he got here, the first thing he did was check things out, and I explained to him what I’d already done, the roots that I’d found, and the issues we’d been having in the past. Among the things we had to consider was how old everything was, and the risk of causing more damage. Not that we had any choice. He then went and got his auger and tools.
Would you look at that beast! What a beautiful machine!
Shortly after he started, he broke though the area that was blocking the laundry sink, and suddenly we had water shooting up the pipe and into the basement! Not much he could do to stop it, either. He just had to keep on going and eventually clear through to the tank.
That old garden hose came in very handy! He made a lot of use of it, and it really helped.
Once he got that pipe done, he worked on the floor drain to the pipe.
In the process, he pulled out a clump of roots and crud the size of a small animal!! You can see it in the above photo. He got more roots out after that, too.
Then he worked in the other direction, clearing the pipe towards the weeping tile, as far as he could go.
It wasn’t until the very end, when he was using the hose to wash everything out as much as he could, that the well pump started grinding, so I quickly got him to turn off the hose. When I explained to him about the noise, and that two other plumbers had already looked at it, but didn’t dare replace the pump, he went over to take a look. Right away, he was saying, “I can see why they would be scared to do it!” The risk of something going very wrong and losing us water entirely is very high.
When he was done with the floor drain, I was really impressed by how much lower the water level now is. It doesn’t fully drain; it was grandfathered into the septic system, and there is a slightly higher spot somewhere in the line to the access pipe, preventing it from draining completely. However, it now drains as much as it can, very quickly, and it’s no longer full of silt and sand. He did such a fantastic job!
When he was done, I took advantage of him being there and asked if he could give an estimate on replacing our tub’s taps and faucet. He tried to look at the hot water tap that is leaking so badly, but it’s so corroded inside, he couldn’t get it off. He didn’t want to risk breaking something, so he didn’t want to try too hard.
In the end, he estimated the total cost to replace the taps and faucet would be around $400 – $500, but we would then have to replace the section of tub surround ourselves. Which I would have no issues with. However, he also thinks they can be repaired, which would cost much less. The only issue is not being able to take the tap off! If we replace them, it wouldn’t matter if he ended up breaking the plastic part, but obviously that would be a big issue if he was just going to repair it.
But that will have to wait for another time.
Before he left, he got my email address, then later sent me an invoice. Much to my amazement, it was less than $300! Considering how long he worked on it, plus coming out so late in the day, I fully expected it to be higher.
Worth. Every. Penny!
While he was working on the pipes, and I told him as much as I could about the system, and the problem with the roots. We know that they will eventually come back. With what he did tonight, though, it should be many years before this become an issue again.
I am so very happy with this guy! Definitely someone we will go back to in the future!
Now we have a cleaned out septic tank for the winter, and cleaned out pipes. These are now all set for the winter!
Well, I can at least say that we can now use our plumbing again.
For now.
The septic guy made it over in the late morning. The septic tank was, indeed, very full. When he had emptied it, however, nothing started to drain in the basement, so that – thankfully – ruled out the notion that the clog was due to fluids actually backing up from the tank, into the basement. That could have caused all sorts of problems with our type of system.
Also, when I called for him to come over, I asked what the rates were. They did, of course, go up a bit from when we had the tank emptied in the spring. I made sure to give him a tip, too. If anyone deserves a tip, it’s the septic guy!!!
Once that was done, I quickly grabbed lunch, then headed to the basement. Having helped my brother the last time this happened, I could go straight to where I figured the source of the problem was.
Which is when I had my first problem. I needed to get the cap off this access pipe, but my pipe wrench had disappeared. It should have been on the hot water tank, but I had the vaguest memory of taking it to use somewhere else. Too vague of a memory. I had no idea where it might have been.
While cleaning out the new part basement, we did find a couple of large pipe wrenches, so I decided to try one of those. I grabbed the smaller one, but it turned out to be broken, so I went back to try the bigger one.
Now, situations like this are among the reasons I’m glad we have the opening between the two basements blocked off, keeping the cats out. The mess was bad enough on its own. The mess with cats running through it, then tracking it through the house, is a whole different level of horrific. Unfortunately, it also meant that, to get something that is in the new basement, I had to go back up the stairs to the main floor, go down the other stairs to the new basement, then back up to the main floor, then back down to the old basement.
I don’t do stairs well at the best of times. Having to go up and down the old basement stairs, with its odd dimensions, was not a good thing. But, it had to be done.
So after a few precarious trips with me hobbling up and down the stairs repeatedly, I tried the big pipe wrench. That thing probably weighs about 10 pounds. Thankfully, it was not broken, but I still couldn’t get the cap off. Instead, the entire piece was turning. I realized I would have to take the entire top piece off, and that required loosening the bands holding what appeared to be a rubber seal in place.
That required tools I didn’t have.
At that point, I just hobbled half way up the stairs and called for my husband to bring me the big tool kit Finally, I was able to get the whole piece off the top of the pipe. And no wonder I couldn’t get it off! I knew the metal was rusting away pretty badly, from that last time we had to do this, but my brother did clean it up as best he could. About the only positive thing I could say is that, this time, there wasn’t any actual pieces of rusted out metal that had fallen off, for me to clean up.
I did take a picture, but it is too disgusting to share.
I then brought out the old chimney sweep that my brother and I had found was the only thing that really worked to break through the clogged pipe, last time. The end without the brush could be jammed through, and it’s long enough to reach all the way into the tank. I started to push it through, and barely got more than 10 inches before it was blocked.
I then spent the next… *checks the time* … two hours or so, trying to jam that thing through. I also had an old garden hose we’d used last time, too. It only has a female coupling on it, which works out quite well for a job like this. I could hook it up to the cold water tap that the washing mashing used to be hooked up to – I couldn’t use the taps at the laundry sink, since it was completely full of water… and… stuff. Very happy for the tap redundancy in this basement! Between the wire and the hose, I was eventually able to break through the clog. I knew I finally got it when the laundry sink suddenly started to drain! :-D
I then moved to the floor drain to work on for a bit. I had already had an idea of the cause of the problem, but here, it was confirmed.
There were roots running across the drain from the weeping tile under the new basement, all the way through to the access pipe to the septic tank.
I broke up and tore out as much as I could, but I just don’t have the equipment to do more. We do have a rotary drain snake, and I was able to use that to pull out quite a bit, but it’s just too small to clear the pipes.
Still, I got it to the point where water was flowing freely again, and I could start sweeping the water on the floor, and sweeping up… debris… for the garbage. I got most of it cleared, but not all. Once everything was flowing again, I made sure the dehumidifier that drains directly into the sump pump reservoir was set to maximum, then set the big blower fan up to face the worst of the wet and plugged that in.
Once everything is dry, we’ll be able to clean up the last of the mess and disinfect the floor.
It’s a good thing this is NOT a finished basement! I am also very happy that I made sure everything that we do have down there is up on bricks, not directly on the floor.
As disgusting and messy as the job was, it could have been much worse. Most of what backed up was from a load of laundry. It could have been much, much more disgusting, that’s for sure! Still, when it was done, I was so incredibly glad to be able to take a shower!
We will still need to call someone in to clear the pipes of those roots. Otherwise, we’ll be doing this again before too long. :-( It could probably wait until spring, though, since the trees are going dormant and there will not be new root growth for a while. We won’t be able to get all the weeping tile done, but if we can just clear the pipes that are in the old basement, that would make a big difference.
It’s past midnight as I write this, and it has suddenly become a rather unpleasant night!
I was returning from the bathroom when, while walking past the old basement door, I heard a splashing sound I should not have been hearing, so I went down to take a look.
The septic backed up again.
The pipe with the P trap was full to the top, and water backed up into the laundry sink to the point of overflowing. Thankfully, we don’t really use this basement much, because the water has spread pretty far. Thankfully, whatever caused it to back up happened relatively recently; the last major use of water was a load of laundry, and greywater seems to be most of what I was looking at down there.
I’ve already arranged for the septic guy to come over tomorrow morning. Getting that done was actually in the budget for next month, which means we would have had it done at the next of next week, when my husband’s disability payment came in on Thursday.
Once the tank is empty, I can see what I can do about unclogging the pipes. I am guessing it is the same sort of thing that happened last time. If that turns out to not be it, we’ll have to call in a plumber.
*sigh*
The last time this happened, we were able to set up a honey pot in the bathroom until we could use the toilet again. We don’t have it anymore; I took it over to my mother’s when we found out she was having mobility issues getting to the bathroom at night. We did, however, get the outhouse cleaned up, and made the entry safe to use. So we do have an alternative.
There’s a bit of a new issue, though.
Once we determined that we would have to use the outhouse, I grabbed the flashlight, some cleaning supplies and toilet paper to set it up. It’s been a while since I’ve gone in there, so I wanted to sanitize the seating area. When I opened the toilet lid to clean it, however, things looked… different. When I was cleaning it out before, I made a point of checking underneath, and saw the contents were composted and level from being flooded out by melting snow over the years. It needed to be emptied, but not in any urgent way.
It’s now full.
Of gravel.
After shining the flashlight around, I was able to spot a small hole.
It looks like a groundhog made a den entry leading under the floor boards, filling much of the space under the seat with gravel.
*sigh*
So that’s going to have to be all dug out. It can be accessed from the back of the outhouse, but not very easily.
*sigh*
It’s been a while since we’ve seen the groundhogs; I’ve seen one, once, a couple of weeks ago or so, and that’s it. They no longer visit the bird seed, and we no longer see them around the yard. It seems early, but they seem to have gone into hibernation already.
I suppose it’s good to find this out now, and not in the middle of winter or something.
I am not looking forward to having to clean up the mess in the basement.
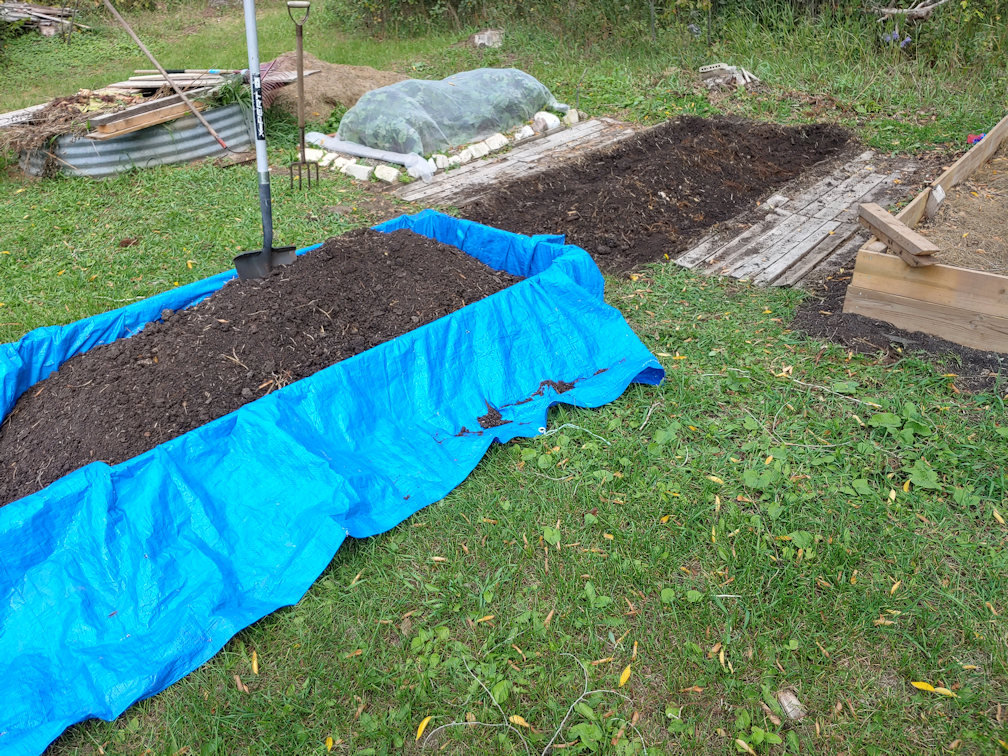
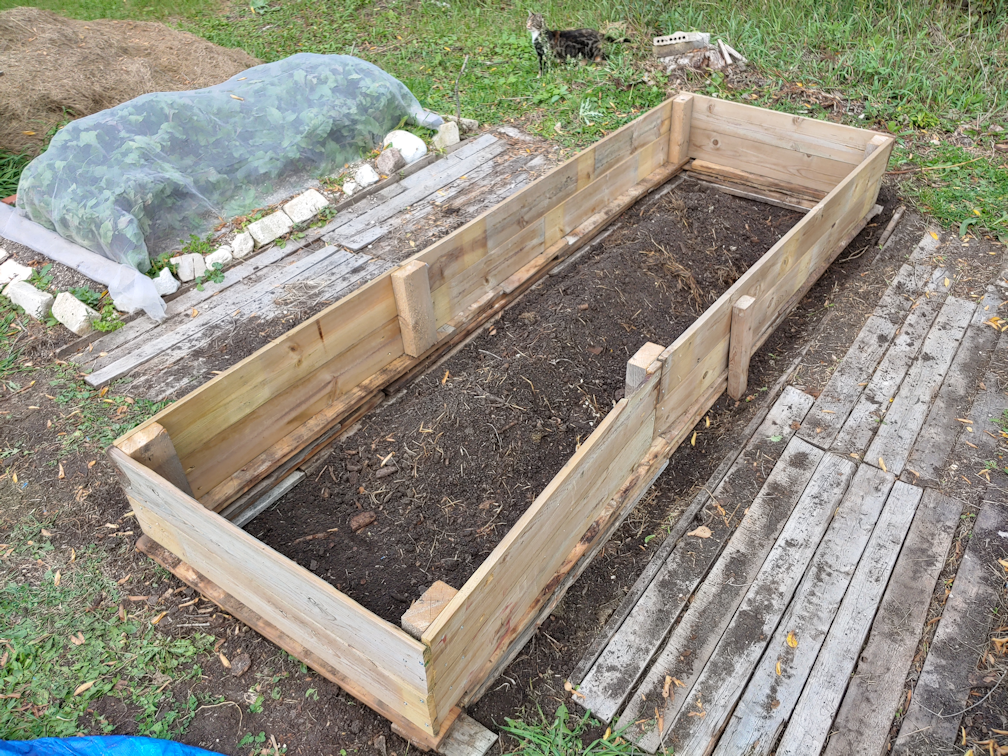
You can read about the first raised bed I did, here and here. Things were done a bit different this time, so here is another step-by-step post with lots of photos! :-) I actually started this bed over a week ago. This is how it looked then.
This bed has been almost completely untouched since the garlic was harvested, letting the weeds get fairly large. This made them easier to pull.
Along with pulling the weeds, with as much of the roots as I could, I lengthened the bed to match the size of the box. Right away, I could tell this one was going to need a “foundation” under the box, too. I was definitely hitting rocks, and a whole lot of roots, while trying to loosen more soil and remove grass and weeds.
Once the weeding and loosening of soil was done, it was left to sit so that any weeds I missed would have a chance to start growing again.
When I started working on it today, the first thing I did was go over the area again, pulling out any new growth by the roots. Then it was time to start shoveling!
Like the previous bed, this one had been originally amended by burying the contents of our compose pile and straw. So I only wanted to remove up to the straw, basically.
In the process, I was finding a LOT more roots! It looks like the cherry trees are encroaching again.
Once I was satisfied with how much of the topsoil I had removed, I raked around the edges to try and level the soil where the box would be resting, as much as possible, while heaping it all in the middle.
Then the box was laid down and, once I had it where I wanted it, I used a sledge hammer to hammer in the supports on either side, at the middle, to prevent the long sides from bowing out when filled with soil. I also hammered down the corners and such, to leave marks in the soil that I could use as guide lines.
The ground wasn’t anywhere near as level as I probably should have made it, but that’s okay. Things will settle and adjust over time, and these boxes can be easily replaced in the future, if need be.
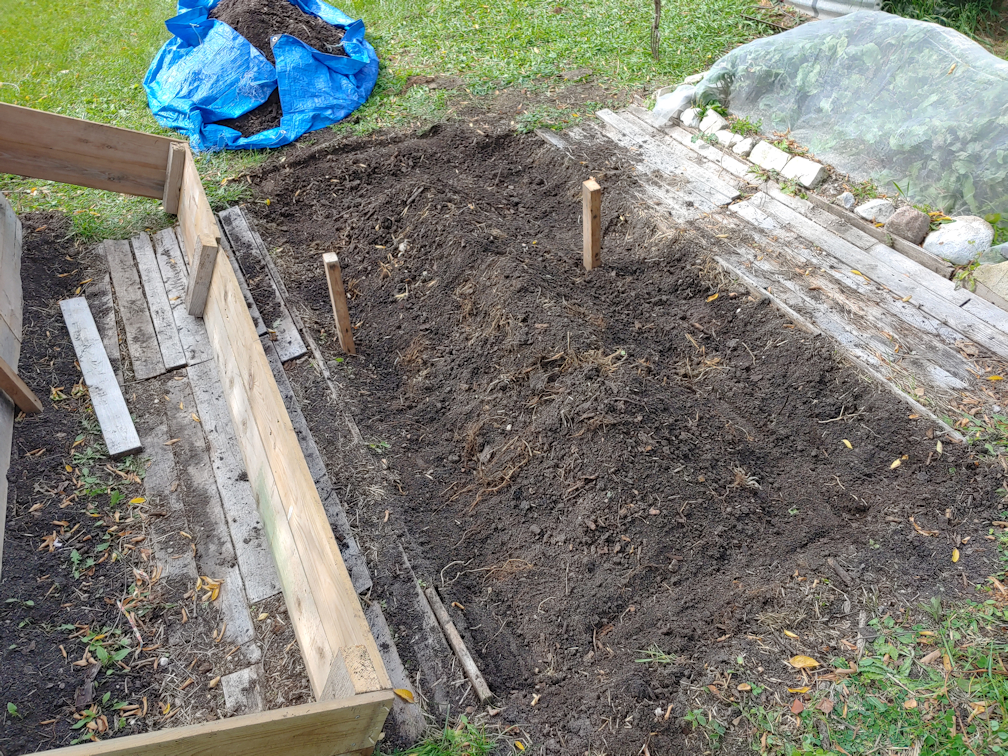
The next step was to raid the pile of old, salvaged boards that the groundhogs have made their den under, and build up a foundation to support the box. Once that was in place, a daughter came out to help me carefully place the box on top of the foundation, and in between the support posts.
Then it was just a matter of shifting the foundation boards a bit, to make sure the box was fully supported. Again, not quite level, but that’s okay.
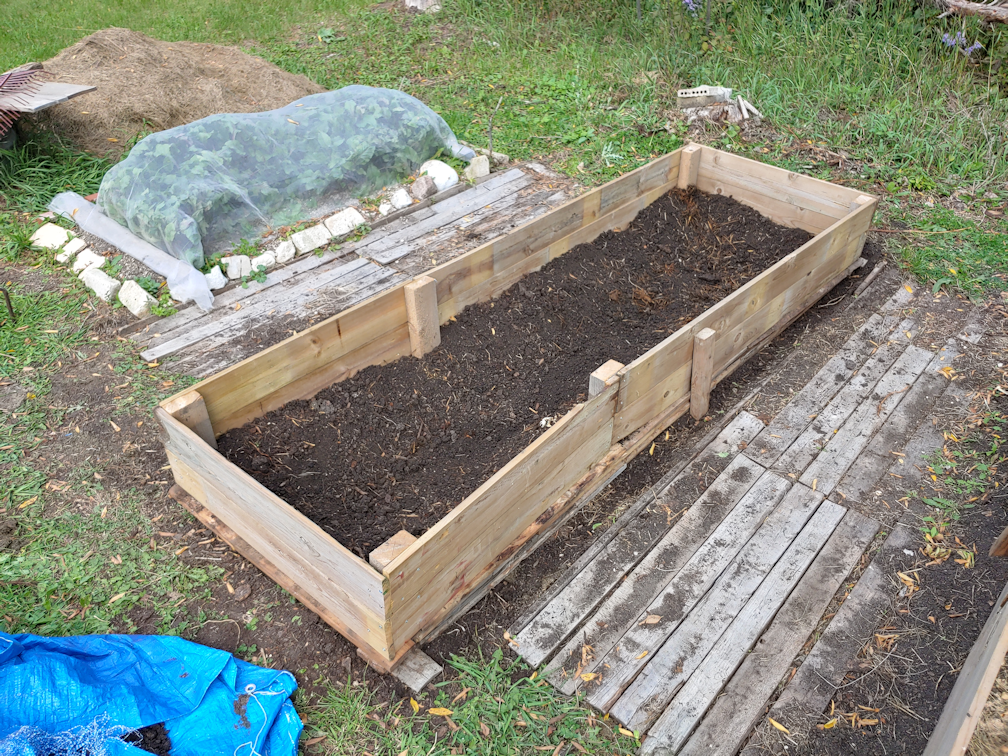
The soil heaped in the middle was then raked out to the sides, covering the foundation boards and creating more of a recess in the centre.
Then it was time to add the first layer of fill, and raid the branch pile. This time, I added more and larger branches than with the first bed I did.
This, unfortunately, left a lot of gaps and air pockets. They will fill in as the wood decomposes and everything settles and sinks, but that will take time. To help fill in spaces and speed up the decomposition process, I started adding back some of the soil. After returning about a quarter of the soil, I hosed it down thoroughly, so wash it further down into the gaps, then added about another quarter of the soil and soaking it down again.
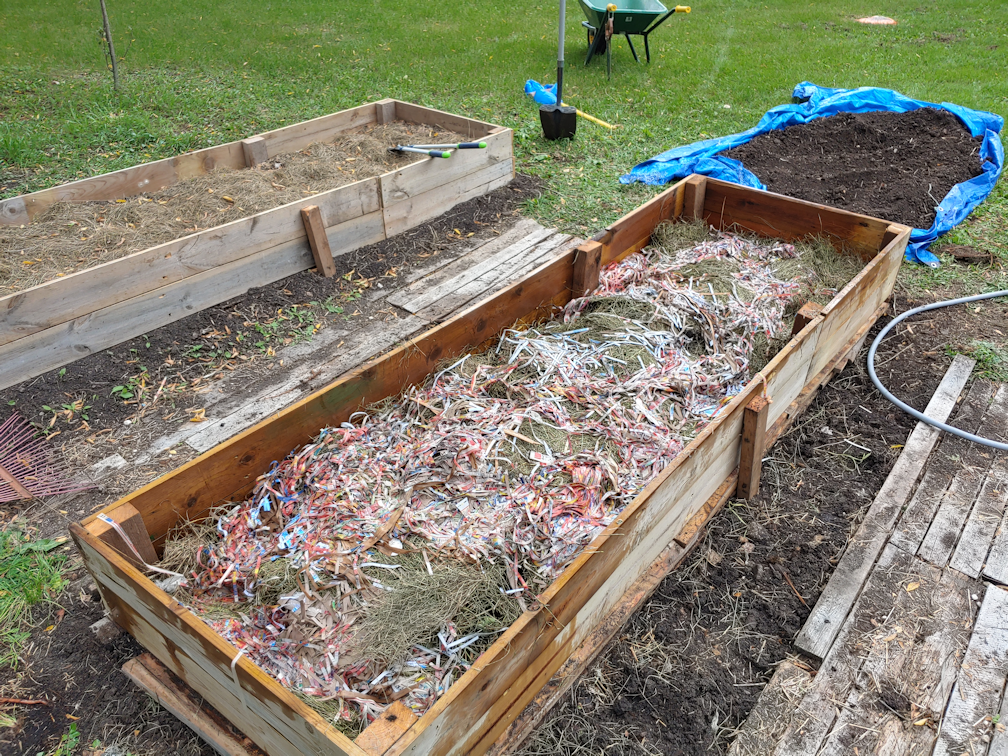
The next layer was contents from the compost heap, most of which was greenery I’d cleared from around the dead spruce trees that were cut down. This got another soak, another scattering of soil, and yet another soak.
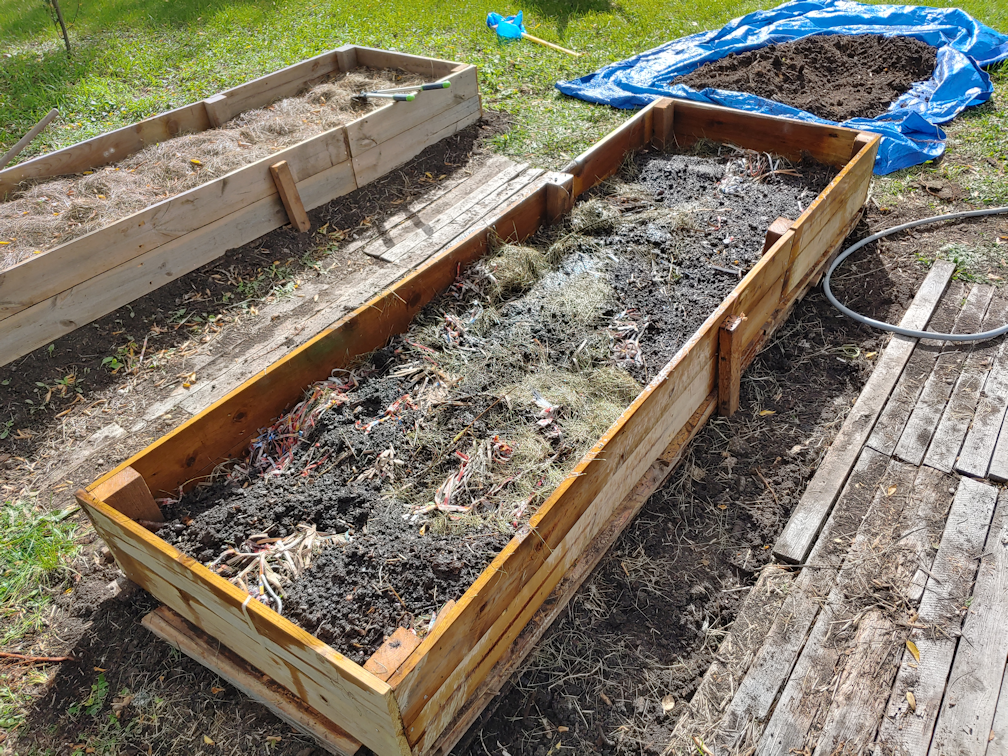
The next layers were grass clippings and shredded paper. This time, after soaking it all down, I walked back and forth over the whole thing, to try and compact and break the buried branches more.
It as at times like this that being a woman of generous proportions comes in handy. ;-)
Yet another thin layer of soil was added and soaked down.
Note the gap between the box and the board path. By this point, it had become a bit of a safety hazard! Without the soil to hold them in place, the boards at the edge kept moving and catching on my feet, and I was constantly catching myself to avoid twisting my ankle in the loose and lumpy soil in the gap.
Another thin layer of grass clippings was added and hosed down. At this point, the fill in the new raised bed is about the same level as in the first one. Adding the extra and larger branches made a noticeable difference, even after being tromped down.
Once this was done, it was time to amend the remaining soil on the tarp. I added about half a 40 pound bag of wood pellets, as was done in the first raised bed, and then a couple of wheel barrow loads of new garden soil was brought over; one added to the soil and wood pellets on the tarp, and the other added directly on top of the grass clippings, then raked out as evenly as I could.
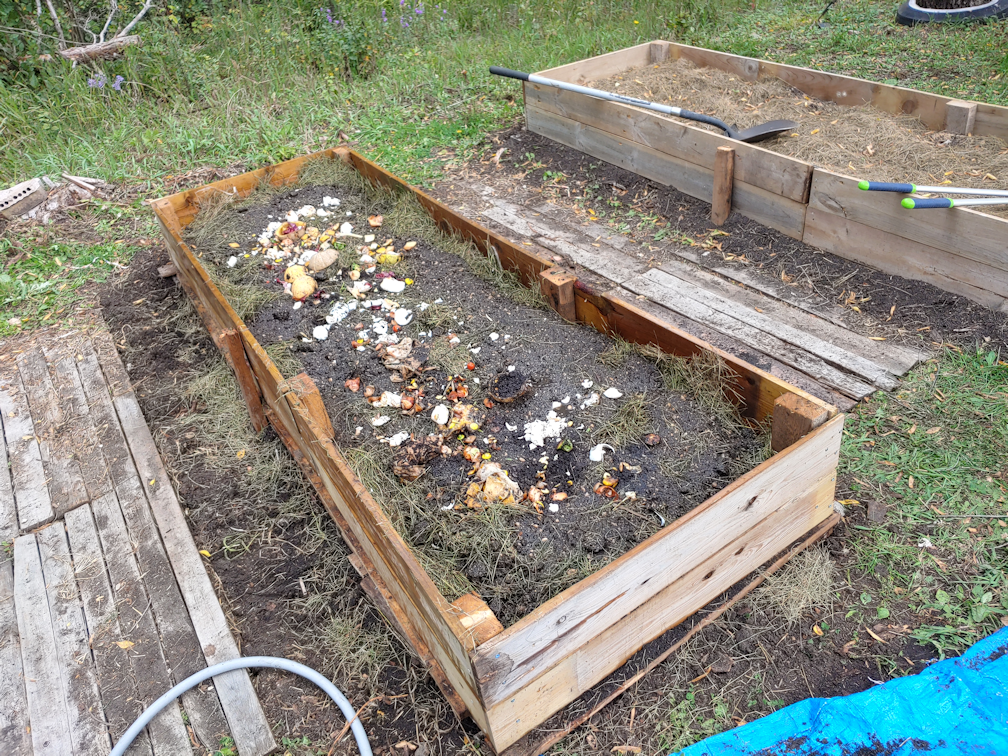
It was about this time that a daughter came out with the kitchen compost buckets, so that got added straight into the raised bed and spread out, then hosed down again.
The next while was spent mixing the soil and wood pellets together, as much as I could, before adding it to the bed.
Once the soil was added, it was raked out evenly. This layer was NOT hosed down, though.
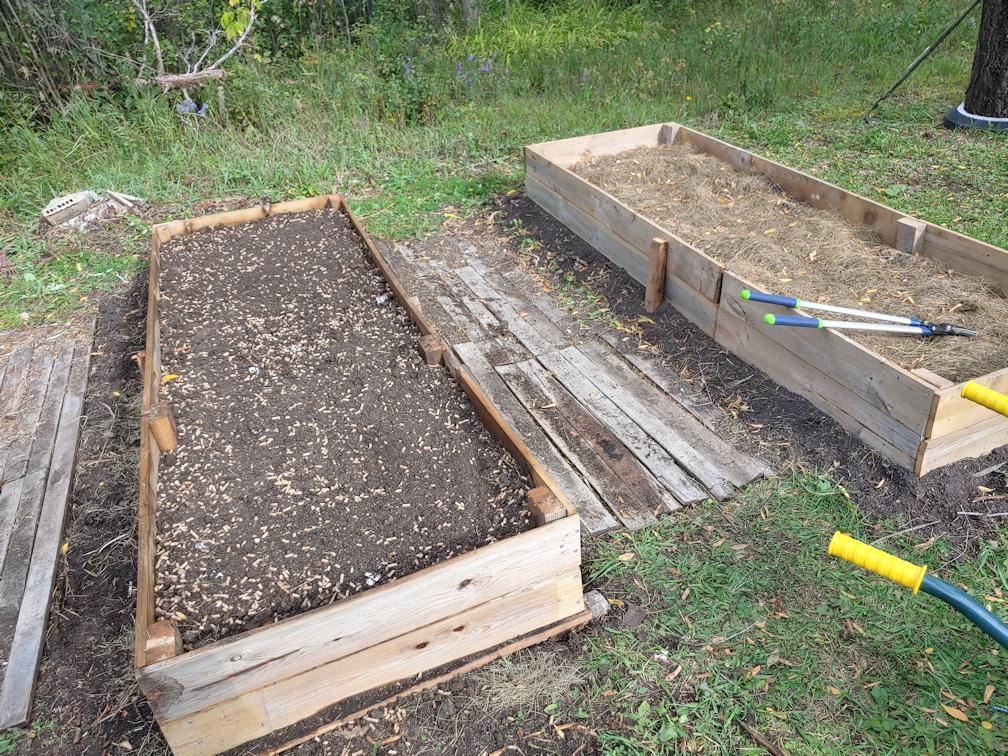
One more layer of grass clippings was added as mulch, then it got one last, very thorough, soak with the hose. This was the time to clean up the sides and edges, too.
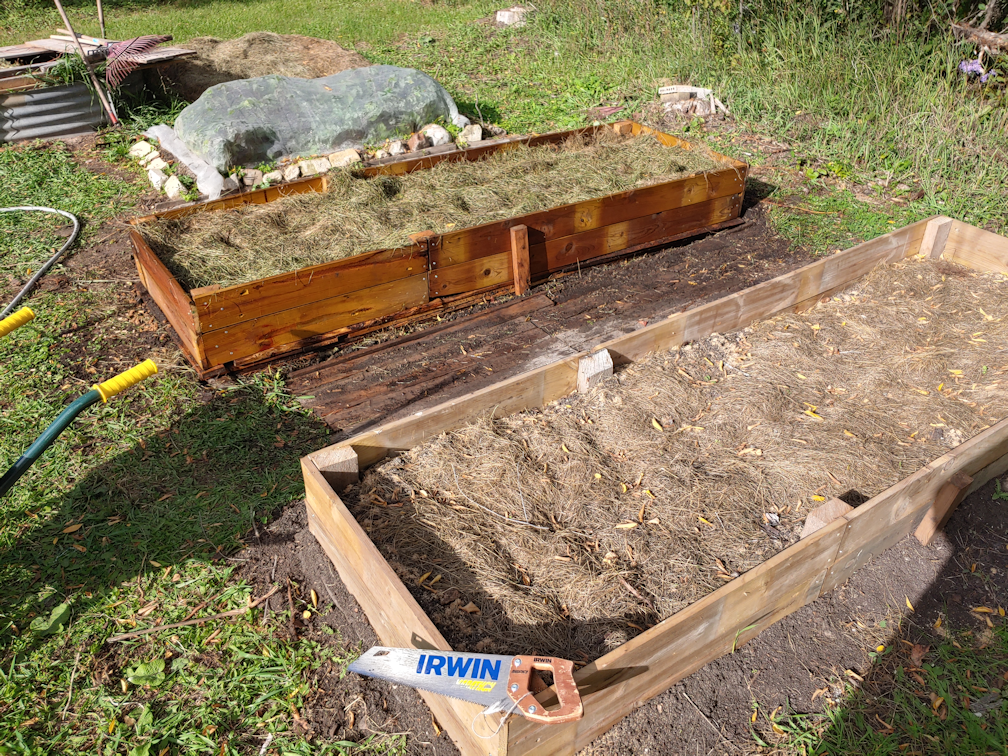
This is as much as will be done in the bed, this year. Both beds will get more amendments added to them in the spring, after they’ve had a winter to settle and sink.
Also, remember the gap in the path on the other side of the bed?
I was going to work on filling that to make it safe, but I had reached my limit. A daughter will be working on that for me later. As these beds have been worked on, and rocks were found, I had been tossing them next to a nearby stump; you can see it in the background, with some bricks on it. Those can be gathered to use as fill in the large gap on the far side of the bed, and more boards will be added, and whatever else my daughter can thing of to make it safe to walk on. The eventual plan is to cover the board paths with sand and gravel.
After this, there is still the third bed in this location to be made, but with the beets still growing, there is no hurry. The last bed will be just one board high, as that is all the wood of this type we have left, but these boards are slightly wider, plus we still have plenty of the scrap wood bits to use as a foundation, so it shouldn’t be too much of a difference.