Yesterday evening, I was able to head out and finally work on the dead tree that’s stuck. While I was getting tools out of the sun room, I discovered I was being watched!
They were not only watching me, but they did NOT run away, and one of them looks almost relaxed!
I’ll take that as progress. :-D
Then it was time to get to work.
For the tree that’s stuck, the first thing that needed to be done was to brace it before I started cutting. Then I measured a little more than four feet from the bottom and cut it most of the way through. Then, just to be safe, I used a rope to pull out the brace from a distance, then used the rope again, to pull out the cut piece.
Now that this has been cut shorter, the tree can be pulled out with the van, once we have something we can use to safely haul it out. We do actually have chain handing around but 1) I won’t want to use chain, because if it breaks, the damage could be catastrophic and 2) the chain I’ve found is so big and long, I would have to use a wheelbarrow to bring it over! :-D At this stage, though, the tree can wait until we get some strong enough rope. It’s also now low enough that I could remove the rope that was wrapped around the trunk, from when I tried to get it to roll off the branches it’s stuck on.
The four foot length was moved to join the others by the main garden beds. Then I took down the third dead tree in this group.
This tree was a fair bit thinner than the other two, and was faster to cut down. When it fell, it landed on the stuck tree, which basically guided it away from the trees it’s stuck on, and down to the cherry trees.
All of those cherry trees will be cleared away, as they are not right for our climate zone, so the first order of business was to start clearing enough of those away that we could access the trunk. Dead branches were also cleared off the trunk. Then, while I continued to clear more of the cherry trees away, using loppers for the thinner ones, and the baby chainsaw for the few larger ones, my daughter started to measure off the trunk to cut the first four foot length.
We got two four foot lengths and a nine foot length before it got too dark to work, so I got these photos this morning.
As with the other two trees, the wood is nice and solid, with no sign of rot. That means, not only will the wood be used to build our high raised beds, but the stump will be used to support a seat or a table.
With so many dead trees to clear away, we’re going to have a lot of those by the time we’re done!
While cutting lengths from the trunk off, we were able to pull the rest of the tree out a bit, but at this point, it’s too hung up on the cherry trees that haven’t been cut away, yet. I had thought to be doing more of that today, but it might have to wait. Pain levels are high, which is no surprise, but as I write this, it is also 30C/86F right now!
One more nine foot length, and I’ll have enough wood to make a raised bed that’s 3 logs high. With how thick the trunks are, that might be high enough! :-)
Well, we’ve done as much as we can with the outhouse for now, and I think it’s turned our rather well!
The first order of business was to paint the shelf boards.
The longer one was the one that got painted on one side, and the edges, yesterday. I decided to paint the remaining section of the board, too, for a future shelf after we get more shelf brackets. After a cleaning and a sanding of the rougher edges, it gone one side and the edges painted, too.
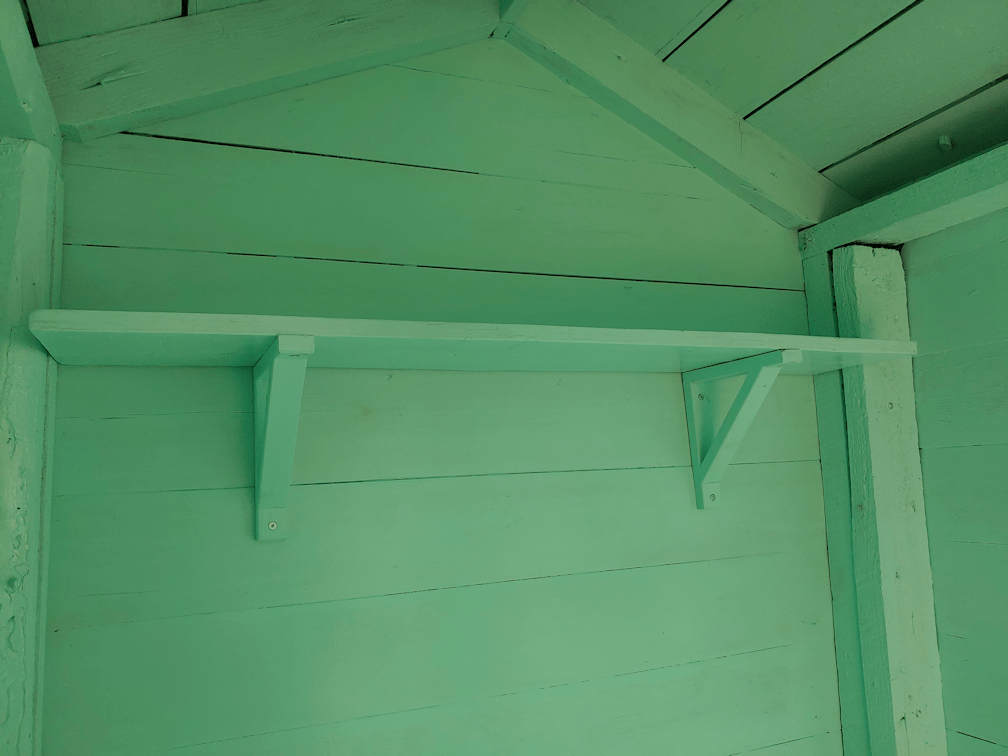
Leaving those to dry, I put up the shelf brackets, living them up with the top of one of the boards.
That screw in the top corner was a real pain in the butt to do. There’s almost no space for the screwdriver! I also put the screws to attach the board part way, so that when I came back later, I’d only need to bring the screwdriver.
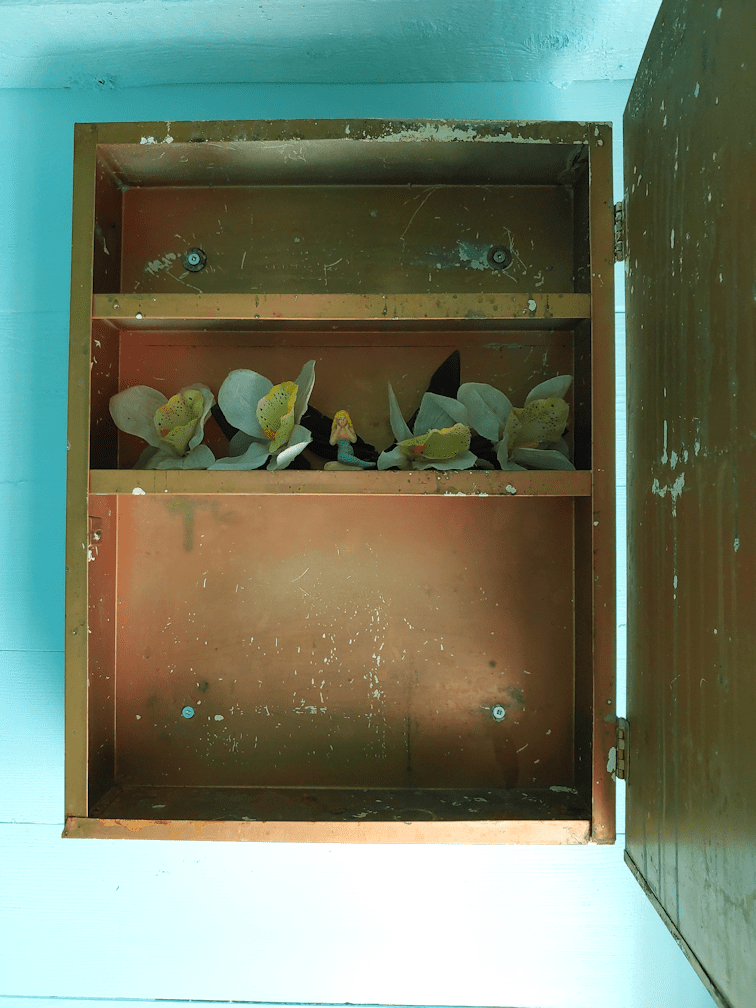
I noticed one of the girls had moved the mermaid toy into the middle shelf (I’d put it on the bottom). Remembering that there were some fake flowers in the garage, I went digging around and found some small ones to put beside her. :-D
After giving the shelf boards a couple of hours to dry, I came back later to put up the longer shelf board.
We wanted the shelf to be pretty high up, but when I tried to put it in place, I found it was narrower than where I’d checked the fit, before! Not by much, though, and I was able to jam it in and screw it in place.
That done, it was time to paint. Since there was so little paint left, the first thing that got done was the other side of the second shelf board, then the inside of the door. The back wall was done as high as the shelf, and the wide walls on either side of the seat box were done.
There was just enough paint left to do the wall joists in the middle, and the final dregs were used to paint the inside edges at the bottom boards under the joists. I’d painted the tops, but not the inside edges before. One of the boards only had half an edge along most of its length; a chunk seemed to be missing! LOL
Then I cleaned off the paint brush on the toilet lid again. :-D
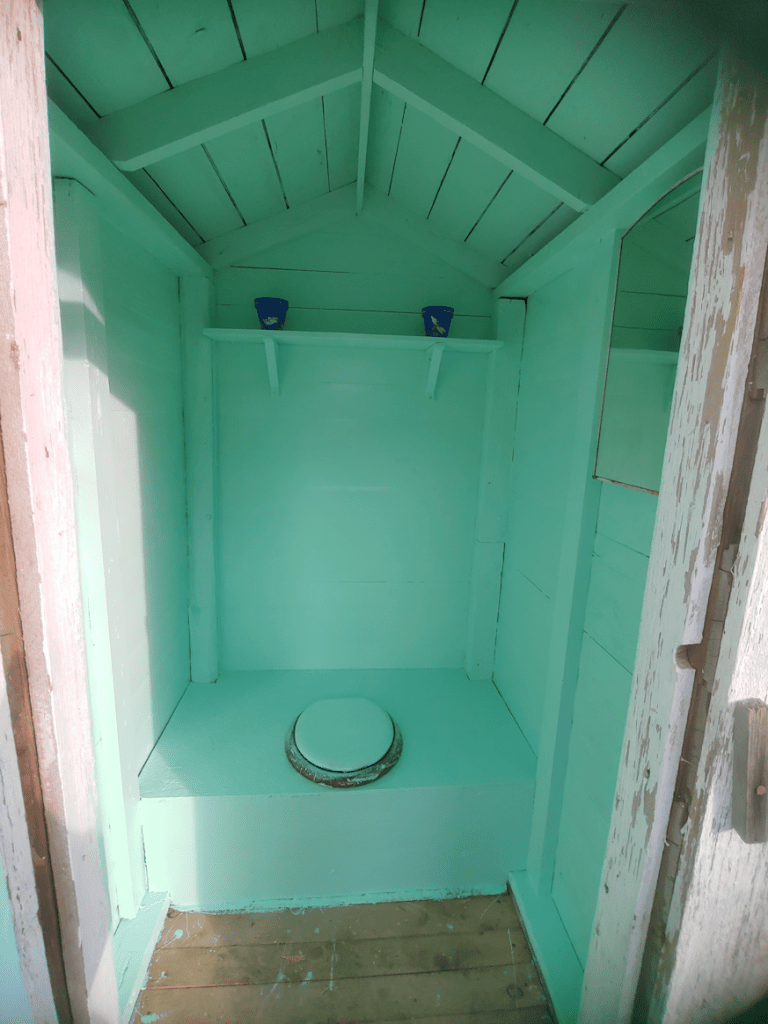
After washing up the paint supplies (including the empty can; I figure we can reuse it for something), I took a couple of decorated terracotta plant pots we’d found when we first cleaned out the sun room and put them on the new shelf.
Gosh, that looks so much better!!
The girls are already talking about getting another gallon of paint to add another coat in the future. Other than adding the battery operated light inside, whatever we figure out for the floor, and eventually replacing the toilet seat, it’s basically done on the inside. Oh, and the latch for the inside.
While waiting for the painted shelves to dry, I took a closer look at the outside.
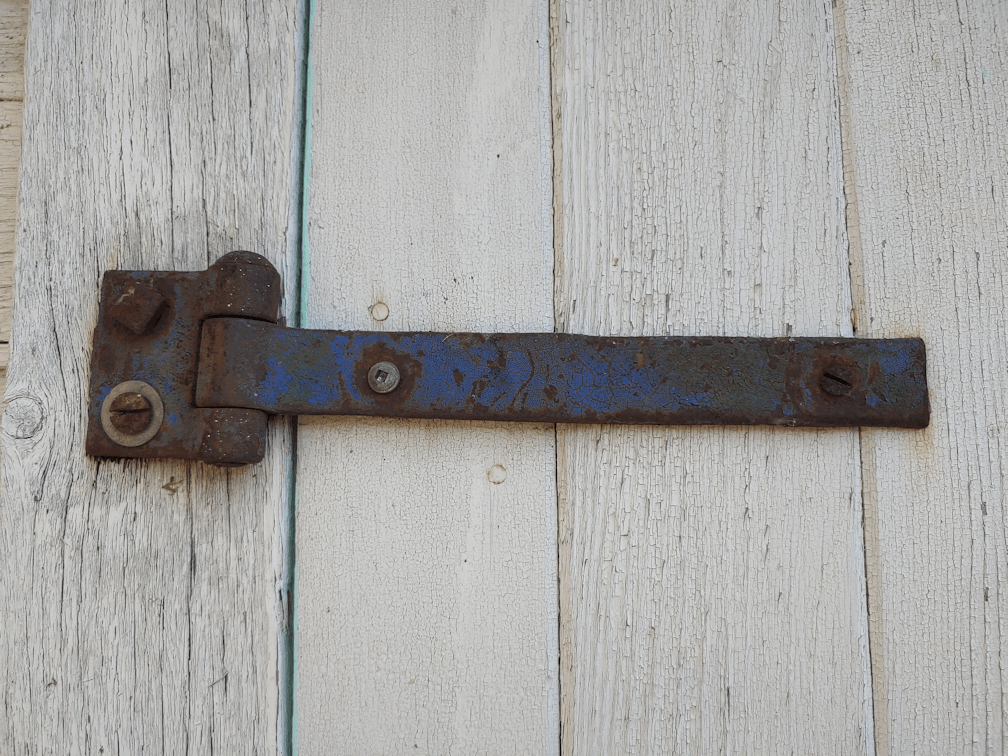
This is one of the hinges that needs to be replaced.
Why does it have four different screws???
The other one has three different screws.
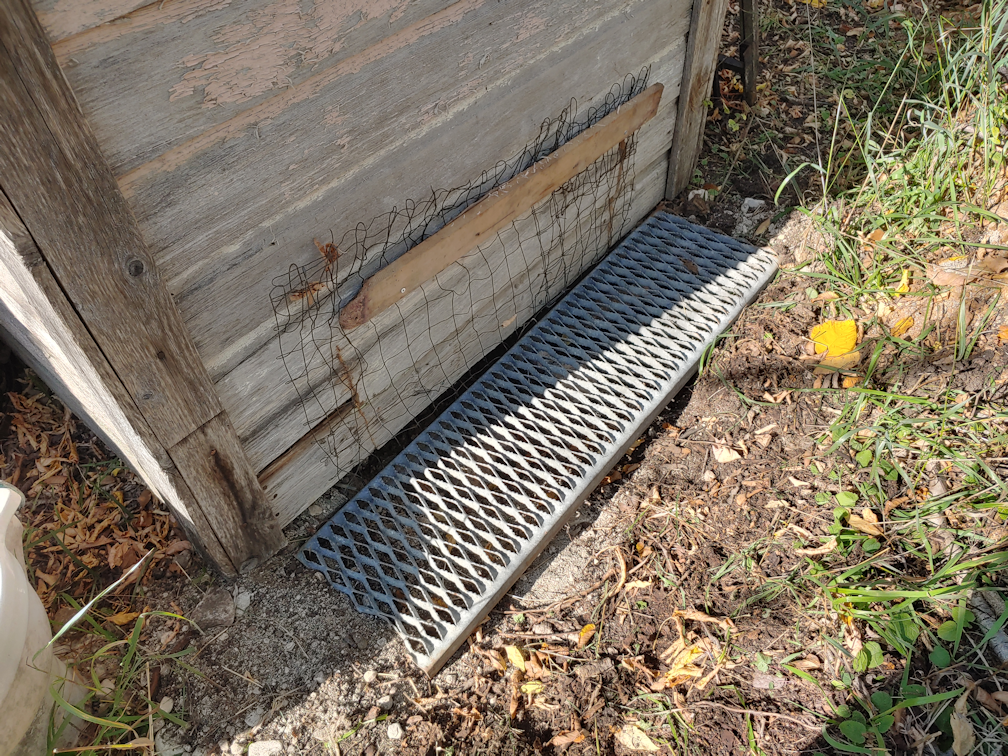
I also took the metal thing that had been in front of the door, to cover the hole that was getting bigger, over the wire mesh at the back. I didn’t even bother to level it or anything. That can wait for when we actually paint the outside.
I also looked at the roof, thinking ahead to when we fix it up. There’s quite a lot of rotted edges on there. :-/ One of the things I wanted to do in repairing it was making an overhand above the doorway. We definitely want to have it overhang the roof trusses, too. After they have been reinforced because of the rotten edges!
It would be good if we can get that done before winter, but we shall see. After the roof is done, we’ll work on painting the outside. The front of the outhouse is white, but the other three sides are a pink. It may have started out as a red, but there’s so little left, it’s rather hard to tell. You can see some of it in the above photo.
The girls want to keep the pink. :-D
By the time we’re done, this thing is going to be downright adorable. Plus, it will last longer, until we build the outdoor bathroom we have planned.
The plan was to head over to the outhouse, quickly do a second coat of paint until we ran out, then get back to working on the bread baking.
Instead, I kept adding more things to do, and by the time I got inside, I had to get my daughter to continue the bread baking, as I was no longer physically able to do it. Which is what she is working on now, as I write this blog post!
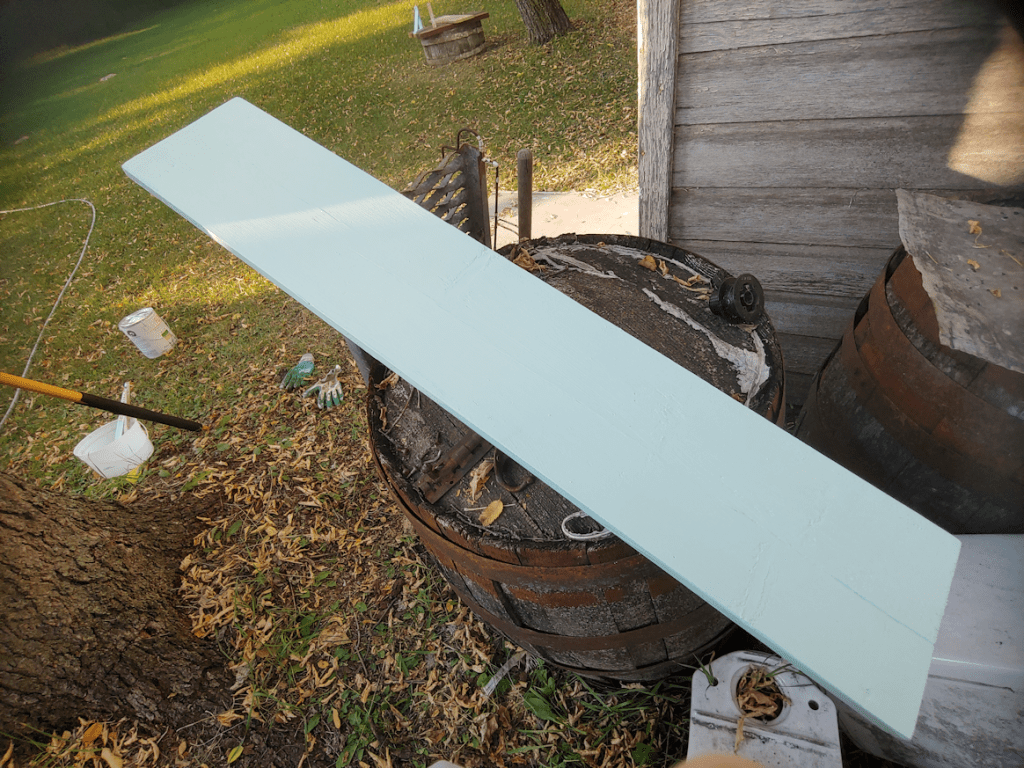
While looking for something else entirely, I found a pair of wooden shelf supports and instantly realized that they could be painted and used to put a shelf in the outhouse. So when I headed out to do the second coat of paint, I also poked around the barn and a shed to find a thin board wide enough for the supports. It was about six feet long, though, so I basically held it up to the outhouse door from the outside, and eyeballed where to cut it to fit along the back of the outhouse. It ended up being just over half the length of the board, so I figured if I was off with the longer one, I could still use the slightly shorter one.
It ended up being just a hair too wide to fit between the corner posts. A few swipes with a micro plan and some sand paper was enough to get it to fit perfectly!
That done, I sanded the rough edges, then scrubbed and hosed it down before setting it aside to dry. Then I added a second coat of paint, just to the seat box inside, before painting the shelf supports.
I’m thinking I might paint the rest of the board, too. If we get more shelf supports, we can add it onto one of the side walls.
It took a while for the washed shelf board to dry, so I decided to give the mirrored shelf a scrub down, too, then once that was dry, I hung it back up inside the outhouse.
Rolando Moon decided she absolutely had to be on top of where I was putting the tools and screws! The violent beast went from demanding I pet her, to attacking the hand that was petting here, making me bleed! I did manage to get the screws with washers out from under her, though.
I just wanted the washers, though. There were just two, for the top screw holes, which are slightly wider than the bottom ones. I used new screws to hang the mirror back up. After washing the blood off the new screws and washer, from the wound Rolando Moon gave me!
Previously, it had been hung up right against the centre joist, but I chose to centre it between the corner and the joist, instead.
Then, I just had to do it…
I just had to put the little mermaid I found while I first emptied and cleaned out the outhouse, inside the cabinet.
She lives here now.
:-D
Once we’ve picked one up, the LED battery operated light switch will be mounted directly opposite the mirror.
By the time this was done, the shelf board was dry.
After removing Rolando Moon, I got the one side painted. Tomorrow, I will paint the other side. By then, I should be able to mount the shelf supports, using the boards on the wall to make sure they are level, then attach the shelf board once the paint is dry. Only then will I continue doing the second coat of paint inside, until the can is empty. If I end up not doing the ceiling, or the narrow parts around the door, that’s not going to be a problem. As long as the areas that are most likely to get scrubbed in the future get a second coat, it’s all good.
Since I could no longer work on the inside, I decided to work on the outside, and empty the pit of groundhog gravel.
The wire mesh on the back was held in place by being hooked onto two bent nails, that were nowhere near each other. You can see one at the top right. The other is barely visible, near the bottom left. It didn’t take much to remove the mesh.
There was a second, smaller piece of mesh, partly buried until a thick layer of grass and roots.
*sigh*
That took some doing to move out of the way.
I thought I would be able to remove the two bottom boards by taking off the smaller pieces on the side, then pulling them off. They where, however, thoroughly nailed in place, with old and rusted nails that were not about to come out. So, I instead dug out my jig saw and used it to cut a piece off the bottom.
As you can see, it’s solid gravel against it! I ended up having to cut a second piece off. I was then able to start shoveling the gravel out, and when I could no longer get the shovel far enough in before the 2×4 across the bottom stopped me, I used a garden hoe to move more gravel closer, then shoveled some more.
I never did reach the … compost… layer. I did hit a lot of rocks, though! I emptied it as best as I could, without removing the more recent… deposits.
Then it was time to cover the hole back up.
I put the two pieces of siding back, then screwed the bottom one to the 2×4 behind it. The next time we need to get under there, we can just remove the screws and the boards will easily pop out again.
I then folded the smaller piece of wire mesh to fit the opening. I found a scrap piece of board with screw holes already in it, so I used that to fasten the mesh in place. The wire is folded at the bottom and weighted down with rocks. Critters can still get in if they really wanted to, but this is temporary. When we get to painting the outside, we’ll make things more permanent, perhaps replacing the cut boards with a hinged flap that can be latched to keep the critters out. Who knows.
I have no idea why that other large piece of wire mesh was used to cover almost the entire back of the outhouse. It really served no purpose, since only the gap at the bottom needed to be covered. Even the smaller one on the bottom couldn’t keep the critters out.
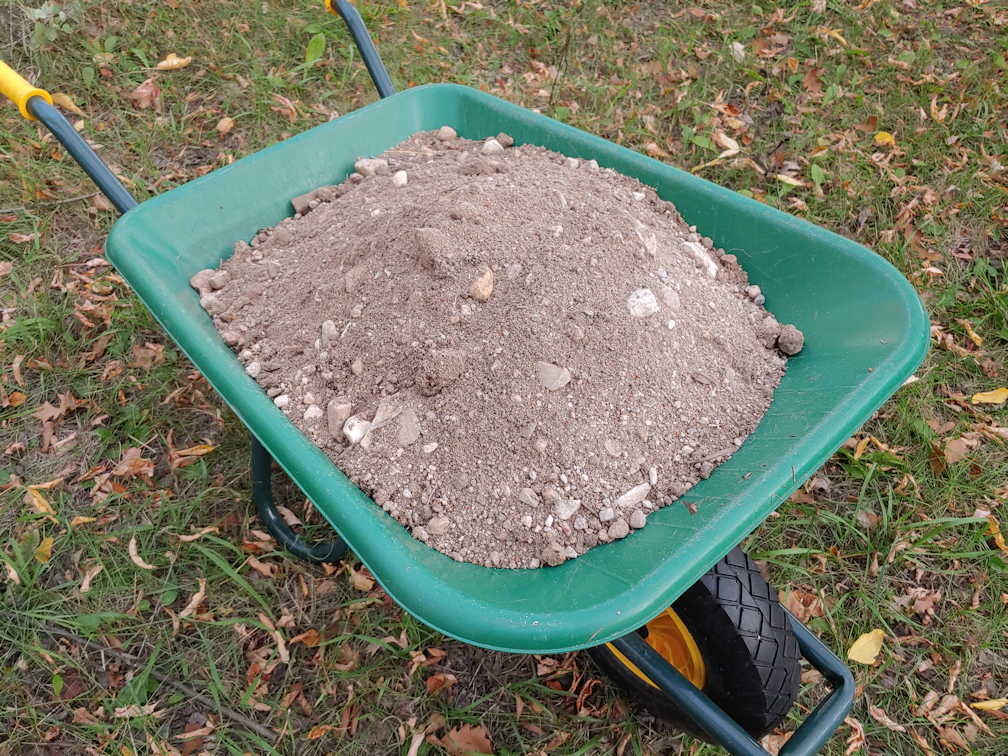
I was able to fill the wheelbarrow with clean groundhog gravel! If there was any chance the shovel full I pulled out wasn’t clean, it went onto the nearby cat litter compost pile, instead.
The clean gravel was put to good use.
It was enough to make a thin layer on top of the boards in the path between the new low raised bed boxes. The bigger rocks went up against one of the boxes, where there is a larger gap, then it all got spread out and hosed down, so that the finer particles would wash into the gaps between the boards below. It seems to be more clay than sand and gravel, though. We will still need to add more, but this is a good start.
And that was it for today!
Deciding to include a shelf added at least an extra day to finishing the inside, but I think it will be worth it. I’m more happy about getting the pit clean up over and done with for now!
Today, my husband was finally up to heading outside to help me sight the crossbow. I found an excellent spot for a shooting range and got us set up.
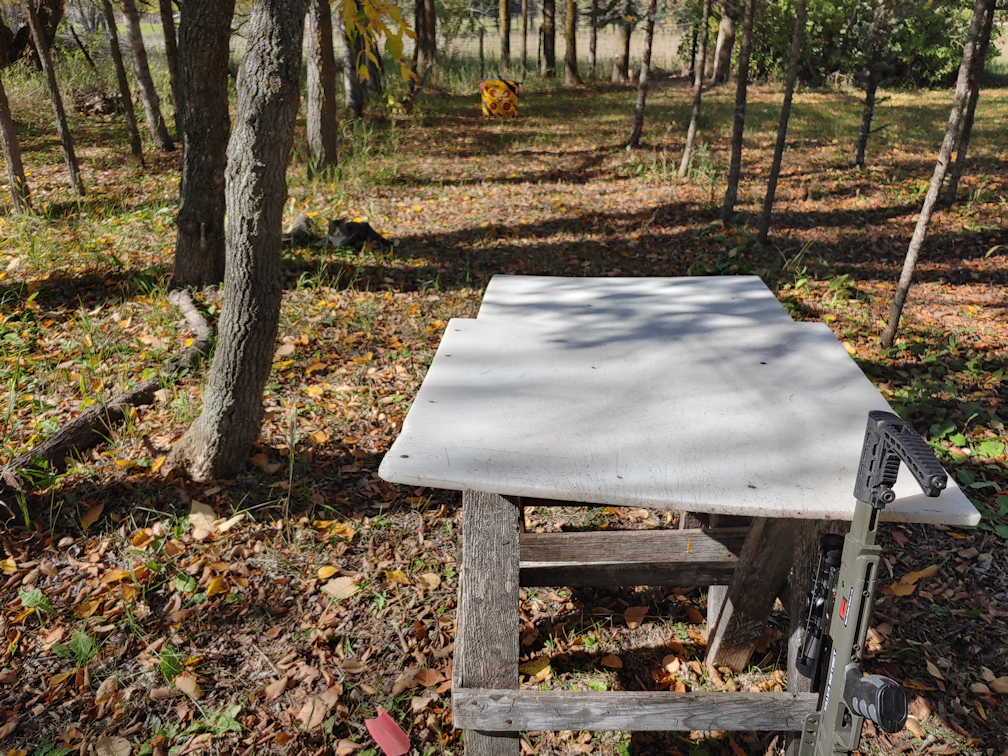
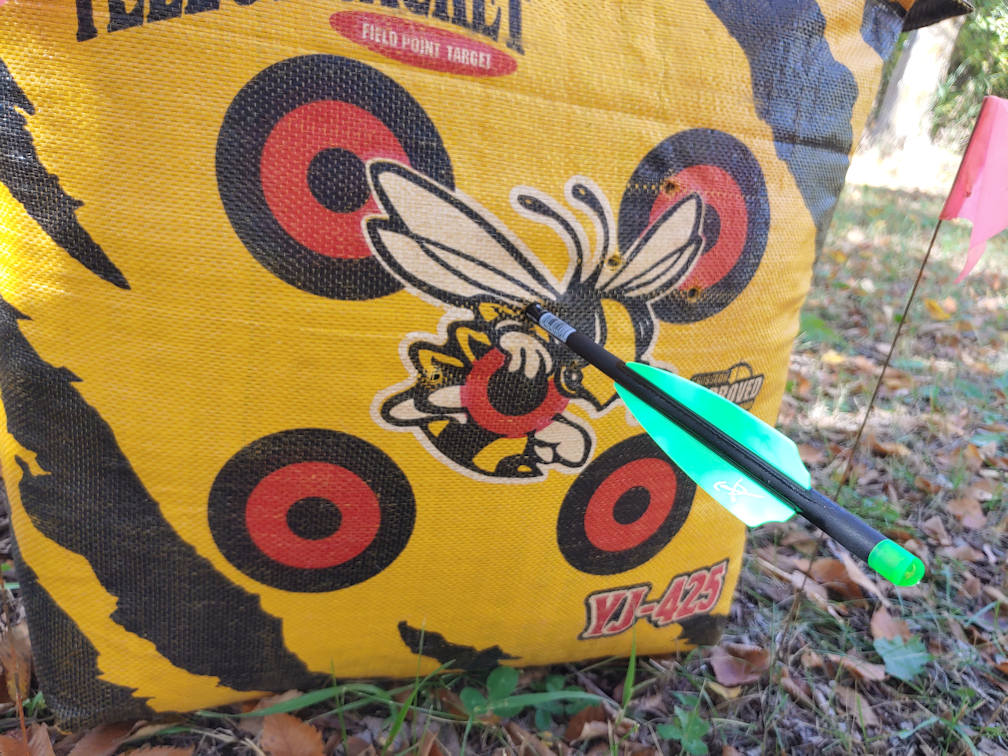
The instructions said to sight at 10 yards, then micro adjust at 20 yards. I pre-measured the distance on some paracord, then used flags to mark where the target was placed, at 10 yards, then 20 yards. In the photo, we are set up at at 10 yards.
I did try to use the cocking cable myself, first, but even after my husband shortened the cable, I’m just too short! He had to do it for me.
Unfortunately, cocking the bow turned out to be very hard on him. To cock the bow, you lean over the bow, hook the cord up in the appropriate spots, grab the handles, pull and straighten up at the same time.
Which is really, really painful for someone with a lower back injury.
He did it a few times, took a few shots and adjusted the sight. When it comes time to micro adjust, we’ll have to take into account that he shoots left handed, and I shoot right handed. I quickly called it a day, though. I did not want him to injure his back even more.
I did, however, get one shot in, myself, before we packed up. Here is my first ever shot with the crossbow!
I was aiming for that centre target. The holes above, right, were my husband’s shots while adjusting the sight. The other holes were from when my brother in law was adjusting the sight at 20 yards.
The crossbow has an adjustable stock, and I didn’t noticed my husband had shortened it while cocking the bow, because it was digging into his abdomen uncomfortably, then didn’t return it to where it was. So when I fired, I was a bit too close to the sight. There’s just enough recoil that the sight smacked me in the glasses. Oops.
We definitely need to get a crank. Unfortunately, Cabelas, where I bought it, doesn’t seem to carry them anymore, and Killer Instinct, the manufacturer, doesn’t seem to make them anymore. The only one my husband has been able to find has been on eBay, and it’s pretty expensive.
I may have to just shorten the cord even more and try again. Even if I do get it to a length that works for me, I still want a crank. The crank is silent. The pulleys on the cocking cord squeak. If I’m going to be hunting, I need to be able to cock it silently!
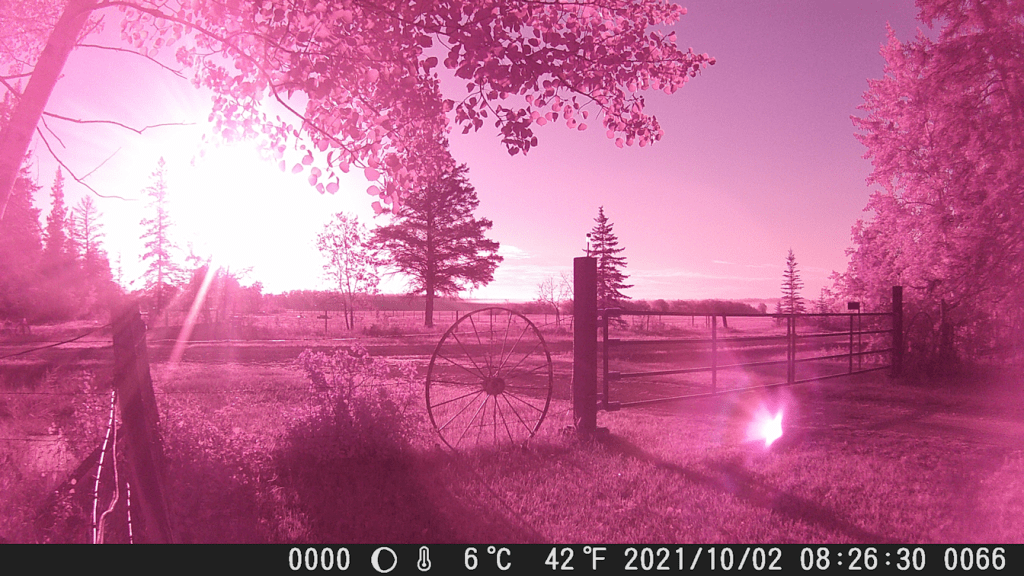
Well, this is one way to tell the temperature are getting chilly at night.
And that I need to change the batteries in the newer trail cam.
Until the camera warms up enough, it starts recording things in pink!
Also, during night shots, the infrared flash stops working and the files have a red law battery warning across the bottom. I’ve taken down the white string lights that had been along the top barbed wire on the fence, as they were getting pretty damaged and burnt out. There is now a solar powered string of lights long enough to reach from the gate to the corner fence post. When the infrared flash doesn’t turn on, they are quite nice and bright! :-)
I’ll have to head back out later with some fresh batteries. :-)
After a quick run out to hit the farmer’s market, and then town, I decided to finish painting the inside of the outhouse while there was still enough light.
I’m glad I did. :-)
Here are the “before” pictures.
I had a few drips, while working on the top and ceiling. :-D
It was a bit tight to get photos of the inside, front!
There are a LOT of nooks and crannies around that door frame.
I actually started with the door. I figured I should get that done first, just in case it needed to get closed at the end of the day, so it would have more time to dry.
Then I worked on the most difficult areas around the door. For such a small amount of square footage, it took quite a while to get that done! Painting the inside of the door frame turned out to take quite a while, too, as there are a lot of gaps that I needed to squeeze the brush into.
Once the front was done, I methodically worked my way to the back. Of course, I found more staples and tacks that I missed! :-D
Since I wasn’t planning on taking off the toilet seat, once the sides were done, I painted the seat box under the toilet seat first. The lid leans against the back wall when it’s open, so I wanted to give the paint at least a little while to dry before having to close the lid again. On the plus side, there are only 2 points of contact under the seat, so even if still wet, closing the lid wouldn’t mess the paint up too badly.
Here are the “after” shots.
This time, I remembered my phone has a “panorama” setting. LOL
Yeah, I painted the toilet lid. Sort of. It had so many drips on it, I just went ahead and used the lid to get excess paint off the brush. :-D
And here it is, with the painted door.
While doing a second coat will take a lot less paint, I suspect we will need to buy another can. Those nooks and crannies took a lot more paint to cover than expected. Especially when I came across wood that had pieces fall out, or had a very rough finish. One of the beams supporting the corner still had bark on it, and winding gouges on the surface from insects. All of this ended up needing extra paint to get into the various holes and surfaces
What a difference!
One of the things we’ll have to do is put some sort of non-slip… something… on the metal sheet in front of the outhouse. It can get slippery when it’s wet.
After a second coat of paint, we’ll put the mirror cabinet back in – my daughter suggested just putting the old one back, rather than digging out the one in the basement, because then we’d just have to find somewhere to store the old one, anyhow! :-D Also, she noticed we had a chain latch, still in its package, that we can use on the inside, so we don’t have to buy a new latch. It will be mounted on the top cross piece of the door, so I won’t be trying to mount a latch where old screw holes have already damaged the wood. I’ve decided that, for a light, I will pick up another one of those LED, battery operated light switches. We have two of them in the house that come in very handy; one is set up in the bathroom to use at night instead of turning on the very bright main lights, and another is set up in a very dark corner where one of the upstairs litter boxes is kept. When we get one for the outhouse, I want to mount it across from the mirror, to take full advantage of reflected light. We’ll need some sort of dust, critter and insect proof container to keep toilet paper in, and maybe some wet wipes or something. The girls plan to put art on the walls. :-D
The next time something happens and we can’t use our indoor bathroom again, we will at least have someplace pleasant to go! :-D The only other thing is, we now have to empty the pit of all that gravel the groundhog dug up. It will be important to get that done before winter, because if we get any normal amount of snow, when it melts in the spring, we’ll have a big puddle in front of the outhouse, and the back of the garage, and water will drain into the pit again. The gravel is high enough in there, that there is no longer room for it, which would force the water above the floor boards. Mind you, it would probably end up draining into the groundhog’s den, but there is nothing we can do about that.
The main thing was getting at least this first coat of paint done, then digging out the pit. If we don’t have a chance to fix the roof before winter, I want to at least put a tarp or something over it. The rest can be done slowly, as we find the time.
Hopefully, I’ll be able to continue later today, but if not, there is at least some progress in painting the inside of the outhouse.
This is the colour my daughter chose. Personally, I would have gone for a pale blue instead of a pale mint, but honestly, I don’t really care that much. We just needed a light colour to brighten things up on the inside, that wasn’t institutional white. :-D
I almost forgot to take the before photos!
The angle is bad because I was already standing on the seat box when I took these, and I wasn’t about to clamber down, just to take pictures. ;-)
My main goal for today was to do everything that needed me to be standing on the seat box to reach. The only exception was one side of a roof joist, right in the middle. For that, I made use of the thick boards we’d found stored in here when we cleaned it out. The three of them together gave me 6 inches in height, and that was enough.
This is probably the most difficult part to do, with all the corners and tight areas. After this, things should go a lot faster.
The opening at the top is covered with wire mesh window screen, stapled in place. It did not occur to me that the mesh was not flush with the surface when I started trying to paint over it. I didn’t want to take it off, though. I think we will pick up some more wire mesh window screen in the future for other projects, and when we do, I’ll look at replacing this screen. Then the frame can be painted properly. No hurry, though. Depending on how long before we can do that, we could paint the frame in the same colour as the outside. We haven’t decided what that colour will be.
For now, though, I’m off to the Farmer’s Market. I’ve discovered that organic humans are being allowed in, and I want to pick up some pork from our neighbour. :-) We’ve emailed briefly and I might be able to check their homestead out over the weekend, too. :-) I’m looking forward to it!
While it was incredibly handy that the old outhouse had been made safe and cleaned up inside, when we found ourselves unable to use our indoor bathroom, the reality is, it was still pretty… unpleasant… using it.
So now that we have the scrubbable, high traffic paint, I decided it was time to work on the inside of the outhouse. Because the way things seem to go in this house, we never know when we’re going to have to use it again!
Which means that today, I worked on preparing the inside for paint, starting with removing the remaining stuff stuck to the walls, after taking down all the colourful paper my mother had put up.
Thumb tacks, nails, staples, bits of paper, and bits of packing tape. Some of those tacks, I’m sure a hammer was used to put them in! I found myself using a staple remover, a screwdriver small enough to lever under the thumb tacks, and even a wrench, to yank out the most stubborn bits. They were all over the walls, on the top and front of the seat box, and the inside of the door.
Of course, I found more that I’d missed, after I took the photo, too!
My mother was very through in covering those walls! :-D
I also removed the mirrored medicine cabinet, then used a broom and brushes of different sizes to get as much dust and dirt off the walls, ceiling and floor, and out of the corners, as I could. The inside latch on the door was also removed. It was held in place with two very rusty screws, and a bent roofing nail!
The final step was to power wash the inside with the house. Remembering how difficult it was to go the front of the inside, before, that was where I started this time. By standing on the seat box, I was able to get at the cracks and crevices fairly well, without being splashed with water too badly! :-D Even doing the underside of the roof worked out all right. Once the front was done, I could get down and do the rest from the doorway.
Now it needs to dry overnight. It will be ready for painting, tomorrow!
I am happy to note that the floor is a lot sturdier than I thought it was. I had still been wanting to reinforce it by adding more boards on top. However, the seat box is pretty low. If we add any more height on the floor, it will make using the seat pretty hard on the knees. So I will have to rethink what to use to reinforce the floor. A sheet of metal could be thin enough, and strong enough, to do it. We have more like what is now in front of the outhouse, but they are huge pieces and I don’t have the tools to cut them with. Not that I would want to. I have no doubt that, some time in the future, I’m going to be thankful to have such large sheets of metal for some project! :-D There is no hurry, though. After it is painted, we can poke around the barn and the sheds and see what we can find.
After it is painted, I am thinking it would be good to replace the inside latch with a new one, as well as adding a handle or latch to the outside. Right now, it is kept closed with a piece of wood nailed loosely to the frame.
I should probably pick up new hinges. The door is starting to sag and I want to straighten it out, too. And if I’m going to do that, I may as well get matching handles and latches for the outside, too. There is not as much of a hurry on that, though, as the outside needs to be scraped and painted, and that likely won’t happen until next year. Fixing the roof is more of a priority, and I still hope to get that done this year. For now, I’ll just replace the inside latch with a new one.
Hmm. Now that I’m thinking about it, there is another medicine cabinet with a mirrored door in the basement. I think it’s in better shape than the one I took off. If it is, I’ll use that one, instead.
It may be just an old outhouse, but if we’re going to have to use it, we’re going to make that thing as pretty and pleasant as possible! The girls already have ideas for decorating it inside. :-D
I’d posted about being able to get our blocked pipe to the septic tank open, at least enough for things to finally drain. I thought we would be good for a while.
I was wrong.
Things were fine, at first. I got my shower in, no problem. Then my daughters took their showers.
By the third shower, I decided to check the basement.
There was more water on the floor again.
It took me a while to figure out where it was coming from. It turned out to be the laundry sink. Water was backing up into the sink, but this sink isn’t properly attached, and the drain opening leaks around the drain itself, so it was trying to fill and drain from the same area, at the same time. As a result, not only was the bucket under the U bend filling, but water was missing it entirely and splashing onto the concrete floor. I let my daughter know, so she could quickly finish her shower, then started bailing water into the floor drain. The water was slowly draining, but the volume from the shower was just too fast.
Which meant we had to call a plumber right away.
Well. Almost.
Since we had no way to do dishes or use the kitchen sinks, my older daughter offered to buy us supper, so my younger daughter and I made a trip into town where she could run do some errands she needed, then we picked up some fried chicken for supper. We even picked up a couple of things at the grocery store, just in case I couldn’t make the trip to the city for our monthly shop tomorrow.
Once at home, I started making calls. I first tried one of the plumbers that had come out to check our well. They were very apologetic, but were so busy, they would not be able to come out for at least a couple of weeks. !! I asked if he could recommend anyone, and he gave me the name of a plumber he thought would have an auger, in another town. I called them, but they were also booked solid. I asked for another recommendation, and got the name of a third plumber they thought had an auger.
Third time’s the charm!
After explaining what was going on, he hemmed and hawed a bit, then said that the earliest he’d be able to come out was 9:30.
Tonight.
!!!
I was ecstatic! We were prepared to have to wait until morning. We spoke a bit more, then he said he would call me back about an hour before he would be able to come out and get directions to our place.
When he got here, the first thing he did was check things out, and I explained to him what I’d already done, the roots that I’d found, and the issues we’d been having in the past. Among the things we had to consider was how old everything was, and the risk of causing more damage. Not that we had any choice. He then went and got his auger and tools.
Would you look at that beast! What a beautiful machine!
Shortly after he started, he broke though the area that was blocking the laundry sink, and suddenly we had water shooting up the pipe and into the basement! Not much he could do to stop it, either. He just had to keep on going and eventually clear through to the tank.
That old garden hose came in very handy! He made a lot of use of it, and it really helped.
Once he got that pipe done, he worked on the floor drain to the pipe.
In the process, he pulled out a clump of roots and crud the size of a small animal!! You can see it in the above photo. He got more roots out after that, too.
Then he worked in the other direction, clearing the pipe towards the weeping tile, as far as he could go.
It wasn’t until the very end, when he was using the hose to wash everything out as much as he could, that the well pump started grinding, so I quickly got him to turn off the hose. When I explained to him about the noise, and that two other plumbers had already looked at it, but didn’t dare replace the pump, he went over to take a look. Right away, he was saying, “I can see why they would be scared to do it!” The risk of something going very wrong and losing us water entirely is very high.
When he was done with the floor drain, I was really impressed by how much lower the water level now is. It doesn’t fully drain; it was grandfathered into the septic system, and there is a slightly higher spot somewhere in the line to the access pipe, preventing it from draining completely. However, it now drains as much as it can, very quickly, and it’s no longer full of silt and sand. He did such a fantastic job!
When he was done, I took advantage of him being there and asked if he could give an estimate on replacing our tub’s taps and faucet. He tried to look at the hot water tap that is leaking so badly, but it’s so corroded inside, he couldn’t get it off. He didn’t want to risk breaking something, so he didn’t want to try too hard.
In the end, he estimated the total cost to replace the taps and faucet would be around $400 – $500, but we would then have to replace the section of tub surround ourselves. Which I would have no issues with. However, he also thinks they can be repaired, which would cost much less. The only issue is not being able to take the tap off! If we replace them, it wouldn’t matter if he ended up breaking the plastic part, but obviously that would be a big issue if he was just going to repair it.
But that will have to wait for another time.
Before he left, he got my email address, then later sent me an invoice. Much to my amazement, it was less than $300! Considering how long he worked on it, plus coming out so late in the day, I fully expected it to be higher.
Worth. Every. Penny!
While he was working on the pipes, and I told him as much as I could about the system, and the problem with the roots. We know that they will eventually come back. With what he did tonight, though, it should be many years before this become an issue again.
I am so very happy with this guy! Definitely someone we will go back to in the future!
Now we have a cleaned out septic tank for the winter, and cleaned out pipes. These are now all set for the winter!