Drained

Well, I can at least say that we can now use our plumbing again.

For now.

The septic guy made it over in the late morning. The septic tank was, indeed, very full. When he had emptied it, however, nothing started to drain in the basement, so that – thankfully – ruled out the notion that the clog was due to fluids actually backing up from the tank, into the basement. That could have caused all sorts of problems with our type of system.

Also, when I called for him to come over, I asked what the rates were. They did, of course, go up a bit from when we had the tank emptied in the spring. I made sure to give him a tip, too. If anyone deserves a tip, it’s the septic guy!!!

Once that was done, I quickly grabbed lunch, then headed to the basement. Having helped my brother the last time this happened, I could go straight to where I figured the source of the problem was.

Which is when I had my first problem. I needed to get the cap off this access pipe, but my pipe wrench had disappeared. It should have been on the hot water tank, but I had the vaguest memory of taking it to use somewhere else. Too vague of a memory. I had no idea where it might have been.

While cleaning out the new part basement, we did find a couple of large pipe wrenches, so I decided to try one of those. I grabbed the smaller one, but it turned out to be broken, so I went back to try the bigger one.

Now, situations like this are among the reasons I’m glad we have the opening between the two basements blocked off, keeping the cats out. The mess was bad enough on its own. The mess with cats running through it, then tracking it through the house, is a whole different level of horrific. Unfortunately, it also meant that, to get something that is in the new basement, I had to go back up the stairs to the main floor, go down the other stairs to the new basement, then back up to the main floor, then back down to the old basement.

I don’t do stairs well at the best of times. Having to go up and down the old basement stairs, with its odd dimensions, was not a good thing. But, it had to be done.

So after a few precarious trips with me hobbling up and down the stairs repeatedly, I tried the big pipe wrench. That thing probably weighs about 10 pounds. Thankfully, it was not broken, but I still couldn’t get the cap off. Instead, the entire piece was turning. I realized I would have to take the entire top piece off, and that required loosening the bands holding what appeared to be a rubber seal in place.

That required tools I didn’t have.

At that point, I just hobbled half way up the stairs and called for my husband to bring me the big tool kit Finally, I was able to get the whole piece off the top of the pipe. And no wonder I couldn’t get it off! I knew the metal was rusting away pretty badly, from that last time we had to do this, but my brother did clean it up as best he could. About the only positive thing I could say is that, this time, there wasn’t any actual pieces of rusted out metal that had fallen off, for me to clean up.

I did take a picture, but it is too disgusting to share.

I then brought out the old chimney sweep that my brother and I had found was the only thing that really worked to break through the clogged pipe, last time. The end without the brush could be jammed through, and it’s long enough to reach all the way into the tank. I started to push it through, and barely got more than 10 inches before it was blocked.

I then spent the next… *checks the time* … two hours or so, trying to jam that thing through. I also had an old garden hose we’d used last time, too. It only has a female coupling on it, which works out quite well for a job like this. I could hook it up to the cold water tap that the washing mashing used to be hooked up to – I couldn’t use the taps at the laundry sink, since it was completely full of water… and… stuff. Very happy for the tap redundancy in this basement! Between the wire and the hose, I was eventually able to break through the clog. I knew I finally got it when the laundry sink suddenly started to drain! :-D

I then moved to the floor drain to work on for a bit. I had already had an idea of the cause of the problem, but here, it was confirmed.

There were roots running across the drain from the weeping tile under the new basement, all the way through to the access pipe to the septic tank.

I broke up and tore out as much as I could, but I just don’t have the equipment to do more. We do have a rotary drain snake, and I was able to use that to pull out quite a bit, but it’s just too small to clear the pipes.

Still, I got it to the point where water was flowing freely again, and I could start sweeping the water on the floor, and sweeping up… debris… for the garbage. I got most of it cleared, but not all. Once everything was flowing again, I made sure the dehumidifier that drains directly into the sump pump reservoir was set to maximum, then set the big blower fan up to face the worst of the wet and plugged that in.

Once everything is dry, we’ll be able to clean up the last of the mess and disinfect the floor.

It’s a good thing this is NOT a finished basement! I am also very happy that I made sure everything that we do have down there is up on bricks, not directly on the floor.

As disgusting and messy as the job was, it could have been much worse. Most of what backed up was from a load of laundry. It could have been much, much more disgusting, that’s for sure! Still, when it was done, I was so incredibly glad to be able to take a shower!

We will still need to call someone in to clear the pipes of those roots. Otherwise, we’ll be doing this again before too long. :-( It could probably wait until spring, though, since the trees are going dormant and there will not be new root growth for a while. We won’t be able to get all the weeping tile done, but if we can just clear the pipes that are in the old basement, that would make a big difference.

The main thing is, things are now draining.

And I am drained!

The Re-Farmer

Well, it’s a good thing we cleaned up the outhouse

Oy vey.

It’s past midnight as I write this, and it has suddenly become a rather unpleasant night!

I was returning from the bathroom when, while walking past the old basement door, I heard a splashing sound I should not have been hearing, so I went down to take a look.

The septic backed up again.

The pipe with the P trap was full to the top, and water backed up into the laundry sink to the point of overflowing. Thankfully, we don’t really use this basement much, because the water has spread pretty far. Thankfully, whatever caused it to back up happened relatively recently; the last major use of water was a load of laundry, and greywater seems to be most of what I was looking at down there.

I’ve already arranged for the septic guy to come over tomorrow morning. Getting that done was actually in the budget for next month, which means we would have had it done at the next of next week, when my husband’s disability payment came in on Thursday.

Once the tank is empty, I can see what I can do about unclogging the pipes. I am guessing it is the same sort of thing that happened last time. If that turns out to not be it, we’ll have to call in a plumber.

*sigh*

The last time this happened, we were able to set up a honey pot in the bathroom until we could use the toilet again. We don’t have it anymore; I took it over to my mother’s when we found out she was having mobility issues getting to the bathroom at night. We did, however, get the outhouse cleaned up, and made the entry safe to use. So we do have an alternative.

There’s a bit of a new issue, though.

Once we determined that we would have to use the outhouse, I grabbed the flashlight, some cleaning supplies and toilet paper to set it up. It’s been a while since I’ve gone in there, so I wanted to sanitize the seating area. When I opened the toilet lid to clean it, however, things looked… different. When I was cleaning it out before, I made a point of checking underneath, and saw the contents were composted and level from being flooded out by melting snow over the years. It needed to be emptied, but not in any urgent way.

It’s now full.

Of gravel.

After shining the flashlight around, I was able to spot a small hole.

It looks like a groundhog made a den entry leading under the floor boards, filling much of the space under the seat with gravel.

*sigh*

So that’s going to have to be all dug out. It can be accessed from the back of the outhouse, but not very easily.

*sigh*

It’s been a while since we’ve seen the groundhogs; I’ve seen one, once, a couple of weeks ago or so, and that’s it. They no longer visit the bird seed, and we no longer see them around the yard. It seems early, but they seem to have gone into hibernation already.

I suppose it’s good to find this out now, and not in the middle of winter or something.

I am not looking forward to having to clean up the mess in the basement.

Again.

The Re-Farmer

Second low raised bed: done!

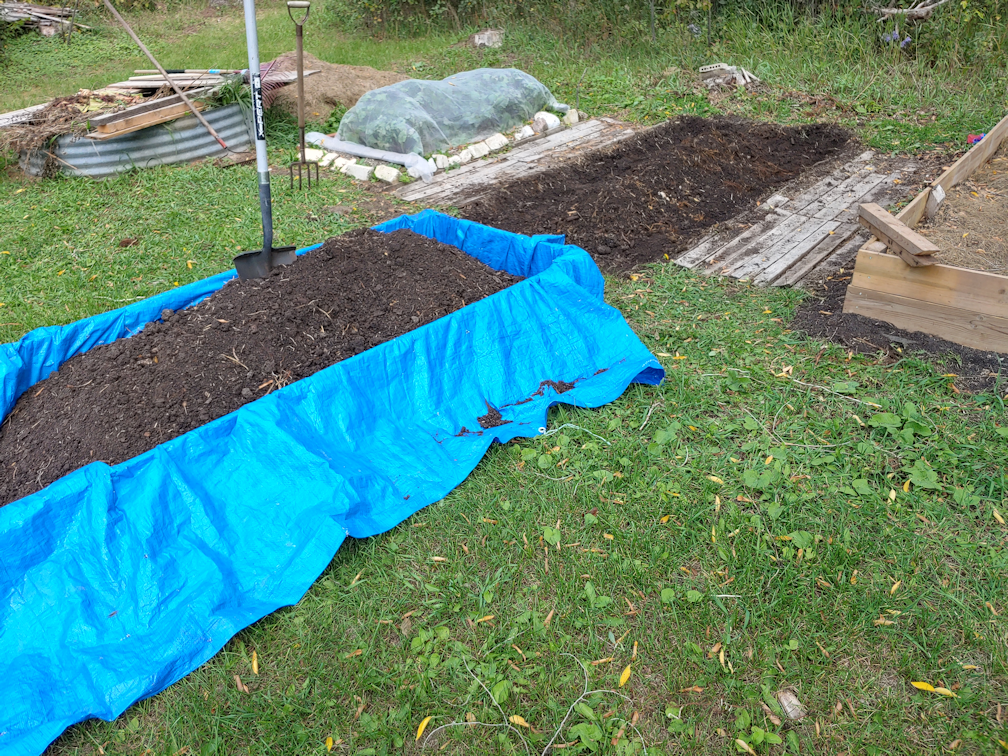
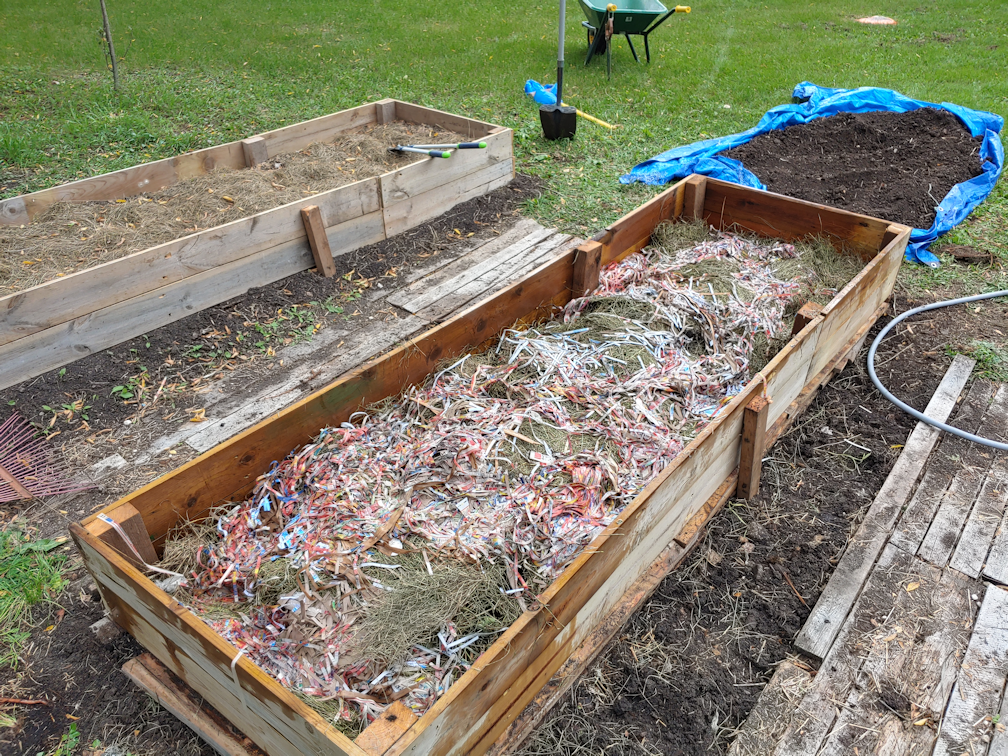
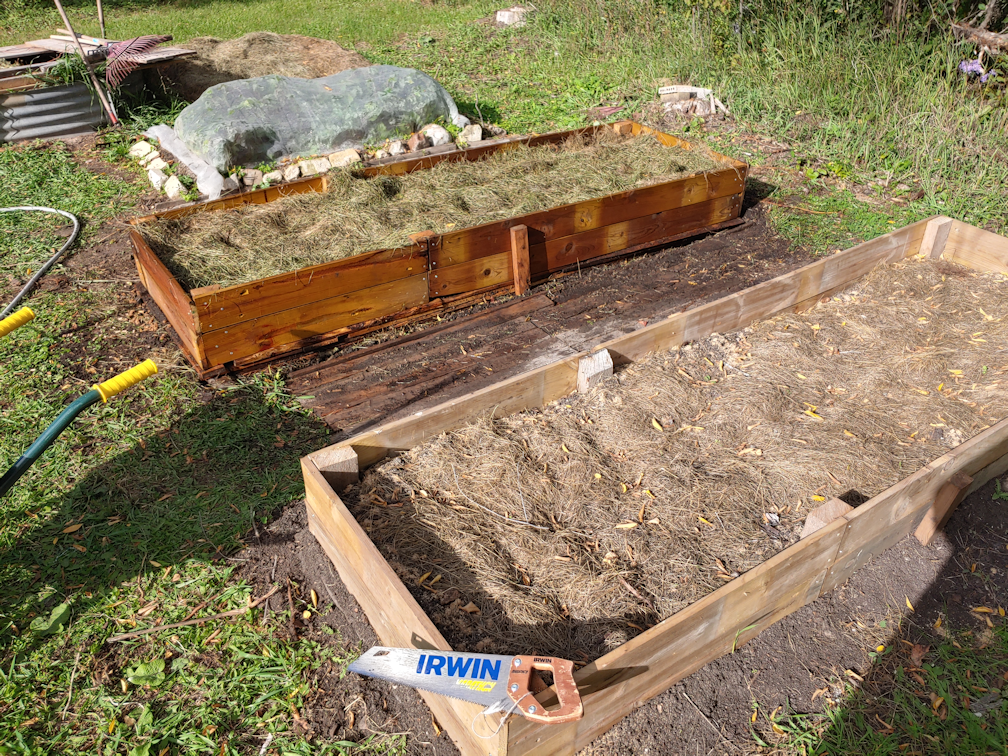
You can read about the first raised bed I did, here and here. Things were done a bit different this time, so here is another step-by-step post with lots of photos! :-) I actually started this bed over a week ago. This is how it looked then.

This bed has been almost completely untouched since the garlic was harvested, letting the weeds get fairly large. This made them easier to pull.

Along with pulling the weeds, with as much of the roots as I could, I lengthened the bed to match the size of the box. Right away, I could tell this one was going to need a “foundation” under the box, too. I was definitely hitting rocks, and a whole lot of roots, while trying to loosen more soil and remove grass and weeds.

Once the weeding and loosening of soil was done, it was left to sit so that any weeds I missed would have a chance to start growing again.

When I started working on it today, the first thing I did was go over the area again, pulling out any new growth by the roots. Then it was time to start shoveling!

Like the previous bed, this one had been originally amended by burying the contents of our compose pile and straw. So I only wanted to remove up to the straw, basically.

In the process, I was finding a LOT more roots! It looks like the cherry trees are encroaching again.

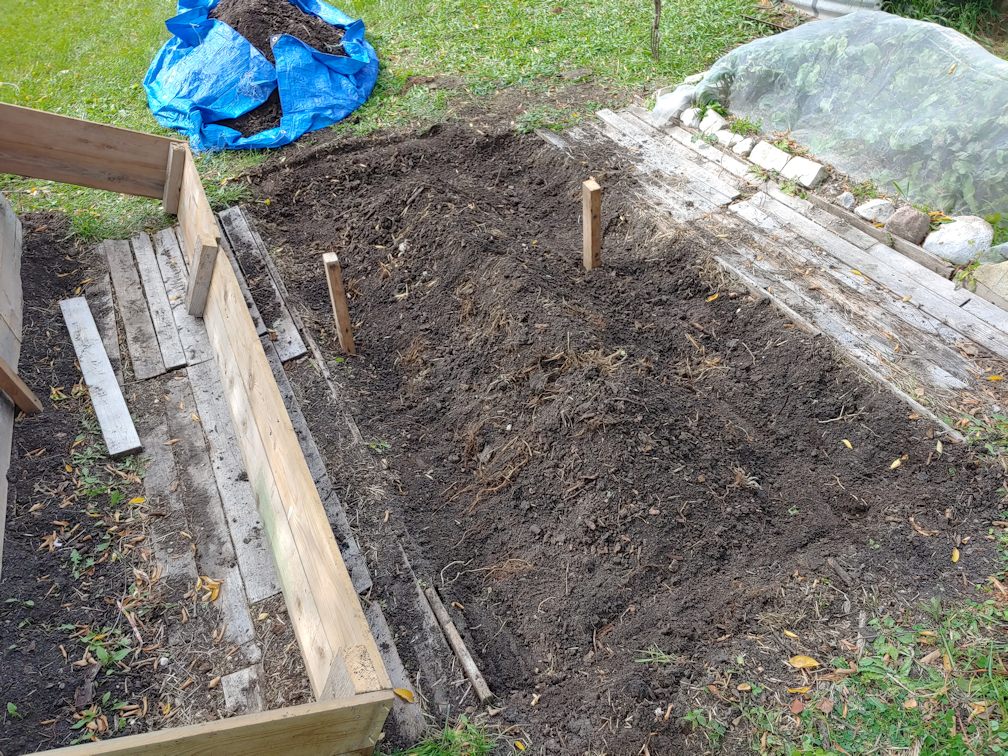
Once I was satisfied with how much of the topsoil I had removed, I raked around the edges to try and level the soil where the box would be resting, as much as possible, while heaping it all in the middle.

Then the box was laid down and, once I had it where I wanted it, I used a sledge hammer to hammer in the supports on either side, at the middle, to prevent the long sides from bowing out when filled with soil. I also hammered down the corners and such, to leave marks in the soil that I could use as guide lines.

The ground wasn’t anywhere near as level as I probably should have made it, but that’s okay. Things will settle and adjust over time, and these boxes can be easily replaced in the future, if need be.

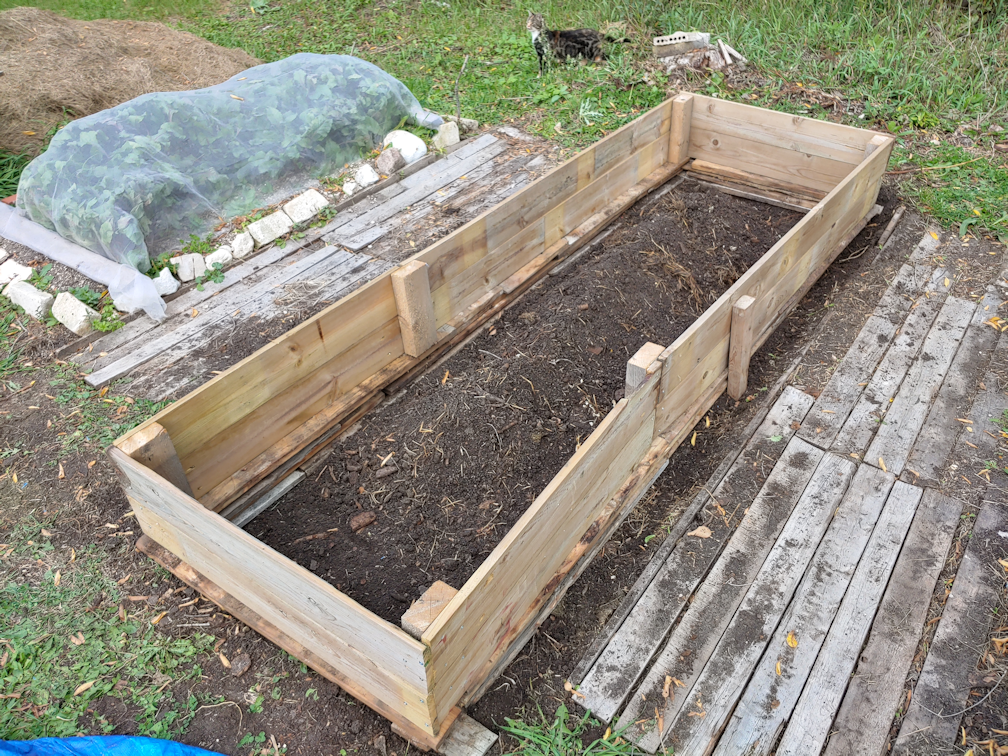
The next step was to raid the pile of old, salvaged boards that the groundhogs have made their den under, and build up a foundation to support the box. Once that was in place, a daughter came out to help me carefully place the box on top of the foundation, and in between the support posts.

Then it was just a matter of shifting the foundation boards a bit, to make sure the box was fully supported. Again, not quite level, but that’s okay.

The soil heaped in the middle was then raked out to the sides, covering the foundation boards and creating more of a recess in the centre.

Then it was time to add the first layer of fill, and raid the branch pile. This time, I added more and larger branches than with the first bed I did.

This, unfortunately, left a lot of gaps and air pockets. They will fill in as the wood decomposes and everything settles and sinks, but that will take time. To help fill in spaces and speed up the decomposition process, I started adding back some of the soil. After returning about a quarter of the soil, I hosed it down thoroughly, so wash it further down into the gaps, then added about another quarter of the soil and soaking it down again.

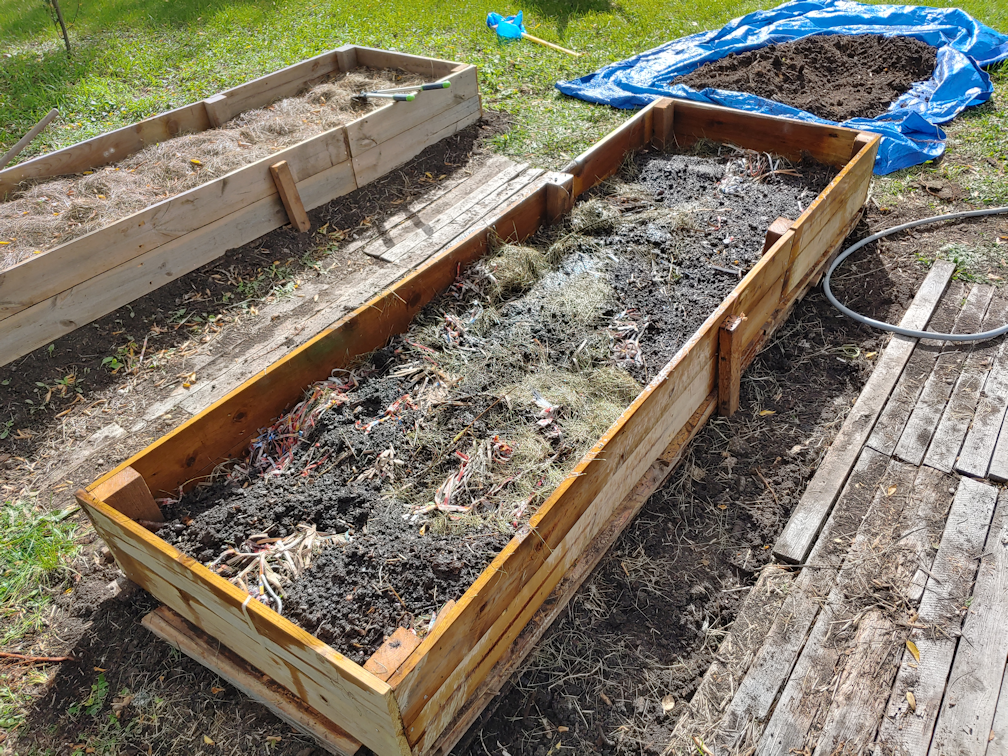
The next layer was contents from the compost heap, most of which was greenery I’d cleared from around the dead spruce trees that were cut down. This got another soak, another scattering of soil, and yet another soak.

The next layers were grass clippings and shredded paper. This time, after soaking it all down, I walked back and forth over the whole thing, to try and compact and break the buried branches more.

It as at times like this that being a woman of generous proportions comes in handy. ;-)

Yet another thin layer of soil was added and soaked down.

Note the gap between the box and the board path. By this point, it had become a bit of a safety hazard! Without the soil to hold them in place, the boards at the edge kept moving and catching on my feet, and I was constantly catching myself to avoid twisting my ankle in the loose and lumpy soil in the gap.

Another thin layer of grass clippings was added and hosed down. At this point, the fill in the new raised bed is about the same level as in the first one. Adding the extra and larger branches made a noticeable difference, even after being tromped down.

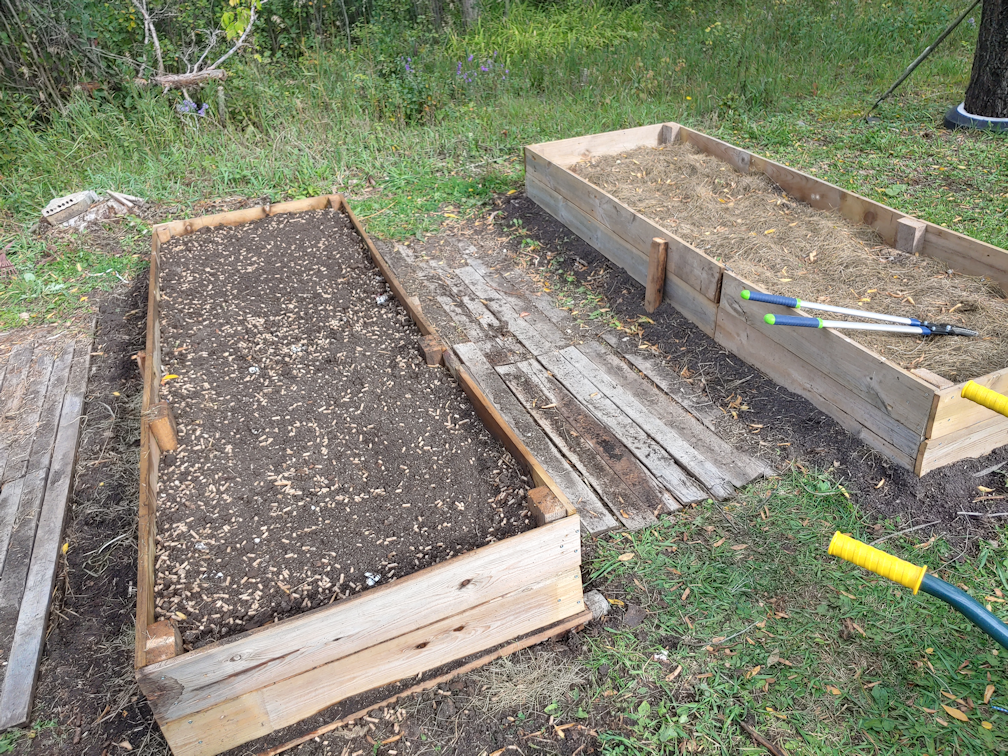
Once this was done, it was time to amend the remaining soil on the tarp. I added about half a 40 pound bag of wood pellets, as was done in the first raised bed, and then a couple of wheel barrow loads of new garden soil was brought over; one added to the soil and wood pellets on the tarp, and the other added directly on top of the grass clippings, then raked out as evenly as I could.

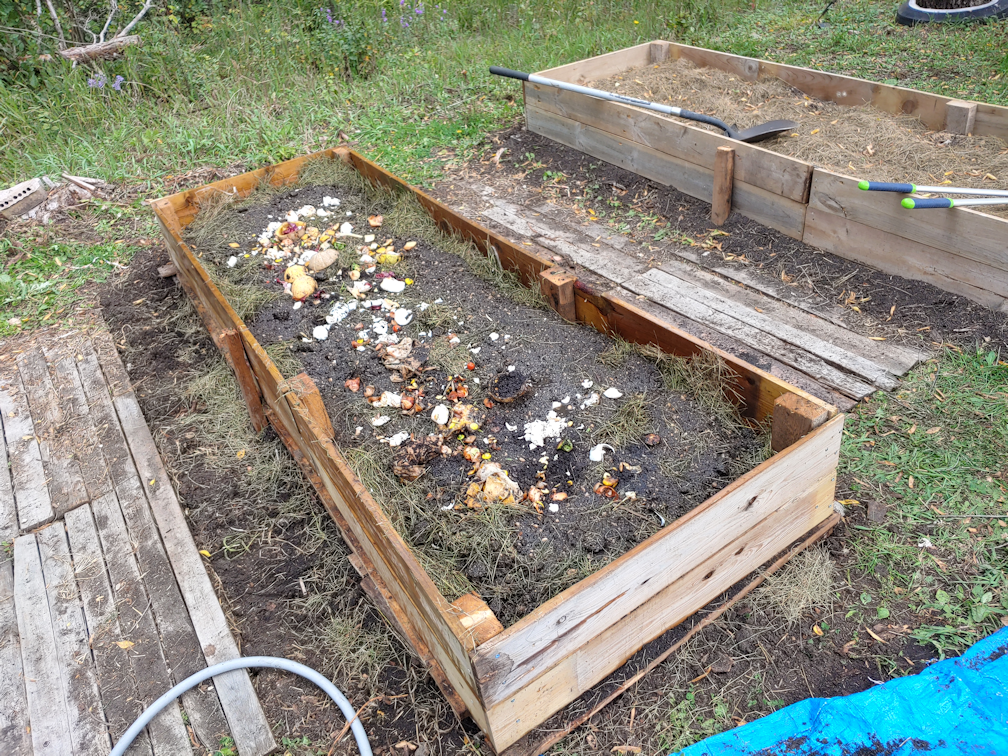
It was about this time that a daughter came out with the kitchen compost buckets, so that got added straight into the raised bed and spread out, then hosed down again.

The next while was spent mixing the soil and wood pellets together, as much as I could, before adding it to the bed.

Once the soil was added, it was raked out evenly. This layer was NOT hosed down, though.

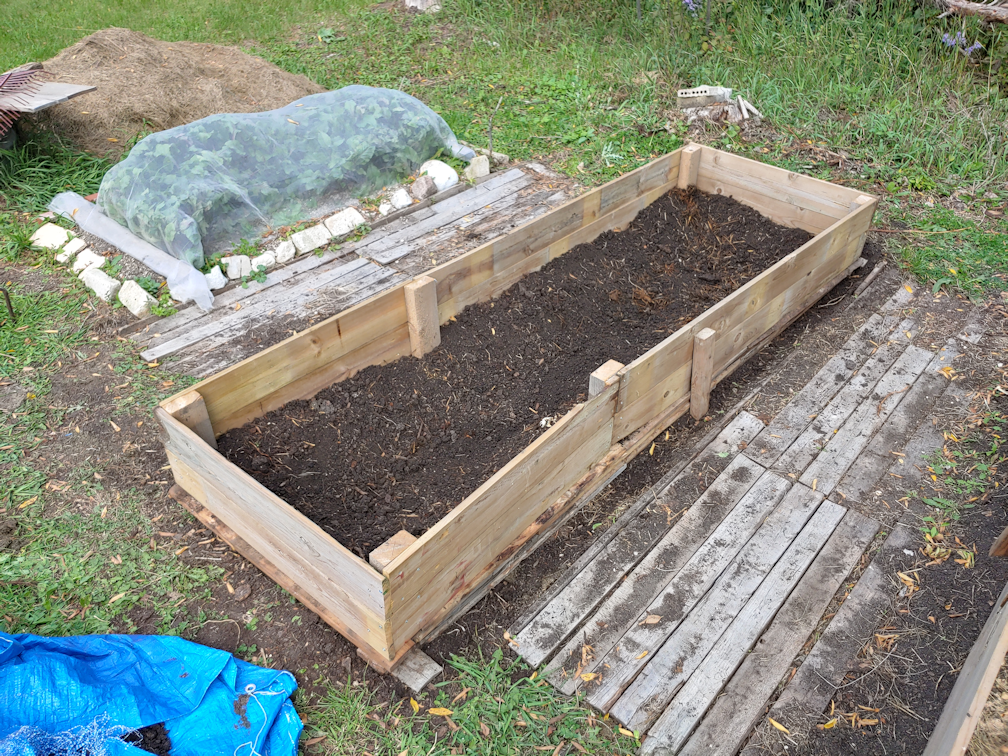
One more layer of grass clippings was added as mulch, then it got one last, very thorough, soak with the hose. This was the time to clean up the sides and edges, too.

This is as much as will be done in the bed, this year. Both beds will get more amendments added to them in the spring, after they’ve had a winter to settle and sink.

Also, remember the gap in the path on the other side of the bed?

I was going to work on filling that to make it safe, but I had reached my limit. A daughter will be working on that for me later. As these beds have been worked on, and rocks were found, I had been tossing them next to a nearby stump; you can see it in the background, with some bricks on it. Those can be gathered to use as fill in the large gap on the far side of the bed, and more boards will be added, and whatever else my daughter can thing of to make it safe to walk on. The eventual plan is to cover the board paths with sand and gravel.

After this, there is still the third bed in this location to be made, but with the beets still growing, there is no hurry. The last bed will be just one board high, as that is all the wood of this type we have left, but these boards are slightly wider, plus we still have plenty of the scrap wood bits to use as a foundation, so it shouldn’t be too much of a difference.

Two raised beds down; seven more to go! :-D

The Re-Farmer

Clean up: salvaging logs, and bonus clean up

Today was dry enough that I could work on cutting up the dead tree that had finally fallen, thanks to recent high winds.

This time, I could use power tools! I used my baby chainsaw (aka: cordless pruner), with it’s 4″ blade, to trim off branches, then a reciprocating saw, with a 12″ blade to cut the measured lengths. Unfortunately, my reciprocating saw is giving up the ghost. It cuts, but it doesn’t stop. Sometimes, it’ll slow down when I release the trigger, but other times it would just keep right on going. I had to unplug it to turn it off!

At the last minute, I changed my mind on the longer lengths I would be cutting. These will be used to make high raised beds in the main garden area, and I had been thinking of building them at 10 feet long. As I was measuring, however, I decided to make them 9 feet long. The boxes we built for the beds where the garlic had been planted are 9′ x 3′. I figured if I did these at 9 feet long, any future cover frames we build will fit on both. I kept the short ends at 4 feet, though. With the width of the wood, the inside of the beds will be roughly 3 feet wide, so any covers would still be interchangeable.

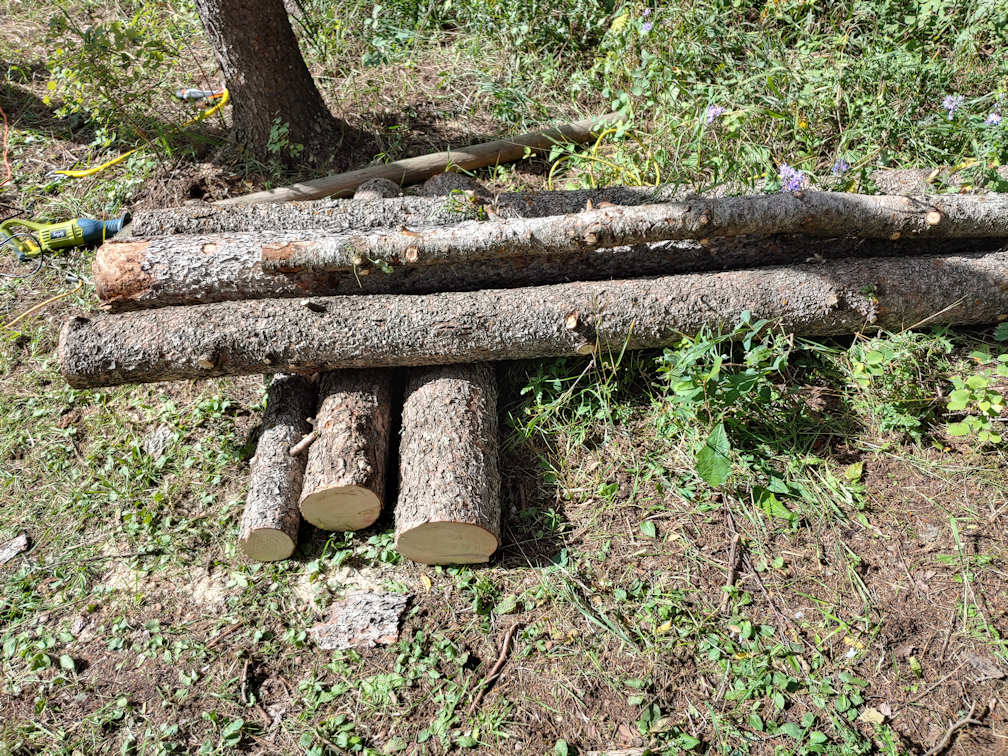
So here we have two 4′ and two 9′ lengths. Enough to make one course of logs to frame a high raised bed.

By the time I cut these, the rest of the tree was light enough that I could drag it closer to cut a couple more pieces.

That gave me another 9′ and another 4′ piece. At the top of the long pieces is the remaining top of the tree, which is about 7 or 8 feet. I set that aside for potential future use. When I was trimming the branches off, I found another 6 or 7 feet of the top had broken off and was dangling from a nearby tree. With three 9′ lengths, three 4′ lengths, plus another, say, 7 feet of trunk, and 6 feet for the top that broke off, we’re looking at a tree trunk that was roughly 52 feet. Add in the roughly 3 feet of stump left behind, we’re looking at a dead tree that was about 55 feet tall when I cut it down.

The one that’s still stuck on another tree was a bit taller.

At this point, I had salvaged logs to do 1 1/2 courses to build a raised garden bed. I needed two more pieces.

I didn’t have to cut down another tree, though. I still had the trunk of the dead tree I’d cut down and used the stump to make a bench.

After I finished trimming the branches, the trunk was eventually rolled up against the patch on the right, where there is a currant bush, chokecherry tree, raspberries, some flowers and a crab apple tree that died this spring. So after dragging/carrying the first pieces over to where the garden bed will be built, I cut a couple more lengths from this tree trunk, then set the remaining top piece aside with the top of the other tree, for potential future use.

You can see that the new raised bed will be quite a bit shorter than the low raised beds we had this year. Those are about 13 feet long. We will be losing planting space, but we should also be able to plant more densely, once they are at a more accessible height. For now, I want to make these at least 3 logs high, then see how they work. I expect to finish them off at 4 logs high.

Which would translate to roughly 3 or 4 trees to harvest, per bed. In this area, there are six low raised beds that will be converted to high raised beds, so that means as many as 12 trees to replace all the low raised beds with high raised beds.

Considering that we have more than 20 dead trees that need to be cut down, having enough logs won’t be a problem, even if some of them turn out to be too rotten to use. Some of those trees are thicker and taller than the two I used today, so I’ll probably need even fewer. With the new beds being several feet shorter than the current beds, we could potentially have a double row of beds. That will depend on the space for paths. These are meant to be accessible raised beds, with room for a walker or wheelchair in between, so the paths need to be 4′ wide.

The one thing we do have is the luxury of space. While we are starting with raised beds in this area we are already gardening in, as time goes by we will be adding more beds in this area. Not a lot more, though, as there are too many tall trees on the south side casting shadows. The plan is to build more permanent raised beds in the outer yard, where they will get full sun.

But that is for after we’ve done a lot more logging of dead trees in the spruce grove!

Once the last of the logs were dragged over, I took advantage of having the tools handy and finally took down the dead crab apple tree.

For this job, I was able to use the baby chain saw, and didn’t need anything else. I love that thing!

In the photo, you can somewhat see where the bark as split off the trunk at the bottom. This tree had started to get leaves in the spring, but then just died off, and seeing that damage sure explains why. The tree itself was showing signs of disease, even last year, so all this wood is for burning, not the chipping piles. I noticed that even the raspberry plants near it were also showing signs of disease, so what we will likely have to do is remove any plants growing around the tree and not plant anything at all here for a few years. That should be time enough for whatever disease has gotten into the soil to die off.

Once cutting and clearing away to the base, I could see that this tree was actually the sucker of a larger tree that had died, long ago! The inside of the old stump was so rotted out, I could brush it aside with my hands.

I kept cutting and breaking up bits and pieces for a while, but what I will ultimately do is bring a small metal ring I found and have been using as a portable fire ring, and light a fire on top of the remains of the tree. That will prevent any suckers from trying to start growing and, hopefully, sterilize the soil of whatever disease has gotten into it, at least a bit.

It was good to finally get this cleared up. There are a few other dead and dying crab apple trees that will need to be cleaned up, too. Over time, once enough time has passed, I hope to replace them with other fruit trees that are more disease resistant. This spot, however, will not get anything tall planted in it. There are already too many tall trees shading the area. An awful lot of garden space was lost to shade because my parents planted so many new trees on the south side of the garden, instead of the north! Most frustrating is that they also planted them too close together, so none of them thrived, and quite a few died. I removed a lot of these when I cleaned up the maple grove, our first summer here, but I think I will have to take out an entire row of crab apple trees I discovered in the process. They simply aren’t getting enough light to bloom and produce, even after I cleaned the area up. That’s not a priority right now, though.

But I digress!

I’m happy to have gotten as much done as I did today. Tomorrow, the girls and I have an outing with my mother planned, so we won’t be able to get more done then. I’ll have to use Sunday to take down another tree and hopefully get enough wood to start on the first permanent high raised bed before winter. With several days of rain predicted next week, we shall see how far we will be able to get on that!

The Re-Farmer

Shut off valve installed!

Well, that didn’t take much at all!

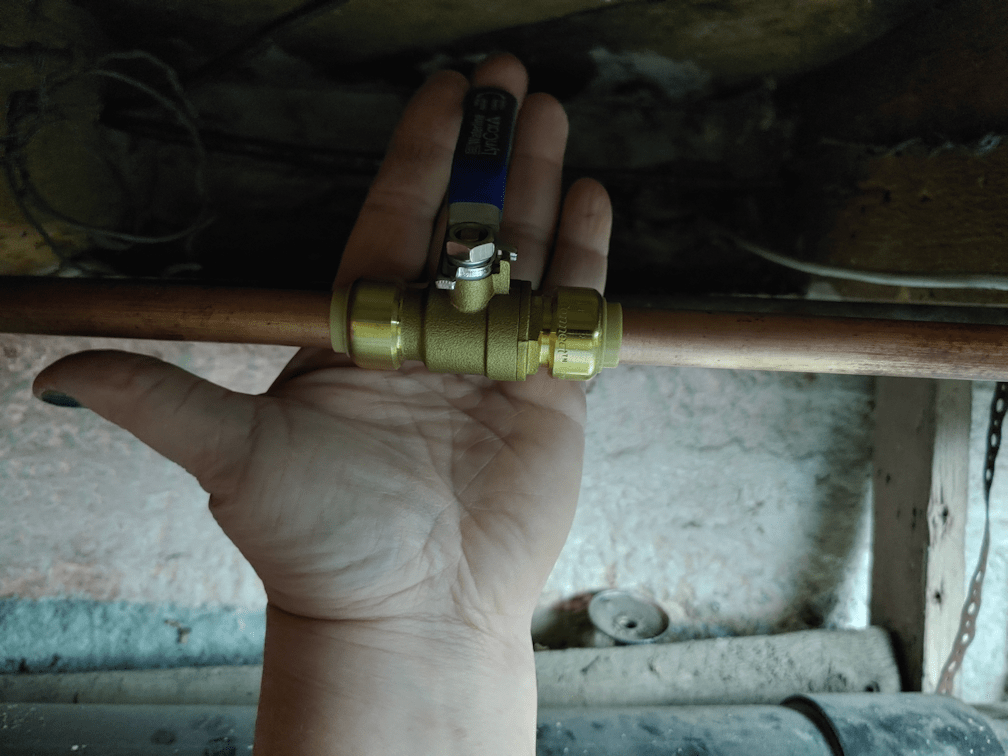
With the help of my younger daughter, we got the shut off valve installed on the hot water pipe.

Ha!

Just kidding.

My daughter did all the work. I took pictures and passed her things.

The first thing we needed to do was take off the “clamps” holding the pipe to the exposed floor joists above, on either side of where the pipes were in contact with each other and, I believe, the source of the vibrating noise that is so alarming. The “clamps”, however, were small strips of aluminum, hammered into place with finishing nails. We never did get the nails out. My daughter ended up ripping the aluminum off, instead. !!! While my daughter worked on that, I shut the water off to the hot water tank, then opened the tap to drain the pipe.

One of the things she noticed while trying to remove the aluminum strips is that the hot water pipe was actually bent upwards at this point. No wonder the crossed pipes were so jammed together.

Once there was a bit of flexibility in the pipe, it was easier to access and work on, too.

After deciding where to put the valve, the pipe got scrubbed clean, then the shut off valve was used to place marks on the pipe, so we could see where to cut it, and later see that the pipe ends were far enough inside the valve once installed. Thanks to needing to fix the kitchen sink a while back, we did have a nice little pipe cutter for the job. :-)

About two inches of pipe was removed, to make room for the valve.

The cut ends then got scrubbed and sanded, inside and out.

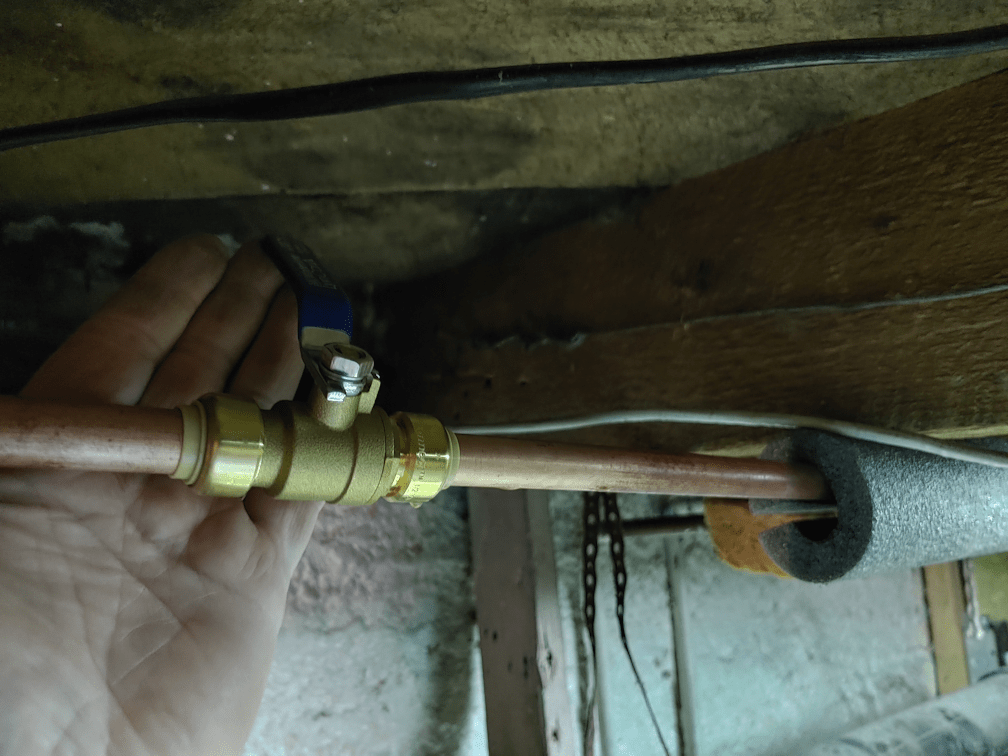
Then is was just a matter of sliding it in, and making sure the pipe was as far as it needed to go. The water to the tank was turned back on so we could test it for leaks, then the valve was shut off.

The whole thing took about 10 minutes.

With the valve in place, there is no water to leak at the tap, but if we need to use it for some reason before the tap can be replaced, we can just turn it on, use the tap, then shut it off again. Very handy.

Meanwhile, there is still the issue of the pipes.

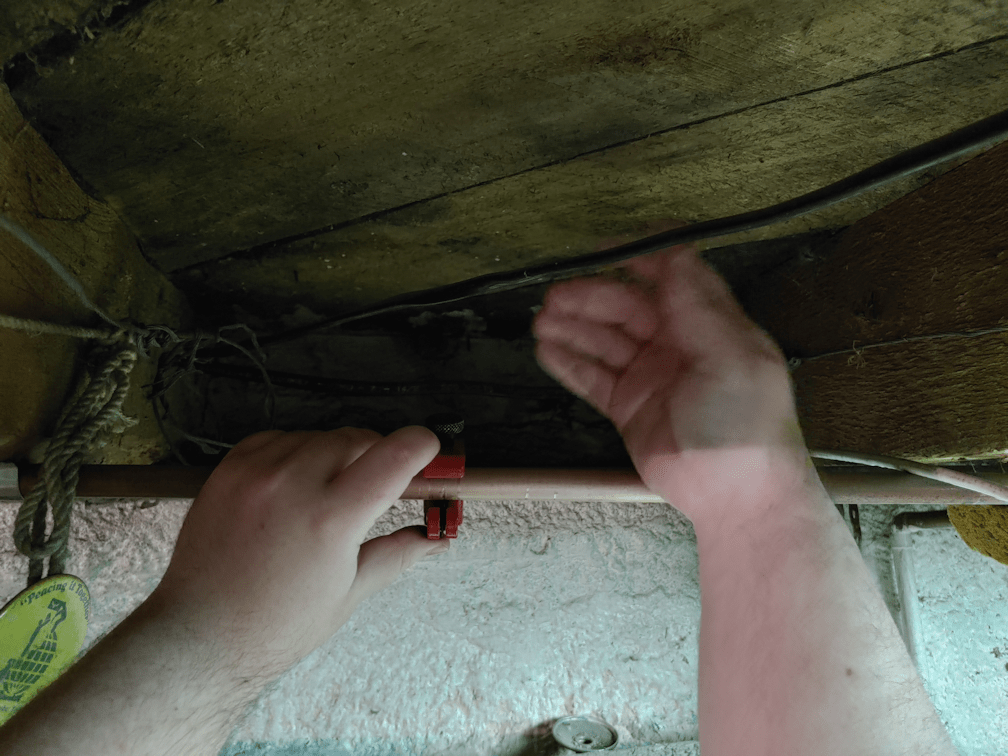
For some reason, we have short lengths of pipe foam in the basement. It’s meant for a width of pipe I don’t see around. I put a section on the pipe, under the floor joists the pipe had been clamped to. It was just long enough to go under both.

I didn’t have any foam that was thin enough, so I jammed an old sponge I’d been using before, in between the two pipes that had been in contact, to absorb vibrations. I’d tried to squeeze it in before, but there was no give at all. I could only get it part way under, so it didn’t really stop the noise, though it seemed to make it better.

Now I am just waiting for someone to use the enough water to trigger the well pump, and see if the noise is still there.

We didn’t add a shut off valve to the cold water pipe, yet. For that, we’d need to shut water off to the entire house, and the pipe is behind the hot water pipe, so it will be harder to reach. That can wait until we are putting on the new taps.

I am quite pleased with how this worked out. I keep expecting things to go horribly wrong. :-D

So far, so good!

The Re-Farmer

Why thank you, wind.

While I was working outside with the loppers and lawn mower, in the area we intend to seed with wildflowers, the winds were pretty high. By the time I was done, I was dealing with double ear aches from it. :-/

It has since only picked up. I’ve just come back from a walkabout, picking up fallen branches and closing up the pump shack door that I found blown open.

There was a benefit to the high winds, when it came to the stuck trees I cut down.

One of them broke free and fell all the way down, right were I was intending it to fall! Which means I can start breaking it down to the lengths I want and clearing it out, and can access another dead tree in this group to cut down.

Unfortunately, the bigger tree is on the wrong side of the tree it’s hung up on. The winds are blowing it into the tree instead of away from it.

Getting this one out is going to be an issue. The only direction it can be pulled from is where I’m standing to take the photo. That leaves the stump in the way. A stump I want to keep, to use as the support for a seat or table.

The trunks will be cut into 10 and 4 foot lengths. What I figure I will do is first find something to support the trunk, then cut it at about 4 1/2 feet from the end. That leaves room to trim the end level. The rest of the tree would then be clear of the stump and can be pulled out, once I have something strong enough to pull it with.

Unless the winds shift, and it manages to fall. Unlikely, but one can hope!

The Re-Farmer

Future wildflower area, and something’s missing

After breaking the lawn mower in the strip along the road, I finally got back to it, today.

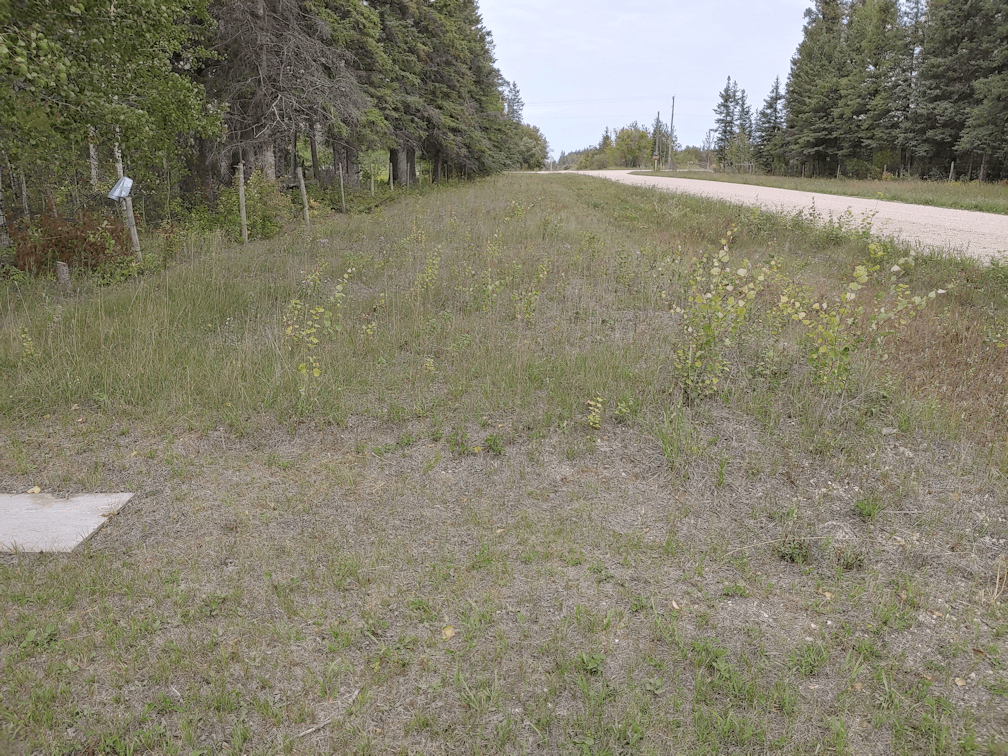
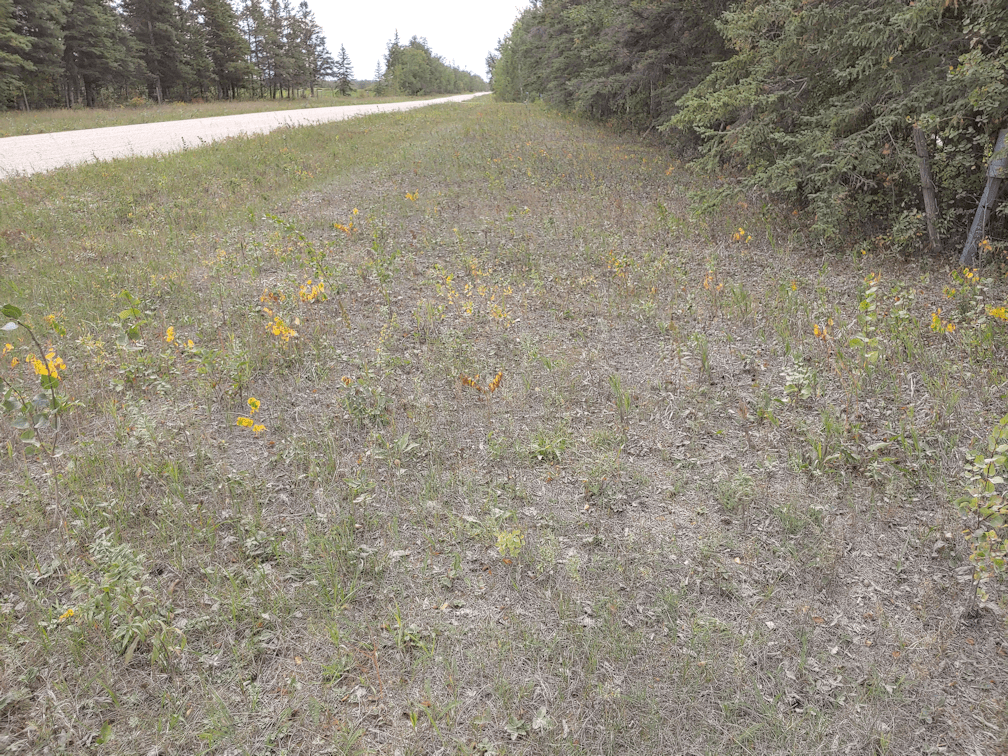
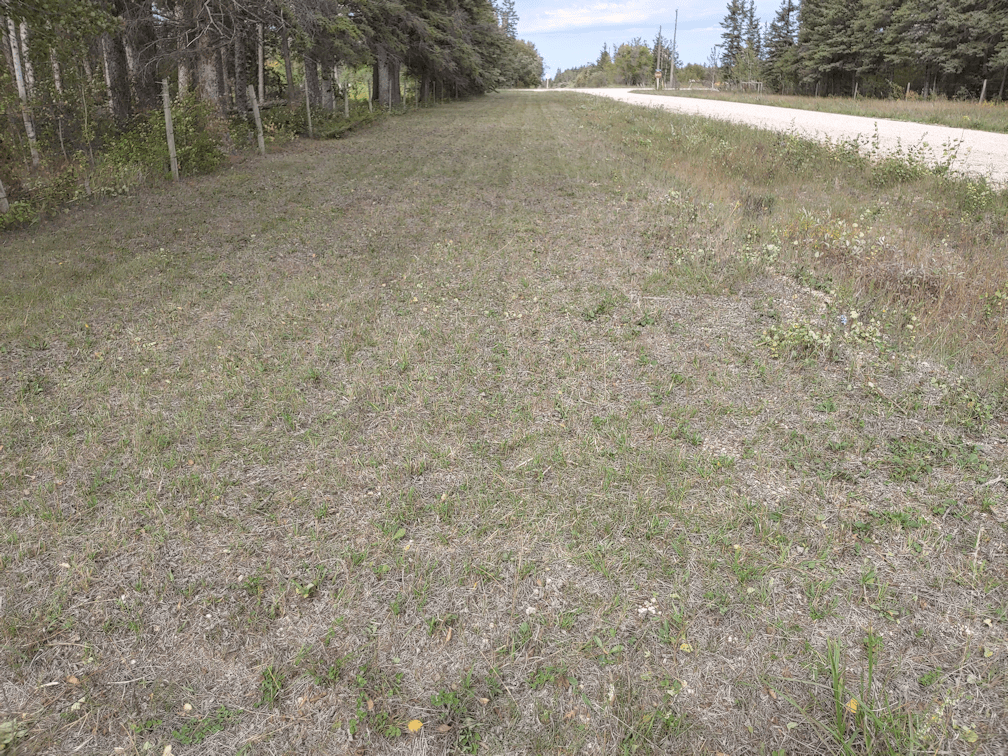
Here is how it looked before I started, from each end.

I suppose one good thing about the drought conditions is that this area has never gotten overgrown. There were saplings starting, so I went over the area with the lopper first, cutting them as close to the ground as I could. The last time I had to do that, we didn’t have loppers, so a lot of these saplings were growing out of the ragged ends of smaller saplings before, that had been mowed over rather than cut with pruning shears. The larger ones had been cut with pruning shears, and there was enough of them that I had needed a wheelbarrow to clean up. This time, I could just pick up the larger ones by hand and didn’t even get an armful.

Here is how it looked when I was done.

The plan for this area is to convert it to native wildflowers for the pollinators. The mix we have has 16 annuals and perennials, chosen for Western Canadian climates. We intend to start at the far end (where the lawn mower can be seen in the one photo), as that end is near the garden. Over time, I intend to continually scatter more seeds down the line, with a goal of this entire strip being full of wildflowers. Once that is established, we won’t need to mow it regularly any more, and we will just need to keep on top of cutting away any saplings that try to establish themselves, and do a single mow, at the highest setting, at the end of the year.

What we can’t do is follow the instructions. This is the method we had intended to follow.

Method Three involves more planning but requires no chemicals. Till in the late summer or early fall the year before planting. You may allow the soil to lie fallow or plant a cover crop after tilling. A cover crop may be important if your site is on a slope. A green manure cover crop such as buckwheat or annual rye grass will hold the soil until spring, help add beneficial organic matter and help snuff out germinating weeds. In the spring, light cultivation will be needed to loosen the soil and turn under all existing growth just prior to planting. ‘

https://www.veseys.com/us/westernmixwildflowers.html

Well, we can’t till this area. Even if we had a working tiller. You can’t see them in the photos, but there are several large rocks peaking through the soil, and I have no doubt there are more that cannot be seen. I had hoped to at least go over the area with a harrow, but we still need to figure out a safe way to get under the riding mower, which has a tow hitch, to put the chain back on, so it will move. It hasn’t exactly been a priority.

Then there are these instructions:

Sowing: 

Once your ground is bare and loose, you are ready to sow. Following are a couple of tips that will make the whole process simple and successful. First, choose a nearly windless day and, second, separate the seed you’re planting, no matter the amount, in roughly two equal parts. Put the first half in a clean bucket or coffee can and add in roughly 10 parts of light sand or vermiculite. There are two reasons for the sand. It will dilute the seed and help you spread it more evenly. More important, since it is lighter-colored than the freshly-tilled soil, you’ll be able to see where you’ve been as you sow. You can simply hand-sow, keeping the seeding as even as possible. Or use a hand-crank seeder. The amount of seed you sow depends on the sort of flower display you want. Many people sow up to two or even three times the minimum seeding rates on seed packages to assure heavy bloom. Avoid planting higher densities since this will inhibit good growth. Sow the first half of your seed/sand mix over the entire area to be seeded. Then go back, mix the second half of your seed with sand and spread that seed over the whole area. This way, you’ll avoid bare spots. Once the seed is evenly sown, you can rake to barely cover the seed with soil. Or, simply compress the seed into the freshly-tilled ground. A lawn roller is perfect for the job, and for smaller areas, a piece of plywood laid down and walked on will do.

Okay, so we can broadcast the seed easily enough, but things like getting rid of all the roots of what’s already there, and having “bare and loose” soil first is out of the question. We’ll be lucky if we can loosen the soil at all. As for raking or tamping down to compress the seed into the soil? Ha! Nope. Not gonna happen. It’s just too large of an area. We will also not be able to do any watering here, at all. We have enough hose that we can reach the furthest corner of the furthest garden bed with the spray nozzle on the hose. I have no intention of buying yet another length of hose, to water outside the garden area.

Nope.

The instructions say to prepare the soil, then plant in the spring, after last frost. Since we can’t water the area, I’m going to throw caution to the wind and broadcast the seeds in the fall. I had expected to be doing that around now, but we are having relatively warm temperatures for the next while, and we’re also getting rain. I don’t want the seeds to germinate. I want them to go dormant before getting covered with snow. Then, when the snow melts in the spring, they will get their moisture.

This goes against all the instructions but… well, these are wildflowers. Wildflowers manage to propagate themselves without freshly turned soil, tamping down or clearing of other plant roots. I’m going to be trying to copy nature, here.

So we will do as much as we can first – which, unless we can get under the mower, is basically what I’ve done today. I’ll be using garden soil instead of sand to help broadcast the seed more evenly. Since I don’t want the seeds to germinate, I will probably wait until the end of the month, or even into October, to do it. Whatever survives, survives. If we keep broadcasting seeds, year after year, eventually the area will get filled. Hopefully with a good variety.

So that’s done as much as possible for today.

This is the first time I’ve been out this way, on foot, all year, which means today was the first time I was able to check out, and get a photo of, this.

This is the corner post of the property’s fence line.

It needs replacing, as does most of the fence, but that is not what I was taking a pictures of.

I was taking a picture of what isn’t there.

My father’s name.

Many years ago, my dad took a piece of red plastic and used gold coloured, metal, self adhesive, letters to put his initial and surname on it. The sign was mounted on this post. Back in the day, before any of these roads had names, and well before the driveway marker system was implemented, the sign was used as a landmark when giving people directions to our place.

We don’t go out often, and the sign can be easily seen only when we are on the return trip, but seeing that flash of red while turning the corner always made me feel good. It was a memory of my father.

Some time ago, however, I realized I wasn’t seeing that flash of red anymore. Today, I got to look around to see why.

There isn’t a trace of that sign. The reflector at the top got broken in half, though, and the rest of it is on the ground, but that’s all I could find.

The road that goes past our driveway has our family name, as well as a numerical name. When we first moved here, the road sign with our family name was at the top of the stop sign across the intersection. One day, the stop sign was lying broken on the ground, and the road sign with our family name on it was gone. I am 99% sure this was done by our vandal, and I’m just as sure that he is responsible for the sign on this fence post being gone. When it happened, I have no way to know.

What a childish, petty thing to do.

If we ever do get the road sign replaced (I’ll have to contact the municipal council again about that), or replace the sign on the fence, we’ll have to set up a trail cam on it, because I just know that our vandal will go after it again.

Switching out memory cards in this location would be much more inconvenient, that’s for sure!! But it would need to be done.

What a pain.

The Re-Farmer

What a drip!

The old basement is the heart of the plumbing in this house. It’s where all the pumps and tanks are, plus we have a couple of sets of taps; one for the laundry sink, and one for where the washing machined to be, and pipes with shut off valves leading to the taps outside.

Until the plumber added a shut off valve to the hot water tank, those were pretty much the only shut off valves in the system. Otherwise, there is a main shut off valve at the well pump that shuts water off to the entire house.

One of the things my brother did was install a pool filter to the septic pump system. It has a filter basket that catches larger bits before they get into the pump and sent on to the outflow. It has to be cleaned out every now and then, so he got an extra basket, so one can be quickly switched out for the other, and the pump can be back in action right away, rather than having to stay off while the filter basket gets cleaned. Which is a big deal, since it basically turns black and needs time to soak in a detergent solution after the grit and odd bits of straw that fell into the tank while it was being emptied are cleaned out.

Handily, the laundry sink is right there, and that’s where I wash out the filter basket.

It is also where we shock our hot water tank with hydrogen peroxide every now and then, when the water develops a rotten egg smell. This is done using siphon action by attaching a short hose to the tap. After shutting water off to the hot water tank, then allowing it to drain until the vacuum created prevents more water from draining out, we can put the hose end into a container of hydrogen peroxide, turn on the hot water tap, and the peroxide gets sucked into the hot water tank. Unfortunately, the threads on the hot water tap are damaged, so instead of being able to screw on a short length of hose directly to the tap, we’ve had to use Gorilla tape and a length of aquarium hose. It doesn’t seal as well, but it works.

Those are pretty much the only times that sink gets used.

When I’d switched out the filter baskets at the septic pump, I noticed that the hot water tap had developed a drip. I have no idea how long it’s been dripping, but as I used the hot water to do a rough clean on the filter basket, then set it in a container to soak, it started to drop more. Last night, I switched out the soaking water, and the slow drip because a fast drip.

We already needed to replace both the hot and cold water taps, but until now, that wasn’t much of a priority.

Here, you can see the hot water tap, with the tape holding the bit of aquarium hose. The cold water tap has a length of hose screwed on – without the hose, the water sprays all over. The piece of hose across both taps is what I’d tried to screw onto the hot water tap, only to discover the threads were damaged.

This morning, I headed into town to hit the hardware store, just as it opened. After showing the photo to one of the staff, he found the right size replacement taps for me (I plan to take advantage of the situation and replace both taps). Unfortunately, these taps are soldered on. Which means, to change them out, I need to heat them with a torch, remove the taps, clean the pipes, then solder on the replacement taps.

We don’t have the tools to do that. Even if I wanted to cut the old tap off and put a new one on the remaining length of pipe, I’d still need a soldering gun – and I don’t want to shorten the distance of the taps over the sink, anyhow.

Of course, there are no shut off valves between these taps and the pumps. To work on it means, at the very least, shutting off the water to the hot water tank. To work on the cold water tap means shutting off water to the entire house.

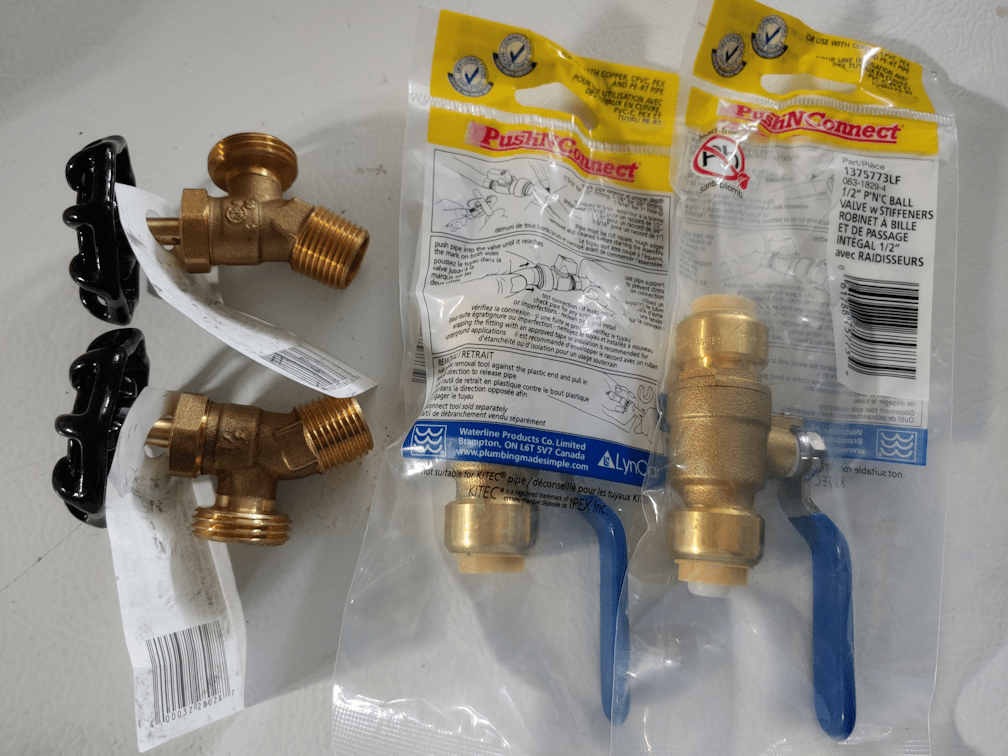
So I picked up a couple of Shark Bite shut off valves.

We have what we need to cut pipe, so we can install the shut off valves ourselves. That will allow us to shut water off to the taps and stop the drip, until we can replace the taps themselves.

I’ve already been able to talk to my brother about this, as he has the tools needed to replace the taps. As for the shut off valves, he had it in his mind to install them in the vertical pipes leading to the taps, but I am thinking of installing them in the horizontal pipes running along the ceiling, so that they will shut off water to the other set of taps as well. Those have never been used since the washing machine was moved upstairs, but considering how old they are, I can see needing to replace them in the future, too.

My daughters are still on “night shift”, though, so I don’t want to start any of this until after they’ve gotten up and had their showers. For now, I just want to install the shut off valve on the hot water pipe, but – as unlikely as it is – if something goes wrong during the install, we wouldn’t be able to turn the hot water back on until it’s fixed, and who knows how long that would be. It’s really a simple job, but I know how easily simple jobs can become major problems, in this place!! Hope for the best, plan for the worst!

One of the considerations for installing the shut off valves; unless we cut out about 3 inches of pipe, they will add to the length of the pipe. That would mean the taps would need to be shifted over by the same distance. Which I wouldn’t have a problem doing, except that parts of the copper pipe have been painted over.

Including the clamps and screws holding the pipes in place. Which is going to make loosening the screws a pain in the butt!

*sigh*

Still, it needs to be done, regardless. We’ve had issues with a loud noise that would start after the well pump kicks in to refill the pressure tank. It is very loud, and I can actually feel the floor vibrating under my feet when I am at my computer. It rather freaked me out because, at first, I thought the noise was coming from the well pump, and we’re already on borrowed time with that thing. Eventually, I was able to trace the noise to the pipes. The pipes run under the exposed floor joists, and have a mishmash of supports attached to the joists, holding them in place. In a couple of spots, there is a pipe that has a 90 degree turn and runs under the pipe it had been parallel to. One of those spots is the hot water pipe that runs from the hot water tank to the laundry sink. What seems to have happened is that, as the house has shifted, those pipes no longer have any sort of gap between them. When the pump starts running, it causes vibrations in the pipes, and with these two pipes now hard against each other, that results in the noise and vibrations I can actually feel in my feet. Right now, the vertical pipes are clamped so tight against the wall – with painted over screws – that there is no give at all. So while we are working on the taps and valves, I want to see if I can adjust the hot water pipe downwards a bit, so that they are no longer touching. Hopefully, I’m right that this is the cause of the noise, and it will stop.

If it doesn’t, and we still get the noise in this location, I’m at a loss as to what else the cause might be!

So we’ve got our work cut out for us this afternoon, just to be able to stop the drip until we can replace the tap itself. Once that’s done, there is no longer any sort of urgency.

The Re-Farmer
Late bloomers

Yesterday afternoon, I headed out to gather a few vegetables from the garden. There were sunburst squash to pick, as well as some beans. We’re still getting enough purple beans to harvest to make for decent sized meal portions for the four of us. There were a few green beans, too, and about five yellow beans left. :-D

While heading back to the house, I just had to pause by the new tree stump bench and get a picture of these late bloomers. Normally, they would have bloomed about a month ago, and there are far fewer of them. With average heat and rainfall, this area gets filled with these flowers, and when they bloom, it’s just a mass of yellow. The bench will be mostly surrounded by them, once they recover. It’s going to be such a lovely place to sit in the shade. :-)

The Re-Farmer

I was hoping to avoid that

After giving my hips a chance to recover, it was time for more manual labour today!
Today, I decided to do a bit more cleanup around the junk pile, so I could access some dead trees that need to be taken down.

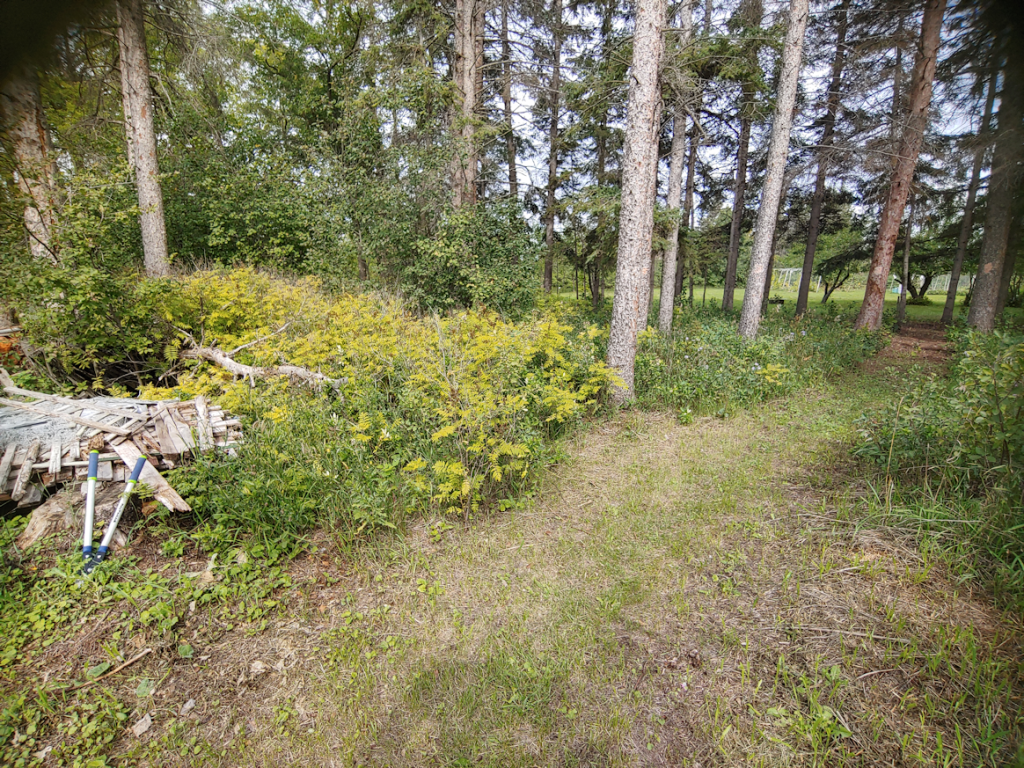
Here is how it looked before I started.

We have our ongoing battle with the spirea that’s choking everything out, so I wanted to pull them up by the roots as much as possible.

Some of them had roots so long, they started going under things. I pushed them aside after a certain point, so I could focus on clearing around three specific dead trees.

The thistles were much more of a problem. The thorns go right through my work gloves!

I did leave on thing behind, besides some wildflowers.

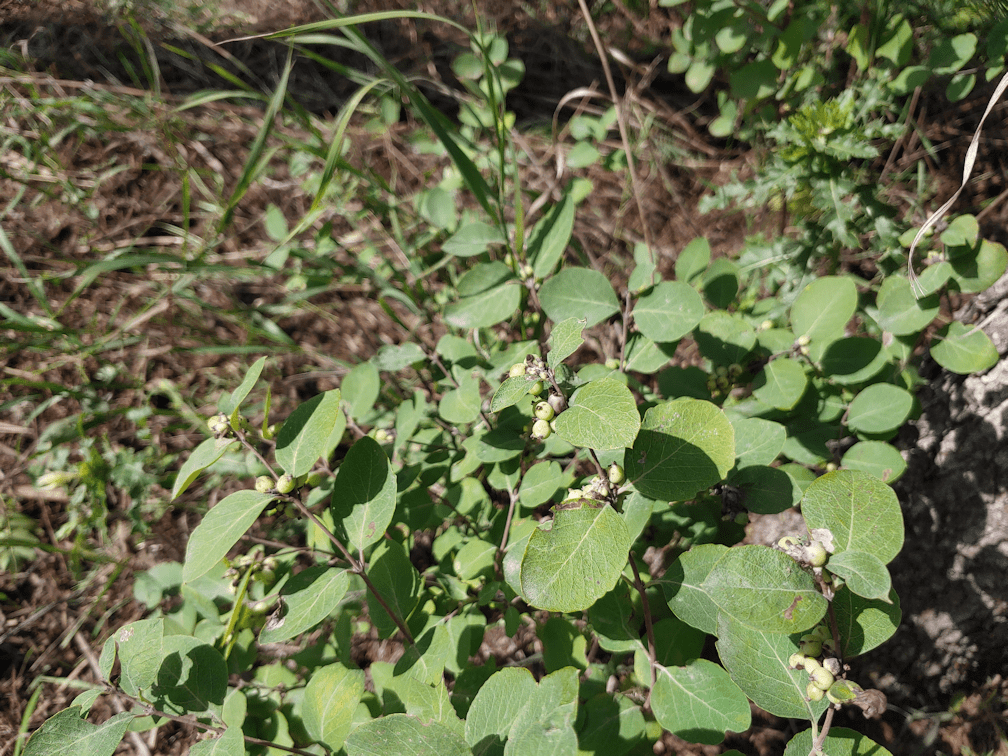
There was a little Saskatoon bush, at the base of one of the trees, and it’s actually trying to produce berries! Weather willing, the berries you see will turn a deep, dark purple, and look a bit like blueberries.

Once the area was cleared of tripping hazards, I started taking down the first tree, using a bucksaw. Because of where these trees are, I tried to do it in such a way that it would fall in a space between some other spruces. I didn’t want it falling towards the open yard, because then it might land on the beet bed or compost pile, or some Saskatoon bushes and an elm tree we want to keep.

It almost worked.

It fell too far to the south, and got hung up on another dead tree, that’s right nest to a still live one.

I was able to wrap some rope around the trunk and get it off the stump, but it would not come loose from the dead tree it was entangled in.

So I moved on to the next tree. This time, it actually fell into the gap I wanted it to fall into.

It still got hung up! I had hoped these trees would be heavy enough that the dead branches would break and let them fall to the ground, but apparently, they are still quite strong.

On the plus side, I was very pleased with what I saw after cutting them down.

The wood is nice and solid, with no sign of rot or ant damage. This is very encouraging, because I want to use the logs. These nice, solid stumps will later be used to make seats and tables.

Here is how it looked when I stopped for the day. I did try to use the rope and our van to try and get that first tree loose from the dead tree it’s hooked up on, but the rope kept breaking. We don’t have any stronger rope. If we’re going to need to use the van anyhow, I will pick up some sturdy rope and hook it up to near the base of the trunks, and pull the entire trees out into the yard, where we will break them down.

Since the wood is in such good shape, these will be used to make the high raised beds we will be building in the main garden area, where we currently have the low raised beds we’d planted spinach, onions and carrots in. I’m thinking of cutting the logs into 10 ft and 4 ft lengths, and I figure it will take about 4 logs to get the accessible height we are after, though of course, that will depend on how big the individual trees are. We don’t have a lot of time left, if we want to get these ready for next year. I’m hoping to get at least a couple built for next year. By using whole logs like this, we won’t have any concerns about the sides bowing out under the weight of the layers of wood, compostable materials and soil they will be filled with.

Once these dead trees closer to the edge of the spruce grove are down, we’ll be able to feel the other ones towards the yard, and there will be no other trees for them to get hung up on!

Once all the dead trees in this corner are down, and the area is cleaned up, we will be able to convert the trunks into seating and surfaces. Then we can start planting food trees that need a protected microclimate. I will be testing the soil, and if the acidity from all those decades of spruce needles is high enough, I hope to be able to plant blueberries. We do still want to grow a mulberry tree, since the one we got this spring got killed off by that one cold night in May, and it was in here that we originally intended to plant it. I think, this time, we will try and get a Canadian variety we found out about, that is increasingly endangered. We will still need the microclimate for it, but if we can help keep a variety at risk going, that’s what we prefer to do, if we can.

There are a lot more dead trees further to the east and around to the south, inside the spruce grove. Some will also have their trunks converted to seating, but as we go further into the grove, I want to start transplanting more spruces into the spruce grove! :-)

While we are getting rid of the spirea, we will be leaving the wild roses and red bark dogwood as underbrush. I will probably take out most of the chokecherries I’m finding in here, as there are so many, to make room for the Saskatoons to spread. We will also be transplanting new spruces in here, though more strategically. Lots to do, but I am really looking forward to when we have a lovely little sanctuary in here, where we can sit and enjoy the outdoors, somewhat protected from the elements by the trees. :-)

For now, however, I’m going to get some tweezers, and get that thistle thorn that got through my gloves!

The Re-Farmer