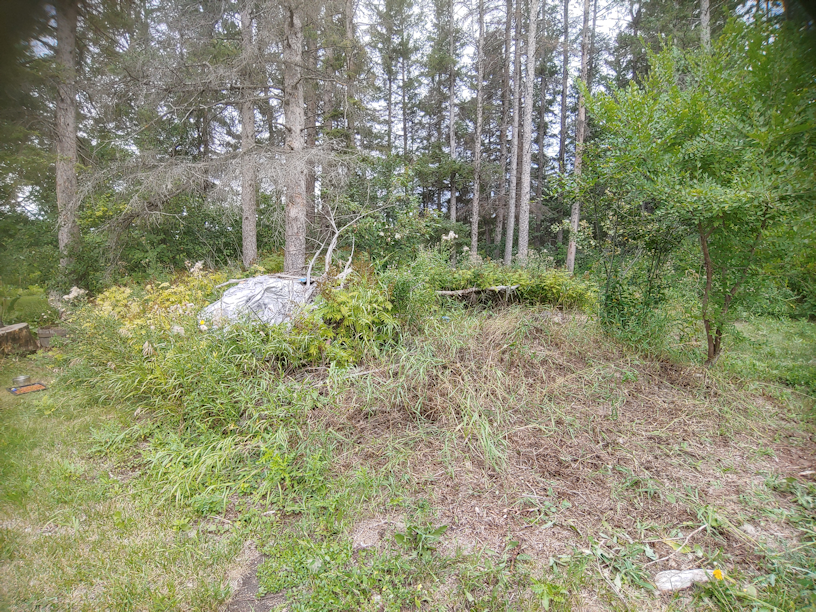
Yesterday’s high winds knocked quite a few branches down.
This one would have landed on the tent, if it had still been there.
We haven’t figured out what to do with the tent yet (other than keep the canvas parts). You can see two of the metal pieces that broke. On the table is the hub they had been attached to. It has no damage to it. :-/
We didn’t lose any trees this time, but we did lose part of one.
This is the apple tree at the very end of the row. In the spring, we had cut away the dead part in the middle, but the saplings that sprouted out the base looked healthy. They don’t have a lot of apples on them, but the ones they do have are larger than any of the other trees, so these young trees were already drooping from the weight.
This one simply broke away from the trunk of the original tree.
When I came back this morning, I was intending to pick the apples off, then cut away the broken tree.
Once I got a better look at it, however, I realized it was still quite attached to the roots. It just wasn’t attached to the dead tree trunk. Even after a chilly night, there wasn’t even any wilting at all.
In fact, it might actually be salvageable.
So instead of cutting it away, I took advantage of the remains of the dead tree, and tied it upright again.
If I can keep it supported upright long, as the tree grows, it should be able to old its own without the support of the trunk. It might take a few years, but that’s okay.
If it survives at all. If it doesn’t, I’ll cut it away then.
Check out the size of this apple!
It would have gotten larger, too, as it ripened. They probably could have used 2 or 3 more weeks.
These are all the apples from that one branch, including a few that had fallen to the ground.
I will be including them with my juicing, today. I’ll start off with just the sweet ones I used to make the crab apple cider vinegar; I’m hoping to get enough to do two gallons of hard apple cider. As the jugs will need room for the sugar, it’ll get less than 2 gallons of juice needed, but still pretty close. Once I get that, I don’t mind mixing different types of apples. Any remaining juice will be for drinking. :-)
The juicer is out of storage, and now I need to get off the computer, get everything prepped and start juicing! :-)
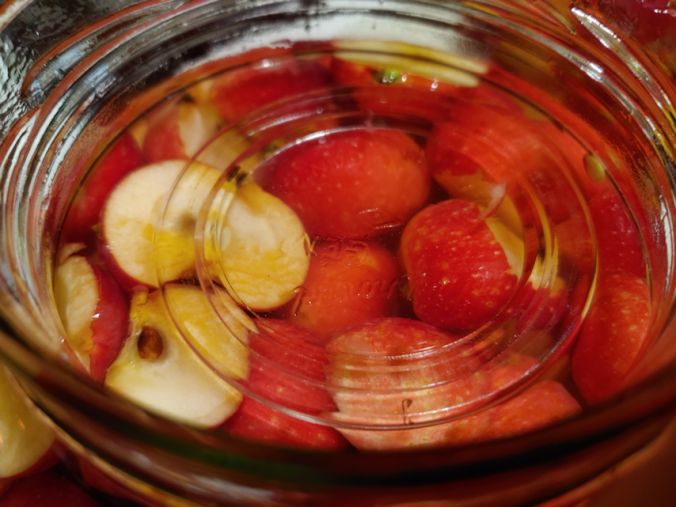
Last night, I procrastinated cleaning the dining room by starting the apple cider vinegar! :-D
I slightly modified the recipe I used last year, which you can find here. (Link will open in a new tab.)
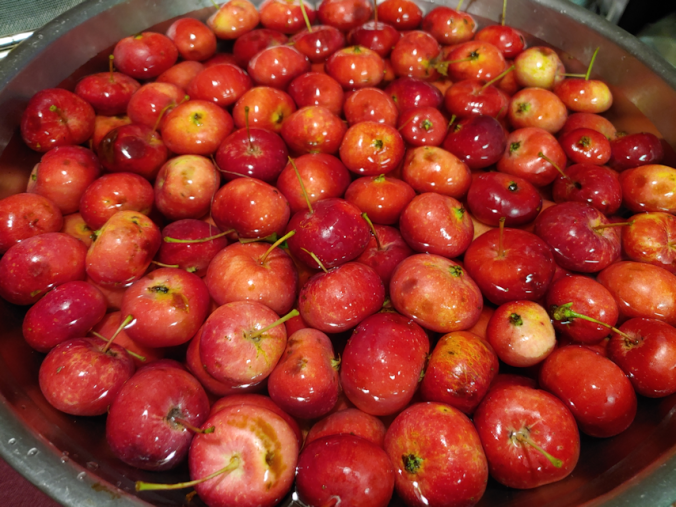
I started off by using one of my gallon jars to measure out apples from one of the 5 gallon buckets. As the apples would be cut into pieces that would fit more tightly, plus I would expect to cut away nasty bits, or even toss entire apples, I filled the jar to the top twice, then added a few extra. I have a large enough bowl to be able to give them a bit of a wash, then leave them to soak while I prepped other things.
Last year, I sterilized things with boiling hot water. Since then, we have started brewing, so along with extra airlocks, we also have sanitizing solution. So one of the changes this year is to use that to sanitize everything, instead of scalding them.
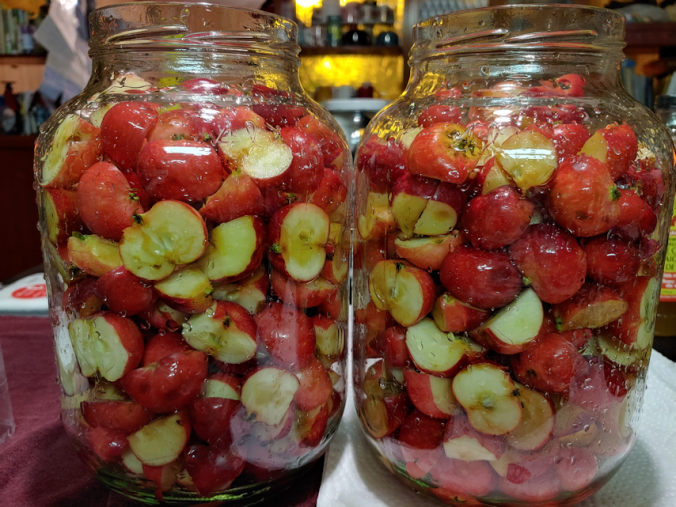
Since I was doing a lot more crab apples this year, I put the cut pieces into water with a bit of lemon juice as I worked. Last time, for the amount of apples I can, there was no need for anything to keep them from browning until I was done. I cut them all into halves or quarters, depending on the size of the apple – or used what was left after cutting off any nasty bits! As expected, there were some losses, but not all that much. In fact, I could have done with fewer apples for the jars!
The recipe said to fill the jar 3/4s full, and I ended up with almost full jars! Even after shaking down, they were still full to the shoulder.
The recipe called for 2 Tbsp of sugar for a 1 quart jar, so for these, I used 8 Tbsp of sugar per jar. The recipe calls for filtered water. Last year, I happened to have some water bottles I could use, instead of our very hard, iron rich, well water. We currently buy refills of water for drinking that is first filtered, then treated with UV light and reverse osmosis. That is what I used to dissolve the sugar in, first.
The next change from last year was the use of a “starter.”
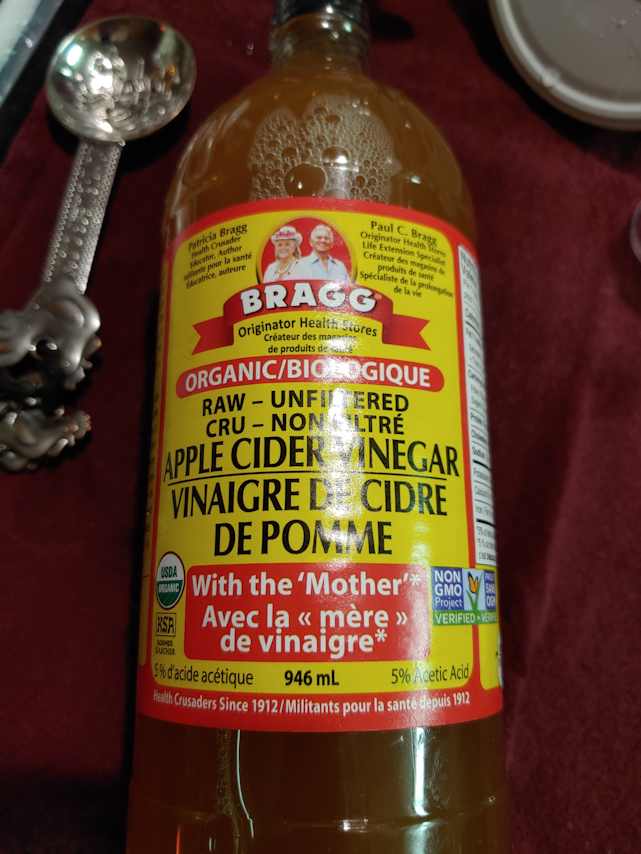
I’ll admit that when I normally buy apple cider vinegar, I buy whatever is cheapest. It gets used as an ingredient in cooking, so I don’t feel the need to anything fancy or expensive. When making the cider vinegar last year, it relied on the water, sugar, apples and whatever natural bacteria in the air “contaminated” it. Since I plan to use an airlock this year, and everything has been well sanitized, it’s not going to get that exposure. So I picked up a bottle of Bragg raw, organic, unpasteurized ACV, with the “mother”, to use as a starter and introduce the little critters needed for fermentation.
In doing my research, I found one person who used this same brand as a starter in his own ACV. He was using a large crock and just sloshed a bunch in, with no measuring, so I was left with no real idea of how much to use. I decided that 2 Tbsp per gallon out be enough. To make sure I got some of the “mother” that had settled on the bottom, I gently turned the bottle back and forth and upside down a few times first.
Once the starter was added, I filled the jars the rest of the way, with about an inch of headspace, with the filtered water.
When doing this last year, I didn’t have any fermentation weights and made do with some small jars. I still don’t have fermentation weights, but with the nice, wide openings in these jars, I had something else I could use.
When I was a kid helping my mother with canning, snap lids wasn’t a thing, yet. She used either wax or glass lids with rubber rings to seal. In cleaning up the basements and the old kitchen, I’ve been finding lots of these glass lids. I cleaned and sanitized a couple of them, and they look like they’re just the right size to keep the apple pieces submerged! :-)
Now comes the experimental part.
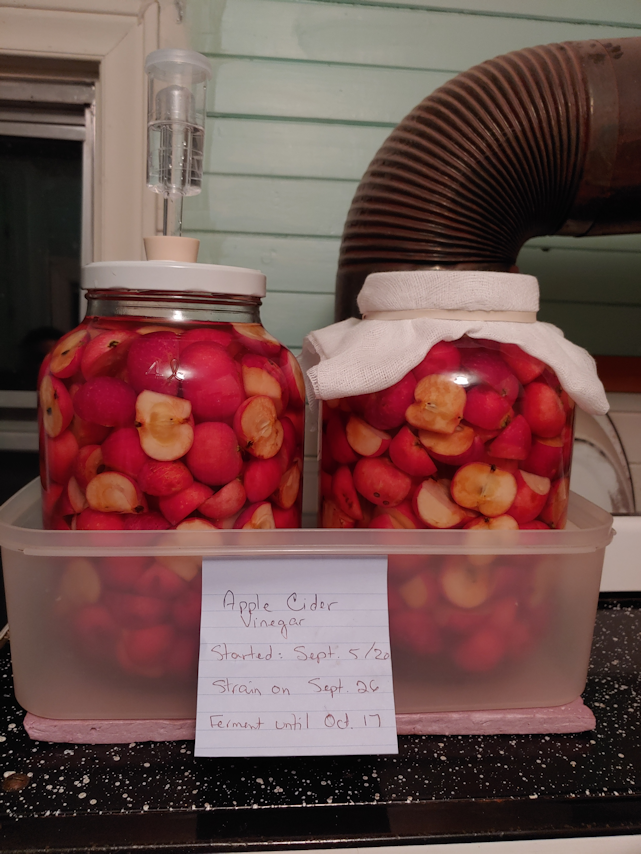
The two jars were made in exactly the same way. One of them now has the airlock cap, while the other is covered with layers of cheesecloth, held in place with an elastic band. They are not sitting on top of the warming shelf of the old wood cookstove in the old kitchen. I placed a small piece of foam insulation down, first. The old kitchen stays quite cool throughout the summer, and is even cooler now, so the metal would be quite cold. During fermentation, there will be bubbling and foaming, and a possibility that the liquid might reach the cheesecloth, or even overflow, so they are in the plastic container to protect the top of the stove from any drips.
Now, it sits for three weeks. During this time, we’ll be checking them daily. I look forward to seeing what differences there might be, between the two methods, as well as comparing to how it turned out last year.
Hopefully, no fruit flies will be attracted to the one with the cheesecloth! We have a fruit fly problem in the kitchen right now, but so far, they haven’t been found in the old kitchen.
I still have about 7 or 8 gallons of apples left, even after my mother took some home. Tomorrow, I plan to juice them and start making some hard crab apple cider! The traditional way to do it is to use a press to smush the whole apples, then leave the juice to ferment on its own. We don’t have a press, but we do have a juicer, so I’ll be using that, plus some of the yeast we picked up to use for mead making. We have four 1 gallon jugs, plus a half gallon jug, to use for fermentation, so there’s plenty to be able to do both. :-)
This should be fun!! :-)
The Re-Farmer
Update: Sept 7, 2020 – I goofed! But you won’t spot my mistake here. Visit this follow up post to see what I did wrong, and how I fixed it.
Today was the day we were planning on having an outdoor family gathering to celebrate 3 birthdays and an anniversary. I’d been keeping a close eye on the weather radar, and aside from one bit of rain that sidled past us early in the day, it looked like the main system was going to miss most of the province completely. An Alberta Clipper was making its way across the prairies, and we were getting all sorts of warnings for thunderstorms, frost, rain, and even possible snow. None of that was going to reach us, though.
The only thing for us to watch out for was the wind.
In the morning, things were looking well enough that I started putting the walls on my daughter’s market tent that we had set up near the fire pit, over the picnic table. It was windy enough that we thought the fire might be an issue, but the tent seemed fine.
I had ordered Chinese food, which my brother picked up on his way over. It was around the time we were expecting him to arrive that we decided to start the fire. We wanted to get some good coals built up in case anyone wanted to roast some wienies later, plus the wind made it a bit on the cool side, and a fire would help keep us warm.
I must say, it was a bit surreal to be at the fire pit and have a car suddenly pull up to us! :-D I rather like having a yard big enough that not only could my brother drive right up to the fire pit, but when he moved his car later, he had room to turn around.
It was at about that time that the gusts started picking up.
Hard.
At that point, my brother started trying to tie the corners of the tent to nearby trees.
Then one side collapsed completely.
The tent has sides that close up like an accordion. That means there are a couple of hubs, with 4 pieces of metal affixed to them, on each side. One of those hubs gave out.
No, not the plastic piece in the middle. All 4 aluminum supports it held, snapped.
Once we realized there was no way it was going back up, it took 4 of us to take the sides off, shorten the legs and fold the tent into itself – with a picnic table in the way – while increasing gusts of winds tried to tear everything out of our hands.
And my daughters had just got the fire going, too! That promptly turned into a mini fire tornado. So that got put out right away.
Then we went to plan…
C.
Plan B was to use the sun room and old kitchen, but we figured my mom would rather be at the dining table. Once we got all the supplies in (the only thing we hadn’t taken out yet was the food!), we opened up the table to fit everyone and started setting up there.
My sister arrived with my mother just in time for that!
As for the family gathering itself, it was … good, but very draining! My mother was in fine form, which we do expect, but my goodness, it just sucks the energy out from everyone. Once she was sitting at the table, and we were all doing various things to set up food and drink, she kept making demands and asking where this, that or the other thing was, and if she couldn’t see someone (never mind that her back was to the kitchen, which meant if she couldn’t see us, it was because we were there and busy), she kept asking where that person was, because only that person could do whatever it was she wanted. Including people who were already doing the things she wanted them to do!
Still, we did eventually get it all settled. Though we got a “dinner for 6” and there was 7 of us, there was more than enough for everyone – plus my brother got a bit extra, just in case, my sister brought some tomatoes, cucumbers and onions from her garden and made a salad, plus we’d made a fruit salad. My mother had brought a sausage, because she was afraid there wouldn’t be enough to eat. She also brought her own box of tissues; apparently, she thought we wouldn’t have any. My sister told me she once brought soap when visiting her place. Just ordinary hand soap. Because she didn’t think my sister would have soap?? Anyhow. We had so much food, we forgot about the sausage (which she insisted we keep), and settled in for coffee and tea. After getting her tea, my mother started asking for something to go with it. I’d already asked her if she wanted milk or sugar, and she’d said no. So what was she looking for?
Something to eat, with the tea. Like crackers or cookies or something. !!!
So I broke out the cake I’d picked up. I figured we would take some time to digest first, since we were all so full, but nope! My mother had to have something with her tea! :-D
It wasn’t until they were getting ready to leave that my mother remembered she’d brought a bottle of wine. My brother and sister, who were both going to drive soon, couldn’t have any. She started saying that “just a little” was okay, and when everyone politely declined, she suggested my husband have some (he’d already had to move away from the table, due to pain, but was still nearby). At that point, we were all, NO! He *can’t* have alcohol, because of the medications he’s on. Just a little will be okay? No. None. No alcohol for him. Since she was the only one who would be drinking any, she decided it wasn’t worth cracking open the bottle and took it home. :-D
Overall, it was a pretty good visit. There was only one incident where my mother lost it and started shouting (over the ceiling fan, of all things), but we were able to calm her down. She had some confusion when my brother said he would like to drive her home, and she couldn’t seem to understand that, as far as driving goes, it made no difference if he or my sister drove her. They both had to go through her town, first. As he took her stuff to his vehicle (she took some of the crab apples we picked. :-) ), I followed out and discovered some branches had come down in the yard. My mother followed and asked for my dad’s walker, so my brother was kind enough to pick up the biggest one while I got the walker for her. The winds were still really high, and small branches were falling everywhere. As I came back from the sun room with the walker, I found my mother had taken the broom we keep by the main entry, and was sweeping the concrete in front of the door. She’d already made numerous passive aggressive digs at me for things like not clearing the table fast enough for her, or whatever other perceived failure in my housekeeping she found (like not dusting the ceiling fan before they arrived), but to start sweeping the front, in the middle of a wind storm, while branches were still falling down… that was a bit much, even for her!
Then she decided she wanted to walk around the yard and look at my garden – specifically, the area where the old wood pile used to be, that I now have beets, carrots and parsley growing. She’d missed that area, the last time she was here. When she saw the parsley, she asked for some to take home, which I was happy to do. We have much more than we need. :-) She tried walking around more of the yard, but with the winds, she turned around rather quickly!
There was only one last confused round of shouting as everyone was getting ready to leave. It turned out my mother had cards for all of us, but none of us knew this, so when my sister started to leave while my mother was in the bathroom (going through the cupboards and drawers, with the water running to try and hide the noises), she almost started panicking! But it all got done, and they were all able to head out at the same time. After locking the gate, I picked up a few more larger branches that had come down. This evening, I’m going to have to be more thorough in doing my rounds, to see what else has come down.
I’ve said it before, and I’ll say it again. I am SO glad we got those trees cut away from the roof and the power lines!
Ah, as much as the winds have been an issue for us, at least we didn’t lose power. I just got off the phone with my brother, and the power there had been off for about 3 hours. Thankfully, he has an inverter and can hook his truck up to provide power to the house. The power came on while we were talking on the phone, so that’s a relief for them. They’re quite a bit further south than we are, so they tend to get the weather systems that miss us entirely!
Meanwhile, I’ve had some kitten therapy to recharge, and had better go do my rounds while it’s still light out!
Last night, I finally had a chance to clean up and move out the temporary fire pit I’d set up to burn things that wouldn’t fit in the burn barrel.
It was too dark for photos at the time, so I went back this morning.
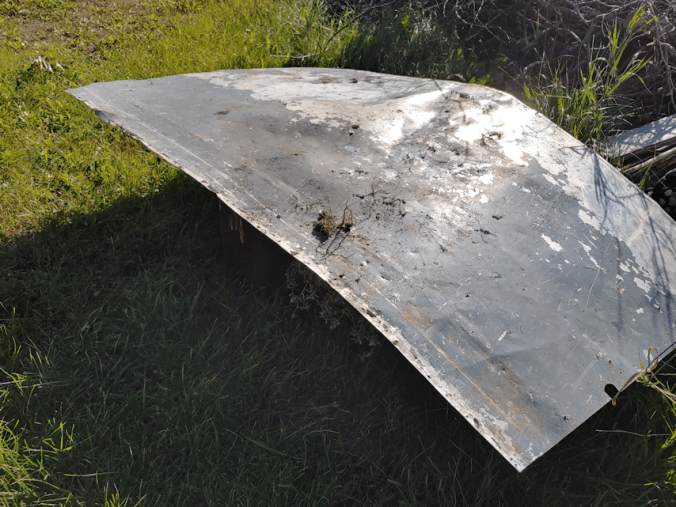
This is where it had been sitting, and you can really see how the heat affected the ground, through the metal sheet it was on.
I’ve set it aside near the burn barrel for now. It worked out so well, I want to have it handy for future use.
That weed that managed to grow through a hole in the metal sheet was certainly tenacious!
I had originally intended to dump the ashes behind the old outhouse. That is where we’ve started to dump things that are compostable, but not appropriate to use in the garden later. Then I remembered something.
Not far from the burn barrel, there were two tractors. My dad had given one of them to my nephew. He and my brother, amazingly enough, got it running and were able to move it, though my nephew had to come back another time with a buddy to help him get it home. The tractor had been sitting there so long, its wheels had sunk into the ground, leaving behind holes. They had filled the holes with scrap wood and rocks that they found around the area, but it wasn’t quite enough. While we don’t usually go into this overgrown area, it was still a safety hazard. Especially when the renter’s cows got through the fence. Human or cow, it would be easy to break a leg in them.
I could use the ashes to fill the holes the rest of the way!
So I did.
Here, you can see 3 of the tire holes. The fourth is hidden by the little maples. The holes from the back tires each needed a full wheelbarrow of ashes to fill. A third wheelbarrow was enough to fill the smaller holes from the front wheels. That was even with the pieces of wood and rocks filling them! After those three loads, the fire pit was empty enough that, with maybe another shovelful or two scraped up, I could remove the ring and use the sheet of metal to pick up and pour the remains into the wheelbarrow. That last little bit went onto the larger holes.
So I was able to accomplish two things at once; remove the temporary firepit, and fill in some holes!
As for the little maples growing where the tractor was, I am debating if I want to let them grow, or if I should take them out. In time, we plan to fill in and level out this area, and maybe put in some polytunnels, raised beds, etc. This would be years in the future, and I don’t even know if we’d go into this space. If we leave them, and then find we want to build around there, they would be much harder to get rid of than now.
I still need to cut away the trees growing through the remaining tractor. I can decide then.
Last year, we made apple cider vinegar using the bright red apples from just one tree. The result was a delicious, delicately pink cider vinegar, and we were looking forward to making it again.
There was just one problem.
The instructions we followed said to put the jar in a dark place, so we tucked it into a cupboard. Unfortunately, it attracted fruit flies. The jar was covered with a coffee filter and they couldn’t get in but, as it fermented, some had bubbled up enough to dampen the paper. Which meant any time we opened the cupboard, we’d find a cloud of fruit flies inside!
Not good.
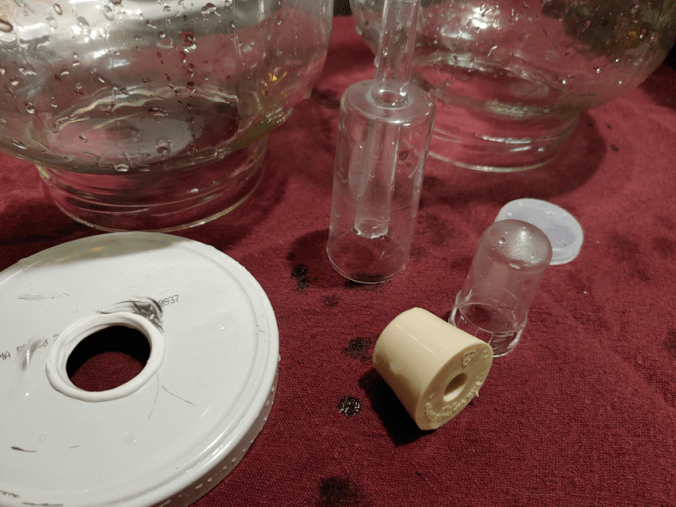
Since then, we’ve bought the things necessary to make mead. This includes smaller bungs to fit airlocks into gallon jars. We will be using some to make hard apple cider out of our crab apple juice, later. With airlocks being so cheap, I’ve picked up extra, so we could have all our gallon jugs, plus the 5 gallon carboy, all going at once, and still have extras.
This year, I will be taking advantage of our mead making supplies.
Since making the ACV requires using apple pieces, I need to use a wide mouth jar. I also want to make more than last year, so I wanted to use something bigger than a quart jar.
Every now and then, we picked up the big gallon jars of pickles at Costco, and I’ve been keeping the jars. That’s what I’ll be using to make the vinegar this year.
The question then becomes, how do I use an airlock on one of these?
Now, if I had some silicon grommets (which I learned the name of only yesterday), I could drill an appropriately sized hold in a cap, pop on a grommet, and insert an airlock.
I don’t have those. I do have extra bungs, though.
I don’t have anything I can use to simply drill a hole that big into a cap, though, so I had to do it the use-watcha-got way.
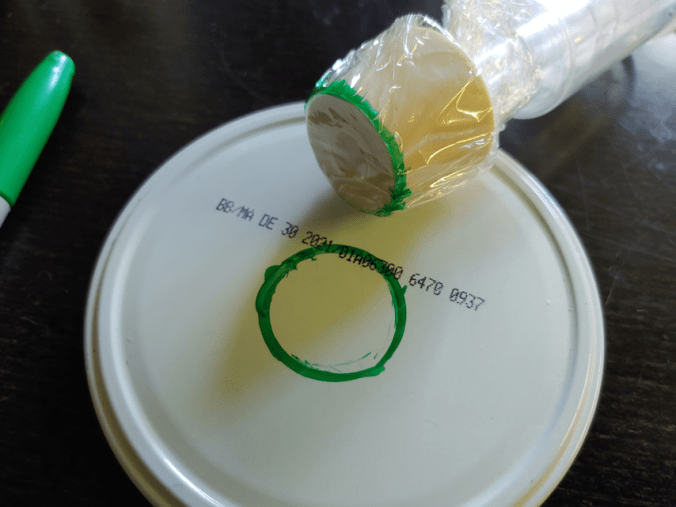
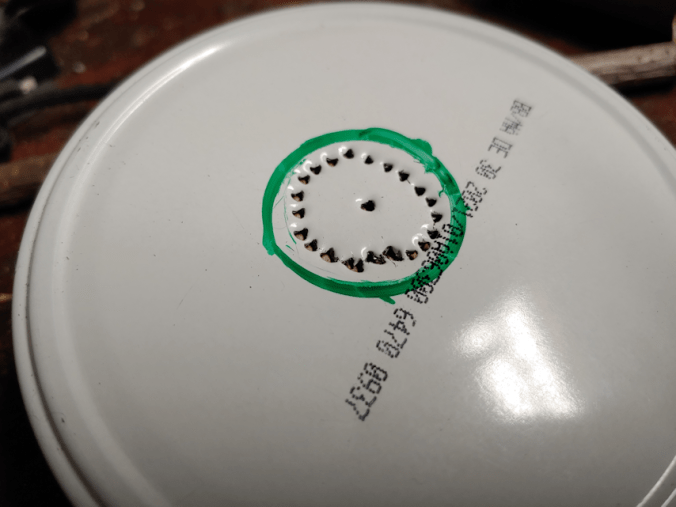
The first thing to do was mark the size of hole I needed. After protecting the bung with plastic wrap, I traced around it with permanent marker. As the bung is tapered, the actual size of the hole needs to be slightly larger than the inside of the circle.
With a scrap of wood underneath, I punched a series of holes well within the marked circle, then used pliers to break off the middle.
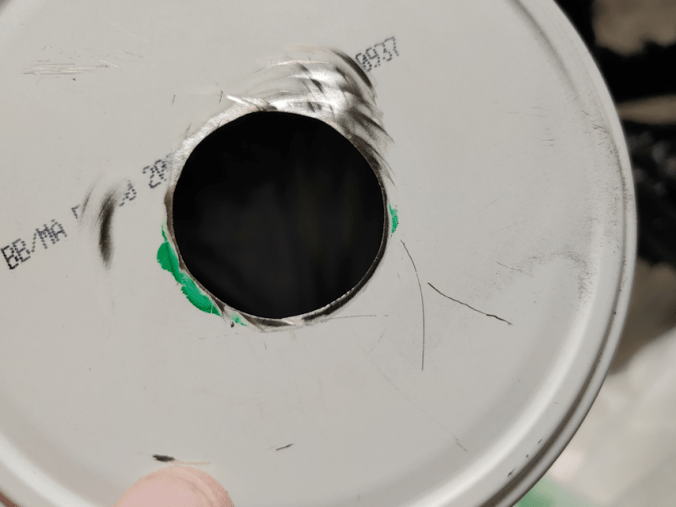
Working directly over a garbage bag, I used a series of metal files to grind away at the opening to smooth it out, then make it larger.
Once I’d reached the inside of the marked circle, I switched to the Dremel to grind and smooth the metal.
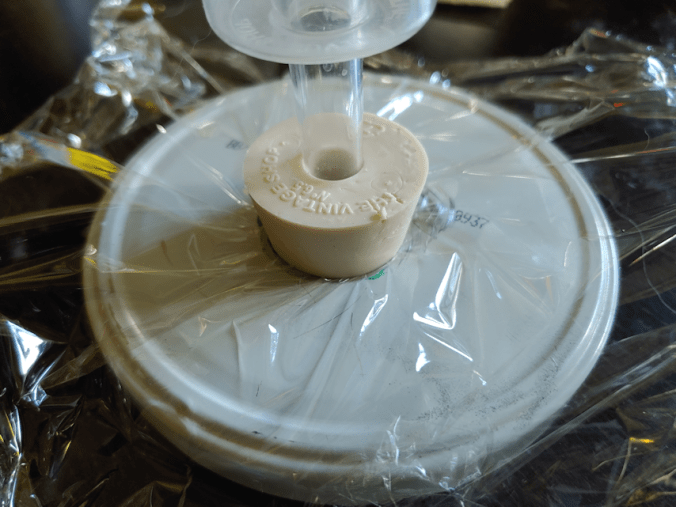
Then it was time to test the size of the opening. A perfect fit!
We’re not done yet!
Though the metal was ground smooth, it still is sharp enough to potentially damage the bung, if I were to push it in tight enough to great a proper seal.
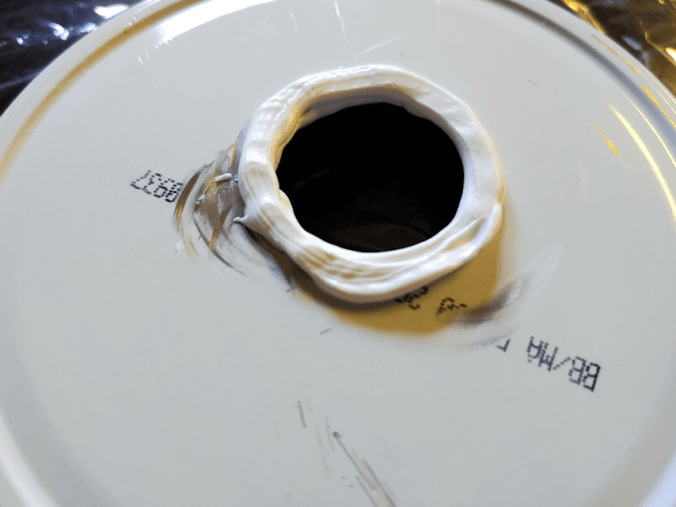
Silicon sealant to the rescue!
I used the same stuff we got to fill screw holes when our satellite dishes got moved, then again, for a final seal in the cracks on the rain barrel we set up by the garden. It’s a multipurpose, indoor/outdoor product that is coming in very handy.
The tube it comes in is also very easy to control, even for a job as small as this. After giving the cap a very through cleaning, I lay a bead down on both sides of the cap, right on the edge of the hole, so that top and bottom would touch and completely cover the metal edge. Basically, I imitated a silicon grommet. This should both protect the bung, and ensure an air-tight seal is created.
Now it just needs time to cure before I can test it again with the bung.
Since we have so many apples, I might make two; one with the airlock, and one without, to see which works better. I’ve also picked up some fancy-schmancy ACV “with mother” to use as a starter (last time, we just used water and sugar). Using just a coffee filter, it relies on exposure to the air to get the bacteria needed for fermentation. So it’s touch and go, whether you get a good bacteria or not. With an airlock, it won’t get that exposure, so using a vinegar with the mother in it will ensure the right kind of bacteria is already in there.
There are areas around the house that we do and do not allow the cats. For example, they are not allowed on the kitchen counter the sink it in, nor where counters were food is prepared, but there is one small counter by the window they are allowed on, so they can sit and look out the window.
The dining table is another place the are not allowed.
Unfortunately, it’s hard to enforce this when we’re asleep.
This is what I found this morning.
The bowl of carrots and potatoes were scrubbed last night, to be cooked today. The cucamelons are kept out for snacking.
It turns out the cats like to drag off the carrots.
Shortly after I took this photo, I spotted Saffron running by behind me.
Then she dropped a pilfered cucamelon she had been carrying, and started batting it around.
Looking at the weather forecasts, it’s looking more and more like our planned outdoor gathering with family to celebrate multiple birthdays and anniversaries is going to be an indoor celebration!
So today, I focused on tidying up the Old Kitchen a bit more, so my mother, at least, can sit in it comfortably. Between the Old Kitchen and the sun room, we should be able to fit all of us, if a bit tightly. Of course, if my mother is up to doing the stairs between the old and new parts of the house, we can always move to the dining room.
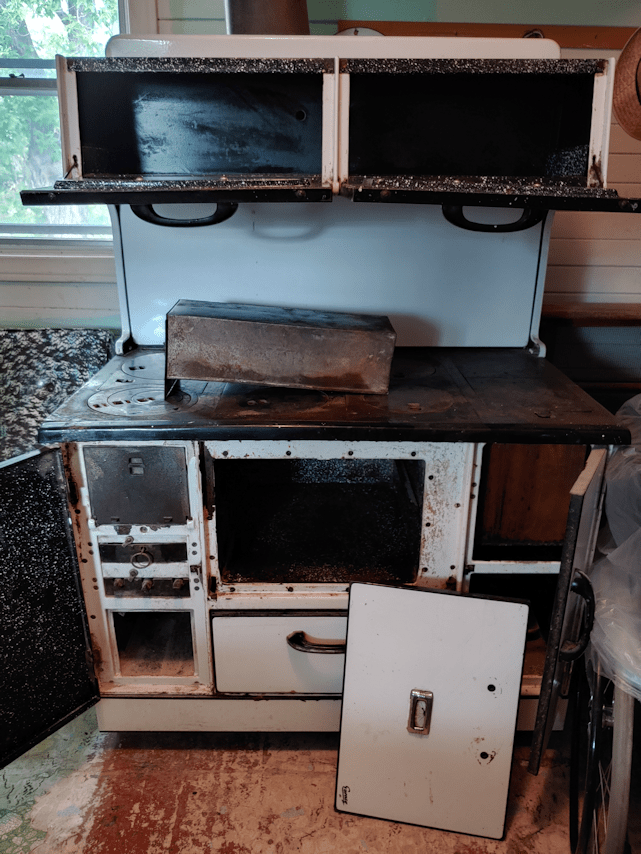
While wiping things down, I started doing a more thorough cleaning of the old wood burning cookstove. It’ll probably just have a tablecloth thrown over it and be used to hold the food, but I wanted to get some more progress in cleaning it out. Including several decades old ashes in the fire box!
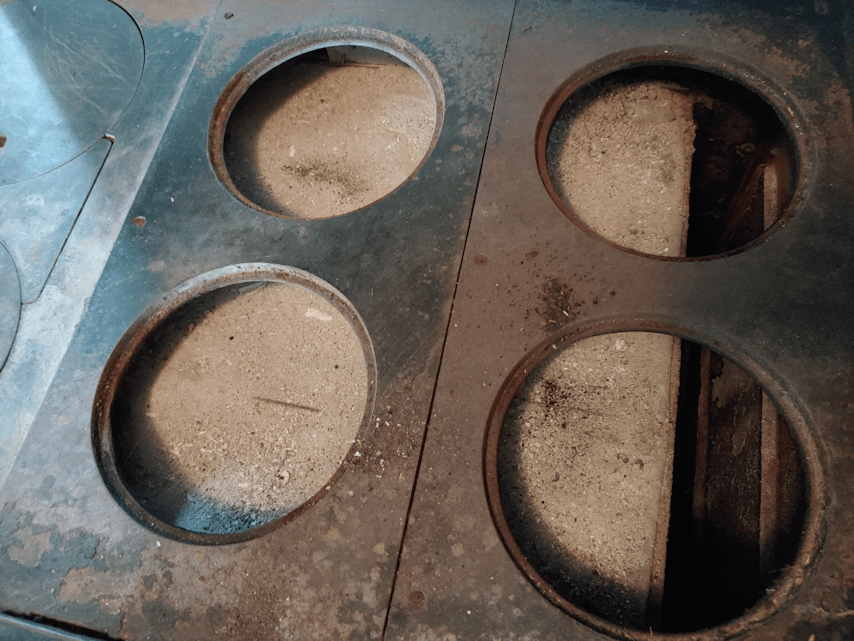
Here is how it looked after I removed the top pieces, and brushed the ashes through.
I should be able to remove the metal plates at each end, which would allow me to remove the grate at the bottom, but I couldn’t see how to do that. For now, I just tried to sweep away as much as I could.
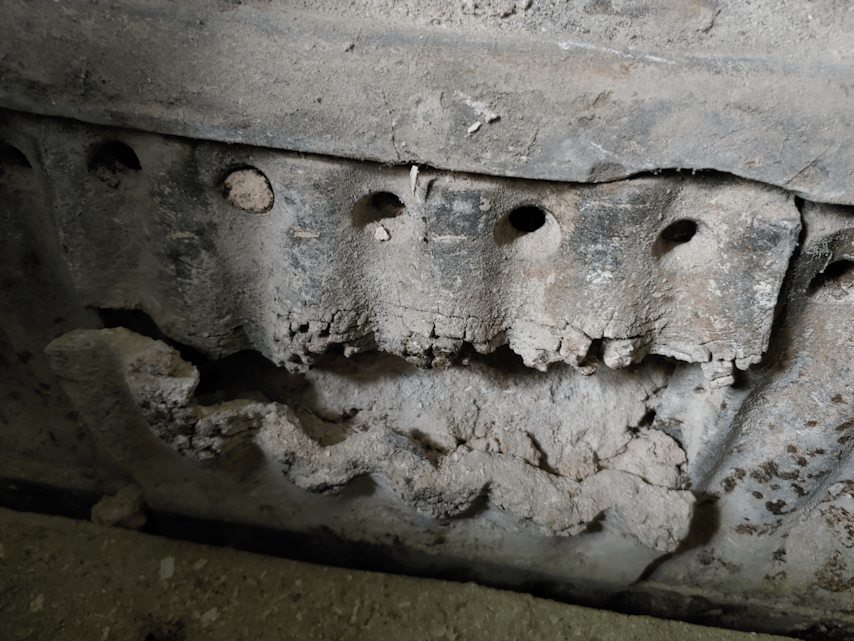
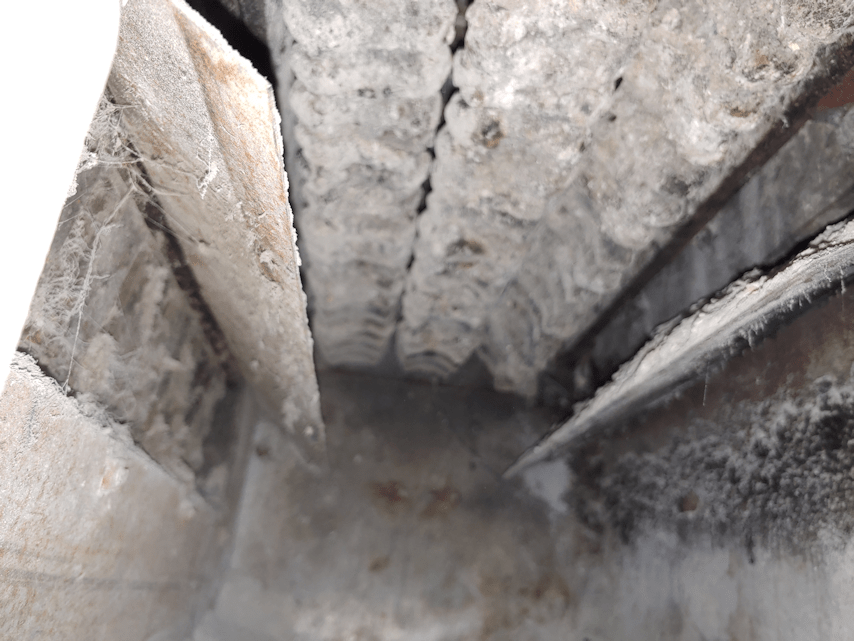
Doing so revealed something strange about the inside wall.
The middle plate looks absolutely destroyed!
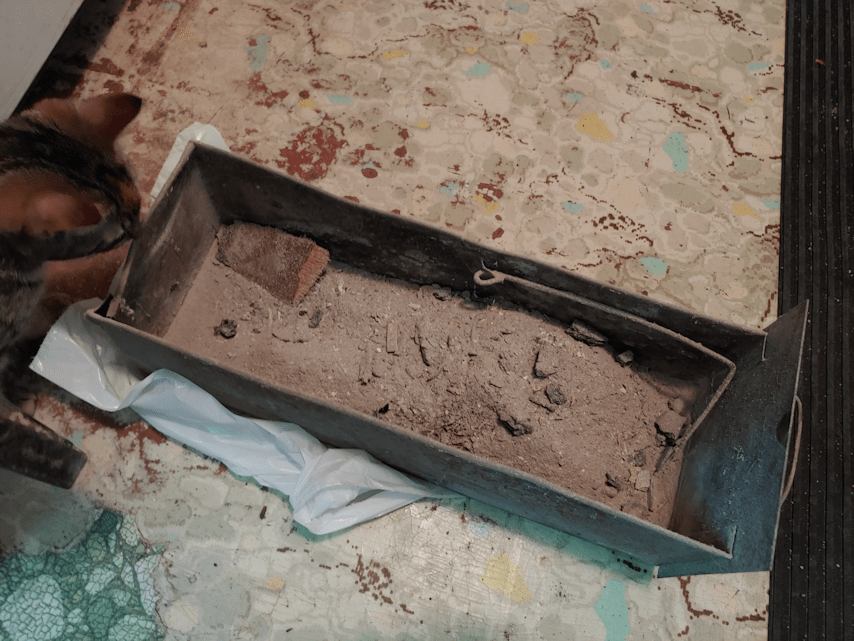
I left that for later. First, I wanted to get rid of the ashes. Under the grate are three rollers that can be turned from the outside; a crank handle to do that seems to be missing, but I was able to turn them with my fingers. This allows the ashes to fall into the box below.
I had mostly emptied this box before, so this is all ashes from the fire box.
I’m not sure where that unburned piece of… paneling? … came from. I might have simply missed it, before.
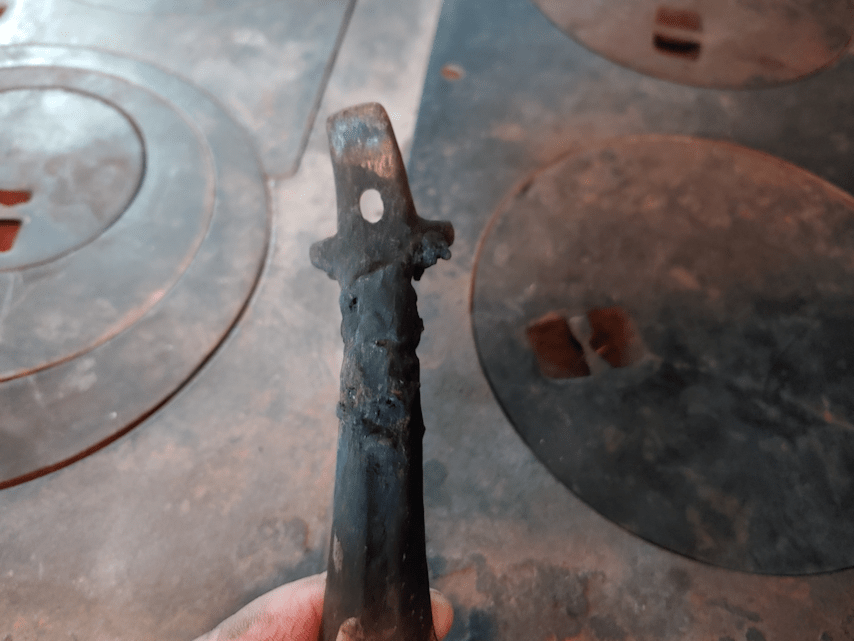
The piece to hold one end of the handle is broken.
After taking the ashes out to the compost, I hosed it down. Then used a chisel to scrape off things stuck to the sides and bottom that were definitely not wood ashes. :-( After hosing it down again, I set it aside to dry, then went back to working on the fire box.
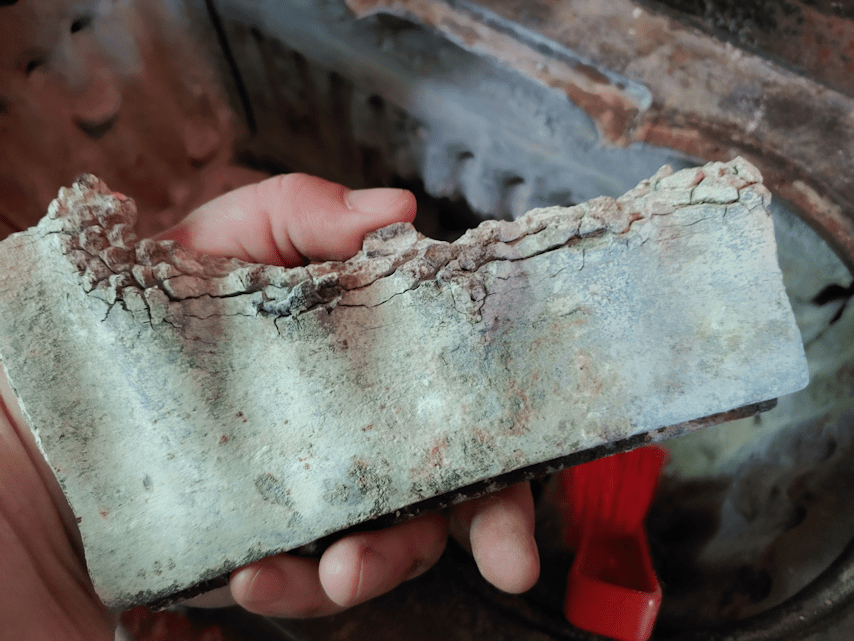
I ended up taking out the bottom of that destroyed panel completely.
This is thick, cast iron. Just how hot did things get, for this top happen?
Once it was out, I tried to sweep away more ashes.
I ended up knocking out chunks of packed ashes, like this one. More was jammed behind the top piece of the metal panel, and I took that out to get at the rest.
Ashes are not supposed to be able to get in there!
I then started sweeping out the space the ash box fits into. In the ashes I swept out, I found some odd things, like old nails and…
What is this???
That, my friends, is the screw end of a light bulb.
Later, I found the filament in the ashes, too. No glass, thank God!
Why on earth would someone toss a light bulb into the fire? The nails, at least, I can see happening. Scrap wood would have been burned, and if they had nails in them, no one would have taken the time to pull them out, first.
But a light bulb???
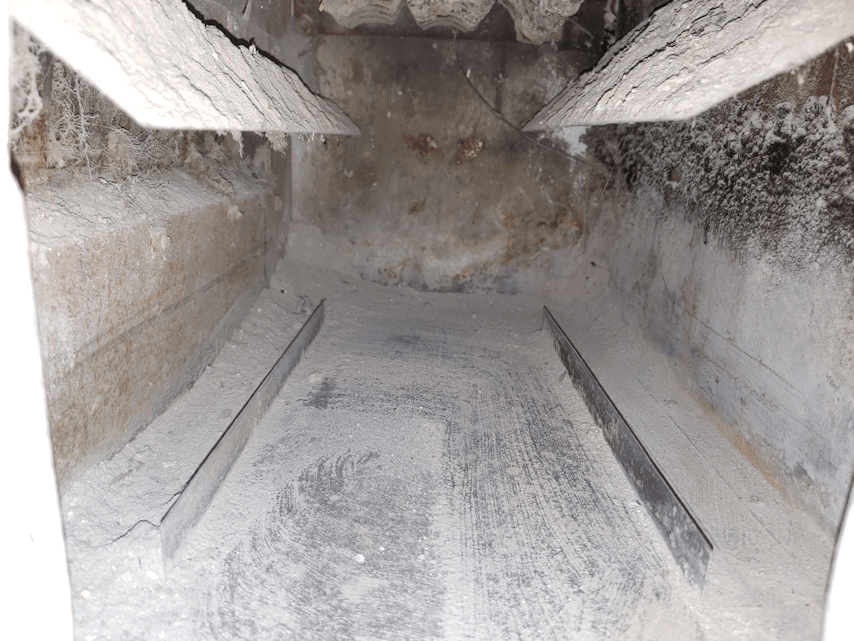
Then I used the miracle of technology that is my phone camera, to see what I couldn’t see otherwise!
This is where the as box slides in. The flaps above divert the falling ashes towards the box.
The camera focused on the flaps, but you can see the rollers above, that keep the hot coals from falling into the ash box.
I did as much as I could for now on the fire box side. Next was the cook top above the oven.
As you can see, the oven box is covered with ashes. Now that I’ve seen the broken panel piece in the fire box, I know why.
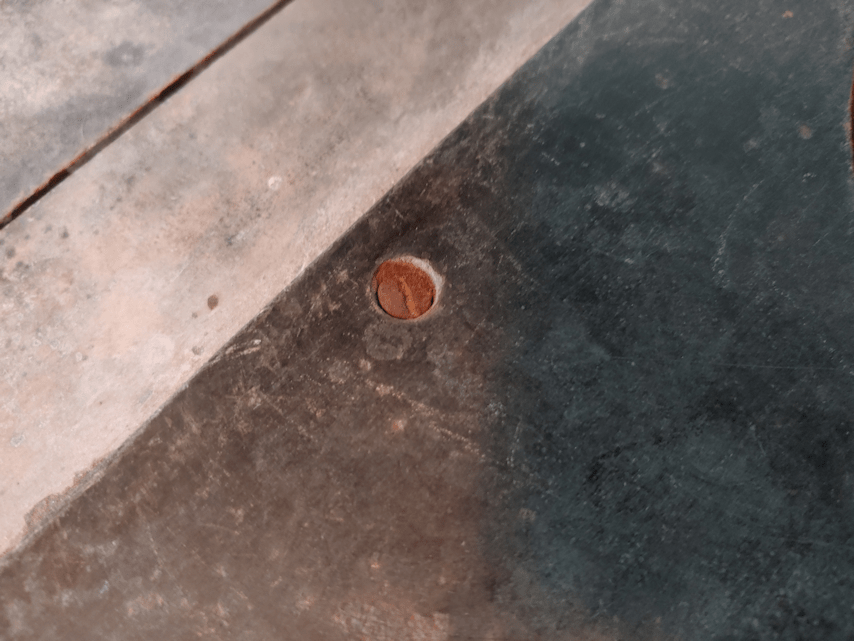
I didn’t even try to get those out. The metal pieces can be removed for easier access, but…
… they are held in place by screws, and there is no way I’m going to try and take those screws out now!
Though I’ve taken the ring plates out before, somehow I never looked at the bottoms of them.
!!!
It seems the fire was allowed to be built up too big and too hot to cause all that damage in the fire box, which then lead to ashes and sooty smoke getting into the space around the oven box. I was quite young when this was still being used, and don’t remember much about it, but I may well have been among those causing the damage. :-/
I really wonder, at times, how we didn’t burn the house down back then!!
I just brushed off as much as I could from the underside of the ring plates. The panels over the water reservoir didn’t need as much.
I didn’t even try to clean the inside of the water reservoir this time.
I did go into the drawer under the oven. The handle and a piece of hinge from the broken oven door is in there, along with …
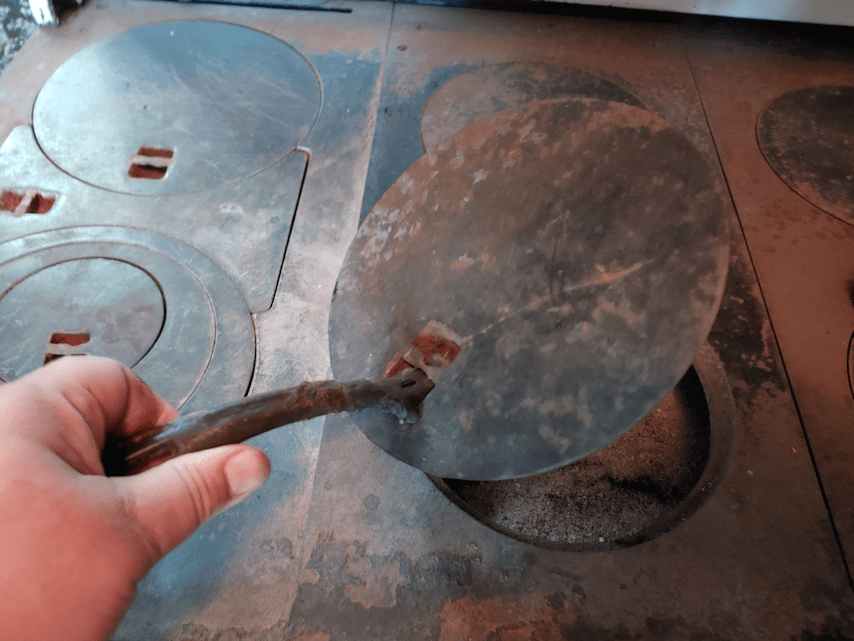
… the lifter for the ring plates.
I just used my hands to lift them, but when the stove is in use, this tool is vital.
I… can’t imagine what was done to it to cause this damage. !!!
The final thing to do was give it all a wipe down, then leaving it to dry completely before closing it up and putting everything together again. The cook surface and parts like the front of the fire box, and the panels below it, are the only things that are not enameled. Eventually, I want to use stove blacking on those parts. The rest still needs a very thorough scrubbing and rust removal, but I really don’t know far I’ll bother to go with that. We can’t use it – partly because of the damage, partly because we’d lose our insurance if we did – so mostly, I just want to keep it from degrading further. It would be great if we could get it all fixed up but… I’m not sure that it’s worth it. Especially since, there is another one in the storage shed that I know my late brother used, back when that building was his workshop. As far as I know, it’s in good shape. It’s not as old as this one, but is almost exactly the same design.
Who knows. When we finally build our outdoor cooking area, maybe we can include the wood cookstove as part of it. I think I’d really like that.
Today turned out to be actually chilly, for a change. Also, a bit on the damp side, with the odd bit of rain here and there.
Which made it the perfect day to FINALLY get a burn done.
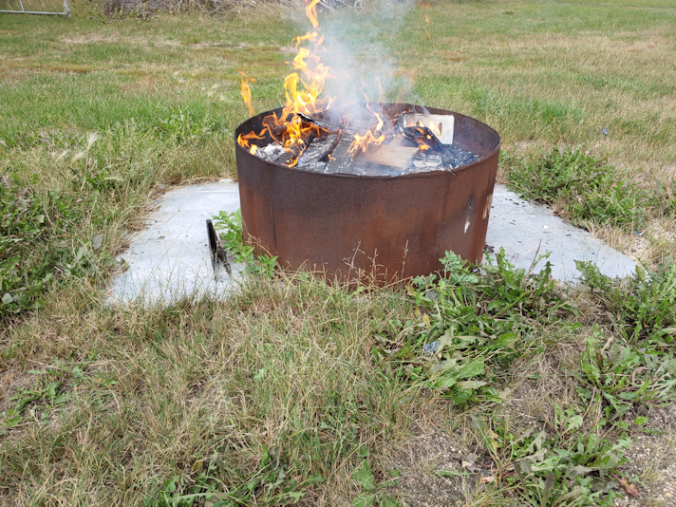
I set this ring up last year, so we could burn away the scrap and rotted wood and other garbage that was too big or oddly shaped for the burn barrel.
With weather conditions, neither have been used much at all, lately! There was stuff in here, waiting to be burned, for months. This thing was supposed to be a short term set up that was meant to be cleaned up by fall of last year!
It is about 2/3rds full of ashes now, so this will be the last burn in it.
I was originally thinking that the ashes would be emptied into garbage bags, then taken to the dump, but I’ve decided against that. It will be added to the material we’ve been putting behind the outhouse. At some point, we’ll be ready to get rid of it and fill in the pit, and we should be able to just shovel this stuff in.
While tending the fire, I had some loving company!
He was not only determined to get hugs and cuddles, but also to lick my nose. If he couldn’t get at my nose, he would go for my neck, chin, ears, hair… but apparently, my nose tasted best of all! LOL Which wouldn’t have been too bad, except he kept trying to lick the inside of my nose, too.
Which actually hurts. That tongue is sharp!
When I had get up to tend the fire…
… he took my butt spot! :-D
After everything was burned out, I found some pieces of metal that I fished out. Nails and old wire are one thing; they’ll be left in there. These pieces, however, were a bit too big!
The metal plate could have been on pretty much anything that was in there, and I half remember the parts and pieces of an old drawer going in, which would explain the handle, but I cannot, for the life of me, think of what went into the pile that had such a huge hinge on it!
The next step will be to shovel out the ashes until I can move the ring. The metal sheet underneath will make it easier to clean up whatever is left. Then the whole thing will be moved away. I had deliberately placed it, not only far away from anything that could catch fire, while still being close enough to reach with a hose, but also in the way of using this part of the driveway. The inconvenience of it would be incentive to get it done! :-D
Well, it worked. It was definitely inconvenient where it was. LOL It’ll be good to finally have it cleared away!
Today I found myself heading into town for a trip that included a stop at the hardware store. I took advantage of being there to look for some Dremel tips.
The didn’t have the individual tip I was looking for.
I ended up getting this, instead.
I think I’ve got enough tips for quite a few projects, now! :-)
So, of course, I had to find a reason to use it. :-)
A while back, I posted about making a maple spoon.
You see that chunk of wood beside it?
That’s what I worked with, today.
This is that same piece of wood, roughed out.
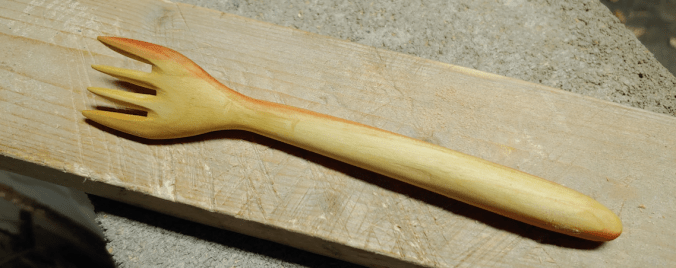
Not for a spoon, though. Today, I was determined to make a fork!
For this project, I used everything I had around to remove the excess wood. The 4 way rasp got a lot of use, but I also used several of my new Dremel tips, the big K-bar knife, and a couple of my fine saws.
Basically, I see no point in dulling the blades on my carving knives any more than I have to! :-D
I saved cutting the tines for when I was ready to start using sandpaper on the rest of it.
I used a carving knife, as well as a fine tip on the Dremel to shape the tines.
Unfortunately, while sanding them, the wood broke off the tip of one of the inside tines.
Which meant I had to shorten all the others to match.
Here it is, after sanding.
Front
Back
The end result is the wonkiest of forks!
But it’s still a fork. :-D
Here is it, after oiling.
Front
Back
Oh, gosh, it’s the funniest looking fork, ever! :-D
Here it is, next to the spoon made with the same wood.
The spoon could use another coat of oil!
Well, I at least accomplished what I set out to do. Even if it does look totally wonky!! :-D
I still have wood left from the piece I used for these. I suppose my next project should be a knife. :-)
It was a little bit cooler today, so I decided to do a bit of clean up around the spruce grove perimeter. Eventually, we want to clean out the junk pile, but it’s got kittens in it, so I am just working my way towards it.
Here is where I started working.
All those thistles and crab grass are growing out of a pile of … dirt? I’d already cleared a path to the chokecherry tree behind it, and now I wanted to clear the pile itself.
Which meant pulling the thistles and crab grass up by hand.
Yes, the row marker I used in the spring was still there!
It is now leaning against the garage, where there is at least a bit of shelter from the elements.
As for the pile itself, I’m not sure what it is. Stuff was pulling out of it easily, so I thought it might be an ash pile from cleaning out the old wood furnace over the years?
It’s really quite sandy in texture, though.
I’m sure this pile was made for a purpose, but if it’s not an ash pile, I just can’t figure out what that might have been!
After clearing most of the pile from both sides, I continued working my way towards the junk pile. I had seen branches piled there early on, and had added a few myself whenever I needed to clear something but didn’t have a chance to take the wood to one of the piles outside the yard at the time. Like part of the cherry tree by the house that broke off when I tried to move it around the post with an old bird house on it. In the above photo, I’d already cleared that out – and dragged out a length of those tiny decorative wire fences for around flower beds, in the process. It was pretty bent up, so that ended up on the junk pile that will eventually be hauled away.
My first load of very old branches that I dragged out after pulling away more thistles and years of crab grass.
I never did get another full load…
The closer I got to the junk pile, the more old branches I uncovered – as well as something yellow. It looks like a large piece of very thick plastic… tarp?
It was at about this point that I got stung, and found a small, yellow and black wasp stuck in my shirt.
After brushing it away, I kept a close eye out while pulling out a few more branches.
Aaaaannnddd… yes. There were more wasps.
To the left of centre in the above photo is the remains of a log. The wasps seemed to be coming out from under it.
So I took a hose to it, then eventually used a long metal pipe we use for poking around when doing a burn, to lift it over.
Yup. It looked like the opening to a ground nest was right under it.
I hosed that for a while, too. I don’t know if it was enough to drown out the nest, but there were quite a few wasps flying around. They don’t show up in the photo, but they’re there!
At which point, I was done.
I have never seen so many wasp nests in my life, before this summer. They’re all over the place! There is the tree in front of the kitchen window, and one beside the beet and carrot beds, that are nests. Then there are 3 active paper nests in various places, plus the one above the garage door that I got rid of, and the one under the eaves of the house at the old kitchen that I got rid of. There appears to be a nest inside the branch pile near the garage, and now this ground nest by the junk pile.
And those are just the ones I know of.
There isn’t much we can do to stop them from building under the eaves, but this is just more reason to get rid of the junk piles, debris and branch piles!
And those Chinese elms.
Meanwhile…
This is the pile of thistles and quack grass, with a couple of spirea I pulled up near the end, that I cleared up and added to the new compost pile. With so many thistle seeds, I plan to give them a few days to dry, then burn them. That will help with breaking down the old tree stump in the middle, and making sure more saplings don’t start pushing their way through again.
So, I think this is going to be it for clean up in this area for a while. I’m not sure what to do about the wasps, other than hosing the area down repeatedly. With the kittens living in the junk pile, I don’t want to be using wasp poison.
I think it’s time to pick up another wasp trap. The one I got before is currently being used to catch fruit flies in the house, which suddenly became a problem.
Well, a bit of progress is better than no progress at all!