For the past while, whenever I’ve had the chance, I’ve been looking for what I might need to fix the front outside tap.
At first, it would spray water when we shut the water off, so we just left it on. It made it more convenient when using the hose, anyhow. Then, after the end of the hose broke off and I tried putting on another one, I found it had started spraying water all the time. So we’ve had to use the tap at the back of the house – and almost 300 ft of hose – leaving the front one shut off in the basement.
I figured I just needed to replace the O ring (or whatever this type of seal is properly called) inside the tap, but do you think I could find one? I was also looking for replacement taps, since I thought that might be easier (and I figured it was due to be replaced, anyhow), but I couldn’t find those, either. I wasn’t even sure what section of various stores to look in. The closest I could find to what we had were laundry taps, and any ring seals I saw were not for inside the tap itself, but for the couplings.
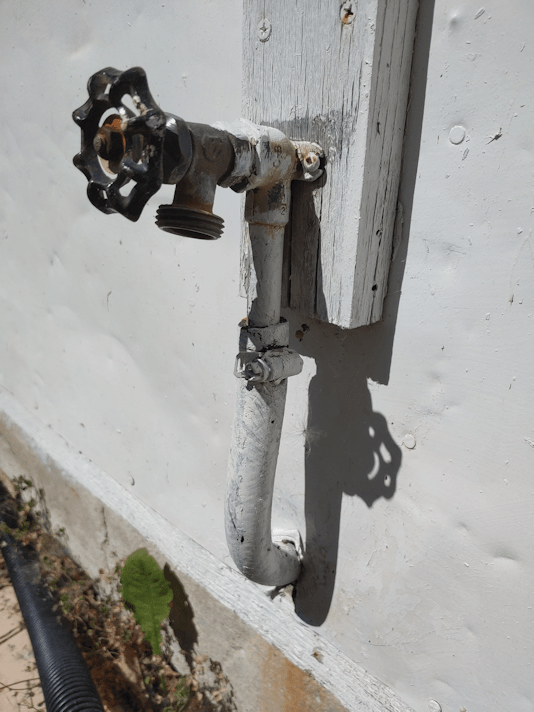
I needed to go to town today, so I remembered to take a photo of the tap before I left. Once at the hardware store, I just showed it to an employee, explained the problem, and asked him where I might find what I needed.
Of course, he needed to know where it was leaking from, which was right at where it turns on and off.
Well, it turns out there’s a reason I couldn’t find what I was looking for.
They don’t carry that type of seal.
In the end, it was easier to just replace it!
Also, the new taps were, indeed, in the plumbing section (not the gardening or laundry sections, where I had also looked), but not where I had been looking. According to the label, the tap is designed for boilers. :-D
Once back at home, I dug up some thread tape and headed out to replace the old tap. The old tap was painted over a bit, but nothing a wrench couldn’t get loose.
On screwing in the new tap, however, I found an unexpected problem.
This is the new tap, with the hose connector facing down. Notice how much of the threads are exposed? In the old tap, there was nothing like this!
It wasn’t actually screwed in tight in the above photo. I got a daughter to turn the water on in the basement to test it out, and I was happy to see it did not leak at all, but as I turned the tap on and off, the whole thing would turn and wiggle even looser.
For the tap to be on good and tight, we get this.
All it took was a quarter turn to tighten it, but it would go no further.
It’s a flexible hose coming through the wall, so we could move that board the tap is affixed to, if we wanted, and reposition it to the side. I don’t really want to put new holes in the wall, then have to seal the old holes, get paint to touch up the wall (the house was painted the summer before we moved in, but we don’t have any leftover paint from that), and end up with a tap that’s lower and harder to reach to screw the hose into.
So we’ll just leave it like this, with the hose sticking out sideways. :-)
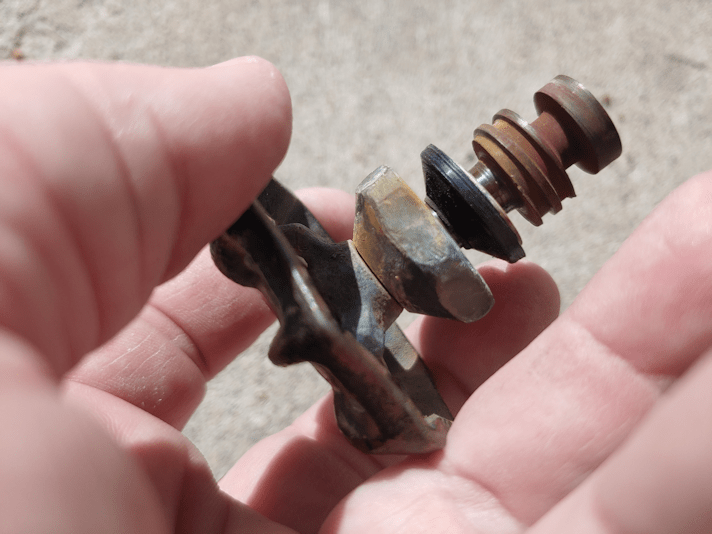
Of course, I had to open up the old tap to see how bad the seal was inside.
It…
…looks perfectly fine!
The seal is still flexible, and nothing is cracked or broken.
I have no idea why this tap started spraying water like it did, where it did!
So I’ve kept it.
In the end, I’m happy with the new tap. I like the triangular design over the round one, as it can be gripped more easily and securely. Especially with wet hands.
So now we have front and back hoses again!
We might need to get another hose for the front, though. I looked for something to fix the hose that broke, but everything I could see would require me to cut off the metal reinforced end. I might just wait for the fall sales and pick up another one, instead.
Over the past while, I’ve been adding another coat of Plasi Dip to the ends of the picnic table legs. I stopped adding more coats yesterday, but have continued to spray the cracks in the rain barrel. Basically, I plan to empty that can on those. :-D
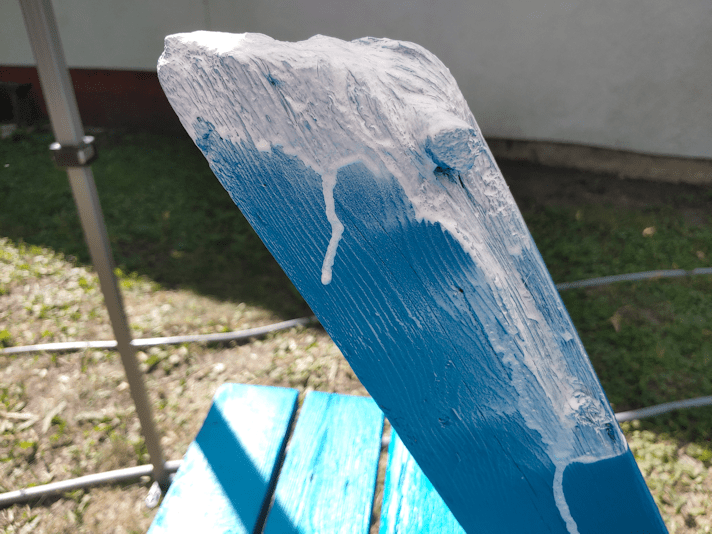
This is about 5 or 6 coats. I lost track of how many, exactly. When I took the picture, it had at least 24 hours to cure since the final coat. It looks like it will do the job just fine, and help extend the life of the picnic table.
Earlier today, a daughter and I flipped the picnic table right side up, then checked the surface. Sure enough, there was a bit of damage. Some paint had come off when the bird feeder had been put on top of it – both surfaces hadn’t quite cured yet, and the feeder stuck to the table.
While upside down, the table was on the chimney inserts I’d used to raise it off the ground while painting. There were a few scratches from those, as well as dirt. My daughter hosed it off and scrubbed where needed.
Tomorrow, the bits of damage will get touched up before we move it to somewhere near the fire pit.
For something that is too far gone to repair, this should last quite a bit longer now. As long and nothing actually breaks. :-D
I headed out last night to brush spider webs away from the garage security camera. The infrared flash was reflecting off a single strand of web, but it was enough to completely mess with what could be seen!
That and seeing a spider go by on it is a bit alarming. :-D
Which is why I happened to be out to notice the incredible number of stars that were visible.
Time to break out the Gorilla pod and see what I could capture with the camera on my phone!
Now, I will admit off the top that I have only the vaguest understanding of the manual settings on cameras. I’ve had them explained to me often enough. The problem is that when I try to adjust things, what I get is often the opposite of what I’m supposed to get.
Very frustrating.
So what I ended up doing with my phone’s camera is just adjusting settings and trying them out until I find something that works.
Then I don’t touch them again.
To get these pictures, I set up the Gorilla pod’s legs to hold the camera almost parallel to the ground, and a couple of inches above. I can then step back and use voice commands to take the actual photo.
The first pictures that worked were taken in the inner yard.
Aside from resizing the images to 50%, these photos are straight out of the camera.
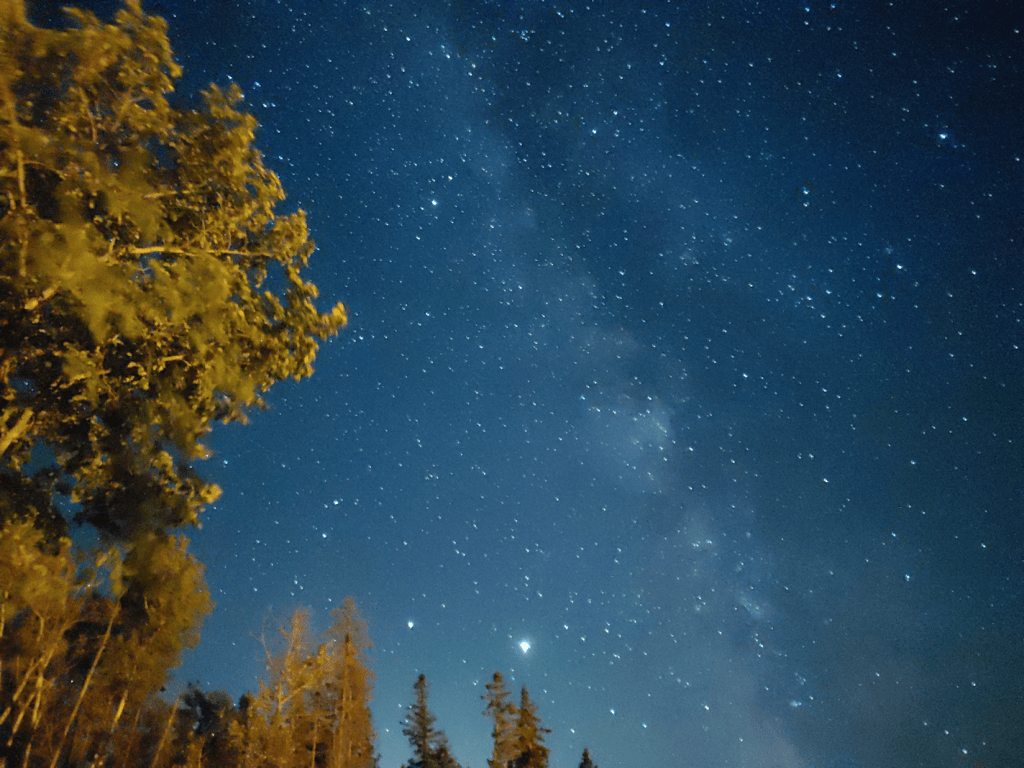
The above is the first picture I took that worked.
Can you see the shooting star? Quite a few pictures had them. Most of which I missed seeing while the photo was being taken.
Though I made sure to set up in the shadows of trees, the yard light does actually affect the outcome, as you can really see in this next one.
The camera may have been in shadow, but the tops of these trees were partially lit up by the yard light, so they look SO much brighter!
I’m so happy with how the Milky Way shows!
For the next couple of photos, I’d moved into the outer yard to the mowed area in front of the storage building. This put the pump shack between me and the yard light.
No adjustments made to the settings, and the images are much, much darker, just from the yard light being blocked by a building.
So many more stars are visible with the long exposure, that it’s actually harder to make out constellations. In the above photo, you can just make out the handle of the Big Dipper, near the bottom.
In some of these photos, there were blades of grass visible in the frame. This one just has some seed heads waving around on one side.
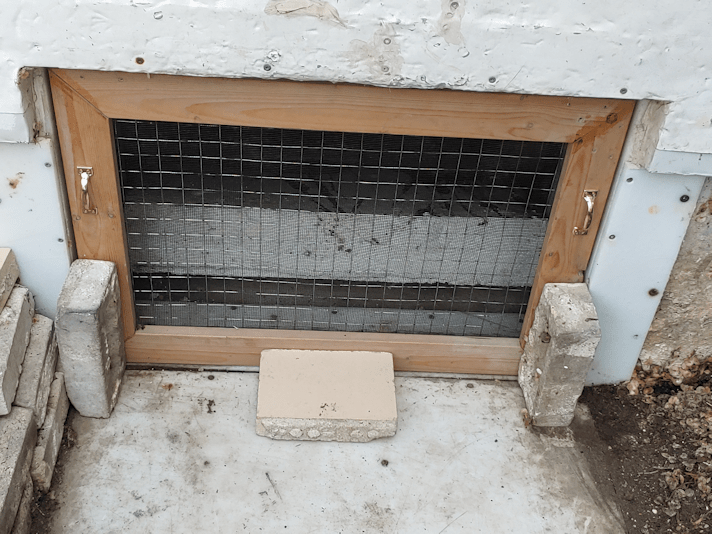
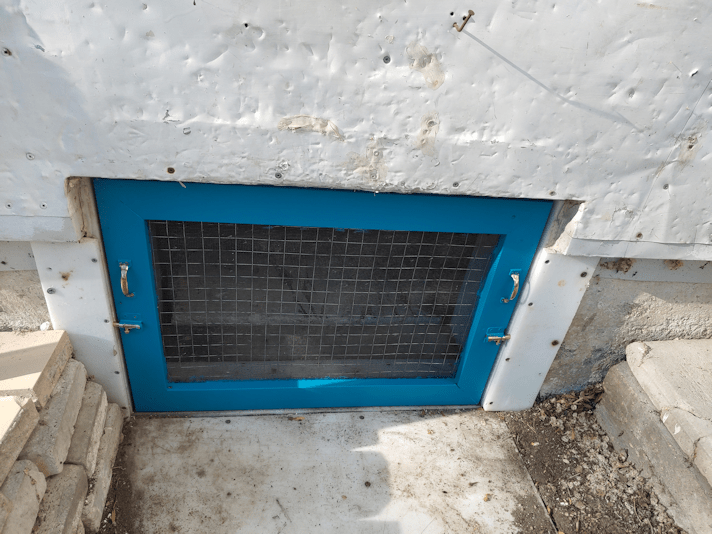
After several coats on of paint on the outside, and one on the inside, the screened window for the old basement is now fully cured and back where it belongs!
It’s one thing to have that bright blue on something that is in the yard. Quite another to have it on something that is part of the house! Even the blue replacement door is a dark blue, so not quite as jarring.
I think it looks rather nice against the white. :-)
Normally, I would not have done clean up on a Sunday, but the chokecherries needed to be picked, and we couldn’t get at the two trees with the ripest berries.
Which turned out to be 4 trees… :-D
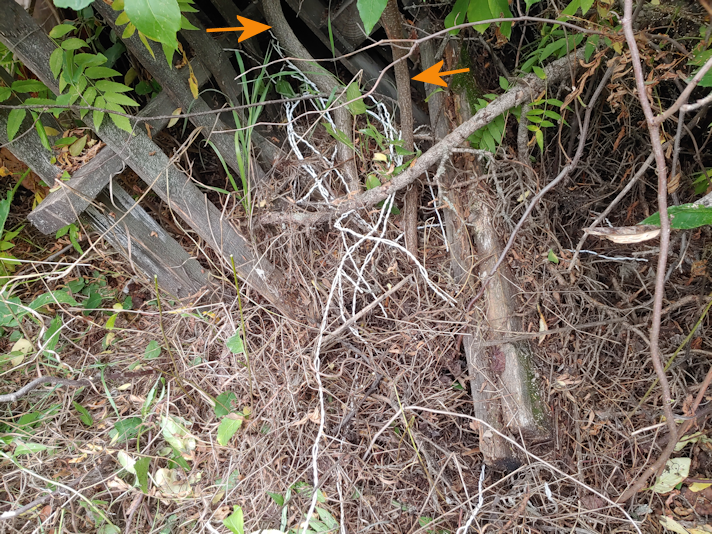
Here are the ones behind the garden beds where the old wood pile used to be.
The arrows are pointing to the two chokecherry trees. They are close enough together that I had thought they were just one tree at first. All around them are dead cherry trees with live cherry saplings coming up the bottoms, along with other odds and sots that have come up since I cleared things away last year.
I started on this side because I figured taking out the dead cherry trees would be the more difficult job. Especially since we were getting spotty rain, so I wasn’t going to string out extension cords to use the electric reciprocating saw!
This is how it looked when I stopped.
The fallen spruce tree and poplars behind them kinda make it look like they’re not cleared, but there is plenty of space to walk around them now.
While the girls started picking berries, I moved on to the other side. This is how it looked before I started.
In the spring, I had cleared a path to the junk pile to access the wood stacked in it, and I’ve been trying to keep things clear around the Saskatoons. You can see those on either side of what’s left of the path, and the arrow is pointing to the chokecherry tree. Which is actually two trees next to each other.
Most of what’s here is spirea and thistles, with a bit of burdock, plus a few other things hidden by the spirea. I figured this side would be much easier to clear, since I could basically just yank them out of the ground.
I really should know better by now.
The spirea and thistles were, indeed, easy to pull up.
First, I’d forgotten about the fallen spruce tree in there, and how close it was to where I needed to go.
It’s been there for a long time, so I was pulling out bits and pieces that had broken off as it fell, as well as breaking off or pulling out rotten branches that were jutting out all over.
I’d uncovered the one stump that I already knew about, then found another, smaller one, beyond it.
As I worked my way closer, I found something else.
There’s a reason we call what started out as a pile of neatly stacked boards that used to be covered with a tarp, a “junk pile”.
So… that’s… wire? It looks like the wire from those little decorative fences you can get to put around garden beds.
Also, there’s an old pallet there.
Because, of course there is.
Don’t mind me. After clearing out the old wood pile and dragging away a couple dozen rotten pallets, I’m not much of a fan of those anymore! :-D I remember having to work my way around it, while searching for boards in the pile that weren’t too badly rotted.
As I worked my way closer, I found the chokecherry trees grew through the partially rolled up wire. Which gives an idea of how long it’s been hidden there!
That wire really does look like it’s from one of those little fences, undone. It even has cross pieces still wound into the twists.
At this point, I stopped!
It was clear enough to reach the trees, and most of the berries. So I started picking those, while the girls harvested carrots and little squashes. :-)
The piles of debris will wait until tomorrow to be hauled away!
This pile is almost all spirea and thistles, with a few smaller branches from the fallen spruce tree tossed in. I had to pull up some of the wildflowers, too. They’ve shown up all over the place this year, so there are plenty more around the yard.
This pile is mostly the cherry I cleared away from around the first chokecherry trees, plus the larger pieces of the dead spruce tree I was working around.
These are pieces I set aside to keep for future crafting or carving purposes.
As for the chokecherries, we picked about a gallon pail of them. The girls had picked from the tree by the squash beds, and the ones among the lilac hedge, too. Lots were left behind for the birds. We are finding more chokecherry trees deeper in the spruce grove, that are not ripe yet, so we will have more to pick, later on.
This morning, I applied the first coat of spray-on rubber to the legs of the picnic table, and the cracks on the rain barrel.
This is the product I am using.
I have never used this stuff, or this brand, before. It was the only one on the shelf, so it’s not like I had a choice of brands or product versions. I think it will work just fine.
The first time we used a product like this, it was a can of liquid rubber deep enough to dip things directly onto. Like the handles of tools. Which is what we did at the time. Or it could be brushed onto a surface. The first time we tried a spray, it was basically the same product as an aerosol. My husband used it to coat the handle of one of his canes (made with aircraft grade aluminum, that could also be used for self defense), and to a cord wrapping he added to parts of his walker for extra support to hold the weight of the backpack he has hung on it. For the can, a dip version would have done a better job, but as a spray, it worked very well on the uneven surface created by the rope work. It’s still holding out, and it’s been about 5 years.
So that was basically what I was expecting. Black, spray on rubber.
Nope.
It’s white.
At least it looks white against the blue paint.
It’s also a lot lighter and thinner than I expected. Which I suppose is exactly what I need to fill in all those crevices. I added extra along the part where the most rotted wood had come off on the one leg.
I probably could have applied it more carefully to avoid drips, but there is no aesthetic requirement on this.
On the rain barrel, it looks a bit different. The barrel got sprayed both inside and out.
Here, you can see it has an almost blue tint to it. Depending on the angle, it looked a bit more purple than blue.
It should be interesting to see how it looks when it’s done.
How many layers we put on will depend on how well it coats. It requires at least 2 hours between coats. Depending on how often someone can get outside to add another coat, this may take a day or two! It then needs at least 4 hours of curing time after the final coat for the coated object can be used. Thankfully, these are not things we need to use, quickly.
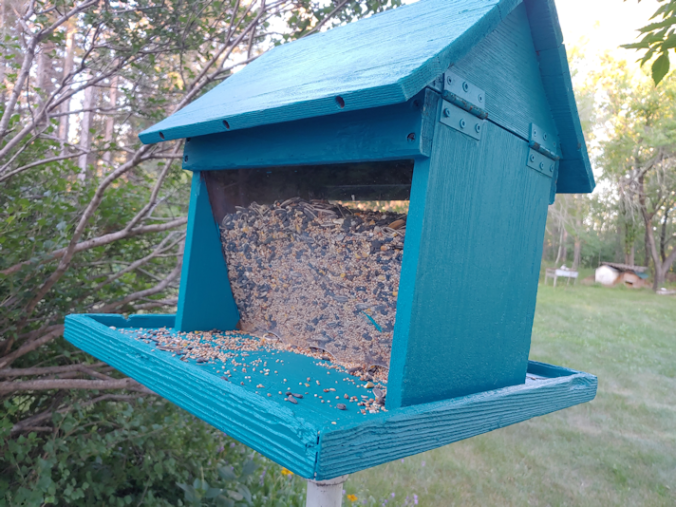
This evening, I remembered to grab a box of screws so I could get the newly painted bird feeder back up.
I did have an unexpected problem, though!
The feeder had been moved to the top of the picnic table, so that wire frame it was on could be used to hold the screen window from the basement for painting.
Either the feeder or the picnic table were not quite cured yet. The feeder was stuck!
In the photo below, you can actually see where some of the paint came off.
It’s the underside, though, so it doesn’t matter.
Meanwhile, the post mount now has 6 of the same type of screw holding it in place, instead of the two very different screws next to each other, like it was before! :-D
It’s up!
The post is actually narrower than the opening in the mount by a fair bit. Plus, I noticed the post, which is basically a steel pipe, is slightly squished. Which means the feeder wobbles. I’ll have to find something I can put around the top of the post to make up for that.
I did have to move one of the lilac branches and tuck it behind another one, to get it out of the feeder, as well as angle it to keep the one side clear. It holds a surprising amount of seed; I’m going to have to pick up more, if I want to keep adding bird seed to the other end of this flower bed, where the platform feeder and bird bath are.
I look forward to seeing how quickly the birds find it. :-)
As we work on clearing, cleaning and reclaiming the yard and planting our first garden beds, I’ve been keeping a close eye on details to keep in mind for the future. Things that will help us decide what needs to be done next, what to change or what to keep the same.
This morning, I found myself making a lot of comparisons.
The cutest one is the cucamelons.
This is the largest one that is developing, with my fingers giving an idea of just show small these are!
Isn’t that just the cutest thing? :-D This is the first one big enough to start seeing the patterns developing.
The trellis I made for these is just cotton yarn. It is working very well, except for on thing.
The cats.
When I am out there and the boys come over for some attention, they will plow their way through the trellis, pulling tendrils off in the process, then look at me all confused over why I’m flipping out at them. :-D They also try to lean and rub against the strands of yarn, only to flop over onto the plants. !!!
We already know that this location doesn’t have enough sun for cucamelons. If we grow them in the future, they will be planted somewhere with full sun. Our original intention was to plant them against the chain link fence for them to climb, and the cats are showing us exactly why that’s a very good idea! If not there, then we will have to make sure to have trellises that are sturdier, with strands much closer together. Not because the cucamelons themselves need it, but because of the cats!
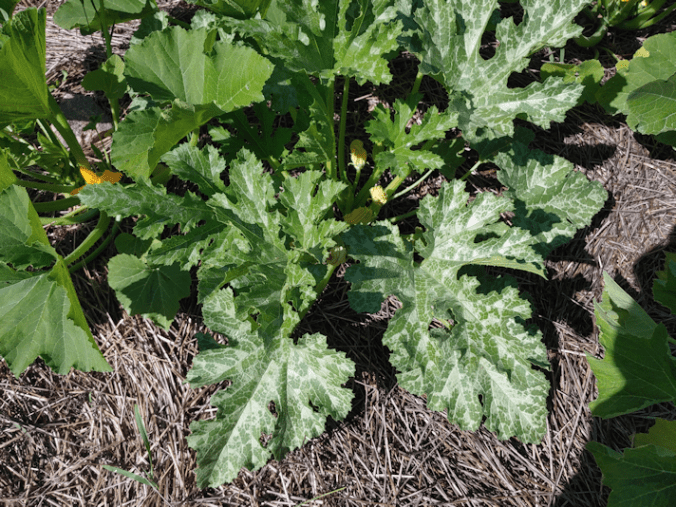
Here is another comparison. These two squash plants, with the mottled leaves.
They look pretty much like the same kind of plant, don’t they?
Now look at the developing squash.
They’re completely different!
I’m looking forward to being able to start harvesting these. My favourite way to eat them is raw, with dip. No need for anything else, when they’re at just the right stage. :-)
It was looking at the chokecherry trees that I am really seeing what a difference even minor changes in conditions makes.
This first one is at the south side of the garden where the squash beds are.
This one gets sun in the mornings, but for most of the day, it is shaded by spruce and maple trees to the South and West of it. It is not crowded by other trees. It has quite a lot of berries that are looking big and juicy (well… as much as chokecherries can be! ;-) ). Even last year, during the drought, it had larger berries. While I do not specifically water this tree, I do sometimes water the little patch of flowers and raspberries on one side of it, and the black current bush (my sister confirmed what it was for me) on the other side, so it does get extra water from that. While is has larger berries, it also ripens later. As you can see, the berries are still very much on the red side of things.
This next one is the chokecherry tree that is engulfed by lilacs.
This one gets full sun for most of the day, though it does get slightly shaded at the end of the day, by the trees my mother left to grow after she moved the raspberries they’d self-sown in between, years ago. This whole area gets quite dry, and we do not make any effort to try and water anything here.
The berries themselves are noticeably smaller than in the previous tree, and there are less of them, but they are also ripening faster.
Then there is this tree, right nearby.
This is the top of a young, small tree that was self-sown and allowed to grow (rather than get mowed over, like all the other saplings) in a grassy band between the old garden area (with the row of trees mentioned previously) and the lilac hedge. It might get some shade towards the end of the day, but otherwise gets full sun. Our first summer here, it did not produce fruit yet, and I wasn’t even completely sure what kind of tree it was. Our second summer, it had a few berries. This year, it has matured enough to produce quite a lot of berries. With full sun most of the day, not at all crowded, and little moisture, the berries are still not as big as the ones closer to the house, but the clusters are dense and ripening quickly.
You can see how this tree is situated in the background of the next photo, below. This next chokecherry is also among the lilacs, but on the edge of the hedge, not in the middle of them.
Here, it gets no shade at all. It has lots of berries that are already ripe. As you can see, though, some of the leaves are turning yellow. Only a few branches are like this, not all of them. It’s not stopping them from heavily fruiting! Like the other two along this side of the old garden, the berries are not as large as the trees nearer the house.
This next one was a surprise find, along with the Saskatoon berries. This area had been full of spirea that I had pulled up. It’s starting to grow back, so I’ll have to do it again, as pulling them up has been a good thing for other trees. The Saskatoons thrived this summer, and we discovered another chokecherry tree among them.
This area is under spruce trees, both living and dead, getting very little sun. In the above photo are the berries on the North side of the tree, where it gets even less sun. As you can see, they are just turning from green to red here.
This next photo is of the same tree, but on the South side.
That little bit more sunlight sure makes a noticeable difference in how fast they ripen!
Again, while I have not really been watering these trees, they are near the horseradish, and with the spirea taken out, wildflowers have come up and I’ve been watering those. So they will have benefited a bit from that, too. Mostly, though, being under the spruces as they are, they don’t get the full heat of the day, so the soil doesn’t dry out after a rainfall as quickly, either.
Then there is this one…
That’s a chokecherry in the middle of the photo. I had cleared a path to the junk pile you can see part of, to try and find useful pieces of wood in it, but that’s as far as I got so far. The tree itself is not crowded by other, large trees, and is shaded only in the morning hours. It’s surrounded by spirea and thistles, so we can’t get at it right now, but it appears to be just loaded with ripe chokecherries.
Finally, there is this one.
This is the top of a chokecherry tree among the cherries. I can get close to it, but not enough to be able to harvest it until I clear away the cherries around it; mostly cherries that had been killed off by last year’s horrible spring, and the bits that are now growing up from the bases. They create a formidable barrier!
This tree also gets shade in the morning hours only. Our last two summers, I don’t recall seeing any flowers or berries at all. Last summer, I’d cleared away the old wood pile, which turned out to be a much, much larger job than I expected. You can read about it in this series of posts (all links should open in new tabs, so you won’t lose your place!); parts one, two, three, four, five, six, seven, eight.
Did I mention it turned out to be a really huge job?
Yeah.
So while there is still lots to clean up to work our way into the spruce grove, what has been done so far made a big difference. I’m thinking that, had the cherries not been so damaged by the previous spring conditions, they would have improved, too. Mind you, the one cherry tree I kept because it managed to actually produce a few berries, and is not at all crowded, did not produce even a blossom this year.
It’s amazing how the same type of tree, while not really all that far apart from each other, are so different based on even minor changes in sun, shade, moisture, etc. When it comes time for us to plant more food trees, the differences among these chokecherry trees is providing us with a lot of information.
It’s a hot day today, but it’s going to get even hotter throughout the week, hitting above 30C/86F in a few days. Plus, I’ll be doing a lot of driving throughout the week. I figured if my brother could be out baling hay in this heat today, I can prune some deadwood!
There were two trees in particular I wanted to get at. Here is the first I worked on.
I had already cut the dead parts of the main tree, our first summer here. What was left were the suckers growing out the base. As the main part was grafted, what grew out the base was not the same type of apple as what had already died.
When I first worked on it, the live parts were bending low, so I left tall stumps of the original tree and used them as supports to tie the live ones to. One, growing out the middle, didn’t need the support.
As you can see in the photo, that’s the one that is now dead.
It actually did have leaves and even flowers this spring, but they didn’t last. As I cut it away, I was surprised it managed even that much. It was so dead and dry, I could only cut about half way, and then it was easier to break it off by hand.
One of the live branches was hanging down again, even though part of it was supported, so I got creative.
I found what was probably an old mop handle and zip tied it to one of the old stumps at the bottom, and to another live branch higher up. Then I lifted the bent branch and attached it to the support. Hopefully, this will be enough for it to start growing straight – or at least straighter – on its own. If nothing else, I won’t be getting my hair caught in it when I mow past it, anymore!
The next tree was a bigger job.
I’d actually thought I would be working on an old plum tree, but it was another apple tree that needed help.
There are two large branches on the apple tree that have died. In the background, you can see the dark coloured plum tree meandering its way up. The branches are so tangled, it was hard to see what belonged were, but it seemed that the plum branch still had live branches and little plums at the top.
I would see better, after the apple was cleared.
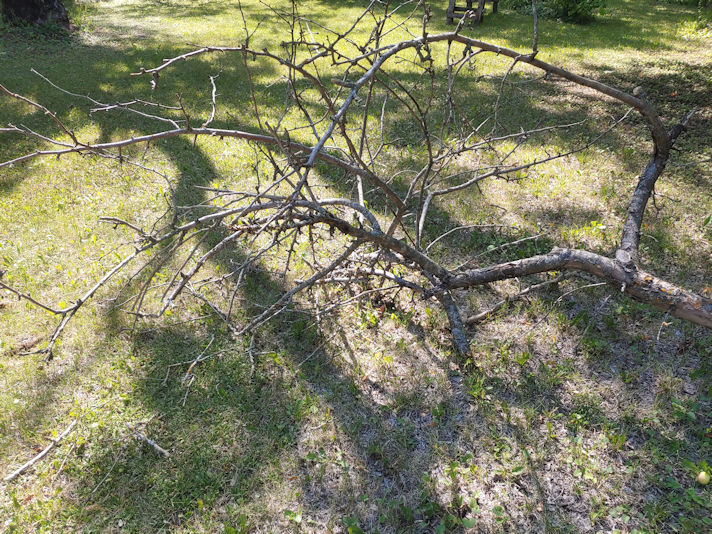
I took the slightly smaller branch off first (on the left of the trunk, in the above photo) using the reciprocating saw, and it came down fairly well. The branches at the ends were tangled with live branches, so it ended up standing upright on its cut end when it fell. Once I cleared that, it was time to get the big one down.
When cutting larger branches like this, you always have to be careful when it gets past a certain point, depending on the angle and weight of the branch. Once it starts breaking under its own weight, things can go in unexpected directions.
This one was a bit different.
It didn’t fall.
You can see the one live branch growing out the side, so I made sure to cut above it.
I cut right through, and it just sat there!
Hmmm… I wonder why that would be…
The live plum and apple branches were holding it up!
There was a lot to get tangled on!
For this tree, I used pruning spray on the cut branches, to protect the main trunk a bit.
There is still one branch alive on this tree, and it’s got quite a few apples on it.
The plum in the background does have a lot of dead branches, but at the top, it’s still alive. I am leaving it for now.
Usually, for stuff like this, I would have broken down the branches a bit, but otherwise just hauled it over to one of the piles of branches we’ve made while cleaning up over the past couple of years. I did things differently this time.
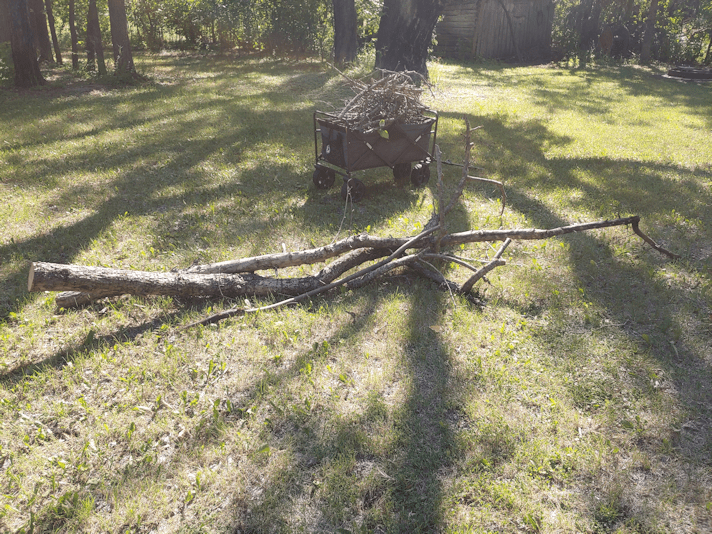
The small branches, I cut short and loaded into the wagon, to be used as kindling in the fire pit.
The large pieces will wait until I can co-ordinate with one of the girls to work on them.
The wood looks surprisingly solid. I’m going to see if anything can be salvaged for carving. If not, they’ll be cut to fire pit size for use during cook outs.
It isn’t much, but I’m happy to have gotten at least this bit done. There is another tree, an elm, near the fire pit area that is mostly dead. I actually thought it was dead our first year here, but after a rainfall, it perked up. Last year’s drought seems to have done it in, though. It’s quite large, though, so we’ll have to be more careful taking down the dead parts.
When I got back from the city with our new washing machine, I just had to go around back to see how the painting went for the girls.
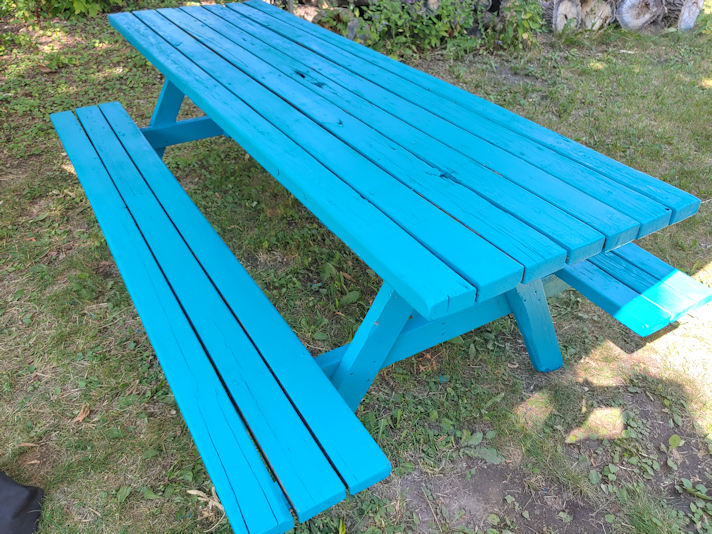
The first coat of paint is done!
You know, when I first picked up this shade, I was afraid that once it was on large surfaces like this, it would be too much. I’m happy to say that, now that I see it, I’m loving it even more!
The bird feeder had also been started.
Since these photos were taken, the girls were able to go back and do another coat on the picnic table, then flip the bird feeder to finish the rest of the top side and give the roof a second coat.
I might have to get another can of this paint! The window frame for the basement screened window didn’t get done, but that’s okay. There is no rush on that. We’re also going to wait for the paint to fully cure before we add the spray on rubber stuff for the bottoms of the picnic table legs. Since they’ve already been painted, there’s no rush on that, either.
These are going to look great, once they’re done and set up in the yard!