Reclaiming space

Well, it’s a good thing I was planning on using the push mower more.

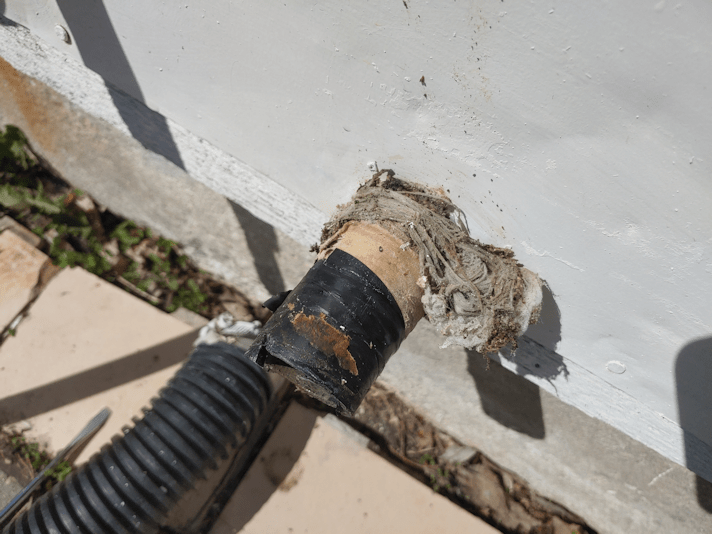
While using the riding mower in the inner yard today, I stopped at one point, to go over to talk to my daughter, who was using the push mower. When I returned to the riding mower, it started just fine, but wouldn’t move. !! There were no issues at all before. One minute, it was working fine. The next, no go. Forward or reverse.

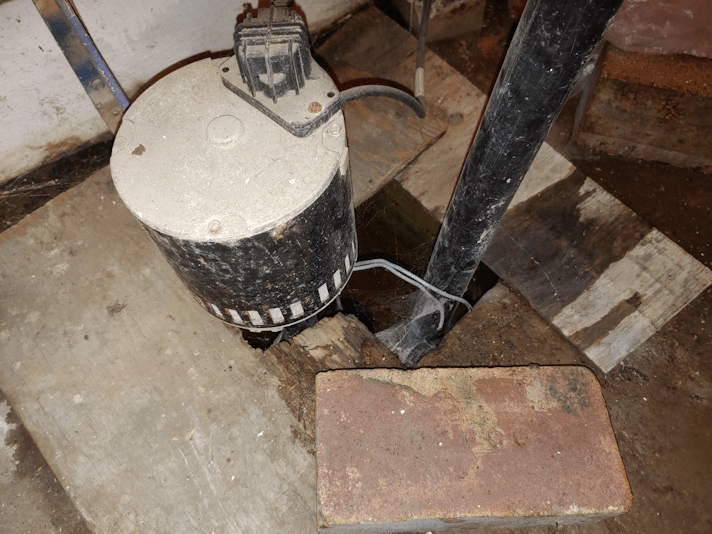
Well, we were planning to take it in for Maintenance next month, anyhow…

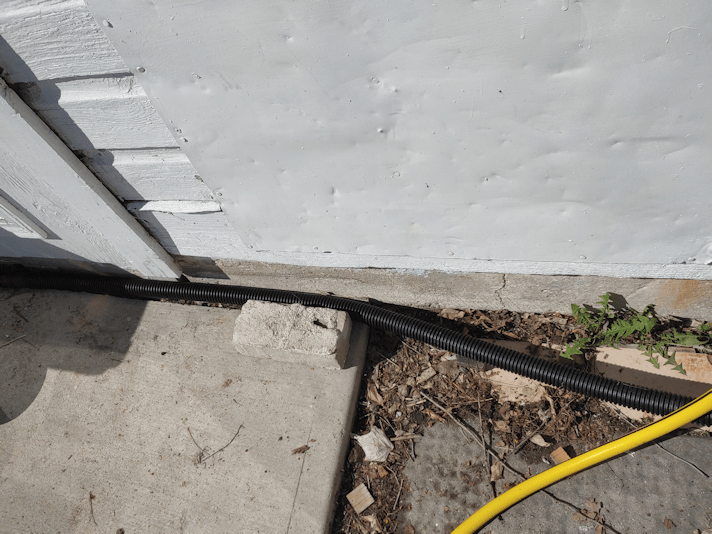
After doing most of the inner yard, I switched to cutting the outer yard, as there was so much of it that hasn’t been done at all this year. I quickly stopped using the bag to collect grass clippings. It filled so quickly, and the mower just doesn’t like to restart very well.

That did mean I was able to reclaim more areas of the outer yard.

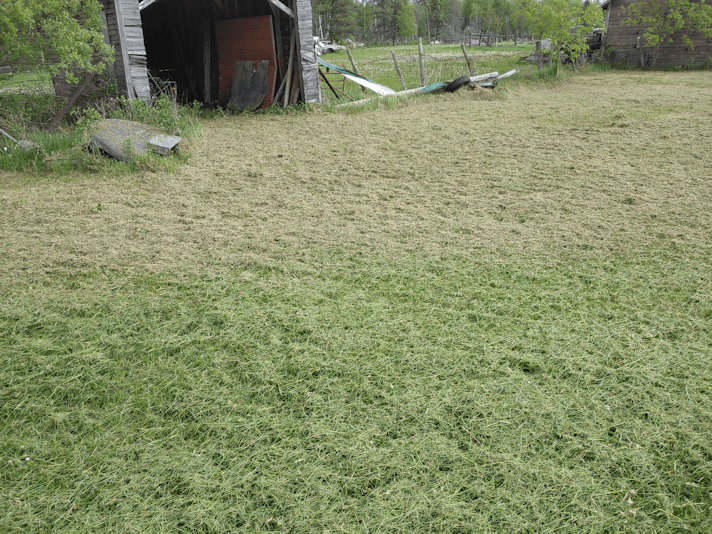
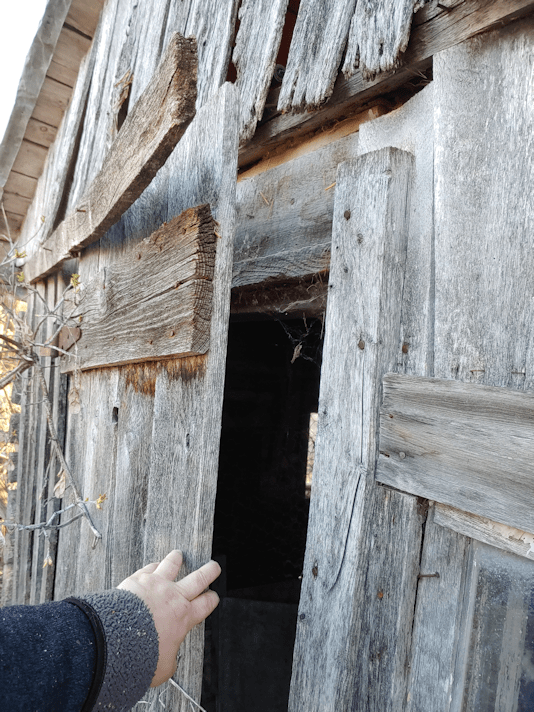
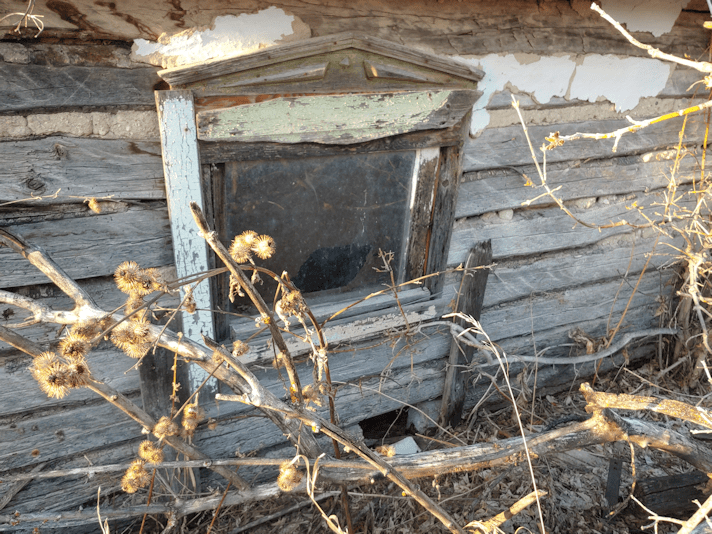
For the first time since we’ve moved here, I was able to clear the area in front of this old shed.

Do you see where the colour changes from nice and green, to more brown?

While the clippings blur the line a bit, there is a clear demarcation where the colour changes. The brown is where I had not been able to mow, until today. Where I’d been able to mow for the past couple of years, the grass is green, thick and healthy. Where I hadn’t been able to get in with the riding mower (and it’s so rough, I still won’t be able to use it there), the grass was choked out by its own thatch.

I’ve now been able to reclaim pretty much all of the outer yard on this side, and I’ve started to reclaim the area leading to the collapsing log house and chicken coop.

I feel like I should have been making hay! The grass was starting to go to seed.

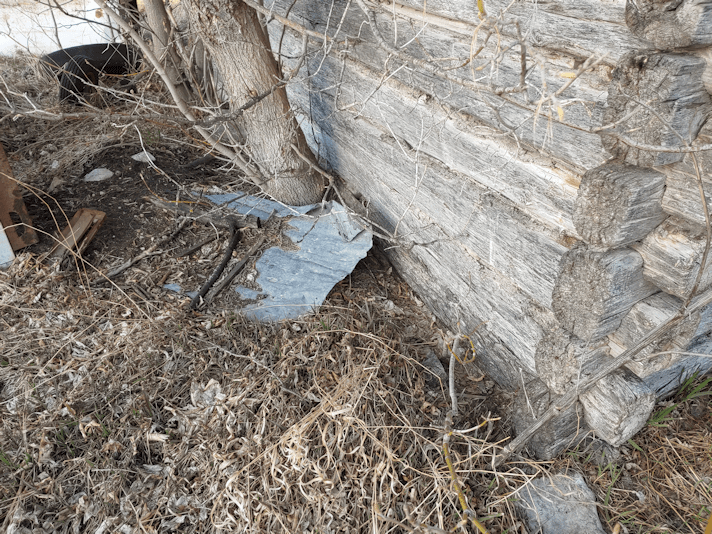
I will work on this area tomorrow, weather willing. With the push mower, I’ll be able to reclaim even more of the outer yard, little by little. I’ll be mowing a path to the other gate, as before, but will have to be very careful as I go beyond what I’d been able to do with the riding mower. Who knows what is hiding in that tall grass! Rocks and rough ground is one thing, but there could be chunks of wood, metal and small kitchen appliances, for all we can tell.

Since I was walking back and forth so much, I took advantage of it and opened up Pokemon Go on my phone. There is a feature in the game where you have a “buddy” Pokemon that walks with you. While it is your buddy, the game records distance, even when the game is not active. After you walk a certain number of kilometers, your buddy “finds” a candy.

The buddy I have right now is a Meltan. While most buddies need to be walked for 2, 5 or 10 km before finding a candy, Meltan needs to be walked for 20km. Once a candy is found, the meter restarts for the next 20km.

Based on the distance measured in the game, I walked at least 12 km this afternoon. And that doesn’t count the distance this morning.

My phone came with one of those “health” apps that I can turn off, but can’t get rid of. These apps irritate me, since they all basically measure “health” as “lose weight”. It doesn’t matter how good your other health measures are, or how much exercise you get, if you haven’t lost weight, you’re a failure. It does, however, have a pedometer. I’m curious to know just how many kilometers I am actually walking while doing basic yard work.

The Re-Farmer

What a job!

My brother, being the wonderful person that he is, came over to remove the rusted out screws on the trailer frame with an angle grinder.

I told him about the box for an angle grinder I’d found in the garage. The one with human teeth in it. He figures that is probably the strangest thing we’ve found, since moving out here! Though I admit, there are some things that are still competing for that top spot.

I had to pop over to the house while he was working on the trailer frame, and he was done by the time I came back! I did find one that he’d missed, though, so I was able to get a picture of him working on it. :-D

He also removed the remains of old lights at the end, and cut the bolts of a piece in the corner that had been twisted completely around. That corner that you see? Where those squarish marks are? There used to be a sort of bumper there, with a piece on the frame below the bolt hole at the very end. The piece is still there. It’s just now on the inside, instead of the outside.

Some of the old screws he took off still had their heads on them. They were hex screws. Totally the wrong kind of screw for the job.

After he was done, he showed me how to use the self drilling screws I picked up, and we took measurements. Exactly 2 sheets of plywood will fit on there, but we will need to cut openings for the tires and make some sort of fenders.

It is now ready for cleaning and rust removal and, if all goes well, painting.

Then he surprised me.

He had ulterior motives for coming out. He didn’t drive all that way just to take off a few screws for me.

The shed next to the barn, where we found the table saw, has holes in it. I believe it was last year, or maybe our first year here, I’d helped him cover holes on one side, but we weren’t able to do more at the time.

It’s been bugging him, ever since.

We still have sheets of metal roofing in the barn, left over from when the barn itself, and other buildings, had them installed.

Note the piece of equipment with the board leaning on the tank. I’ll have more to say about that, later.

On the left is what we put on last year. We actually dragged them out from a pile outside the barn, and one of them had a piece cut out of it.

On the right, my brother has already covered one hole with a short piece. None of the pieces we had were long enough to cover the whole length, so he put short pieces along the bottom, first, so there would be an overlap.

The scary part was having to go to the peak of the roof and unscrew that top cap, so he could slide the panels under it. He screwed a scrap of plywood we found in the barn down first. There was no way he could have climbed to the top without it.

This was interesting.

There are three types of shingles on here, and so much of one type has blown away, we can see what are likely the original shingles.

What an interesting diamond shape! That roof must have looked great, when it was new!

Here is how the roof looked, at the end.

Bits and pieces, cobbled together, but who cares what it looks like? No more gaping holes!

My brother is just screwing down some pieces of metal we found in the barn that could be used as top caps. After that, he put in more screws as far as he could reach from the ladder, so the winds won’t catch and blow them off.

It was very, very dangerous up there. That ladder on the right was the best place to get up there, but there were tree branches in the way, making it even more dangerous. Once he was safely at the top, I went and grabbed a saw and cut away almost half the tree (one tree at the base, two trunks up the sides).

I’m keeping that wood for future carving!

My brother is really, really awesome. We spent hours out there, working on it, and I couldn’t do much more than pass him things, and hold the ladder for him.

Remember that piece of equipment by the building?

Thanks to ladder holding, I was looking at it from angles I hadn’t, before. I asked my brother if he knew was it was. It belonged to our late brother, and has been sitting there for at least 10 years.

After looking it over, we figured it out.

It’s a boiler system for steam cleaning.

The boiler itself is pretty amazing.

There should be a cover on that round opening.

Just look on the date on that thing!

It had to have been salvaged from somewhere. I wonder if my late brother built it? He certainly had the skills to do it.

The fuel tank is actually part of the trailer frame! On the left, you can see the fender over one of the tires.

Both tires are flat, which is why this end is resting on the ground.

The white tank in front would have held the water. It was most likely used to steam clean culverts or something like that.

That boiler isn’t the only old object of interest we talked about.

As we were putting everything away and getting ready to leave the barn, my brother pointed at a metal object on the floor and told me to make sure to keep that. I had no idea what it was.

It turned to be part of an antique hand pump for a well. A wooden handle would have been attached to it. I was told there was another one, but my mother had sold it to a scrap dealer, years ago.

*sigh*

After all this, my brother couldn’t even stay for lunch. Our mother was expecting him, and by the time we were done, he barely had time to come into the house and say hello to the rest of the family!

Have I mentioned my brother is amazing?

I don’t know what we would do without him! No one living knows this place better than he does! And certainly no one else in the family has the tools, skills and knowledge – not to mention physical ability – to do stuff like this. It’s been many years, since I was physically able to go up on a roof like that! Of course, being a woman of ample proportions, I would have gone straight through a roof in that condition, with or without a sheet of plywood to climb on!

So that was a whole lot of hours in the sun, but the job is done. My brother figures, this probably added about 10 years to the life of the building.

Well. On this side, maybe. The other side probably won’t last that long, and I think we’re out of metal roofing material to do that side, anyhow! It doesn’t get the brunt of the weather, though, the way the side we covered did.

What a job!

While I may not need to do it this year, I should cut the rest of that tree down. It would be a shame to work so hard to preserve the shed from the top, only to have it wrecked from the bottom. The tree is growing right out from under a wall!

Little by little, we’ll get this place fixed up.

The Re-Farmer

They arrived!

My new “toys” came in today – I wasn’t expecting them until next week!

I got myself a beginners wood carving set. :-) With all the interesting woods we’ve been pruning and clearing away, there are all sorts of things I’d rather be doing with them, rather than burning them or having them chipped.

I have no plans to carve figurines or anything like that; that’s just not my thing. But to carve small, useful things, like spoons, spreaders, tiny bowls and the like is right up my alley!

This kit includes safety gloves, three carving knives, including a curved knife for cutting bowls, a leather strop and polishing compound to use on it, and sand paper in a range of grits. Plus, a spoon blank to practice on!

I actually plan to use a piece of scrap wood to practice cuts on, before I start on the spoon blank.

Of course, I’ve been looking up how to use these, and noticed I would need a couple other things. One was a breastplate, so I can safely brace the wood against my chest as I work. My darling husband has already filled that need. He had some heavy leather scraps and glued a couple of pieces together to make an even thicker piece, and cut a couple of holes in the top corners. All I need now is some sturdy cord to put through the holes so I can hang it around my neck. So I now have a very strong, purple breastplate to use! The other thing is something I will need for when I want to carve bowls, and that’s a particular type of chisel to cut away waste wood. The curved blade in the kit is sufficient to carve spoon bowls, and while I will likely be keeping things small – at least for the first while – I will still want to go bigger than a spoon! Plus, I think I have some pieces that might make great cups, and for that, I definitely will want something more appropriate to chisel away the waste wood.

I am really looking forward to testing these out!

The Re-Farmer

Sump pump hose fix

Well, today ended up a bit going off plan, but we still got a couple of things off the to-do list for outside.

The main one being, the broken flexible hose for the sump pump has been replaced!

This is what the connection looked like, before I started.

After talking to my brother, I was confident there wouldn’t be any weird surprises when I took off the flexible hose.

The first order of business was to make sure the pump wouldn’t go off while I was working on it. The reservoir was pretty full, so I lifted the float to trigger the pump and let it drain before unplugging the pump.

My brother had suggested I might want to push the pipe from the inside, through the opening to maybe add a bit of length on the outside. The pipe is so snug in there, though, that it wouldn’t budge. Which told me I wouldn’t need to have one of my daughters in the basement to brace it while I was attaching things on the outside, at least!

Once I took the flexible hose off, I could see that the batting or whatever that is, and the rest of the hose, was wrapped in a thick later of electric tape.

I started taking that off and found…

… something that looked… almost like fabric? Canvas??

It turned out to be hockey tape. Several layers of it.

I got all the old tape and the batting-looking-stuff off and discovered…

… the end of the pipe had a big ole crack.

I guess that’s why it was taped so thoroughly, and why a larger hose was added over it.

I wonder. If the previous hose had indeed been wrecked by someone running over it with a lawn mower, it’s possible the hose was yanked hard enough to crack the pipe at this end, too.

I cut off the cracked part, which didn’t leave a whole lot of pipe sticking out the wall. I did try and push more through from the basement, but didn’t seem to accomplish anything.

The next thing to do was clean up the inside of the pipe, then use the connector piece the guy at the hardware store picked out for me, in case I needed to attach the two hose kits to each other.

Pushing the connector into the pipe did finally start moving the pipe through the opening – making it shorter, of course, but not enough that I couldn’t get it done. I brought out a hair drier to soften the plastic of the pipe, which made pushing the connector the rest of the way in much easier.

That didn’t quite work with the flexible hose part. I could get it through the flat part easily enough, but once the end started to go into the flexible rings, it just wouldn’t go any further.

So I tightened the clamps as it was. It really should be closer together, but I know the important parts of the connector are through to the flexible rings of the hose and, together with the clamp, that should be enough. We’ll just have to keep an eye on it, to see if it leaks. If it does, I should just need to tighten the clamps a bit more. I put a container under the connections, so if it does leak, I’ll be able to see water in the container.

Next, I ran the hose down the side of the house.

There is adequate space along the house to tuck it under, so it won’t be in the way at all. It’s also being held in place by a shelf, garbage can and rain barrel along it’s length. The brick was just a little extra to hold it in place, closer to the pipe.

The hose reaches several feet into the old kitchen garden. I would have preferred an extra foot or two, but this should be fine. If we find it needs to be further from the sun room’s foundation, we can always get another connector and attach the hose from the spare kit onto it.

Once it was all done, the sump pump was plugged back in, but so far it hasn’t had to go off, yet. I’ll be sure to check on it, later today.

While I was working on this, the girls dragged the table saw out of the old shed we’d found the door in and brought it by the house. They plugged it in and turned it on and YES!!! It works!

It is currently sitting in the sun room. We won’t be able to work on the replacement door for the sun room today, as I’d planned. It likely won’t be worked on tomorrow, either.

Oh, I don’t think I’ve mentioned it here, yet. My husband got a call from the cardiac clinic in the city a couple of weeks ago. When they cancelled all appointments, they were looking to June for rescheduling. It seems they were no where near as busy with the Wuhan virus as they expected, and could start re-booking earlier. The appointment is early tomorrow afternoon, but he and I will be leaving in the late morning.

I have to figure out what to do after I drop him off, though, as I will not be allowed to go in with him, as normal. Which is frustrating, but whatever. Unfortunately, it’s not like I can find a coffee shop or something and hang out for more than an hour. My FIL actually lives nearby but, like where my mother lives, the building is locked down to visitors, since so many people living there are very high risk, including my FIL.

If I can find someplace free to park, maybe I’ll get some Pokemon Go in or something. :-/

Meanwhile, I have had to take it a bit easier today than I intended. It’s been a slightly worse pain day, and I don’t want to overdo it when I have what will likely be a long day, tomorrow.

For now, I think I’ll painkiller up and find something more sedentary to work on. :-/ Normally, I’d work on some crochet, but the pain is mostly in my arms and finger joints today, so that might not be possible.

Ah, the joys of being old(ish) and broken. :-D

The Re-Farmer

Future plans; checking out the old chicken coop

While doing my evening rounds today, I decided to take a look at the building that we had used as a chicken coop, when I was a kid.

Since we first moved here, the roof/attic has been slowly settling downwards by noticeable amounts. The board you see me puling away from the wall used to be directly above the door. As things settled downwards, this board ended up over the top of the door, making it impossible to open. Now, it has dropped further but has weakened to the point I could just pull it away from the wall and the door.

That meant I could pull the door open.

Sort of.

When I pulled on it, that top hinge came loose (the bottom one was already loose). I ended up just lifting the door out of the ground it was being pushed into, and sliding it to the side.

Previously, the only way I could get a look inside had been to shove my phone through the gap in the door and use voice commands to take pictures, hoping it was angled half-way decent. Today is the first time I could actually go in and see what’s in there since… well, since we still had chickens, when I was a kid.

I didn’t go far.

Why are there so many old tires, all over the place? And so many of them still on rims!

At the far end you can see the nesting boxes, and to the right is the roost.

It was so strange to look at it. In my childhood memory, that roost was much, much higher. In my mind’s eye, I was expecting it to be a couple of feet from the ceiling. I actually remember looking UP to the roost, when I went in to tend to the chickens!

I’m pretty sure this old cabin did NOT have a dirt floor, but it was always covered with straw, except for the part under the roost, which was covered in chicken poop, so I can’t quite be sure.

I’m kinda hoping I am remembering that wrong, and this really is a dirt floor. I remember helping clean out the old straw, but not well enough to remember if there was a floor under there.

Whatever it is, I did not go any further in than I could while stepping on some boards near the door.

I don’t know what that material is that’s covering the walls. It’s almost like asphalt shingles, except much thicker.

You can see where the clay between the logs crumbling out in places, such as right by the door in the above photo.

This little side area is where we would keep new chicks. There is another little space at the far end with a door that was basically a frame with a screen finer than the chicken wire I’m taking this photo through. New chicks would have been small enough to squeeze through chicken wire. I can’t quite remember, but I think that’s where the feed was stored.

You can also see the outlet where we plugged in the heat lamp for the chicks. Below the window is an opening for the chickens to go outside. There was chicken yard enclosed around 2 sides of the cabin, with the area on the other side of this wall sectioned off, and another door to access it from outside. This way, the new chicks could be kept away from the older ones, even when they were big enough to venture outside. When they were fully grown, the doors into the chick enclosures would just be left open. In the summer, we would leave the main door into the enclosure open during the day, so the chickens could wander around the barn yard as they pleased, then closed them up in the coop for the night, making sure to close up little opening in the wall, too. Skunks, foxes and weasels were the most common predators we had to keep them safe from. Especially skunks.

To take the above photo, I am standing in what used to be part of the smaller chicken yard. You can see the piece of electrical cord coming out from under the right side of window frame. The cut end is hidden behind a dried up leaf. The outlet itself is in a different location than where that wire is, so I don’t know what it’s actually for. You can also see signs that the outer wall used to be covered in plaster and painted white.

It’s in rough shape and kinda gross, but of the 3 log buildings we’ve got, this is the one that’s the most solid and least damaged. If there is any chance of salvaging it, we’ve got to take care of some things.

One of those things is to cut away the trees that have been growing against it. This one here is growing partially out from under the back wall. Though efforts had been made to protect the roof by adding what looks like a corrugated tin over the original wood shingles, the branches of this tree has torn off a whole section of it, and is tearing more pieces off with every strong wind. You can even see one of the pieces of tin from the roof half buried under debris at the bottom of the tree. Which gives an idea of just how long ago it was torn off and has been sitting there.

Quite a few sheds and outbuildings have trees growing right up against them. They are almost all maples. One near the pump shack had been cut down; there is a rather large stump there. Maple stumps throw out new growth, though, which might be great if you actually want to coppice them, but not so good if you’re trying to protect buildings.

When we moved here, my original timeline has been to work on the inner yard for the first 2 years, then start on the outer yard in the third summer. Last summer was a bit of a write off in some ways, so it’s going to take another year to finish that, but there are things that need to be done in the outer yard that really shouldn’t wait.

Cutting away the self-sown trees that are causing damage is one of those things!

The Re-Farmer

Replacement door: that didn’t quite work

After all that work to resize the replacement door for the sun room, painting it, carving out the recesses (and fixing my goof), touching up the paint, the door finally got hung up today!

Aaaaannnnd…

It doesn’t fit.

Part of the problem is the hinges. The original hinges on the door were put back on, not the hinges from the old door. The screws are stripped on some of those and we weren’t even able to get all of them off to salvage them. The hinges that were on the replacement door position the door slightly differently. Once the door was hung up, the girls found it was too “tall”. By mere millimeters!

The easiest thing to do turned out to be removing the top molding of the frame.

So they did that.

It still didn’t fit.

This is the door, at the middle of the frame.

We’re looking at about 1/8th to 1/4 of an inch here.

This is the door at the top of the frame.

Yeah.

There’s a gap.

So, weather willing, tomorrow we will get that table saw out of the shed and see if it works. If it does, we’ll take the molding off the top and side, cut it and reinstall it.

Straight.

Then carve out a new recess for the plate that gets installed in the frame, because that’ll be cut right off.

Once we’ve got that done, we’ll just repaint the frame.

What a pain in the butt this is turning out to be!

If the table saw turns out to not work… I’m not sure what we’ll do. I’d hate to have to take the door off and trim the door knob side! We can’t trim any more on the hinge side at this point. We’d have to take the door knob assembly off, and I suppose we could use the circular saw again. It would be very difficult to take off such a tiny amount with that, though.

*sigh*

Ah, well. It’s not like we have a lot of choices. We’re just making do with what we have for now.

Speaking of making do…

When my brother and I visited our mother earlier today, I made sure to ask him about the sump pump hose attachment, showing him the pictures I’d taken.

I learned all sorts of details from him! Like why he had to McGyver the pipes in the basement, adding an extension. Someone else had tried to replace the pump and pipes for my dad and… well, let’s just say, after my dad called my brother to come fix it, he found the pump dangling at about a 30 degree angle, because the person who did it couldn’t be bothered to add a section of pipe to extend it, so it could stand straight in the reservoir. So my brother did that, and the pump is now nice and straight. It may not be the prettiest job, but it’s solid, and I should not need to replace any of it.

I also learned that he had installed a flexible hose on the outside. No, not the one that’s there now. He used a proper sump pump hose kit, like what I bought two of. He said it was about 50 ft long, and drained over by the storage house.

Then one day, he came over and the hose that’s there now had been attached. The long one was gone.

From what he’d been able to gather, someone had run over the hose with a lawn mower.

So my dad used what hose he could find and, rather than getting a fitting to attach the larger hose to the smaller pipe, he wrapped something around the smaller pipe, then clamped the bigger hose on. I had thought the stuff looked like batting, and he thinks it was probably stuffing from an old couch or something like that.

I confirmed that the pipe going through the wall is 1 1/4″ pipe, and that it should be just the end of the pipe on the outside of the wall; nothing weird done to it – though it might have been cut shorter on the outside. I’ll know that when I take off the broken hose.

The fittings that come with the hose kit won’t work, though, since they have a threaded end to attach directly to the sump pump. I should have what I need to attach the hose to the pipe, though, in among the extra parts and pieces I got, just in case.

Now that I’ve double checked details with my brother, this is something I hope to get done, tomorrow!

The Re-Farmer

Aaaannnd… something else to fix

One of the odd things we have on this house is this window cover that the visiting goat discovered.

When I was a kid growing up here, this did not exist, but I think I understand why it’s here.

It is over the window we used to toss firewood through, when we had the wood burning furnace. The window is about 6 – 8 inches below grade. I clearly remember tossing wood through, bouncing logs off the ground in front of the window, into the basement. Sometimes, the log would hit the window frame. So the bottom of the window frame and the dirt in front of it got pretty bashed up. At some point, someone fixed the frame and added a dense, hard plastic to the ground in front of it, and made a sort of retaining wall out of bricks and paving stones on each side

Judging from the shape of this cover, it was meant to hang over the window, with the thinner portion fitting between the little retaining walls, to cover the basement window completely. It’s hinged, so it could be lift up as needed.

However, we have never seen it down, because a small fence post was put into the ground in front of it, holding it up above the window. My guess would be that this allowed access to the window, while the cover itself served as a roof to keep rain and snow out of the sunken area in front of the window. Otherwise, any moisture would leak into the basement.

We took advantage of this by putting the food containers for the outside cats under it, so rain wouldn’t turn it all into mush. It worked well, and it’s something we would continue to do, once the winter debris is cleaned up.

With that in mind, today I lifted the cover higher, so I could start cleaning stuff out from under it.

It fell off.

But only one one side!

It was an easy matter to rip it loose from the other side, too.

As you can see by the underside, it’s a fair bit of moisture damage.

The screws on the hinges pulled right out of the weathered wood.

Seeing this, I am amazed it didn’t come apart under the weight of that goat! :-D

This cover was made up of two wood panels attached to each other.

Oh, look!

The narrower piece was attached to the wider piece with screws, that were sticking through underneath.

Three of them.

I have gone under this cover, letting it rest on my back while I tended to various things at the window, so many times.

I’m now wondering how I managed to do that and never stab myself in the back, or scrape the back of my head, with those screw ends!!!

Meanwhile…

The hinge screws are still in the hinges. One of the hinges – the one that broke first – is quite loose from the wall, too.

So… this is something we’re going to need to replace. As odd as it is, it serves a purpose.

We’re going to have to figure out how to replace it, and with what.

Now that the old cover has broken off, we can think about making an improved version. Since I doubt we’ll ever have the cover hang down to cover the window, we don’t need to have the narrower end. I would also want it to be all one piece. The little fence post can stay to hold it up at the lower end, but I would like to use a material that is lighter; a hard plastic of some kind, that can handle the sun without breaking down, perhaps. I also would want to set it up so that it can be swung upwards, with something to hold it against the wall, so we can access the space under it without having to be bent over, holding it up with our own backs.

Hmmm… An idea just occurred to me. If we’re building a new cover anyhow, it could be made with legs to support it at each corner, instead of the fence post that’s there now, in the middle. The legs could be on hinges, so when it’s lifted, the legs will fold downwards rather than sticking straight out. That way, no one would be bashing their heads into a leg when it’s up. :-D

There is a piece of dense plastic near the window that may have been used as a cover there before. I could see no evidence it was ever attached to hinges, so it may simply have been placed against the wall on its own, to cover the window for the winter. I don’t actually know. I’m just guessing, based on the shape. It’s even heavier than the wood version, though, so it’s not something we can use to replace the cover, as it’s set up now.

This does remind me of something else for the to-do list, though. For the summer, the basement window, plus the foam insulation cut to fit into the frame, gets removed, and a metal screen gets used, instead. This helps with air circulation in the old basement, helping to keep it dry. My older brother even had a fan set up on the inside (which disappeared before we moved in) to draw air in, along with the big blower fan that’s still down there, to help keep that basement’s floor dry.

The wood framing the metal screen was pretty old and starting to break when we first moved her, and this past winter, it finally broke apart. We will need to find some wood to make a new frame before we’ll be able to use that screen again.

Another couple of things for the to-do list! :-)

The Re-Farmer

Replacement door progress: almost there!

Today, I finally got a chance to continue working on the replacement door for the sun room.

Cutting out recesses for the hinges.

To line them up with the recesses that are already in the door frame, I dragged the broken door over and lined it up with the replacement door.

After making sure they were facing the right way, I used one of the hinges we took off to line up the recessed area, then traced around it.

And only now, as I look at this photo, I realize that for all the care I took to line it up and facing the right way, I got it backwards.

Dangit!

Ah, well. We’ll work it out.

*sigh*

I ended up carving out the recess with a combination of chiselling it, and shaving it with a utility knife.

My daughter then turned the door to access the outside of it, painted the carved out areas, and gave the outside of the door a final coat. It’s got some rough areas in the wood, so she really wanted to make sure it was well coated to protect it from the weather.

Now that I realize I goofed on the recesses, I’ll just carve out the remaining bit, so the recess runs across the door, then we’ll paint that over, too.

Ugh. I can’t believe I made such an obvious error. I even remember telling myself, when thinking about it a couple of days ago, to make sure I didn’t do that!

What a goof I am! :-D

The Re-Farmer

Some winter damage to fix

This spring, our sump pump is actually going off pretty regularly. Which is great, because it means we have moisture in the ground. The last two springs, I think it went off only once or twice, aside from when we drained the hot water tank into it.

Which brought to my attention some damage to the drainage hose outside.

I think it might have gotten stepped on, while frozen… and it was likely me who stepped on it! :-D

So I went into town to see if I could pick up some replacement hose. Something longer, so that I could direct the hose towards the garden by the old kitchen, instead of having it drain next to the well.

At the hardware store, I was very happy to find sump pump hose kits with 24 ft hoses!

Except… well… see for yourself.

They are very different diameters!

On reading the package, I realized that this hose kit is intended to attach directly to the sump pump itself.

That is not what we have.

I found a very knowledgeable employee to help me out. Unfortunately, I didn’t think to take any photos before I left, so I had to try and describe to him what we had instead.

We’ve got this semi-rigid hose cobbled together, instead. The diameter of this hose, however, should fit the hose kit. It was on the other side that the size is somehow modified so the larger diameter flexible hose could be attached. I had looked at it before and saw that it was clamped very close to the wall, but could not see what it was clamped too.

I still can’t really see.

Something has been wrapped around the end, and then the larger hose was clamped in place.

That “something” looks, for all the world, like batting. Like quilt batting, or aquarium filter batting.

Whatever it is, it’s been there long enough to be covered in crud.

In talking to the guy at the hardware store, he picked several different attachments that I might need, and a plumber’s adhesive that I would need if I had to use one of them. Once I get working on this and remove the broken hose, I should have the pieces needed to attach the hose kit, if it’s a different size. Or, if the end coming out of the wall is the size I’m seeing from the basement, and doesn’t have something weird done to it on the outside, I might be able to use what came with the kit itself.

He said I could return anything I don’t end up using, but that’s not going to happen. Even if I don’t use the pieces, they are things that will come in handy in the future and will not go to waste!

Plus, just in case, I picked up two hose kits. If things are bad enough, I can replace the cobbled together hose that’s inside the basement now and replace it with the flexible hose that should have been there in the first place. If I do end up doing that, one hose will not be long enough to run along the side of the house and reach the garden.

With that in mind, I asked the guy at the store if I could attach the hoses of two kits together, mentioning in passing that right now, the hose is draining next to our well.

That got a rather dismayed and understanding “oh, dear!” as I continued to say why I wanted to have longer hose!

He then found me the piece I would need to attach the hoses together, should I need to.

I was one very happy customer by the time I left the store!

When it comes time to actually start working on the hose, I’ll have to make sure to have the sump pump shut off in the basement. It would not be good for it to turn on while I’m working on the house outside! :-D

So this is a task prepped for, but will have to wait for another day. At least we’re all ready to get it done, though. Other things had priority for today, which will be in my next post. :-)

The Re-Farmer

Dismantling the failed goat catcher

Another thing on the to-do list accomplished!

The pen we threw together to try and catch the visiting goat was finally dismantled. Which never did work. :-D

The “door” end was already trying to make its escape. :-D

The straw I hoped the goat would use for bedding went onto the little garden near the old kitchen; another area we’re trying to build up the soil with layers of organic matter.

The chicken wire belongs to the goat’s owner, so that’s all rolled up and, along with the containers he brought to try and lure the goat with food, it is set aside and ready to be returned.

After what happened when I walked the goat over to his place, I don’t particularly want to see him, or even go to his place, so I might just drop them off at the end of his driveway when we have the chance. :-/

The frames are just set aside for now. I plan to take them apart and will likely use them to make trellises for the squash. Before I do, I will have to snag one of the girls to help me get that table saw out of the shed so we can test it out. If it works, I’ll be able to cut straight ends to the pieces, and even *gasp* have matching lengths to work with. :-D

If it doesn’t work, I’ll see what I can manage with the circular saw.

For now, though, it’s done. We no longer have a pen in the middle of our south yard! :-D

Another thing checked off the to-do list!

The Re-Farmer