Fall planting: the last of the flowers, plus other progress

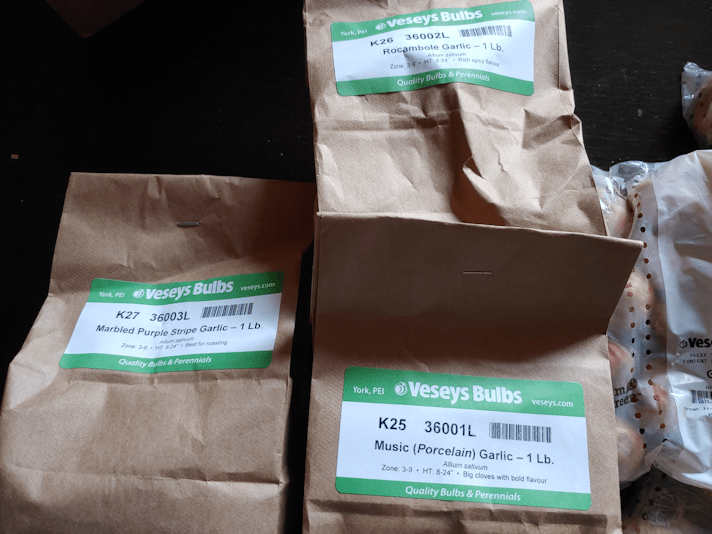
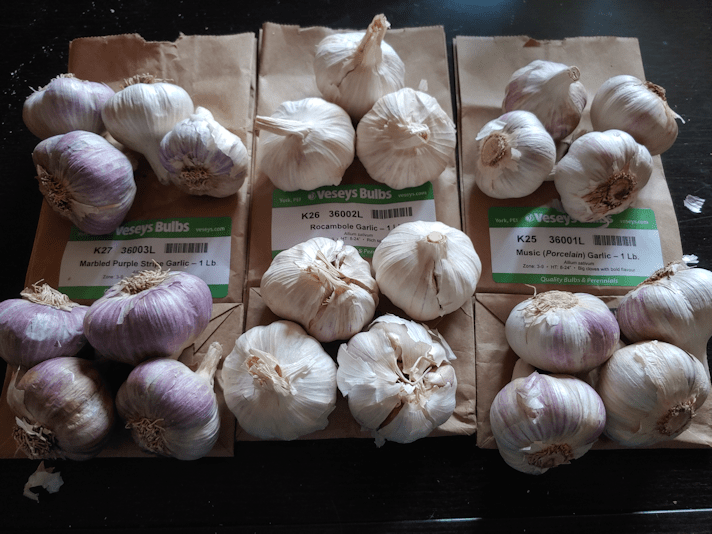
Along with the three types of garlic that came in, my daughters’ flower bulbs arrived.

The tulip collection included 10 bulbs each of Orca, Pinksize and Brownie, and 8 bulbs each of Black Hero, Pamplona and Vanilla Coup. There was also 6 bulbs of Gardenia Daffodil.

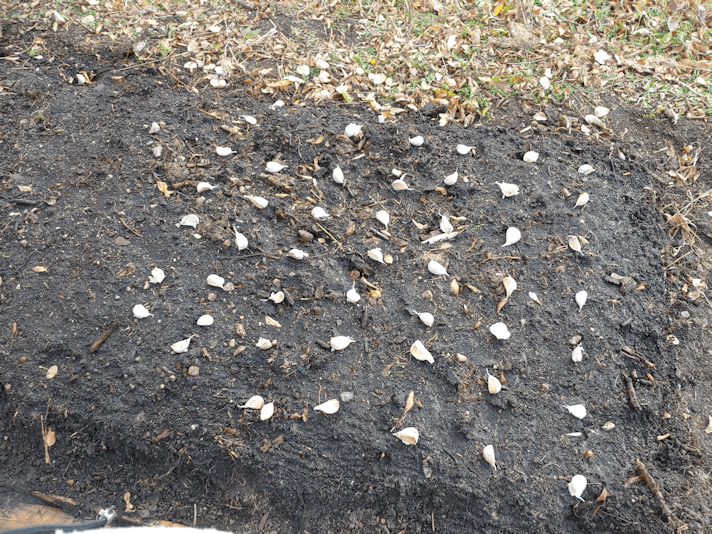
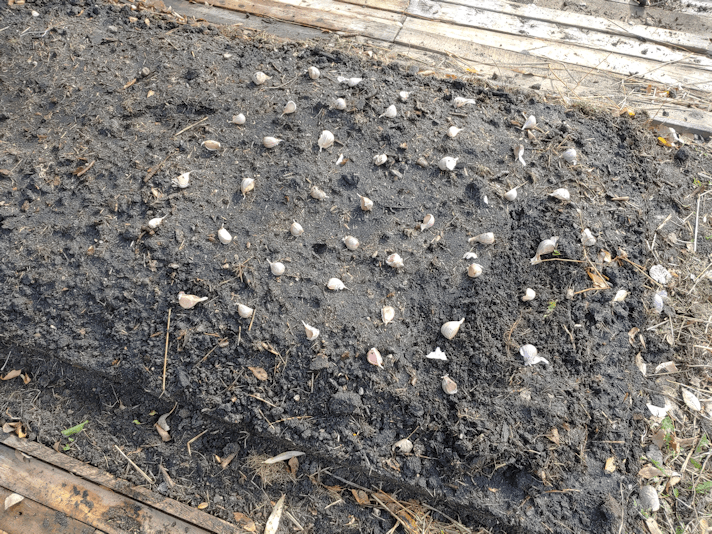
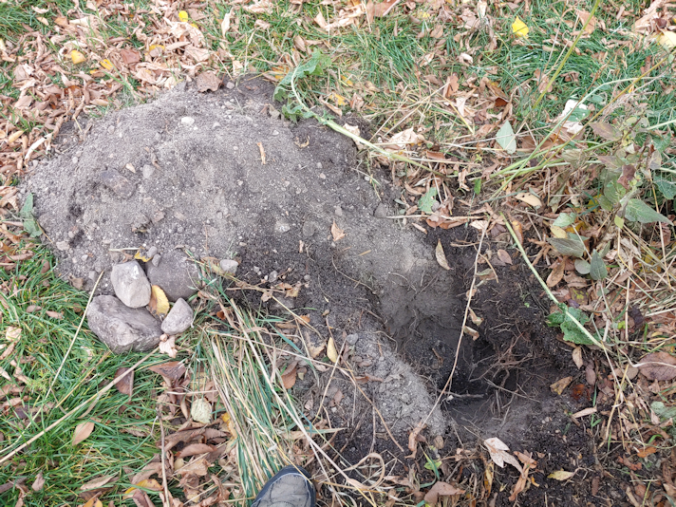
So while I was having fun working in the soft soil, planting garlic, the girls did the hard work of digging holes for bulbs in hard soil, and between roots!

They did not take pictures of the process, unfortunately.

The tulips were planted not far from where they’d planted the Bulls Eye tulips that came in earlier. This area was selected for its combination of sunlight and drainage, and because they’re not supposed to be watered, and this is not an area where they might accidentally get watered along with something else.

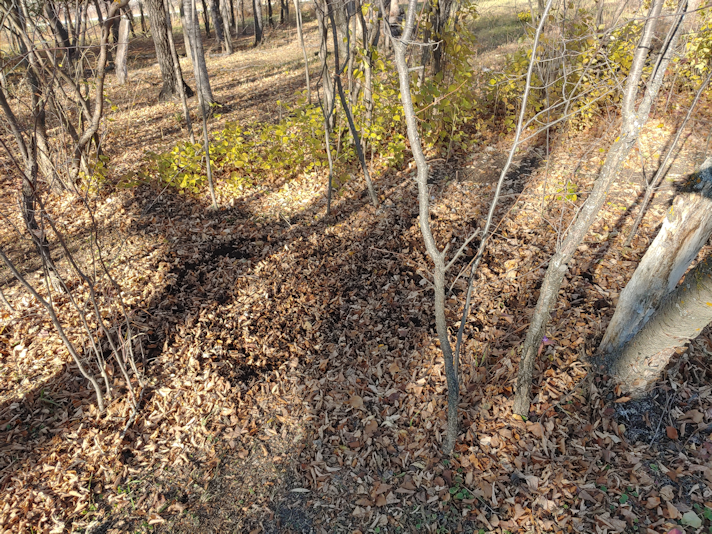
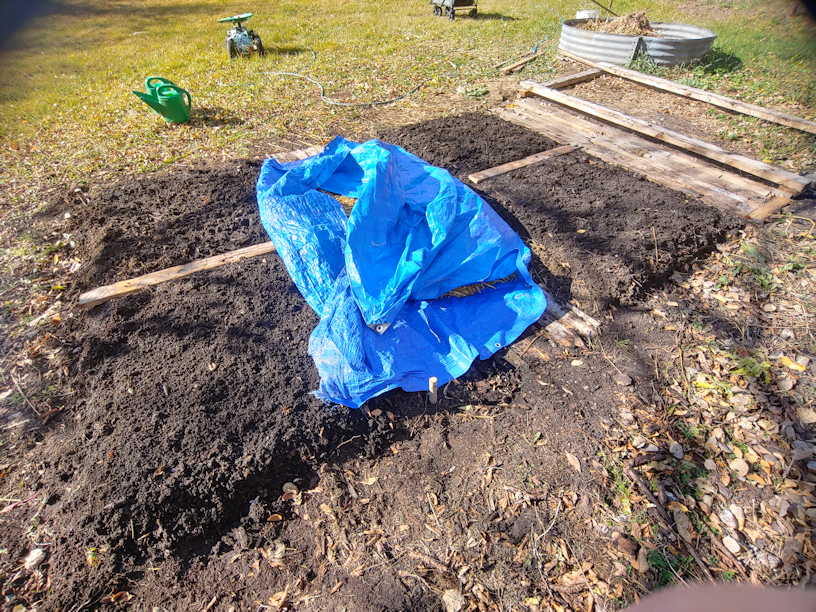
The tulips need to be planted up to 12 inches deep, if we want them coming back year after year, but that depth includes the depth of any mulch. So they planted the 50+ bulbs at 6 inches, adding a 6 inch leaf mulch. Leaves, however, crumble and settle quite a bit, plus the wind was threatening to blow it way, so they also wet down some peat, which we still have lots of, and added that to the top.

The Gardenia Daffodil had different requirements, so it was planted with the Eye of the Tiger irises planted along one side of the old kitchen garden.

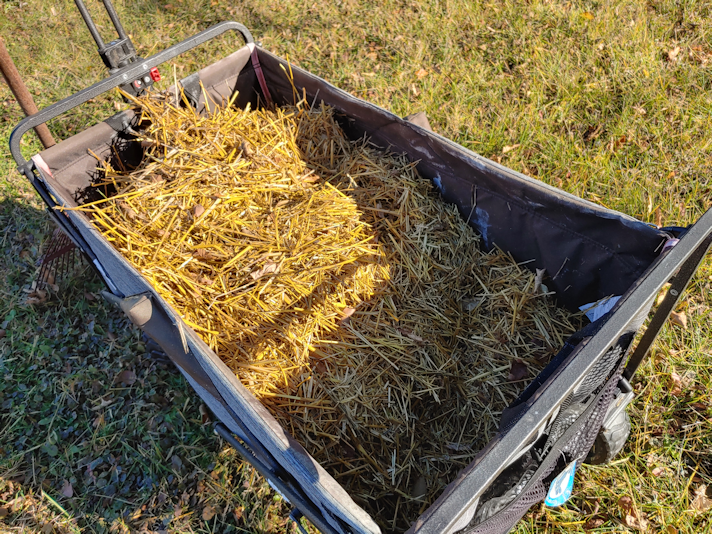
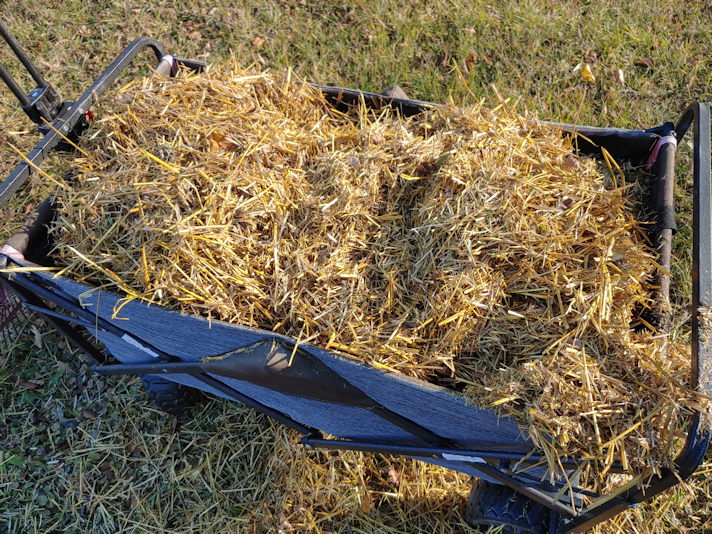
When we are next able to, we’re thinking of picking up a couple of bags of soil to scatter on top of the mulch. The soil under the mulch in the old kitchen garden is much improved from before, but the straw itself, and even the grass clippings, aren’t breaking down very quickly, making it not at all conducive to planting in it. It’s all just too stringy! :-D And now there’s the excess flax straw from inside the cat shelter. Adding some soil and peat, as well as moisture, for the microbes and worms to do their stuff should help it break down faster.

We also got a couple other things off the to-do list today.

Now that the soil around the support post has had a few days to settle (and get stomped down some more, every now and then), our new bird feeder is now hung up. Hopefully, this less decorative design will not get flung around in the wind as much as the church and barn shaped ones were, and with the support now buried in the ground like a fence post, we don’t have to worry about it being knocked over any more!

I also had a chance to work on the grapes, while the girls were still digging holes for tulips.

The first thing that needed to be done was prune them. I hope I did it right. From what I’ve read, they should be pruned above the second bud from the ground, as grapes will be produced on first year vines. The problem was, I couldn’t see any buds at all! So I tried to err on the side of caution.

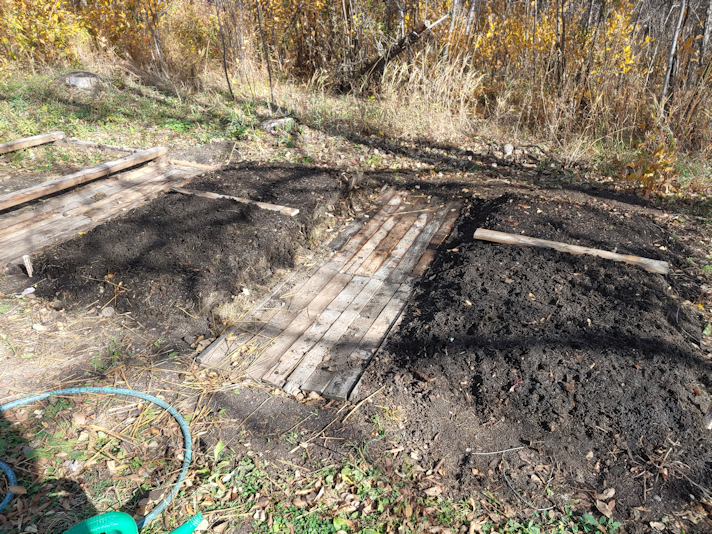
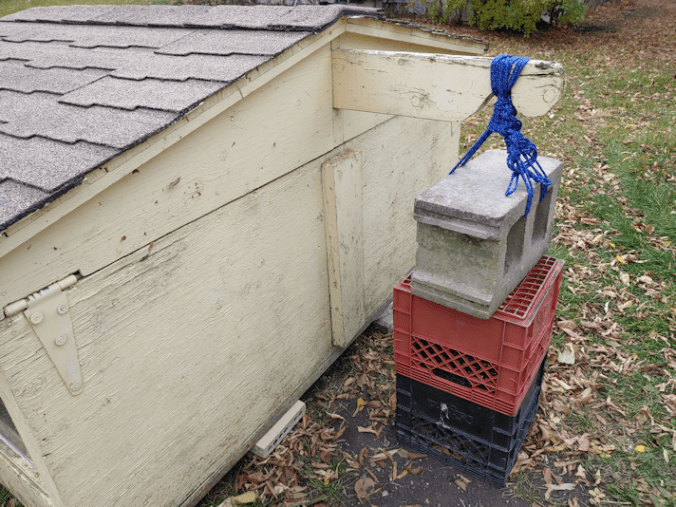
I had to move the trellis supports so I could get behind to harvest the grapes. Today, I finally set them into the ground in their new locations, so we can squeeze behind them again, if necessary. On the right is a long piece of rebar, but the white support on the left is actually two plastic tubes on a shorter piece of rebar. The bar wasn’t long enough to hold the trellis wire, but it is long enough to support the plastic tube. I had to lift off the piece that was woven into the wire mesh, then reset the position of the other two pieces.

When I set this up as a makeshift trellis, I was able to bang the rebar into the ground with a piece of broken brick I’d found while cleaning up around the storage house. I tried that again, but it broke. So I dug around in the sun room, among the things we’d found in there while cleaning it up. There was an old hammer with a ball peen on one side, and a heavy flat head on the other. Much heavier than a regular hammer. For the long piece of rebar, I had to stand on the stairs to reach the top and start hammering it in.

The head fell off the hammer.

It turned out the handle was rotted out at the head!

Thankfully, I still had the new handle I’d found while cleaning up the old basement. I’d intended it for something else, but it didn’t fit right, so I’d left it for later.

Now, I’m glad it didn’t fit the other thing I’d meant it for!

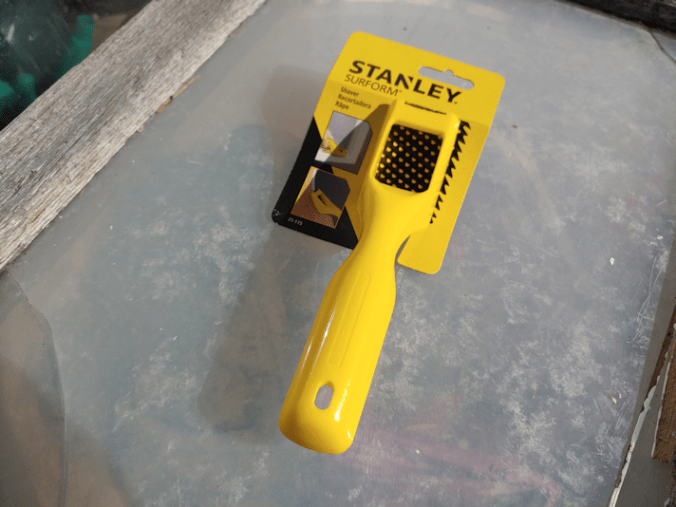
Mind you, it didn’t fit the head of this hammer, either, but I was able to shave the corners of the top, and got it on. I was able to finish the job!

After hammering the rebar supports into the ground and getting the plastic tube in the wire mesh back in place, I was able to use foam covered garden wires a darling friend found for me, to tie the pruned vines to the mesh. Then I used one of the bamboo poles that we’d used in the squash beds as a support for the top. With the grapes growing so well this past summer, I was able to see the weight of the vines were pulling the wire mesh downwards, so this should add some extra support.

Now, all they need is for some mulch to be added to protect them from the winter’s cold. From what I’ve found out about growing grapes in our zone is that they should be just fine with snow as insulation; the vine would be laid down on the ground to be covered. Planted against the storage house like this, that doesn’t really work out, so mulch it is!

We now have all the flower bulbs we ordered planted – 200 grape hyacinth, 100 snow crocuses, irises, gladiolas, and almost 70 tulips – plus the garlic.

That’s it for fall planting this year.

Now, we need to assess how our vegetable gardening went, and decide what we want to plant next year! :-)

The Re-Farmer

Fall planting: the garlic is in!

I was so excited to finally get our bulbs this morning!

Here are the three varieties of garlic we ordered.

I appreciate how they add things to the label, like “best for roasting” , “rich, spicy flavour” and “big cloves with bold flavour”.

This is what 1 pound of each variety looks like. I wasn’t sure how many bulb heads or cloves that would translate into. That was the main reason I wasn’t sure if the two beds I’d prepared for them would be enough. At least I was reasonably sure it wasn’t going to be too much space! :-)

Today turned out to be a very windy day, so my daughter and I broke apart the cloves inside the house.

Those old take out containers were perfect for keeping the varieties organized!

Also, they made the house smell absolutely amazing!

I had been watering the prepared beds, to try and get moisture down to the layer of compost and straw buried inside. Unfortunately, I wasn’t able to do that as often as I’d wanted to, so I gave them another thorough soak.

The frame used as a guide to dig 4′ x 8′ beds fit in the next space, inches to spare between it and the ring around the new compost pile. It was ready, just in case I needed a third bed.

Thankfully, I didn’t!

Porcelain Music Garlic

The first variety I planted was Music. Directions for planting hard neck garlic I have looked up, say to plant cloves 4 – 8 inches apart, in rows about 12 – 18 inches apart. Since we are doing beds rather than rows, I laid them out in a roughly 6 inch grid. The soil is so soft here, I was able to plant the by just pushing my gloved fingers in to the correct depth, without the need for any tools.

Purple Stripe Garlic

With the number of cloves we got from the Purple Stripe, my grid wasn’t quite as even at the end. :-D The corners on this bed seemed like they would collapse a bit, so I moved the cloves that would have been planted there to the other side.

Once the two varieties were planted, I added boards to mark where the grid ended, and the third variety, which would be in both beds, started.

Racombole Garlic
Roggenrola (Pokémon) - Bulbapedia, the community-driven Pokémon encyclopedia

The last ones to plant were Racombole. Which sounds like a Pokemon.

Meet Roggenrola.

(image source)

The Racombole turned out to have a lot more cloves, including more smaller ones. It was almost like soft neck garlic that way. So these were planted slightly closer together. More like 4 inches apart, rather than 6. I probably shouldn’t have bothered to plant the smallest ones, but I didn’t want to waste a single clove!

Those boards across the beds also came in very handy to put a foot on to brace myself, making it easier for my short little arms to reach the middle. ;-)

Planting in these beds really demonstrated for me that building much higher raised beds for accessibility is a very good idea!

The next step was to add the mulch, and this is where the wind became a real potential problem.

Thankfully, I thought to put the chopped up straw on a tarp.

It was easy to slide the whole thing into the path between the beds. I could then grab handfuls, keeping them low and out of the wind as much as I could, to spread out.

I then had to rush to give the mulch a soak with the hose, more to weigh the mulch down than anything else! As you can see, the wind was already starting to blow the straw away!

The last step was to cover the beds with plastic – which the wind certainly made challenging! Thankfully, we’ve found a couple of rolls of plastic while cleaning up the house and basements, so we have plenty, and I could unroll it directly on the mulch, adding weights as I did.. The plastic is actually folded in half on the roll, and I didn’t bother to unfold it, so this is a double layer of plastic on the beds.

As you can see, those board across the beds came in handy for the weights, too!

The plastic isn’t something I’ve seen suggested, in general, but we are in zone three, and most of the places I’ve looked up are in at least a zone 6. While October is the month for planting hard neck garlic for them, we probably should have planted these at the end of September – and would have, if they had not been back ordered.

The issue is overnight temperatures. We’re consistently hovering just below freezing. In the long range forecasts, our highs for the day will be just barely above freezing.

There are a few things going for these beds that should help with our planting this late in our zone. Burying the organic matter at the bottom of the beds means there should be some warmth generated as they break down, just as it would have if it were in a compost pile. The mulch will also help regulate the temperatures and, finally, the plastic should help keep things a bit on the warm side. I don’t want it warm enough for the garlic to start sprouting, but they do need to start their growth below ground before winter temperatures set in.

I might remove the plastic later on. Snow also acts as an insulator, plus these beds should not need any watering throughout the growing season. Between normal precipitation and the mulch, they should have enough moisture. Letting the snow cover the beds would give them that first burst of moisture in the spring, and the beds being slightly raised means they should thaw out faster than the ground surrounding them. However, the plastic will also keep the moisture they already have from drying out before the snow falls, and will help the soil warm up even faster in the spring, giving the garlic a chance to start growing a bit earlier. I would then remove the plastic once I saw that greens were making their way through the mulch.

My mother grew garlic in the old kitchen garden, but she never used mulch or plastic or any of the other techniques I am using that irritates her so much. :-D So I can’t go by how she did things, in past years.

So if there are any experienced garlic growers here, I would love to hear how you have done it! And would you leave the plastic, or take it off before the snow falls?

I’m really looking forward to seeing how these do. When it comes time to harvest them next year, we will be looking to save the largest bulbs for planting. Hopefully, we’ll have enough large ones to have more to plant than what we started with.

You just can’t have too much garlic, after all!

The Re-Farmer

Sun room progress: door frame painted

With the chillier temperatures, it’s really not a good time to be painting outdoors, so I made a point of starting right after doing my morning rounds. This way, it could have the whole day to cure, and I could decide on whether I wanted to do a second coat or not.

The top is cut so terribly crooked! LOL This is the piece I cut using a hand saw, after two failed attempts with the power tools we have available.

Though the house was painted the summer before we moved in, it looks like the inside of the door frame only got one coat, so I went ahead and painted that, too.

The extension cord to the cat shelter was staying, but I managed to keep it away from the paint. This corner on the left is where we’ve had to add the most material to make up for the shifting of the frame.

It’s really amazing how much a coat of paint makes even the worst patch jobs look better! :-D

Well, that didn’t take long! :-D

I had to leave the doors into the sun room open, of course, and later in the day we found white foot prints on the concrete inside! :-D

I’m rather happy with how the paint was feeling by the end of the day. We will be able to drop the cord down and actually close the door for the night. I’ve decided to go ahead and give it a second coat tomorrow morning, which means that the day after tomorrow, we can hang the door back up again.

It will be so good to finally have this job done!!!

After painting this morning, I headed to the post office to pick up our bulbs, which are now planted – but those will get their own posts! :-)

The Re-Farmer

Thanksgiving lunch, mulch experiment and outside kitten progress

Lats this morning I headed over to my mother’s place with a turkey dinner to have lunch with her.

On the way out, I spotted three sets of ears in the window of the cat shelter.

Tiny sets of years belonging to the little kittens! I didn’t dare go closer for a picture, though, because I didn’t want to startle them away. There may have been more cats inside with them that I couldn’t see, too. I’m so glad to see them in the shelter, rather than hiding under it!

My mother and I had a very nice lunch and visit (how visits turn out is always touch and go with my mother! LOL). I brought a mask exemption card to tape to her door, and another she can carry with her. Hopefully, that will help reduce the harassment from the caretakers. Unfortunately, I think more has happened than she is telling us, because she kept insisting she “doesn’t want a war” and even started asking me not to call the housing department responsible for her building to talk about the caretaker’s abusive behaviour. She wore a mask – under her nose! – to meet me at the side door that’s very close to her own apartment door, and even in that short distance, by the time she was back in her apartment, she was struggling to breathe. She had also mentioned to me on the phone, waking up and struggling to breathe again. So I brought a foam wedge we got for my husband that he ended up not being able to use. Depending on how it’s positioned, it can be used under the knees, to lean against while sitting up in bed, or to sleep in an inclined position. The doctor had recommended trying to sleep more upright to see if that helped. When she saw it, however, she flat out refused to even try it and told me to take it home. Eventually, she said it was because it looked ugly! Which I highly doubt is the real reason. Frustrating!

Still, it was a good visit and my mother was very happy I was able to come over. I think the pandemic social restrictions are really getting to her. There used to be many events and gatherings, either in her own building, or in nearby venues, that she attended. Now, there are none. It seems the only real “social” interactions she’s getting these days are with the nasty caretaking couple. The restrictions seem to be bringing out the worst in people. I think she is getting very lonely, and some serious cabin fever!

Once at home, I took advantage of the warmer weather. With the garlic ready to be picked up when the post office opens tomorrow, I was thinking of how I wanted to mulch the beds. The straw is not breaking down as I had expected, and I decided to try an experiment.

Using the new push mower to chop it into smaller pieces!

The bag filled up very quickly, but it wasn’t until I had already started that I realized I’d forgotten to check the height of the mower. It was at 7; the highest setting! So things weren’t quite as chopped up as I wanted.

I lowered it to 3 and that chopped things up much better.

It took only 2 bags to fill the wagon, it’s so fluffy. LOL I laid out a tarp near the beds the garlic will be planted it, to make it easier to work with when it’s needed – plus I can fold half the tarp over the pile to keep the wind from blowing it away.

Unfortunately, I had an unexpected problem.

The new lawn mower stopped starting.

Right from the beginning, it was harder to start, but every time I had to turn it off to empty that bag, it kept getting harder to restart it until, finally, I just couldn’t start it at all. It had been so easy to start, before! In the spring, when we had so much rain, I was using it a lot and had no problems. Then the rain stopped, and the grass never really got long enough to make it worth cutting again. So it’s been sitting in the garage for the last couple of months. That on its own should not cause the problem. I couldn’t find any reason for it. It just won’t start. After getting only 2 1/2 wagon loads done, I finally gave up.

I will just have to take it in to the small engine shop in town to get it looked at, later in the year.

So the experiment worked, as far as chopping up the straw to make a finer mulch. It was just the lawn mower that failed!

After giving up on that task, I took the time to take the sun room replacement door off in preparation for painting the frame. I plan to get at that as soon as possible tomorrow morning, then go to the mail to pick up our bulbs. I will get the garlic in, while the girls will be doing the digging to get their flowers in.

While working at the door, I spotted this.

That is two little kittens in there! One of the orange tabbies, and Creamsicle Jr. As I walked around after taking the picture, Potato Beetle came out of the entry. I hadn’t seen him at all in there!

So I decided not to go inside after taking the door off, and stayed to see if I could get the kittens to play.

I had a target in mind.

This little lady. In the interest of trying to reduce future litters, we are hoping to get her friendly enough to bring her inside.

Yeah. I know. We have too many cats inside already!

Nostrildamus, meanwhile, couldn’t get enough attention! It was only a couple of weeks ago that we were lucky if we could pet him at all. Now, he’s all over us, asking for pets! He still doesn’t like to be picked up, but he does like chewing on fingers!

The two napping in the shelter eventually came out to see what was going on, and joined in on the play. I was able to pet the little orange one – the smallest of the 4 younger kittens – and even managed to pet Creamsicle Jr. a bit. The calico, however, would not let me touch her! However, my daughter came out to join me for a while, and she tried to play with them. Not only did she get the calico close enough to pet, she was even able to pick her up! Only briefly, and she didn’t like it, but she didn’t run away after jumping down, either.

Aside from Nostrildamus, we seem to be having a better time of socializing Butterscotch’s second litter than the older kittens. Though it didn’t help that Butterscotch was around and growling all the other cats away, including her own babies!

Still, we have made some socialization progress!

The other little orange kitten came by later. That one, the gender is still in doubt, but from what little we’ve been able to see, I suspect it is female.

I thought it was supposed to be rare for orange tabbies to be female, but here, they seem to be the majority! Of the older kittens, Nostrildamus is the only whose gender we are sure of. His one confirmed sister is now inside, but with the luck we’ve been having, his other sibling and Rosencrantz’s baby are also female! And we can’t get anywhere near any of them. :-(

Ah, well. We will just have to do what we can. Mostly, I’m just really, really glad the little kittens are going inside the shelter.

The Re-Farmer

Happy Canadian Thanksgiving weekend!

The kitties got an early Thanksgiving breakfast.

Someone is looking like I woke him up too early!

Nostrildamus and his sibling were sleeping in the cat house. From the red light on the timer, I could see that the heater was on. Now I’m thinking of getting a thermometer to put inside, facing the window. LOL I’m such a suck, when it comes to the cats!

Not only does Nostrildamus (aka Nosey) now allow me to pet him, regularly, he’s picked up Potato Beetle’s habit of going between my feet while I’m trying to walk!

Mystery is giving me attitude!

I’m good with that. She and her mom usually run away!

Though Thanksgiving is officially tomorrow, we had our dinner today. The brined turkey using apple cider vinegar in the brine, apple pieces added into the cavity along with the lemon halves, and more ACV added to the roaster, turned out fantastic. I made a mushroom gravy this time, frying up a mix of sliced white button, crimini and oyster mushrooms in advance, adding them when I made gravy from the drippings, then using an immersion blender to whiz the mushroom pieces. That worked really well.

Also, we still had some of the Poor Man’s Hippocras left, and it most definitely tastes better chilled. :-) It also went well with the pumpkin pie and whipped cream! Which makes sense. They both have a lot of the same spices

Meanwhile, I’ve already packed up some take-out containers will be taking them to my mother for lunch tomorrow. When I called to arrange the time, she was asking me right away, if I had mashed potatoes and gravy! LOL Yes, Mom, I do. Just for you!

We have much to be thankful for and right now, as I look out the window, I am thankful we aren’t having a blizzard right now, like we did last year! :-D

Happy Thanksgiving!

The Re-Farmer

Winterizing the cat shelter

After working on the sun room door frame and the bird feeder, it was time to work on the cat house.

The first thing I needed to do, though, was adjust the counterweight.

I sacrificed another crate to hold the block, then retied it. I had doubled up the rope before and this time, rather than cut it, I folded it into thirds. There shouldn’t be a lot of friction from the block, but I figure the more cords there are, the less likely they’ll end up breaking and falling apart. Of course, the weight being supported by the crates will help prevent that, too.

I then added a couple of bricks into the openings of the block to add more weight before I tried opening the roof up.

It’s a Potato Beetle!

Nostrildamus was in there, too, but he ran off when I opened it up.

Potato Beetle didn’t move, the entire time I was working on things!

With the roof fully open, the brick is resting on the ground. This is exactly what I was hoping for!

I then screwed in the terrarium heater, then used the aluminum lid of a take out container as a heat shield, with washers as spacers to keep it from being directly against the wood.

I then plugged it in and let it heat up, sticking my hand under it every now and then. I’m happy to say that the aluminum didn’t even get warm in the entire time I was testing it, though I could certainly feel the heat off the ceramic bulb.

Which was a good time to install the smoke detector.

At the very least, if something goes wrong and a fire starts, any cats inside will be frightened off long before we hear the alarm from inside the house.

Once I was satisfied that the heat shield was adequate, the safety cage was put back. With the heater being slightly wider than a light bulb, I used washers as spacers to make sure nothing was touching it. I ended up using 5 washers at each screw. It’s a good thing that was enough, because any more, and there wouldn’t have been enough of the screw sticking out to secure the cage!

I also put in the timer, set to turn on/off at dusk/dawn. The sensor is facing the largest window, which is facing East. This will likely mean it will turn on before actual dusk but, in the winter especially, that will be just fine.

Then it was time to set up the waterproof case for the electrical cords. I still intend to pick up a longer extension cord, so that it can be tucked under the roof and out of the snow, but at least we can start using it now.

Once everything was done, the counterweight was as much a help with closing the roof as opening it. The hard part is near the end. There is a notch cut out that has to line up with the roof of the entry that was added on later. Without the counterweight, and two people lifting, the person on the window side of the entry has enough to grip, but the person holding the other side of the roof has nothing to grip without risking smashed fingers – and at that point, the roof drops pretty hard! With the counterweight, not only can I easily open it myself but, as I close it, I can do so gently enough to line up the notch to the entry roof, and let it close gently instead of dropping it.

The only thing left in here will be to plug in the heated water bowl, and that won’t be needed for a few more weeks, at least.

Tonight, the outside cats will have their first night with a heated shelter! It isn’t much; the terrarium heater may get very hot to the touch, but that’s a large space for a small heater. This is okay, though, as being too warm would have a whole different set of problems!

It should be interesting to see how many cats I will find taking advantage of the new warmth, in the morning!

The Re-Farmer

Progress: sun room door frame, and bird feeder support post

It has been a rather productive afternoon!

The first order of business was to test out my new tool on the sun room door frame.

I had gone into town to look at mini planers, but while perusing my options, I chose this tool, instead.

It’s a shaver. The shaving plate looks rather like a bada$$ Parmesan cheese grater. I figured the many cutting blades would make short work of the areas I needed to work on.

I was right. (For a change! LOL)

Using the blue paint marks from the door to show me exactly where I needed to shave off the wood – was well as smoothing my messy, messy cut somewhat – I did both the side of the door frame and the threshold.

What a fantastic little tool! The door can now close without catching anywhere on the frame or the threshold!

Then, because it worked so well, I did the threshold for the inner door, too. It now closes better, too.

The door is not quite done, yet. I’ve decided I need to take it off again, and move the hinges in about half an inch. Right now, when the door is closed, there is a lot of stress at the hinges, and I can actually see where parts of the door are starting to pull apart. This is a temporary fix with a salvaged door, but I’d like it to at least last the winter!

When we first set up the replacement door and attached it to the frame, we lined the hinges up on the door itself with the old door, then rehung it in the same recesses in the frame that the old door’s hinges were in.

With all the other problems that had to be dealt with, we still used the same spots, even after I filled the recesses with wood. Now that the door can actually close, I can see that the hinges are too far out, which basically forces the door to bend in order to close.

As I was thinking about this, and remembering the old door we were replacing, I am realizing what likely happened. When the sun room was built (which happened while we were living in another province), it likely had a different door. When that door was replaced with the door that was here when we moved in, the same recesses in the frame were used for the hinges. Remembering the problems we had to close that door before it finally fell apart, I am guessing that the house had already shifted and the frame was no longer straight, plus the door itself didn’t set the same way as the previous door, but whomever hung it didn’t bother doing anything to compensate for that. Over the years, my parents just put up with it. Meanwhile, the house would have continued to shift which would have made it worse, until it was in the condition it was in when we moved here.

If my guess is right, we hung this door up in the same location as the previous door, which was hung in the same location as the original door.

What I am now thinking of doing is taking the door off again, painting the frame, then hanging it back up with the hinges further in, rather than where the old door was hung.

Given the overnight temperatures, though, I will need to wait for a sunny, warmer day so the paint will have as much time to cure as possible before it starts dropping below freezing. Unfortunately, the long range forecasts are showing a steep drop in temperatures over the next few days, though it is supposed to flatten off after that.

For now, though, we have a working door!

The next job on the list was setting up the newly painted bird feeder stand.

I decided to set it like a fence post, in the same spot as before. The new metal support we have the suet cage hanging from was set aside, and self-seeded flowers and bird seed plants cleared away. Much of it was already empty, though. I don’t know what cats were fighting in there, but they flattened everything around the bases of the bird bath and feeder!

I half considered trying out one of the old post hole diggers we found, but as I dug, I immediately started hitting rocks, so I’m glad I didn’t! The soil is a lot deeper here than in other areas; I just started to hit sandy soil when I stopped. Very different from the soil further away from the house.

The larger rocks I dug out went back in, to help support the post.

Finally, the soil was returned and stamped down. It will now be left for a few days to settle before I hang anything on the hook.

If you look closely at the suet feeder in the back, you can see a chickadee on it!

Chickadees were not my only audience!

The suet feeder was returned, with the hook facing the bird bath. I deliberately placed the other hook facing away from the bird bath, to reduce the number of seeds that end up in it. That’s not as much of a concern with a suet feeder, though my daughter pointed out that it’s a lot closer to something the cats use to drink out of! So it will likely be moved further away.

The chickadees were quick to return, and are already using the support bars from under the platform feeder as perches! This might actually be a better use for them than to add another platform later.

The hook is on the north side of the post, but the post itself is leaning slightly to the south. This was not intentional, but rather than straightening it, I decided to leave it. It should compensate a bit for any pull from the weight of a full bird feeder. That would be more of an issue with those surprisingly fierce winds from the south that kept blowing the whole thing over until we stopped hanging a feeder on it.

I’m rather pleased with how it looks. Plus, it’s set deep enough in the ground that I should be able to hang a feeder on it without needing to stand on something. Previously, I could tip the whole thing over to reach but, obviously, that is no longer an option!

The real test will be how it holds up the next time we have a storm, while a feeder is hanging off of it!

The Re-Farmer

Preparing for Thanksgiving

Before I start, I want to say Powitaninia! Dziękują za odwiedzanie! to my sudden spike of new visitors from Poland. To jest cudowne mieć wy tutaj.

Today is going to be a busy day for us – and it was a busy day of cats this morning!

On the list of things to do is clean out the eaves troughs (aka gutters), so I left the ladder out after bringing it to the well for the plumbers. The cats don’t seem to mind it there at all. :-D

The painted bird feeder stand is now ready to be put up again, so that’s another thing on the to-do list.

Can you see the little snoot of a hidden kitten?

There he is!

The little kittens now come out to the food bowls here, consistently. Though I have seen one or two explore inside the cat house, they prefer to hide under it, rather than in it!

Also, their mother is getting nasty! Butterscotch has been growling and hissing other cats away from the food bowls, which is not all that atypical. It’s when she goes after her own kittens that it concerns me!

Also on the to-do list is building a simple shelter to keep the snow off the food bowls. One that’s long enough that I can spread them out, instead of crowding them under the makeshift shelter I’ve made on the sawhorses to keep any rain off.

It’s Thanksgiving weekend here in Canada. While the holiday falls on Monday, we will be having our dinner tomorrow, and some preparations are starting today. I’ve got a turkey that should be thawed out by now, and I just finished preparing a brine. I decided to try something different this year, since I happen to have the ingredients. Along with the usual salt, brown sugar and herbs, I’ve added a generous amount of apple cider vinegar (the one that I used as a “starter” for our own vinegar that is still fermenting). Once the brine is cooled down, it will go into our giant stock pot with the turkey, adding enough cold water to completely immerse the bird. Then it will go into the old kitchen to chill for the night.

Having an un-insulated room has come in surprisingly handy for things that need refrigerating, but don’t fit in our refrigerator! It’s not quite cool enough in the summer, but this time of year, it’s perfect for the job.

Probably not too good for our fermenting vinegar, though! :-D

We never stuff our turkey, but I do like to add aromatics into the cavity. When it comes time to roast the turkey tomorrow, I will continue the apple theme. I like to rub the turkey all over with lemon, then put the pieces inside the cavity for extra flavour and moisture. This time, I plan to add apple pieces as well. The bottom of the roasting pan will have some celery sticks, onion slices and carrot pieces laid out to act as a roasting rack, while also adding flavour to the juices that will be used to make a gravy. The turkey itself will be topped with a woven mat of bacon – a trick I learned from my late mother-in-law.

I picked up some things yesterday, to help me with finishing the sun room door, so I will be heading out to work on that right away. I neglected to check the mail yesterday, though. It turns out our bulbs and garlic arrived, but with Monday being a holiday, I won’t be able to pick them up until Tuesday. So the girls and I will use the time to prep where the bulbs will be planted. Given how late in the season it is, and that we are dipping below freezing almost every night now, we will have to make good use of mulch to help the bulbs get the start they need once they’re in the ground.

Lots of work to do before the cold! But we will still take the time to celebrate the many things we have to be thankful for. For all the problems we are finding in this place, it’s still better than where we were before moving out here! :-D

The Re-Farmer

Encouraged

Well, after getting such bad news from the plumbers, and passing on what they told me to my brother, he gave me a call, and I’m feeling much more encouraged.

There is no one alive today that knows this farm and the systems that run it better than my brother. So when I told him in more detail about what the plumbers had said, he was torn between disbelief and laughter, that they would be so unfamiliar with, and intimidated by, the system we have. It’s still used a fair bit, and he had no problems finding a replacement for the basement pump.

He does not share their concerns about the immersion pump and that we might lose our water. This pump has been replaced about 4 times in the past 50 years, by his memory, and it has always been a relatively simple switch.

He will be coming out to do it himself. He just has to find the time in his own schedule to make the trip out. It was something we both hoped to avoid, but he’s frustrated by plumbers that are so intimidated by our old system.

By the end of the call, I was feeling much more encouraged. As much as I am willing to trust the professionals, my brother knows things about our system that they don’t. If he is confident that the pump can be switched out without causing problems in the well itself, I trust his experience.

Speaking of wells, I remembered to ask him if he remembered what happened to our old well, from before this one was dug. This pump was operated with electricity, but when we had power failures, we could attach a handle and pump it manually. I remember bits and pieces of when problems started, but not why. He told me that the water had started to come out dirty. His guess is that something collapsed in the pipes. I then got the lowdown on how that well was set up, including that it has a piston at the very bottom, some 80 feet down. So when it was first being pumped, it would take a while for the water to reach the top (I remember that time it took before water started to come out). Of course, once it was no longer being used for a long enough time, that water would slowly drain down again.

Theoretically, if I pumped long enough, I should be able to get water out of them, but it is most likely the pipes need to be replaced.

That opens up possibilities for us, since one of the things we want is to have a manual pump well as a back up if we ever lose power and can no longer get water from the well by the house.

I wonder if I should move things away from that pump and give it a try?

The Re-Farmer

Can I just quit now?

Honestly. I would really like to just quit right now.

This morning, I tried calling a plumber about switching out our well pump in the basement. This would be the third plumber we’ve contacted in the past few weeks.

To recap: we are on a deep well for water. There is an immersion pump in the well itself, and two pipes going from the well to our basement, into another pump. The two pipes in at one end become one pipe out the other, pumping water into our pressure tank.

The well pump in the basement has been making noises. At times, the pressure is lost, as if it is losing prime, or as if we’re using the water faster than it can refill the pressure tank. When that happens, it makes a grinding noise. Once the pressure gauge on the pump is where it’s supposed to be, it goes quiet and stays quite for the rest of the time it’s running, but the noises return frequently, if not every time it turns on. Basically, it seems to be wearing out.

My older brother had bought us a new pump and was going to install it for us, but we ended up fighting with our septic, instead. So the new pump, with all the fittings, clamps and whatnot that he could think of possibly needing, has been sitting and waiting ever since. Instead of making my brother come back, we were just going to hire a plumber. Unfortunately, the “discretionary” funds had to go towards vehicle repairs, but I really wanted to get that done before winter, in case the plumber needed to go into the well, since there was also the possibility the foot valve in there was leaking.

I called the plumber and left a message, honestly not expecting to hear back until Monday. So it was a pleasant surprise to get a call back a couple of hours later.

I had said in the message what we needed done, and that we already had a pump. It just needed to be switched up.

When he called, he asked if I meant the immersion pump. No, I said. The one in the basement. He seemed confused. I brought up the possibility of the foot valve leaking in the well, but that it was the pump in the basement that was making the noise, and we wanted to switch that out.

He said they had better come out and take a look.

They came out this afternoon!

I now understand why he was confused. I’m starting to get the impression that we are the only ones that still have this old system. Once they were in the basement, checking it out, he explained that basically, no one likes to work on these systems, because they are such a problem. He asked me to turn on a tap to trigger the pump to turn on, so I went to the bathtub and did what we normally avoid doing: turned both taps on to full. This not only turned on the pump, but triggered that grinding noise and, eventually, I lost water to the tub. Which is when I shut off the taps and joined them in the basement again.

Once the pump’s pressure reached where it was supposed to be, the pump was nice and quiet again. He told me that, it’s not a matter of simply switching pumps. The front cap of the new pump would have to be removed and installed inside the well itself – and there would be just one pipe leading to the basement and the rest of the pump. There was a good chance changing it would cause further problems, which is when he asked to see the well.

They were able to get the cap off, with it’s one bent up handle. I am pretty sure this is the first time I have ever seen the inside. My only memories are of when the trench was dug from where this well was dug, towards the barn. That is where a water pipe to serve the barn and water fountains for the cows was laid, as well as the main pipe for the grey water from our septic tank. I don’t know exactly where near the barn these pipes split off in opposite directions, but I do have a general idea of where it must be.

Once the plumber used the ladder to get into the well, his assistant had to take it out so he’d have room to actually move around.

The news did not get any better.

It seems ours is a 4 inch well. Modern wells are 5 inch. That means there is a smaller immersion pump – a size that’s very hard to find these days.

Like the first plumber we talked to – the guy who has worked in our well before – he said it would be better to replace the immersion pump. This would mean one pipe into the house (the other could be used for the electrical wires to go through) and no pump in the house.

The other problem with doing that job is, the cap inside the well – what he was standing on to check out the system – would have to be removed. There’s no way to know how high the water table is right there, but given how damp and rusty things were, it’s probably quite high. Which means they’d be working in water.

However, this is a 50 year old well.

What we really need is a new well.

We could do all the other work, spending what might be as much as a couple thousand dollars but, in the end, we could lose out water entirely. He did not dare even switch out the pump in the basement, for fear of losing us our water.

As we were chatting, I asked questions and mentioned various things, ranging from the snails that showed up in our fish tank after using well water to make a change (I forgot to mention the algae blooms), and how we stopped drinking the water since them,to having to shock the hot water tank with hydrogen peroxide regularly because of the smell.

By the time I got to that, he was looking a little wild eyed. What had been, to paraphrase, as sort of “I won’t go so far as to recommend it, but if it were me, I’d drill a new well,” became a “yeah… you really need a new well!” The more he heard about it, the more he wanted to stay away from doing things like replacing the pumps, either one at a time, or both at once. We definitely have issues that are beyond what they can do for us.

In the end, after apologizing for being the bearer of bad news, I gave him my email so he could send me some names for well drillers.

Oh, and when I asked if he knew what a new well might cost? Depending on various factors, of course, it could cost as much as $10,000.

I told him that if we had that kind of money, we’d have a new roof! :-D

Normally, they would have charged for a service call like this, but by the end of it, he said he would not charge us anything. Then apologized again for all the bad news. My response was along the lines of, with this place, I’ve come to expect it!

For now, we were basically told to hang in there with what we’ve got. We have water right now, and it’s not worth jeopardizing that until we are in a position to get the job done fully.

So, not only do we need $10,000 for a new roof, now we need another $10,000 (estimated) for a new well. That’s on top of everything else that needs replacing, like flooring and walls and repairing the old basement walls, and the weeping tile under the new basement… on and on it goes.

Coming up with that kind of money is a challenge all on its own. Doing it without jeopardizing my husband’s disability insurance is another issue. If we made that much in “income,” he’d basically lose his insurance. It’s not just a matter of his disability income that we are living on, but coverage for his medications.

Needless to say, I got zero work on the sun room door today.

It would be so much easier if we could quit, somehow.

But that’s just not an option.

So, I guess we’ll just have to figure something out.

:-/

The Re-Farmer