This morning, I touched up the scratches we found after we flipped the picnic table upright again. This evening, we moved it over by the fire pit.
It will probably be moved again, the next time we do a cookout and figure out where is the most useful place to position it in relation to the fire pit.
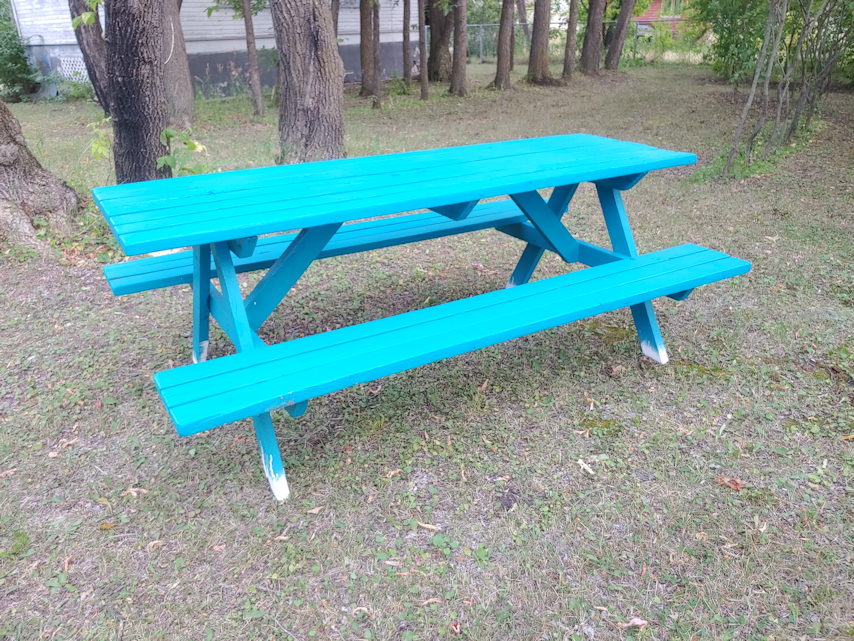
It practically glows! :-D I’m really happy with how it turned out, and look forward to using it at our next cook out!
Last night was supposed to be the height of this year’s Perseids meteor shower, so I headed out again to try and get some photos.
This time, I actually played around with the manual settings on my phone’s camera a bit, so I will include that information the photos in the captions, for those who are interested. I resized the following photos by 50%, but the images are otherwise untouched.
f/1.5 Exposure time: 13 seconds ISO 1600
This time, I headed straight to the old garden area, which is the darkest areas that is close to the house. As before, I had my phone on a GorillaPod and used voice commands to take the photos after positioning it.
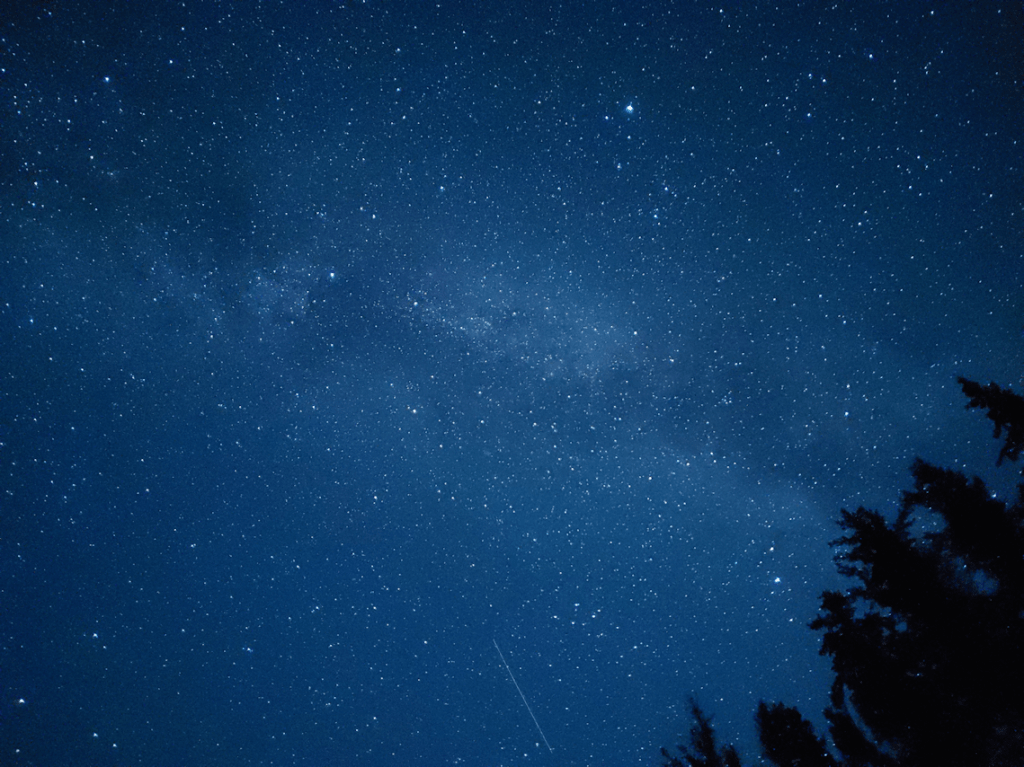
In the above photo, you can see I caught a meteor on the bottom left. I did not actually catch many meteors in photos, and while I did see (but missed getting a photo of) one really bright meteor, followed by a flash when it hit the atmosphere, I didn’t actually see most of the meteors I managed to catch during the long exposures!
I think I may have simply gone out too early in the night, and it may have still been a bit too bright.
f/1.5 Exposure time: 20 seconds ISO 1600
In the above photo, you can see some clouds, looking like a smudge on the bottom right. They were so thin and sparse, we could not actually see them ourselves.
f/1.5 Exposure time: 20 seconds ISO 1600
After taking a few shots with the phone on the ground (and being tackled by a Potato Beetle, desperate for attention!), I ended up using the top of the straw bale as a surface.
This was good enough for Potato Beetle, too. After sniffing the phone, he laid down nearby and kept me company.
Much nicer than him jumping half way up me, and hanging on with his claws… :-o
f/1.5 Exposure time: 30 seconds ISO 3200
While I was taking photos with my phone’s camera, my daughters came out with the DSLR on the tripod to give it a try.
I haven’t uploaded the card yet, but my daughter was very frustrated. Even at 30 seconds exposure time, the camera preview showed nothing but black. While it may not have been as light as the above 30 second exposure shot, it still shouldn’t have been black!
f/1.5 Exposure time: 30 seconds ISO 1600
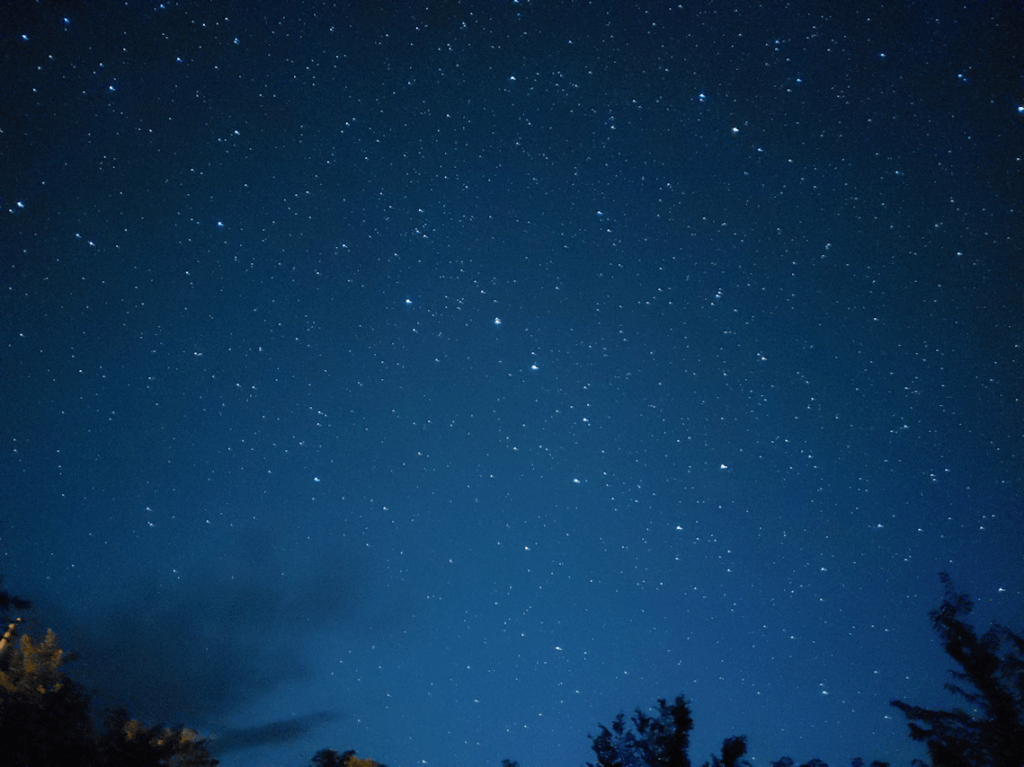
I just love how the Milky Way shows up. Especially in contrast with the trees.
f/1.5 Exposure time: 30 seconds ISO 1600
One of the frustrating things about trying to take the photos is how many of them ended up being out of focus. The camera was on auto focus, so I finally switched that to manual. There is a sliding bar between a flower (macro) and mountain (landscape) icons. I set it as far as it would go towards landscape, but for some reason, the bar would adjust itself just short of that, on its own. I’d take a good picture, then the next one would be out of focus and, invariably, I would find the manual focus had changed on its own.
f/1.5 Exposure time: 30 seconds ISO 1600
It took me many tries, but I finally got one where the Big Dipper could be clearly seen!
f/1.5 Exposure time: 30 seconds ISO 1600
Before heading into the house, I couldn’t resist taking a few more photos from the East yard – and caught another meteor! :-)
Hmm. Interesting. I selected what I thought were among the best photos from the many I took last night, and they all ended up having almost exactly the same properties. I know I adjusted the F stop, as well as trying out different ISO and exposure times. I guess f/1.5 and ISO 1600 for 30 seconds simply gave the best results!
It’s a pain in the butt using manual settings on a smart phone. Especially with how I have the GorillaPod set up so it lies almost parallel to the ground, resulting in a Pod leg blocking the part of the screen the adjustments are made. It is, however, worth it. I am so happy with how these photos turned out!
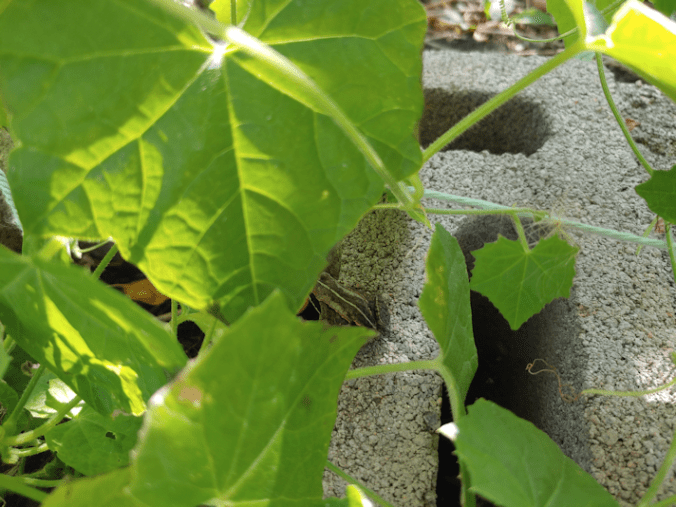
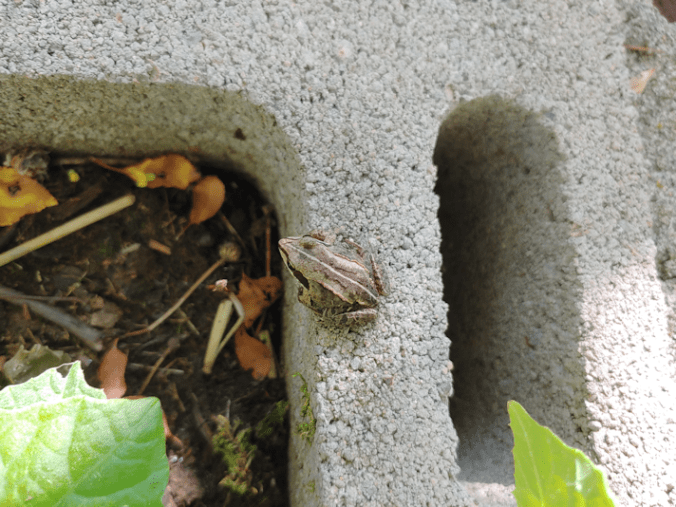
While picking cucalmelons this morning, I found a little friend!
We’ve been seeing LOTS of frogs about this size, every time we to go through the garden beds. Usually, they hop off too quickly for me to get photos, but this one didn’t move!
He was even okay with the cucamelon leaves being pulled aside.
I am very happy to see so many frogs in our garden beds. I’m sure they’re doing a great job of eating up things that would be eating our vegetables!
On a less cheerful note, the original plan for today had to change. This was the day I was supposed to bring my husband into the city for an appointment at the cardiac clinic. They want to discuss the possibility of implanting a defibrillator in him.
Unfortunately, about a week ago, my husband discovered cats had peed under his hospital bed, and under the small table with the mini fridge he keeps some of his medications in. He cleaned it up himself, rather than asking any of us to do it.
He still hasn’t completely recovered.
When his pain levels didn’t improve by Monday, he called the cardiac clinic about his appointment. The letter he received said to expect to be there for at least 2 hours. He explained his situation. The choices were to either cancel the appointment, or they could find some way to accommodate his pain levels and disability.
The appointment got cancelled.
They way he put it, the response was along the lines of, how dare he mess with their system.
They will send another letter with a new appointment (I find it interesting that they make these appointments with zero input from patients), and after he gets the new letter, he can talk to them about accommodations. Of course, he has no way of knowing if he’ll have a good day or a bad day – or even a good week or a bad week – that far in advance. That’s why he was stuck phoning them only about 48 hours before today’s appointment. No matter; even if he’s having a good day, being able to lie down on a stretcher of something would probably be needed, just after such a long drive.
I understand why the province has a single cardiac clinic in a central location. It is probably much more efficient, and allows for things like better access to equipment. The problem is, like almost all Canadian provinces, we are geographically huge, and not everyone lives in or near this particular city. We’re just an hour away from the city (though it can take another half hour to reach the clinic, depending on traffic), and it’s difficult enough. I can’t imagine living in one of the fly-in communities and needing cardiac care. Sure, the small communities don’t have the population base to warrant their own cardiac clinics, but there are large towns and other cities that could serve these more remote communities.
The fact that it’s such and inconvenience for them to accommodate my husband’s disability is also frustrating. They’re in a hospital, for crying out loud. And with so many hospitals cancelling care to make room for all the pandemic hospitalizations that never materialized, there are plenty of stretchers and beds available that could be used for someone like my husband, without having to prearrange it weeks in advance.
Another unfortunate thing with my husband is that his pain levels have forced him to cancel a number of appointments. He has also done things like walked out after being forced to wait well past his appointment time, due to pain caused by the wait itself, and basically has stood up for himself. He is likely now considered a “problem” patient. I don’t think they realize that, when it comes to his list of health problems, his recently developed heart condition is actually not at the top of the list. Not even close. With everything else going on, this new development doesn’t even phase him, and certainly doesn’t frighten him, as it probably more typical. His pain needs to be gotten under control first. Some of his other health problems are caused by the pain itself, and will improve on their own, accordingly. They have not been able to figure out why his heart failure developed in the first place, and we’re pretty sure it has more to do with the large number of medications he is on, and has been for such a long time, than anything else. We already know that there is no surgery or treatment that can “fix” the physical source of his disability, and it will continue to cause further degradation of his spine. The only real thing that can be done is treat the pain. That’s the foundational thing. Without that being addressed, treating his other problems are little more than stop-gap motions.
This has been explained at heart clinic appointments a few times. I’ve watched notes get taken for his file, that the whole team looks at. There is no reason for them to not be aware of his disability, and what that means for his appointments. Even the fact that we have to drive so far and the affect that has on his pain levels has been duly noted.
Yet when he tries to address this with them, he’s made to feel like he’s inconveniencing them somehow?
Not impressed.
Well, next week he has his first appointment with the pain clinic. Hopefully, that will get the ball rolling on more effective treatment.
For the past while, whenever I’ve had the chance, I’ve been looking for what I might need to fix the front outside tap.
At first, it would spray water when we shut the water off, so we just left it on. It made it more convenient when using the hose, anyhow. Then, after the end of the hose broke off and I tried putting on another one, I found it had started spraying water all the time. So we’ve had to use the tap at the back of the house – and almost 300 ft of hose – leaving the front one shut off in the basement.
I figured I just needed to replace the O ring (or whatever this type of seal is properly called) inside the tap, but do you think I could find one? I was also looking for replacement taps, since I thought that might be easier (and I figured it was due to be replaced, anyhow), but I couldn’t find those, either. I wasn’t even sure what section of various stores to look in. The closest I could find to what we had were laundry taps, and any ring seals I saw were not for inside the tap itself, but for the couplings.
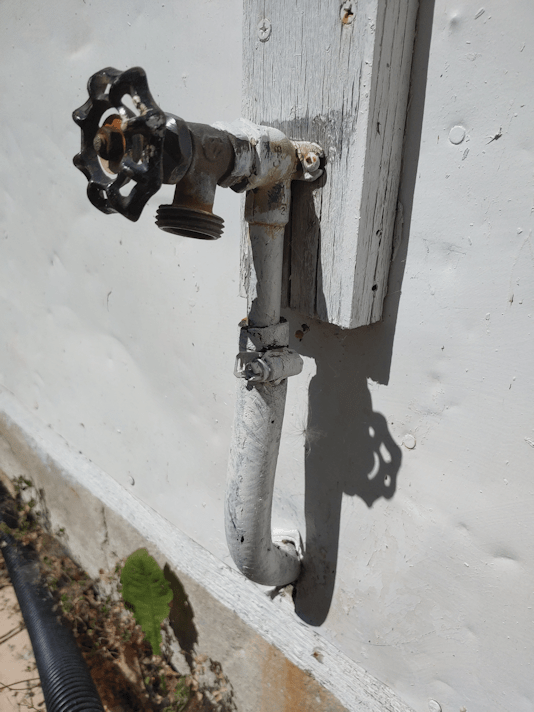
I needed to go to town today, so I remembered to take a photo of the tap before I left. Once at the hardware store, I just showed it to an employee, explained the problem, and asked him where I might find what I needed.
Of course, he needed to know where it was leaking from, which was right at where it turns on and off.
Well, it turns out there’s a reason I couldn’t find what I was looking for.
They don’t carry that type of seal.
In the end, it was easier to just replace it!
Also, the new taps were, indeed, in the plumbing section (not the gardening or laundry sections, where I had also looked), but not where I had been looking. According to the label, the tap is designed for boilers. :-D
Once back at home, I dug up some thread tape and headed out to replace the old tap. The old tap was painted over a bit, but nothing a wrench couldn’t get loose.
On screwing in the new tap, however, I found an unexpected problem.
This is the new tap, with the hose connector facing down. Notice how much of the threads are exposed? In the old tap, there was nothing like this!
It wasn’t actually screwed in tight in the above photo. I got a daughter to turn the water on in the basement to test it out, and I was happy to see it did not leak at all, but as I turned the tap on and off, the whole thing would turn and wiggle even looser.
For the tap to be on good and tight, we get this.
All it took was a quarter turn to tighten it, but it would go no further.
It’s a flexible hose coming through the wall, so we could move that board the tap is affixed to, if we wanted, and reposition it to the side. I don’t really want to put new holes in the wall, then have to seal the old holes, get paint to touch up the wall (the house was painted the summer before we moved in, but we don’t have any leftover paint from that), and end up with a tap that’s lower and harder to reach to screw the hose into.
So we’ll just leave it like this, with the hose sticking out sideways. :-)
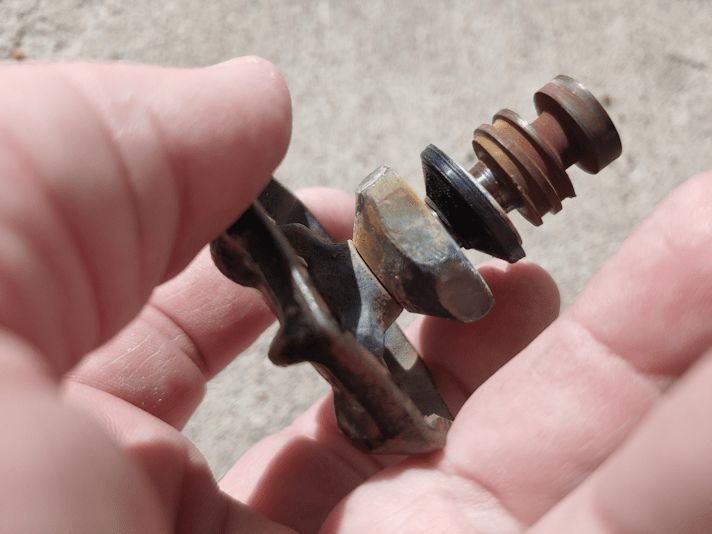
Of course, I had to open up the old tap to see how bad the seal was inside.
It…
…looks perfectly fine!
The seal is still flexible, and nothing is cracked or broken.
I have no idea why this tap started spraying water like it did, where it did!
So I’ve kept it.
In the end, I’m happy with the new tap. I like the triangular design over the round one, as it can be gripped more easily and securely. Especially with wet hands.
So now we have front and back hoses again!
We might need to get another hose for the front, though. I looked for something to fix the hose that broke, but everything I could see would require me to cut off the metal reinforced end. I might just wait for the fall sales and pick up another one, instead.
Over the past while, I’ve been adding another coat of Plasi Dip to the ends of the picnic table legs. I stopped adding more coats yesterday, but have continued to spray the cracks in the rain barrel. Basically, I plan to empty that can on those. :-D
This is about 5 or 6 coats. I lost track of how many, exactly. When I took the picture, it had at least 24 hours to cure since the final coat. It looks like it will do the job just fine, and help extend the life of the picnic table.
Earlier today, a daughter and I flipped the picnic table right side up, then checked the surface. Sure enough, there was a bit of damage. Some paint had come off when the bird feeder had been put on top of it – both surfaces hadn’t quite cured yet, and the feeder stuck to the table.
While upside down, the table was on the chimney inserts I’d used to raise it off the ground while painting. There were a few scratches from those, as well as dirt. My daughter hosed it off and scrubbed where needed.
Tomorrow, the bits of damage will get touched up before we move it to somewhere near the fire pit.
For something that is too far gone to repair, this should last quite a bit longer now. As long and nothing actually breaks. :-D
I headed out last night to brush spider webs away from the garage security camera. The infrared flash was reflecting off a single strand of web, but it was enough to completely mess with what could be seen!
That and seeing a spider go by on it is a bit alarming. :-D
Which is why I happened to be out to notice the incredible number of stars that were visible.
Time to break out the Gorilla pod and see what I could capture with the camera on my phone!
Now, I will admit off the top that I have only the vaguest understanding of the manual settings on cameras. I’ve had them explained to me often enough. The problem is that when I try to adjust things, what I get is often the opposite of what I’m supposed to get.
Very frustrating.
So what I ended up doing with my phone’s camera is just adjusting settings and trying them out until I find something that works.
Then I don’t touch them again.
To get these pictures, I set up the Gorilla pod’s legs to hold the camera almost parallel to the ground, and a couple of inches above. I can then step back and use voice commands to take the actual photo.
The first pictures that worked were taken in the inner yard.
Aside from resizing the images to 50%, these photos are straight out of the camera.
The above is the first picture I took that worked.
Can you see the shooting star? Quite a few pictures had them. Most of which I missed seeing while the photo was being taken.
Though I made sure to set up in the shadows of trees, the yard light does actually affect the outcome, as you can really see in this next one.
The camera may have been in shadow, but the tops of these trees were partially lit up by the yard light, so they look SO much brighter!
I’m so happy with how the Milky Way shows!
For the next couple of photos, I’d moved into the outer yard to the mowed area in front of the storage building. This put the pump shack between me and the yard light.
No adjustments made to the settings, and the images are much, much darker, just from the yard light being blocked by a building.
So many more stars are visible with the long exposure, that it’s actually harder to make out constellations. In the above photo, you can just make out the handle of the Big Dipper, near the bottom.
In some of these photos, there were blades of grass visible in the frame. This one just has some seed heads waving around on one side.
After looking up and confirming when to start harvesting cucamelons, I went ahead and picked the largest ones.
The fruit doesn’t grow larger than 1 or 2 inches, and we read that if they are left too long, they get really seedy. Which makes sense.
Aren’t they adorable?
There was just enough for 2 each, so the girls and I tried them last night, while I left the last two in the little bowl on the table for my husband to try in the morning.
One of them disappeared.
Either we’re going to step on a cucamelon at some point, or a cat ate it. :-D
So… how did they taste?
Like cucumber, really. :-D The skin to flesh ratio is higher, so you do have more of that slightly bitter flavour of the skin, but just enough to make them distinct. They have a nice crunch, too.
From what we read, picking the fruit makes them more productive, and they will produce for a long time. I look forward to having more of them to gather, soon!
I think these are definitely keepers for future gardening. Apparently, in colder climates with shorter growing seasons like ours, you can even dig up the roots in the fall for spring transplanting, and have earlier production.
While making scalloped potatoes yesterday, I wanted to find a way to use the carrots from our garden I had picked that morning.
If they had been larger, I would have just sliced them thin and layered them with the potatoes, but these were on the small side.
So I got creative.
Here is how I ended up making the the scalloped potatoes.
For the cheese sauce, I used 1 medium onion, sliced thin, butter, flour, seasonings, whipping cream and cheese.
We already had old cheddar and grated Parmesan in the fridge. I also picked up a cheese that has recently showed up in local stores that is just awesome. BellaVitano Reserve. We’ve tried the three different varieties we have available, and I picked up Tennessee Whiskey this time. They have an Espresso one that it really good, too. I shredded this, plus the cheddar, and mixed it all together with some grated Parmesan. I used most of it in the sauce, saving some for later.
For the seasonings, I used mushroom salt, freshly ground pepper, garlic powder and paprika. For the liquid, I like to use whipping cream, but it can be made with milk or a lighter cream, though why anyone would want to, I don’t know. ;-)
To make the sauce, the onion first gets slowly cooked in about a tablespoon of butter until soft. Then, a couple more tablespoons of butter is added. When that’s melted and bubbling, the flour (about 2 tablespoons) is added and cooked, stirring constantly with a whisk, for maybe a minute. Then 2 cups of room temperature cream is added, little by little, with pauses to whisk it smooth. For the first while, the flour thickens the cream very quickly. After all the cream is added, the sauce is simmered, while constantly stirred with a whisk, until it is slightly thickened. Then the seasonings are mixed in. Finally, the heat is turned off, then the shredded cheese mixture is stirred in until melted. After tasting to see if the seasonings need adjusting, it is set aside.
For the rest of it, I had potatoes peeled and sliced thin and the carrots were peeled and shredded. I didn’t count how many potatoes I used. They were on the small side, so it was probably around a dozen. The shredded carrots made about 3 cups, loosely packed.
In a buttered baking dish, I put a layer of potato slices, topped it with 1/3rd of the shredded carrots, then added 1/4th of the onion and cheese sauce. This was repeated two more times, then the top layer was just potatoes and the last of the sauce.
It then went into a 350F oven for about 40 minutes.
Shortly before the time was up, I took a ring of Polish sausage and cut it into slices. The slices were then laid on the top of the potatoes.
I hadn’t originally planned to use the sausage, but I happened to have it, so why not? :-)
I did have some concerns at this point. We’re still getting used to the new stove, and haven’t used the oven much at all in this heat. When stabbing the potatoes with a fork before adding the sausage, they were still surprisingly hard. I had forgotten to cover it with foil at first, so that might be why.
I covered with foil at this point, but it really should have been added right from the start.
With the sausage on the top, I put them in for another 10 minutes. Most recipes for scalloped potatoes that I’ve seen say to bake for 40-50 minutes, and I was shooting for 50 minutes in total. After that, I added the rest of the cheese mixture on top.
Back in the oven it went, though without the foil. I didn’t want the cheese to stick to it. I then baked it until fork tender.
It ended up taking a lot longer to cook than I expected.
Also, handy hint. Put the pan on top of a baking sheet, in case the sauce bubbles over.
We’ll be testing out the oven’s self cleaning function, next…
:-D
When it was fork tender, I took it out and topped it with chopped parsley I’d picked from our garden that morning.
This was quite an experiment from how I usually make scalloped potatoes. They are usually just the potatoes and onion-cheese sauce, these days. I was very curious as to how the carrots worked.
They pretty much disappeared!
I used some of each type of carrot we have; white satin, rainbow (orange, pale yellow, and white), and deep purple. The purple carrots left colour on the potatoes, but with them being shredded, and such a long cooking time, they all pretty much disintegrated and disappeared into the sauce. I could taste a hint of their sweetness, but that was it.
I would definitely be up to including them again.
The addition of sausage… well, you can’t go wrong with adding kielbasa!
The cheese mixture worked really well, too. That Tennessee Whiskey cheese added to the flavour, but did not overpower.
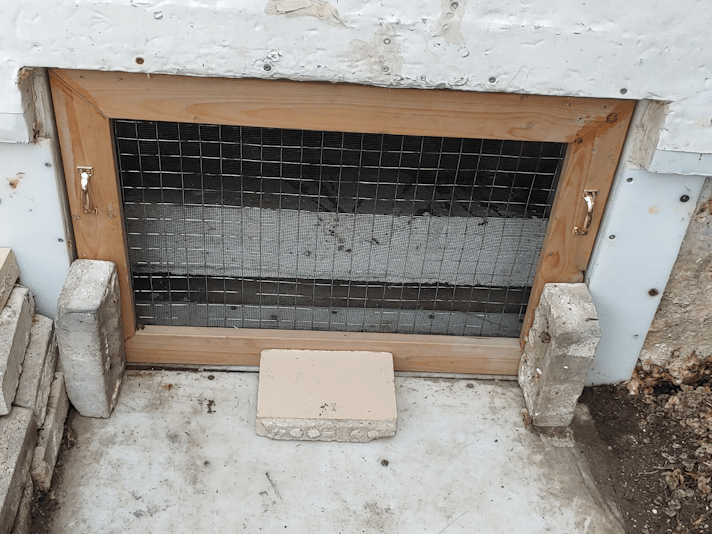
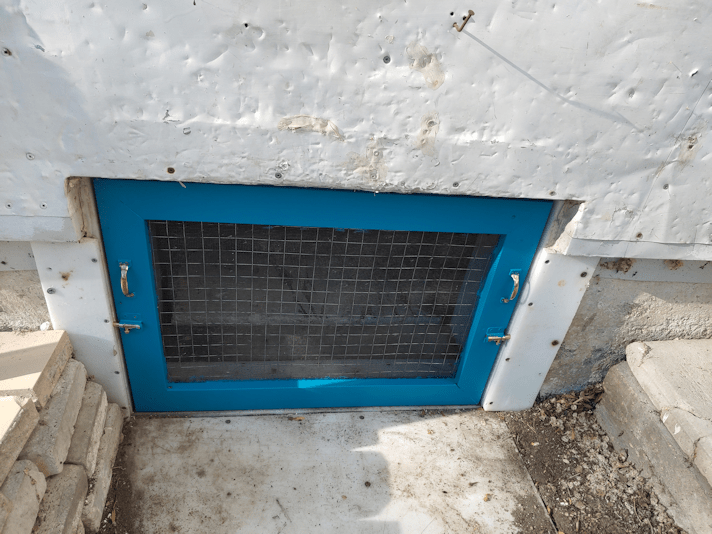
After several coats on of paint on the outside, and one on the inside, the screened window for the old basement is now fully cured and back where it belongs!
It’s one thing to have that bright blue on something that is in the yard. Quite another to have it on something that is part of the house! Even the blue replacement door is a dark blue, so not quite as jarring.
I think it looks rather nice against the white. :-)