Our 2021 garden seedling shuffle, monthly shop, and man that’s bright!

Wow. It’s coming up on 10pm as I start this, and this is the first time I’ve had to sit down for most of the day!

Today was our monthly shop, so after doing my rounds, my younger daughter and I headed out to the city. We were going to do our usual shop when I remembered I wanted to pick up some wood pellets to try as a litter replacement, so we added a stop at Canadian Tire, first.

Canadian Tire is a dangerous place for me to be, on payday! ;-)

While we were there, I got my daughter to choose a paint colour so we can finally paint the kibble house. We’ll be able to paint the cat house, too. This is the colour she chose.

She actually chose two colours, then asked me which one I preferred, and I chose the darker one. “Citrusy”, I think it’s called. The girls have declared we don’t have enough colour around the farm, and they would like to change that.

It’s going to be colourful, all right! :-D The kibble house is going to be really bright!

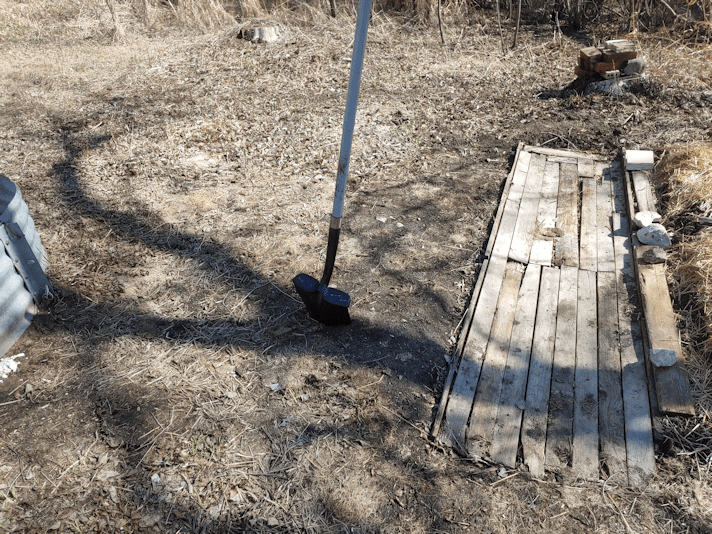
One of the other things we picked up was a new axe. We’ve found a whole collection of them, mostly in the old basement, but the girls have examined every one, and they’re all in terrible shape. I suppose we could fix them, but we’d much rather have something new and higher quality. After we paid for our stuff and were heading for the van, my daughter suddenly asked, “where’s the axe?”

Yup. We’d forgotten it at the cash desk!

So off my daughter went with the receipt to get it. It was so hilarious to see her coming out again, long flowing hair, skirt swirling in the wind, and an axe over her shoulder. A woman happened to be getting out of her vehicle beside us and called out, “walk proud, and carry a big axe!” Too funny!

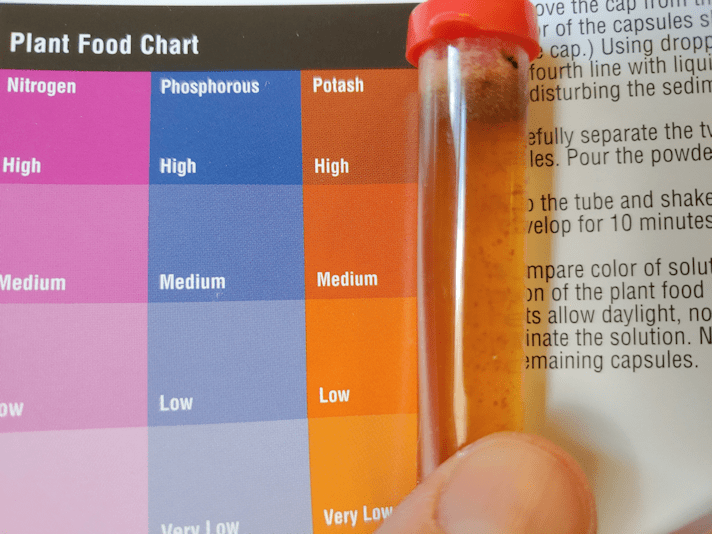
With our rather meager success with onion seeds, when I saw some onion sets at Canadian Tire, I did pick some up.

When we got home and I quickly checked my email, I found a shipping notification from Vesey’s. The onion sets we ordered from them have shipped, with an expected arrival of May 7. Those are a red variety, so between the two, we’ll have a couple hundred onion sets to plant, on top of the surviving seedlings. We shall see how they compare! I’d rather grow onions from seeds, if only because there are so many more choices in varieties, but I’m not too fussy about it! We use a lot of onions, so I’ll take whatever will grow.

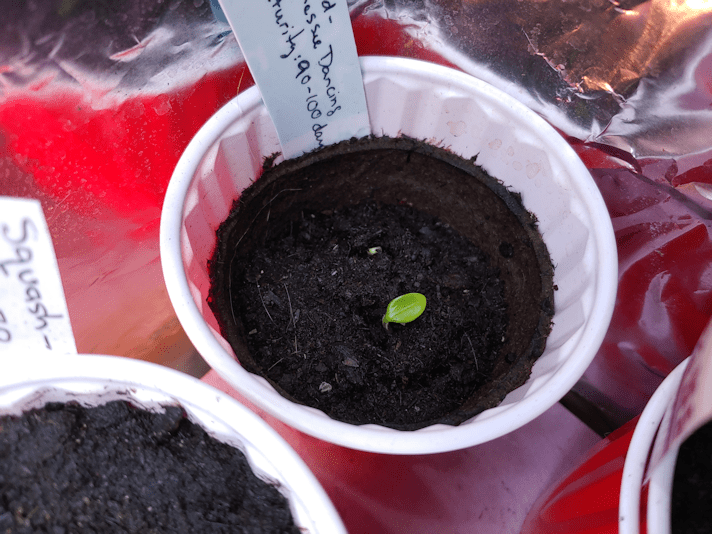
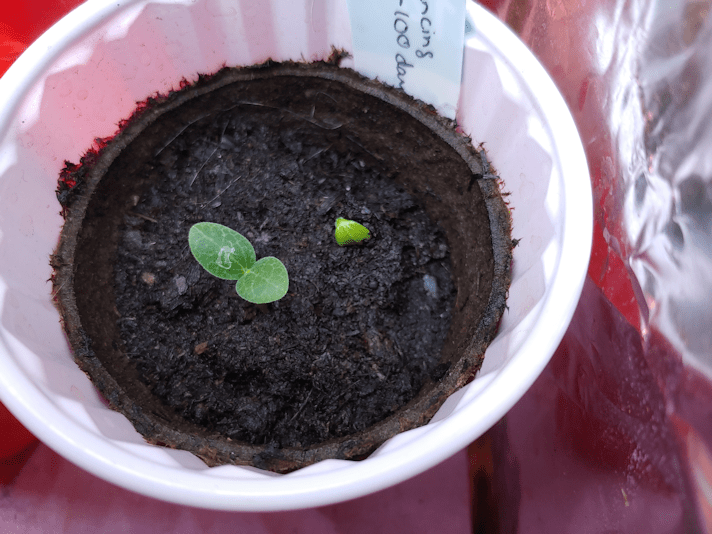
After all the shopping was put way and we had supper, the girls and I then worked on planting the squash seeds. That required taking everything out of the big tank to make room for the new starts, so the tomatoes, luffa and the last onion seeds I started have all been moved to the sun room.

All of the onions have been moved to the new shelf we got for our transplants.

This photo was taken somewhere around 9pm. I love how bright it still is outside! It was an overcast and rainy day today, so not a lot of light, but the sun room was still quite warm.

Not warm enough for the new seedlings, though. I had to get creative.

I rigged up the light we’ve been using to keep the small tank warm, so it hangs from the support bar holding the top points of the mini greenhouse in place. It has a full spectrum bulb in it, so they’ll get both good light and warmth from above, as well has warmth from below, where the ceramic heater bulb is set up. We still need to use that at night.

The small tank now has all the remaining gourds that have not sprouted yet. Without the light fixture that was helping to keep the tank warm, I added a couple of bottles filled with hot water help maintain the temperature.

We changed the level of the base in the big tank, so the cups would be closer to the lights. One of the fixtures does give off warmth, but the other does not, so I added bottles of hot water to this tank, too.

This tank now has the one cup with the Tennessee Dancing Gourds, and one cup with a single tomato seedling in it that isn’t doing well, but we just can’t bring ourselves to get rid of. Everything else is summer and winter squash. We planted fewer of the winter squash, pumpkin and zucchini, and lots of the melons and pattypan squash.

We are really looking forward to lots of summer squash in particular! The pattypans are our favourite vegetable, and we really miss being able to pick a bunch of summer squash every morning, for that day’s meals. :-)

We now have a couple of weeks or so before we start the last of our seeds; the Montana Morado corn, cucamelons, and half of our sunflowers. The corn will be in toilet paper tubes, so they’ll be in their own bin to keep the tubes supported. By then, we should be able to use the sun room exclusively, instead of the aquarium greenhouses. The gourds might even have germinated by then! ;-)

The next few days are going to be odd ones. Our days are going to warm up again, but check out those expected lows…

Tomorrow, we’re supposed to have a fairly decent 7C/45F, but then drop to -4C/25F with flurries overnight! Then, two days later, we’re supposed to reach a high of 19C/66F, only to drop to 4C/39F overnight. Then Sunday’s overnight low is back below freezing again! At least the long range forecast shows no lows below freezing after that, but… well, we do have a frost date of June 2, so there’s a good chance will dip below freezing a few times more. I just wish it wouldn’t lurch back and forth like that! Still, those daytime temperatures will give us plenty of opportunity to get garden beds prepped, and the early planting started. We have lots of work to do outside, and will need to take advantage of every good day we get!

It’s going to be fun! :-D

The Re-Farmer

Our 2021 garden: building the first pea trellis

We had a beautiful warm day today – prefect for working outside!

Our peas are among the things that require the most preparation before we can direct sow them, so we decided to focus on building trellises for them. After looking over some design ideas, drawing some sketches and making some decisions, I headed out with my baby chain saw and rifled through the pile of poplar poles we kept after doing some clean up and testing out the cordless pruner.

That baby chainsaw made cutting poles to size very fast!

In the background are the support poles, cut to 6 ft lengths. The poles on the wagon are the cross pieces. I am short a few to be able to complete all the beds, but I ran out of medium sized poles. We are saving the bigger ones for the squash trellises, as they will have the most weight on them. The smaller ones will be good as stakes, but are too thin to be cross pieces.

I’ll just have to do more clean up and gather more poles! :-)

Our purple peas have the fewest seeds, so it got the simpler trellis design.

I started by laying out the support poles near where they will be set. Each bed will have 5 support poles, with the biggest ones on the ends, and the middles.

That rain barrel in the background is the one I patched up last year, to keep water at ambient temperature near our squash beds. We will need to fill it with water soon, so it doesn’t blow away! It’s going to take all our hoses put together, to reach that far.

After finding the centre of the first bed, I started digging a post hole – and immediately started hitting roots and rocks!!

I did drag over one of the post hole diggers we found, to try it out.

I’m pretty sure it has pieces missing. :-D

It can handle smaller pebbles, but roots and larger rocks were a problem. For some of the rocks, I had to get in there and bring them out by hand, because not even the spade could get them out. We only have one spade, and I don’t want to break it! We did have a second spade. The handle broke while I was digging holes for the haskaps. :-/

First pole is in!

The pile of rocks was later added to the top of the soil around the post. The soil that was put back into the hole and tamped down was a lot softer, and sank down quite a bit.

Shortly after that, my younger daughter was able to join me, and the rest of the poles went in much faster. :-)

Attaching the cross pieces was a bit of an issue. What I really would have liked to do was screw them together. There’s no way to do that manually, since we’d end up pushing the poles around in their holes. We don’t have enough extension cords to reach this area to use a corded drill and drill pilot holes. Our cordless drill is old and the batteries no longer hold a charge – and it’s old enough that the brand no longer uses the same batteries and does not make them anymore. Once we work out a solution, we’ll go back and put in screws.

Before adding the cross pieces, we measured and marked heights at the top and bottom of each support pole, then cut flattened spots on the ends of the cross pieces and at the marked areas of the support poles. When cleaning up the basements, we found a ball of old bale twine, so we used that to tie the crosspieces in place. That twine is really old, so while it’s holding surprisingly well right now, I expect it to disintegrate fairly quickly.

Once that was done, I used the twine to weave on strings for the peas to climb.

Which took quite a long time! The ball of twine was lots of shorter pieces. I kept stopping to tie ends together and make centre pull balls, to make wrapping around the cross pieces easier. I ended up using most of the ball, so we’ll have to find something else to use for the other trellises.

This bed is now ready to layer straw and soil down. We might even be able to find something usable in the old compost pile to add to the layers. We don’t have a lot of material that can be used to build over that grass, but anything is better than what’s already here! And we can deal with weeds.

It seems a bit much, to do all this burying of posts for a temporary garden, but wind is something we have to take into consideration. Hopefully, we were able to get the support poles deep enough that they won’t be blown over.

The other two beds will have double rows of peas planted in them, so the trellises we build there will not have the cross pieces at the bottom. Instead, we will put cross pieces about a foot away from the centre poles, at about the same height as these ones. Once these trellises are strung, they will form a sort of A frame, with each row having it’s own side of strings to climb.

When I was a kid, my mother always grew peas, but never used trellises. One of my jobs as a child was to flip the rows of peas, so that the sun could reach the other side of the plants. I do remember a lot of yellowed or rotted leaves when flipping my mother’s un-trellised peas. This would have been due to lack of sunlight in the bunched up plants, and contact with the soil. There was likely fungal issues, too, but as a child, I wouldn’t have recognized it for what it was. It worked, and we always had lots of peas, but this will be healthier for the plants, and should result in better yields.

While I was working out here, I was able to hear people out and about, walking on the road, etc. The old house across the road from us has no one living there, but the current owners come out regularly. It was so wonderful to hear the voices of children, playing outside! At one point, I was even visited by a very friendly little dog. The only down side was having our vandal come driving by on his ATV, very studiously avoiding looking our way and pretending to be doing something else other than creeping on me. As if his driving over, turning around and going home again wasn’t making it really, really obvious. :-/

We definitely need privacy screens! The corn and sunflowers will help, once they’re tall enough, but when we clear the fence line so we can repair the fence, we’ll be removing what little screening we have in that area right now.

For now, I’m rather pleased with our “rustic” pea trellis. Not too bad for something made of completely salvaged materials!

The Re-Farmer

Our 2021 garden: killing grass, and first one!

While doing my rounds today, I brought out one of our black tarps and headed over to where we will be planting the Montana Morado corn.

None of our corn can be planted until well after our June 2 last frost date. Covering this area now will give us about 5-6 weeks to kill off the grass as much as possible, before the corn can be planted. There’s a lot of crab grass around here, so I don’t expect to kill those off completely, but we should be able to pull up a lot of the rhizomes later on.

The Montana Morado is the only corn we will be starting indoors, as we are not sure how well they will grow in our zone. If things go to plan, we will save seeds from these and, over the years, it should develop hardiness to our local climate. But first, we have to get a successful crop! I’m really looking forward to how these turn out.

Of course, while continuing my rounds, I checked the areas where we planted in the fall. There are more tiny little muscari showing up, as well as the snow crocuses. This was my morning surprise, though.

The very first of my daughter’s tulips has emerged! So exciting! The tulip bulbs they planted here needed to be buried quite deep, and heavily mulched. While they need cold winters, we didn’t know if they survived the extreme cold we got in February. If they had been established, I would not have been concerned, but this is their first winter after planting, and they were more vulnerable. Hopefully, this means we will be seeing the other tulips, and the irises come up soon.

We did see something coming up that we thought might have been an iris, though my daughter didn’t remember planting that far out. It turned out to be an onion! When we moved here, the old kitchen garden had a fence around it, and my mother had some onions just outside the fence line. One or two have been coming up every year, but they never reach full maturity before dying back, so I’m really surprised to see one coming up.

It makes me think about transplanting our bulb onions in the sun room soon. The ones started in the Jiffy pellets are getting really big. :-) We still need to add soil to the beds those will be going into, though, which means I should probably start hardening them off now.

We’re going to have an awful lot that needs to get done, all at once, pretty soon!

The Re-Farmer

Our 2021 garden: marking spaces

After working things out and making some decisions on where we want to plant things, we are ready to mark out beds in preparation for planting. We have seeds than need to be direct sown before our first frost, and those are the areas we want to focus on.

We’d decided to mark off blocks at 20′ x 20′ (about 6m x 6m) for the corn and 20′ x15′ (about 6m x 4.5m) for the sunflowers, and then make 3′ x 8′ (about 1m x 2.5m) beds for most of the rest.

With that in mind, I figured the easiest way to mark off blocks would be with knotted cord. I used 2 lengths of paracord with a loop at one end. From the loop, I tied knots at 3′, 8′, 15′ and 20′ We have a bundle of small marker flags, and I grabbed those to mark the corners of the plots.

The first thing I did was mark off a 20′ x 20′ block in the furthest corner, from which everything else would be lined up.

I decided to start the rectangular plots roughly 4′ (just over 1m) away from where the corn will be. Once I started marking off the first one, though, I quickly threw away the idea of making them only 8 ft long. For this space, that is just minuscule!

I made them 20′ long, instead.

In the above photo, there are 4 plots marked off, with 3′ paths between them.

I added 1 more and ran out of flags, so I used a stick from the pile of branched I’d pruned a few weeks back.

Then I went back and made more marker sticks. We’ve got the bright orange marking paint, so I used that on one end of the sticks so they would be more visible.

Using the two knotted ropes to find where to place the markers worked really, really well. With the looped ends at markers or flags, lining up the knots to find the next spot to mark also made it easy to keep straight lines and right angles at the corners. It’s not perfect, of course. The rough ground alone made that impossible. They don’t need to be perfect. All of this is just temporary, anyhow, until we plant trees here.

I took the time to make more markers from sticks, spraying one end with the bright orange paint, then made another row of plots.

This is how it looked when I was done.

Yeah. I know. Hard to see!

So I edited it to as close as I could match the lines.

The big block by itself is where the corn will start. It’s hard to know how much space we’ll actually need, but at least we have the general area worked out.

With just the rectangular plots, this is an area that’s 15′ wide and 66′ long (about 4.5m x 20m), including the paths in between.

We will be marking more of the rectangular plots, as well as another corn block at this end.

Our three varieties of bush beans will be planted in the plots nearest the corn, though I’m already rethinking that. The peas, which need to be planted right away, will need to be trellised, so they need to be to the north, so they don’t shade other plants. We have only 2 varieties, but one of them is a bag of 200 seeds, while the other is a typical seed envelope, so having two sections of the green peas and one of the purple should work out. The three varieties of beans can take the next three sections.

The actual dimensions of the area, compared to what we thought we had on the satellite image, means we’ve got three plots at the end that does not have anything specific planned for them. It’s hard to see in the photo, but even the furthest plots are still far enough away from the apple trees that they will still get full sun.

We’re out of cardboard, and we’ll be running out of straw very quickly. It’s going to be a challenge with all that grass, until the plants fully mature. By planting densely, they should shade out and choke out the grass and weeds. When we do add the soil, we will have to be careful in how we use it, or we’ll run out very quickly! One of the things to keep in mind, as always, is that this is meant to be temporary. When it comes to food trees, they take so long to reach productions stage, we really need to get those planted quickly. If we can swing it next year, that would be amazing, but even if we can only afford to do a few a year, rather than a whole nut orchard, all at once, that will be a good start.

Until then, we’ll be breaking up and amending the soil with vegetables. :-)

The Re-Farmer

Our 2021 garden: unplanned garden bed

My daughters and I have spent quite a bit of time, working out where to plant what, so we know where to build beds to plant in. Then I realized we completely forgot about the purple asparagus crowns that will be shipped later, to arrive at time of planting in our zone 3 region.

We’d talked about them before, but hadn’t made any decisions. Where my mother had asparagus was ruled out. She’d planted trees and bushes in that garden, so that area no longer gets enough hours of sun in a day. Asparagus will produce for up to 20 years, so we couldn’t include them in most of the areas we will be planting in this year.

After talking about it, we settled on a spot where we had not originally planned to have any garden beds at all this year.

This is the spot we settled on, after I’d raked it out.

Part way down is where there used to be one of my mother’s tire planters that I’d taken out. I’d dumped the soil out to remove it, and found it was on top of the remains of an old maple.

I know it was an old maple, because it immediately began sending up suckers.

I had covered it with the soil inside the planter as much as I could. The flowers that were in that planter have been showing up, which was nice to see at least. :-) Much of this area is difficult to maintain, though. So now we will be planting two things here. At the far end, on the other side of the remains of maple, is where we will be planting the Strawberry Spinach. In reviews on the Baker Creek website, where I bought the seeds, it was mentioned that these self seed easily, and it was recommended to plant them in a permanent location because of this. That was kept in mind when we chose this location.

In the foreground is where the asparagus will go. For that, we will need to dig a trench long enough for the 6 crowns we will be getting.

Digging a trench here is going to be a challenge.

So today, I set up the soaker hose directly on the ground to start. Saturating the soil will make it easier to dig the trench.

While that was soaking, I prepped as many cardboard boxes as I could find, removing any tape or stickers on them.

My daughters helped me to lay the cardboard under the soaker hose, and we left it running for a while as we checked other areas. The rain barrel was full, so we used it to fill our watering cans and wet down the cardboard more, and finally just left the soaker hose going for about an hour. The above photo is what it looked like when I turned off the water.

(We are now out of cardboard. :-/ We do still have some moving boxes left, but they’re in really good shape, so we’re saving them for something else.)

We were planning to put straw over the cardboard, too, but it was way too windy today. We have several weeks before the asparagus crowns will arrive, so covering the area now will help kill off the grass, as well as make it easier to dig a trench, later. We’ll just have to keep soaking it. Where the Strawberry Spinach will be planted can have mulch and soil added to it at any time.

I’ve been looking at instructions for planting asparagus, and some places say to dig a trench 15 inches/38cm.

That’s not going to happen!

Those articles, however, also say to fill the bottom third of the trench with compost. We don’t have compost left.

Other articles say to soak the crowns in compost tea for 30 minutes before planting.

Since we don’t have compost to make compost tea with, that’s not happening, either. Our new garden soil, however, has plenty of compost in it.

I’m reading that the crowns should be planted 1 1/2 – 2 ft/46-61cm apart. We will be getting 6 crowns. That space isn’t long enough to plant them in one long row, but it’s wide enough to plant them in 2 rows, so we’ll need to made a double wide trench – about 24-30 in/61-76cm wide. A depth of 8 inches/20cm should be good, but we will be building the area up, so we won’t need to go quite that deep. I don’t know if we even could go any deeper, with the trees being so close. I expect to find a lot of roots under there. By the time we’re done, this area should be about 4-6 inches/10-15cm higher than it is now, so all we really need to do is get rid of the top layer of grass roots.

Hopefully, we will be able to remove more of that tree stump and cover the remains over, in the process.

Once it’s done, we should be able to leave things here and just keep them maintained, for the next couple of decades.

The Re-Farmer

Our 2021 garden: Soil test on purchased soil and tending tomatoes

I finished testing samples of the new garden soil this afternoon.

I was interrupted by scrabbling sounds behind me.

Saffron looks so adorable!

She is also a vicious beast. ;-) Her favourite thing it to suddenly launch herself across the room, onto whichever human is passing by. She typically lands about half way up, and then starts sliding down.

Which can be very painful! She is very sharp, and rather clumsy. :-D

Anyhow.

Here are the test results from the purchased garden soil.

The nutrients are nice and high, all round – and so is the pH! Most of what we are growing recommends a pH of 6 – 6.5, so we’ll want to look into increasing the acidity a little, if we can.

Today, I decided to “pot up” the tomatoes. It feels strange to do that, since they are so tiny, but they are also tiny varieties of tomatoes! ;-)

We planted 4 double cups of each variety, but I worked with only three each. Of the Spoon tomatoes, there’s one cup where nothing at all has germinated. Of the Mosaic Medley, one cup as a single seedling in it, and it’s quite small, so I left it.

I’ve never grown tomatoes before, so I looked at a lot of gardening resources before deciding to plant them in a small amount of growing medium in the larger cups, rather than Jiffy Pellets or tiny pots, so as to add more soil as they grew bigger, rather than transplanting them from small to larger pots.

After the soil was added, they got a careful, but large watering. I left them to drain for a while, emptied the lower cups and left them to drain some more. I wanted to ensure the added soil was completely dampened, through and through. I’m hoping this will give them a nice growth spurt. :-)

The overnight temperatures in the sun room are getting much nicer, so we will be able to move things out of the aquarium soon. Over the next while, we will be starting all the summer and winter squash. We’re going to need the space! :-D

Something else on the to-do list:

Having worked out where we will be planting things (which is always subject to change until the seeds are in the ground!) and, more or less, what dimensions we’ll need, my daughters and I need to start measuring out, marking out and preparing garden beds. Some things, like our two varieties of peas, need to be direct sown well before the last frost date. They are going to be near the corn, which isn’t supposed to be planted until well after the last frost date. So we’ll need to mark out the plots and start prepping them. We’ve decided to make most beds at 3′ x 8′ (roughly 1m x 2 1/2m) for ease of access and denser planting. Ultimately, we have no idea how many of these we will need, until we actually start planting. Some varieties had packets with a LOT more seeds than others of the same vegetable type, and some were packed by weight, so we won’t know how many seeds there are until we open them.

We’re finally getting close to when we can plant things outside! Yay!!!

The Re-Farmer

New baby sprrrooots, and soil testing status

We have gourd sprooots!!

Yesterday afternoon, I spotted these.

These are the Tennessee Dancing Gourds, and they are the first of the gourds to sprout!

This is how they looked this morning! So awesome, to see how much they grew in less than 24 hours!

I’m hoping this means we’ll start seeing some of the other gourds sprouting soon, too. :-)

I also checked on the soil sample that was left overnight to settle.

Hmm.

It looks completely unchanged!

The instructions said that soil heavy with clay could take 24 hours to settle, but… I don’t think that’s clay. I think it may actually be organic material.

With how long this is taking, I think I’ll find another jar and test the next soil sample while this one continues to sit.

But not right away.

My older daughter got a call back from the tax preparer. They can’t log into her file at Canada Revenue. Like with her sister, it’s telling them there’s something wrong with her name. We have no idea what that could be. We’re going to have to call up Canada Revenue again. I’ve found a directory, and the numbers all have wait times listed. The number we need to call has a wait time of just over 2 hours.

So we’ll be taking turns monitoring the phone while on hold.

Again.

The Re-Farmer

Our 2021 garden: new, layered bed

The forecast for today has changed, and we are expected to be even warmer than originally predicted. Before trying to get my husband to the lab in town for his blood work (he never even got to the counter to get his requisition; the line up was out the door, and was moving so slowly, he ended up leaving, due to his pain levels), I saw we’d already reached 13C/55F, which was originally our predicted high. The new high for the day was listed as 18C/64F. As soon as I could after we got back, I headed out to get the new bed done, before things got too hot.

Yeah. I know. It’s not really “hot”, but we’re not acclimatized yet!

This is what it looked like before I started.

I would like to point out how deep into the soil the spade is. This is actually really, really impressive. Pretty much anywhere else in the yard, I would not be able to get the spade that deep, even while standing on it – and I’m no lightweight! Typically, I’d shove the spade into the ground, turn around to do something else, only to have it fall over, moments later. What a difference with soil that has been buried for decades under where the wood pile for the furnace used to be.

The first thing to do was remove that lovely soft soil.

And more roots.

We’ve de-rooted this area three times, and I was still finding old cherry roots!!

Also, worms. Lots of worms!

I dug down until I hit gravel. Which was not as deep as the other two beds that our garlic is planted in.

You can see a root sticking out that I couldn’t remove. I decided it wasn’t worth going back to the sun room to get something to cut it with. Some of the other roots I pulled out went under the boardwalk on the side! I’d dug those areas down to the gravel, too.

Being near the compost ring, this bed is narrower than the others, as well as shallower.

Being right next to the compost ring came in handy, though.

I pretty much emptied the compost ring, then walked back and forth on it to stomp it down.

Using the contents of our compost pile like this, we aren’t getting a chance to get any finished compost! Which is fine. It’s still organic material for our garden beds.

Speaking of which…

Next came a layer of straw.

Unfortunately, the wind was really picking up, and things were blowing away, so I made sure to tromp all over the straw, too.

When it came time to return the soil, I did much of it by hand. This allowed me to break up lumps, remove rocks, old tree roots, weed roots, and gently cover the worms.

This is where a soil sifter would make things a lot easier.

Well. Except for the “gently cover the worms” part. That would be more of a “bash the worms to bits” thing. So I don’t mind doing it by hand!

With the previous beds, I returned the soil that was dug up, plus added the soil from where the paths are. I’m not making a path on the other side, so it’s just the soil I removed. I’d used that side area to pile grass clippings last year. Most was used elsewhere, but there still was some left, and that got added to the bed as well.

We will be adding some of the lovely new garden soil to this, but not yet. By this point, it was just too windy to keep working on it. Hopefully, it will calm down a bit, later. After today’s high of 18C/64F (it’s already 17C/62F), we’re supposed to drop to -3C/26F, with “isolated flurries”. Tomorrow’s high is only 2C/35F, so if I can get this finished today, that would be great.

I do want to break out the soil testing kit first, though. I want to compare soil samples from this area, with the big garden area, and with the new garden soil. That should be quite interesting!

So there is the new, layered, garden bed, almost complete. This will be a good bed for root vegetables. I think we’re planning to put a variety of beets in here, though maybe it would be better for carrots. We have several varieties of both beets and carrots, so we might even do one of each. We shall see!

A lot of our seeds packets say to direct sow “as soon as the ground can be worked.” Which, obviously, can be done now. With the predicted overnight temperatures, though, I don’t think I’d be willing to chance it for another week even if we cover them with plastic. Even cool weather crops have their limits! That will just give us more time to prepare the beds. We’ll have to go over the seed packets and figure out just how big some of them will need to be and start marking them out. That will help us make some decisions on exactly where different things will be planted. Especially those that will need trellises and other supports.

We have lots of work to do, and I’m so thankful to finally be able to get at it!!

The Re-Farmer

Our 2021 garden: new bed built

It was an absolutely gorgeous day today!

My younger daughter and I took advantage of it and built a new garden bed in the area we plan to plant tomatoes.

The tomato seedlings are doing well, as are the luffa.

They have roots starting to show out the bottoms of the pots already!

The onions in the sun room are doing well, but not to much the ones planted more recently.

As for the gourds, none have sprouted yet but, from what I’ve read, they do take a long time to germinate.

Here is where the tomatoes will be going.

We did absolutely nothing to the ground before we started. There really wasn’t any point of even trying.

The first step was to cover the grass.

Actually, the first step was to cut down that maple. I’d already noted that it was creating so much shade when in full leaf, that a unique lilac in the flower bed beside it was being killed off. The stump was left high and will become the support for a seat. The main trunk and some of the larger branches are being kept for future projects.

We’ve been saving the cardboard boxes from cat litter, and their flaps were placed against the fence as a short barrier to hold in the soil.

Well… after spending some time removing all the tape. It took more time to get all the tape off than to lay out the cardboard!

Those and some moving boxes were enough to cover the entire space between the flower bed and the fence. :-)

Then, we broke out the new soaker hose! :-)

We will likely be going below freezing tonight, so the water will still need to be shut off from the basement when we’re done, but for a warm day like today, we could use the hoses for a while.

The soaker hose is 50 ft/15m, so we’re looking at approximately 25 ft/7 1/2m for the new bed.

While letting that soak, my daughter and I began bringing loads of straw over from the bale in the big garden area.

We probably could have left the water running all day to soak it thoroughly, but we didn’t bother. We did move the soaker hose over by the haskap berry bushes, though, and left the water running while we moved on to the next step: spreading the straw.

Actually, I spread the straw while my daughter filled a couple of wheelbarrows of soil and brought them over. Once the cardboard was covered, we tromped back and forth on it, stamping it down, then lay the soaker hose back over it.

We left that to soak and took a walk around the big garden area and talked about changing a few things.

The above image shows the existing beds from last year’s garden, in green. The three smaller beds in the middle were going to be where our three varieties of spinach would be planted. I was thinking we might change those up completely. Instead of three short beds oriented East-West, it would probably be better to have two longer beds oriented North-South, like the two we already have. One of the North-South beds was supposed to have shallots planted in it, but the shallot seedlings failed, so we’ll still have three beds available to plant spinach (and whatever else we interplant with them).

Eventually, we will be building accessible raised beds here, so nothing is permanent at this point, anyhow.

There’s also the two small beds – the shorter green rectangles in the above pictures – where we’d planted potatoes last year. There’s nothing stopping us from making those longer, stretching into the skinny bit that’s marked in orange.

So that’s what we’ll do with those areas.

By the time we went back to the new bed, my older daughter was done work for the day and was able to join us.

The first thing they did was stop using the larger wheelbarrow, because it sucks. :-/ Actually, they both do. We need to get a new wheelbarrow! Just one good one is enough. :-)

So one daughter had shovel duty, filling the smaller wheelbarrow, while the other brought it over and dumped it, then I spread the soil until a new load was brought. The job was done very quickly!

The area of straw left uncovered will be a pathway. At some point, we’ll put in some pavers or something, but for now, the straw and cardboard will keep the weeds and grass down. That and lots of tromping it down with our feet. :-)

Each of the haskaps got a load of soil around them, too.

Then, because the hose was handy, the soil got a brief watering, more to keep it from blowing away than anything else.

Our last frost date is June 2, so this will have more than a month for the straw to settle. We’ve got one more warm day, then we’re supposed to get snow. Long range forecast sees more snow and rain into the first few days of May. Any precipitation we get will help settle it more, and we’ll be able to see if we need to add more soil or not.

If all goes well, I will use tomorrow to dig a new bed next to the garlic beds, before things cool down again. That one will be a lot more physical labour than this one was!

I’m looking forward to it. :-)

One area done, many more to go! :-)

The Re-Farmer

Our 2021 garden: Checking the haskap and planning ahead

This morning, none of the kitties were cooperative about getting their pictures taken, so I had to settle for something that didn’t move.

Much.

;-)

While doing my rounds these days, I check all the areas we planted things in the fall. I found more garlic coming up under the mulch, but we’re still leaving them covered. Ideally, we’d have plastic row covers over them, but we don’t have any sort of hoops or frames to hold it up right now. They’ll be fine; a cover would just kick start them a bit more.

This morning, I decided to clean up the old flower stalks in the bed our two haskap bushes are in. Those flowers are among the things my mother insists we keep, but I wanted to open up the space around the bushes more, so if a few fresh roots came up with the flower stalks, I didn’t mind.

This meant I finally got the first good look at how the haskaps were doing.

I had to hold the branches to get a photo, because of the wind! :-D

This is the male plant, and it’s starting to leaf out quite nicely! It did well last year, too.

It’s the female plant that I am more concerned about.

Last year, I was sure it had died, but it did grow and even managed to produce a couple of berries. It’s still very weak and spindly, with branches so thin, the camera on my phone couldn’t focus on them! There’s the tiniest bit of green showing, though, so at least I can tell it’s still alive. We need to pick up a couple more of the female plants. I never saw any last year, so we will likely have to order them in.

I want to side dress the ones we have with our nice, new garden soil, but probably not today. It started to snow while I was out there. The snow has already stopped, but it’s going to stay chilly today. We’re supposed to warm up a lot over the next two days, then get snow again. During those two warm days, I’m hoping to start prepping the areas at the chain link fence, so we’ll be able to tend the nearby haskap at the same time.

We’ve been saving our cardboard for the past while, and will be laying that over the grass between this bed and the chain link fence, then adding a layer of old straw before topping with soil. This is where the tomatoes will be planted, with the fence to use as support. On the other side of the person gate, we’ll lay cardboard down as well, but that side is where we’re planning to put the remaining old chimney blocks to use as planters. This year, they will be used for the cucamelons but, in the future, they will be good for anything we need to keep contained. We still need to get those blocks out of the old basement. We ended up having to use them to barricade the screen “door” we made over the opening between the two basements. The cats were managing to push their way through, so we’ll have to find an alternate way of bracing the frame before we can remove the blocks. Unfortunately, the opening is basically just a hole that was cut into the wall around the time the new basement was built, so it’s oddly shaped, plus the floors are at slightly different levels. It makes creating a barrier the cats can’t push through much more challenging! Once we figure that out, we can haul the blocks out. I do want to keep one in the new basement, though. I found it was the perfect height to use as a hard surface to brace on while I was rough shaping wood to carve. The rest will be set up along the chain link fence. We want to transplant the grapes to the chain link fence, where they will get more sunlight, but not this year.

I keep forgetting that we also have some chain link fence on the other side of the vehicle gate. Just a short stretch to the garage. Part of it is shaded by the garage in the morning, but it does get full sun overall. It’s another area we can keep in mind for any future garden plots for things than need support. There’s a lot more of the chain link fencing towards the west, but that stretch doesn’t get much sunlight. Once we clean up the dead branches and trees on the outside of the fence, it’ll be better and we’ll have more options.

It feels great to finally be able to start these preparations now, even though we can’t plant anything for almost another month, at the earliest. Getting the soil delivered yesterday means we can work on different areas a little at a time, rather than rushing to get it all done at once, later.

Little by little, it’ll get done! :-)

The Re-Farmer