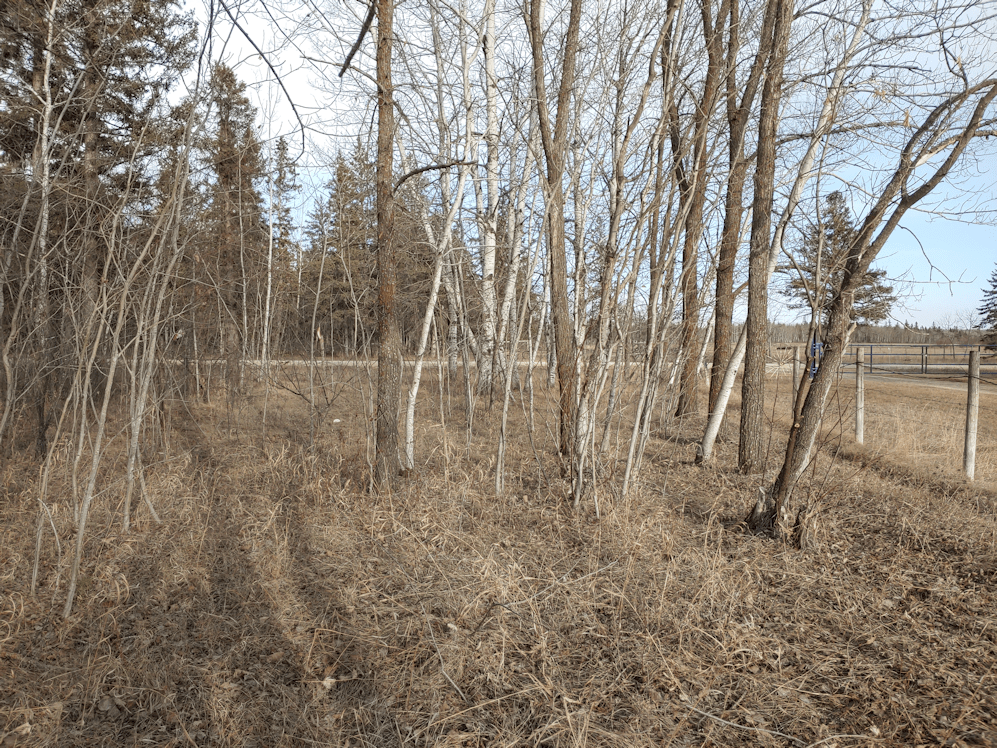
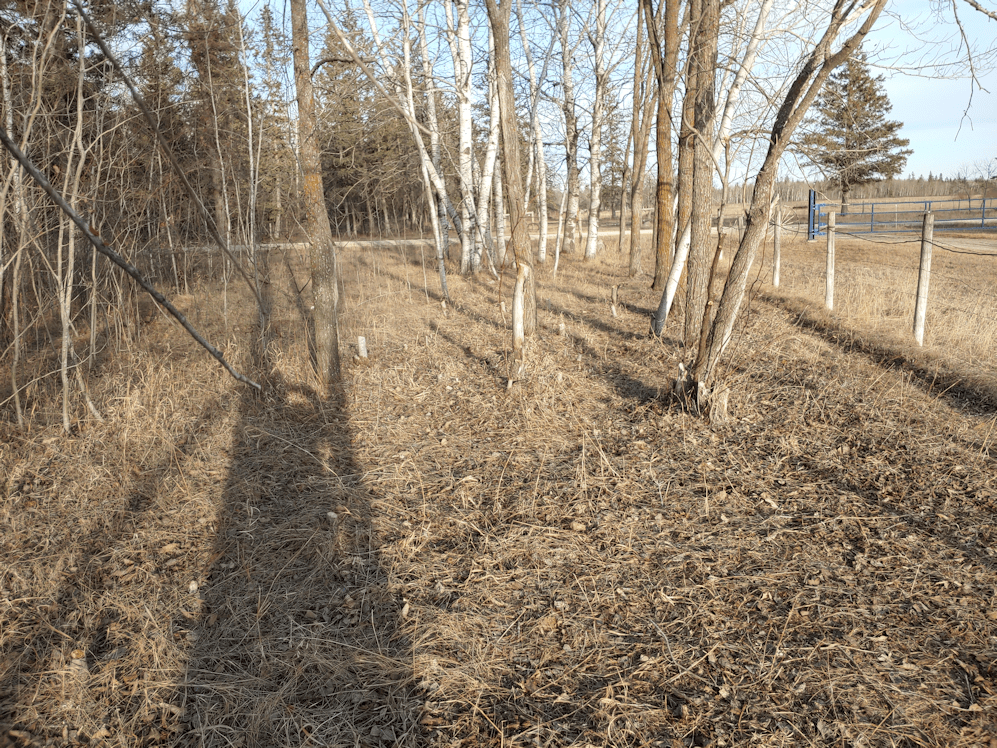
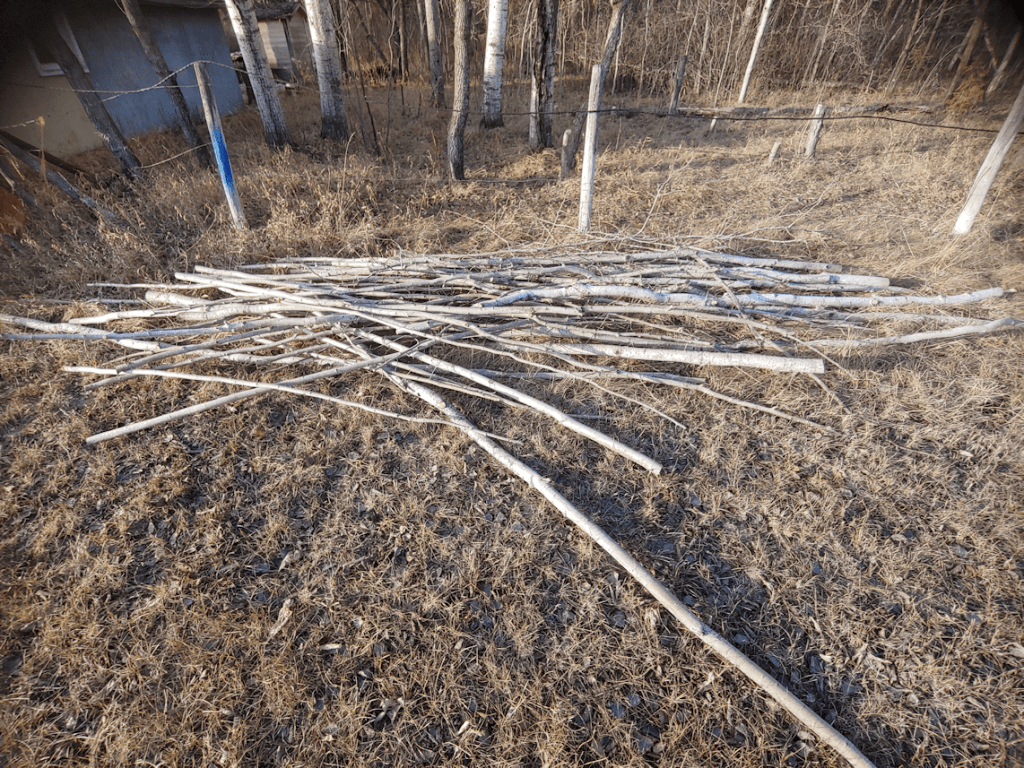
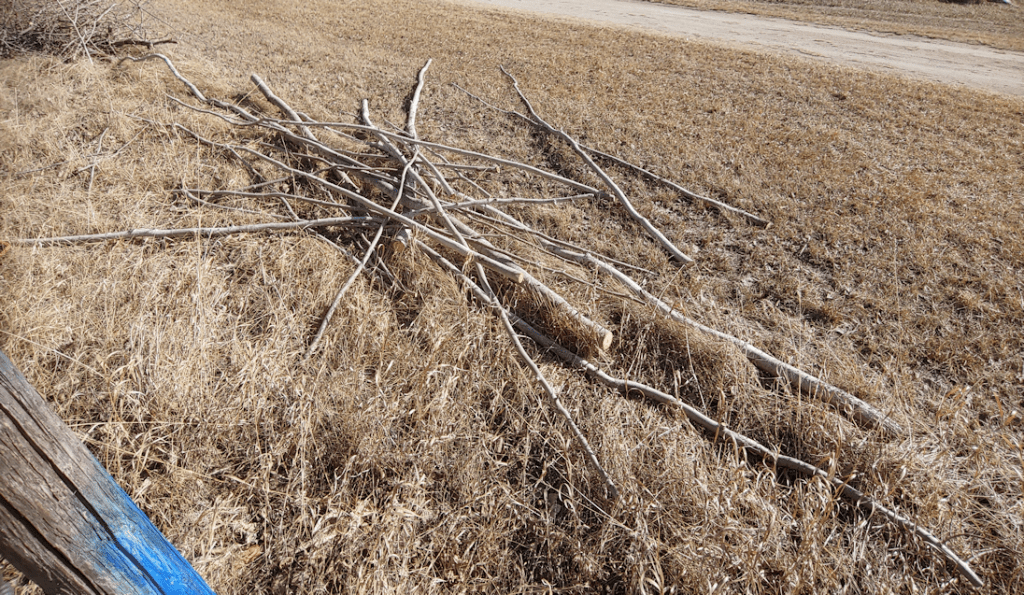
I was very happy to see the battery charged up fast enough that I could use it again tonight. I quickly trimmed the poles I’d left earlier and moved them out, then got started. Both my daughters were able to join me this time, so I got to focus on cutting and trimming, while they cleared away the trimmed branches and hauled away the poles.
Here is the before and after.
I was also able to take out some of the smaller dead trees, though one had to be cut pretty high up, where the 4 inch bar could get through. Another didn’t even need cutting; once I’d cleared around it, I could just push it over!
After about half an hour of almost continual cutting, the battery started to die. I probably could have gotten a few more cuts out of it, but I helped the girls finish cleaning up, instead.
This is a very good start in materials to build with!
We then spent some time talking about what sort of trellises and arches to build (though I suppose “pergola” would be the word to use) and walking through the garden area to think about how we want to work things out. The strongest, heaviest poles will be used to support the winter squash, and for those, we were thinking of some sort of A frame tall enough for us to walk under.
Which, I admit, doesn’t have to be that tall. ;-)
Then we wandered around, looking at where we planted the bulbs and corms last fall. We have no idea if they survived the deep freeze we had last month. My bigger concern is how dry everything is. You’re not supposed to have to water these. Especially the tulips. But we’ve had so little snow this past winter! We’re supposed to get a little big of snow on Friday or Saturday, but even if it reaches us here, the amount of precipitation expected would be pretty negligible. It’s not unusual to have one last blizzard in April, which would actually be very beneficial, as far as precipitation goes. I’d rather have snow right now, instead of rain, as the ground it still so frozen, rain would wash away to the ditches, rather than watering the soil.
But I digress.
It was so great to finally get outside and start doing yard work! I was really missing it. :-) And our new baby chainsaw is turning out to be an awesome tool!
It was a lovely day today, with the temperature at a glorious 3C/37F. With things still on track for our garden plans, I figured this was a good day to start some clean up and gather the materials that will be used to build trellises, etc.
This meant giving our new baby chainsaw (otherwise known as a cordless pruner, but that’s boring) its first workout, as I took down some of the little poplars along the south fence line of the spruce grove.
I’m just really excited to be able to do this work in March! I think the earliest I’ve ever been able to start this sort of work since we’ve moved here, has been in May.
Before starting, I took the time to clear out a number of branches that fell over the winter. In the process, I found this old bird’s nest on the ground. I left it there. :-)
Here are the before and after pictures. I’m afraid I didn’t match up my positioning very well! (click on the pictures to see them better)
The larger tree lying on the ground on the left came down last fall, and there’s another hung up in the brush behind it that has been there since before we moved in. The further into the grove we go, the more downed trees and branches there are. Clearing those, and other fire hazards, out is a major goal.
When we had a trail cam on a tree instead of a post, I used to trudge down that foot path, every morning, to switch out the memory card. This area has already seen a fair bit of clean up since we first moved here. The space to the left of the foot path has self-seeding flowers. I figure it would be good to get this done before they start growing again. Once they’re in full bloom, it’s a gorgeous mix of purple and green, almost all the way down.
In the distance of the after picture, you can see several poplars lying on the ground. I was trimming branches off of them when the battery died. I’ve left them there until I can come back to finish the trimming.
Because I goofed on my positioning, the elm tree in the foreground of the second picture is hiding where I cleared out some things between the two big poplars.
From the time it took me to take the before pictures, to the time it took for the battery to run out (which includes the time taken to clear out dead branches first, was only about 50 minutes. In that short time, I did as much as would have taken me at least twice that amount of time, with hand tools. Even using the reciprocating saw took longer.
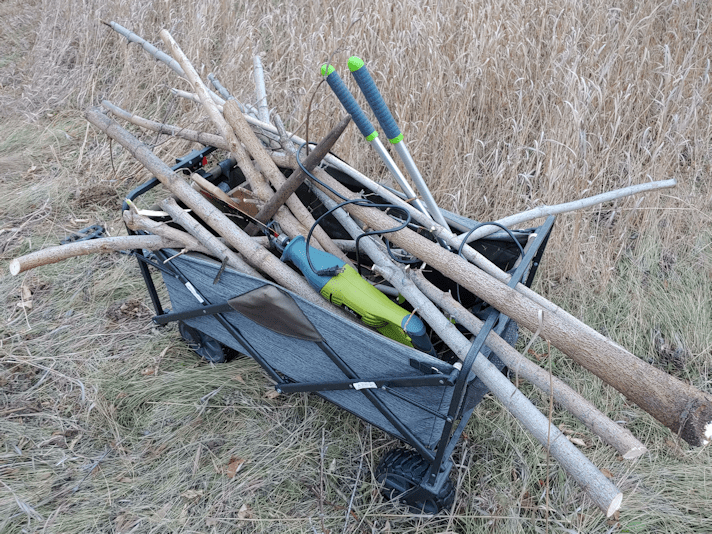
These are the trimmed poles that will be used for building supports in our various garden beds. There will be quite a bit more, by the time I’m done clearing this area.
That baby chain saw made the job SO much faster and easier! And it was surprisingly quiet, and downright fun to use! I can certainly see why these things are selling out so quickly. The only down side is that the little bitty battery doesn’t last very long. I’d estimate about half an hour of cutting time in total. So having a second battery is going to be a necessity, and with the work I am expecting to do over the next few months, a third certainly won’t be overkill!
I still have to leave some of the larger stumplings to go back and cut to ground level later, with a larger cutting tool. Not as many as I’d expected to, though.
I’m now eagerly awaiting the battery charge, in hopes that I’ll be able to take it out again this evening! :-D Mind you, I could go out with manual tools, if I really wanted to, but they’re stored in the sun room with Ginger, so I’ll wait for the charger.
Today is supposed to be our last warmish day in quite some time, and we are very fortunate to have it. Just yesterday, a major system passed through. To the north of us, they had near blizzard conditions. To the south, it was rain instead of snow. Yet, there on the weather radar, was a clear spot in the system, passing over our area!
I am quite grateful for out continued mild weather! It gave me one last day to patch the other window in the pump shack.
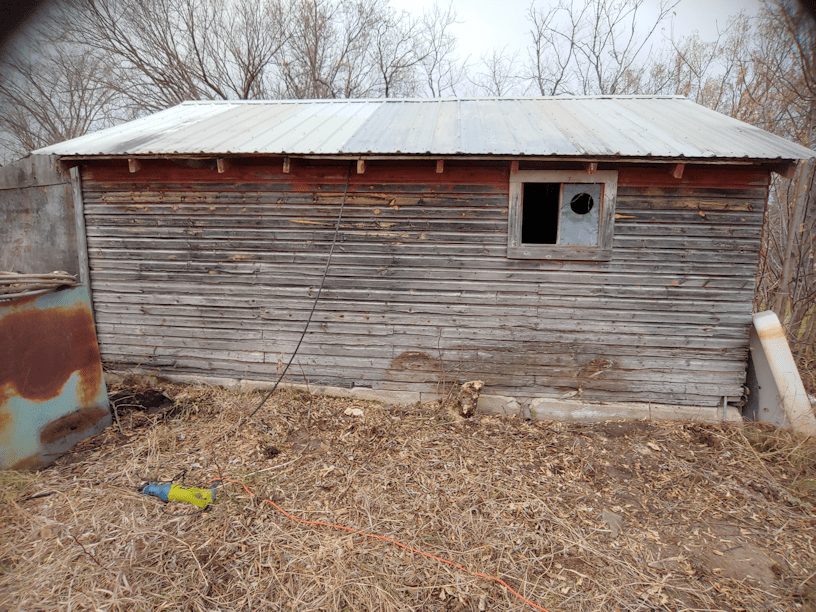
Here is how it looked before I started.
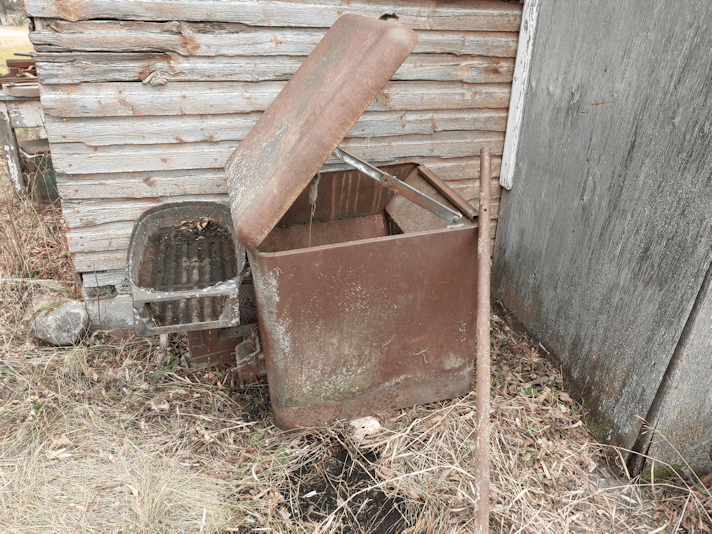
In the forefront is an old forge my dad made. My brother told me he’d cobbled it together using an old blower that the tray of coals is attached to.
I’d already cut away the bigger saplings that had self sown in the area. Before I could start, I had to cut away some more, move the steel bars and that flat piece of metal with a slight curved shape to it (it turned out to be partly buried), out of the way.
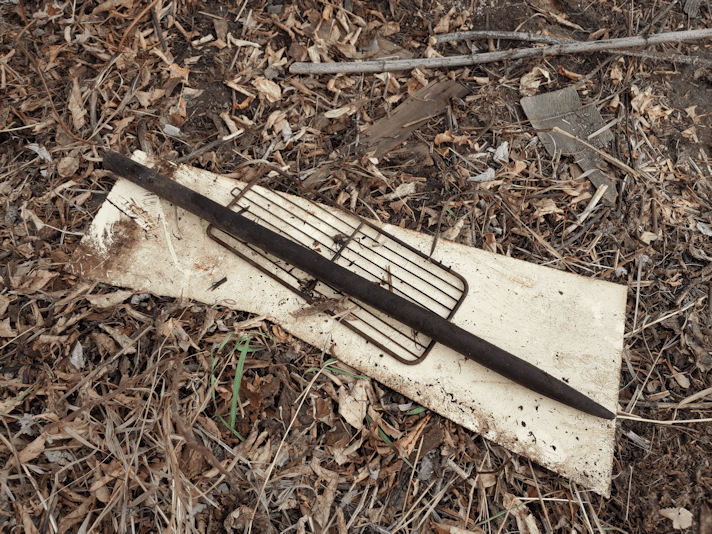
I also pulled this out of the grass.
I don’t know what it is, but it’s in the pump shack now. My brother had said something about it in passing, but I just can’t remember. I understood that he felt it was worth salvaging and protecting, so that’s what I’m going.
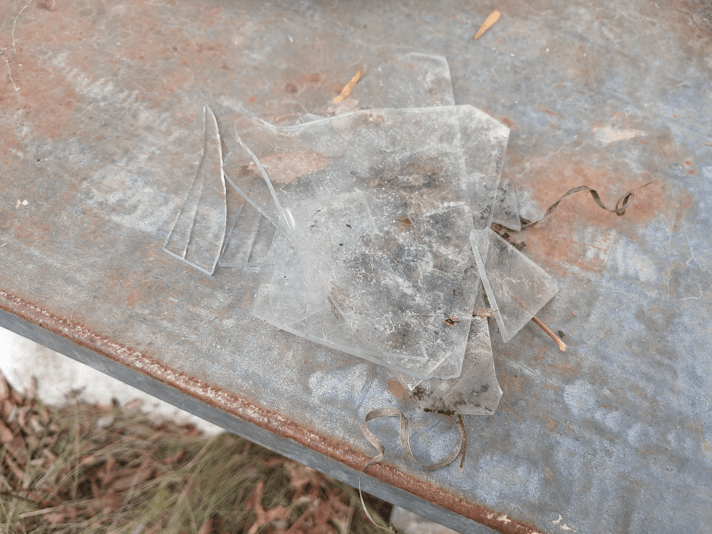
After clearing things away, I was able to pick up all the broken pieces of glass.
As I looked more closely at the window itself, I realized it was just held in place with three bent nails. All I had to do was rotate them, and I could take out the whole thing!
So I did.
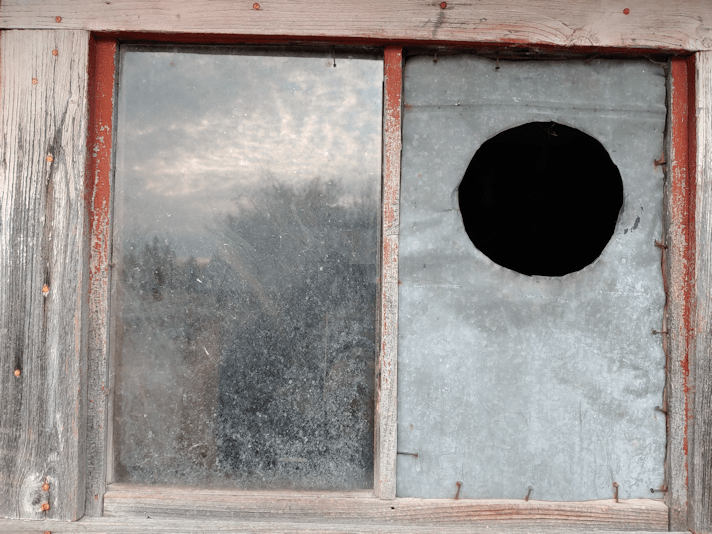
It’d hard to see, but each piece of glass has tiny little metal things holding the panes in place. They have pointed ends driven into the wood frame. The glass was then caulked to the frame, but most of that has long since fallen off, revealing those metal bits in the process.
I decided to use some rigid foam insulation to fill in the hole, as well as support the wooden pieces that were holding the remaining glass in place. I trimmed the inside edges of the insulation so it would fit more flush into the recesses of the wood.
Everything was very loose. Even the corner joins. Though the thickness of the piece of insulation would help keep things from moving around, there was still a pretty high chance other pieces of glass could fall out.
So, I got out the silicone caulking I had left and caulked it all, then put the window back in place.
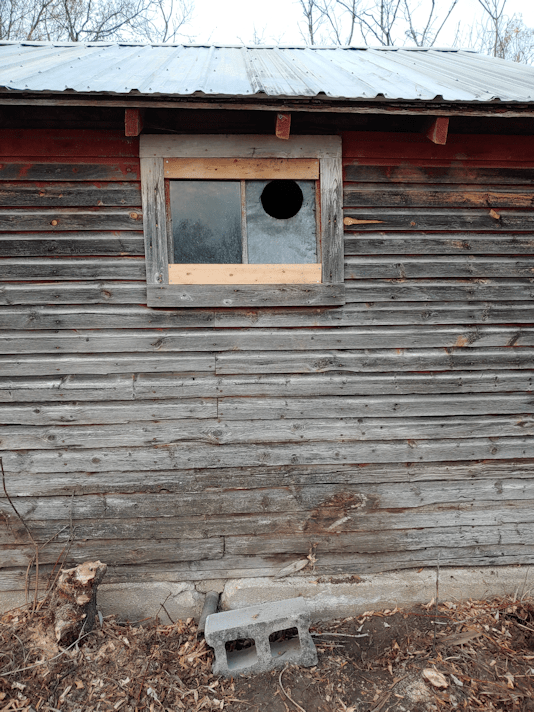
It looks horrible, but it’ll do the job for now.
Here is how it looks from the inside.
Any work done on this building is just keeping it going as long as possible. It really needs to be replaced completely. Even the concrete floor is cracked and heaving. But it still keeps things inside dry, and it isn’t collapsing, like other buildings, so it’s worth it to keep patching things.
That done, I turned my attention to the old forge. Now that things were cleared away under the window, I wanted to move it next to the wall, for a bit more protection from the elements.
It had sunk into the ground and, as I was looking around to see what I had to work with, I found the plug for it! :-D
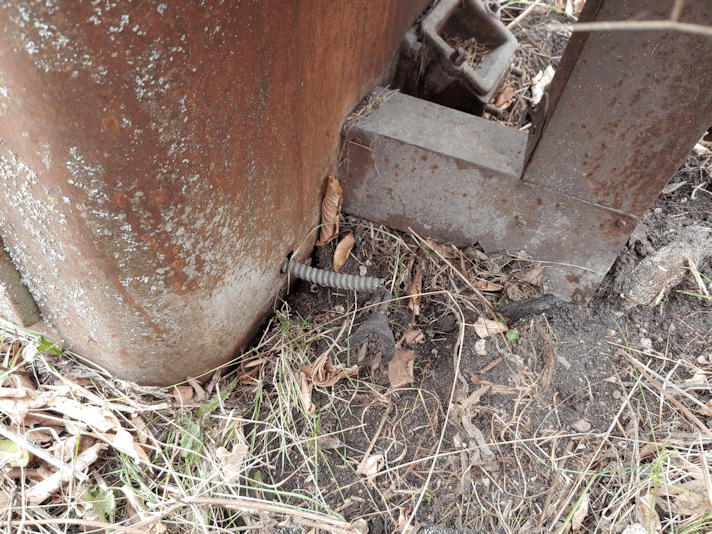
I tried lifting and shifting, and while I could move it a fair bit on one end, the end with the coal tray was much heavier. The tray itself has only two screws holding it to the metal, so I couldn’t even use that as a grip to lift.
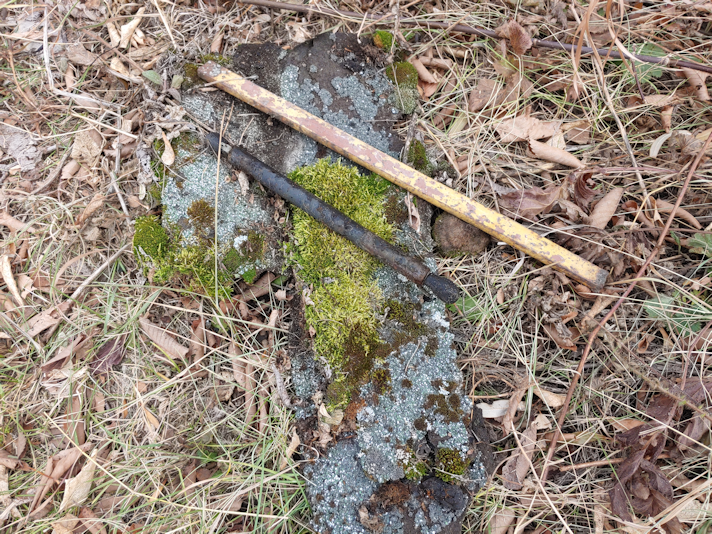
I ended up grabbing one of the steel bars I’d set aside, using it as a lever. The ground was pretty soft, so I also tried using bricks, as well as another, shorter, bar I found in the grass, as support.
I was having a hard time getting things under it, though. There was something blocking me.
Did this thing have legs?
No!
Are those… wheels???
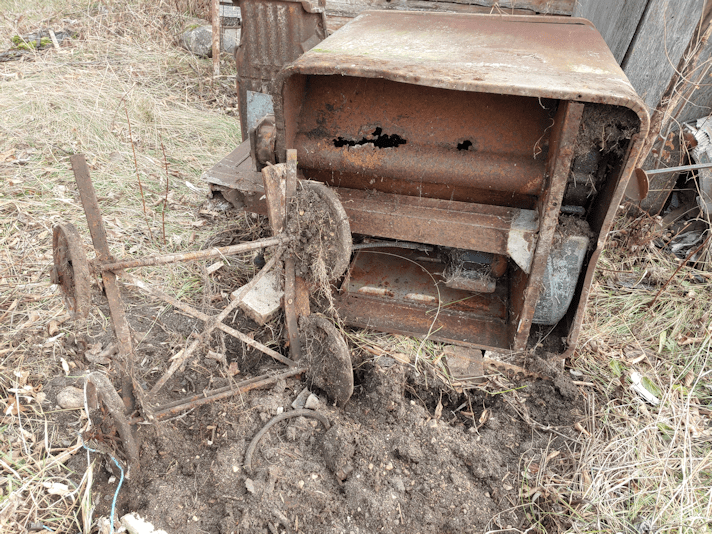
By now, I realized I would need to tip it over onto its side, because I just could not lever the heavy side out of the dirt and over the overgrown grass.
The coal tray had stuff on it, though, so I took that off.
It was asphalt shingles, covering the coal. The yellow metal piece was on top, but the round metal piece was something I found under the shingles, lying on top of the coal bits.
I then tried to use the bar to lever it around some more. There was really just one place solid enough to put the bar. The piece you can see under the coal tray is hollow, which I discovered when it started crumbling when I pushed the bar against it.
I did, eventually, manage to get it on its side.
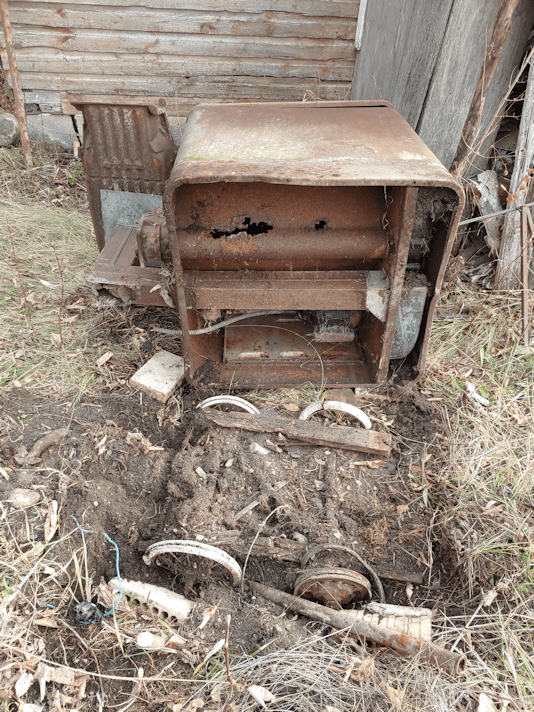
Yup. Those were wheels! But they weren’t attached to the forge!
There was still some rotted wood attached. It was like a little wheeled scooter that the whole thing was resting on.
It wasn’t until I uploaded the pictures that I realized where the motor was. It is on the light end!
I kept trying to shift the forge, but the weight on one side made it very awkward to do anything.
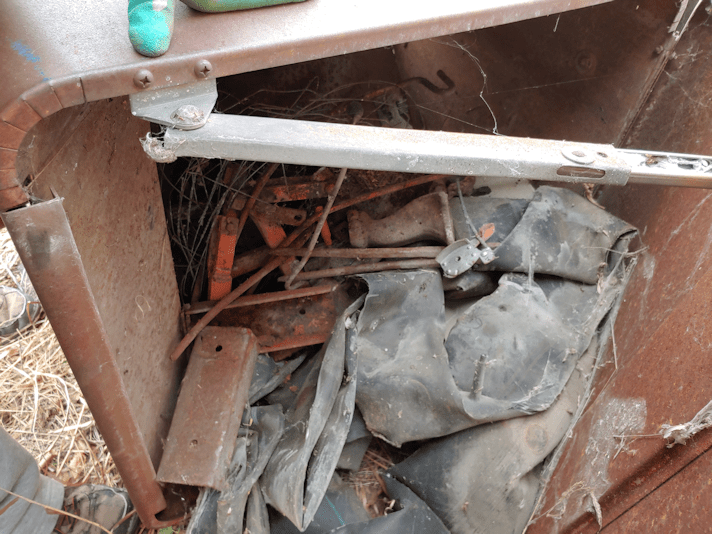
I’d opened it before and saw someone had stuffed some inner tubes inside. Maybe I could take the blower pieces out or something, and lighten it?
There… is no blower in there.
What on earth was I seeing in there? Hidden away, under the inner tubes?!!
Dear Lord in Heaven.
It’s a grinding wheel.
Why on earth did someone put a grinding wheel in there?
Not that I mind too much. This might be the one I remember as I child. The log building it was in had been burned to the ground to get rid of it, and as far as I knew, none of the stuff inside had been removed, first. So I’m actually very happy to see this.
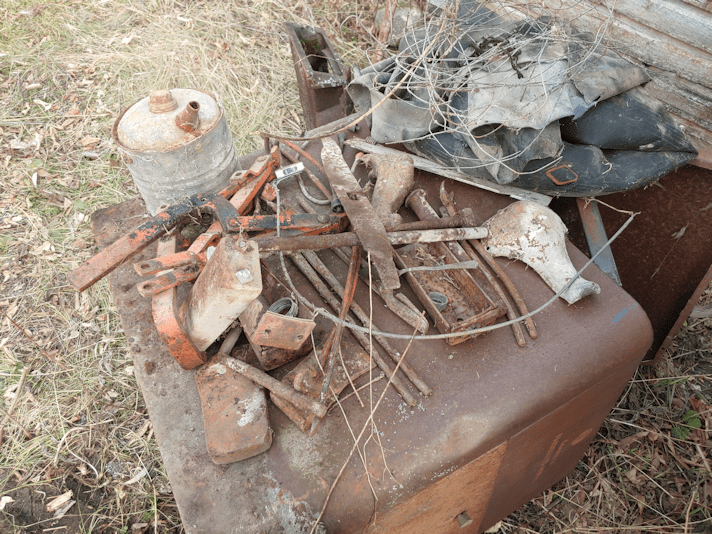
After moving it away, I started pulling other things out.
There was just so much stuff!!
I found 4 inner tubes, a gas can, a lawnmower blade, the throttle cable from a lawn mower, and even a spoon.
There are also blacksmith tongs, though one has the handle broken off. A couple of objects with lots of pivoting pieces on it. A couple of old metal legs, like off an old-style bathtub. Two ax heads, and more odds and ends
Two things in there really excited me. I don’t know what they are called, but from videos I’ve watched of people using carving benches, I recognize them. One end goes into a hole drilled into the carving bench, and the other holds the item being carved in place. It was something I realized I could really use, if I plan to extend my carving repertoire. I just had no idea where to find them – a hard thing to do when you don’t know the name of what you’re looking for – and some of the carvers whose videos I watched, commented on how expensive they are They’d made their own, instead.
Now I have two!
So I’m pretty excited about that!
Once empty, I was able to right the forge again.
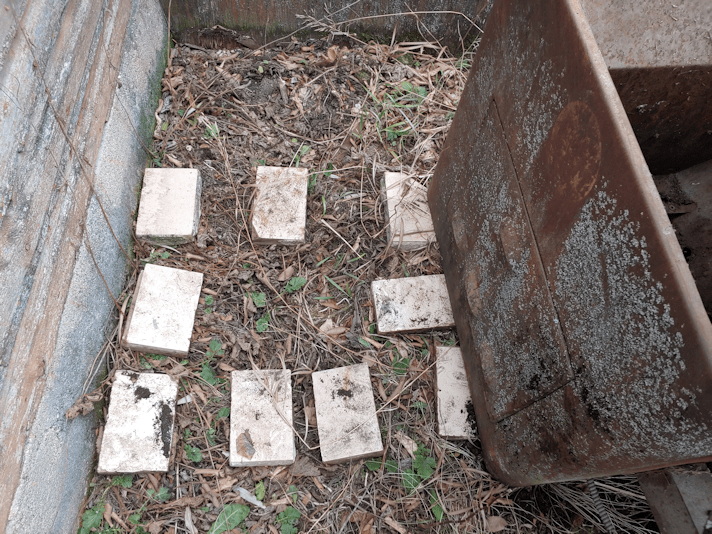
After seeing the remains of the wheels it was on, I decided to take some of the glazed bricks I’ve been finding and put them under the forge.
Even empty, it was still hard to move! The light end, I could grasp and lift, but the heavy end was harder to get a grip on. I ended up using the bar to lever and shift that end, to get it onto the bricks.
I did finally get it in place!
You can see the bar I used to lever it.
The coal tray looked like it was cracked, but I think it was there for a purpose. The “crack” extends to some holes in the middle of the coal tray. Under the holes is the squared pipe. The air from the blower was directed under the coals through there.
I considered throwing away the wheels, but the frame they’re attached to looks like it might actually be salvageable, so I am keeping it for now. I just knocked the dirt and roots out of the spokes, first.
After that, it was time to clean up where the forge had been sitting.
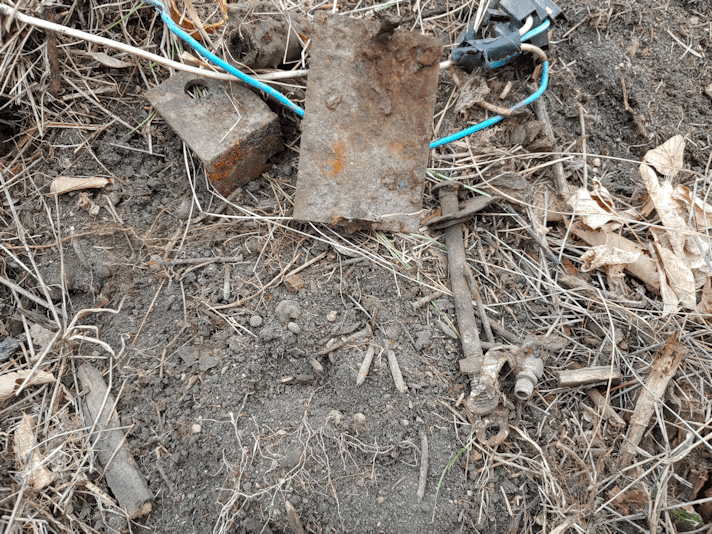
I’d found a few metal bits and wires. Then some nails.
Then more nails. And screws.
And more nails!
I think a container full of nails, screws and other odd bits had spilled there. The last thing I wanted was for someone to step on them and get sepsis or something.
So I dug out what I think is the original lid for our septic tank, to use as a tray, and magnets.
Along with the nails, I found bits of spark plugs, a gas cap, the tooth of a hay mower, and miscellaneous other bits!
Once that was done, and my younger daughter helped me tuck the keepers I’d found into the pump shack, I enlisted her help to move the other thing I don’t know the name off. One of the pictures below is from when I first dug it out from beside the fuel tank, yesterday. This is another of those things my brother said was worth salvaging and protecting, so I wanted to move it into the pump shack.
In the older photo, you can see what looks like a completely sheered piece of steel, in the middle.
There was dirt and roots jamming one of the pieces sticking out the narrow side – in the first picture, it is completely hidden by grass. It now rotates freely again.
Between the two of us, we could not lift it! Not without risking injury, anyhow (and I think my daughter might have hurt her back trying, but isn’t telling me, so I won’t worry. :-( ). I’m astounded by how heavy this thing is.
One thing we noticed after trying is that some ?oil? leaked out.
I ended up rolling and flipping it, end over end, until it was under the coal tray of the forge.
We could hear fluid sloshing inside!
So that’s tucked away as much as it can be, for now.
My goodness, what a lot more work there turned out to be! But it’s done now, and we don’t have to worry about this stuff as winter comes in.
Today, my goal was to board up at least one of the broken windows in our old pump shack.
Which was not an easy job. (Photo heavy post ahead!)
You see, in order to fix the window, I needed to be able to reach the window.
In order to reach the window, I had to cut back some self-sown maples growing in the way.
To be able to reach the trees, I had to clean up this.
You can see part of an old freezer, over on the left. Next to the old furnace is a partially dismantled modern washing machine, next to part of an old wringer washer, and beyond that, a second fuel tank.
It’s hard to see in the above photo, but there is a black electrical cord coming out of a hole under the eaves, about in the middle.
This cord is eventually buried, and extends to the storage shed, which used to be my late brother’s workshop. Though the cord is plugged in inside the pump shack, it was actually easier to plug my extension cord into the other end of this cord, in the storage shed!
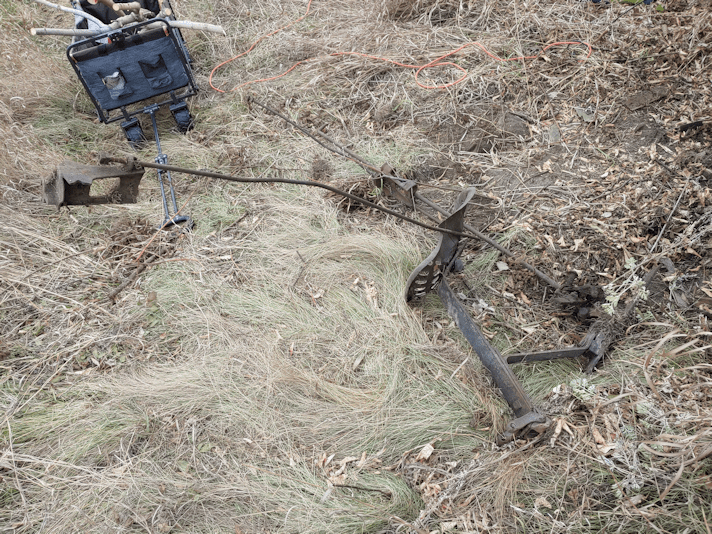
I… don’t know what this is.
I’d moved it aside, only to realize I needed to clean out the stuff I’d just put it on top of. It’s quite heavy, so I just moved it by the old freezer for now.
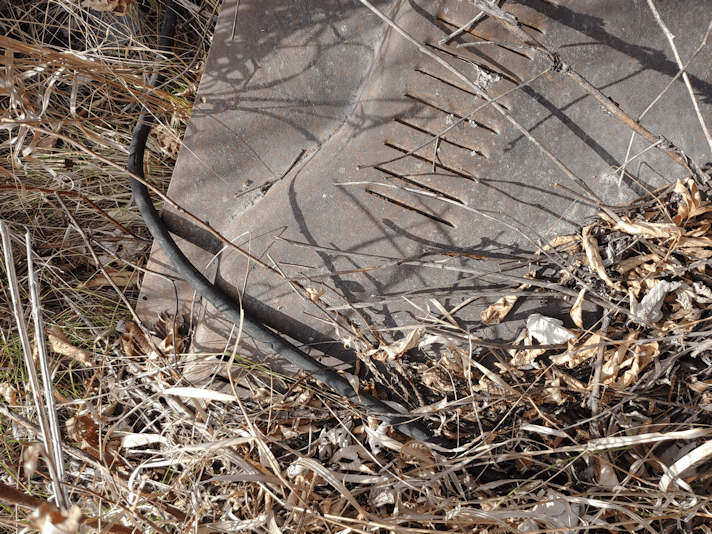
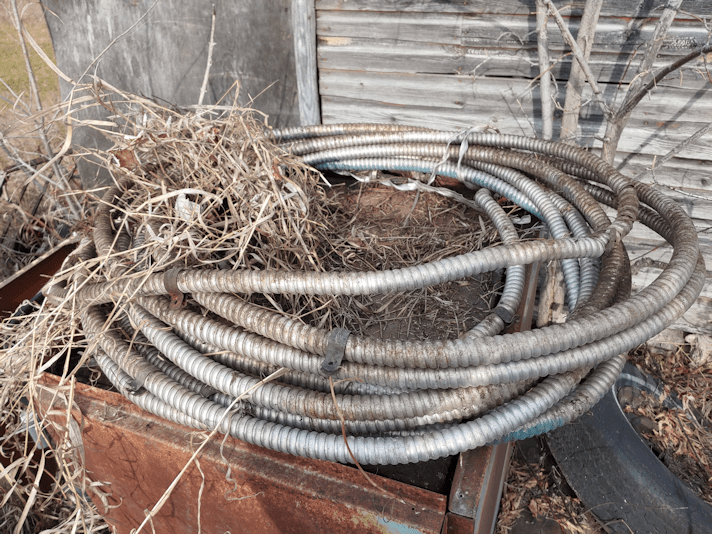
While following the cord until it was buried, I found all sorts of things. Including this old wiring, which I just put on top of the old furnace for now.
I went to move one of the tanks, and found another mystery item was propped against it. No clue what it is, but it says “Ohio” on it. :-D
I also discovered the electrical cable was not actually buried where I thought, and was still on the surface, under the tank!
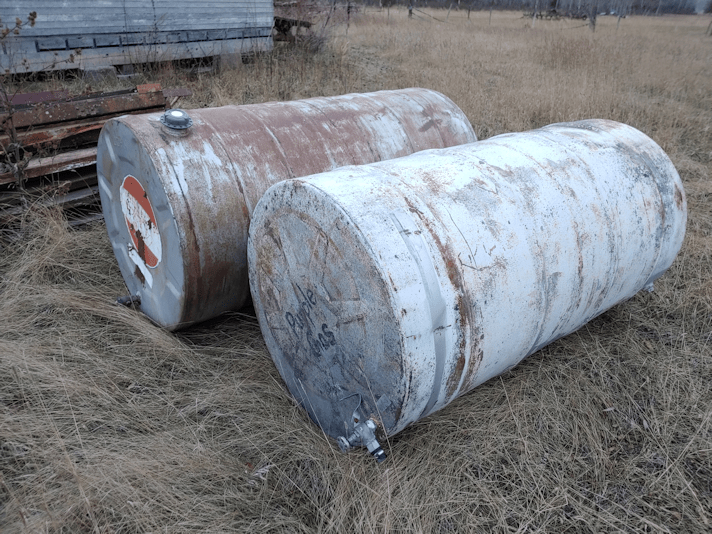
The tanks were quite light, so I rolled them completely away, near the storage shed.
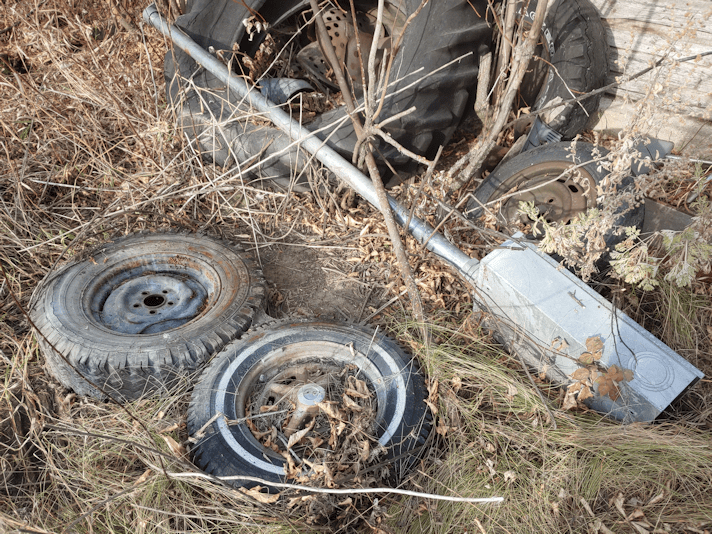
Under the big white tank labeled “purple gas”, I found this.
It was on top of those two tires flat on the ground, and propped up by the other stuff.
While cleaning up around the tires, I found the window pane! It had simply fallen out and didn’t break!
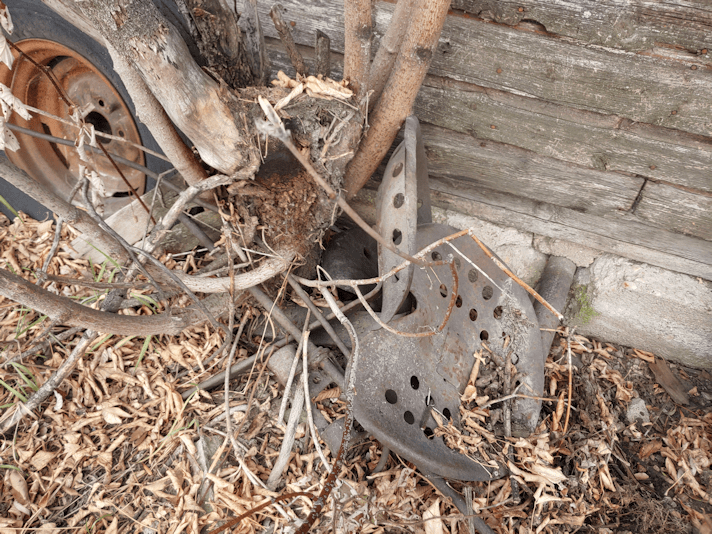
Once I moved the big tractor tire, I found a collection of seats from old farm equipment under it.
I ended up having to cut away that tree to get them out, because it had grown around some of the metal pieces.
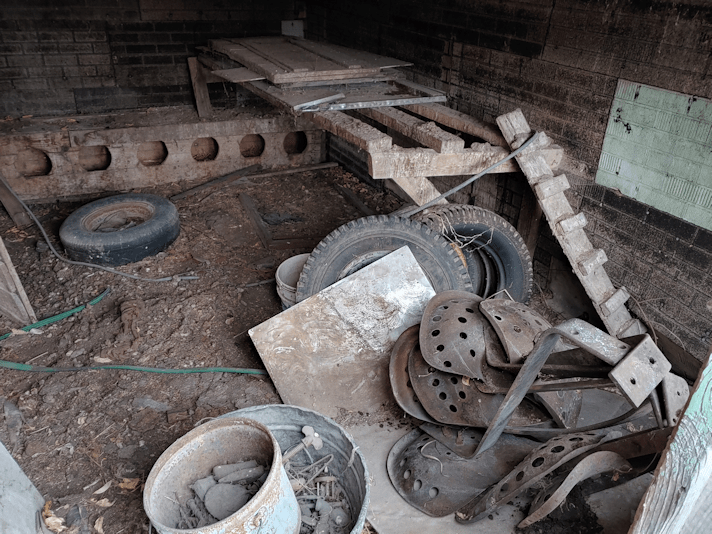
I decided they could be salvaged and wanted to put them somewhere out of the elements. I decided the old chicken coop was the best bet for now.
I am not looking forward to cleaning this thing out! But, if we have any chance of salvaging the building, it has to be done. The beam across the doorway is sinking, and a board that used to be above the door is now over the door. There’s room enough I can move the door to one side, but it can no longer be closed fully.
Also, there is another maple at the corner that needs to be cleared away.
To get to the old coop door, I had to first clear away a forest of burrs with the loppers.
They attacked me.
Actually, just one of them. Once it caught on my sleeve, that was it. Before I knew it, I had burrs all over the front of my jacket, both sleeves, my pant legs, my butt, and even my hair!
I had to ask my daughters to help get the burrs out of my hair! The burrs did NOT want to let go!
That tractor in the background is another thing I need to clear. It has trees growing through it. :-(
As I was getting the old seats out, I found…
… a cast iron frying pan!
I ended up putting it in the pump shack. Where the wood burning stove used to be, there is a tiny electric stove (I doubt it works) that has only 2 elements on it. I just had to put the pan on it! :-D
There was one last seat I was struggling with. It was still attached to something, which was buried, and part of it was stuck in the tree I had to cut away, and other parts stretched out further.
I was eventually able to drag it all out.
I… have no idea what this is. Or was, I should say.
There was no way that was fitting through the old coop door, so it got set aside elsewhere.
Once it was cleared enough, I took a look at the old kitchen sink, leaning against the corner of the pump shack.
I love this thing!!! I have got to find some way to use it somewhere. :-D
For now, I just tucked it closer to the building. I don’t dare move it until I have someone to help. I don’t want to chance breaking it.
After clearing more stuff away, I found this bar sticking out of the ground.
I don’t know what it’s attached to underground, but it was not moving. It could turn a bit, and I could wobble it a bit, but that’s it. I could not pull it out,
No clue why it’s there.
I made my way to the old furnace, moved another tire and found and an old kettle! LOL Then I went to move the old steel… container of some sort, and found more stuff in it. It doesn’t show in the photo, but at the very bottom, there was a roaster lid.
Just the lid. :-D
As I pulled more stuff out from under the dirt and leaves behind the old furnace, I found some other odds and sots.
Score!!!!! Oh, I was so excited! That bar with a point at one end is solid steel and very heavy for its size. I could have used something like that in the past few years! There used to be a bar like this, except more like 4 or 5 feet long, but it is among the things that disappeared. This is a bit short, but it’ll still be very handy.
The other stuff joined the hub caps and other weird scraps on the junk pile.
This is as far as I could go, though. That metal is under the old furnace. I’ll have to, at the very least, tip the furnace to be able to get it out.
Not today.
This is as far as I got today!
Under the window, coming through the concrete, you can just see a pipe. That is a drain pipe. Back when we were still using the well under this shack, and had no running water in the house, we had a claw footed bath tub in here. We would heat water on the wood stove for our baths, and this is where the bath water would drain out. I have no memory if there was more pipe, so it wouldn’t drain right at the foundation.
There’s a bit of stump in the middle that I am leaving for now. My poor little reciprocating saw was really starting to struggle by this point!
I could finally fix the window!
The glass pane fit perfectly in a recess in the frame. It looks like it was held in place by a single nail at the top! The metal side, where a stove pipe used to go through, has about a dozen nails holding it!
As the cats go through that hole, I screwed scrap boards across both halves to hold them in place.
Also, I’m short. I found the cinder block by the storage shed to stand on, so I could reach the top of the window. When cleaning up later, it joined the 5 or 6 glazed bricks that I’d also uncovered by the old furnace.
I keep finding those, absolutely everywhere! I would not be the least surprised if I move the old furnace, and find more of them under it.
One of these days, I need to remember to ask my brother if he knows where they all came from, and why my parents got them! Or maybe my mother might remember.
Now, what am I to do with all the tires I dragged out?
Why, drag them back again, of course. :-D
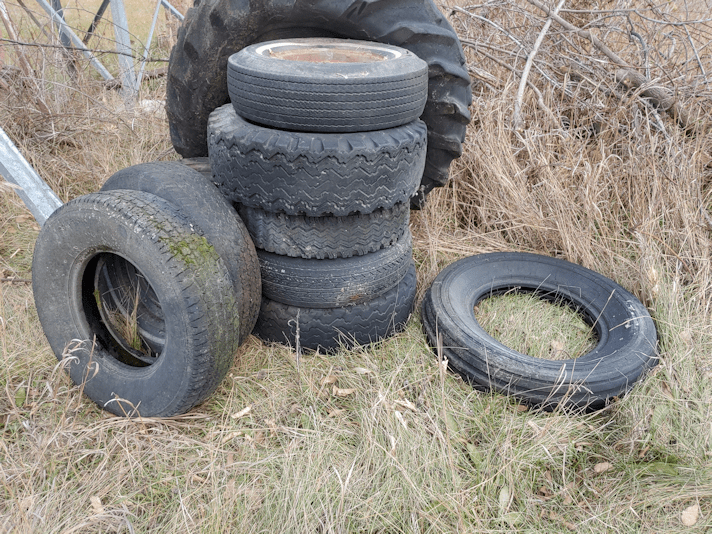
The stack on the left is covering that bar that’s sticking out of the ground, so no one will accidentally hurt themselves on it. Those tires all have rims. The others are by the window so the cats can still get in through the opening. The ones lying flat have no rims, so they can potentially provide critter shelter.
Yeah. I’m a suck.
I am keeping a fair bit of the maple I cut. I’m sure I will be able to find something I can make with them! :-)
There is still a small window at the end of the shack that needs to be fixed. It’s made up of 4 squares of glass, framed by a + of wood in the middle. One of the three squares is gone, but I have yet to find it on the ground, so I don’t know if it has broken or not. I’m just assuming it’s broken, since I saw the cat that jumped through it.
Tomorrow is going to be our last warmish day for quite some time, so I’m hoping to be able to get that done. I might end up just boarding that one up completely. We’ll see.
That’s assuming my body is up to it. I’m feeling pretty sore right now! :-D
One of the things I’ve been wanting to get done in the outer yard, was to clear some trees from what used to be a chicken coop, when I was a kid. Getting things done in the outer yard has now been pushed back another year, but the last wind storm we had left more damage to the roof. It’s a job that needed to get done sooner, rather than later!
Since this involved some rather larger trees, I figured I would finally use the chain saw I got repaired last year!
Of course, I had to test start it, first. It’s been a very long time since I’ve used a gas powered chain saw, so I appreciated that it has each step written out, right on the machine.
Oops.
Yeah. I pulled on the knob, and the whole piece broke off!
So much for using a chain saw.
This meant dragging out a 100 ft extension cord and the reciprocating saw, instead.
This is what it looked like before I started.
Someone went through all the effort to cover the original roof with corrugated steel, only to have so many pieces get torn off, because no one cut back the self-seeded maples.
This is not a small tree, either!
Yeah, I had to cut my way through burrs, first, just to reach it!
The other corner had tree problems, too.
You can see how both sections of tree are rubbing against the corrugated steel. On the side, it at least bent into a more rounded shape…
This one was growing around a sharp end!
I started off cutting the lower branch that was tearing the metal sheets off on the south side, then trimming it back, bit by bit, until I had to cut the trees from this side, to be able to reach the rest.
This is where they were rubbing against the roof.
Once the smaller ones were clear, I could reach more of the larger tree and get that one clear, too.
I had to move other things around, too. The sheet of metal is still buried somewhere; I could only lift and bend part of it to get access. I am not sure, but I think roots have grown over the buried end. !!
After I reached this point, I spent some time trimming branches and cleaning up.
This is where I stopped for the night. I might not take the rest of the trunk down. I haven’t decided, yet. Left alone, all of the stumps will start growing again, and I really want to prevent that. This log building is remarkably solid, and it’s the only log building left that isn’t collapsing outright, so we really want to protect it as much as we can, until we can possibly even restore it.
I don’t know what to do about this section of roof, though. We might have some sheets of metal roofing material large enough to use, lying about, but no safe way to get up there. I will have to consult with my brother. We likely can’t do anything until next year, but with the branches gone, it will at least not get ripped apart in high winds, anymore.
It’s hard to see, but in the tall grass are piles of smaller, thinner branches I trimmed off.
These larger branches have been set aside to be trimmed, and I will keep the larger pieces.
Some logs are already trimmed and set aside – including a pile of wonky shapes, in the back!
Maple is quite a heavy wood to drag around! That last, biggest piece of trunk was pretty awkward to move, too. It is, however, large enough that I might be able to get some long, shallow bowls out of it. I’ve ordered a gouge that I can use to carve deeper than with what I have now, and I hope to be able to carve some cups as well as small, deeper bowls. I might be able to do some small dishes, too.
I clear branches off differently now, compared when we were first clearing trees away. I no longer cut smaller branches right at the main branch. Now I leave longer pieces that may end up being the handles for ladles, or long handled spoons, with the crook of the branch being the bowl for ladle or spoon.
A lot of this wood, in a variety of sizes and shapes, will end up in the basement for potential future projects. Some pieces will join the apple wood by the fire pit, and what’s left will go into the piles for chipping.
I was losing light by this point, so I will continue tomorrow. By the time I put all the tools away, it was full dark – and only 5:30 by the time I got inside! It felt like 8 or 9. :-D
If all goes productively, I’ll be able to clear more, smaller, maples that are growing up against the pump shack, giving access to the windows the cats broke. Some of the mamas have had their kittens in there. One of the windows was only half a window. The other half had a board with a hole cut in it for a stove pipe. My brother took the stove itself away, because it was getting damaged. The cats had been jumping through the hole for the stove pipe, but over time, the stress of that finally broke the other side. Meanwhile, another window lost its pane when I walked into the pump shack, not knowing a cat was in there. The poor thing panicked and jumped through part of the window. :-( At least it was an old, single pane window that was barely holding together already, so the cat was completely uninjured.
We’ll see what we can find to patch those up, tomorrow.
Little by little, I had been working my way towards the junk pile. With a litter of kittens living in it, it was not as high on the priority list. Still, I’d been clearing access to it, and had even gone digging into it to find scrap pieces of wood.
The junk pile is actually a wood pile, with lots of junk around it, too. The wood had been neatly stacked and covered with tarps, which have long since torn up and degraded, which means the wood at the top has a lot of rot happening, but the further down it goes, the better the shape of the wood.
Unfortunately, in sorting through the pieces to find the least rotten ones, I also discovered that many were also full of nails, screws or staples. I’d set those aside to deal with another time. With having to go through it so much more today, and having to set aside so many pieces, “another time” was today!
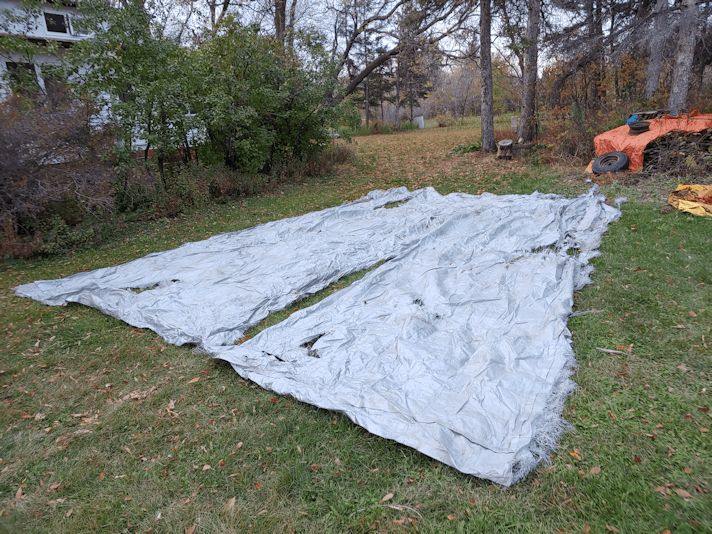
While trying to get at the wood to find better pieces, I ended up having to move the remains of old tarps to access it, and finally had to move the grey tarp that was draped across the end of the pile.
That was my first surprise.
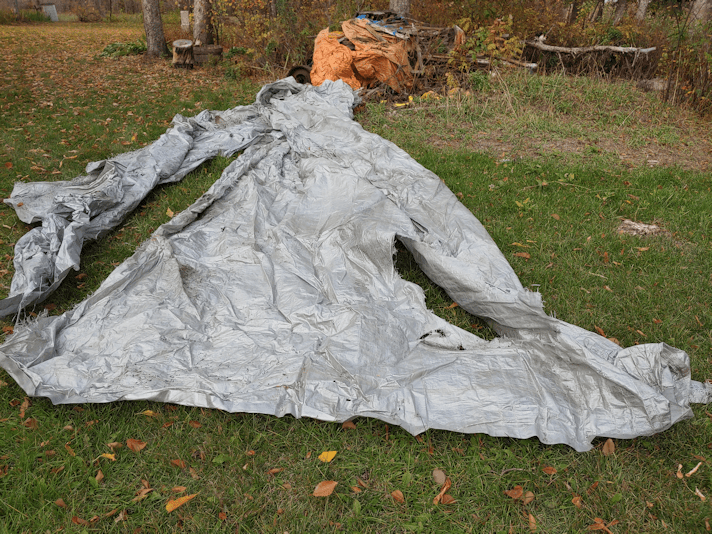
It turned out to be huge!
I then had to remove the even more torn up orange tarp, though I found another, smaller orange one (it actually looks more like the remains of a larger tarp). There are also the remains of a blue tarp on the pile of wood, but it’s so disintegrated, I didn’t even try to dig it out, yet.
I also finally dug out the yellow tarp I was seeing just bits and pieces of. This one was so brittle, I could hear it cracking as I moved it.
When it came time to do something with the wood I’d set aside, I was a bit at a loss. I didn’t want to just make a pile on the ground. I also wanted to stack it in suck a way that no critters would hurt themselves on all the nails and such.
After thinking about it for a bit, I went over to the garden shed and hunted through the stuff we’d piled around it while cleaning out the maple grove.
I ended up bringing over an old metal bed frame – one of three I found in the maple grove. It has metal slats held in place with springs, so I put the longest boards I placed the first few boards in such a way that none of the weight was on the slats. After that, I layered the pieces in such a way that all the pointy bits were facing down or tucked away somehow. Critters can still get under it, without the risk of scratching themselves on rusty nails.
Once the rotted and dangerous pieces were stacked, I started to pull up the disintegrating orange tarp that was mostly on the side, tangled in the things that had been leaned against it to keep it from blowing away in the wind.
That’s when I started to see wheels.
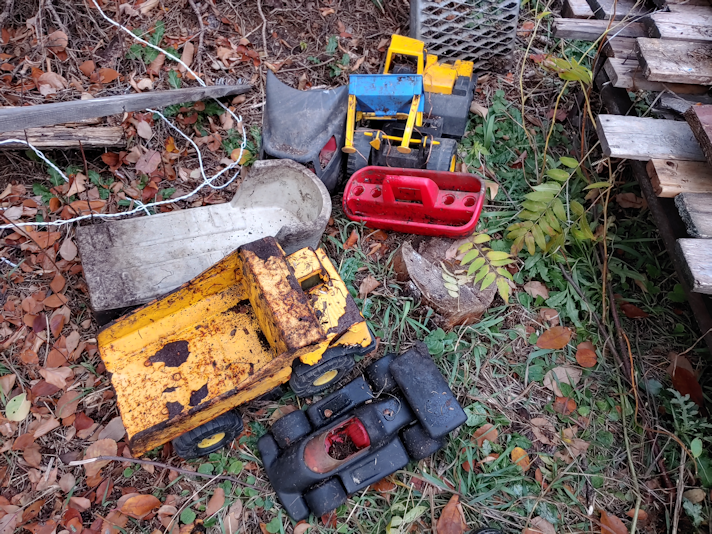
By the time I was done, I’d pulled out all of these.
That’s a metal dump truck in there! Too bad it is so rusted out. The paint is coming off in chunks, too.
I think these might have belonged to one of my nephews.
All of my nephews are adults now.
I ended up tucking them part way under the pile of rotted wood, to partially cover them. I’ll figure out what to do with them, another time.
As I was pulling those out, I also found this…
A rather large white tail deer antler! The discolouring shows the parts that were in contact with debris that would have gotten wet, regularly.
While I was working, I was eventually able to get closer to a tree stump than before. Which is when I noticed something odd.
There were nails in the stump!
Looking closer, I could see the board on the ground. Assuming that was what the nails had been holding in the past, I’m wondering if maybe this had been a platform bird feeder at some point? It’s too high to be a seat, and too small to be much use as a table.
Once I’d done as much clearing as I was going to today, I put the partial tarp that was still useful over the wood pile, having thrown out the torn up one. Then I spread out the big grey tarp.
I’m not sure it’s actually a tarp. It might be a canopy cover of some sort. Whatever it was made for, it’s really big! It’s unfortunate it was left out the way it was, and got all torn up by the elements.
I ended up folding it up and setting it aside. It’s not much use at full size, but it’s big enough that, folded in quarters, I might actually find a use for it for one more winter, before tossing it.
At some point, I want to finish cleaning up the junk around the wood, then go through the wood itself to sort out the rotten pieces from the ones that are still useful.
Somewhere in there is a space big enough for Butterscotch to have a nest for her and her babies. I’m curious to see it!
Since I went and build up a bed and walkway yesterday, I kinda had to continue today! :-D
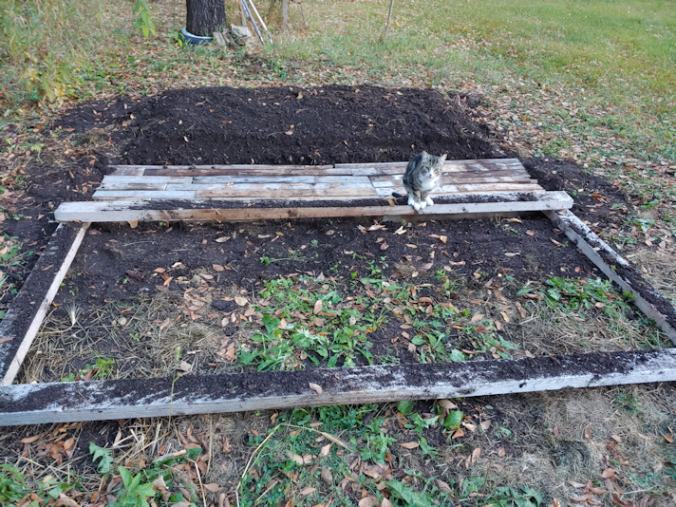
Here is where I left off, yesterday.
The goal was to create another bed with compostable material buried in it, and make a second walkway.
The first thing that had to be done was to break up all the soil inside the frame and pull out any weeds and roots I found. Then I loosened the areas the walkway was going to go. This area had been mulched with grass clippings, so there weren’t a lot of weeks that needed to be pulled out of there.
Then it was time to dig out the new bed, just keep enough to start hitting gravel. Of course, there were more roots – and rocks! – to take out.
There wasn’t much in the new compost pile I could use for this, so I also loaded up a wheel barrow full from the old compost pile. That got topped off with another wheel barrow full of old, damp straw.
The compostable material got buried, with extra soil added from digging out the walkway. I wanted this one to be slightly narrower than the other, to give me more room for a third bed, if I decide to do another one.
I had to make many trips to the junk pile to find enough wood to do the walkway 3 layers deep, like the first one.
Once this was done, I went to clean up the mess I’d made digging for pieces of wood in the junk pile. A lot of the pieces were either too rotten, or too full of nails, staples and screws!
Cleaning that up led to finding all sorts of things, so that will get it’s own post!
So we now have to beds ready and waiting for the garlic to come in. Tomorrow, I will get one of the girls to help me move the frame and see if we can fit a third one in. I don’t even know if we’ll have enough garlic to need three beds, but if it’s feasible, I’d rather have it and not need it, then need it and not have it!
When I cleared out the old wood pile from the yard last year, the soil I found below was a very pleasant surprise. Still, there was a whole lot of clean up that needed to be done this spring, before we could plant anything. We were still finding some pretty strange things in there! The biggest challenge was all the tree roots crisscrossing the area.
Now that we’ve had our first vegetables growing in there, it was interesting to see what was coming up along with them! After being buried by a wood pile for decades, there were still seeds and root systems that managed to survive and sprout. There was plantain (the weed, not the banana!), which is not surprising; that stuff can grow anywhere and is very hardy. Clover was more of a surprise, but there was also a lot of some long, delicate green plant that I didn’t recognize at all. I thought it might be a flower of some kind, but it never had any. There were flowers that came up, too, and since they came up where the khol rabi failed, to, I let them bed until today, when they were basically done blooming, anyhow.
All this meant that in digging over the beds, I was basically stopping with every fork full to break up the soil with my hands, so I could pull out as many weeds with their roots as I could.
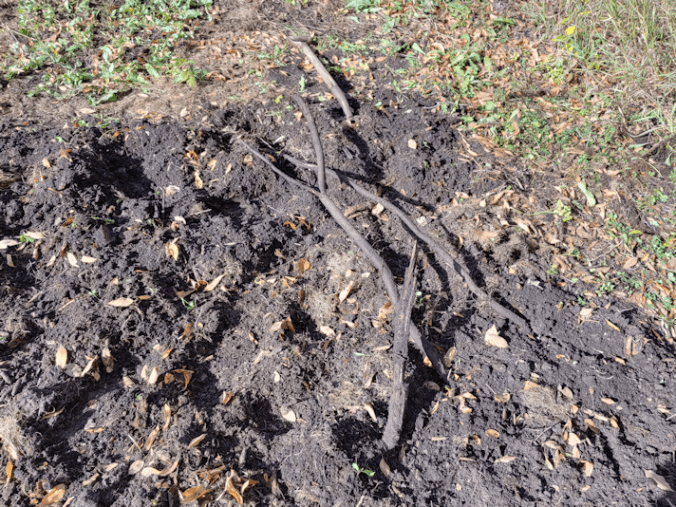
I also found tree roots I’d missed in the spring!
While fighting with the roots, my feet sinking into the soft, soft soil, I kept thinking about where and how we would plant the garlic. The spaces to walk on, in between the beds of carrots and beets we’d planted, was packed down harder than the rest, of course, and it almost seemed like wasted soil!
Also, I discovered that, like the girls had discovered when planting deep bulbs, it seems even here, there is only about 8 inches of topsoil before I started hitting a lot of rocks.
We’ve got three kinds of garlic coming, which meant three beds. How and were did I want to arrange them?
Then I remembered I still had a 4’x8′ frame from the goat catcher we’d built.
Those are coming in very handy!
I dragged it over, and the area I’d worked on turned out to be almost exactly the size of the frame!
That’s when I started to go a bit crazy.
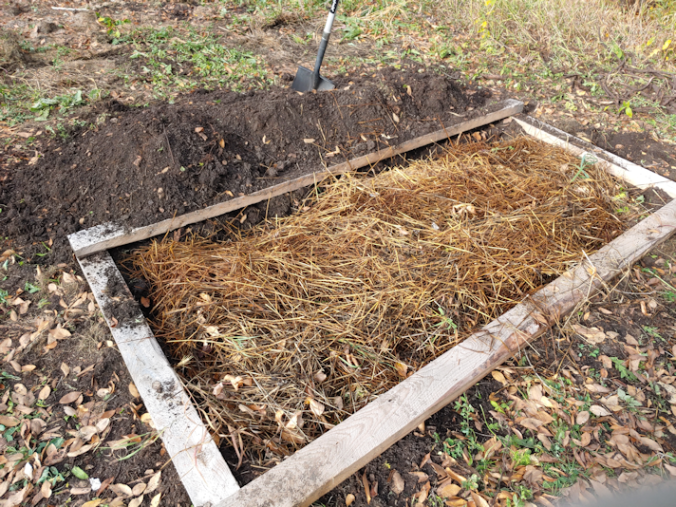
I started to dig out the soil inside the frame.
Hitting more roots, of course.
By this time, plan had started to form in my mind.
All the stuff I’d added to the compost a little while before?
It ended up in the space I’d shoveled out, along with some damp straw that I raked up from around the old dog houses, where they had been used as insulation around them.
When it came time to return the soil to the space, I kinda went overboard again…
I kept digging.
The vague plan in my mind took into account walking paths, and I didn’t want to be sinking in the soil. The pieces of wood I’d used to walk on weren’t very stabled, but what if…
What if they were laid down on an area that was dug down and leveled to just above the gravel?
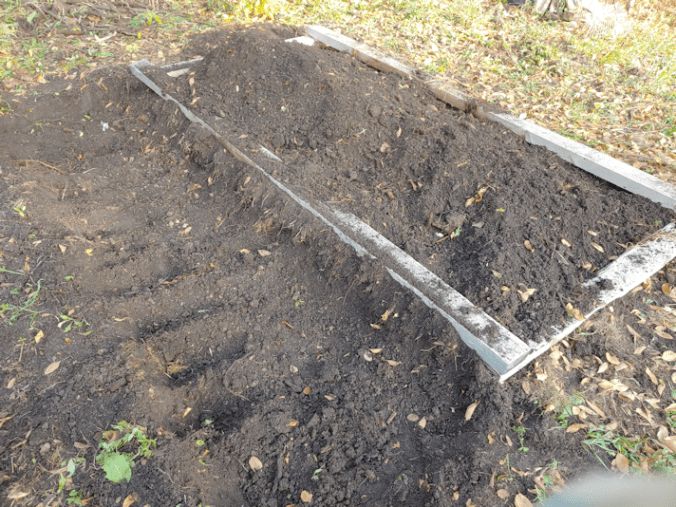
So after I used a hoe and rake to even out the mound of soil, I used them to even out the pathway and started laying down boards.
This is how far I got before stopping for supper.
This is where I pause to say how much I appreciate the girls. While I’m outside doing stuff like this – which I consider fun – they’re inside taking care of the cooking and housework – which I loathe.
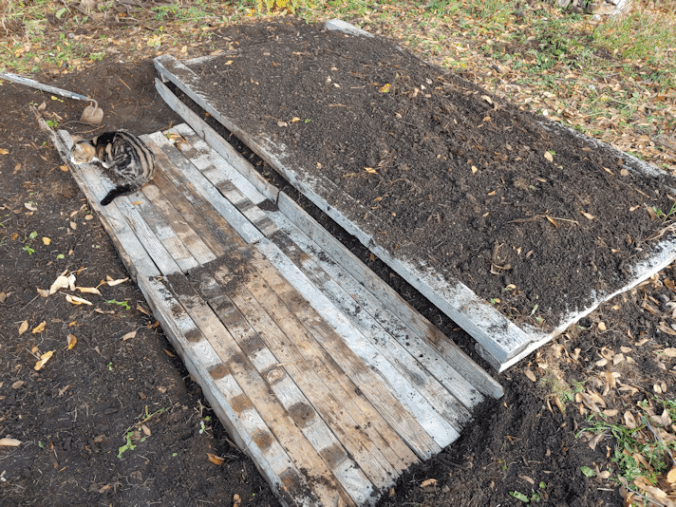
Then I went back to finish the job, and this is how it looked.
The wood I was using was salvaged from the junk pile in the spring, and some of if was slightly wider. I used the wider ones to make “walls” on either side of the path, then laid down three layers of boards in the middle. This made them a lot more stable to walk on, and also made the path the same thickness as the height of the “walls”. I had to cut a few to size to fill in gaps at the ends, which worked out all right.
This is old wood, some of which was already starting to rot. If I’d had the option, I would have put down gravel or something. These will do the job for now, and perhaps some day we’ll replaced them with flagstones or something.
When the girls came out to see how it looked, I snagged one of them to help me move the frame to the other side of the path.
This is where the second bed will be.
With 3 varieties of garlic, it looks like I’ll have to make three of these. It looks like there is just barely enough space to do that, before reaching the metal ring around the compost, though I could put the third one at a right angle to the others, instead.
I don’t know if I’ll be up to doing three of them! I don’t know how many cloves we’ll get out of a pound of seed garlic, each. If I do only two, I could split one variety between the two beds.
We shall see, after the second one is done.
I made a whole lot more work for myself by doing this, but… I think I like it better!
Yay! The squash beds in the old garden area are now all done.
Also, where the pumpkin mounds were, we now have three new beds.
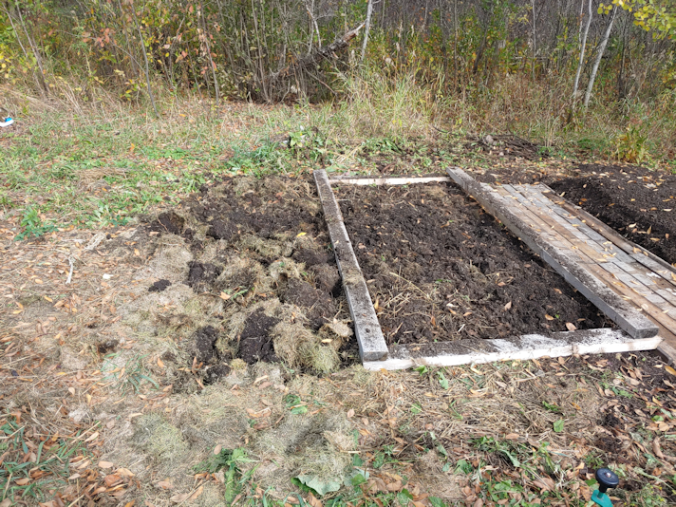
Here is how it looked when I started.
The bamboo stakes are marking where I planted the seed potatoes I found while digging up the potato beds. It should be interesting to see what happens there in the spring!
Being such a narrow row, it shouldn’t have taken long to prep this area. It was, however, incredibly full of rocks. Not even big ones, really. Just so many! If we decide to continue planting here, this area would be the one most in need of a raised bed. If we do build a raised bed in this area, it’s going to be long, narrow (no more than 2 ft wide), and will have a built in trellis for a back “wall”.
Here is how the pumpkin mounds looked before I started.
The crab grass growing through it is noticeably brighter!
Once done, here is how the back row looked.
It’s hard to see through the mulch, but I turned the soil and mulch, so the more decomposed mulch was more on top, and the less decomposed mulch was partially buried. I don’t know what we’ll plant here next year, but whatever it is, it’ll need to be pretty hardy, until we can build the soil up more!
Here is how the pumpkin mounds look now.
I was pretty sure about turning one of the mounds into a larger bed, but with so much crab grass, I didn’t think I would do the others. However, after a year covered in mulch, and a lot fewer rocks then in other areas, the soil was much softer than expected, and I ended up turning them all into larger beds. The one on the left had the least amount of grass and weeds to clean up, but it also had the most rocks that needed to be cleaned out! When I started on the middle mound, the soil was so much better than it had been, I went ahead and dug another bed, pulling up as many weed roots as I could. That went fairly easily with the crab grass. They took the easy route, and their rhizomes spread like a net under the mulch, rather than into the ground. Those come up quite easily.
Then I hit a patch of Creeping Charlie, making its way through the mulch. I lost about an inch or two of topsoil, pulling up those root mats. !!
The third bed was even easier to dig up, so that went very quickly.
So this area now has 6 beds in total, ready for next year. :-)
The next area to prep will be the carrot and beet beds. I’ve been leaving them in the ground as long as possible. Which might be working for the carrots, but the beets are mostly a lost cause. Too many visits from deer! That area will be cleaned out and prepped for the winter garlic that should be coming in within the next couple of weeks.
I will leave that for tomorrow, however. Today, we need to strain the crab apple cider vinegar. We meant to do it yesterday, but so many things went sideways, it got postponed.
I am happy to say that the septic truck did show up yesterday, shortly before 6pm. The poor guy looked so tired! All I could say after greeting him was “long day?” I think he had been bracing himself to be given a hard time for being so late, because all the tension seemed to just droop out of his body as he simply said, “yeah.” He ended up spending half an hour on the tank. I honestly don’t know how my parents emptied the tank only once a year with 7 of us. We didn’t empty it this past spring, since we’d had him come out in the winter, when things started backing up into the basement. So it was more than 6 months since it was cleaned out, and it showed!
When we booked him to come in, I asked how much it would cost so I could take out cash; it’s not like these guys can take debit. ;-) I didn’t have exact change, but when it came time to pay, I didn’t ask for any, even when I confirmed the amount and he gave me a lower number! Maybe he was giving me a deal for being so late but I figure, if anyone deserves a tip, it’s the septic guy! If I’d had more to give him, I would have!
I really, really appreciate people like him. What would we do without people willing to do such dirty jobs?
Meanwhile, I have not heard back from the plumber. We’re getting near the point of having to call someone else. Our plumber knows this place and has been doing work here for many, many years, plus he’s really gone above and beyond for us, so I would rather not go with someone else. But we need to get that well pump changed. We should have done it months ago, but all our “spare” funds went to paying for the new differential on my mother’s car. If it does turn out to be something wrong in the well itself, we want to find that out now, not when there’s snow on the ground! We shall see how that pans out.
On my list of things to do today was to prep the squash beds for winter.
Of course, things happened, so I started much later than intended – past 2pm – and didn’t get as much done as I’d planned on.
Here is how it looked when I started.
The first thing I had done we pick up the bricks we’d used to weigh down the plastic we used to cover the beds in the spring, and again under some of the plants to protect the stems or support heavier squash.
You can really see which bed had the most successful plants!
Also, notice the raspberry canes to the left on the foreground? Or, should I say, the bare raspberry canes?
The deer have been nibbling the leaves off those, as well as the sunflowers!
I had brought out both the potato fork and the spade to see which would be better to work on the beds.
It turned out to be the fork. After a year under the mulch, the ground was a lot softer than before, but even with the fork, I had difficulties getting past the rocks. We have only one good spade. I don’t want to break the blade on a rock!
Here is how they looked when I finished for the day.
The bed on the left was still a real chore to dig up. With each section I lifted with the fork, I had to break up the soil by hand. That gave me the opportunity to pull out weed roots and the more in-the-way rocks. The bed on the right was much easier to work, and I had a lot fewer rocks that needed to be pulled out. The squash plants were also buried so they can compost directly into the soil.
I was really happy with how much easier the soil was to work with. To compare, I had pushed the spade into the ground next to the mulched area. After working for a while, I took off my jacket and hung it on the spade. A few minutes later, and a gust of wind turned my jacket into a sail and down it went. So I pushed it into the ground again, this time, standing on the foot supports and bouncing my ample weight on it a few times, then hung my jacket back on the handle. The next stiff breeze, and it fell over again! And I didn’t even hit and rocks when I was pushing in the spade! What a difference, working under the mulched squash beds. Not only was the ground much easier to work, I was finding SO many worms! What a great sign. :-)
The next area I will dig up will be the long row at the back, and then the pumpkin hills in the middle. The one hill nearest the back row, I might enlarge to create another longer bed, but the other two are so surrounded with crab grass, I’m just going to dig up a roughly 4′ x 4′ area and pull out as many rhizomes from there as I can.
The main reason I had to stop, though, we because I started to feel rather unwell. It took a while for me to realize something.
I hadn’t eaten yet, other than a couple of freshly baked cookies, before I headed outside.
Usually, I do my morning rounds outside, then have breakfast while going over the trail cam files. Today, I was out earlier to make sure the gates were open for the septic truck. (Which still hasn’t shown up.) Then I heard someone in the kitchen and with our kitchen being so small, I decided to wait until they were done.
Then my husband came over and informed me we were almost out of butter. He is having a good pain day today for a change, and was up to making cookies, not realizing we didn’t have enough butter to make them. Normally, we would have done our monthly shop by now, and there would have been a whole bunch in the freezer, but we had to take care of other things. We’ll be going in a couple of days.
So I made a quick run into town to pick up a few things along with the butter. I’m glad I did, because once I had a data signal, I started getting texts from our plumber. I’d sent him pictures of our well pump when I was in town yesterday, as he requested, and he was responding to them
*sigh*
The first thing he noted was that the new pump is 1/2 hp, while the old pump is 3/4 hp. My brother bought this pump and he knows the system very well, so I knew it would work. It’s just not as powerful. After seeing the pictures of the old pump, from various angles, he thought the problem might be in the well itself. This is something my brother and I had talked about, as he thinks the foot valve might be leaking. The problem is, this is a very old system. He has actually worked in there before – about 20 years ago! – and that was probably the last time anyone has gone into the well.
So aside from it getting harder to find parts for it, it’s going to be fragile. If he starts opening things up to see what’s what, we might end up with no water at all. I could go to a company that specializes in wells, but they don’t like these old systems, either, and he said we would most likely be told we need a new well drilled. We could instead replace the submersible pump in the well, along with the pump in the basement, and that would take care of all sorts of potential problems down there. I asked him for an idea of what those pumps cost, but before he could get back to me, I had to leave town and head home, where I would no longer be able to get text messages. I sent him a message to phone me later and headed home.
Once at home, I emailed my brother to pass on the info, since he knows the system way better than I do. We both agreed that we should just get the pump in the basement switched to the new one, then see how it goes. If we still have problems, then it would be time to have someone go into the well and see what’s what. I hope it doesn’t come to that. Over the years, the well cover has been damaged. It’s a concrete circle with bent rebar handles embedded in the concrete. At some point, one of those handles got broken right off, and the other is bent down against the concrete. I’m not sure how we would get it open.
So I ended up calling the plumber back and leaving a message about starting with switching out the old pump in the basement and seeing how that goes. I also called the septic company to see if they are still coming out today, but we’ve had no call back from them, either. Which is really, really unusual for them.
I don’t like have the gate not only unlocked, but open, for so long. At least I can keep an eye on it through the live feed of the garage security camera.
It’s still afternoon as I write this, but it feels like it should be several hours later, right now!