What a lovely evening!

And a lovely morning, with faces like this, saying hello.

Unfortunately, he was just in some sort of altercation – I never heard a thing, but my daughter went running outside, earlier. There’s a puncture wound on the paw, but he wasn’t favouring it in any way.

I tried doing a head count this morning. I counted 37! Then I counted again and got 34. So I counted again and got… 34. This count included Nosencrantz (yay!), Rolando Moon (yay!) and Shop Towel (boooooooo!!!). Shop Towel is the likely cause of that puncture wound.

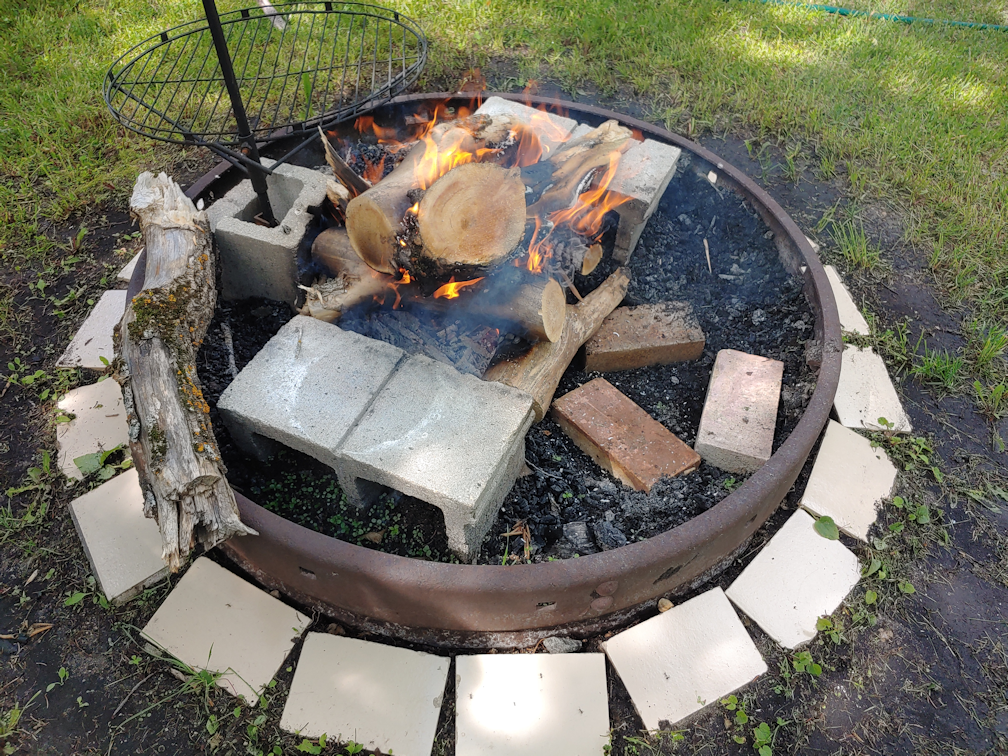
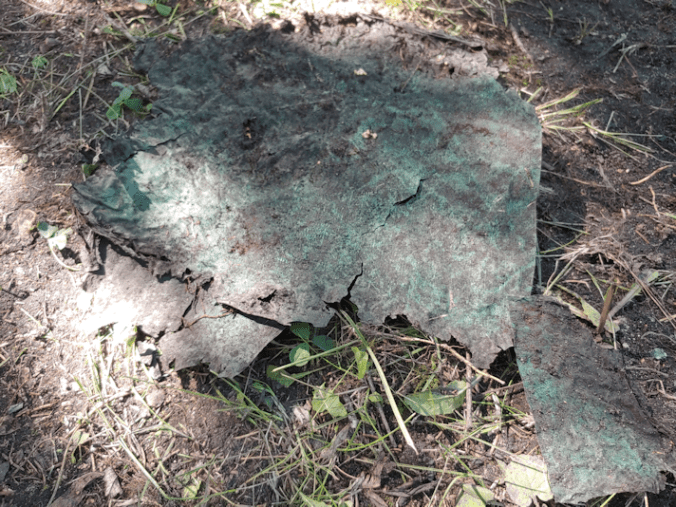
We had a fantastic time, yesterday! Having company for a cook out gave us the excuse to do things that tend to slide, when it’s just for ourselves. One of those things was to empty the fire pit of ashes, level the bottom as much as we could, then re-set the concrete blocks that are there to hold the old oven racks we saved for fire pit cooking, as well as solidly setting up the four fire bricks we found here and there around the property, to set the Dutch Oven on, so the legs won’t sink into the ground. The ashes were dumped near the garden, to later be used in garden beds.

My younger daughter took on the job of getting a fire going, then burning it down to get the coals needed for the Dutch Oven. Since the set up for it is right near the fire itself, one side would be really hot, so she set a timer to rotate the oven every 15 minutes or soo.

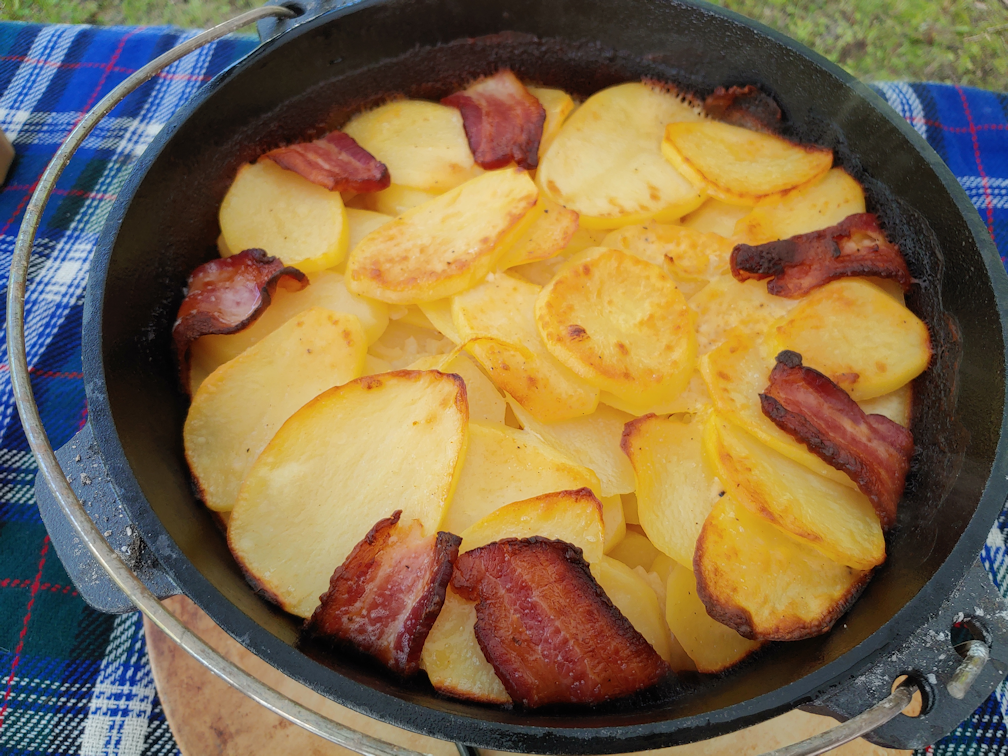
It turned out awesome!

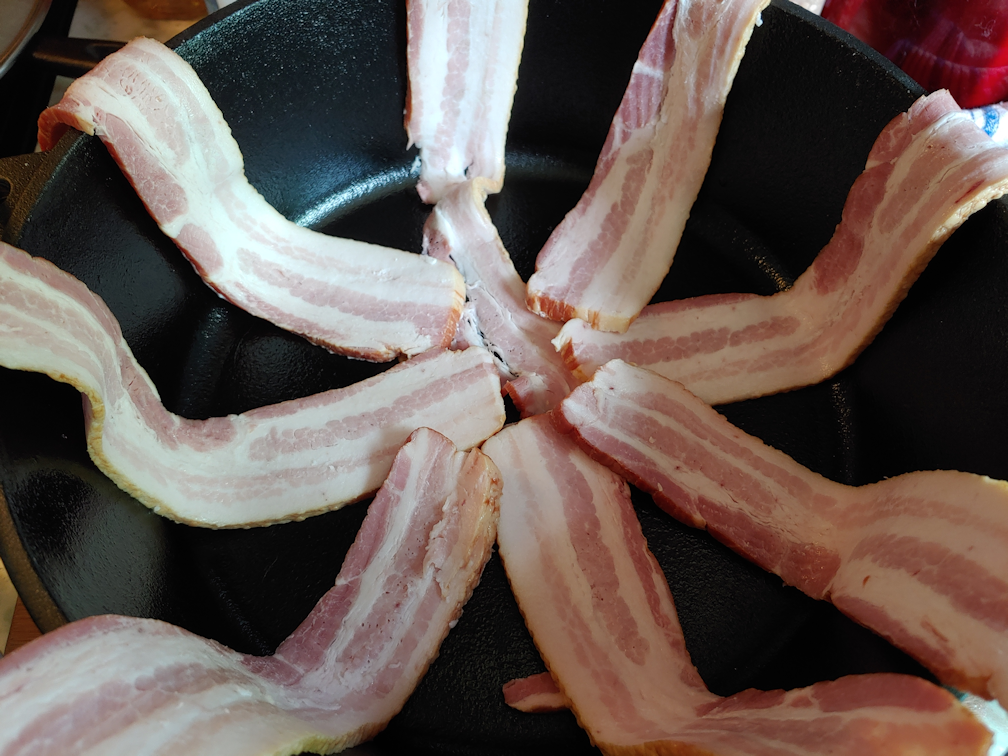
The inside of the pot was first rubbed with ghee, which can handle the hot temperatures better than, say, olive oil or normal butter. Some slices of bacon went on the bottom. The beef was seared in a pan before going into the pot – with the legs on the Dutch oven, we can’t do a sear in the pot itself unless it’s been heated over a fire/coals.

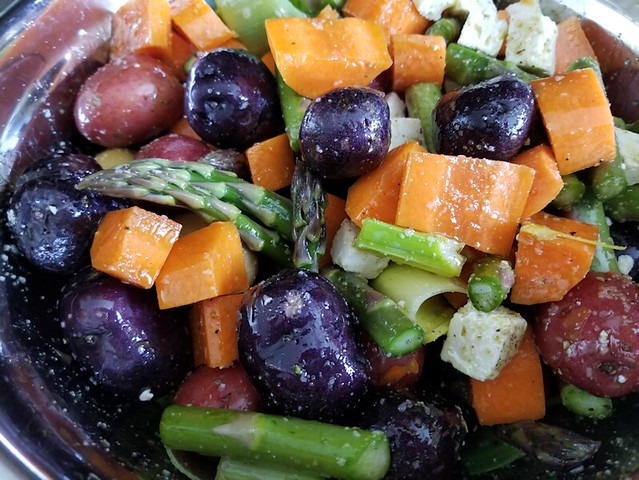
Since the meat would need quite a long time to cook, I used whole small onions from the ones we had to harvest early, because they’ve been cat crushed, whole Irish Cobbler potatoes, and big chunks of Uzbek Golden carrots. When we grew the Uzbek carrots last year, like so many other things, they did not grow to their full size. This year, they did much better! The ones I dug up for the pot were big, thick buggers! There are still plenty in the garden.

There’s a whole bulb of garlic in there – all three massive cloves of it! 😄

For seasoning, I used the truffle salt we were gifted with, and I cut up one of the sprigs of fresh pepper and scattered them about. Last off all, I added about a litre of water.

In the future, I’ll have to make sure to add more water. The photo was taken right after the pot was removed from the coals. The cast iron stays hot for a long time, and by the time we were eating, it was getting pretty black against the iron!

I neglected to take a picture of the roasted Pink Banana squash.

We also had hot dog fixings, if anyone wanted to roast some wienies, and if we were really into it, we had burger patties ready and waiting in the fridge, so there was plenty for everyone when company arrived. Especially since they brought pizzas, pie and ice cream! They also were incredibly generous and brought us FOUR big bags of kibble! 9.1kg size bags. Between that and a generous cash donation we received from a dear friend, it’s going to be a huge help with stocking up for the kitties for October.

Oh, and it looks like we have a new favourite local pizza place. They tried a place that opened in a new location recently. They’ve been around for a while, but I had no idea. I’ve walked past the previous location many times, but it was such a hole in the wall, I thought it was somehow part of the Greek restaurant, next door! There were no signs to say it was anything else. I think this new location will be much better for them. People will actually be able to see they exist!

We had a fantastic evening. We even managed to do a walk around the inner yard and garden beds before it got too dark to see.

It gets dark so fast, this time of year!

My husband was able to join us for the cook out for quite a long time. The longest I’ve ever seen him manage in ages. Of course, he then had to go inside and medicate to the gills, and he’s paying for it today, but he got to spent time with his family, and he really, really misses that. We’ve had to turn down invitations to see family simply because it’s so painful for him to travel, and he’d have to leave so quickly. So for us to have some of his family be able to make a last minute visit to our place is really, really special for him.

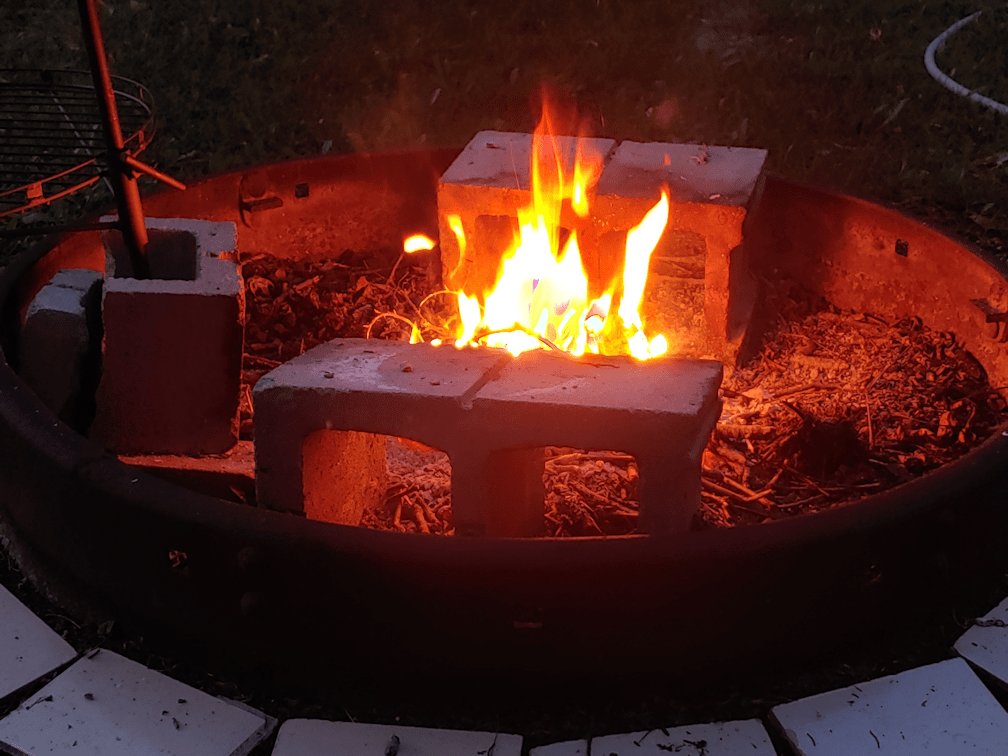
It was such a perfect night for it, too. Things got pretty hot during the day – our predicted 22C/72F turned out to be 25C/77F – but the evening temperatures were just ideal. Even after our company left, my daughters and I stayed out to tend the fire and let it burn itself down (leaving the most perfect cooking coals, and nothing we needed to cook anymore! 😂), because we just did not want to go inside. I felt ready to go to bed outside, it was so gorgeous! This, on the last day of September, too!

It was a bit disorienting when we did finally make it inside. After hauling everything in, putting things away, I finally started my computer, settled in and…

It was barely past 10:30pm.

It felt like it should have been at least midnight!

We did end up getting a solid rain last night, starting at maybe 4 or 5 am. The forecasts were predicting a thunderstorm today… or maybe tomorrow. Now, I’m seeing more rain in the forecast, but no storms. I’m also now seeing predictions for overnight lows of 0C/32F on Friday, when earlier long range forecasts weren’t expecting anything that low for another couple of weeks. It changed, every time I look a tthe forecasts, it seems!

We shall see.

Anyhow.

We had an absolutely fantastic day yesterday, and such a great visit. I’m so glad they were able to come out!

The Re-Farmer

Dutch oven scalloped potatoes; almost a recipe!

We had a very successful cookout, with great company and lots of food!

And lots of mosquitoes.

Insane numbers of mosquitoes.

We had bug spray, citronella candles, and even the smoke from the fire, and we still got invaded.

Still, we had a great time of it.

Having company was my excuse to finally use our new Dutch oven.

I’ve been looking up recipes for quite a while, and it’s been rather frustrating. So many of the sites I’ve been finding are just the same links to the same recipes, over and over. I had better luck with YouTube and survivalist/bushcraft type channels.

In the end, I realized I really didn’t need any special recipes so much as get a handle on the technique.

With our planned cookout, we were going to have burgers on the grill, with wieners and hoagies over the fire. So for the Dutch oven, I decided to do scalloped potatoes. I just slightly modified my usual recipe for them.

The first thing I made for them was a cheesy white sauce. A basic white sauce is a table spoon of butter, melted, a tablespoon of flour added and stirred to keep smooth, then slowly add about 2 cups of milk (how much milk depends on how thick you want the sauce), stirring constantly. The sauce it cooked until the desired thickness, then seasoned to taste (I used salt, pepper, paprika and garlic powder). For today’s sauce, I also added a handful of shredded Old cheddar cheese, stirring until melted. The sauce was then set aside until it was time to do the rest.

Along with the sauce, I used bacon slices, sliced onions and peeled and sliced potatoes.

The Dutch oven we got was pre-seasoned. According to the instructions, we could use it straight out of the box. However, since it was our first time using it, I still gave it a wipe down, then gave it a light coat of oil.

My first modification to my usual scalloped potatoes recipe was with the bacon. Pre-sliced bacon would have worked, but we happen to have a slab of bacon right now, so I cut a bunch of slices from that. They were not at all even and pretty, but who cares? :-D

The bacon is there to keep the potatoes from directly touching the surface – at least not right away. As they cook, the fat from the bacon renders out, making another layer between the sides and the other ingredients, until they absorb it. At least, that was the plan.

The sliced potatoes were in a bowl of water, and I didn’t try to shake it off much. The water would add to the moisture that would cook the potatoes, without making things too runny. The potatoes were layered on top of the bacon first, then a layer of sliced onions. Because of the bacon and seasonings in the sauce, no other seasonings were added between the layers.

Because I was making enough for 8 people, I used about 7 – 8 pounds of potatoes and 2 sliced onions. The layers made for a VERY full pot! Once the layers were down, the bacon ends were folded over the top.

Then the cheesy sauce was poured over the whole thing. The sauce had thickened more as it cooled, so I smoothed it out and pushed it down the sides to get it down into the potatoes.

Because it was so very full, I thought it might end up touching the lid, so I gave the underside of the lid an extra coat of oil. Just in case.

Our Dutch oven set came with a carry bag. I put the full Dutch oven into the bag, tucking an ice pack under it, and a couple more along the sides, until it was time to get cooking. The carry bag made it much easier to move the whole thing to the fire pit later on, too.

About 2 hours before we were expecting our guests, I got the fire going.

I made sure to use all maple wood at first. That piece of tree that fell on our canopy tent and destroyed it was nice and dry, and burned really well.

Still, it took an hour to get it down to the coals I needed.

I put a bunch of coals in between the fire bricks I found. We will need to empty the fire pit of ashes, soon, so one of the benefits of using the bricks under the Dutch oven is that it keeps the legs from sinking. More ashes were added to the lid (they got spread out better, after I took the picture), and then I built the fire up again, for later roasting of wieners. :-)

By this time, I was starting to use pieces of apple wood we’d set aside was we pruned branches or cut away dead trees.

Since the fire was going, with so much more heat on the one side, I set a timer on my phone to go off every 15 minutes, at which point I rotated the pot a 1/3 turn. Getting the legs to rest on the bricks equally was more difficult than expected. I can’t see them while using the lid lifter on the handle to turn it, and I’d sometimes miss. At the very end, though, with my last rotation, I missed the bricks entirely, and the Dutch oven was resting directly on the bricks. It was more than an hour by then, and the coals were starting to die down, so I left it that way.

After about 1 1/2 hours, I decided it was time to take it off. Being cast iron, which holds heat for a very long time, if the potatoes weren’t quite done yet, they would continue to cook, even off the fire.

I ended up using a BBQ scrubbing brush to get as much of the ashes off the lid as I could, then used my fire fan to blow more ashes off the top. We brought out our pizza stone to use as a trivet on the picnic table.

The potatoes turned out to be perfectly done. The bacon was nice and crisp, and the potatoes absorbed the sauce completely. They were perfectly soft – almost creamy in texture, but still holding their shape. While things were crispier around the bottom and edges, nothing was burnt. Just toasty.

They were an absolute hit. So incredibly tasty!!

With how well these worked, we are looking forward to trying other dishes in the Dutch oven as we do more cookouts!

When that will be is hard to say, though, with so many mosquitoes to do battle with!!!

The Re-Farmer

First cookout!

Last night, for the first time in about two years, we actually used our fire pit and had a cookout!

We even used the new fire grill my brother and his wife bought for us, for the first time. <3

It was spur of the moment, so all we had on hand was hot dogs – I missed getting a photo of toasting the half-frozen buns around the edge of the fire grill. I’d finally burned away the vines and whatnot that had been sitting in the pit for many months, then decided to go ahead and build up a cooking fire, using apple wood we’d pruned a couple of years ago.

I think we did actually light a fire once last year, to burn off the invasive weeds that could not go into the compost that were in there, but that was it. Even in previous years, when we used the fire pit, we had the hose going constantly spraying water around the pit, just to be on the safe side. The only time we didn’t need to do that was when we had a cookout in the winter, and there was two feet of snow. We’ve had enough rain in the last while, there was no need to do that. We just had the hose nearby for dousing the fire later.

It was an absolutely gorgeous evening for the fire pit. So very relaxing.

Gosh, I missed doing this!

The Re-Farmer

Fire pit mods, done!

We have been talking about using the fire pit to do an actual cookout tomorrow (weather willing!). That will require a trip into town to pick up things we want to cook over a fire, so I cleaned out and modified the fire pit today.

The first thing to do was empty out the ashes. I have done that once before, in our first year here, but not as thoroughly as I wanted before adding modifications to the pit.

I filled our large wheelbarrow twice! The first load was pretty much all ashes, while the second was a mix of soil and composted ashes.

I dug down far enough that I was starting to fight with root mats. Then I started hitting a… mat?

I pulled out the buried remains of… whatever this is.

It’s some sort of woven material that looks similar to a tarp, but… not.

When I pulled it away, I had another surprise under it.

Do you see those whitish specks among the roots?

Those are ants eggs!

Ants have somehow managed to survive in the fire pit! Considering how hot it would have gotten, just last night, I’m amazed. They weren’t just under the sheet, either. I found more around the edges, elsewhere.

Well, I hope they move on to someplace else because, now that the ashes and dirt are gone, they’ve lost what protection from the heat they had!

Clearly, this fire pit has been used to burn garbage, too. Along with the green mat I pulled out, I found broken glass and old nails, along with more expected things, like chunks of wood and rocks.

Once the pit was cleaned out and raked even, it was time for the concrete blocks.

We have a few of them around, but most of them are where they are, for a purpose. Like the ones around the storage house, that are holding various panels to cover what used to be the top of the basement. I haven’t moved them to try and see what they are covering yet, so I’m leaving them be for now.

I did have one available that wasn’t being used, and there was another in the middle of the tire planter, that had been buried in the middle to support the bird bath, which is now set up in a different location. So I dug that out and hosed out the dirt that had filled the openings.

I then had to decide how to orient things.

I decided to orient it with the nearby gate. That gap where the wind usually comes from, and I wanted some air flow over the fire. The openings in the blocks will allow for some air flow from the sides, too. I used one of the oven racks to determine how far apart to put the blocks.

I wanted to have the option of using both racks, so I also brought over the 1 half-block we have.

It’s shorter than the full blocks, so I added a couple of bricks under it, to make it level with the others.

Then I hosed everything down.

We now have several options.

If we want to do a simple wiener roast, we can leave the racks off, and the blocks can be used to support our roasting sticks.

Once we’ve built up the coals, we can place both racks on, like in the picture, for a large cooking area. If we need to, we can still easily feed the fire from one end.

Or we can use one rack across the middle, supported by the two large blocks.

Or, we can have one rack towards the end, supported by all three blocks. We’d be able to keep a fire going at the open end, and push hot coals under the cooking area as needed.

We can also fill the half block with coals for anything that needs high heat, like setting a pot or kettle of water to boil, and have the one rack covering it as it is in the photo, for air flow. To do this, though, we’ll need to get a long handled, metal scoop, like are used to clean fireplaces. Mind you, it’s entirely possible we already have one, hiding in one of the sheds. LOL

Now that the set up is complete, we can keep it in mind when we go into town tomorrow. We still might go for an ordinary wiener roast, but who knows what we might find to inspire us, instead. :-)

I’m really looking forward to it! I hope the weather co-operates. :-)

The Re-Farmer

Recommended: Historical Italian Cooking

Welcome to my “Recommended” series of posts. These will be weekly – for now – posts about resources I have found over the past while that I found so excellent, I want to share them with you, my dear readers. 🙂 Whether or not I continue to post these, and how often they are posted, will depend on feedback. Please feel free to comment below, and if you have a favorite resource of your own, do share, and I will review them for possible future posts.

I hope you find these recommendations as useful and enjoyable as I have!

One of my life long interests has been human history.

Not the names and dates, wars and politics, conquerors and empires stuff.

No. My interest has always been in, how did ordinary people live? What did they wear? How did they work? What tools did they use? What kind of homes did they have? How and what did they hunt? What foods did they gather or grow? What skills did they develop? How did they do for fun?

Over the years, I found that the best way to learn about a people and their culture is through what they wore, and what they ate. It’s amazing how much everything else revolves around those two things!

In the process, I developed a love of historical cooking.

Recently, I discovered a YouTube cooking channel that has become my favorite. My daughters and I will happily sit and watch them together, one after another.

My recommendation this week is Historical Italian Cooking.

This channel has only been around for a year, but has so much going for it! They focus specifically on the recreation of dishes from ancient Roman, Renaissance and Medieval periods of the region.

It is very different than most cooking channels and, subject matter aside, those differences are why I like it so much. I’ve tried watching other videos dedicated to historical cooking, and often find myself turned off by so many things. I think what I find the most irritating about these other channels is that they try too hard to be “entertaining”. I don’t enjoy the hosts going off on tangents, chattering with the crew, or all those other things that supposedly make them seem more “authentic”.

Just cook the food and tell me about it. That’s all I really want.

This channel, for me, makes perfect cooking videos!

The first thing that makes it stand out is the format.

Most of each video is just the camera filming from above a clean, distraction free, work surface. All you see of the chef is his hands. The various containers, bowls, boards and ingredients are laid out simply and clearly. When they go through the ingredients and fresh herbs are mentioned, it cuts to their garden, and the picking of herbs. Only the chefs arms are seen.

When the actual cooking occurs, you see the fire or oven and the cooking vessels. Again, the only view of the chef is of his hands.

The other thing I love about it is the narration. The speaker has a very calm, rhythmic manner of speaking. Even in the few videos where a woman takes over the narration (because the chef lost his voice), she speaks in the same rhythmic, soothing manner.

They also enunciate their words very clearly. For me, this is extremely important. I have an auditory processing problem. Though my hearing is quite excellent, when it comes to speech, sometimes things don’t translate well between the vibrations picked up by my ear drums, and how my brain turns those signals into words. If there are a lot of distractions, or a person has a particularly strong accent, instead of hearing words, I hear gibberish. Or sometimes, nothing at all. It’s like a blank spot, part way through a sentence. Most of the time, my brain can fill in the missing information, but sometimes, it just doesn’t work. When speaking to someone, I’ll ask them to repeat what they’ve said, but most mistake my request as me not understanding the meaning of what they were saying, so they rephrase what they said, instead of repeating their words. Which doesn’t usually help at all.

The narrator(s) in these videos speak English with very strong Italian accents. If they emoted more, or spoke faster, or were any more chatty, my brain would have endless problems processing their words. Instead, their measured and clearly enunciated speaking mannerisms are exactly right for me to hear every word. And I love it!

Another thing I love about this channel is how informative it is. While the chef is, say, busily grinding things with mortar and pestle, the narration will go on to explain where the recipe came from, the history of certain ingredients, what they had to do to recreate recipes that don’t include things like quantities or cooking times and temperature, or why they chose certain ingredients when the recipe itself didn’t specify anything beyond a general description. For ingredients that are difficult to find, they give modern alternatives. They even talk about the names and words used at times. It’s a fascinating and educational experience.

It’s very clear that the people making these videos have spent a great deal of time researching and testing these recipes before finally making the videos. Their dedication to authenticity shows everywhere. Many of the dishes, bowls, cups and cooking vessels are clearly hand made, using materials that would have been used in the time periods they cover. This includes tools made of wood, terracotta and even horn.

In the process of going through their “about” section on the channel, I found they also have a website, where you can find their recipes in English or Italian.

With our internet data limitations making video watching something I have to ration, I’m happy to find this, because I am really looking forward to trying some of these recipes myself!

The Re-Farmer

Foil packet fire pit cooking: preparations

I am really looking forward to our cookout this afternoon, and have been doing some preparations for things beyond hot dogs and corn dogs. :-)

I’ve got 4 foil packets now sitting, ready and waiting, allowing several hours for the seasonings to work their magic. Here is the first one I made up.

20190316.firepit.foilpacket.potatoe.mix

The base of this one is a packet of mixed baby potatoes. I stabbed them all over with a fork to allow the flavours in. The rest is mix and match of what I had available. A couple of carrots, a leek, and some asparagus (there was a good sale on those recently. ;-) ). They were tossed with Rosemary Lemon Salt, pepper, garlic powder and olive oil.

This amount ended up being split between two foil packets. I used a double thickness of heavy duty aluminum foil to wrap them in.

This is something I’ve done before, using whatever vegetables and seasonings I had, and cooking it in an oven. Today will be the first time I’m doing this over a fire. I can hardly wait!

I am also trying out two versions of cabbage.

20190316.firepit.foilpacket.cabbage.butter.mix

I’d found a recipe and instructions online, modified slightly for what I had on hand. This is one cabbage, outer leaves removed and cut into 8 wedges. The cut sides are spread with softened butter. In with is is half a medium onion, Scarborough Fair Garlic Salt, pepper, and extra garlic powder.

Because you can’t have enough garlic.

These were also wrapped with a double layer of heavy duty aluminum foil.

20190316.firepit.foilpacket.cabbage.oliveoil.mix

With this version, the only thing I changed was to toss everything in olive oil, instead of buttering the wedges.

As you can see, some of the leaves of cabbage came loose. Before wrapping it up, I took one out to give it a taste.

Wow.

I am totally still craving it right now. I think this is going to be a future salad; raw cabbage chunks tossed, with the same seasonings, tossed in olive oil. It was so, so good!

You know. When I was a kid, I hated cabbage. We used to grow lots of it, and my mother used it to make sauerkraut, or to wrap cabbage rolls. I don’t recall us ever eating it raw. My mother’s sauerkraut was incredibly strong – at least to me – and I didn’t like it. As for cabbage rolls, I loved the filling. Hated the cabbage. I still am not a fan of cabbage rolls (for a Polish person, that’s heresy! :-D ), and it’s because of the cabbage leaves. I’ve since eaten and enjoyed sauerkraut, cooked in bigos – something my mother never made – but that’s about the only time I’ll eat it.

Anyhow…

These cabbage wedges were also wrapped in double thickness, heavy duty aluminum foil.

Along with these, I have cut a pineapple into slices (with the core still in; otherwise it falls apart) to cook up on the grill for desert.

It should warm up to -4C by the time we’re going to start cooking over the fire. It’s going to be a beautiful day! I am so looking forward to it!

The Re-Farmer

Fire pit tester

I was thinking of things to do for the cookout we have planned on the weekend. Being such a warm day today (we’re hovering around 0C), I wanted to do some more to prepare the fire pit area. I figured we may as well try something new, while I was at it!

While looking for ideas, I found the idea of wrapping the wiener in bread dough and cooking it over the fire; hot dog and bun, all in one. This is something we’ve done before in the oven, but not over an open fire.

When I was at the grocery store earlier today, I spotted some frozen dinner rolls, uncooked, and decided to cheat.

Continue reading

Flame Roasted Potatoes

I roasted potatoes in yesterday’s cookout, and I thought I’d share. :-D

To make these, you will need;

20180604.fire.roasted.potatoes1

  • Large potatoes (1 per person)
  • Butter and seasonings
  • heavy duty aluminum foil, pieces sized to wrap each potato in a double layer
  • fire

Start by thoroughly scrubbing the unpeeled potatoes, then stabbing them all over with a fork.

For the butter and seasoning, you can use plain butter, then add coarse salt (how we usually do it), or you can make a flavored butter using whatever 20180604.fire.roasted.potatoes2
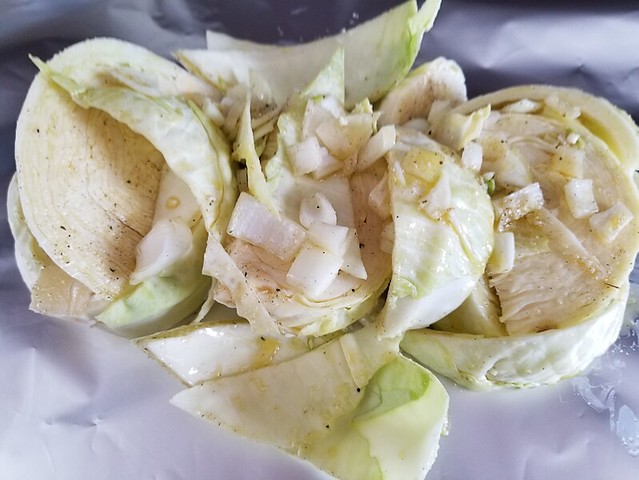
seasonings you like.  This time, I added paprika, fresh ground pink Himalayan salt and fresh ground pepper, dill and garlic powder.

Generously cover the potatoes with the butter and seasonings.  Tightly wrap each potato in a double thickness of heavy duty aluminum foil.

Don’t skimp on the foil.  ;-)

Time to go outside!

Prep a small fire and let it burn down.  When you have a layer of coals, place the foil wrapped potatoes directly on top of the hot coals.

Build the fire up again on top of the potatoes.

Enjoy your fire for about an hour, letting it burn down to coals. Gently move the foil wrapped potatoes out of the coals and remove to a container that can handle high temperatures.

The time is completely a judgement call.  A lot depends on the size of the potatoes and how hot the fire gets.  You might want to try for 45 minutes the first time you do it, and adjust for the next cookout.

Because there will be another cookout! :-D

20180604.fire.roasted.potatoes7

Carefully unwrap the foil (I used two forks) and cut a potato in half.

As you can see, this potato was VERY well done!  Which I’m okay with, as the skin serves as a bowl.

While the potato is cooling, roast some wieners over the fire.

20180604.fire.roasted.potatoes8

Add flavorings to taste.  I had some of the flavored butter used on the outside of the potatoes left, so I put some of that on one half, and sour cream on the other.  Then I used a fork to mix in the flavorings, in the skin “bowl”.

I think, the next time we do this, I’ll roast 2 potatoes per person instead of one!  It was SO good!

These can also be left to cool and eaten later.  Just unwrap and reheat in the microwave, or chop into cubes to use to make hash browns, or to make a potato salad.

Enjoy!  And please remember to exercise fire safety precautions, at all times.

The Re-Farmer