Here is a really easy recipe for a healthy snack to satisfy those cravings for something crunchy!
Roasted, Seasoned Chickpeas
Ingredients:
canned chick peas
olive oil
seasonings to taste
I have found that a 9×13 baking tray fits 2 cans of chickpeas in a single layer very well.
Instructions:
Turn oven to 400F.
Drain the chickpeas into a colander and rinse well. Spread the wet chickpeas onto a baking tray and let the water dry off for a while.
Put the dried chickpeas into a bowl large enough to toss them. Add olive oil and seasonings. (In our last batch, we used Scarborough Fair Garlic Salt and freshly ground pepper. You can use ordinary course salt and pepper, if you wish. It would be great with Rosemary Lemon Salt as well, or if you want to stay away from salt, use your favourite Mrs. Dash mix. )
Toss the chick peas until well coated with olive oil and seasonings.
Return the chick peas to the baking tray and spread into a single layer. Place on centre rack in pre-heated oven.
Roast for about 20 minutes. Take the pan out and give it a shake to turn the chick peas. Return to oven and continue roasting to desired crunchiness, giving the pan another shake every now and then. (We like them extra crisp. With our oven, that takes more than an hour of roasting time. Our oven also has some cold spots, so when we give the chick peas a shake, we also turn the pan, to ensure even roasting. )
When done, remove the pan and allow the chick peas to cool.
Once cool, store in an air tight container.
These make a really excellent and healthy snack, and are downright addictive!
While we are ready and waiting for my husband to come home from the hospital, we are also getting ready for Easter.
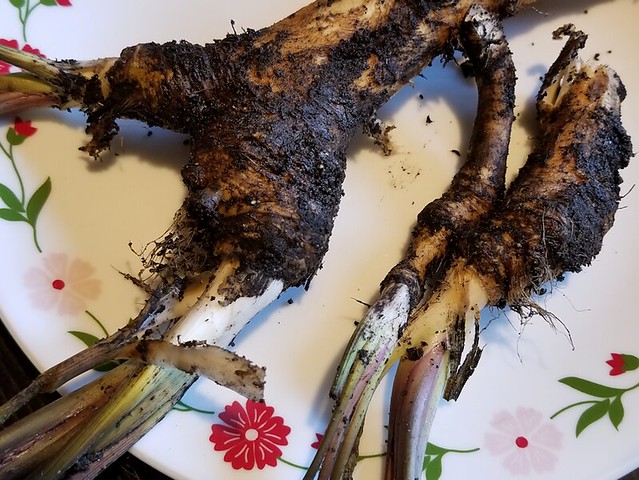
This evening, I went hunting for horseradish.
After scraping away some fallen leaves, I found some new grow peaking through the ground. I used a potato fork (the only fork that didn’t grow legs and walk away over the years) to dig up a few pieces.
This bunch is growing under the power pole in the garden. I knew the area was very rocky, but wow. I had a really hard time getting that fork deep enough to get some roots out. No matter where I moved it, I was hitting rocks, just a couple of inches below the surface.
I didn’t take out much. A larger piece for our own basket, and a couple of small pieces for my mother. If she wants, she can use one and plant the other, since she has garden space where she lives.
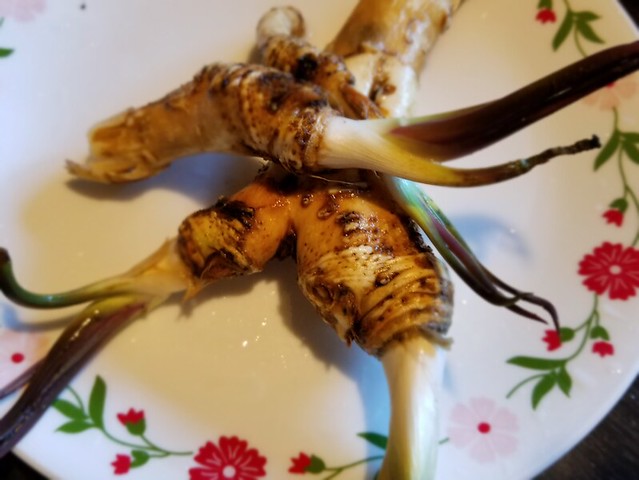
For now, I’ve scrubbed the dirt off, and they are wrapped in damp paper towels. For our basket, I will peel some of the outer skin off the lower part, and save the top. The tradition is to use horseradish paste, mixed with beetroot, in the basket; the bitter taste of the horseradish symbolizes the pain of crucifixion Christ endured for us, while the sweetness of the beetroot symbolizes the joy of the resurrection. Growing up, though, we always used fresh horseradish root. My mother would sometimes give away pieces with sprouting tops, after the baskets were blessed, to friends to plant if they wanted.
My mother planted the horseradish in strange places. One batch is under a spruce tree, which would be just as difficult to harvest as the ones growing among rocks. I found more growing among some of her flowers outside the living room window, which has better soil conditions, but harvesting it would mean damaging the bulbs of the flowers it’s growing with.
I’m thinking of maybe using some of the raised planters that are still in decent shape, so the horseradish itself will also be contained better, and not spread too much.
Something to figure out over the next few days!
Meanwhile, I will now go and boil some eggs to make pink pickled eggs. :-)
Though it is still weeks away, we are already planning our semi-traditional Polish Easter basket.
I say “semi” traditional, because we’ve modified some of the contents over the years.
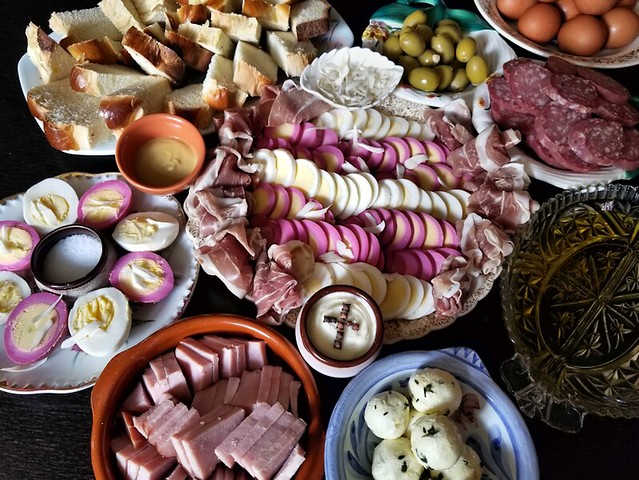
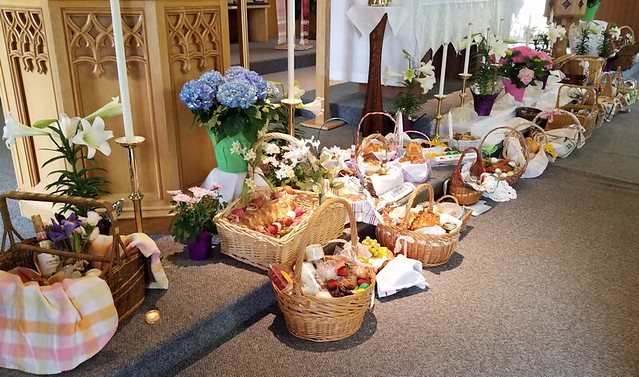
If you’re unfamiliar with a Polish Easter basket, these are filled with symbolic foods to be blessed on Holy Saturday, and eaten on Easter Sunday. The foods include ham, sausage, bacon, bread, cheese, salt, butter, horseradish and eggs. We also include things like olives, vinegar, and olive oil. It may also contain a bottle of wine and a candle. Oh, and sometimes chocolate or candy. The baskets are decorated and covered with lace or embroidered clothes. As a child, Easter was my favourite holiday, and our traditional basket was a big reason for that!
Some of the contents require more advance preparation, and I was able to start on one of those, yesterday. This is a non-traditional way to include the traditional cheese in the basket.
This year, I found some absolutely delightful mini-jars, and decided to make several small jars of marinated goat cheese, but we’ve also done it by layering medallions of goat cheese in a larger jar. Both ways work fine.
It had been my intention to make two baskets this year, with a large family basket for ourselves, and a smaller one for my mother. She declined my offer, and will be making her own basket.
We’re going to have lots extra out of this batch!
To start with, I scalded the tiny jars I bought special for the basket, plus extra pint size jars. Then I prepared the ingredients. The mini-jars have smaller openings, though, so that changed things a bit.
Here we have fresh rosemary leaves and fresh thyme leaves – they came in 28gram packages, and I stripped the leaves from the stems. There are peppercorns and about 8 cloves of garlic, sliced. Not pictured is Extra Virgin Olive Oil.
I completely forgot about the bay leaves. There should have been a bay leaf per jar.
As you can see, this is a forgiving recipe.
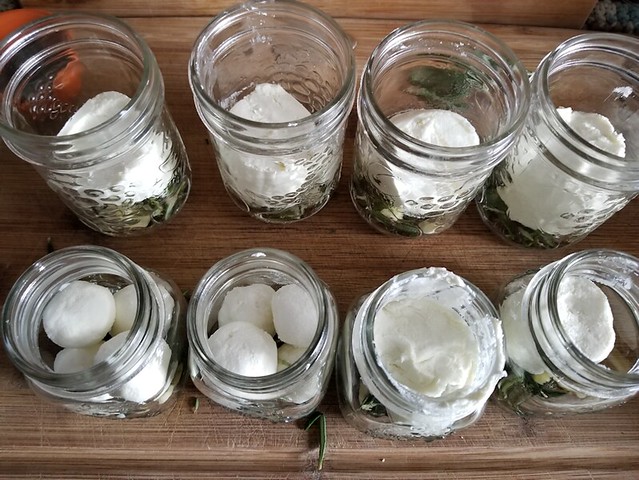
The goat cheese came in 300 gram logs; I had 2 of them and cut them each into 4 equal pieces. For the ones to go into the mini-jars, I cut pieces off to try and make them into smaller columns, then gently rolled them between my hands to make them smooth and round.
The first one I tried, promptly crumbed apart. Which is why I have rolled balls of cheese. I broke up each trimmed quarter piece into 4 and formed the smaller pieces into smooth balls.
For the pint sized jars, I didn’t have to be pretty, since they’re not intended for the basket
Each jar got some peppercorns, thyme leaves, garlic and rosemary leaves placed on the bottom. If I’d remembered the bay leaves, they would have gone into the bottom, too. Then the goat cheese gets put into the jars.
This is why I make extras…
I didn’t make one of the small columns of cheese small enough. It got messy. :-D
No worries. It’ll still taste good!
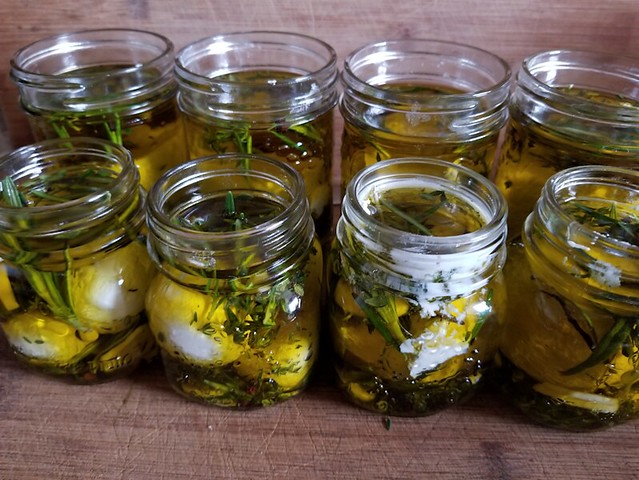
Once the cheese is in, more peppercorns were added, as well as the rest of the thyme, rosemary and garlic slices. Then the olive oil was added.
After the oil was added, the rims were cleaned, the jars sealed, and into the fridge they went.
Next is the hard part; waiting a week before using them!
From the looks of them, I think the balled cheese will be kept for the basket. I do have one non-messy mini-jar with a bigger piece, so I might use one of each. We shall see. The pint jars don’t have to wait for then, though, and I will post pictures, when they are ready. :-)
After marinating for a week, the oil can be drained through a sieve and reserved (the herbs are discarded). It makes for incredibly flavourful oil to use when cooking. The cheese can be served as a spread on bread or crackers, or used any other way you would use goat cheese.
Alternatively, little jars like this can be served as individual appetizers. The jars can be warmed by placing them in a flat bottomed pan with hot water, and placed in a hot oven until heated through. They can then be used as individual servings, eaten straight from the jar.
I intend to put these in our basket, just as they are, without straining them first since the jars are so small. When we made them before, with layers of cheese in a larger jar, we removed the cheese, then put a few pieces into a smaller container with a liquid tight seal. I then covered the cheese with strained oil and closed it up. It made for a nice presentation in the basket. :-)
I am really looking forward to our cookout this afternoon, and have been doing some preparations for things beyond hot dogs and corn dogs. :-)
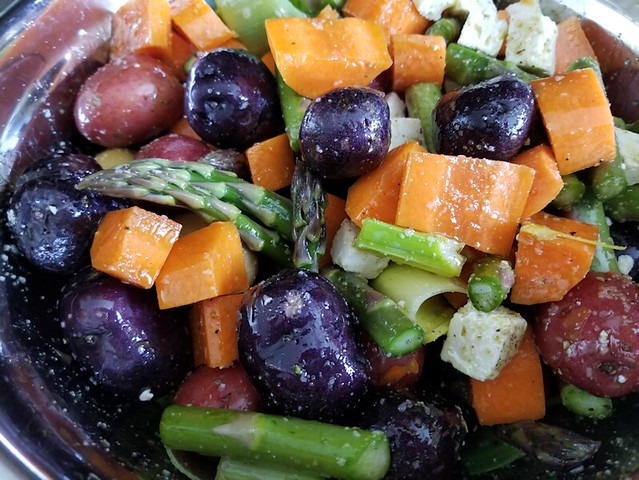
I’ve got 4 foil packets now sitting, ready and waiting, allowing several hours for the seasonings to work their magic. Here is the first one I made up.
The base of this one is a packet of mixed baby potatoes. I stabbed them all over with a fork to allow the flavours in. The rest is mix and match of what I had available. A couple of carrots, a leek, and some asparagus (there was a good sale on those recently. ;-) ). They were tossed with Rosemary Lemon Salt, pepper, garlic powder and olive oil.
This amount ended up being split between two foil packets. I used a double thickness of heavy duty aluminum foil to wrap them in.
This is something I’ve done before, using whatever vegetables and seasonings I had, and cooking it in an oven. Today will be the first time I’m doing this over a fire. I can hardly wait!
I am also trying out two versions of cabbage.
I’d found a recipe and instructions online, modified slightly for what I had on hand. This is one cabbage, outer leaves removed and cut into 8 wedges. The cut sides are spread with softened butter. In with is is half a medium onion, Scarborough Fair Garlic Salt, pepper, and extra garlic powder.
Because you can’t have enough garlic.
These were also wrapped with a double layer of heavy duty aluminum foil.
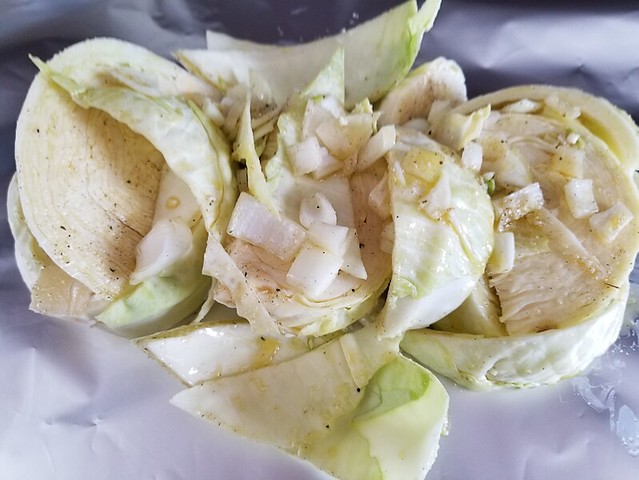
With this version, the only thing I changed was to toss everything in olive oil, instead of buttering the wedges.
As you can see, some of the leaves of cabbage came loose. Before wrapping it up, I took one out to give it a taste.
Wow.
I am totally still craving it right now. I think this is going to be a future salad; raw cabbage chunks tossed, with the same seasonings, tossed in olive oil. It was so, so good!
You know. When I was a kid, I hated cabbage. We used to grow lots of it, and my mother used it to make sauerkraut, or to wrap cabbage rolls. I don’t recall us ever eating it raw. My mother’s sauerkraut was incredibly strong – at least to me – and I didn’t like it. As for cabbage rolls, I loved the filling. Hated the cabbage. I still am not a fan of cabbage rolls (for a Polish person, that’s heresy! :-D ), and it’s because of the cabbage leaves. I’ve since eaten and enjoyed sauerkraut, cooked in bigos – something my mother never made – but that’s about the only time I’ll eat it.
Anyhow…
These cabbage wedges were also wrapped in double thickness, heavy duty aluminum foil.
Along with these, I have cut a pineapple into slices (with the core still in; otherwise it falls apart) to cook up on the grill for desert.
It should warm up to -4C by the time we’re going to start cooking over the fire. It’s going to be a beautiful day! I am so looking forward to it!
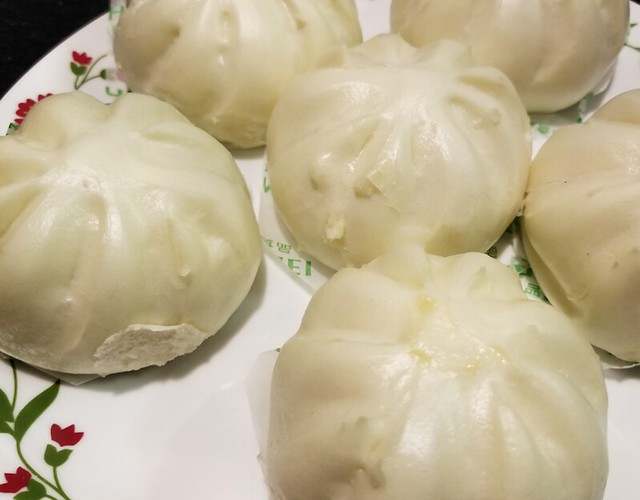
We got to try out the new bamboo steamers last night, and these are the results!
First up; pork and mushroom bao.
I was sure I’d bought some frozen bao, but I looked at so many things, I think I actually bought the in-house made bao at the same counter I got the dumplings. Either that or the buns were completely thawed out by the time we got home. Since the other frozen food wasn’t, that seems unlikely.
They were the first things my daughter prepared in the steamer. The instructions I found suggested putting something as a liner in the steamer, such as cabbage leaves or parchment paper, so food wouldn’t stick. These already had their own little parchment papers under them, so no extra liner was needed.
The dough was satiny soft and tender, and they were delicious. They did tend to stick a tiny bit to their papers, which is much better that than sticking to the steamer tray! :-)
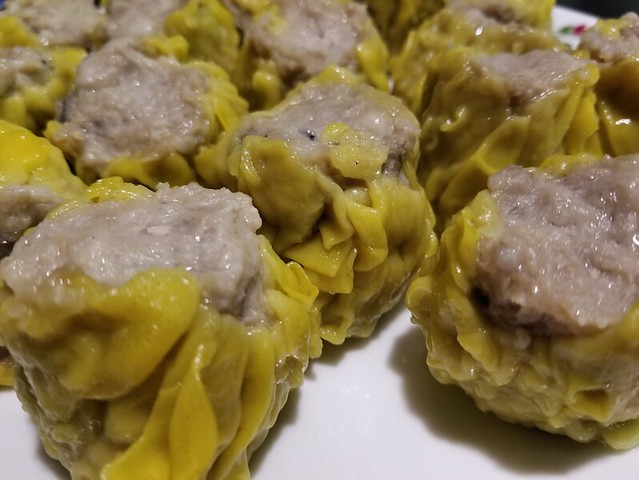
The variety tray of dumplings I got had so many that, even with 3 steamer trays holding 5 dumplings each, they had to be cooked in batches. These also did not need anything to line the trays, since they are each wrapped in their own little cabbage leaf.
The first batch was pork dumplings.
Definitely my favourites. I realize these are just “grocery story” dumplings, and I’m sure purists would be quite unimpressed, but boy did they ever hit the spot. Meaty and juicy and full of flavour!
The tray also included seafood dumplings; about half as many as the pork ones.
Personally, I found them too strongly fishy in taste; something my daughters did not find at all. There isn’t a lot of seafood I like, so the girls happily ate the rest of my share! :-D They preferred these to the pork ones. The dumplings were big, heavy and dense with seafood. No skimping, here!
The store we got these at have other varieties that were not included in the mixed tray I got, and we look forward to trying others the next time we shop there!
Now that we’ve broken the steamers in and have an idea of how to use them, it’s time to break out some of my cook books. I have dim sum recipes that I would love to try out!
A super easy and quick recipe to share with you today. Warning: these are amazingly addictive! :-D
This recipe takes something I don’t normally like – chewy toffee – and turns it into a delectable treat (thatdoesn’t stick to my teeth!). Using semi-sweet dark chocolate chips and unsalted crackers helps keep the sweet and salty flavours from becoming overwhelming.
Line a baking tray with aluminum foil. Spread a layer of crackers on the tray. Lift the edges of the aluminum foil around the crackers to keep them snug and in place. Set aside.
In a small pot, melt the butter and sugar together. Bring to a boil and let simmer for 5 minutes, stirring constantly. After 5 minutes, pour the toffee over the crackers and spread evenly, making sure all the crackers are completely covered.
Bake for 5 minutes.
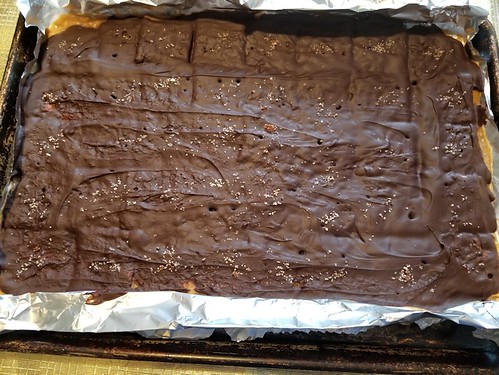
Remove from oven, then spread the chocolate chips evenly over the crackers and toffee. Let sit for a few minutes to melt the chocolate (if necessary, place the tray back into the still-warm oven to soften the chocolate), then spread the chocolate to cover the entire surface.
Sprinkle a small amount (a little goes a long way!!) of bacon salt over the top, ensuring that each cracker gets a bit. (Note: you can substitute coarse Himalayan Sea Salt, or any other sea salt, in place of the bacon salt.)
Let cool completely. Can be refrigerated to harden faster.
Once completely cold, peel away the foil, then cut or break apart into pieces.
Can be stored in an air tight container at room temperature for up to 1 week. Not that they will last that long. ;-) Can also be frozen.
Enjoy!! :-)
A thought occurred to me as I was resizing the above photo, noting my very grungy looking baking pan. A 9×13 jelly roll pan, I’ve had this for many years. In fact, when I moved off the farm at age 18, it was among the items I took with me, along with cutlery I still use today, and a few other necessities. I have had this pan for 32 years and 18 moves. My mother had this pan for longer than I can remember.
It’s entirely possible that this pan is older than I am!