Okay, so I made this video a while ago, but had all sorts of problems exporting the finished video into a file format that I could upload to YouTube that worked. After trying for days and having it fail, suddenly it worked. Nothing had changed on my computer, and there was no software update. Just, one day no-worky, another day, yes-worky.
Frustrating!
No matter!
Normally, I would have done a long, photo heavy post on making this, but I don’t have the media storage space, so I’m trying to make more videos. I’d found a video on how to make a Tuscan beef stew that looked really good, but I didn’t have the exact ingredients.
So I made it with what I had on hand.
Here is not-quite Tuscan style beef stew, made with mead.
Let me know what you think, and if you have any suggestions to improve things!
Last night, I finally got around to making some butter, using whipping cream. It’s been ages since I’ve made butter! I decided to try it again when I was picking up butter at the local grocery store, and the cheap, house brand butter had gone up in price so much, it was actually more expensive than whipping cream.
Making butter is easy and relatively fast when using an electric mixer. It can also be made by putting the cream in a well sealed jar and shaking it. Hopefully, with someone that can take turns shaking it with you!
To make butter with an electric mixer, a fairly large bowl is needed, since it will be in the fluffy, whipped cream stage for quite a while. It feels like it’s taking so long, whipping and scraping the sides and whipping and scraping and whipping and scraping some more, when then suddenly it “breaks” and you’ve got butter!
Also, even with a deep bowl, you’ll get cream splattering all over! You are forewarned! 😄
One thing about using a mixer is that the churned butter’s initial texture is very different. You don’t get a lump of butter. Instead, you get this.
The beaters keep the butter from forming larger pieces, so you get lots of very little pieces, instead. This photo was taken after the butter had been drained of buttermilk, then rinsed with cold running water. The smaller pieces made it easier to gently turn it while it drained, being very careful not to push the butter through the sieve.
Once drained through the sieve, there’s still water in the butter than needs to be removed as much as possible. That’s actually the part I find most difficult. It might be easier if we had one of those old style butter presses, but I just had my flat wooden spatula to squeeze and mash the butter in a bowl. I’d press it, drain the liquid, press it again, drain the liquid, and when I thought I was done, I’d press it a bit more and get even more liquid out! Finally, I got to the point where I could mix in a bit of salt to taste. Then, I pressed the butter into a small bowl with a lid, and put it in the fridge to sit until we use it today.
In the end, I estimate I got about 1 3/4 cups of butter, and about the same volume of buttermilk. A pound of butter is 2 cups, so there’s less butter from 1L of whipping cream, but we also got two products out of it. That buttermilk will be very nice in baking!
Whether or not it’s worth making butter with whipping cream is debateable. At least if price is your measurement. Whether it’s the cream or the butter that’s more expensive seems to change rather quickly. About a year ago, I remember whipping cream selling for over $8 for 1L, while butter was still under $4 a pound. The next time I went shopping, the price of whipping cream had gone down again, though still higher than butter was at the time. If you consider being able to control the amount of salt, the flavour, and getting buttermilk as well, the benefits do add up.
If the price of butter keeps going up, while the price of whipping cream remains more stable, it may well become the most cost effective way to get butter!
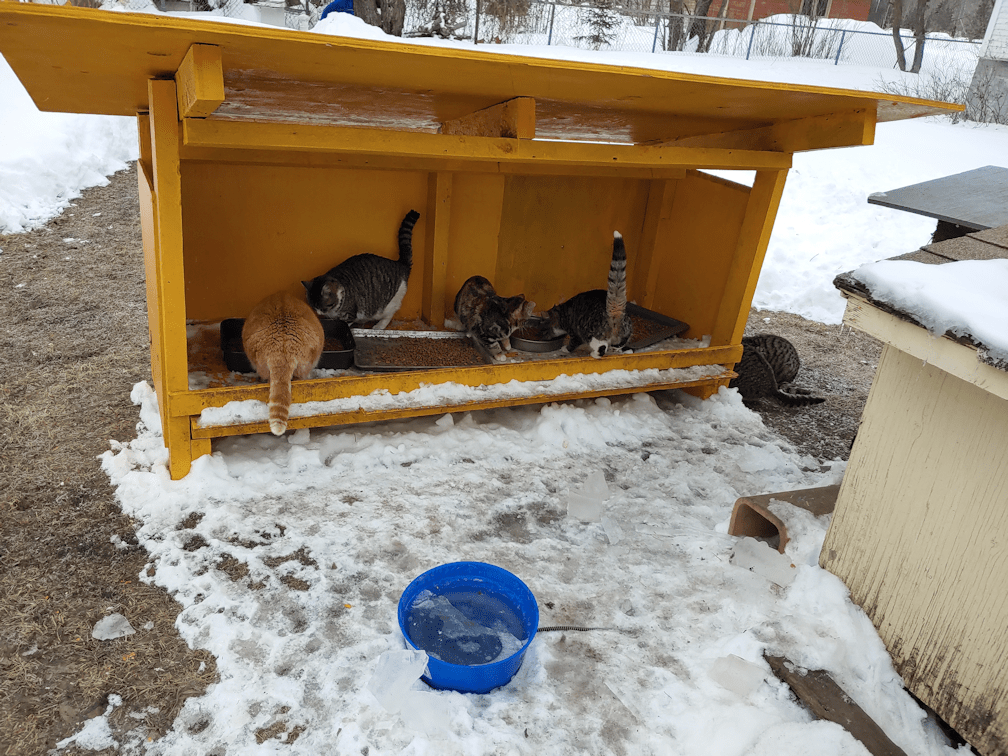
Okay, so I didn’t make it to Costco, and at this point, I probably won’t make it there at all this month. With the roofers showing up today, I was able to get almost everything on my list, at the Walmart where I’d met the cat lady to take our cats to be spayed.
When I got home, along with all the cats running around on the tarp the roofers laid out to catch what they were tossing off the roof, I found these guys in the sun room.
Are they adorable, or what?
I think these white and greys are all from one litter, but at this point, we just can’t tell for sure anymore.
Judgement is looking somewhat less judgemental than usual!
Alas, I had to interrupt their snuggle time on the swing bench to bring in the shopping.
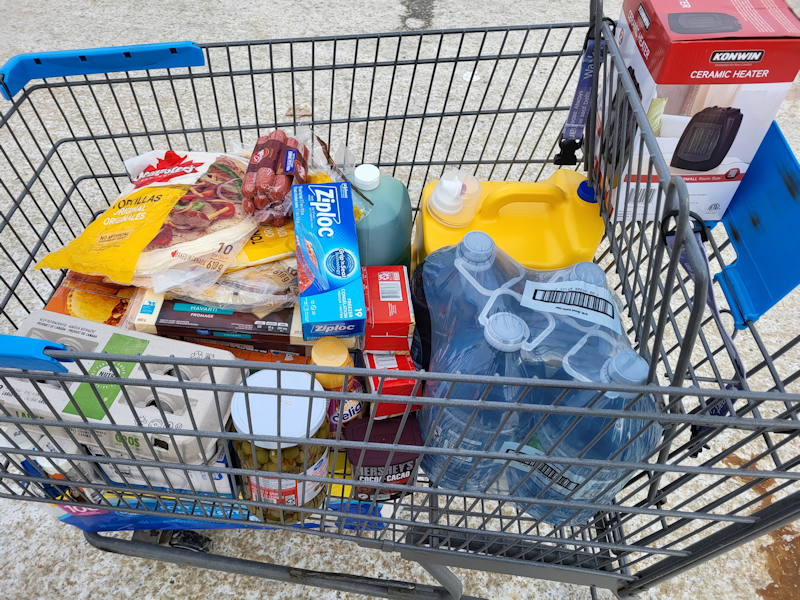
This is what $254.53 (after taxes) looks like.
There was one thing on my list I did not get. Ghee. The largest jar they had was almost $30. For about $10 more, I can get a big bucket – about 5 times as much – at Costco. We still have some left, so I skipped it entirely. At Costco, I would normally get 10 pounds of butter, but we still have some in the freezer, so I only got 2 pounds. The Costco price is better, and so is the quality of their house brand butter.
One thing I got that I could not have picked up at Costco was the distilled water for my husband’s CPAP humidifier. I also got a small ceramic heater for the upstairs. We got two of them for the girls last year, but one of them recently stopped working. The fan still works, but no heat, so it was just blowing around cold air. It gets so bitterly cold on the second floor, they really need a heater for each room. Hopefully, once the roof is done, it will be a bit less chilly up there!
Other items include the biggest package of toilet paper I could get, that also happened to be on sale. We got more laundry detergent, which was surprisingly cheap, as was the dish detergent. I got a larger type of hot dog wiener, as requested by one of my daughters, but forgot to get hot dog buns. We prefer the Costco ones, but these will do for now. I did remember to get wraps, though. Again, we prefer the Costco ones, but we will make do. 😉 They only had small containers of cocoa, so I got two, along with some LED light bulbs for the bathroom light fixture. One bulb is burnt out, but I want to replace all four, as I can’t find the same type of bulb anymore.
At Costco, I’d be getting a giant block of cheese, but here, I got 4 different types of cheese in the largest sizes they do have. They had large jars of green olives at a good price, so I grabbed one of those, along with a case of Kraft Dinner for the girls. The Pizza Pops are a much better price than elsewhere, so I grabbed a big box for the freezer. They make for a quick meal, and one my husband can make without needing help. I found a new seasonal flavour of coffee creamer – waffle! – so I got that as a surprise for my coffee drinking daughters. I also grabbed three flavours of popcorn seasoning for the pantry, and a box of size medium slide lock freezer bags – we’ve only got huge ones left right now. At Costco, I would have picked up a 60 pack of eggs, but their biggest size is 18 eggs.
I think that’s all of it. I keep looking at the receipt, trying to see what I’ve missed for this to be over $250! Even the ceramic heater was pretty cheap.
This is such a small shopping trip for us – and it feels weird not to have any cat food in there at all!
This is also the first photo taken with my new phone!
I set the new phone up to the bare essentials, making sure I had Discord set up because that’s what we used to message each other with, then headed out. I stopped along the way to pick up some fuel and breakfast (it was about noon by then!), then sent a test message home. It wasn’t until I got to The Wholesale Club and connected with their free wifi that I saw my message never got sent. Not connection to data. My set up wasn’t complete. Which meant I couldn’t have made a call if I needed to. Ah, well.
This store caters more towards restaurants, especially take-out places, so while there is a lot of what we’d find in their regular retail grocery stores (Superstore/Loblaws), there’s a lot that they carry only at their wholesale locations, or things in sizes that are only here.
For this trip, I picked up their last two biggest bags (9kg) of dry cat food. They always seem to be low in stock on that. They had other sizes and their no-name brand, but these were the better deal per kg. I also picked up a 32 pack of canned cat food. When I get to Costco, I’ll be picking up more of both, of course. There’s no way this will last us long. The outside cats go through almost 2 bags of this size a week. The wet cat food is just for the inside cats. The dry cat food has gone up to $30.99 a bag in this size. The wet cat food in this size was $26.99 I used to be able to get them at Walmart for under $19 just a few months ago.
In the non-food items, I picked up a couple of packs of paper towels, because it was cheaper per package to get 2 of them than just one, by about 40%. I also picked up a 6 pack of facial tissues, which I usually get at Costco or Walmart. I found some biodegradable liners for our kitchen compost bucket. A spur of the moment purchase from the restaurant supply section was a wooden muddler. It’s designed for mixing drinks, but it will come in handy the next time we make sauerkraut. It’ll work better than what we made do with, before. There’s also a 4 pk of distilled water for my husband’s CPAP humidifier, and a jug of windshield water fluid rated to -45C/-49F for the van.
I picked up more peanut butter for the pantry. I was very tempted to pick up a big restaurant sized bucket, but that was just out of budget for this trip. There’s a box of Sweet and Salty peanut granola bars that was cheaper than even Costco. I picked up the giant bags of pasta, in penne and rotini, for the pantry, which will be repacked into more functional sized containers. We should be well stocked for pasta for a long time, and if we really need to, we can make our own from scratch, too.
There’s a giant container of stuffed olives – a favourite snack of my husband’s, as well as a cooking ingredient – and a restaurant sized tin of tomato paste. I had been planning to buy a case of tinned tomato paste at Costco, but after making our own and canning it in those little tiny jars, we’ve been spoiled at being able to use a spoonful and seal the container for later. I have another case of those jars, so we can open this giant can, transfer the paste into the little jars, and water bath can them like we did with or own. We’ve been going through those pretty steadily, so more will not go amiss!
I picked up some seasonal coffee creamer for my daughters – the Christmas flavours are out already!, and only 3 pounds of butter. The no-name brand was $5.99 each. I’m hoping Costco, where I usually get 10 pounds at once, will still have better prices. There’s a tub of sour cream, and smaller blocks of old cheddar, marble and mozzarella cheese that were ten bucks each. Usually, I get a giant block of old cheddar at Costco, and I still might do that. We’ll see. I also picked up a bag of AP flour, there’s a flat of 30 eggs, plus four big bags of frozen perogies, in two different flavours. They were only $4 each! I would have gotten more, but it’s a long drive to keep things frozen, even with the insulated bags. There’s a bulk package of wieners (I’ll get buns another time), a giant summer sausage, and a box of frozen chicken tenders that was only $20. I’ll get more “real” meat at Costco. The bunch of celery is for making bone broth, and I picked up more sweet potatoes, now that we’ve found we like them in certain soups. I like them in general, but I’m the only one.
I almost got a 50lb bag of potatoes, but after looking at them through the window in their paper bags, I found they were not really in good shape. They were the “irregulars”, which I don’t mind, but I do mind if I see what looks like scab, or bruising. The bulk sized boxes “table potatoes” cost almost double, so I just got an ordinary bag of russets. Oh, and there’s a big jug of olive oil in there, too.
So that trip is done for now. I won’t be able to make another trip into the city until next week. Tomorrow, I’m taking my mother’s car in to get the slow leaking tire fixed, so hopefully, I can use her car instead. We’re trying to use the van as little as possible, until we can finally replace it.
Once at home, and the girls helped me put everything away, I got to work on finishing setting up my phone. The phone came with a data transfer cable, so I could potentially hook my old phone to my new phone and transfer data that way. It never worked. It kept telling me the cable was connecting and disconnecting. Then an alarm started sounding from the new phone, telling me that it had detected moisture or debris in the connector. !! I tried cleaning out the old phone, but it made no difference. I finally gave up and tried transferring data through wifi. That too forever to get working! I kept getting messages saying that both phones had to be on the same wireless connection (they were), then the new one would tell me it needed to disconnect my internet so it could use the wifi alone. I even tried turning on the BlueTooth on both phones (it made no difference), then turning on the NFC on the old phone – there doesn’t seem to be that option on the new phone. Then it finally started working.
I wasn’t able to transfer all data, though. The new phone cannot support a micro SD card. On my old phone, that’s where my photos and video default to. When I tried to transfer everything, it told me there wasn’t enough room. So I switched to transferring internal storage data only, and it finally started working – only to have something turning on and interrupting the transfer!
Eventually I got it done, but the new phone’s storage is already at 63%. I took a look and found a backup from my old phone was in internal storage, which means that some things are duplicated. Before I’d looked at that, though, I’d removed the SD card from the old phone, and am currently transferring everything on it into my external hard drive.
There’s more than 20,000 files on there, and most of them are photos. It’s going to take a LONG time for that to transfer! Since I want to transfer the internal back up folder onto the external hard drive, too, that will likely have to wait until tomorrow. It’s been about an hour since I started, and it’s at only 4%.
I’m going to have to spend some time figuring out the new phone, resetting things and testing things out. While I did take the one picture, I have yet to look at the phone camera’s setting for quality and resolution.
One of the things my husband did while I was away was order a phone case and screen protectors for it. Smartphones always feel like they’re going to slide right out of my hands, if I don’t have a case on them! He found a style very much like the one I got for the old phone, so it will have a “wallet” cover for the touch screen that can fit a few cards and maybe some cash, and that’s it. I want something as flat as possible, since it’s going to spent most of its time in my pocket while I work outside.
When I turned on the old phone this morning, while starting to set up the new one, a couple of texts came in from the cat lady. She sent pictures of the bitty babies, and they are doing great! I told her that the missing bitty showed up in the cat shelter again. At this point, we will leave things as they are, but if there is any sign of distress or abandonment, she said to contact her and she’ll come get it, too. I was looking for it while we unloaded the van, but it wasn’t in the cat shelter anymore. Likely, it was underneath again, while there was a lot of to-do going on as we unloaded. I will check again before it gets dark and hopefully will see it inside again. I did check one last time after putting the van in the garage, and I saw Junk Pile looking back at me through the window, from inside the cat bed! I have the hardest time believing she’s the mama, since her second litter is still so young, but if she’s decided to mother the bitty baby along with her own, I don’t have a problem with that at all!
Now… time to play with my new phone and get it set up the way I like!
I knew making the tomato paste would take a long time, but my goodness, it did drag on!
The girls and I had a sort of assembly line set up. At one end of the kitchen counter we had the electric kettle going, then space for the container used to bring batches of frozen tomatoes. Then there was the giant bowl we used to blanch them, a bowl with a colander for the skins, a cutting board and compost bag for final prep, a kettle on the stove to boil more water, and finally my giant stock pot.
I even remembered to check what size that thing is.
This thing was an excellent investment. We originally got it for when we were making tourtierre regularly, and would be browning more than 30 pounds of ground meat at a time – then adding the rest of the filling ingredients. That was once a year, though. We’ve used it more often just this summer than we have since we bought it!
We did the tomatoes in fairly small batches. The electric kettle and the stove top kettle took very different lengths of time to boil, which worked out.
One kettle was enough to cover one batch of tomatoes. After they had time to blanch, they’d be transferred to a colander over a bowl, where I would remove the skins, then cut them up (and remove the rest of the stem ends, if needed), and pop them into the stock pot. A daughter would get another batch of tomatoes from the freezer, and by the time we were ready to blanch those, the second kettle would be boiling and ready to go.
It took many batches. I figure there were maybe a couple hundred tomatoes, in a variety of sizes.
The cooking was started as soon as the first batch went in, which cut the time down quite a bit, I’m sure. By the time all the tomatoes were blanched and added, the stock pot was about half full – roughly 11 quarts or about 10L.
It took about 2 hours of cooking before I felt it was ready for straining through a sieve.
Our giant sieve has a very fine mesh. Great for straining out the seeds and any bits of skin that got left. Some of the tomatoes turned out to still be a bit green, so there were pieces that never got soft enough to be pushed through the mesh.
If we end up doing this regularly, it’ll be worth the investment to get a food mill.
The tomato sauce was strained a bit at a time, while the cooking continued. By the time I got to the bottom of the pot, it was getting pretty thick, and there was a lot less pulp left behind in the strainer.
This is all the seeds, cores, green bits and fibrous pulp that was strained out.
The strained puree was very thin. Can you imagine if we were not using a paste tomato for this! It would have been more like tomato juice, than tomato puree!
The stock pot I strained into has a very handy feature.
Measurements on the inside!
We went from roughly 11 quarts of blanched tomatoes, to just under 5 quarts of strained tomato puree. This was what I used to calculate how much lemon juice to use, later on. I had wanted to use citric acid, but couldn’t find any. Lemon juice will work, but does affect the flavour, too. If I were just canning the puree at this point, I could have added the lemon juice (and salt, if I wanted) directly to the jars, but that can’t work with tomato paste.
At this point, I took a break for a while.
For the rest of the cooking time, we set up the hot plate at the dining room table, to free up the kitchen, because I knew it would take hours to reduce this to a paste.
I could have cooked down the puree on its own, with just the lemon juice to increase the acidity. After looking at many different instructions for making and canning tomato paste, I decided to include a couple of large, crushed garlic cloves, a big bay leaf, and some canning salt.
The hot plate worked out really well. Once the puree was up to temperature, however, it stayed very hot and quick to splatter all over, even with the hot plate set quite low.
Another benefit to having a pot with measurements on the inside. I could see progress, even when it didn’t feel like any was being made!
As it reduced in volume, I also had to keep reducing the temperature. I only needed to stir it enough to keep it from bubbling and spattering. The more it reduced, the more often it needed to be stirred, and the lower the temperature needed to be turned. At first, I could just sit on a chair to stir every once in a while. After several hours, I was having to stand at the table, holding the pot to keep it from being knocked about as I stirred vigorously. Once it started getting quite thick, I removed the bay leaf. The garlic cloves were completely disintegrated by then.
I must say, towards the end, it was SO tempting to stop earlier because… it’s thick enough now, right? Right?
Not quite.
In the end, it took somewhere around 6 or 7 hours to get the puree into a good, thick paste.
When the spoon could scrape along the bottom, and the paste wouldn’t fill the gap right away, it was finally ready.
At this point, one of my daughters had taken over the stirring while I got the giant stock pot, which they had washed out for me while I stirred for hours, and sterilized the jars.
But how many jars would I need?
The measurement in the pot starts at 2 quarts and, at this point, the paste was well below that. I estimated around 1 quart, perhaps.
Because the paste is so thick, it has to be canned in small jars. The instructions I’d been reading were from the US and talked about “half pint” jars. I didn’t stop to convert that and was thinking the jars I had were probably half pints. Usually I get 750ml or 500ml wide mouth jars. Though the measurements don’t match, what sells as quart jars in the US are 1L jars here. A pint is 500ml so a half pint would be 250ml – or about 1 cup.
The jars I have are 125ml. So, a quarter pint, not a half pint! 😁
Which meant that if there was about a quart of paste in the pot, I would need 8 jars. I had two cases of twelve, so I sterilized one case. With the jars being to tiny, I could use both canning racks and stack them.
It still takes long time for the water to boil! I almost forgot to add vinegar to the water, to prevent the jars from clouding on the outside from our very hard well water.
Much to my surprise, I was able to fill every jar! Granted, for the last one, I was scraping the sides quite a bit, but I still got my half inch head space!
By the time I finished canning the tomato paste, it was well past 1am. I gotta say, I was quite happy to be able to finally leave them to cool for the night!
When I checked them this morning, I found 2 jars had not sealed properly. Which I’m just fine with! They went straight into the fridge to use right away.
I just love those adorable little jars.
We’ve been out of tomato paste for a while. I typically buy cases of them at Costco. The problem is that we usually only use a small amount at a time. Just adding a spoonful into a dish for extra flavour, for example, leaving us with aluminum cans partly filled with paste, that can’t be resealed well. Then we’d be rushing to use the rest up before it went bad. It will be much handier to have it in sealable jars!
I’ve already had some today, adding a spoonful to some leftover pasta I had for lunch, adding a bit of cream to make a bit of a sauce. As my daughter had mentioned when taste testing the fresh tomatoes for me, the Cup of Moldova tomatoes are very mild in flavour, so the resulting paste is not as strongly flavoured as the tinned paste we would buy. Which I don’t mind at all.
The question will be, is all the time end effort that goes into making and canning the paste worthwhile? There are lots of other ways to can tomatoes that take a lot less time. It’s the time that’s the kicker. I have seen some instructions that use the oven to make the paste – basically, dehydrating the puree – but while that might require less supervision, it means not being able to use the oven for anything else for a very long time.
That’s something we’ll have to talk about and decide after we’ve used this batch up, I think.
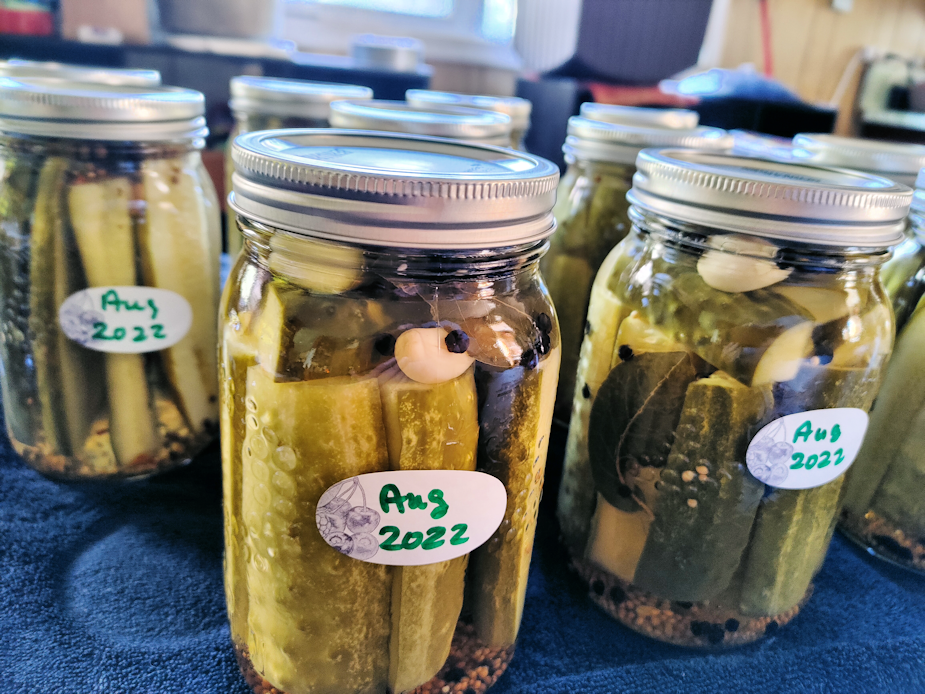
Today, I made my first pickled cucumbers, using a mix of our own cucumbers, and those given to us by my sister.
She gave us so many, they over filled my mother’s massive bowl that was left here. When I was a kid, I remember she used this bowl for making pickles, too!
My canning cookbook is still missing, so I found a recipe online – it was surprisingly hard to find a simple, basic recipe that didn’t require ingredients that we didn’t have, either because we don’t like them, or because they aren’t available locally. Or they required ridiculously long preparation – one recipe I found took nine days of preparation before the final canning and, after reading the instructions, I can’t for the life of me figure out how the cucumbers weren’t complete mush long before then! Or, they were for fermented pickles, and I wanted to water bath can these.
I just wanted to make basic pickles.
Who’d have though that would be so difficult? 😄
But I found one, and got to work. I had only 1 case of quart size jars, and I am very glad they were wide mouth jars! They are so much easier to fill than the regular mouth jars.
I filled the dozen quarts, and there was still lots of cucumbers left over!
There we have it! My first canning of cucumbers into pickles. I even got a 100% ping rate – all the lids sealed properly! Once they’re fully cool, I’ll remove the rings, put the jars in the case they came in, and we’ll need to find somewhere to store them. There’s the root cellar, of course, but that’s quite the oubliette right now. Things that go in there, get forgotten! At least it won’t matter as much with canned goods, and if we are able to harvest enough produce from the garden to store in there, that will help us remember we actually have food in there, and not just the Christmas trees and decorations. 😁 I’ll have to get the girls to take things down there, though. With my knees, trying to navigate the stairs while carrying glass jars is just not a good idea. 😉
I’m glad it’s done, though I left quite a bit for the girls to clean up tonight. At times like this, they get the raw end of the deal! They are sweethearts about it, though. 💕
It’s coming up on noon, and we’ve already reached out high of 27C/81F, with the humidex at 29C/84F. Usually, we don’t reach our high until about 5pm! They’re also predicting rain, though, so hopefully that includes our area, and things will cool down a bit.
Some things seem to like the heat, though.
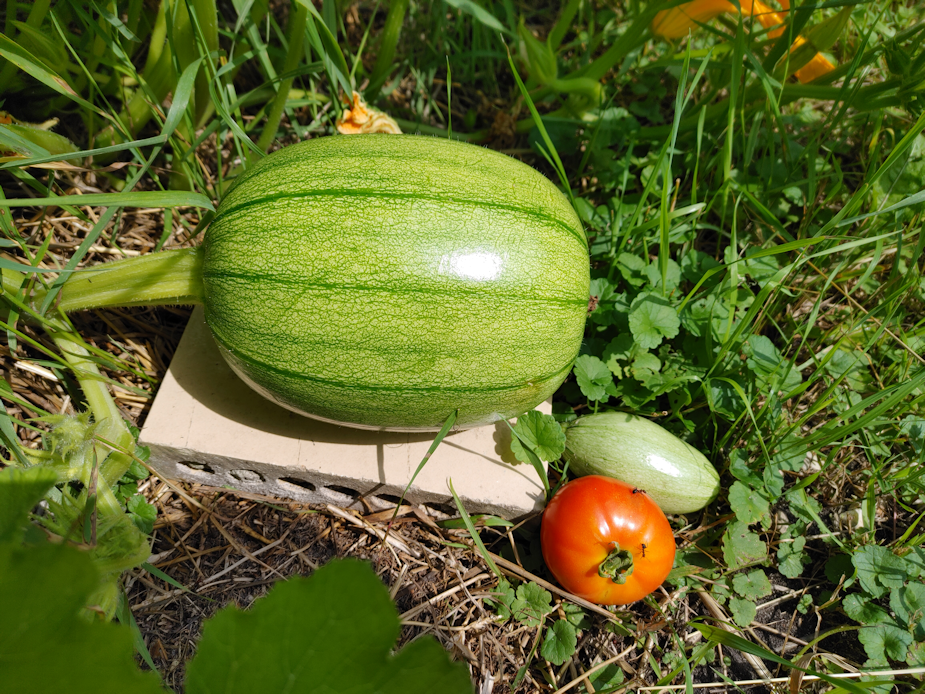
That one giant pumpkin is noticeably bigger, every day!
I put our very first tomato that I just picked, and a Magda squash, down for perspective.
Those ants were all over the tomato, immediately!
I have since placed an ant trap at the hill. The main part of the hill is next to the other giant pumpkin plant, and it’s looking like the ants are finally starting to damage it. I put traps next to two other ant hills as well. Usually, I prefer to leave them since ants are pollinators, too, but these ones have to go. There are plenty of other hills in the area, so it’s not like we’re making much of a dent in the population by doing this.
Here we have this morning’s harvest. Our very first tomato – Sophie’s Choice. I will leave the family to taste test it, since I can’t do raw tomatoes. They make me gag. Which, I’ve learned, is a thing, similar to how cilantro tastes like soap to some people, but not others!
Those pea pods are the first peas from our second planting. Remarkably, the first planting of peas is still green and trying to produce.
I didn’t pick any yellow beans tomorrow. There should be a good amount to gather tomorrow, though.
On another note, I got to pick up and pet the black and white kitten with the black splotch by its nose. I was happy to see it, since I did not see it at all, yesterday. It did not run away when I came by, and had no issues with being picked up and cuddled.
While going through the fridge, I noticed a container that got pushed to the back and…
… discovered we completely forgot about the soya sauce pickled eggs!
So I had one with my breakfast.
We were missing the Mirin sauce, but it was still quite good. Definitely something worth making again. It’s too bad we forgot about them for our basket. They would have looked a lot like milk chocolate eggs in there! :-D
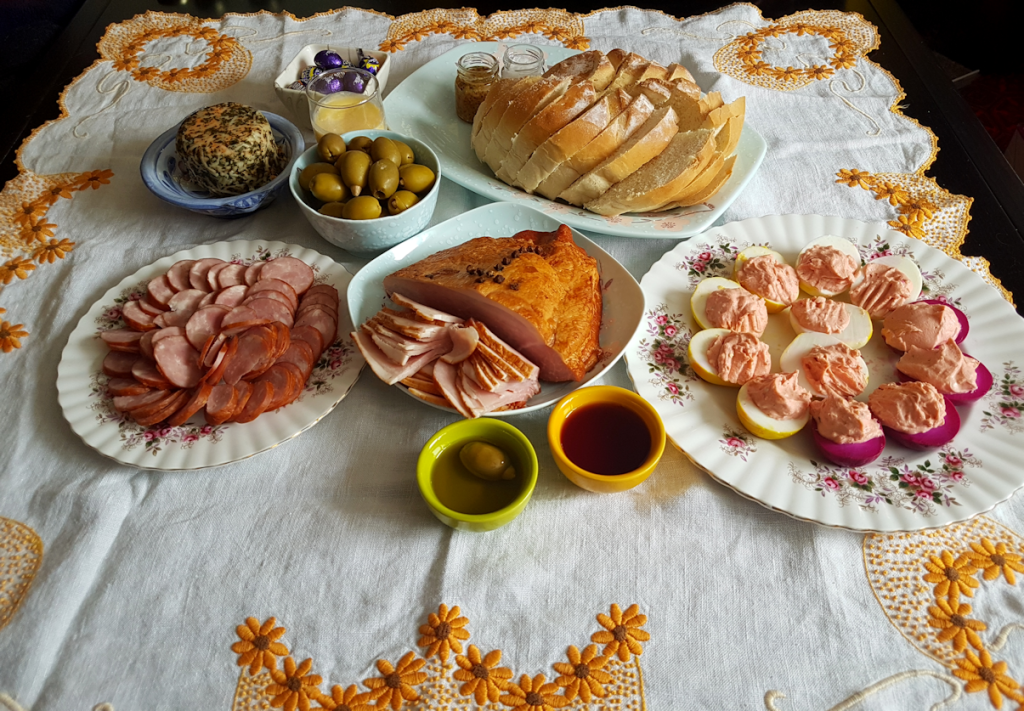
My daughter was sweet enough to take photos of Easter brunch from our basket for me to share.
She even used a couple of the Lavender Rose China we inherited from my late MIL as part of the display. She made it all look so pretty!
Unfortunately, my husband had an unusually bad pain day and was not able to join the girls. In fact, I don’t think he even ate at all until shortly before I got home. :-(
As for myself, I left early for my mom’s to make sure I had time to fill her gas tank first (gas prices have gone down a few pennies to 169.9 cents per litre). We had a short visit before walking across the street with her walker to her church. Having the church so close is one of the main reasons she chose to move to where she is! :-D It was an excellent service, and I quite appreciated the homily. After church, we headed out to my brother’s place.
There are two routes that I’m familiar with to get to their place. Normally, I’d take a more straightforward route on the highways, bypassing the city, to get to the town my brother lives in. My mother, however, insists on a route that takes us through a smaller city, where we have to cross an insanely narrow bridge over a major river. Which isn’t too much of a problem in my mother’s little car, but every time I take that bridge with our van, I feel like I’m either going to hit oncoming traffic, or scrape the guardrails! My mother is so insistent on taking the “right” route (which she thinks is a short cut), that when I got distracted and turned towards the city (my usual route) instead of the other direction to take a cross road to another highway, she actually got furious and started shouting at me for going the wrong way.
It took half a minute to circle around, and I was able to calm her down, but even for her it was a bit much to get so angry, so fast.
There turned out to be an irony about this.
Things were more pleasant as the drive continued. We got to the smaller city and drove through it to the bridge and…
It was closed.
Which… of course it would be. With the snow we’ve recently had, and the bridge being so narrow, now that I think about it, yeah, it would be. In fact, I would not be surprised to learn it was closed through most of the winter.
So we bypassed the bridge and got onto another highway towards the bigger city. However, in taking this route, we were passing through a more populated area, so the speed limits were all much lower. Which means that we probably ended up taking at least half an hour longer to get there than if we’d gone the route I almost took out of habit that she yelled at me for!
The irony was not lost on her!
When we realized the bridge was closed, I pulled over long enough to message my brother to let him know about the bridge, and that we would be a bit longer. As I was getting back on the road, I noticed it was just starting to snow.
The weather forecast for today was for either isolated flurries, or up to 6cm/2in of snow, depending on which app I looked at. Until then, the day had been completely clear. Within minutes, we were driving into ever heavier snowfall. Thankfully, it was warm enough that it melted as soon as it hit pavement, but visibility got quite poor in places.
When we finally got to the last leg of the journey, approaching a road I could have taken for a shorter route to my brother’s, we kept on going because it was blocked by a train! It was quite a while before we finally passed the end of the train, and I was actually starting to wonder if it would be clear of our next possible turn off when we got there. Thankfully, it was, so there were no more delays in getting to my brother’s.
The visit was absolutely fantastic. We had a fantastic time seeing each other, a wonderful dinner and, best of all, I got lots of baby snuggles!
So many baby snuggles.
Unfortunately, the snow did not lessen any and we left far earlier than we wanted to. It’s a good thing we did. While the roads were still good, they were very wet, and would have soon started to freeze. As it was, the further north we got, the snow was less, but I could see it starting to freeze over in places.
After dropping my mother off and continuing home, the highway was actually much better and almost dry, until I got about 5 or 10 minutes from home, when I drove into snow again, but it was just snowy enough to impact visibility a bit, not road conditions.
One thing we did see a lot of was deer! Not often. Just lost of them. On our way out, we passed a field that had maybe 20 deer scattered around it. On my way back, just as I was slowing down to turn off the highway, I saw what had to be at least 30 deer in a field. A group of at least 10 were just lying in the snow! I’ve seen some fairly large herds of deer in the area over the years, but this group was easily the most I’ve ever seen of white tail deer, all at once.
The girls were sweet enough to set aside portions from our basket for me, which was much appreciated by the time I got home.
I did notice that, by the time I got home, the kibble was all gone, so I topped that up before going in.
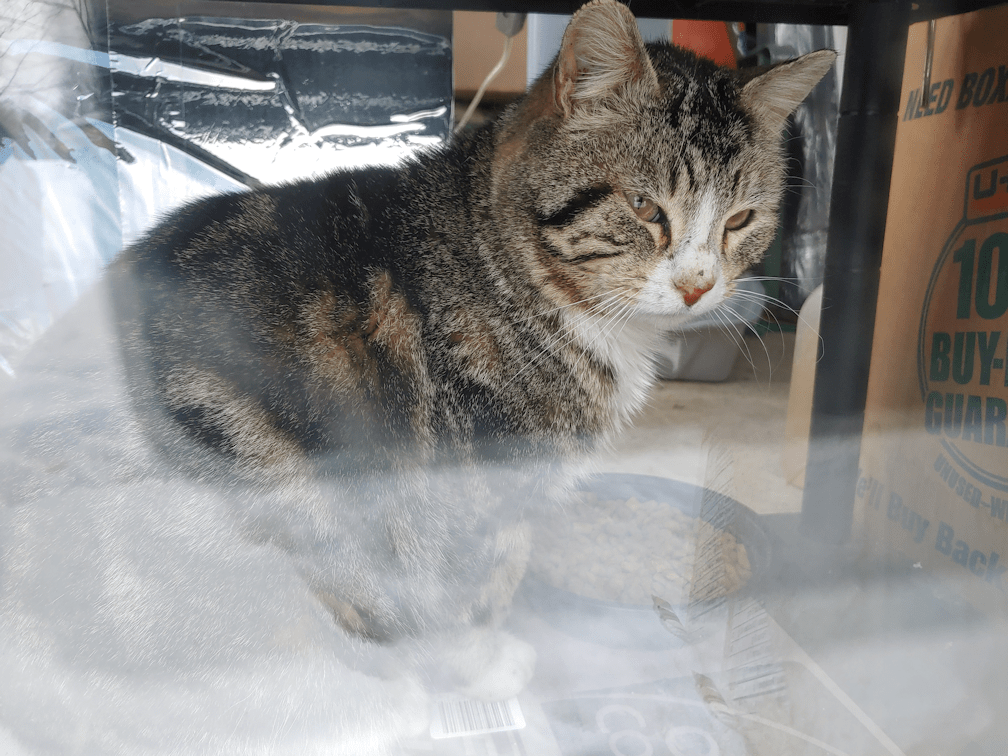
I saw very few outside cats this morning. As I was leaving, I startled a skunk, and it ran under the cat’s house. As I walked by, I could see it’s adorable, pointy little nose poking out, as it watched me leave. When I got back, there was another skunk – or maybe the same one – poking around the kibble house trays, trying to find something to eat.
Potato Beetle, meanwhile, remains in the sun room, and has his very own bowl of food that he doesn’t have to share with any other cats. Or skunks… birds… deer… When I got home, he actually made a “dash” for the door to get outside. He can’t dash very quickly right now, with his injured leg, so that wasn’t much of a problem.
What is more of a problem is the fact that the litter box remains completely unused. Which means he’s found a corner in the sun room somewhere that he’s using, instead. *sigh* It’s a good thing the sun room has a concrete floor!
Rolando Moon was following me around while I was doing my morning rounds, and enjoys running ahead, then rolling on the ground. I couldn’t resist sharing this picture, when I realized her tongue is sticking out!
What a silly kitty!
As I write this, we’re now heading towards 10pm. It’s still snowing a bit, and gotten cold enough for it to finally start accumulating. It’s not the first time we’ve had snow for Easter, of course, but usually that’s been when Easter was earlier in the month! Last night, we hit lows of -17C/1F, that I know of, and the sun room thermometer actually dipped below 0C/32F. Potato Beetle made use of the warming lamp and was just fine. Tonight, the low is supposed to be only -7C/19F, though the wind chill is supposed to be -14C/7F. Starting tomorrow, however, we’re supposed to reach highs above freezing, and stay there from now on, with lows barely dipping below freezing over the next few days. In a couple of days, we’re supposed to get a mix of rain and snow, but today’s snow should be our last blast of winter.
But then, we thought we were getting the last blasts of winter a couple of times now, only to have the forecast change, quite a lot, over and over! However, looking at our 30 year average, and record, highs and lows, I think we’ll be leveling off and warming up from now on.
Even with the snow, however, today was a fantastic Easter!
I hope you and yours also had an excellent day, filled with food, family and fun!
With all the heavy stuff going on around, I wanted to bring things back to what this blog is supposed to be about for a while. So here is a food post for you to enjoy!
There’s nothing quite like a hearty bowl of thicksome soup on a cold winter’s day! Most of our cooking falls half way between “this is how you make a thing” and, “let’s use whatever’s in the fridge or cupboards at right now and wing it.” So here is the approximate recipe for this soup. Quantities are pretty flexible. This is one of those soups that taste better the next day, so I made a huge pot of it this time.
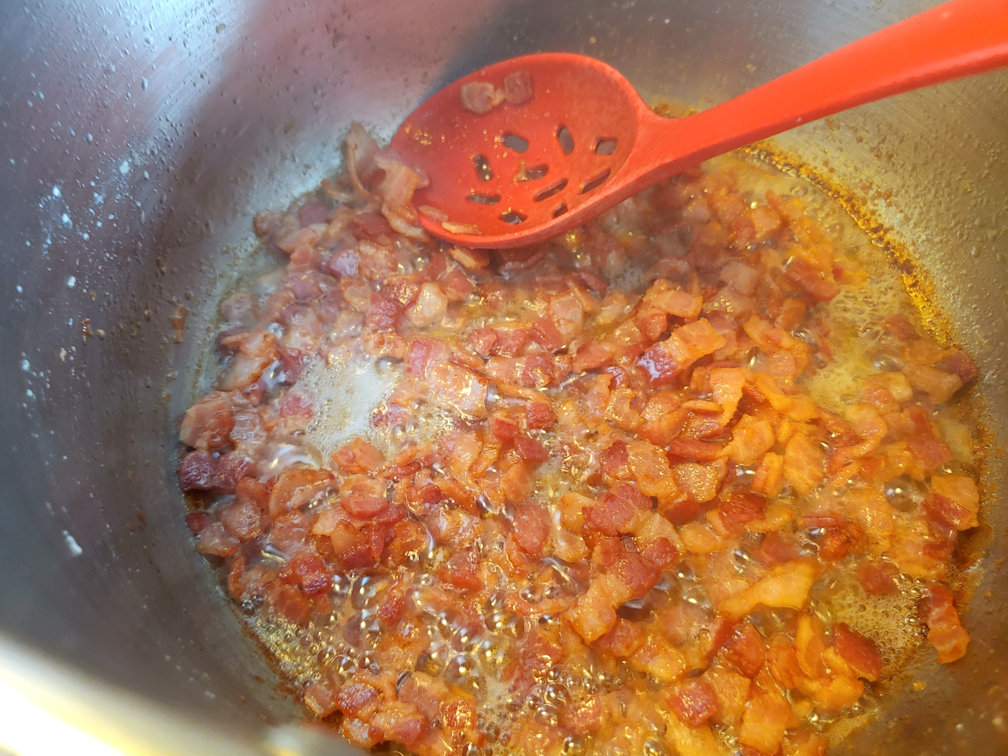
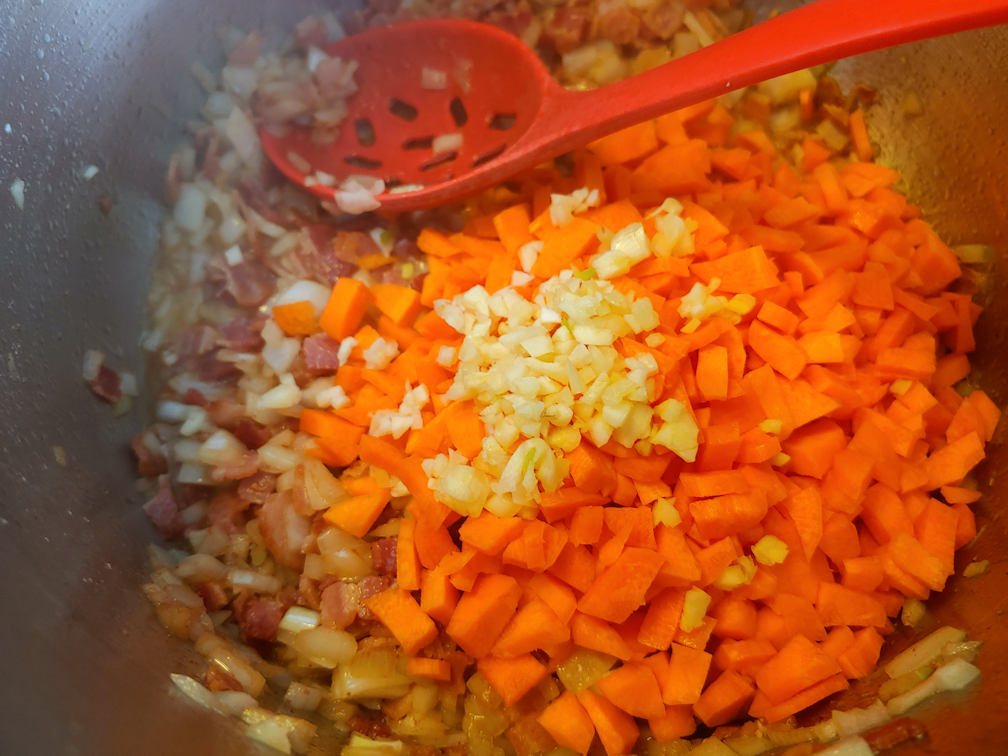
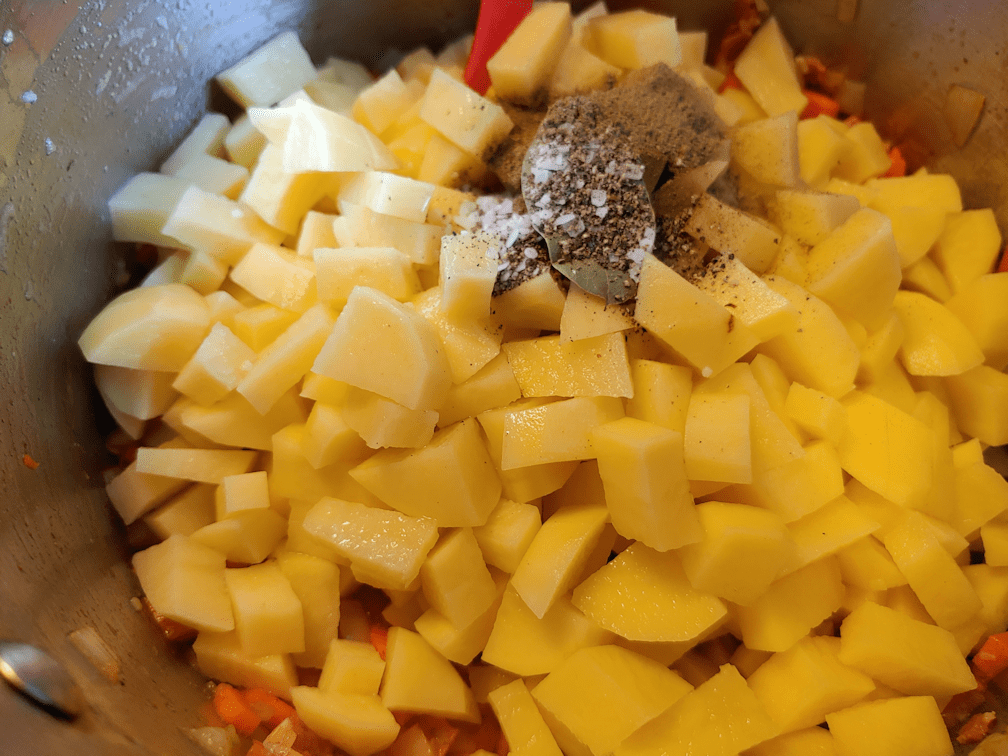
Bacon, cut into small pieces – I used half a package of sliced bacon Onions, 2 medium, finely diced Garlic, several cloves, chopped fine. I like to use lots of garlic, but use however much you fancy carrots, peeled and finely diced. Three largish carrots was what was used this time. Feel free to include other vegetables, like celery, broccoli, etc. For a large quantity of soup like this one, shoot for a total of 2 – 2 1/2 cups of finely chopped or diced vegetables. (In this soup, I also added about half a cup of our frozen tiny tomatoes. It is not something we normally use in this soup, because tomatoes and I don’t get along. :-D ) potatoes, peeled and cut into 1/4 – 1/2 inch cubes. For this soup, I like to include different sizes of potato cubes, because I want the smaller cubes to overcook and basically dissolve into the soup, to make it thicker. For this batch, I used about 6 large-ish yellow potatoes. egg noodles, or other pasta in shapes of a similar size cooked chicken; we used canned chicken, drained, but this would be a good way to use any leftover roasted chicken or turkey. cream, about 2 cups. We use whipping cream, because that’s pretty much the only cream we buy, but a lighter cream would work, too shredded cheese – sharp cheddar is always good, but any strong flavoured, shred-able cheese will be wonderful bay leaf dry mustard powder, about half a teaspoon, or to taste. A prepared Dijon type mustard can be used, too. herbs of choice, to taste (we almost always use a combination of ground thyme, sage, paprika and parsley. If we aren’t using fresh garlic, we’ll use garlic granules with the herbs) salt and pepper to taste chicken stock, water, or water with bouillon cubes/powder. I usually use bouillon cubes, and less than recommended for the amount of water used, because herbs, salt and pepper are also used. You can always add more seasoning, but you can’t take it out! optional garnish: sour cream and shredded cheese
Start by cooking the bacon pieces in a large stock pot. If they seemed to be cooking unevenly, add a bit of water, which will help render out the fat more evenly, and deglaze the bottom so it doesn’t burn. Cook to desired doneness. I like it on the crispier side.
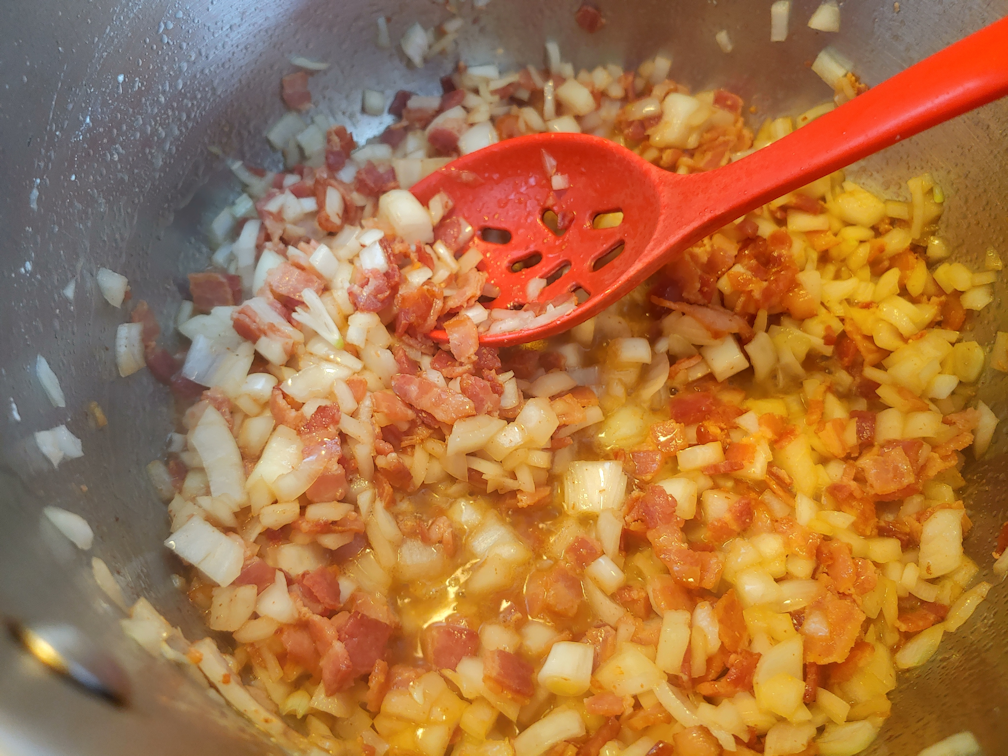
Next, add the chopped onions and cook until the onions are softening and starting to become translucent.
Add the carrots and garlic. Stir and cook until the carrots are about half done. If using other vegetables as well, add the longer cooking vegetables in first.
Next, add the potatoes, bay leaf, herbs, salt and pepper.
Add enough water or stock to cover everything. Since I was using bouillon cubes, I added them at this point, too. I like to chop them up a bit, so that they dissolve faster.
Stir well, then bring to a boil.
Once the liquid has been brought to a boil, reduce heat and simmer for the time needed to cook the potatoes, minus the time needed to cook the egg noodles or pasta. So if the size of potato cubes you cut need 20 minutes, and you’re using pasta that needs 8 minutes to cook, simmer for 12 minutes.
Because I wanted to deliberately overcook the potatoes, I simmered mine for 15 minutes.
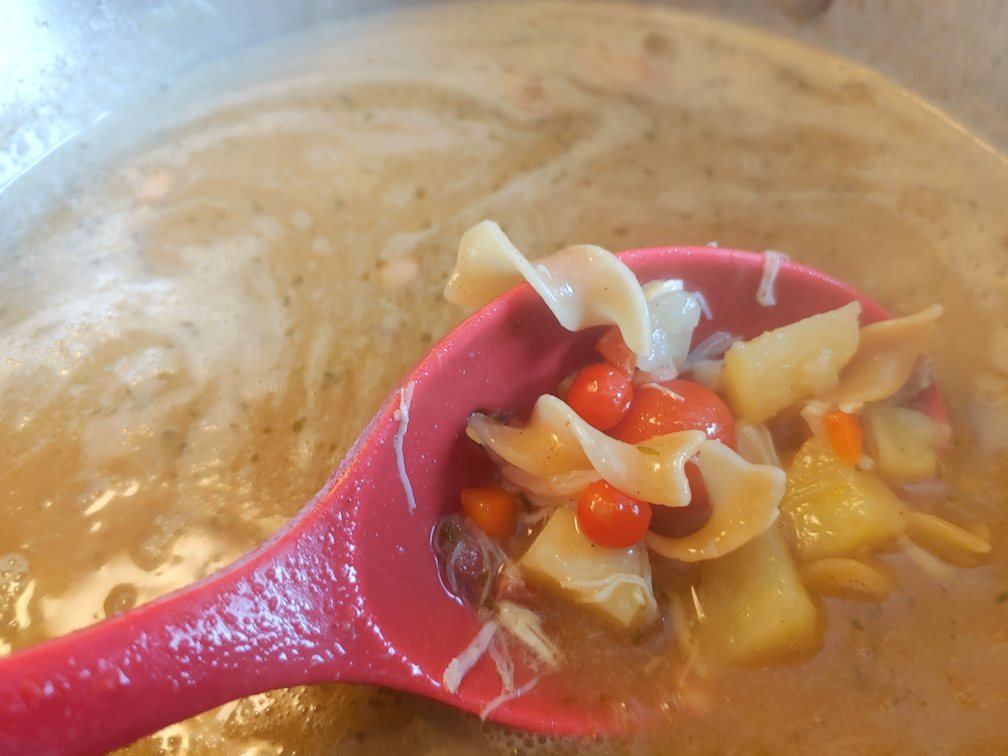
Stir in the egg noodles. This was an entire small package of egg noodles. I don’t remember the weight on it.
Add more water as needed. To keep it from cooling down too much, boil some water in advance and use that while it’s still hot.
Stir in the canned or cooked chicken.
The tiny frozen tomatoes were added at this point, then the soup was brought to a boil again.
These are the super tiny Spoon tomatoes, and some cherry tomatoes, we grew last year. Their tiny size allowed them to be added at this stage, but if we were to use regular sized tomatoes, they would have been added with the carrots, much earlier on.
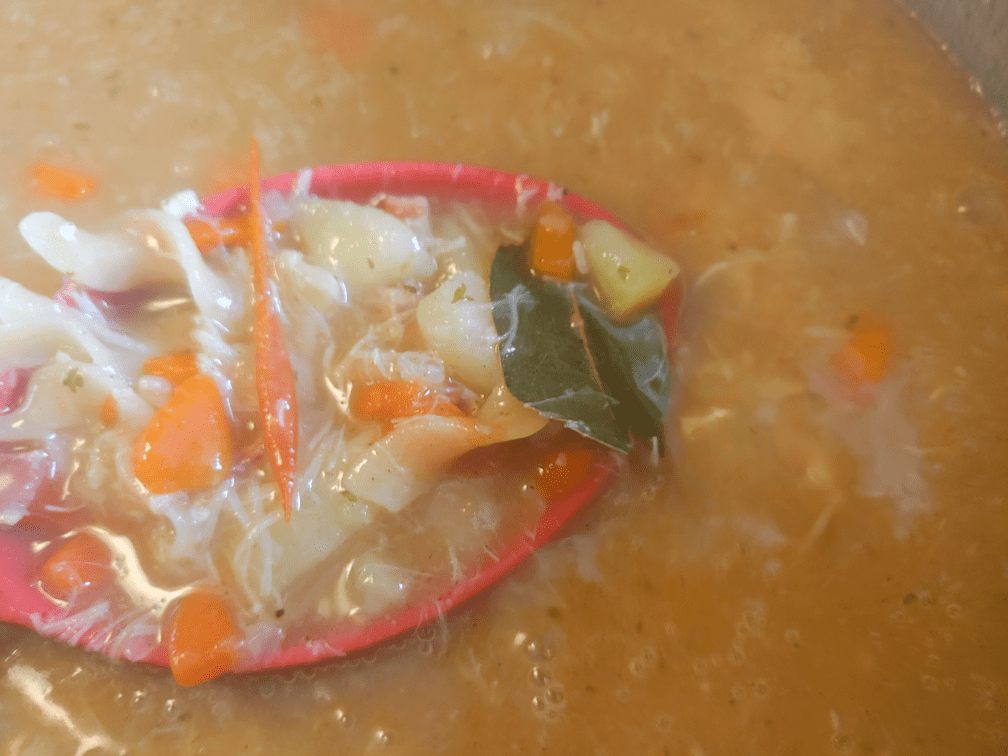
Bring to a boil, then simmer until the noodles are done. Remove the bay leaf.
Stir in the cream and mustard powder. Bring the heat back up and simmer just long enough to heat the cream through, stirring continually. Turn off the heat.
Taste and adjust seasonings.
This is the soup after the cream and mustard powder has been incorporated. You could skip the next step, if you like a thinner, chunkier soup.
Or, you can partially blend it. I have an immersion blender, which makes easy work of it, but if you have a countertop blender or food processor, use it to blend about half of the soup, then return the blended soup to the rest in the pot. Stir and, if necessary, reheat until it’s hot enough to melt cheese, then remove from heat.
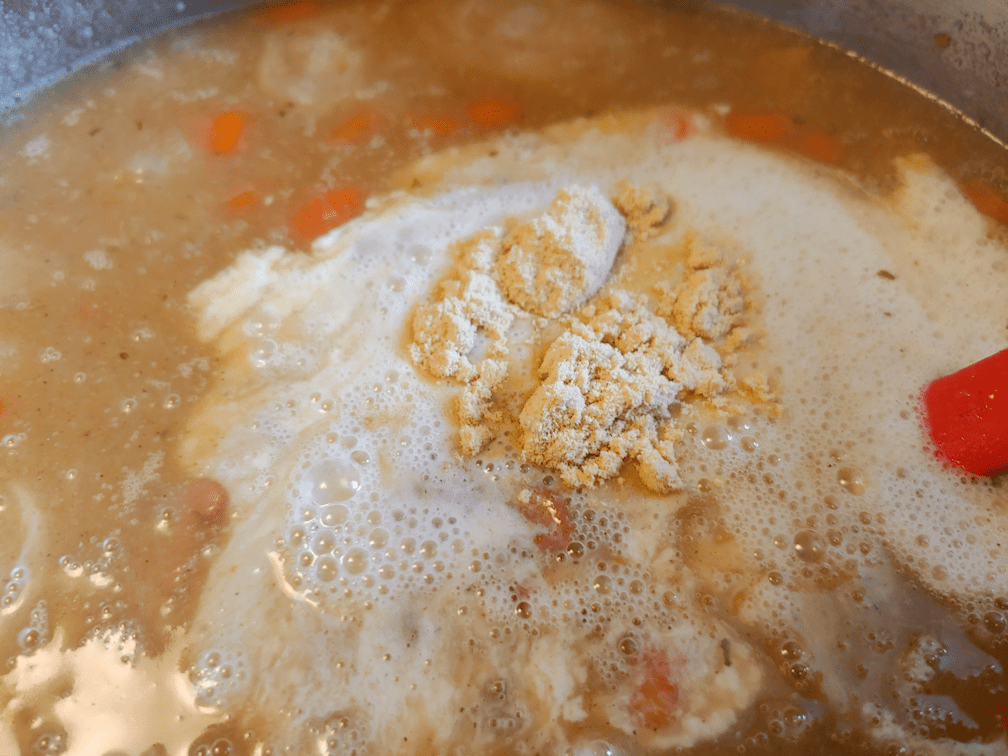
Add in a good handful or two of shredded cheese and stir until thoroughly melted and incorporated.
Serve topped with a dollop of sour cream and a bit of shredded cheese, if desired.
This soup always goes over really well, even with my lactose intolerant family! It’s thick and hearty enough to be the main course, with maybe some buttered bread to go with it. If you like an even thicker soup, use more potatoes, and blend it more at the end.