Today is supposed to be warmer, but it’s still dreary and overcast out there. Which means it’s all I can do to stay awake!
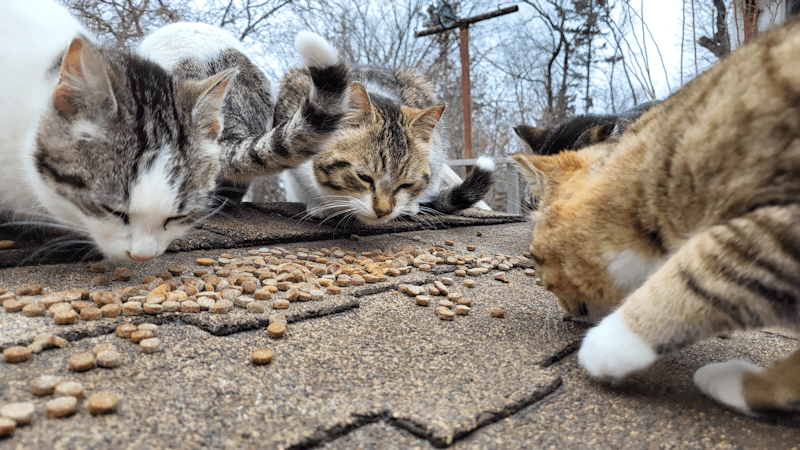
The first order of business, as always, it to feed the yard cats. The adults get distracted with their kibble feeding first, then I set out the canned cat food for the kittens, some in the sun room, some in the cat house. This morning, they got some bonus cat soup from one of the trays for the inside cats that got mostly ignored (we set out 3 trays, plus some in Butterscotch’s cat bowl, every day). This is supplemented with lysine, so that’s extra good for them. After adding it to the kitten bowls, I set the tray with some still in it by the kibble house to lure the adult cats away, and it was licked clean in no time!
Poirot headed out while all this was going on, so I had a chance to say hello to her babies, and look them over. Hastings (the white and grey) is the biggest of them, and most definitely female. Miss Lemon (the mostly white) and Japp (the mostly black) are less developed and harder to tell, still, but I suspect they are also female.
I made sure the sun room was closed up with some of the bigger kittens inside, so they got a chance to fill their bellies before the adult cats gobbled up their wet cat food, then continued my rounds.
I think the winter sowing in the bed is a lost cause now. I don’t know how they managed it, but I found a section of netting completely pushed over the hoops to one side, allowing all sorts of elm seeds in. This was even a section that was pinned down with ground staples on the fence side, but it still got pulled up. About the only benefit the netting provides at this point is to keep those elm seeds off, since the cats are still managing to either get under the netting, or just lie on top of it, and even the seed protection is being sabotaged by the cats! I keep looking for seedlings, and even the onion seedlings and what I thought might be sprouting beans seem to be gone. I do see some seedlings that I know are weeds (mostly creeping bellflower), plus grasses. This is so frustrating!
On a more pleasant note, more trees are blooming. The Saskatoons have been blooming for a while, as have the cherry trees now. The ornamental crab apples are really starting to open up. Then there’s this one.
These are on the tree that get many small but very edible crabapples on it (click through for a second image). The others in the row have flower buds, but they aren’t opening up yet, like this one.
It wasn’t raining this morning (though I did see snow, every now and then) so I headed into the outer yard to check on the walnuts.
In the first photo, you can see the tiniest of leaves on the walnut sapling are emerging.
Click through to the next image, and you can see the little friend I found, hiding out in some of the grass that fell into the collar!
*sigh* Of course, my phone’s camera didn’t focus in the right place. I hate it when I have pictures that look great on my phone, only to discover they actually suck, when I see them on a proper screen!
Our rhubarb is doing really well with all this rain, so I gathered a few stalks before heading inside. Poirot was back with her babies, though, so I did pause to give her her squeeze treat! She is much more pleasant about it than Brussel was (Brussel no longer goes into the sun room, now that the older babies have all moved themselves into the cat house to join Caramel’s babies!). Brussel would always growl at me, then attack my hand, when I gave her the treats!
As for the rhubarb, they got cleaned up and cut up, along with some strawberries, to make a double recipe of Upside Down Strawberry Cast Iron Skillet Cornbread We’ve got two cast iron skillets and can fit both of them in our oven at the same time, so that works out. This, together with a bit of whipped cream, and some Vanilla Chai tea made for a perfect treat for such a dreary day!
I still fell ready to fall sleep on my keyboard, though.
And now, just for fun, here is the newest cooking video from Townsends. This sounds like something that would be perfect for a day like today!
The seeds still need to be done, but they are not as urgent.
I had debated where to plant the sapling, and decided to plant is to the south of the ash tree. This location is almost straight out from the gate by the fire pit, so if we need to, it would be fairly easy to get a hose out to it. It’s also closer to the ash tree than the Korean Pine that got drowned out. When things were at their wettest, this area did get wet, but not to the point of standing water.
In the first photo, you can see the area is thick with dead thatch. I actually started out by pulling a lot of it out by hand, around the marker, before going over it again with a rake. In the second photo, you can see it after the raking. The dead grass I raked up is basically hay, so I set it aside to use as a mulch, later.
The next step was to dig out the sod around the marker. Since a sapling is going into here, I dug it wider than I would need to do if I were planting a seed.
Of course, I hit rocks.
After removing wedges of sod to the side, I dug around to loosen the soil and get it a bit deeper. Which wasn’t very deep before I started kitting gravel. Quite a while was spent finding and removing the flat pieces of rock that you can see in the next photo. These would all be from a single piece of limestone that fractured in layers, which is very typical. There was also a big chunk of granite.
The soil here is very black, very sticky and very heavy! It wanted to stick to my spade like clay.
After digging down as much as I intended to – just to the gravel layer – I went through the chunks of sod to remove any larger roots, and to loosen them up a pit. Then, leaving them upside down, I put them back into the hole, slightly beyond the edge, so the points of the wedges all sort of sunk downwards. Then a hacked at the sod around the middle with a hoe to loosen more soil and refill the hollow in the centre a bit. On top of that, I added about half of the soil I brought. My brother had a leftover bag of soil he passed on to me. After reading the label, I decided to use that instead of making our own mix.
I then used about half of the container of water I brought to water the hole before planting the walnut sapling. I wanted to make sure it would be slightly higher than what the ground level was when I started, but also wanted to make it so any rain would drain towards the middle before getting absorbed by the soil. I’d brought a collar to put around the sapling as well, which will help with both keeping it slightly higher, and also allowing water to percolate into the soil slowly around the sapling itself, rather than draining away and eroding the soil away from the transplant.
Then, since I had these handy flat rocks I needed to do something with, I set them around the sapling, on the upturned pieces of sod. This would both direct water flow towards the sapling and keep any grass or weeds from coming up around it. While this area gets pretty wet at times, we tend to have more drought conditions than flooding conditions, overall.
The marker was placed near the sapling. I forgot to bring something to gently secure the sapling to the marker, to keep it upright. Something I will want to do sooner rather than later, to keep it secure in place until its roots become established.
Last of all, the raked up hay/dried grass was set around the collar to act as a mulch. I ran out, but it was just a matter of raking nearby to get more.
Little by little, over the next while, we’ll get those walnut seeds planted at the other markers. For those, at least, they won’t need as large a hole to be dug!
After that was done, I decided to finally work on one of the garden beds that was being solarized.
Ha!
That didn’t quite work.
The thing with solarizations is, the plastic has to have direct contact with the soil. It needs to be held down tightly. Which we weren’t able to do – and with this bed, it just became a greenhouse for weeds!
In the first picture, you can see how “puffy” the plastic looks, as it gets lifted by the greenery below.
The second picture shows how completely overgrown this bed had gotten! It is mostly dandelions – which were even blooming on the north end of the bed, where it gets longer sunshine.
This bed has had a few years of amendments to it, and was completely reworked last spring, so the soil would be nice and loose. Between that and how large the weeds were, it was going to be a lot easier to clean it up than it looked! The first thing to do was go over the entire bed with a garden fork to loosen the soil and root systems. Once that was done, I brought out my little hand cultivator to loosen it more, so I could remove as much of the root systems as possible. Along with the dandelion tap roots, there were some crab grass rhizomes, and waaaayyyy too much Creeping Charlie. Creeping Charlie roots really do creep, mostly near the surface of the soil, as it spreads. These mats of roots would even get all caught up in my hand cultivator, making it easier to get them out. Unfortunately, even the tiniest remaining root can start growing and spreading, but at least I could get the bulk of it out!
While working on this, I disturbed a surprising number of frogs, and even a Wooly Bear!
With the bed so low to the ground, though, this was an uncomfortable and painful job. I brought over the rolling seat, which helped, but I was only up to weeding one side. Since this is all infested with Creeping Charlie roots, it all went into a wheelbarrow to add to the burn pile, rather than to compost.
Tomorrow, if all goes well, I’ll finish the other half of the bed and get it planted. I have decided
The caterpillar was something I ended up picking up and moving. My apologies for the terrible picture, but it was in the leaf litter under the nearby black currant bush, and I had to zoom in quite a bit!
The frog in the next picture was really tiny, so I caught that one and moved it, too. The others I disturbed were larger, and I left them to hop out of the way on their own!
By the time I was done, it was time to feed the outside cats for the evening. With giving the littles wet cat food, what I end up doing is chasing out the adult cats and closing up the door to the sun room, to give them a chance to eat. With Caramel and her babies, I set a bowl with both wet and dry cat food inside the entry to the cat house – and spotted Caramel peaking at me from around the opening inside! I couldn’t see her babies but, when looking through the window next to the entrance, I couldn’t see her babies in their cat bed, either. I went to the other window, where I could see Caramel from the other side, and could just spot her darker kitten half under her, waiting. She was already bringing her babies to the entry, expecting food for them! This is a good sign!
While tending to the kittens in the sun room, I noticed Kale’s front leg had a scab fall off, so I got a daughter to bring the cat safe polysporin to put on the leg. It’s not bleeding, and the wound is closing up, but there is still a chance of infection. There is also the wound on her back leg but, right now, there just seems to be a spot of matted fur. My daughter had to look at it while I tried to hold on to a squirming Kale. She thinks the matting is from dried puss, but she can’t see anything other than the matted fur right now. The wound there seems to have closed up. We can’t say for sure what caused these wounds, but I still think it was from being excessively licked after some squeeze treat accidentally dripped onto her while I was giving it to Brussel.
That done, I was glad to get inside and sit down to the supper my daughter had made for me – but did remember to call my mother, first. I’ve been forgetting to take her in for her monthly blood work. This time, she’s also got a requisition for fasting blood work. We are now arranged for me to take her to the lab when they open at 9am, so that she won’t have to wait too long before eating. When I told her not to eat anything with her morning pills, she told me that she would stop eating for the rest of today; the home care aid for her suppertime meds had left just before I called. I told her she could still have a snack before bed or something; just not breakfast. It seems she’s gotten it into her head that it’s somehow a morally superior thing to not eat for the rest of this evening, too. That would be way too long for her to go without eating!
I remembered to ask her about her new prescription painkillers, to find out if she’d taken them before bed, as I’d suggested, and how they worked. It turned out she hadn’t taken any at all, but was feeling enough pain that she was just about to. I’m glad I asked about it, because she thought that she was supposed to take 2 tablets at a time, “as needed”. The actual instructions are to take 1 tablet, twice a day, as needed. As we went over the instructions again, she started saying that maybe she should not take them at all until she finished her other ones – the extra strength Tylenol she normally takes. I had to explain to her that she could take both; that if, for some reason, she had taken her prescription painkillers twice, but was still feeling pain, she could safely take a Tylenol, because they are in the same family of painkillers (which is the same thing for me, with the different painkillers I’ve been tried on so far). While I was trying to explain that if she had taken the prescription painkillers, she kept interrupting me to tell me that she hasn’t taken any at all. I’d say again, yes, I know, but IF you had taken them… I haven’t taken any of them! she would tell me, again and again, cutting me off before I could finish what I was trying to explain to her! I did finally finish what I was trying to say but, by then, I’m not sure she was still following me along, or if her mind had already gone somewhere else.
So… I think she was still going to take one after we were done on the phone, and knew that she could take a second one before she went to bed if she needed to, but I am not sure what she will actually do.
She also brought up, in the middle of everything else, that she has been having troubles with her headaches and her chest. I had to ask her what she meant by her “chest”. Oh, you know… my head and my chest…
No, Mom. I don’t know! I understand headaches, but what to you mean by chest?
I had to clarify, because sometimes she complains about different physical pains in her chest, but sometimes, she means her breathing.
It turned out she meant her breathing.
I asked if she was seeing any swelling in her legs.
Oh, yes… but it’s my chest that’s the problem.
*sigh*
She then started saying that she’s fine if she is just sitting, but when she walks around, she starts having trouble breathing.
So I had to explain to her again, the doctors warned her that if she has swelling in her legs and has trouble breathing, she might need to go back to the hospital. She couldn’t make the connection between the swelling and her breathing, so I explained again that if she has swelling in her legs, that means her body is holding water, and she might have water in her lungs, too. She then wondered how this could be happening, with all the pills she’s taking.
*sigh*
She has somehow convinced herself that, because she is taking soooo many pills, she should never get sick with anything. I told her that there is only one pill she is taking that has anything to do with her swelling, and that’s her water pill. The other pills are for different things, and none of them are specifically about breathing.
We’ve had similar conversations many times, so I expect she will have forgotten it already. I did suggest that she ask the home care aid to check the swelling on her legs tonight; the last time I was there and she said she had swollen legs, when she showed them to me, they weren’t swollen at all. She actually had sagging skin, which suggests that she did have swelling recently, but it had gone down by the time I was there to see, one way or the other.
The home care office is closed, but I’ll call up the case coordinator and leave a message with her. She was at the meeting with the doctor in the hospital before my mother was discharged, so she is aware of what we were told to watch out for.
The lab I’ll be taking her to, tomorrow, is in the local hospital. Which isn’t really a hospital, since they don’t have the doctors to actually do anything, but there are Nurse Practitioners in the clinic in the same building. That’s where she had gone when they saw that she needed to be hospitalized, and she was transferred to a hospital that has actual doctors, a functioning emergency room and can admit patients.
At this point, my mother being hospitalized again could actually be another of those “blessings in disguise” when it comes to getting her into some sort of assisted living or long term care situation, like she wants so much. With the updates to her panel application for long term care, it might just be enough to get her in.
I wasn’t sure how much we could get done on the trellis build today, and it turns out to be just two vertical supports. Which is actually pretty good, all things considering!
I selected and de-barked logs for the verticals something like a year ago, and that was about as far as things got for quite some time. Having been sitting out over the bed like that all winter, I went over them and took one out completely, as it cracked too badly to be used. After going through the others, I debated whether I wanted to do four or five verticals, and decided to go ahead and with five. The two largest would go on each corner.
We had debated various ways of setting these up, including digging holes and sinking them, but decided to just attach them directly to the frame of the raised bed. The one last minute decision we made was to set them on scrap bricks, so that the bases wouldn’t be in contact with the soil. We went through the pile of bricks from the old chimney that was removed when the new roof was done and found several chunks that seemed suitable.
The first thing to do was to trim all the bottoms so that they’d be straight. Then, we needed to create flattish, straight-ish surfaces on the sides where they would come in contact with the frame.
With the first corner, the bottom log of the end cap got trimmed a fair bit. With the brick in place, we worked out where we needed to trim the vertical. We still ended up needing to cut extra out near the bottom to fit over that bottom end cap log. Once it was snug enough, we used 3 inch screws to secure it. For now, there’s just two of them. We’ll secure it more, later in the build.
The opposite corner needed a lot more work. We had to cut away more from the frame itself, to create more of a surface to attach to. Then there was cutting away the excess on the vertical. In the end, though, the vertical log was still too thick for our 3″ screws, and we didn’t have anything longer, so we used metal strapping to hold it in place. After using shorter screws to secure the strapping in place, we used a few 3″ screws to tighten it up even more at the gaps.
We weren’t after perfection, by any means. Which is good, because cutting away the excess wood was quite a pain. We mostly used the mini-chainsaw (a Stihl pruning saw) until we drained both batteries, as well as using whatever other tools we had on hand, including a hatchet, a chisel and even the draw knife.
Syndol was especially eager to “help” any time I bent over, wanting to jump onto my back! Then, while using the drill or driver, he kept trying to get in on things. My daughter and I had our hands full either of tools or holding the vertical post, and he took full advantage of the fact that we couldn’t really stop him from getting in the way!
In the end, it took us about 2 hours to get just those two verticals up. This is how it looks now.
We reached our high of 16C/61F today, and we were working in full sun, so it got really hot out there.
After this, we’ll measure out where to put the remaining three verticals, with each on top of a piece of brick. They are not as thick, so it shouldn’t take as long. They can only be attached to the top log, though, as the bottom one bows inward quite a bit.
Once those are in place, we will measure and mark the tops and trim them to all the same height. One those are leveled, horizontals will be put across the top. I’m still not decided on whether I want to put the horizontals directly on top, or on what will be the inside of the trellis tunnel, when the matching bed is built. Probably directly on top. Once that’s in place, support pieces at 45° angles will be added.
With the end posts, I am thinking to add angled posts reaching from the opposite corners of the raised bed to the top of the verticals to secure them more.
Eventually, more horizontals will be added – much thinner horizontals – from vertical to vertical, near the bottom. For now, we will probably use plastic trellis netting, but these will eventually be used to create squash tunnels. They will eventually need to hold quite a bit of weight, so more durable material will be used over time. At this point, I just want something up and useable! It will probably be used to support pole beans or peas this year.
We still have a pile of posts meant for verticals as we build more of these beds and, eventually, join them in pairs to create trellis tunnels. Many are completely hidden in the tall grass! We’ll have to dig them out and see how many are still usable. There was more cracking and splitting in these ones than I expected.
I’d gone walking out to the gravel pit and pond beyond the outer yard the other day and one thing I noticed was that there are a lot of nice, straight poplars that we can potentially harvest for projects like this. It’s the “straight” part that’s harder to find. It was good to see that, if some of the logs I’d already cut for posts are too weather damaged, I can replace them fairly easily.
For now, I’m happy with what we got done today. I’m not sure when we’ll be able to work on it next. Tomorrow there is a homesteader’s show near the city that my daughter and I want to go to, and we might be able to do our first stock up shopping trip at the same time. CPP disability is due to come in on a Monday this month, which means it might show up in our account tomorrow, instead, so if I can save a trip by doing both tomorrow, I will! I doubt either my daughter and I would be physically up to working on the trellis for 2 days in a row, anyhow. I’ve already started to stiffen up quite painfully, and I’m sure she is, too. I don’t plan to work on it on Sunday, since I try to keep that my regular day of rest, but Monday is supposed to be much colder and very windy, so Sunday might be my only chance for quite a while.
Working around our physical limitations, plus the weather, can get complicated at times!
I’m going to go take some pain killers now, while I can still move.
Today is the first of a short spell of warmer days we are expecting. As I write this, at almost 7pm, we are at a lovely 12C/54F. The weather app says it feels like 5C/41F, but it doesn’t seem that chill around our home.
This afternoon, I took advantage of the warmer temperatures and finally got to work, cleaning up in the main garden area. What I’m shooting for is to get some beds ready to try some fall planting – because garlic, that is. I’ve been inspired once again by Gardening in Canada.
The more we can get done in the fall, the easier it will make things in the spring!
I’m surprised by just how much can be planted in the fall, with our zone 3 winters. Her list includes wildflowers; particularly poppies, hollyhocks, sunflowers, coneflowers and columbine. Now that I think about it, all of those make sense; we’ve had all but coneflowers sow themselves here, and the only reason we haven’t had coneflowers overwinter here is because we don’t have them anywhere to begin with. I do still have a native wildflower mix that needs to be sown, but those will have their own space to be seeded in.
For vegetables, she listed them in groups. One is the alliums; onions, leeks and shallots. We’ve got our own onion seed this year, so that is an option for us. We should also be able to use our own garlic for planting this year, too.
She mentions root crops like turnips, carrots, radishes and beets, all of which benefit from winter sowing by becoming sweeter and more flavourful, the following year.
Peas is something she plants all over, as she uses them as an indicator plant. You can tell how warm the soil is becoming by when they germinate.
The next group she mentions are brussels sprouts, kale, spinach, kohlrabi and possibly cabbage.
Last of all, she mentions squash and pumpkins. Considering the squash we had in our compost pile last year, we’ve already had those by accident!
They are normally a hot weather plant, but our compost tomatoes shows that, in the right conditions, tomatoes could be added to the list, too. Hmm… so can beans, for that matter.
Looking at her list and remembering what I have for seeds right now, we could plant onions, turnips, carrots, radishes, beets, peas, spinach, kohlrabi and both summer and winter squash.
What I might end up doing is just mixing up the seeds for onions, turnips, carrots and beets and planting them randomly in one bed – mostly because the onions could protect the things it’s planted with from deer. I could probably interplant onions with kohlrabi, peas and spinach, too, though I’d have to watch the spacing more. Squash… well, they take up so much space, they would be on their own, for the most part!
In order to do this, there are two things I need to get ready. First, is prepare the soil by increasing organic material. Compaction is a huge problem with our soil. I can do trench composting again, which really seems to make a big difference in production, but the soil itself needs to be amended as best we can.
Then, once seeds are planted, the other thing they will need is a light and fine mulch. Grass clippings and leaves would be what we have on hand to use. She recommends piling snow over the seeds in the winter for added insulation, but for the main garden area, I don’t see us needing to do that. That whole space gets well covered with snow over the winter!
Right away, I can see that we would have a very different garden next year, if we do this fall sowing.
We shall see if we can get to that point over the next week or so!
With that in mind, I focused on the main garden area. Here is a slideshow of today’s progress.
I started off using the weed trimmer. I hadn’t been able to do much clearing of the paths, once the winter squash, pumpkins, drum gourds and melon bed vines really took off. In some paths, I could barely walk through them without stepping on a vine.
I started to use the weed trimmer in where the next raised bed that will be part of a squash tunnel will be built, but not too much, just yet. I’ll clear into there more when I have to access the stack of what will be vertical support poles attached to the existing bed.
After trimming one side of the high raised bed, I stopped to pull up the winter squash vines. All the squash got powdery mildew towards the end of the season, so all of these were for the burn pile, not the compost. In fact, the only squash that did not get powdery mildew was the Crespo squash, in a completely different area.
I ended up spending most of my time on the pole bean trellis. There were only 5 surviving plants but, my goodness, they sure took over that trellis netting!
Also, folding up that netting for storage is a lot easier when you lay it out, then weave a bamboo stake through one short end.
After the first squash bed was cleared, I moved the corn stalks over from the other squash bed, so I could get at the vines under them. Later, I plan to trench compost the corn stalks.
Pulling up the squash vines was truly interesting, at times. I couldn’t believe how long some of them had gotten! These would have been so awesome on a trellis tunnel!
The only two beds I did not clear this time were the high raised bed, and the first trellis bed. I did finish weed trimming the paths, though. Right now, the bed that needs the least amount of work is the westernmost one, where I’d already prepped half of it after harvesting the onions and covered it with plastic.
The solarization doesn’t seem to be working, though. I’m seeing a lot of green growing under one end. The problem is, that end of the bed gets a lot more shade, this time of year, so it doesn’t get a chance to get hot enough to solarize. At least not at the south end. There may be greater success towards the middle of the bed.
Around the time I finished the weed trimming, I found some messages from the family. My daughter had spent some time going through all the fittings I picked up, working out which would be needed, which wouldn’t, etc. In the end, we were going to need more of two fittings – and will likely have quite a few to return to the store, once the job is done.
It was past 3:30 by then. The store we needed to go to was the second one I’d gone to, yesterday. Thankfully, they weren’t going to close until 5:30 – the local one closes at 4. My daughter came along with me.
While she was looking at the fittings, I looked around for the hot water tank element tool I needed, then asked for help, because I couldn’t even find the section. It turned out to be tucked away in a corner. 😄 I also asked about a socket large enough to remove the anode rod but, in the end, I think the same heat element tool will fit the anode rod. I’ll test that out, later.
Then my daughter needed help, because one of the fittings she was looking for was behind locked doors! Quite a few displays in this store were behind glass. I would not have expected theft to be more of a problem in this location, that the store I usually go to!
After we got what we needed and were heading home, I missed my turn to cross over to the other highway – the streets look no different than driveways in this town! That meant we ended up driving to the town closer to home.
My daughter hadn’t eaten anything since early in the morning. Since we ended up in town anyhow she, being the sweetheart that she is, sprung for some Dairy Queen for all of us.
It now looks like we have everything we need to replace the pipes and faucet set for the tub. The hard part is going to be cutting the copper pipe to get the old pieces out. There is very little room to work in. Especially since the cutter needs to spin around the pipe.
While I might be able to assist, this is a job mostly for my younger daughter. She’s the most able bodied among us – and considering she has PCOS and all the joint pain that can come with, that’s not saying much!
Hopefully, I will be able go get more progress in the garden instead, and if all goes really well, be able to plant things for next year in a few days!
If all goes well for my daughter, we might even be able to use the tub and shower again, soon, too!
I headed out this afternoon, and got distracted by many adorable fluff balls.
I’ve only recently started using Instagram to upload my photos, since I’m running out of storage space on my WordPress account. WP does allow the purchase of extra storage space, without having to upgrade plans, but the cost for 50G is Cdn$68.54 PER MONTH!!!! – billed yearly. Which is insane. If I upgraded my plan to Business, it would cost Cdn$33/month, billed yearly, and that would come with 50G of storage.
So… uploading to Instagram it is.
The problem is, when I upload photos – especially groups of photos – the images are often corrupted. They seem fine right up until I hit “share”, and when I check them, there’s often something wrong with them. Some are so bad, most of the photo can’t even be made out. I thought the issue might be my computer, but when I double checked using my phone, the images were still corrupted. Today, I had to reload this next batch of photos three times before it worked, and even then, the third one is corrupted. At least it’s still visible, though!
That orange and white kitten is successfully socialized, and absolutely adorable. The tuxedo in Baby Jail is not socialized at all! I am happy that they are going in and out of the cage comfortably, though. If we ever need to suddenly keep a cat in there until we can take it somewhere, they will already be comfortable in the space.
Octomom’s babies are all over the place these days. The one using a brick as a pillow is just too adorable!
After I took those photos, I started walking slowly in between the cat shelters, and the orange and white kitten came over. I was able to pet him and pick him up, and he was purring up a storm. This made the littles very curious, and they started to come out from under the cat house to see what was going on. That they were willing to come within a couple of feet of me was quite encouraging.
I had to tear myself away from the kittens and get to work! It’s taken forever for me to get back to those poplars I cut for the vertical supports on the trellis beds.
I cut the logs to about 7’2″ lengths, in case the bottom ends need to be trimmed flat. In the first photo is the finished stack of 7′ lengths. I got three out of one log. Most of them got me two lengths. In the corner of the photo is the stack of log ends, or sections that were just too crooked to use.
It was as I was finishing up that I realized I was feeling really dizzy and getting the shakes. It was hot, yes, but “only” about 23C/73F Then I remembered.
I’d had a late breakfast, so when I lay down for a nap at about lunch time, I didn’t eat first. I forgot to eat something before heading outside.
Because I’m an idiot that way.
So I quickly cleaned up then headed in for some food.
When I came back out, I had to figure out the best way to get the logs to where the trellis beds are going to be. I got out the loppers and started clearing a path through the spruce grove. At one point, I had to get the baby chain saw to cut away a fallen tree that was half buried in the grass.
Once I was reasonably sure there weren’t any branches, bushes or small trees to get tangled on, I grabbed a log and carried it over. It was one of the bigger ones, but I could carry it on my shoulder easily enough. The problem was the distance. There was no way I was going to be able to carry them all out like that, without wearing myself out too quickly.
So for the other larger logs, I grabbed a rope to drag them with, which you can see in the second picture.
Of course, if I’m going to do this to make it easier on myself, I really need to make sure there are no stumps of branches to dig into the ground! I adjusted the rope to turn the log a couple of times. In the third photo, you can see all the grass that had been pulled up by what turned out to be two “anchors” on the log! After I got those facing up, the rest of the drag went much more smoothly!
I also took a video of it, to give an idea of just how far the logs need to be carried. For this, I chose a log light enough that I could carry it with one hand, while taking video with the other.
Also, my phone’s microphone really picks up the sound of my breathing! 😄
There’s a brief pause as I show were I had to clear the fallen tree. Just a little one, but too long to just move aside.
In the end, I was only able to move three lengths over. I used the rope to drag the third, bigger one over, after I took the video. It was just too hot for that kind of work. I can’t handle the heat like I used to!
I’m going to have to work on moving these early in the morning, before things get hot. I won’t be able to do much over the next couple of days. Tomorrow, not only am I going into the city for our first monthly stock up shop, but I’m losing a daughter for almost a month. She’ll be house sitting for my brother and his wife while they go on a trip of a lifetime, and going over early so they can show her what she needs to do and what to keep an eye on. So I’m losing one of the more able bodied members of our household!
Looking at the long range forecast, though, I see things have changed. We’re going to be getting hotter again. There’s even a forecast of 30C/86F on the weekend!
Which will be great for the garden. Especially for the squash and melons. The longer we have with warmer temperatures and no frost, the better our chances of having something to harvest.
Well, I’ll figure out what to do during the heat. We really need to get progress done on those beds! Plus, if I can get enough dead spruces cut down, I hope to get more high raised beds built, too, replacing some of the current low raised beds.
At the rate we’ve been going, though, I’ll be lucky to get just one trellis bed done!
While catching up on a few garden things in the cool of the evening, I happened to walk near the covered board pile outside the living room window, where Not-Junk Pile has her litter. I’ve been seeing 3 kittens running around and playing on the tarp, and the tire and tire rim we have on top to keep it weighed down.
I could see Not-Junk Pile lying in the grass, nursing her littles. They noticed me, and three kittens ran off into the brush around the board pile.
Leaving three others behind! They and their mother watched me closely as I walked by, but did not run away.
Six.
She has SIX babies!!!!
I saw them again later, and it was quite hilarious. I had to zoom in from a distance, and this is the clearest photo I could get.
That’s just a whole bowl full of babies in there with her! 😹😹
As I was in and out of the sun room, I spotted the kitten with the messed up eye. It’s looking really swollen – even more than before – around and behind the eye socket. I let the girls know, so they could try and get it and tend to it as best they could, but it ran under the counter shelf, and none of us have spotted it since. I did manage to snag a black and white kitten with a gummed up eye, and one of my daughters was able to wash it clear. There’s a white and grey kitten with an eye stuck closed, too, but I haven’t been able to catch it.
As I was finishing up, I spotted a teeny little tuxedo running around outside the sun room door. I’m not sure that I recognise it.
Speaking of recognizing cats, after I put the kibble out and cats were coming around, I realized I was seeing both Junk Pile and Not-Junk Pile. I tried to move closer to Junk Pile, but honestly, the only way I can tell them apart unless they are literally right next to each other, is from the wounds Not-Junk Pile has behind her ears, from scratching herself. We still haven’t been able to catch her to give her that ear might medication, which is really getting to be a problem. The wounds behind her ears had been healing up, but today they are red and raw again. I did manage to come close enough that she sniffed my fingers, but that’s as close as she’ll let me get to her.
We reached at least 24C/75F today, though the thermometer in the sun room was hitting 30C/86F. For all the severe thunderstorm warnings we were getting, we didn’t even get rain. So I made a point of watering as much of the garden as I could, while doing other stuff.
It’s too early for the water soluble fertilizer I used to make much visible difference, but that bed with the Roma tomatoes is bothering me. They are just not thriving, for all that they are producing tomatoes. That bed has a mulch of shredded paper, because that’s all we had left at the time. It does the job, but isn’t as good as a grass mulch, and we have a nice big pile of grass clippings available right now, so I went ahead and topped up the bed with a few inches of grass clippings around the tomatoes, between the onions, and especially the edge, where the crab grass comes up from under the logs framing the bed – and right on top of the soaker hose that winds its way around the bed, leaving only the connector sticking out. Then I went around and pruned the bottom branches off the tomato plants. I’m hoping the fresh mulch and the pruning will help the tomatoes get healthier.
After that was done, I hooked up the garden hose, then went to look at the new soaker hose I set up and tested in the purple corn bed. I got the soaker hose because it was affordable, but I guess you get what you paid for. It works just fine, except for the connector. Inside the connector was a flat green disc with a small hole in the middle. I figured it was to control the flow of water into the soaker hose, but when I hooked up the water hose, it sprayed from between the threads. With the disc there, there’s just too much water pressure, forcing the water out through the connector. So I tried taking out the disc and tried again, but there is no rubber washer, so it still leaked. A lot. I have extra rubber washers, but when I put one in, I discovered that the connector isn’t as deep as others. With the washer in place, there wasn’t enough thread to screw on the garden hose! The washer is just too thick. It’s fine on every other hose. Just not this one. I did eventually use it without the rubber washer, but not for long. There was just too much water leaking.
I did, however, have an extra female coupling, so while giving the other soaker hose time to give the tomatoes and onions a good watering, I cut off the connector on the new hose and replaced it. The original coupling was at the end of a plastic tube on the outside of the soaker hose. The new coupling has a metal tube that needs to be inserted into the hose, then a worm clamp is tightened to keep it in place and from leaking. Getting that into the soaker hose took awhile, though! It was designed for a half inch hose – which is smaller than the hoses we have, but the clamp makes up for that. The soaker hose opening is narrower than half an inch! Thankfully, the material it’s made of does stretch, and I was able to get it in properly, then clamp it down.
Once the tomato bed was watered, I tested out the new hose with its now connector, and it worked perfectly!
Oh, slight interruption!
My daughter read that tonight was supposed to be a good night to see the Northern lights, and she invited me to go outside and see if they were visible, or if it was too cloudy. It turned out to be too cloudy, but we heard the barking sound of racoons, so we went to check.
We found two young racoons on the cat hour roof. When they saw us, they flattened themselves down as much as possible, and froze! We ended up using the hose to chase them off, but… gosh darn it, they are so flippin’ cute!
Anyhow… where was I?
Ah, yes.
With the new soaker hose working, I decided to set up a sprinkler over the squash patch, so the whole patch can be watered at once. We have oscillating sprinklers we found after moving here – three of them. They work, in that they spray water, but the oscillating part doesn’t work at all on two of them.
Of course, the one that worked was the last one I tested!
Turns out that if it’s set right, it not only waters the entire squash patch, but also the small patch with the drum gourds and zucca melon – and the corn bed! So it got a real good watering this evening!
By the time I used the soaker hoses and sprinkler for a half our each, it was getting too dark to do much more, so it was time to go in, and away from the mosquitoes! We’re still getting predictions for rain tonight, but I’m not expecting it to reach us, so I might be watering some more, in the morning!
I so enjoy being able to work outside. I’d say outside all day if I could! Heck, with the temperatures we’ve been having overnight, I’d happily sleep outside, too. One of these days, we’ll have a mosquito proof gazebo, and I’ll be able to do just that!
Today has been a nice, cool day, but very windy, with smatterings of rain. So windy, we didn’t dare set the transplants outside. They’re hardened off by now, so they should be fine. I just don’t want to have tomatoes blown half way across the yard!
So we did what we could, and the wind actually helped by keeping us mosquito free. I even had both daughters able to come help me at the same time! My older daughter normally sleeps during the day, but she couldn’t sleep. A night working on the computer left her more than happy to do physical labour outside, no matter how tired she was!
Thanks to the extra help, we got all three beds done in short order!
That black plastic had been on the bed in the foreground for a week or two, but the weeds underneath were too established to be killed off in that length of time. I moved it to the first bed that was complete – only one end is uncovered, because we found a couple of onions while weeding it, and they got transplanted at the end near the grow bags.
I just realized something. I think I forgot my gloves on the high raised bed, after taking this picture. 😆
The bed in the foreground was easily the worst for weeds, but all of these beds are so much better than when we first started gardening in this area! Every year is a little bit better. Once we’ve got the high raised beds set up, we’ll be sure to set aside the soil we’ve been working so hard on, and using it to top up the high beds.
That won’t happen until the fall, though. Until then, we’ll be collecting the materials and getting them ready, so that once things are harvested, we’ll be able to get right at it.
The next priority is to build the new beds and trellis tunnel – though if we just build beds with trellises, and turn them into tunnels later, that will be a good start! These will be permanent trellises, so I don’t mind taking extra time to make sure they are solidly built, but also, we need something to plant in. We have so many transplants and seeds, but not enough prepared beds for them.
In other things, I got a response to my email to the vet about Judgement. They don’t do “walk ins”, but if we can catch him and call them, they will find a way to get an available vet to see him. So, of course, there’s no sign of Judgement, today! *sigh* With not being able to put any weight on that foot, he is very vulnerable right now.
The girls and I are still trying to figure out the best place to set up grow bags for the potatoes, where they would get full sun, but also be closer to the house for watering. We don’t have a lot of the old feed bags left to use as grow bags, so we decided to use one of the Old Kitchen Garden beds that was recently fixed up.
The bed still needed topping up, so I started by adding some of the sheep manure I recently purchased. I didn’t add a lot, as this bed was filled with purchased garden soil, and it should still be pretty rich in nutrients. What’s missing is organic matter. This is a blend of compost and composted manure, so that will help a bit. This got worked in with a rake.
Also… do you see that bit of green poking out of the wattle weave bed?
It’s a stray onion!
I have no idea where that onion came from. This bed had never had onions planted in it.
I’m not going to complain, though!
Next, it was time to raid the garden soil pile and do some soil sifting.
Three wheelbarrow loads of the garden soil was brought over. The weeds are already starting to grow under the cover on that pile!
Some of the Irish Cobbler seed potatoes were very small, so to fit them all in the bed, I put some of the smaller ones together. Then they got buried as deep as I could, so they don’t need to be hilled.
As this area slopes away from the house, the far end of the bed is somewhat deeper than the end closer to the house, to level it off. Still, with this bed being newly rebuilt, and the layers of organic matter below, the top layer of soil still isn’t very deep.
Once the potatoes were planted, I scattered some stove pellets over the top, then began watering. Once the pellets had expanded into sawdust, I used a rake to spread it out evenly. This is not at all for the potatoes, but to protect the soil and help reduce soil compaction. Over time, we will continue to add grass clippings and wood chips as mulch. The potatoes will easily be able to grow through a mulch. With this bed being higher now, and not using straw for a mulch, hopefully, that will reduce the slug problems!
After spreading out the sawdust, I gave it a deep watering, and plan to water it again a couple more times, today. I want the water to go through all those bottom layers that were added, which will speed up their anaerobic breakdown, while also acting as a sponge to retain moisture. Once those bottom layers are good and moist, this bed should not need much watering at all.
Okay, so I was supposed to take it easy today, so that I wouldn’t be too sore for manual labour tomorrow.
But I kept going outside because, aside from the wind (I’m so tired of the wind!), it was gorgeous out. Unfortunately, the wind limits some of what I could do.
No limits on feeding the kitties, though!
Not-Junk Pile kept watching me closely, but would not let me near her. From what little I could see as she moved around, it does look like she is probably nursing. I haven’t the slightest clue where her litter might be.
One of the things I ended up doing was tending the bed we’ll be planting peas into, a bit.
I just pulled the mulch back from the fence line to expose the soil to the warmth of the sun. There are a fair number of weeds and grass coming up. If I let them get bigger, they’ll be easier to pull up.
I also watered the beds we planted, as well as where the girls sowed the alternative lawn mix in the maple grove. That included pulling back the plastic on the hoops over the carrots to water them. I couldn’t see any carrots germinated, but I am seeing some weeds we missed, pushing their way through. I won’t try to pull those until the carrots have established themselves, so I don’t accidentally pull of carrot seedlings.
Since I had the plastic off anyhow, I improved the hoops set up. I’ve got a pair of bamboo stakes across the tops, and added two more pairs on the sides, just a few inches above the soil, to make sure the plastic doesn’t end up on top of the carrots planted closest to the walls. Then I zig zagged twine from the bottoms of the hoops, to the bamboo stakes at the top. I was noticing the wind was pushing the sides of the plastic inwards more than I liked, so that should help prevent that a bit. By the time it was done and the plastic put back, it didn’t really look any different, so I didn’t bother taking photos.
That was in the afternoon. In the early evening, after feeding the cats, I decided to extend my evening rounds in the outer yard. I went into the warehouse to look again at what’s in there, besides the many bags and boxes of my parents’ belongings and furniture. There’s what appears to be a folding table that we could make use of, but we’d have to move quite a few things to access it. Not as much as what we’d need to access what looks like good lumber and plywood in another corner.
I also went looking under the warehouse. Quite a bit of stuff had been shoved under there. Boards and beams of various sizes. Old drawers. Electrical wire. Lead pipes, some with taps still attached. Some is potentially useful, but others are looking like they’re breaking down, even though they are well sheltered under there.
I also made sure to check the area around our septic outflow. We’re going to have to do some clean up around it, as branches from nearby trees have been falling around it. There is a low spot nearby that, when I was a kid, had a pond in it most years. Since moving here, it had water during last spring’s flooding, but was otherwise bone dry. Right now, it’s full of water – and frogs, from the cacophony I was hearing!
While back there, I was looking around the back of the collapsed log building and noticed something half buried in the tall grass. I ended up pulling out a metal fence post. There were a couple of wooden fence posts under there, too, one of which was still quite useable, so I dragged both of those over to where I have two other metal fence posts leaning against the back of the garage. The one I found is covered in rust, but still solid – and the same length as the other two! Seven feet, I think.
I spent some time looking at stuff in the barn, too. It seems like every time I go in there, I see something “new” that I hadn’t noticed before. One of the things I wanted to look at were the “spare” windows that I’m hoping we can use to replace the windows in the sun room that have lost their inside pane, and the one where the inside pane is cracked. Looking at the larger windows, though, I realized we won’t be able to use them for the sun room. Taking a closer look at them, I realized they are much bigger!
There are a lot of old windows all over the place. Many have broken glass, but many more are still intact. I went into the shed near the barn; the one with the tarp on the roof. There are so many more old windows in there, some of which we could probably find uses for, as we build various sheds and shelters. There are also a lot of doors of various types, styles and ages. I took a closer look at some of them, and they turned out to be closet doors. One pair are a type that are made to slide on tracks. The other is a pair of folding doors, like we are already using as a table top for our transplants. What we used to hold the transplants to harden them off and keep them safe from cats last year are not available. If we can find solid supports that are tall enough, these closet doors would probably give us enough space to set out all the transplants for hardening off!
On the way back to the inner yard, I decided to start moving some things along the side of the garage, where we’re looking to have a shed offered to use placed and used as a chicken coop. There were some odds and ends, some boards on the ground, one of which was so rotted, it had grass growing through it in places, and a length of steel pipe buried in the tall grass. There’s also a small maple that was growing in the space between the boards, and a small red osier dogwood, that we’ll need to get rid of. But first, I grabbed a rake and did more clean up.
I’ll have to come back with the loppers to cut away the maple and dogwood. You can’t really see the dogwood in the photo. It just sort of disappears in the grass by the garage wall. I was finding bits and pieces of the branch pile that used to be here as well. We’ll have to come back with the wagon or wheel barrow to haul away the pile of dead grass and branches for burning – which will have to wait until the wind dies down!
Now that everything is clear, we’ll have to bring a ladder over and clean the eavestroughs on the garage. They haven’t been done since we moved here. On this side, it was because of the branch pile in the way. On the other side, it’s just a lot harder to get to, with so many trees growing near the garage.
Then we’ll have to bring over the old tire rims I’ve decided to use to put under the shed, and level things off at the front of this area, in line with the front of the garage, as best we can. It needs to far enough forward to not shade the garden beds on the other side of the chain link fence. Then I need to contact the guy who offered the shed to use and work out when he can bring it over. Once it’s in place and gets the repairs it needs, and set up as a coop, we should be able to use those metal fence posts we’ve found for the chicken run we’ll need.
I’m looking forward to getting at it, so we can finally have chickens!!!
So that’s what I ended up doing today. I didn’t push myself, and so far, I don’t feel the need to take more painkillers, which is a good sign!
We’ll see how well that last, overnight! I don’t know how much outside work I’ll be able to get done tomorrow, though. I’ve asked the girls to work on cleaning up and de-catting the sun room, so we can start moving transplants into there. I’ll be heading to my mother’s in the afternoon, then hit the hardware store on the way home to pick up the lumber I need to make proper frames for the garden beds. The one thing I haven’t figure out for them yet is what to use across the middles, to keep them from bowing outwards. I don’t want to use wood, or anything larger like that, as I don’t want it to end up being in the way of any plants. I’ve been looking at threaded rods but, at the lengths I need, they are way too expensive. So I was thinking of a steel cable of some kind. I’ll have to look around and see what they have – and how much it costs! – to figure it out.
Today may be cooler, but we’re still staying above freezing, and the kitties are just loving it!
I only counted about 16, this morning. As things melt clear and my morning rounds are extending further out, I’m seeing the cats all over the place. The long haired tuxedo followed me all over the place, much like Pointy Baby did – just without actively trying to get me to pick him up and carry him!
I miss Pointy Baby.
The berry bushes we planted last year are almost completely uncovered. That old saw horse with the sticks is over the highbush cranberry the deer kept eating. I checked the other one and can almost, sorta, see leaf buds starting to form!
The main garden area is still mostly covered with snow. If all goes to plan, the area in front of where I’m standing will have at least a couple of trellis tunnels built.
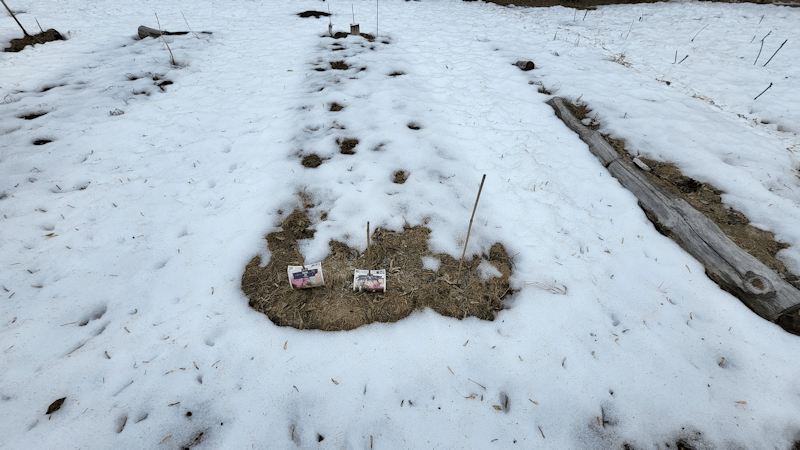
The garlic bed isn’t quite clear, yet!
The standing water has receded more, so I was able to get to the storage warehouse (which I would really love to reclaim as a work shop again!!) and look around. With not being able to get to the dump as often in the winter, we’ve been storing our garbage bags in the old kitchen, where it could freeze. It’s getting too warm for that, now. We need to build a garbage bin outside that is cat and racoon proof to store the bags until we can make our dump runs. There are pieces of plywood and other random boards in the warehouse. With all my parents’ stuff jammed into there, none of it is accessible. Some of the stacks of boxes need to be moved around, anyhow, as they are starting to collapse and tip. That’s as good an excuse as any to move things around. Some of the plywood sheets, however, are behind a couch, and there are all sorts of boxes and bins that predate us on and in front of it. No matter. We’ll figure out how to get to them. I’d love to get rid of all the bags of clothes in there. They’re not even suitable for donating after all this time, but my mother still insists we don’t throw anything out! *sigh* She’s still all worried that someone might come in and steal her old underwear or something. 🤨
While in the shed, I noticed an old broiler pan that will work as a kibble tray. I don’t know why we’ve been finding broiler pans all over the place – no one ever used them for what they were made for – but they make great kibble trays, so I grabbed it. With a bit of readjusting of things, I was able to reclaim two of the baking sheets I got for carrying transplants around that were being used as kibble trays over the winter. There is still one more, just inside the cat house entry, but I will leave that for now. With the two trays I reclaimed, I’ll be able to pot up the Indigo Blue Chocolate tomatoes now.
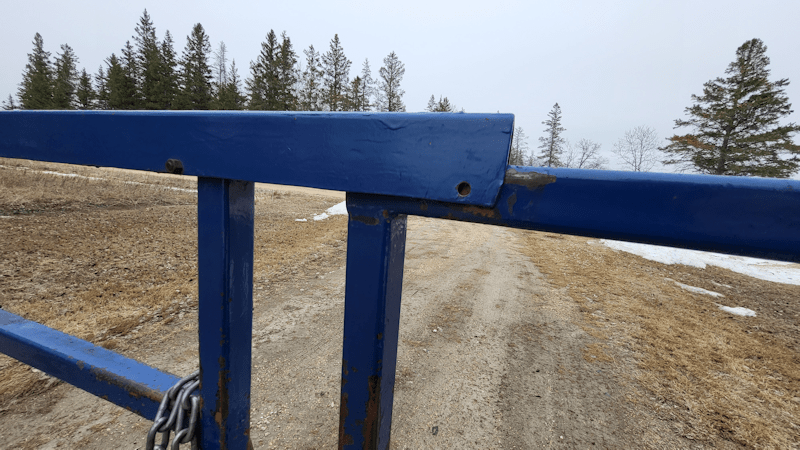
After I was done my rounds, I made a quick trip to the post office to see if a parcel had arrived. With so much snow gone, once I was back, I actually went to close the gate! I’m seeing our vandal walking by with his dog on the trail cam more often, so I wanted to have it at least closed. This makes it the first time that gate has been closed since the snow got too deep to keep clear, several months ago.
Well, now.
When my brother and I put the repaired gate back up, the two sides were even. That sliding bar holds the two sides closed, and I could put a pin through the pair of holes at the corner, which made sure the wind or whatever didn’t vibrate the bar off the end of the gate. Before winter, it was noticeably shifted, but we could still lift one side of the gate while pushing down on the bar and get the pin through. Now, it’s just too far off! We’ll have to come out with a level and see which gate post has shifted the most. I was thinking the north post was tipping away, but my daughters think the south post is tipping inwards. It could well be both. The gate posts were installed in such a way that they can be adjusted by adding washers to the bolts at the base. My brother had done that when he installed the new hinges that replaced the ones our vandal broke. I’d hoped it would be a few years longer before it had to be done again. It’s been about 3 1/2 years since these were repaired and replaced, so I guess that’s not too bad.
The main thing is, the gate is now closed! Without being able to put the pin in the sliding bar, the chain is extra necessary to make sure they don’t swing open on their own. We’ll also have to touch up the paint a bit. I think I still have a spray can of it around. I’ll have to think about what I can put around where the chain and bar is damaging the paint so quickly.
Things are going to stay colder over the next 10 days or so, with daytime highs just above freezing and overnight lows dipping several degrees below freezing. We’re also getting smatterings of rain. I’d say it’s a good thing we didn’t plant those carrots, even if we did have the plastic to cover them until they germinated. I don’t mind, though. It means things will continue to melt and be absorbed by the ground slowly. I rather like not having to wade through giant muddy puddles to get to the garage. It will give us time to work on other preparations.
I’m just thrilled to be able to get outside and get working again, even if it’s just a tiny bit at a time!