Since we had to go into town today to pick up prescriptions, we added in as many errands as we could think of, so we wouldn’t have to come back any time soon.
Which would have been a moot point, since one of my husband’s prescriptions can’t be filled until tomorrow (one of the highly regulated drugs he’s on). I will be taking my mother to a doctor’s appointment tomorrow, though, in a different town. Thankfully, my husband has enough that it can wait for my daughter to pick up when she’s at work on Saturday.
I knew the seeds we ordered were waiting for us at the post office, so we swung by a hardware store, where I hoped to pick up a soil mix specifically for vegetables. I couldn’t find any, so I picked up a couple of trays and extra Jiffy pellets. When I asked about the soil, I expected to hear the inventory wasn’t in yet. Nope. They’re sold out!
My daughter was a sweetheart and picked this up for me.
A mini greenhouse kit! I’ve wanted one of these for years. <3
Cheddar decided he would help me put it together.
In looking at the seeds that have come in, and deciding which ones we’ll want to start indoors, and which we’ll seed outside, I finally went and looked up when our last frost date is. Since the seeds say to start them X number of weeks before all danger of frost is past, I figured I should probably confirm when that is! For most people here, it’s traditional to get their gardens in on the May long weekend.
It turns out that, for our area, the frost date is June 2nd. !! In the city, an hour’s drive south of us, it’s May 28th.
Which means the earliest we would need to start seeds indoors is May 5th! I was expecting to be starting them in mid-April, at the latest.
Hhhmmm. I think we’ll still start some of them in mid-April anyhow. Particularly the cucamelon, which needs at lot more warmth and longer growing season compared to anything else we’ve picked up.
I had something else come in the mail that needed to be assembled. Unlike the mini-greenhouse, this did not come with assembly instructions.
Along with our seeds order (minus the gourd seeds, which were back ordered but should be in very soon), we got the bottle cutter I’d ordered. I chose this one specifically because it can cut square as well as round bottles. While it came with instructions for use, I had to use a photo on the other side of the sheet to figure out how the back plate was supposed to be put on.
While I plan to test it out and make some practice cuts, I don’t think I’ll start making the bottle bricks yet. The plan for our first cordwood practice building is to build on a base of 8x8x16 concrete blocks.
Which has been strangely hard to find in the flat ended type I want. Most that I’m finding are 8x6x16, or 8x8x16’s with shaped ends. I hope to find what we are looking for at the salvage place I found (which, I found out, my brother has been to a few times), but inventory there is based on whatever the demolition crews happen to bring in. If I can’t get enough in the size I’m after, we might have to change the thickness of the walls. So I while I might make a bottle brick or two for practice, until we know what dimensions we’re working with, we will just continue to collect bottles and get them cleaned out and ready. If I can find some polishing paper and polishing paste, I could try cutting some bottles to make vases or something in the mean time.
So now that we have almost all our seeds, the seed starting supplies, the mini-greenhouse, the lawn mower blade sharpener and the bottle cutter, we’ve got the tools and materials to get quite a few things accomplished in the next while!
Having received shipping confirmations for the seeds we ordered, the girls and I have been talking about just where we are going to plant what we’re getting, and what we need for what we’re getting.
In the two years we’ve been here, we’ve been working at reclaiming neglected spaces before we could even consider planting anything. The area where there used to be a huge garden has had more and more trees planted into them – without adequate planning, unfortunately, and causing a lot more shade areas I remember used to get much more sunlight. We currently have some spots here and there that we will be able to plant in, rather than one big vegetable garden, like my parents had for so many decades.
This is what we’ve come up with.
At the top of the sketch is the area we mulched over, then covered with tarps, last summer. This is where we will be planting the varieties of squash we’ll be getting, and the birdhouse gourds. The two giant varieties of sunflowers will be planted in a part of the old garden that I was finally able to mow last year. It’s more lawn than garden now.
The house is where the happy little gardener is standing. On the left is the old kitchen garden. This had been mostly a flower garden, though my mother did plant some onions there. The trouble with this location are the two ornamental apple trees. Still, we’ve already got chives and onions planted overwinter in the chimney block retaining wall. In the rest of the blocks, and in the area against them where I’d been able to add some soil to try and reduce the slope away from the house, is where we will plant fennel, and some of the varieties of carrots and beets we’ll be getting (we’re getting three varieties of each). The other area carrots and beets will be added is in the soft, deep, loose soil uncovered when we cleaned up the old wood pile area.
We’ve decided to set up the remaining chimney blocks along the chain link fence, between the fence and the white lilac bushes. Right now, there is an area of lawn just wide enough to get a mower through, but it would be great to not have to squeeze through there with a mower at all, and use the space to grow cucamelons. The chain link fence will be the trellis for the cucamelons, which need full sun. We chose the lilacs side of the gate, as they will not be affected by the shade created once the cucamelons cover the fence (assuming the grow successfully!), whereas the section of fence on the other side of the gate has flowers and haskap berries, and they’re already shaded too much from an elm, a maple and another variety of lilac.
What isn’t anywhere on the sketch is potatoes. We’ve ordered 6 pounds of Yukon Gem potatoes, but they are back ordered. These would not be shipped until the right planting time for our area, so they can go into the ground right away, so I hope they were get more stock before then. We weren’t billed for them, though. The gourds were back ordered, too, but we were billed for those – and I got a shipping confirmation for those the day after I got one for the other seeds. This suggest to me that they may not be expecting to get more of the Yukon Gem variety of potatoes. Depending on how that goes, we might end up buying some Yukon Gold, locally. We shall see.
We ended up buying quite a few plants that are climbers, so we will be building trellises, too. We will have to go through the barn to see what materials are left that are suitable to build with. When we do build them, we will keep in mind that they will need to be moved after the growing season. These are temporary planting locations, and very much experiments, as there are quite a few plants we have never tried to grow before.
With all the crazy stuff going on right now, with the Wuhan flu, shelter in place recommendations and grocery stores in many places being cleaned out of inventory, I’ve noticed quite the increase in people interested in growing their own food, so I thought I’d talk a bit about our decision making process.
For us, we’ve long sought to increase our level of self sufficiency as much as possible. When it came to gardening, this was not something we could do much of. Partly due to moving so frequently, but also because we usually lived in apartments with no real space to grow in. When we did find ourselves living in homes with nice, big south facing decks, we did container gardening, with varying levels of success.
Now that we’re back on the farm I grew up on, we finally have the space for all kinds of things, but with all the clean up needed first, we can only do a bit at a time, so we have to be quite selective on what we choose to grow.
When it comes to choosing what to grow, there are two ways you can go. You can look at the things you buy the most of and, if they can be grown in your climate zone, grow those, thus reducing your grocery bill. Or, you can look at the things you don’t buy, or buy rarely, either because they are too expensive at the grocery store, or hard to find. The grocery budget may not change, but you’ll have a greater variety of produce, and more “treat” foods, which has substantial psychological benefits, too.
We’ve done a combination of the two.
Carrots, beets and potatoes, for example, are things that are easy to find in the stores. At least the plain ones. It wouldn’t really be worthwhile for us to, for example, grow Russet potatoes. They are still pretty cheap at the grocery store, and common. What we’ve ordered are common foods in uncommon varieties.
Fennel is one of those things we buy as a rare treat. They’re not significantly more expensive, but enough that when the budget is considered, it’s more economical to buy more of the cheaper produce.
The squash varieties are similar. We like them, but rarely do. Some, like the pattypan squash, are pretty rare in stores, and more expensive.
The sunflower seeds are intended to play several roles. These varieties are good for eating in general, but we’re going to be planting a lot of these to use as bird feed in the winter. The large size and strength of the plants themselves will act as wind breaks, as well as privacy screens. Plus, we’ll be planting them in an area that the leaves will hopefully shade the ground enough to prevent the grass and weeds in the area from growing. (This is where we’re going to need more hoses; the area is quite parched, and there is no nearby source of water.) The straw bale we have now will be used as mulch, though it won’t be enough on its own for such a large area. We’ll likely use most of that up when we get and plant potatoes. I’m hoping to get more straw or old hay over the summer. I’m planning to contact the renter of the rest of the farm, whom we have been buying our straw bales from, to see if he has any – and maybe some well composted manure, as well!
You’ll notice one of the things we don’t have on our list are lettuces. These are often recommended for new gardeners, as they produce relatively quickly, and with successive sowing, you can have 3 seasons of lettuce. We’ve tried growing lettuces in our container gardens before but, ultimately, find they are not really be worth the hassle. We’ve found them to be fragile produce, both as a plant to grow, easily killed off by too many things, and as produce to buy at the store, which inevitably go soggy before we can finish them. We just don’t eat enough lettuce to make it worthwhile.
Cabbage, on the other than, will be something we’ll grow in the near future. We use them more than lettuce, and they store very well over winter.
So a lot of what we’re going to be doing for gardening this summer is pretty experimental for us. How things work out will do a lot to help us decide what we’ll do next year.
Meanwhile, we will continue to clean up, reclaim space, and work out where we want to plant the things that will continue to feed us, year after year; berry bushes, fruits trees and, hopefully, nut trees.
It’s going to be a fun (and, hopefully, tasty) learning experience!
After dropping one daughter off at work, my other daughter and I did a whole bunch of manual labour around the yard.
The first thing we did was haul away the stuff I’d clean up in the old wood pile area, including moving the pile of debris to the back of the outhouse, and sorting through the pile of found objects and garbage.
While picking chokecherries, I also checked out one of the gooseberry bushes.
This is the biggest of the gooseberry bushes, and the one that got the most water over the summer, since I had the sprinkler going on the raspberry transplants. It has a fair few berries on it, while the others have either no berries at all, or almost none. The really dark berries I am holding are “ripe”, but so small, they’re practically inedible.
Note for future: transplant the gooseberries out from under other trees, and put them somewhere where they will get both sun and rain!
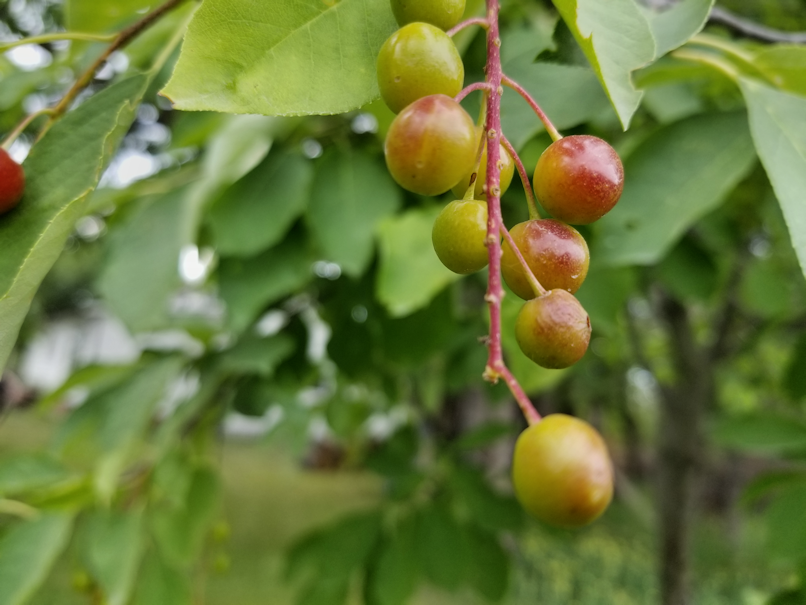
While picking a few more raspberries, I noticed some significant differences in the nearby chokecherry tree, compared to last year. Specifically, the ripening berries are already larger than the fully ripe berries I’d picked from this tree last year.
This location is closer to the house, where it gets shaded for much of the day by nearby spruce trees and the maple grove. Last year, I pruned this tree back and, thanks to my watering the transplanted raspberries, it got watered along with them.
I decided to check out the other two chokecherry trees among the lilacs that run along the north fence, where they (the lilacs) do a bang-up job keeping out the dust from cars passing by on the gravel road.
There are not a lot of berries on this one that I could see, and they are mostly very green; I made a point of getting a picture of the reddest ones I could find. These berries are quite a bit smaller than the tree closer to the house, though I’d say they are the same size as last year.
This tree is mostly hidden by lilac bushes, with a few branches leaning over where I mow. No watering happens this far from the house, other than what nature provides, and there has been no clean up or pruning of any kind. This tree is also in the section bordered to the south by a row of trees that was self-sown when my mother had raspberry bushes there. She transplanted the raspberries, but left the trees, splitting up a section of the old garden. The last time it was plowed, there was some attempt to plow along the north side of the trees, too, but with the trees there, that area is unusable for gardening.
She is not understanding why I see them and their location as a problem.
While this tree does get a lot of sun, that row of self-sown trees is large enough that, at certain times of day, they do shade it a bit. This is also near the end of the row of lilacs. After that, there are mature elms along the fence line that shade the area in the evening.
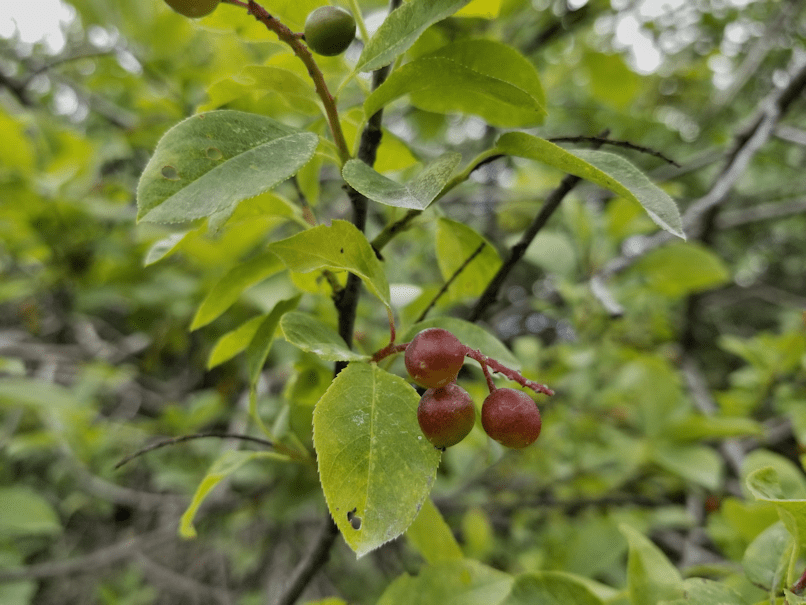
There is another chokecherry tree among the lilacs, and when I got to it, I found quite a surprise.
This tree has massive amounts of almost ripe berries!
Like the other tree among the lilacs, the only watering it’s been getting has been whatever rain we’ve had, and there has been zero pruning or clean up. The main difference is that there are no tall trees to shade it; just the lilacs it is growing with. Which means it gets full sun almost from sunrise to sunset. This time of year, I’d say about 9 or 10 hours of full sun a day, plus maybe 1 1/2 – 2 hours of non-direct light.
I would say the berries are about the same size as last year, though they are slightly bigger than the other one among the lilacs.
Earlier today, I was able to acquire a starter kit of equipment to start brewing mead. In looking up recipes, I’m excited to try some combinations. We’re already going to be using honey locally produced by my cousin. Some of the recipes include fruit and berries. I look forward to trying it out using our own sour cherries and chokecherries. Over time, we could also try it with raspberries (we won’t have enough this year) or Saskatoon berries (I think we’ll have to start over with new trees, though), haskap and other types of fruits and berries we will be growing as time goes by.
I think our first batch will be plain honey mead, as we learn the ropes, but I will be freezing cherries and chokecherries as we gather them (freezing helps with the release of natural sugars) to use in later batches.
I’m pretty excited about trying this out!!
Meanwhile…
Seeing how the same type of tree is doing in three different locations is giving me good information for when we are ready to plant other types of fruit, berry and nut trees around the property.
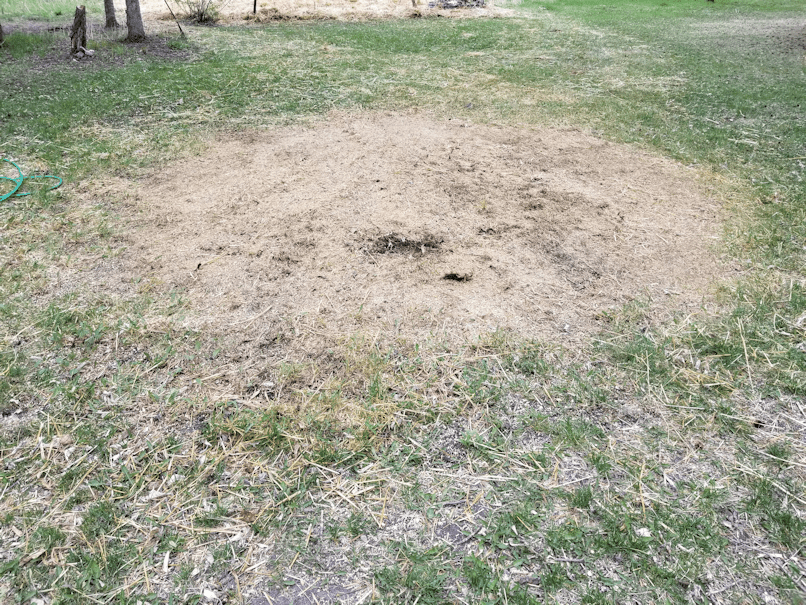
Today, my daughter and I got some progress done on the old garden area that we mulched with straw this spring.
We didn’t put anything under it, so things did start growing through it.
This is taken from one corner, next to the gooseberry bush and raspberries.
It looks a lot worse than it is. Partly because some of the weeds are so big, they take up more space on the surface than what they take up through the mulch. Partly because the mulch itself had seeds in it, and we’ve got oats growing in there, now.
We wanted to cover it, but first, we needed to kill this stuff.
Yes, we used herbicide on it. No, I’m not the least bit bothered by that.
Before we started, we tried to set up a hose to wash up later – and to spray any kittens who might come too close.
I’ve had some problems with the hoses. We’re down to two again, despite my repairs to them. There is, however, a garden tap. Basically, it’s a tap at the garden with a pipe running to the house, then a section of hose that can be screwed on to the water tap at the rear of the house. We’d never needed to test it out last year, so this was a good time to do it!
Yeah. That’s water spraying out of the ground, next to one of the wood piles.
I tried turning on the garden tap itself. Some water did start to come out, which turned really brown, then stopped altogether.
So I tried hooking up a pair of shorter hoses to the house tap, instead. One of them was spraying like crazy at the tap. When I switched to the other hose, it was fine.
So… we were down to one hose. *sigh*
While my daughter sprayed the garden, I worked on taking the pieces of wire that sewed the two sheets of black tarp together, out.
There was quite a lot of it. Some of the pieces were quite long and were done in a running stitch. On one section, there were two pieces used to created a double running stitch!
Getting it out was a challenge.
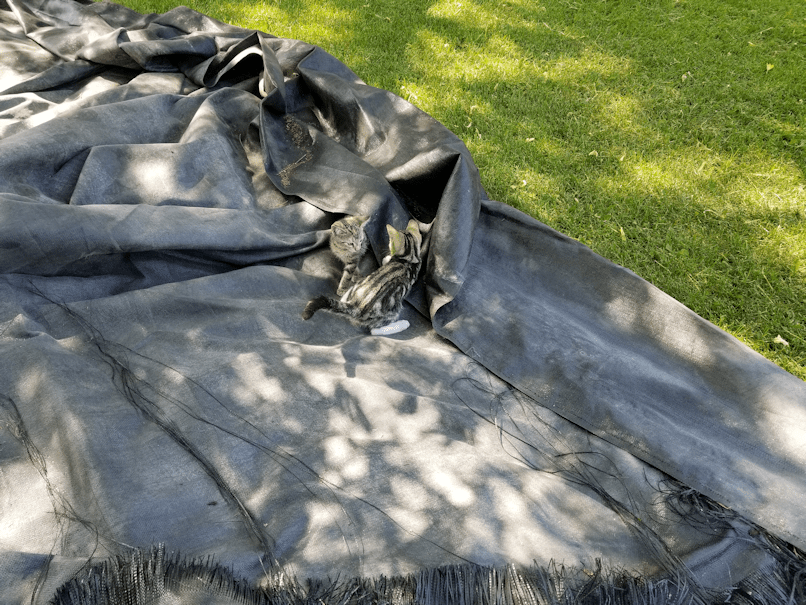
The kittens were very interested in the tarps!
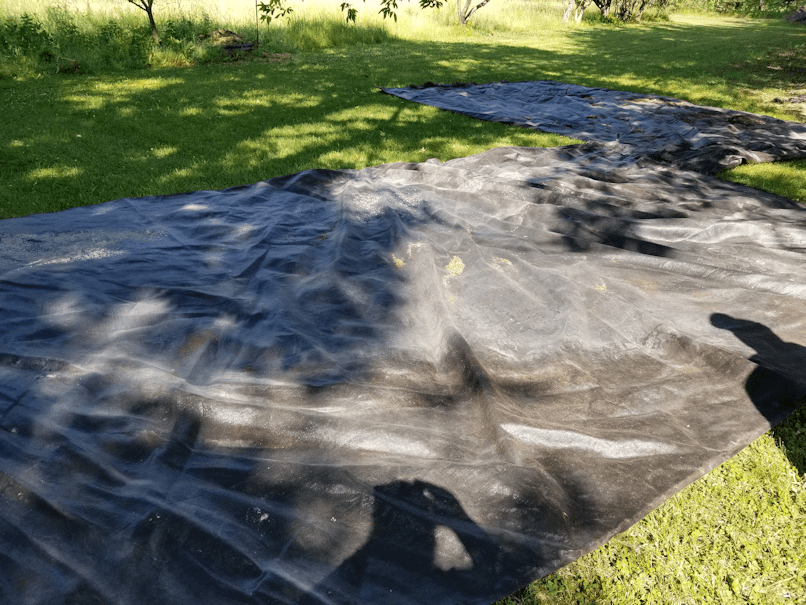
After I got the wire out – and got scissors to cut away the fraying pieces that were catching on everything, I was able to spread them both out.
When the spraying was done, we left this area for a while, and I went back to working on cleaning around the old wood pile. After hauling another wheel barrow load to the pile near the burn barrel, I took a side trip into the barn, where I’d seen some tarps. The two black tarps are big, but not big enough!
While moving things to be able to access on of the tarps. I took a closer look at the old hoses that were in the way, and decided to try one of them out.
Much to my shock, it works just fine! No leaks or cracks, even though it’s really stiff from being in the barn for who knows how long.
So, we are back to two hoses. :-D
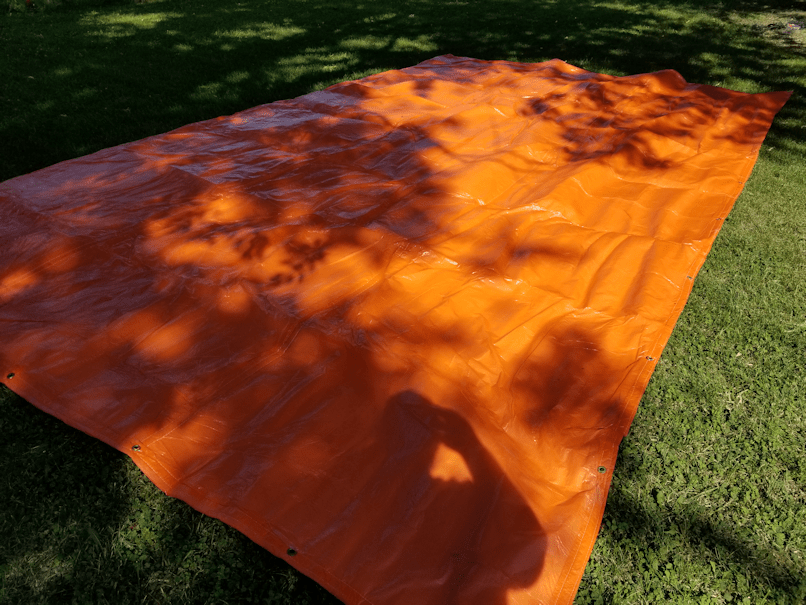
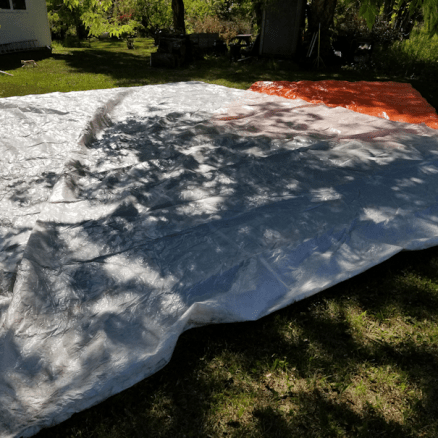
Later, my daughter and I spread the two black tarps over as much of the mulched area we could cover, while still making sure there is overlap. Then we checked out the two rolled up tarps I’d found in the barn.
One turned out to be an insulated tarp. We weren’t going to use that, even if it weren’t too small. We’ll save it for something else.
It turned out to be really huge!
Plus, it has grommets, so we can use tent pegs to pin it down.
We started to do that, but the ground is so hard, we actually bent some of the pegs.
Then, we had a visitor. A mom and her daughters came to look at the kittens to potentially adopt one. They stayed and played with the kittens, and took some pictures, for quite a while. I learned they got our phone number from the vet in town.
I had gone to the vet this morning, with updated pictures of the kittens, and little write-ups about each one, printed out. This family had actually phoned this clinic, asking about kittens, since they are also a shelter, and were given our number.
They will think about which one they will take and get back to us in about a week.
At least I hope so. I’d hate to get ghosted again. :-(
By the time they left, all the aches and pains were kicking in, and I had definitely overdone it on my broken toe, so I didn’t go back to get pictures of the tarps on the garden area, nor get back to working on the wood pile area.
It’ll be at least a day before I get back to it, since we’ll be doing our monthly shop in the city tomorrow. I’ll also be picking up a 5 kilo bucket of liquid honey I ordered yesterday, before we head out. My daughter is wanting to try her hand at making mead. :-)
Until then, it’s time to shower off the bus spray and herbicide, pain killer up and go to bed early!
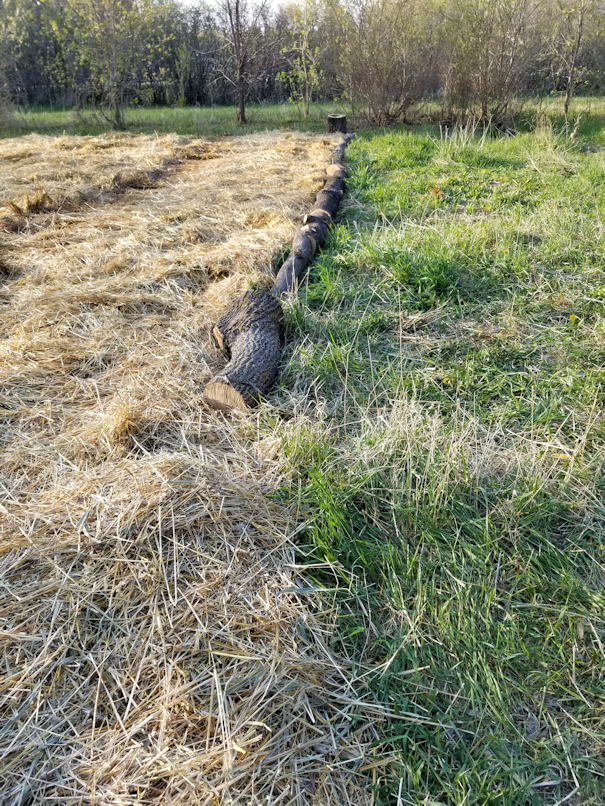
A bit more progress on the garden today; my daughters used some pieces of the trees that were taken down to edge the area we mulched yesterday.
The North end was left alone, since we won’t be going into there much at all, and the South edges were left open a path between the raspberries and the future garden.
The beauty of using these logs is that they are big enough to made an adequate “wall”, but will be easy to move away again, when that time comes.
One of my daughters tried to use a hoe to level some areas, so the logs wouldn’t be more level. The ground is so hard, it just bounced off the dirt!
We’ve broken down and removed the straw bale we got for mulch last year.
It’s amazing just how much material is packed into a round bale.
The girls continued taking wheel barrows of straw to the garden until the core was small enough to tip over and roll away.
There was still plenty left behind, of course.
Despite rolling against the grain, it still left a trail, all the way to the garden. :-D
Note in the above photo, how wide the mulched area in the garden is. We’ve already widened it on one side a bit, since we last worked on it.
Once in place, the core could simply be unrolled, leaving behind a thick enough layer that it only needed to be tamped down in places.
You can really see the difference between what was the bottom of the bale and the top; the part that was touching the ground is still tightly wrapped, and already starting to decompose, while the top is much looser, as it had room to spread while we took layers off to cover the septic tank and mulch the old kitchen garden.
This is where the bale sat all winter. When it was first moved, and my daughter was raking up what was left behind to haul away, she noticed lots of worms. When I was transplanting the raspberries, I noticed plenty of worms, too. This is a good sign!
This area behind the house is very spotty as far as how the grass is going, with the area closest to the house having almost no grass at all. So we’re not too worried about the grass that was under the bale; we’ll need to find some shade hardy grass seed for the area, anyhow.
And here we have the mulched garden area for next year. In the foreground, to the left, is a big gooseberry bush that I hope will actually produce some berries this year. Next to it is a chokecherry, then where the raspberries were transplanted, a crab apple tree, and the compost. Which, I discovered as I tried to turn it, was used for garbage at some point, as I found pieces of food tray foam and the remains of a plastic tray that held transplants. Plus, lots of branches, still. This is where a pile of pruned branches and cut back trees were piled, then moved to the middle of the garden, before we moved here. The plan had been to burn them – yes, even when it was right on the compost pile, under that apple tree! – but we broke it down and moved it manually, last spring. We’ll have fire pit fuel for a long time, just from that one pile!
The next steps for the mulched garden area is to “frame” it with some of those logs we have from getting the trees cleared. The idea is to keep the straw from being dragged around with our feet as we work in it. Other material will be added to it, to build up the layers and improve that rock-hard soil. Covering it all with landscape cloth to prevent the grass and weeds from growing through the mulch would be good, if we can get enough to cover the whole area.
We’re getting a pretty decent sized garden out of this! Obviously, nothing close to what it was before, but we can amend and re-claim sections of it, little by little, over the years, while planning out where we want to put more permanent plantings.