After giving the new squash bed a thorough watering with the sprinkler yesterday evening, I made sure to check them out this morning.
I’m happy to see that they are looking strong and healthy. A few were looking a bit haggard after transplanting and adding the straw mulch, but they have all perked up.
The not so good is that my plans to at least start on getting the sunflowers plants are still out. It’s just too flippin’ windy out there! The sunflowers are to be planted at the far end of where the old garden used to end. There, they will serve as both a wind break (one variety can potentially grow to 10 – 12 feet in height, the other 8 – 10 feet), but also as a privacy screen. Too many people slowing down to peer into our yard/garden area. Which I can understand, when there’s a herd of deer passing through, but with our past having included things like a paid union goon stalker, a crazy dude threatening us, nosy, gossipy neighbours that were diligently working to drive us away from the housing co-op we lived in, and now our vandal, we’re a little more sensitive to the creep factor of that than most!
That far from the house, though, means no shelter from these winds, and they just don’t seem to be dying down.
I really hope it calms down in the next day or two. The predicted thunderstorms have been pushed back a couple of days, and I’d really like to get the sunflowers planted before then. Plus, there are still the cucamelons and remaining squash that need to be transplanted.
Ultimately, though, I’ll be happy as long as I get them in by the start of June.
We’re having another wild and windy day! Still, stuff needs to get planted. I made a quick trip into town and my errands included stopping at the hardware store. Their garden centre was open, so I checked it out.
I couldn’t resist.
I bought some muskmelon transplants. Muskmelon is a type of cantaloupe that I remember we grew here when I was a kid. I absolutely loved them. I only got 2 plants, and we shall see how they do.
In preparation for today, my daughter and I made a bunch of markers to label our plantings.
We made one for each variety of seeds or transplants we have, plus an extra. The cucamelon don’t need one, since they are going to be completely separate from everything else.
We… won’t need to use all of them anymore.
I’ve been hardening off our seedlings. Because of the high winds, I’ve been leaving the trays inside the mini-greenhouse with the flap completely open – that way, they’d get some wind, but still be protected from the worst of it. I also put the mini-greenhouse in front of the old basement window, where it is more sheltered from the wind, and still gets full sun. When I brought home the new melon transplants, I tucked them into an empty shelf in the mini-greenhouse.
When it was time to start planting in the garden, I came out and found this.
My initial thought was that the wind had done this, but now that I think about it, I have changed my mind. If there were a wind enough to knock those trays – and their shelves – down, the whole thing would have been blown over.
I am now thinking a cat decided to go exploring.
Unfortunately, the squash seedlings are now all mixed up. The gourds still haven’t emerged, so at least we can guess that if there is no seedling, it’s a gourd, but there were still some other squash that hadn’t germinated.
I think the few fennel seeds that germinated and promptly bolted are a lost cause. :-(
Most disappointing.
Still, I’ll transplant what I can, tomorrow. One of the seed packets I got was a “surprise” mix. Now, they’re all going to be a surprise! :-D
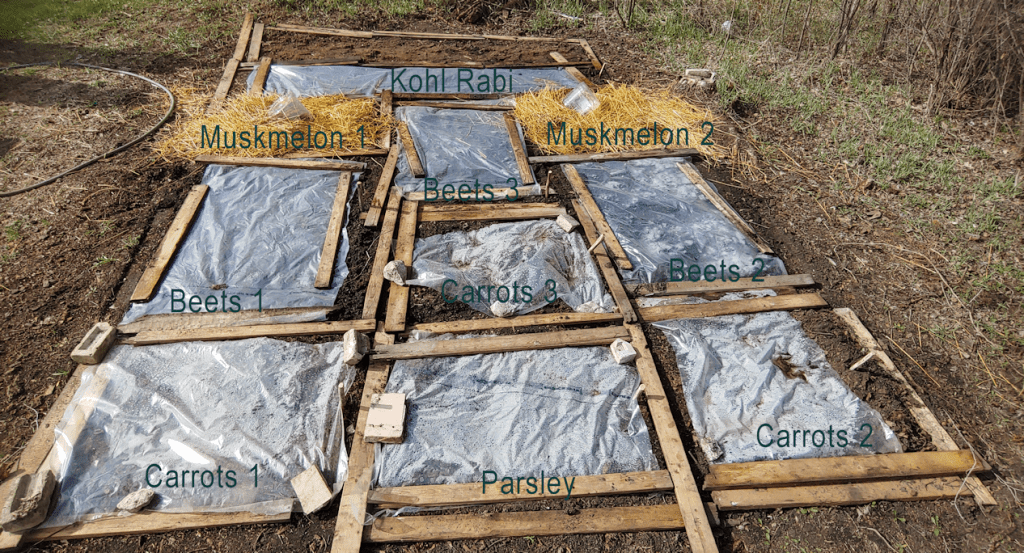
This is where we focused on today.
Even though this area is turning out to be pretty well sheltered from the wind, there is still enough to really dry out the soil. I watered it earlier in the day, then watered it again before planting.
I also re-arranged the pieces of wood to make different sized beds, taking into account that I now have kohl rabi seeds and muskmelon transplants.
This is how it looks after the girls and I finished.
We still have seeds from the 3 varieties of beets, and kohl rabi left.
One of the things I’ve been doing is keeping the large plastic containers from some treats we sometimes get at Costco; cheese balls and pork rinds. I took two old cheese ball containers, drilled holes all around the sides near the bottom, then cut off the tops. I have a wood burning kit that includes a knife, and I used that to cut the tops off. Much better than hacking away at it with a utility knife or scissors! :-D These are now being used as cloches for the melons, which are surrounded by a mulch of straw. The cloches are tipped a bit sideways right now, but I will put them down for the night, when I do my evening rounds. In the morning, I will tip them over again.
Before the melons grow much bigger, I plan to add a trellis of some kind for them to climb.
Once the seedlings emerge, we’ll remove the plastic and the boards. The seeds were planted with square foot gardening in mind, and after the boards are removed, I will most likely add straw in between the beds for foot paths. An odd problem to have here, is that the soil is so soft, we sink when we walk on it. Our usual problem is the opposite. :-D
Here’s a bit more about square foot gardening.
When we do get do building raised beds, they will be quite a bit taller than the ones made in the video, for accessibility requirements. For those, we plan to use materials to fill the beds that turn out to have a name. Hugelkultur.
Or maybe more like this…
Basically, we’ll use whatever we’ve got to fill the bases, then topping with a soil mix. It might be a few years before we reach this point, though.
There is still one section of the new garden plot with nothing planted, and that may just stay empty. Tonight, I’ll be prepping the area in the old garden, where we will be planting our squashes, so we can start transplanting tomorrow. Then we’ll focus on the sunflowers next. Depending on how things go, we might plant some of our leftover seeds from the beets and kohl rabi, elsewhere. There is still the old kitchen garden area available, so we’ll see how things turn out.
This morning, when checking the soaking carrot seeds, I FINALLY spotted some roots!
For those who are new to following this blog (welcome!), this video shows the technique I am trying.
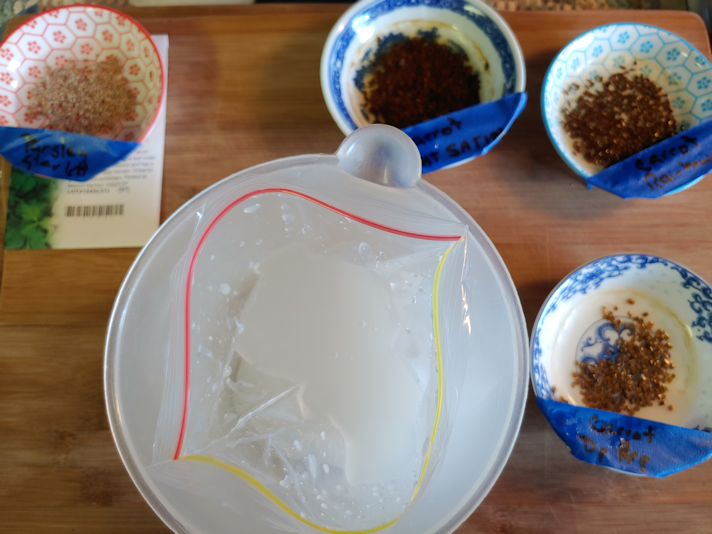
The first thing I needed to do was make the conrstarch gel. I noticed in the comments that people found the ratio in the video made too thick a gel, so I used 2tsp cornstarch to 1 cup of water. I made more than I needed, since I figured if it worked well for the carrots, I would use it for other things with very small seeds.
It took a while to cook the mixture down to gel state, and I think if I do it again, I would increase the cornstarch a little bit more.
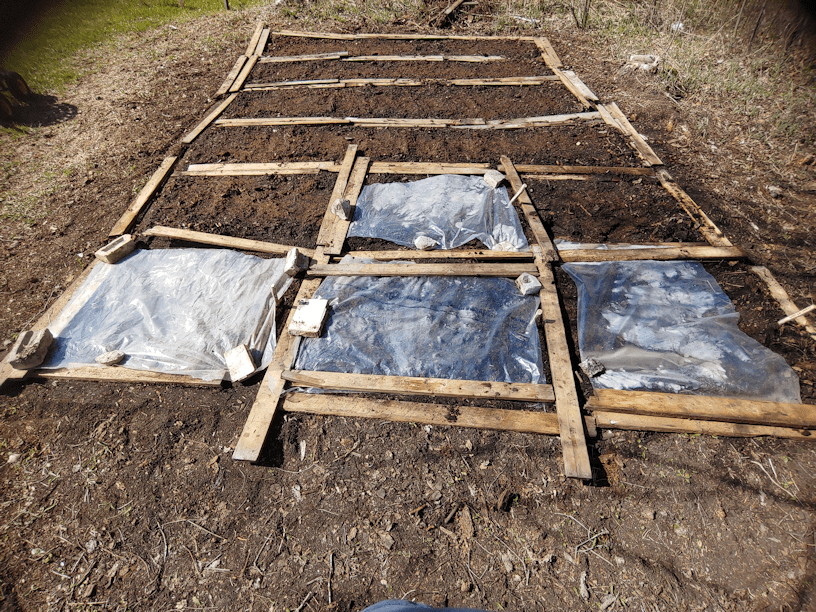
Once the gel was cooked and cooling down, we started getting the new garden bed ready.
I had already raked the soil to even it out, and we gave it a thorough soaking. Then I added a bit of peat to each section and raked it out evenly. After the above photo was taken, it was given another thorough watering.
The gel took a while to cool down so, in between getting things ready outside, I put some of the gel into slide lock bags to cool down after. Then put them in the fridge, and finally putting them in the freezer. They didn’t have to get cold, but they at least had to be cool enough not to harm the seeds.
I prepped 4 bags. One for each variety of carrots, plus one for the parsley.
The instructions for the parsley said to let the seeds soak for a half hour, so that was done while I worked on the carrots. I used a measuring cup to hold the bag of gel up.
Also, the cats somehow managed to knock one of the dishes of carrot seeds upside down. :-( It was the deep purple variety. I was able to salvage most of the seeds, but there was a fair bit of seed loss, too. :-(
Once the seeds were added, I squeezed out as much air as I could, then smooshed the package around to evenly distribute the seeds in the gel.
When it came time to plant the seeds, a corner was snipped off, to make like an icing bag, and the seeds were squeezed into the prepared soil in short rows. By the time that was all ready, the parsley had soaked long enough and those were planted, too.
I’m using a combination of techniques, and one of them is based on square foot gardening. Rather than long rows, they’re being planted in squares. I’ve got the carrots planted in alternating sections, and the parsley is in the middle of the group of three.
I found a roll of plastic in the basement (I think it’s for roofing), so we used some of that to cover and protect the seeds. Those will be removed as soon as sprouts can be seen.
The squares seem very close together, but there really is a fair bit of space in between the plantings.
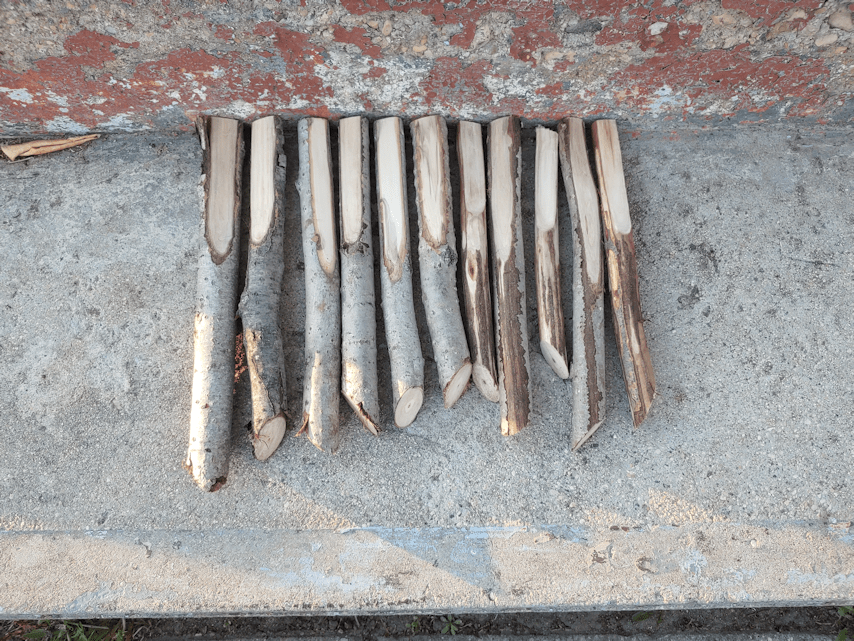
Also, my daughter is a sweetheart.
She trimmed some branches and made labels for me. :-)
The way things are looking, and using the square foot gardening method, we might be able to plant more here than originally planned. The three varieties of beets will go here, plus I ended up buying some kohl rabi. I don’t know if we’ll have much success with the fennel transplants; there really isn’t much improvement there. What few have sprouted can fit here. The parsley and fennel was originally going to be planted in the old kitchen garden, but I think we’ll continue to build up the soil in there and save that for next year.
Today turned out to be surprisingly hot, so we didn’t stay out for too long. We were forecast to hit 22C (71F) this afternoon, but we ended up reading 26C (78F). We will continue planting tomorrow. I think it is safe for us to start planting things that are supposed to wait until after the frost date. Looking at the long range forecast, we seem to have passed that point early.
Which reminds me. I was hoping to use the fire pit and burn barrel in the next while, so I checked the municipal website to see what the burn bad status was at. We are now on a total burn ban, which means no fire pits or burn barrels, either. That sure didn’t take long! And we still have standing water in the ditches and ponds. Ah, well.
The next few days are going to be very busy ones, as we get more things out into the gardens! I’m looking forward to using that soil auger to prep where we will be planting our giant sunflowers. :-) My mother also gave us some pumpkin seeds that were being given away for free at her local grocery store. They had tiny little envelopes, each with 3 seeds in them, and I had grabbed one, not realizing my mother had already included 2 packets in with a bag of stuff she’d prepared for me to take home. I don’t know what variety they are, but my mom tells me her town has annual pumpkin growing contests, so these might be a giant variety.
I think we’ll just plant them and see what we get! :-D
It should be interesting to see how our first year of gardening since we moved here will turn out. :-)
Yes! Finally! The weather is cooperating, and I was able to get our potatoes in!
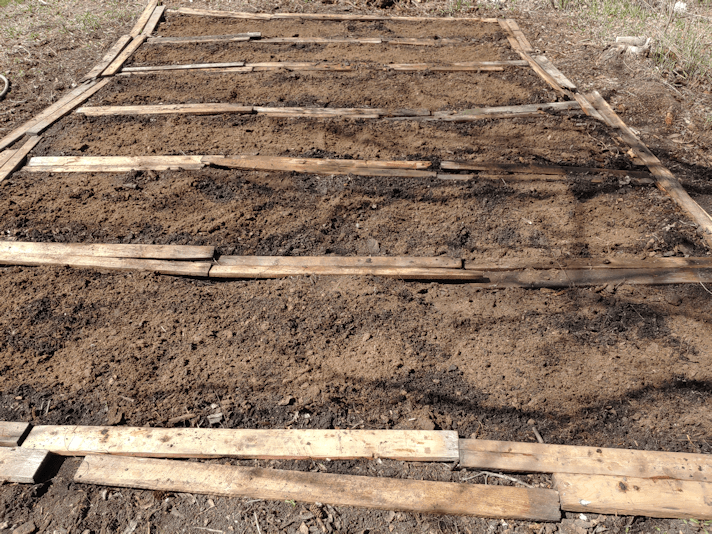
From a previous post, this is what I was starting with.
The frames are just there to mark out where the beds will be. As you can see, there’s a fair bit of grass and weeds. It has been a while since this area had any sort of gardening done in it.
While the no-till, no-dig method we’re using is something that can be done directly on the grass, I wanted to add at least some amendments, first.
I used a wheelbarrow to mix 1 bag of manure with a slightly larger volume of peat.
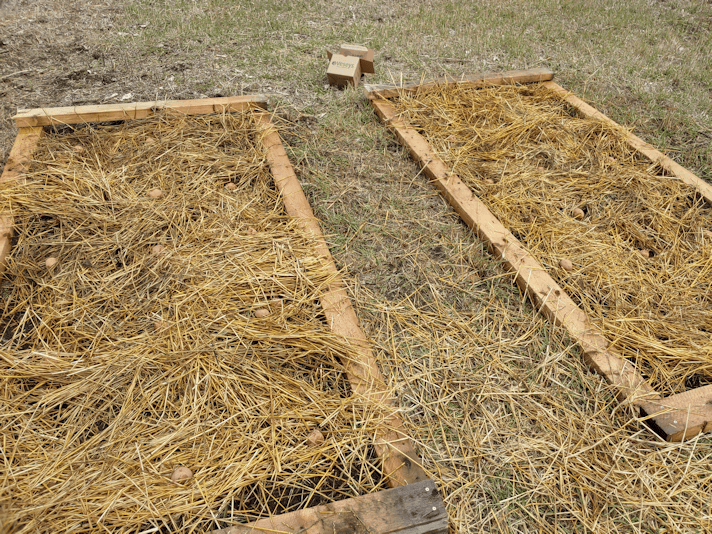
After spreading it out on one of the beds with a rake, I used another bag of manure mixed with peat on the second bed. I then topped them with a thin layer of straw, making sure to use the damp straw from the bottom of the bale, where it was starting to decompose already.
I had hoped to use some material from our own compost pile, but as I dug around, I did not find any usable material. I had tried to clean out some of the older compost, from before we moved here, but as I dug around, I found more stuff I missed. Twigs and branches are one thing. It looks like people had stared to use it for garbage, and I found pieces of wood that were probably used as support stakes, plastic trays from transplants, and even a piece of fabric. There was some well composted material, but it was so full of sticks, it was unusable.
I’m thinking we will need to start a completely new compost pile somewhere else. This one is looking like a write off. :-(
So, no compost of our own for the potato beds.
Once both beds were spread with the manure and peat mixture, I gave them a very thorough watering. Even though we’ve had rain for the past couple of days, the soil was still pretty dry.
After soaking the beds, I added the potatoes. Each box was 3 pounds of seed potatoes. That worked out to 3 rows of 6 potatoes (plus 1 extra, so I put 2 small ones together) in one bed, and 3 rows of 5 potatoes in the other.
After spreading the potatoes out, I went back to evenly space them and push them gently down to have contact with the ground. With one potato, I went to pick it up, but it wouldn’t move.
???
I tried again, but it was stuck to the ground.
Amazingly, in the space of a couple of minutes, this one potato that had direct contact with the ground and shot out a 3 or 4 inch root, with capillaries! I wish I’d made the effort to take off my muddy gloves to take a photo, but instead, I dug a quick hole in the ground where I wanted it to be and “transplanted” it. I still can’t believe a potato could grow a root so deep, so fast, even after seeing it with my own eyes!
The next step was to cover the potatoes with a deep layer of straw. Again, I used straw from the bottom of the bale, where more of it was already damp and some was starting to decompose already. I made a layer roughly a foot deep.
I then scattered more peat across the top, then tamped it all down with the back of the spade. This peat is as much to add some weight to prevent flyaway straw as it is to amend the soil.
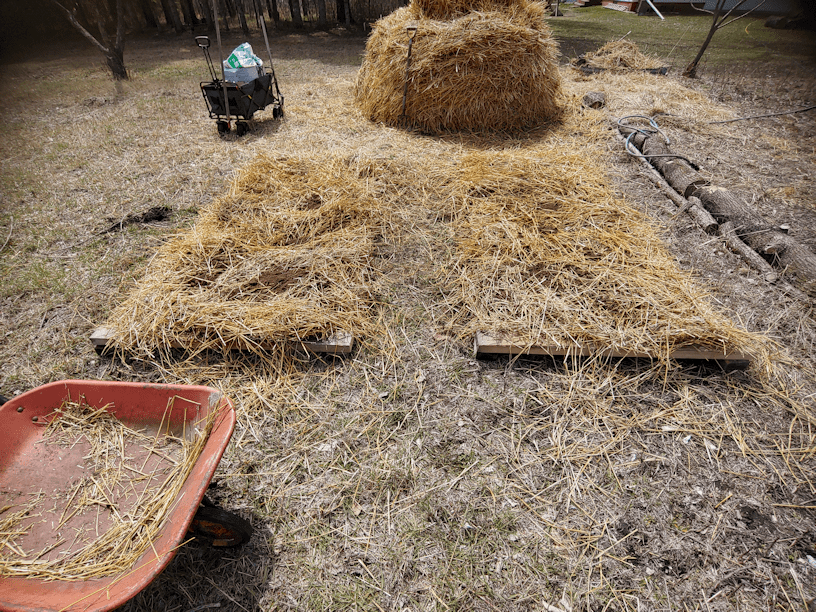
After the above photo was taken, I spent the next while thoroughly soaking the straw.
With this method, I saw recommendations of putting a layer of hay (which I don’t have, so I’m using straw) 2 feet deep. This is definitely not 2 feet deep. Over the next day or two, I plan to soak the straw some more, add another layer, then soak it again. After that, I should not need to water it much, if at all, for the rest of the growing season. I’ve heard people using this method say that no watering is needed at all, because the mulch maintains moisture as it breaks down, but I expect to need to water it at some point. It all depends on whether we have another drought this summer.
After the straw has started to settle and pack itself down, I will remove the frames to be used elsewhere.
Once this was done, I checked out the area we are planning to transplant our squash seedlings. We had covered this area last year with straw, then covered with tarps, to amend the soil and try to kill off the grass and weeds. We still ended up having to use Round Up. Even covered with tarps, weeds where pushing their way through the straw and lifting the pegged down tarps off the ground!
This is how the area looks now.
The black tarps in the back are there to warm up the mulched soil on that side a bit faster.
I could not do this here, last year. In fact, the soil was so hard, we were bending tent pegs while fastening down the tarps. While working on the potato beds next to this area, I would sometimes shove the fork or the spade into the ground to set it aside while I did the next thing, and ended up leaning them on the bale or wagon most of the time, because the ground is just so hard. Yet here, I could sink the fork’s tines their entire length down!
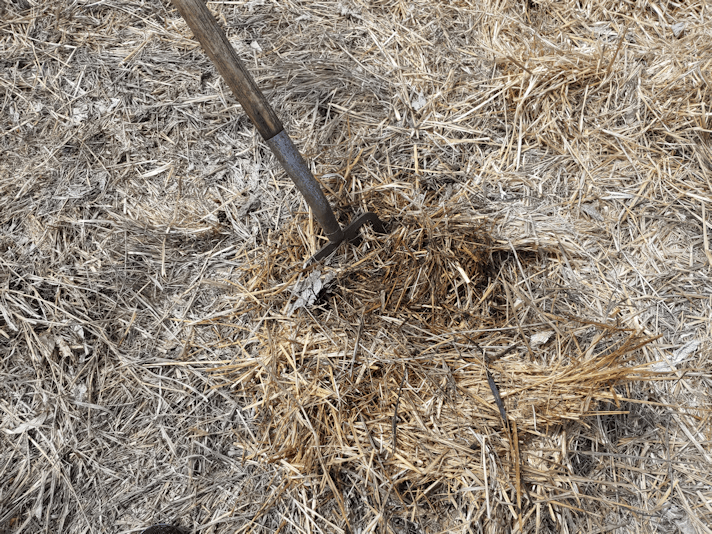
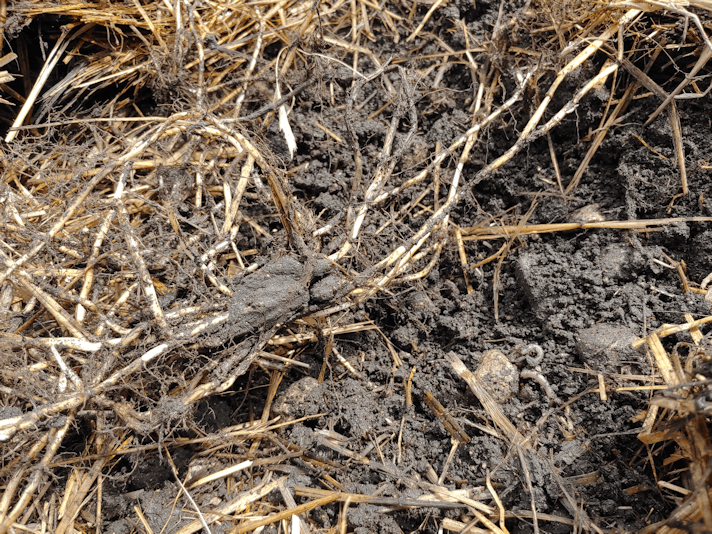
I pushed aside some of the mulch and dug around a bit. There are still a LOT of quack grass roots in there. I pulled some up, and you can see the bundle of roots in the above photo. The soil is quite “sticky”. The exciting thing was uncovering a worm. A very good sign!
Which means our efforts last year are paying off. The soil is already improving. When it’s time to transplant into the area, we will still be dealing with rocks and root systems, but the ground is now workable.
It’s amazing, what a mulch can do to improve soil conditions!
Welcome to my “Recommended” series of posts. These will be weekly – for now – posts about resources I have found over the past while that I found so excellent, I want to share them with you, my dear readers. 🙂 Whether or not I continue to post these, and how often they are posted, will depend on feedback. Please feel free to comment below, and if you have a favorite resource of your own, do share, and I will review them for possible future posts.
I hope you find these recommendations as useful and enjoyable as I have!
You’d think that, having grown up on this farm and with my family being subsistence farmers, I would already know how to garden here. And I guess I do, really. The thing is, I want to do things differently than my parents did. Some simple things, like trellising, which my parents never did. One of my jobs as a kid was to flip the rows of pea plants, so the sun could get at the other side. We also want to grow new things I have no experience in, use no-till methods my parents never used, and eventually have raised beds.
So basically, I’m learning how to garden, all over again.
Part of this learning curve is figuring out how to grow what we want in our climate zone, which is a zone 3. It takes extra measures to produce food in our short growing season. We can’t even take advantage of any urban heat island effects.
With that in mind, I have been looking up resources for cold climate gardening. In my searches, I have found many sites and YouTube channels dedicated to cold climate gardening. How wonderful, I would think, as I eagerly began to explore them.
Right up until I discovered that these “cold climate” gardeners were in…
Zone 5.
Really?
Just about everything I look at that I’m interested in growing is rated to zone 5. How is zone 5 considered a cold climate?
Okay, okay. I realize that these sites are almost all based in the US, and northern states are rightfully considered cold climates compared to the southern states. But I’m in frikkin’ central Canada. To us, zone 5 is almost tropical. :-D
All joking aside, it did make my searches frustrating. It turns out there just aren’t a lot of active Canadian gardening resources out there.
Maritime Gardening is run by Greg Auton, in Nova Scotia. It’s basically one person and 2,500 square feet of back yard garden! He’s been making these videos since 2016.
The only down side?
It’s still a zone 5 climate region… but it’s far closer to our situation than anything else I’ve found! There are lots of videos on how to lengthen the outdoor growing season, like getting the soil to thaw out faster, or dealing with high winds.
There are also a lot of videos on specific crops, such as garlic, onions, potatoes, and strawberries, and techniques, such as no-till gardening, using cold frames, different types of mulches, and so on.
There are videos on planning out your garden spaces, dealing with weeds and insect problems, saving seeds, harvesting and preserving.
There are even cooking videos, fermentation videos, videos on how to make tool handles, and so much more.
There is just SO much to learn from here! I highly recommend this channel as a resource.