Yes! Finally! The weather is cooperating, and I was able to get our potatoes in!
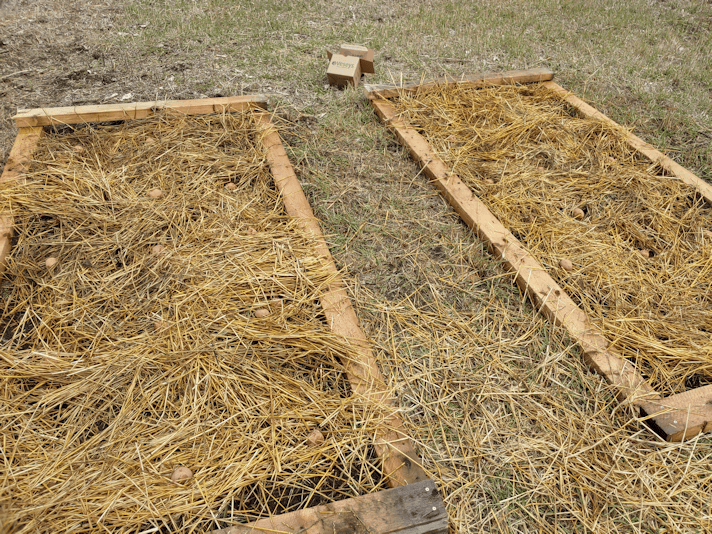
From a previous post, this is what I was starting with.

The frames are just there to mark out where the beds will be. As you can see, there’s a fair bit of grass and weeds. It has been a while since this area had any sort of gardening done in it.
While the no-till, no-dig method we’re using is something that can be done directly on the grass, I wanted to add at least some amendments, first.

I used a wheelbarrow to mix 1 bag of manure with a slightly larger volume of peat.

After spreading it out on one of the beds with a rake, I used another bag of manure mixed with peat on the second bed. I then topped them with a thin layer of straw, making sure to use the damp straw from the bottom of the bale, where it was starting to decompose already.
I had hoped to use some material from our own compost pile, but as I dug around, I did not find any usable material. I had tried to clean out some of the older compost, from before we moved here, but as I dug around, I found more stuff I missed. Twigs and branches are one thing. It looks like people had stared to use it for garbage, and I found pieces of wood that were probably used as support stakes, plastic trays from transplants, and even a piece of fabric. There was some well composted material, but it was so full of sticks, it was unusable.
I’m thinking we will need to start a completely new compost pile somewhere else. This one is looking like a write off. :-(
So, no compost of our own for the potato beds.
Once both beds were spread with the manure and peat mixture, I gave them a very thorough watering. Even though we’ve had rain for the past couple of days, the soil was still pretty dry.
After soaking the beds, I added the potatoes. Each box was 3 pounds of seed potatoes. That worked out to 3 rows of 6 potatoes (plus 1 extra, so I put 2 small ones together) in one bed, and 3 rows of 5 potatoes in the other.
After spreading the potatoes out, I went back to evenly space them and push them gently down to have contact with the ground. With one potato, I went to pick it up, but it wouldn’t move.
???
I tried again, but it was stuck to the ground.
Amazingly, in the space of a couple of minutes, this one potato that had direct contact with the ground and shot out a 3 or 4 inch root, with capillaries! I wish I’d made the effort to take off my muddy gloves to take a photo, but instead, I dug a quick hole in the ground where I wanted it to be and “transplanted” it. I still can’t believe a potato could grow a root so deep, so fast, even after seeing it with my own eyes!

The next step was to cover the potatoes with a deep layer of straw. Again, I used straw from the bottom of the bale, where more of it was already damp and some was starting to decompose already. I made a layer roughly a foot deep.
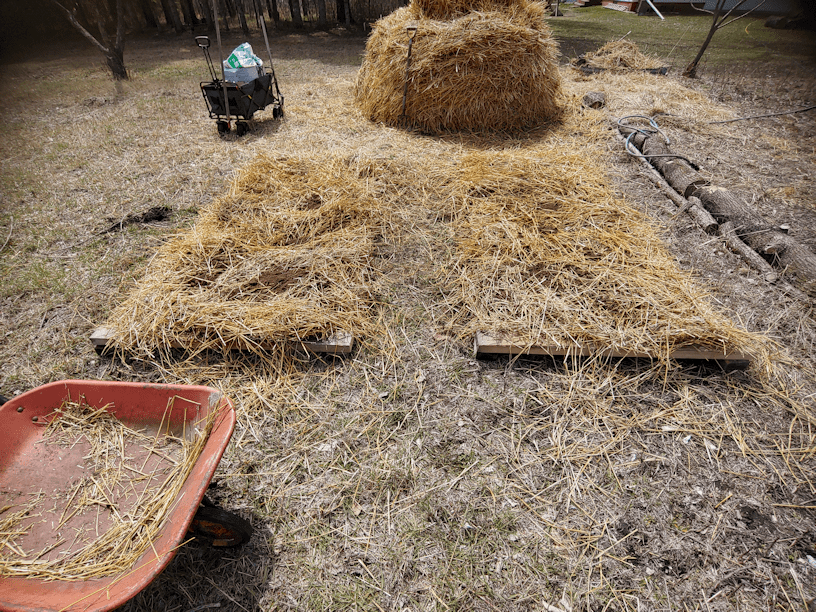
I then scattered more peat across the top, then tamped it all down with the back of the spade. This peat is as much to add some weight to prevent flyaway straw as it is to amend the soil.
After the above photo was taken, I spent the next while thoroughly soaking the straw.
With this method, I saw recommendations of putting a layer of hay (which I don’t have, so I’m using straw) 2 feet deep. This is definitely not 2 feet deep. Over the next day or two, I plan to soak the straw some more, add another layer, then soak it again. After that, I should not need to water it much, if at all, for the rest of the growing season. I’ve heard people using this method say that no watering is needed at all, because the mulch maintains moisture as it breaks down, but I expect to need to water it at some point. It all depends on whether we have another drought this summer.
After the straw has started to settle and pack itself down, I will remove the frames to be used elsewhere.
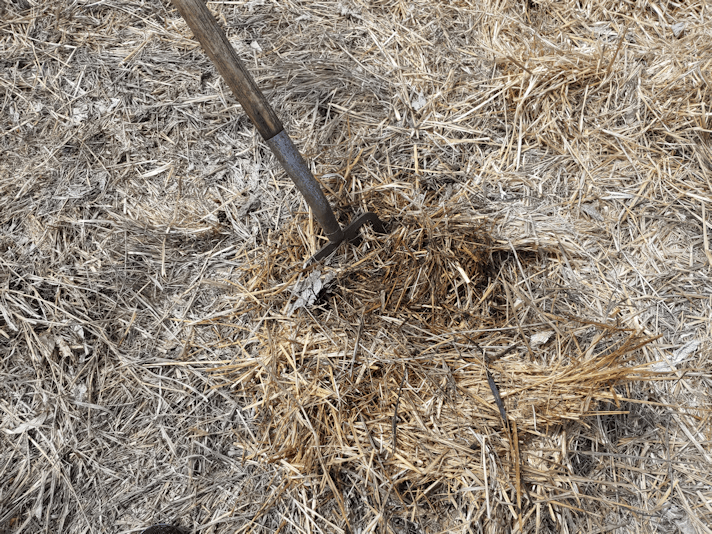
Once this was done, I checked out the area we are planning to transplant our squash seedlings. We had covered this area last year with straw, then covered with tarps, to amend the soil and try to kill off the grass and weeds. We still ended up having to use Round Up. Even covered with tarps, weeds where pushing their way through the straw and lifting the pegged down tarps off the ground!
This is how the area looks now.

The black tarps in the back are there to warm up the mulched soil on that side a bit faster.
I could not do this here, last year. In fact, the soil was so hard, we were bending tent pegs while fastening down the tarps. While working on the potato beds next to this area, I would sometimes shove the fork or the spade into the ground to set it aside while I did the next thing, and ended up leaning them on the bale or wagon most of the time, because the ground is just so hard. Yet here, I could sink the fork’s tines their entire length down!
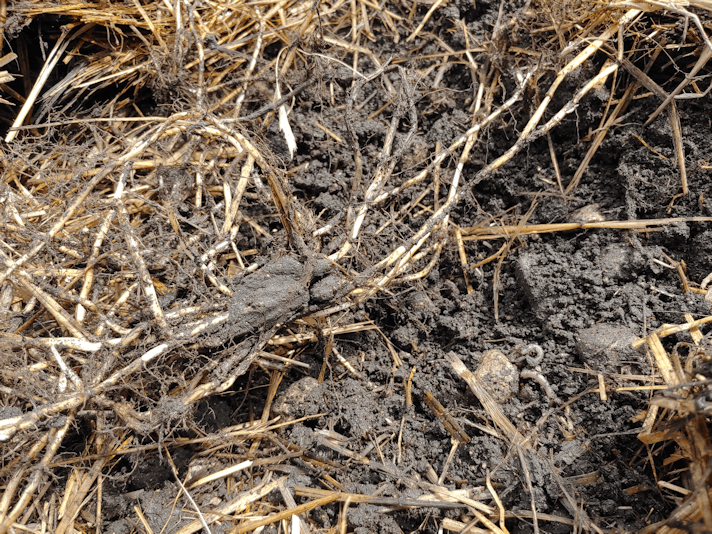
I pushed aside some of the mulch and dug around a bit. There are still a LOT of quack grass roots in there. I pulled some up, and you can see the bundle of roots in the above photo. The soil is quite “sticky”. The exciting thing was uncovering a worm. A very good sign!
Which means our efforts last year are paying off. The soil is already improving. When it’s time to transplant into the area, we will still be dealing with rocks and root systems, but the ground is now workable.
It’s amazing, what a mulch can do to improve soil conditions!
The Re-Farmer


Pingback: First! | The Re-Farmer
Pingback: Fall cover, and working out a problem | The Re-Farmer
Pingback: First year gardens: what worked, what didn’t | The Re-Farmer
Pingback: Anniversary | The Re-Farmer