Our 2022 garden: first spinach sown, and onions transplanted

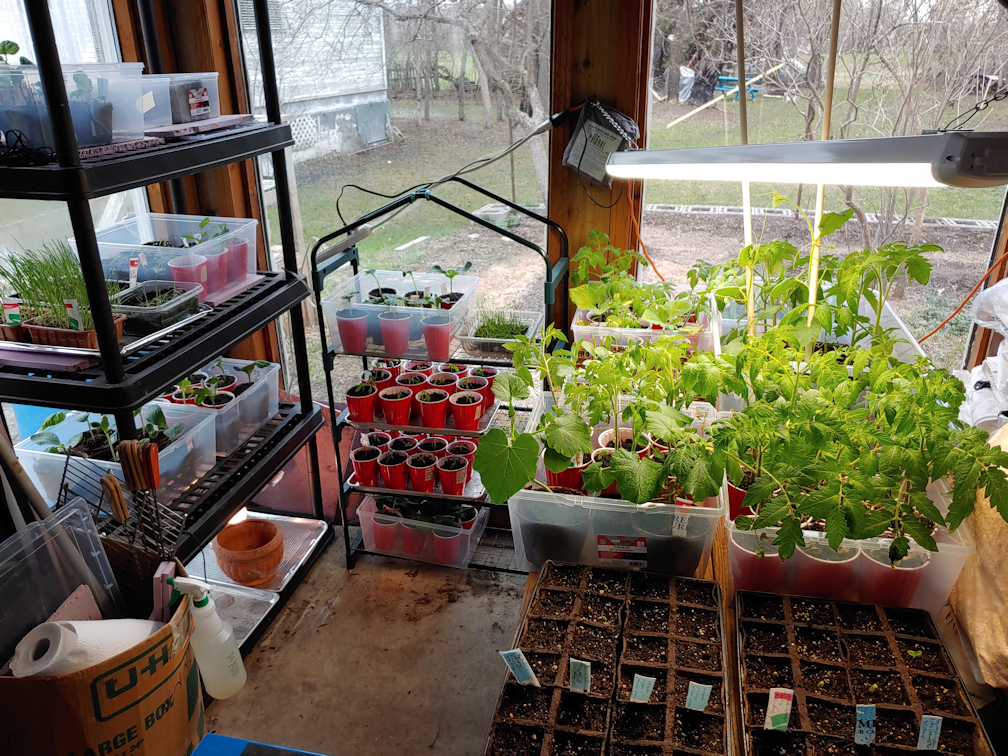
It was a bit cooler and overcast this morning, but still pleasant enough to get the plants outside for a couple of hours.

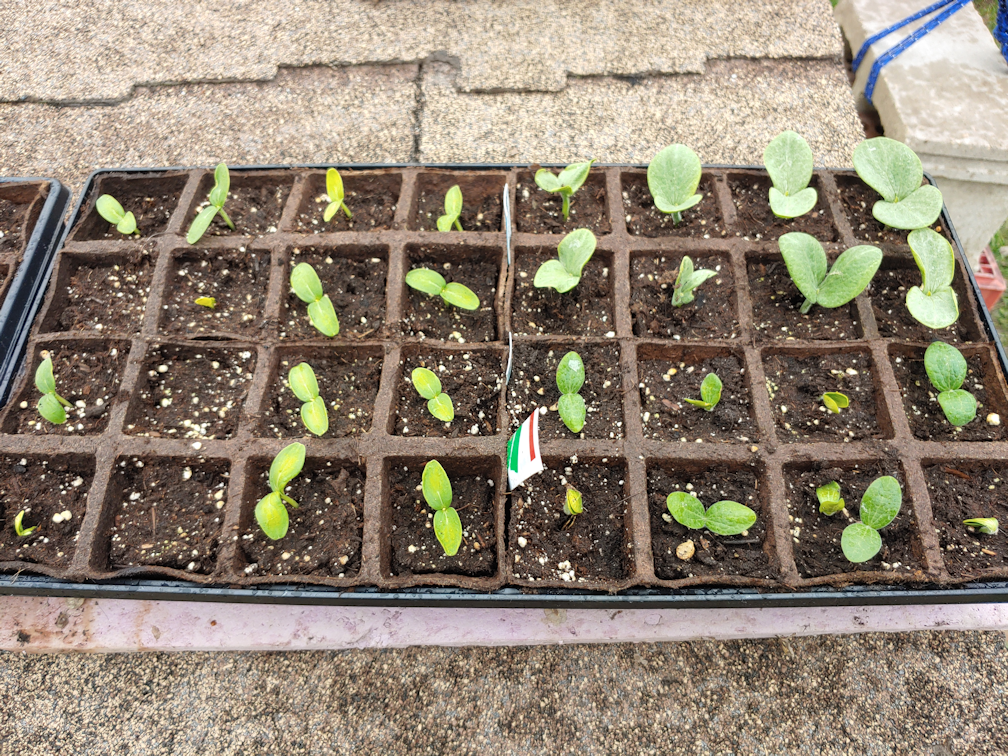
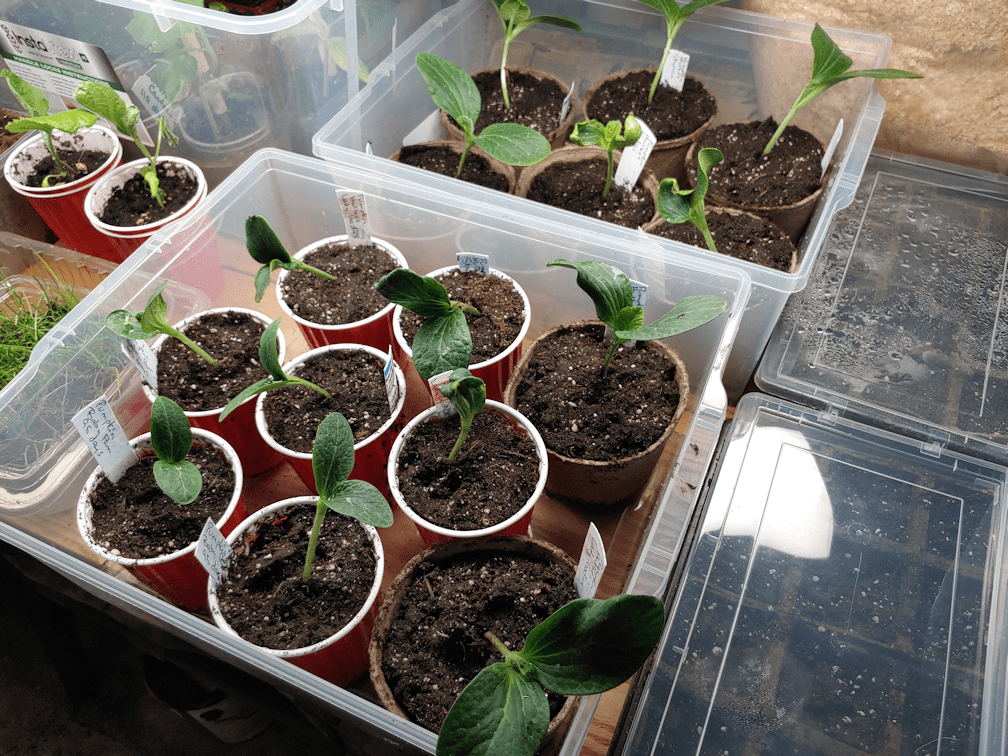
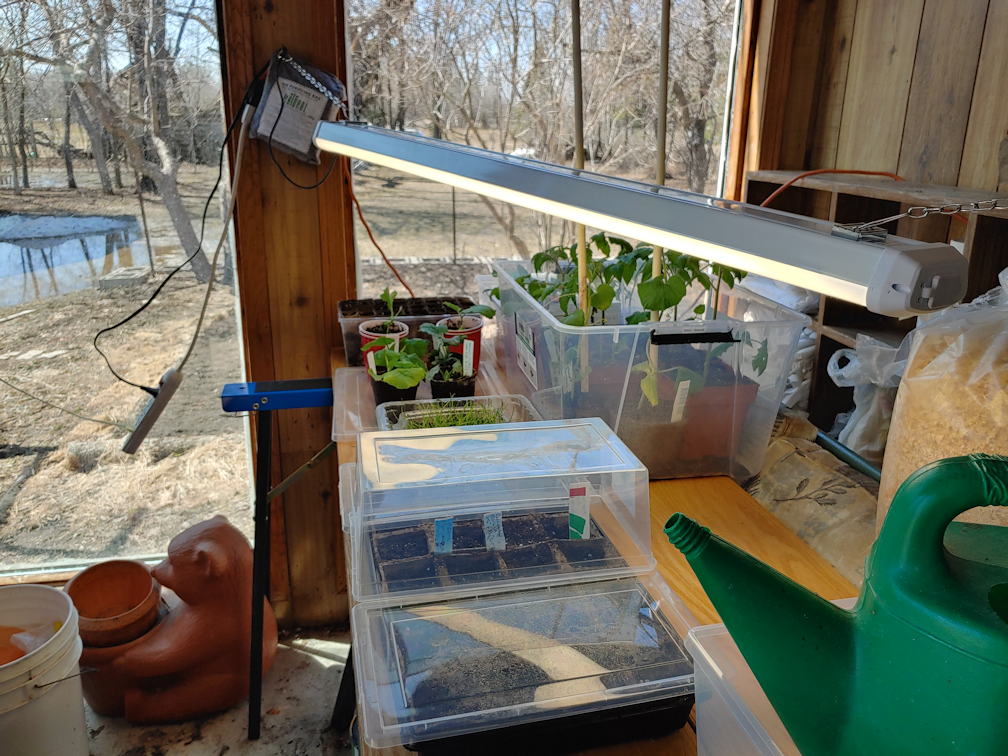
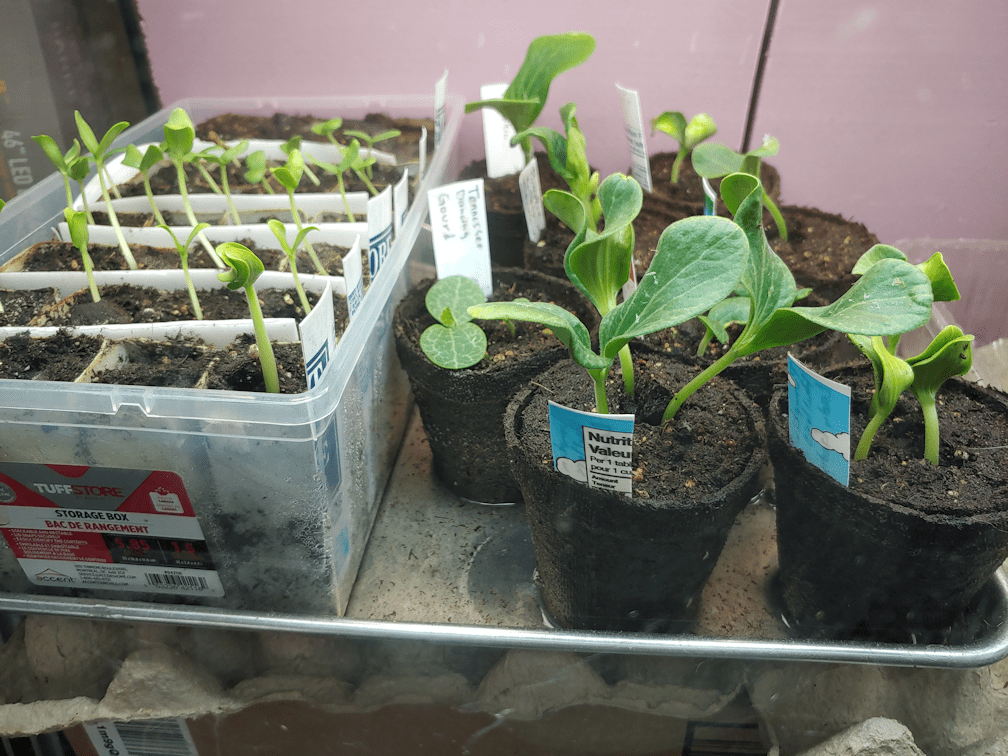
I am really happy with the newest seedlings. This tray has the cucumbers in the left half, with the Teddy and Red Kuri winter squash on the right. It took so long for the winter squash to germinate, I wasn’t sure they’d make it, but we have 100% gemination!

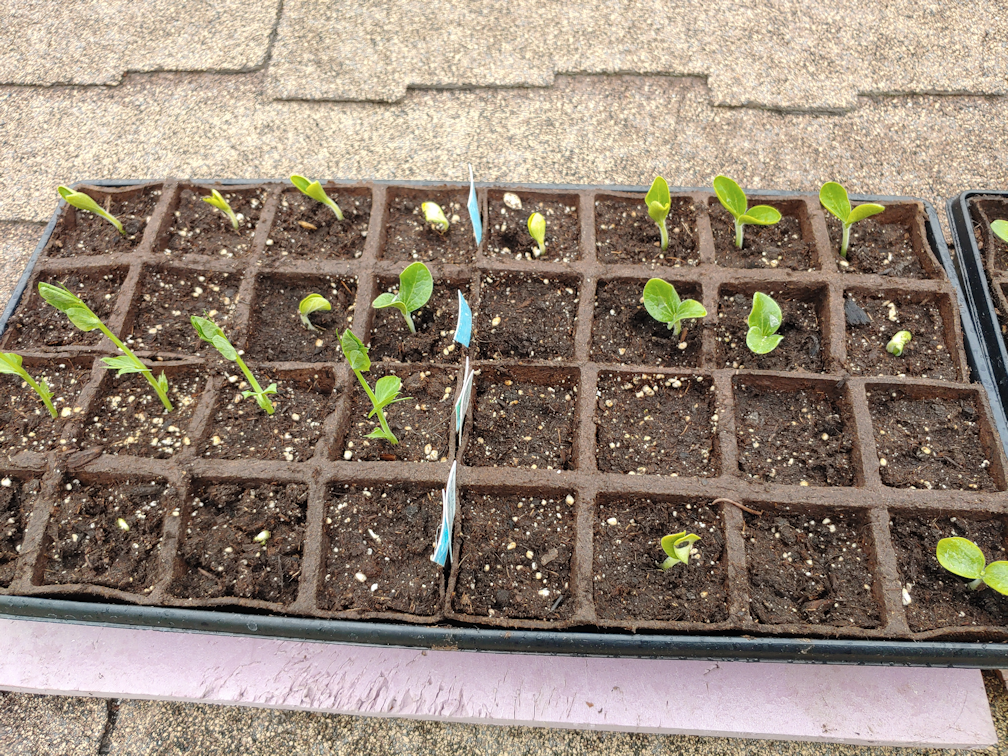
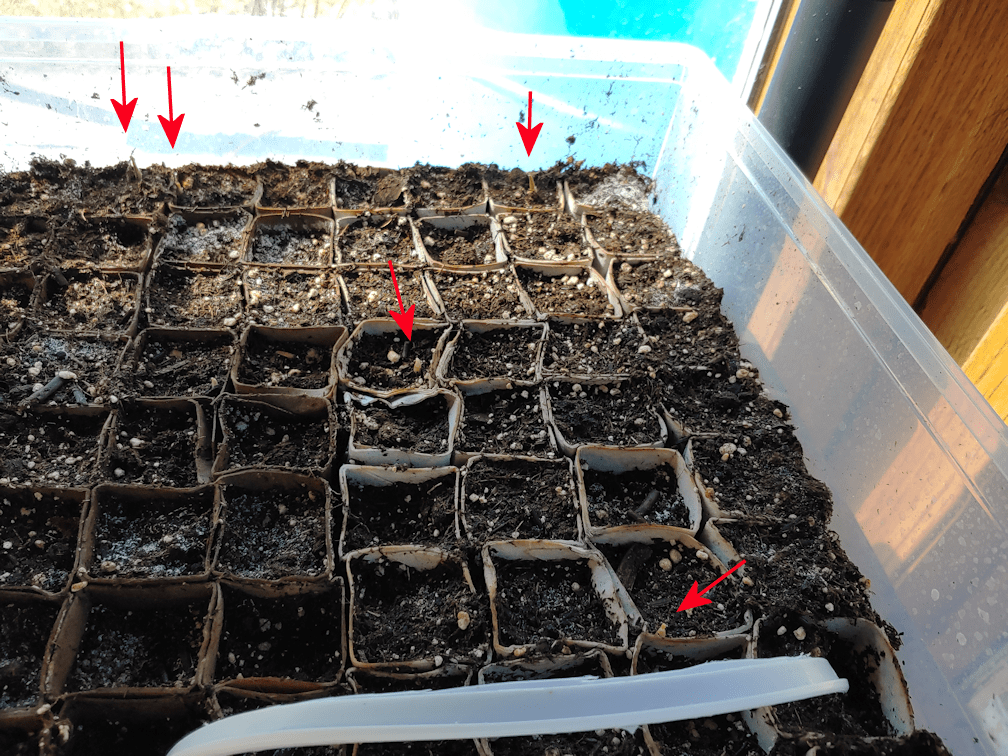
The purple peas in this tray are getting nice and big. The summer squash in the other cells took a long time to germinate, too, but they seemed to get a boost after I put the warming mat under them. It’s hard to see, but even the green zucchini is finally germinating, next to the peas. I thought the Magda squash had started to germinate, but not quite yet. We had less success with those the last 2 years we planted them, too. Our first year, we had only 2 surviving plants. Last year, there was just the one. Magda squash just seems to have a harder time of it.

So far, only 2 of the yellow zucchini have germinated. Last year, we had some germinate, but when they started producing fruit, they were green, and we no yellow zucchini at all. I’m hoping that won’t happen again, this year!

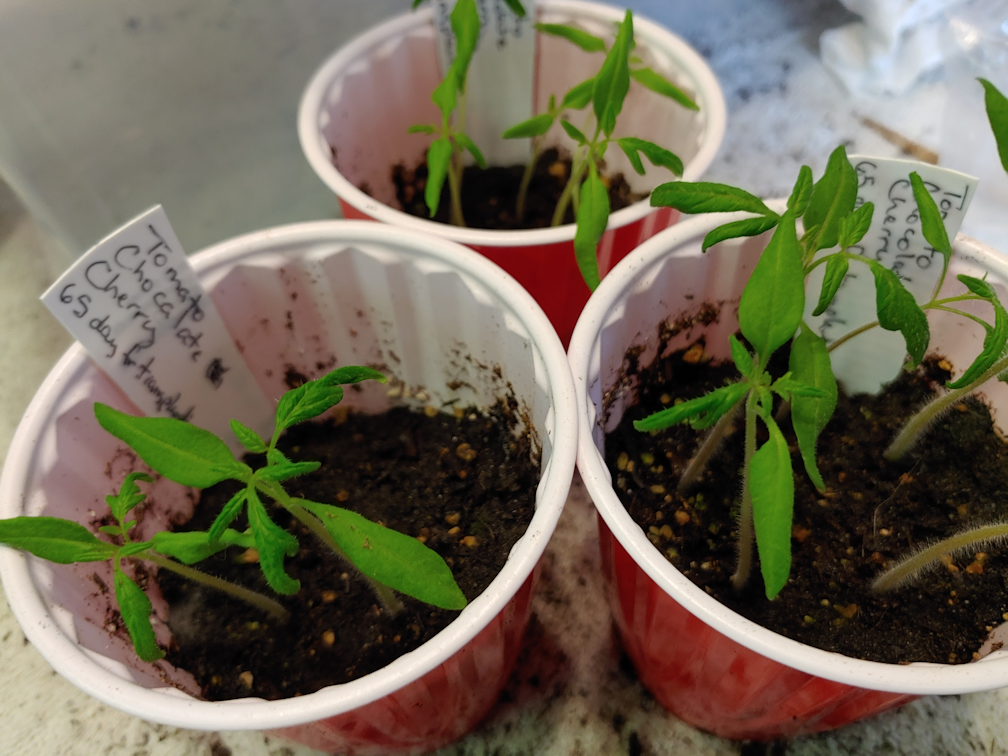
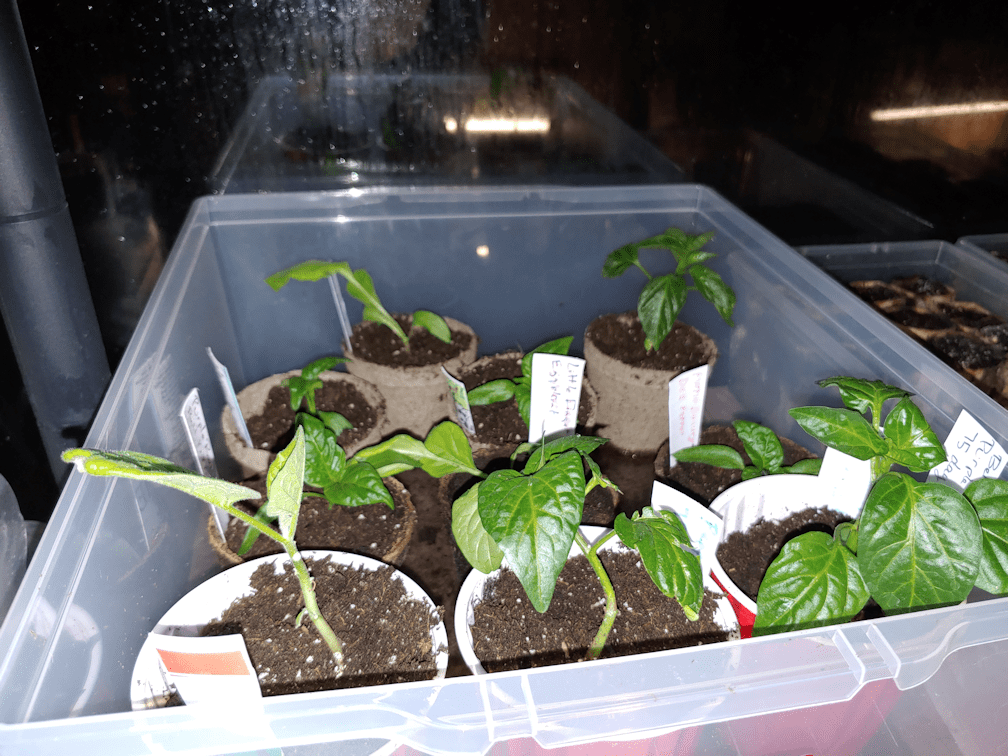
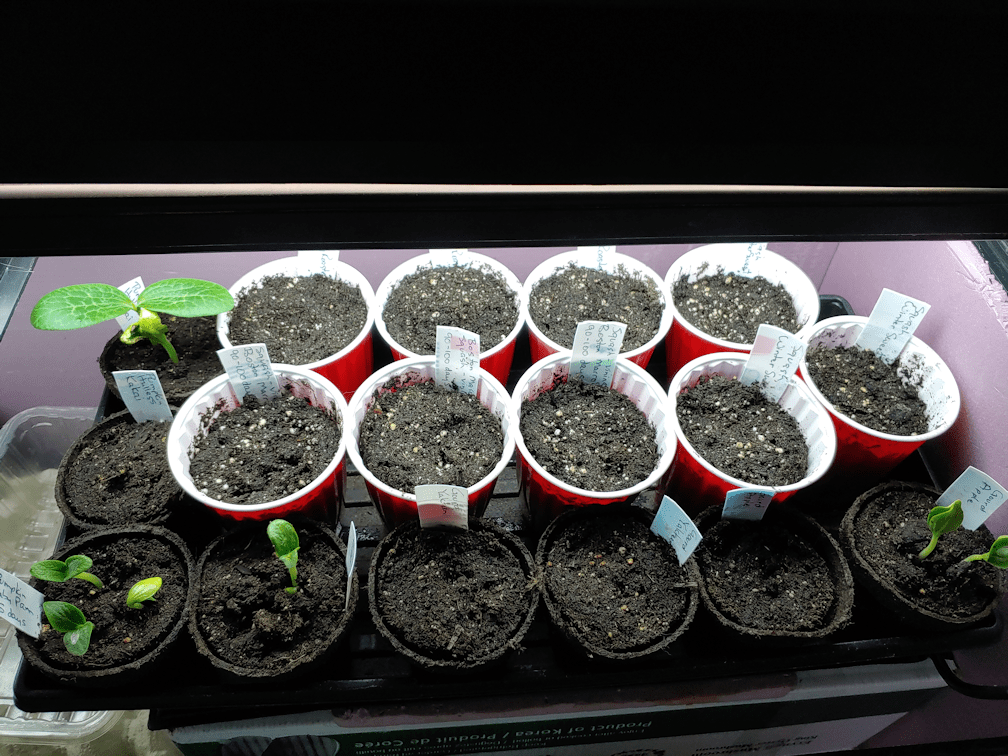
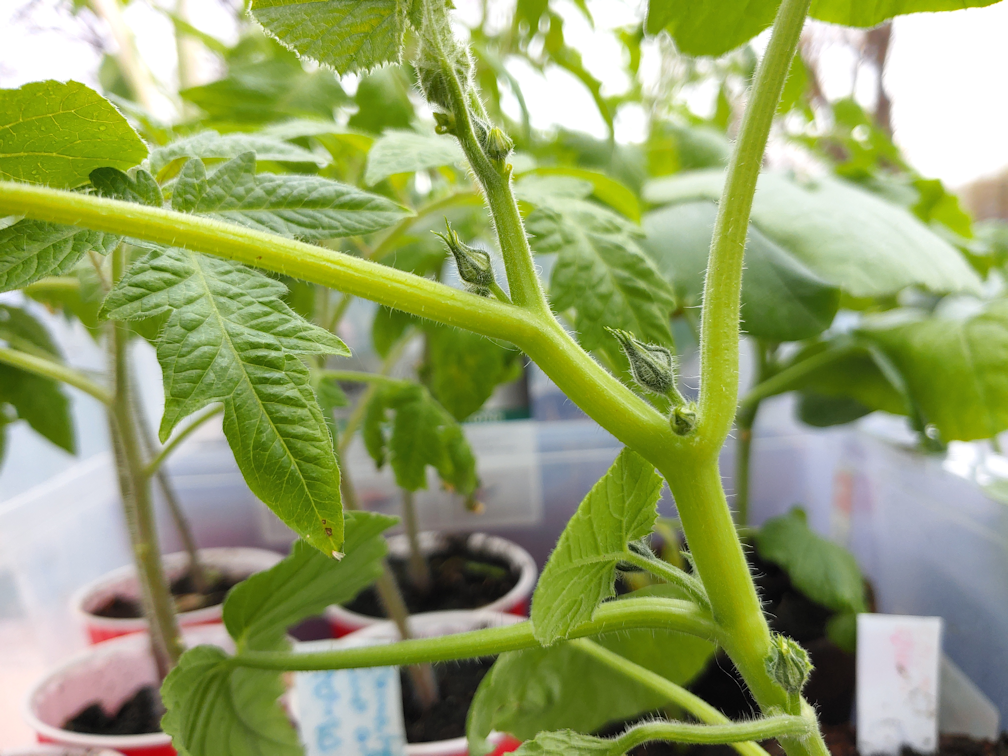
The transplants seem to be quite liking their time outdoors, and even the newest little tomatoes in the foreground are looking generally robust.

We have 3 Crespo squash – and they are budding! Would you look at that!

I considered pinching them off, but these first flowers would be all male flowers. The next batch of buds should be both male and female. So I’m thinking to just leave them? I don’t know. There is very little information out there on how to grow Crespo squash. They do seem to be very enthusiastic growers!

While moving the blooming Wonderberry in and out of the sun room, we have been brushing the 3 plants against each other, in hopes to pollinate them, just in case. I don’t know how if they are self pollinating or not. Nowhere I’ve looked about them even mentions pollinating.

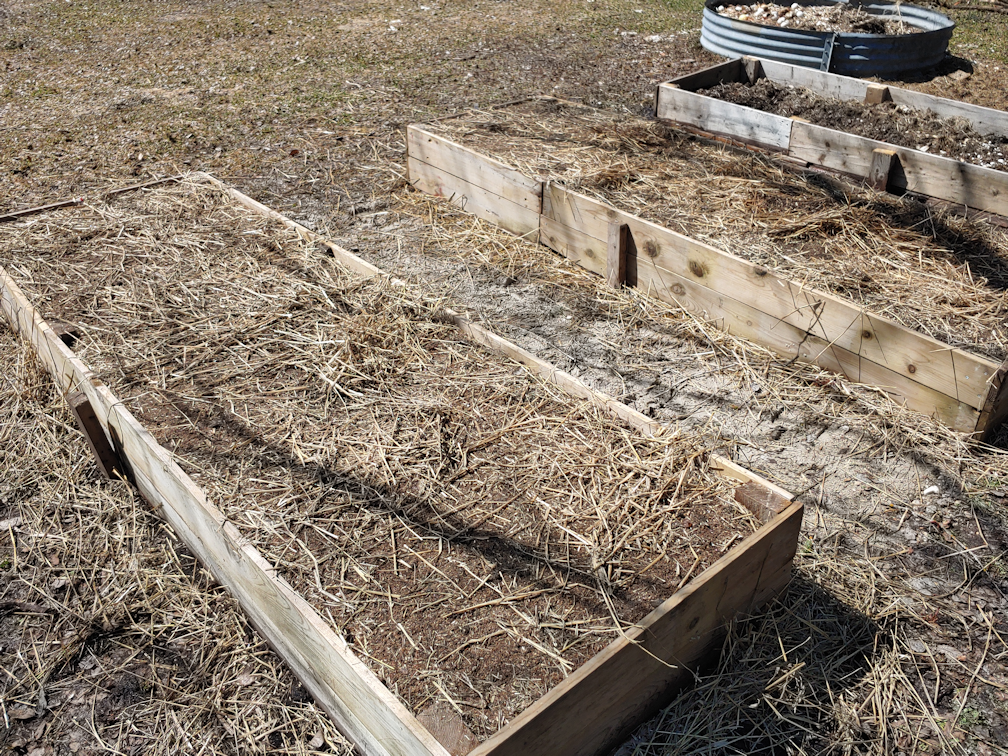
The transplants were left out for 2 hours today, which gave me time to work on our very first direct sowing – and transplanting – in the high raised bed.

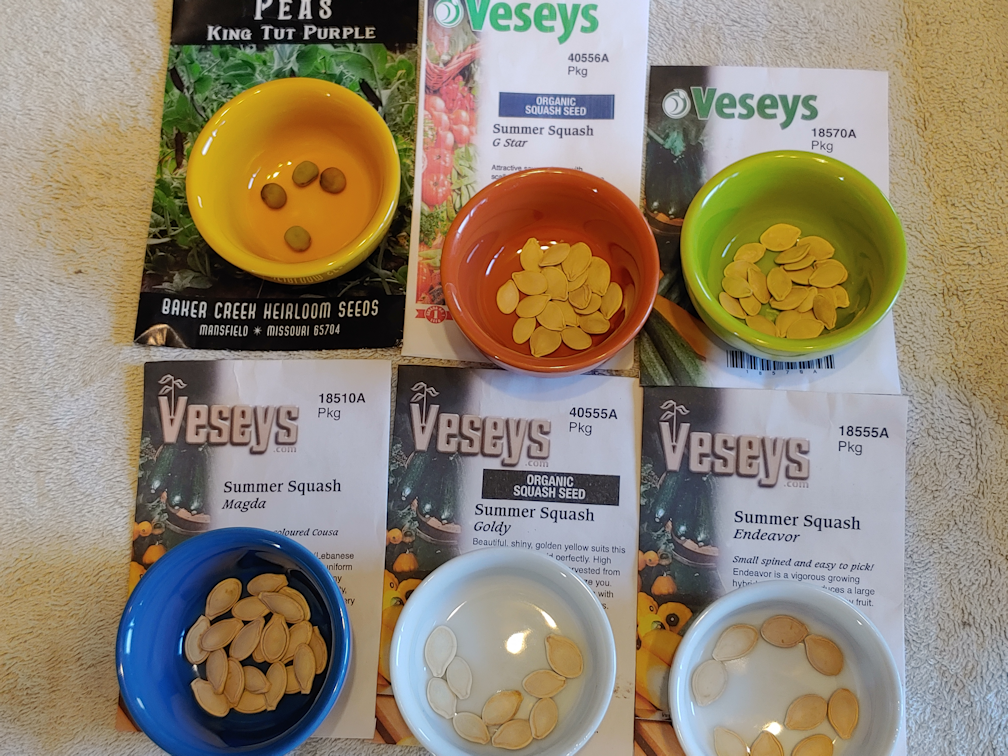
The first thing to do was dig trenches through the wood chip mulch, so that things could be seeded/planted into the soil beneath. We have three varieties of spinach seeds from last year, and for this bed, I chose Lakeside, which is the fastest maturing variety of the three. The tray of onions I grabbed are the red onions, Tropeana Lunga, which should look like this when they mature…

This image belongs to Heritage Harvest Seed. You can see what else we ordered with these, here.

By planting the onions around the spinach, they should help with keeping away harmful insects, and maybe even keep hungry critters away. The high raised bed is buffet height for deer, though, so we will be covering them later.

There is space to do a second planting of spinach in two weeks, which will also finish off the seeds we’ve got left of this variety.

The largest Tropeana Lunga seedlings filled the two outside rows, but there were still a few tiny seedlings left. The size that would be considered not worth planting. I hate to just toss seedlings, though, so I ended up sticking them in the soil at the base of the raised bed on the north end. When this was a low raised bed, it was quite a bit longer, so the soil is softer on that end. If they take, great. If not, that’s okay, too. We don’t have a lot of this variety, so I’m hoping to be able to overwinter a couple of bulbs to go to seed next year.

I was left with nice, soft potting soil in the tray the onions seedlings were growing in, so I used that to gently top the spinach seeds, and put just a little around each onion plant, more to keep the wood chips from falling onto them than anything else.

I have to say, I LOVE the high raised bed to plant in! It was completely pain free, with no strain on my joints. Well. I suppose that doesn’t include my arthritic fingers, but I didn’t even notice pain in my hands, either. It took me less than half an hour to plant into this bed

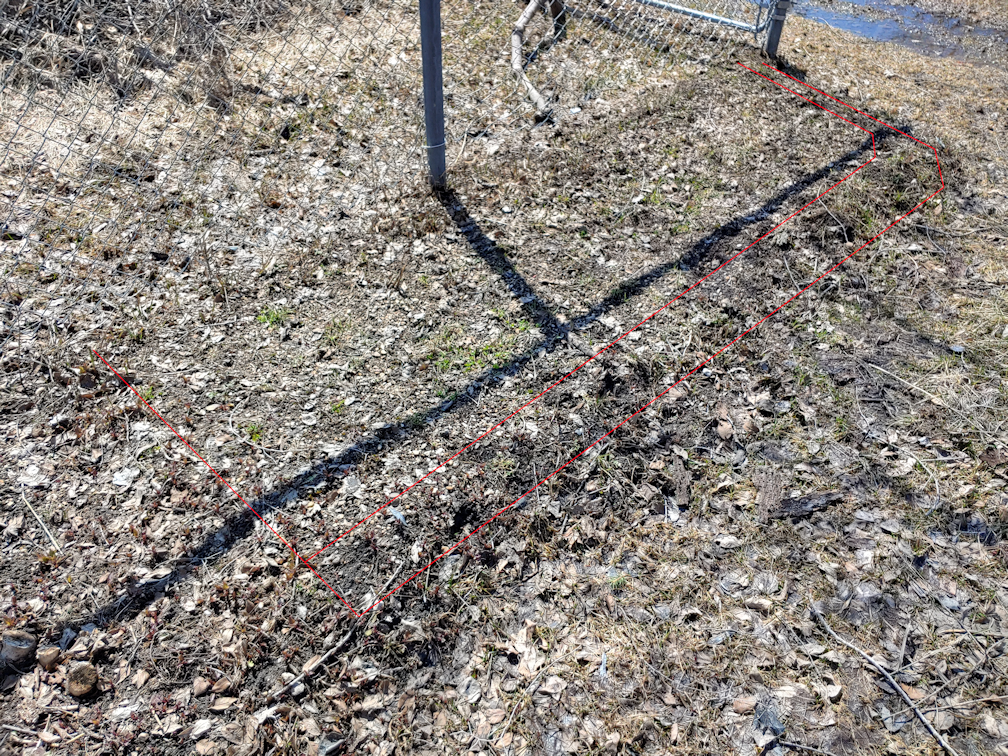
I didn’t bother watering these, since it was already starting to rain by the time I was finishing up. It’s been raining off an on, ever since. My daughter and I got a bit damp when we headed out later on, to figure out exactly where to plant our tree order when it comes in. With 30 silver bison berry to plant, those were the ones we need to figure out the most. They should be planted 3-4 ft apart. Since we are doing these as a privacy hedge, we will planting them 3 feet apart, with most of them along the east end of the garden area, leaving a lane just wide enough to drive through, if necessary, between them and the fence line. Taking into account where the phone line is buried, we’ll be able to plant two staggered rows of 10, though as we get closer to the spruce grove, we many need to jump the rows closer to the fence itself, to keep that driving lane open. There is a branch pile that will be in the way of any lane we leave open, but we’ll still be able to plant around it.

We’ve got 5 sea buckthorn that will be planted nearer the north fence line, to close a gap in the lilac hedge. Any remaining bison berry can also be planted along the lilac hedge, and still keep the lane over the telephone wire clear. This will leave a gap in the privacy hedge, once they’ve grown to full size, that will need fencing or a gate to close it off from deer.

The Korean pine are a whole other issue. Originally, I wanted to plant them in the space between the north side of the spruce grove, and the crab apple trees. These, however, have an 18 foot spread. At their mature size, they would completely fill that space, and we need at least some of it to be kept open to drive through. The alternative was along the north side, which would make an excellent wind break, but with that 18 foot spread and the lilac hedge, we’d be planting them on top of the phone line. Not going to happen.

Which means we’ll have to plant them in the outer yard.

Just past the fence on west side, which has a gate that leads into the garden, there is a space where we can plant 2 of them. Then there is the gate to the secondary driveway – our “emergency exit”, if you will. It was through here that one of our truck loads of garden soil was delivered.

The remaining 7 seedlings will need to be planted on the other side of that back gate, along where there is already a couple of rows of spruces, with some willows at the south end. If we plant them 18 feet apart (we might go with 16 feet), we will have a row of seedlings matching the length of the existing shelter belt trees.

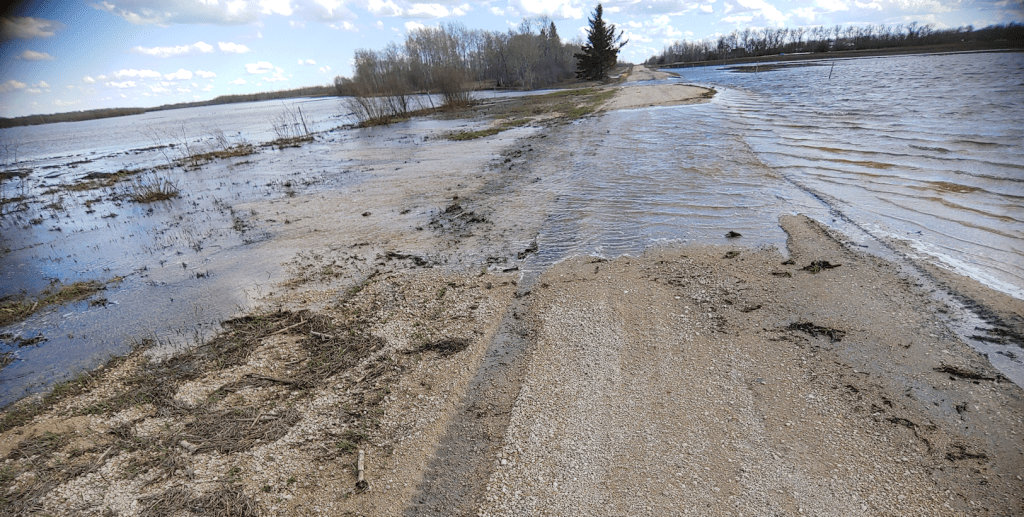
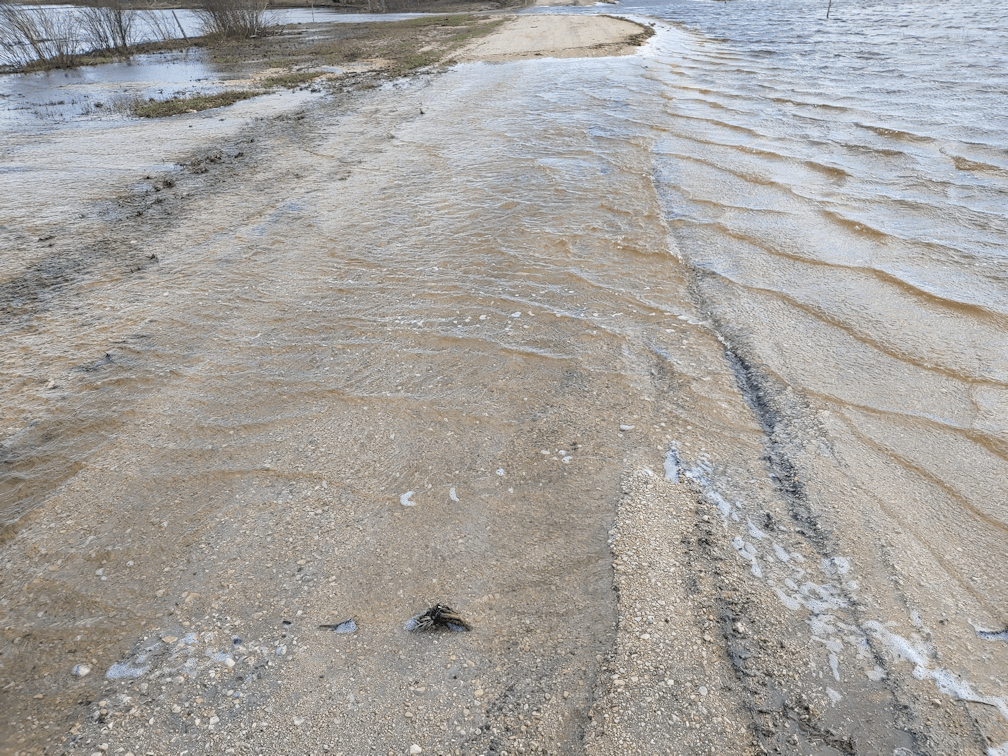
The only problem with this is that the south end is currently under water.

Still, knowing that this is a low spot will help. We can make sure to basically build things up a bit, so that the seedlings will stay above water during spring melt.

Then we’ll have to make sure to put something over them to protect them from being eaten. I don’t know that deer would eat Korean pine, but they could certainly damage them, just by walking over them.

We have not yet received a shipping notice for the trees, but with so many holes to dig, the earlier we get started, the better. Hopefully, by the time they do arrive, we’ll be ready and can plant them right away.

Oh, I just double checked my order! We’re not getting 9 Korean pine. We’re getting 6.

Which means we won’t be digging holes in water, after all. :-D

It’s going to feel weird getting our little 2 yr old plugs and planting them so far apart. Especially since they will grow very slowly for the next 3 years. Which is exactly how my mother ended up planting so many trees way too close together! :-D

Oh, my goodness. I just checked the short range weather forecast, and it’s changed yet again. We’re supposed to get more rain over the next couple of days, then for the two days after that, we’re supposed to get a mix of rain and snow!

What I planted in the high raised bed should be cold hardy enough to handle that, but we might cover it anywhere, just in case, at least for the night.

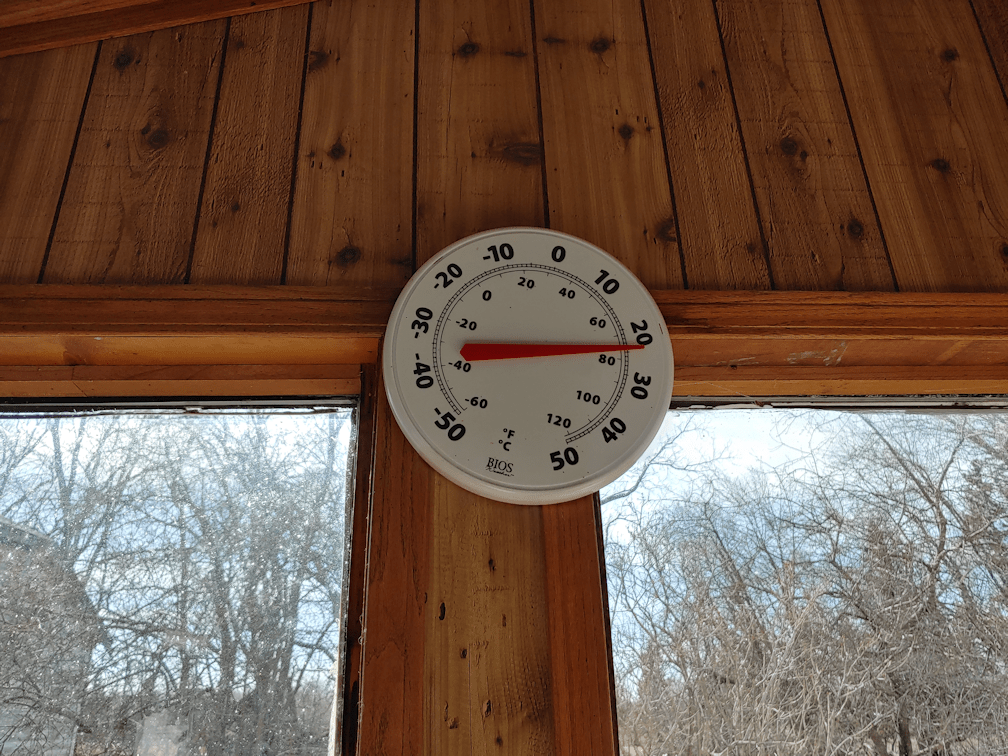
Last year, May was a very warm month. On this exact day last year, we had a new record high of 30C/86F. The record low for today, -4C/24F, was set in 2002.

After a long, cold winter, it seems we’re getting a wet cold spring.

Still, there are things we can plant. I just hope things warm up decently in June, so we can get the warm weather transplants in!

The Re-Farmer

Recommended: RED Gardens

Welcome to my second “Recommended” series. Here, you’ll find various sites and channels that I’ve been enjoying and wanted to share with you. With so many people currently looking to find ways to be more self sufficient or prepared for emergencies, that will be the focus for most of these, but I’ll also be adding a few that are just plain fun. Please feel free to leave a comment or make your own recommendation. I hope you enjoy these!

We are back on a gardening theme this time, but with a major difference. RED Gardens: Research Education and Development Gardens.

And WOW what a set up they have! I’ll just quote a portion from their About page (where you will also find links to their other social media and Patreon pages).

Based on the explorations and discoveries of a series of food growing spaces, located in the Cloughjordan Ecovillage, Tipperary, Ireland. This RED Gardens Project (Research, Education and Development) consists of 6 family scale gardens each one 100m2 (1000sqf) and following a different methodology, or approach, to growing vegetables. There is also a larger Black Plot, of about 1000m2 (1/4 acre) which is exploring issues and possibilities of an intermediate scale growing space.

The YouTube channel has been around since 2016. As you can imagine, there is a wealth of information available!

This early video explains the different types of gardens they are testing on, plus there is a Black Plot.

There are a number of videos about specific crops, comparing how they did in the different growing environments. One of their most extreme years was growing 54 tomatoes varieties.

No, that’s not a typo. Fifty four.

No, they don’t grow that many varieties of tomatoes anymore!

Other videos comparing things like climbing beans, pole beans, cauliflower, carrots, potatoes, eggplant and more. They even tried wheat.

Interestingly, this was a mix of wheat, not just one type. This plot produced enough to bake a surprising amount of bread. I like how he breaks down the math and calculated how much grain would need to be grown to produce enough flour to make X number of loves per week for a year. One thing I’ve never seen before is burying old, stale bread for trench composting.

And yes, bread was made with flour from this wheat.

How the bread was baked is really something to see! A multi-day process.

Their composting system has evolved quite a bit, over the years, which he explains in this video. I appreciate how he goes into dealing with their rat issues, too.

I think I’ll stick to my “just throw it on a heap” method. We end up burying our compostables in garden beds, anyhow.

Pests are another topic they cover, as well as things like different ways to water, making biochar, saving seeds, temporary microclimates, and so much more.

I like the yearly update videos.

It’s really impressive to see how things have worked out over the years, what was changed and why.

The goal at RED Gardens is to try different things, test and compare, collect and analyze the data, then make that information available to anyone who wants to grow their own food, as best they can, for their own circumstances, with the aide of the data provided. Most of us aren’t in a position to try so many varieties, or use so many different techniques. Having this data, even if growing in a different climate zone, can still be very useful.

And I admit – I kinda geek out every time I watch one of their videos.

Whether you’re a new gardener or an experienced on, I think you’ll find loads of great information at RED Gardens!

The Re-Farmer

Our 2022 garden: potting up, moving things – and good news!

First, I’ll start with the good news.

While I was working on the transplants, we got a call from the pharmacy delivery driver. I headed out to meet him at the washed out road, opening the gate before starting the van and heading out.

I was backing out of the garage, when a car pulled into our driveway!

He not only got through, he had no issues at all. The washed out road has been repaired! That means we can now reach the highway and go wherever we need.

I was very happy to hear this. Tomorrow, I’m going to go get the mail! LOL

Oh, the things that are exciting when you’re old and boring. ;-)

My main goal for today was to pot up the newest tomatoes, and move things to the sun room.

I started with the Yellow Pear tomatoes, which are in the image on the left. Of those, there was one seedling that I pulled out, as it was not suitable for transplanting. The Chocolate Cherry (on the right) got all seedlings potted up.

By the time it was done, we had 13 Yellow Pear tomatoes, and 12 Chocolate Cherry, ready to go to the sun room.

Before that could be done, though, the rest of the pots in the mini-greenhouse had to be taken out, and the mini-greenhouse prepped to be moved. The vinyl cover finally got removed, as did the aluminum foil lining it on three sides, to reflect as much light as possible. The foil has been saved for some other future use.

One of the sawhorses supporting the platform holding plants had to be carefully shifted over to make room for the mini-greenhouse frame.

Things got shifted around in the sun room, too. The older tomatoes were getting too tall for the plant shelf, so they got moved to the platform, as did the large bin with the kulli corn. The tomatoes were so tall, I had to adjust the shop light higher, to fit.

Once the newly transplanted tomatoes and seedlings that were in the mini-greenhouse in the living room got oved over, I filled another bin with the seedlings from the large aquarium greenhouse and brought those over, too. Everything fit, with room to spare!

I did change a couple of things after this photo was taken. That terracotta pot was put by the lamp on the bottom shelf, just to get it out of the way. It got moved out, as did the lamp, and the bin at the bottom of the mini-greenhouse was moved to where the lamp had been, so it could get more light.

The seed trays on the bottom right of the above picture are starting to explode. More cucumbers are coming up, and all four of the King Tut Purple Pea seeds that we managed to save are germinating. There is even a Red Kuri/Little Gem squash making an appearance.

These are now the only things left in the big aquarium greenhouse.

There’s still no sign of any Yakteen gourds. As for the Kakai pumpkin that looks like there is a seedling popping up, that’s actually a stem. I was watching it for a few days before I finally took a closer look. It seems it started to germinate – but then the leaves broke off the stem. The stem end is what you’re seeing in that pot! There were more planted in the pot, so I’m hoping that a bit more time on the warming mat will result in germination.

The LED shop light that was used at the mini-greenhouse is now available to be moved to the sun room, but I haven’t figure out how I want it set up yet.

Funny. The living room suddenly feels much bigger, without the mini-greenhouse tied to a chair in front of the couch, anymore. :-D

The Re-Farmer

Road status, and first cucumbers!

What a difference a few hours makes!

It’s been a beautifully warm day. At 19C/66F, even the relatively high winds aren’t cooling things down much. The standing water in and around the yard has reduced significantly since this morning.

I decided to take the walk over to where the road is washed out to the south of us, and see what the status was – this time without Rolando Moon following me!

The waters have gone down a LOT, but the two washed out areas are not in good shape. The flow of water going across is very fast, aided by the wind coming from the northwest.

The wider, shallower area has eroded across even more. Where you can see a darker line is a ridge of clay that hasn’t been washed out yet; everything to the left of that would be very soft. As you can see by the rut on the far left, it’s not going to support the weight of a vehicle much. Still, if we had to, I think we could drive through this part.

The other part, however…

I wasn’t wearing my rubber boots, so I wasn’t going to cross to take a closer look. That further area looks quite a bit deeper than the last time I checked it out. This is where the road was already washed out down to the foundation rocks. There is no why our van can handle driving over that.

I haven’t checked out any of the other washed out areas. If this is still flowing as fast as it is, the others wouldn’t be much different.

Which means we still aren’t going anywhere for a while. :-/

While I was out, I checked a few other areas, including the tulip patch. I swear, they great at least 2 inches since I saw them this morning.

Something new that wasn’t there this morning, though, were these…

The very first cucumbers are sprouting! Seeing these, I took the “dome” off the tray. The transplants we’ve got in the sun room are doing quite well. Even the tomato that was broken at the stem, which got buried back into the pot, looks like it’s recovering.

I think that tomorrow will be the day to move the mini-greenhouse into the sun room, along with most, if not all, the seedlings still in the living room. The Chocolate Cherry and Yellow Pear tomatoes are still tiny, but they can be divided and potted up before being moved to the sun room. The Yakteen gourd have not sprouted yet, but at this point, the sun room is warmer than the living room. Even with them being on the warming mat now, they would probably do better in the sun room. Everything will do better in than in the enclosed spaces they are in right now, I think. We’ll also be able to move the second LED shop light and set it up in the sun room, too, if necessary.

It’ll be good to not have to worry about the cats getting at the seedlings anymore!

The Re-Farmer

Our 2022 garden: thinning and potting up

A lot of the squash in the big aquarium greenhouse were getting too big for their britches, so it was time to thin them out and pot them up!

The Giant Pumpkins were easy enough to do; there’s just one plant per biodegradable pot, so they just got put into bigger biodegradable pots with little issue.

With the others, we thinned by division. We had only a few of the larger biodegradable pots left, so the biggest ones were transplanted into those. After that, they went into the red Solo cups. Then they all went into the sun room.

Once those were done, we went through the mini-greenhouse and moved the remaining eggplants and peppers to the sun room as well. A couple of them got thinned by division, too.

These two bins are all winter squash, the giant pumpkins and hulless pumpkins, under the bright shop light.

The gourds that were already in the sun room joined more squash and Apple gourds in a bin.

The peppers that survived the Great Cat Crush, as well as replacement starts of peppers and eggplants, got moved into the window shelf.

Back in the big aquarium greenhouse, there is now more room to space things out. The melons were looking leggy, so I put something under the bin they’re in to raise them closer to the light. There’s still just one Zucca melon sprouted (the big one in the foreground).

There are still some smaller squash and gourds on the heat mat. The Yakteen gourds have not germinated yet. I tried to get a photo, but the camera decided to focus on the aquarium frame instead of the plants. LOL

In the mini-greenhouse, there are still the Chocolate Cherry and Yellow Pear tomatoes, and the ground cherries. With more space available, they’re now all spread out to get maximum light and air flow.

It’s always a risk to pot up things like squash. Once the new bins were in the sun room, water was added to the bottoms to let them absorb more moisture from below; particularly the biodegradable pots, so the pots themselves wouldn’t wick moisture out of the soil and away from the roots. I left the shop light on all night, to hopefully give them the energy they needed to handle the changes.

As of this morning, everything looked pretty much as I left them. Nothing was drooping or otherwise showing signs of stress from being divided and potted up. So far so good!

In about a week or two, we will start hardening off the transplants. By then, everything that’s in the aquarium greenhouse and the mini-greenhouse should be moved to the sun room, with the tomatoes divided and potted up.

If all goes well, we should have most, if not all, or cold tolerant seeds direct sown outside by the end of the month, too.

It feels so good to finally be able to move ahead with the gardening!

The Re-Farmer

Our 2022 garden: last seeds starts – for real this time!

Okay, I went ahead and did it. I got one more tray of seeds started.

Most of them are summer squash.

I also decided to start the only 4 King Tut Purple Peas I was able to save last year. They did not do well at all in the drought, but they bravely tried!

The seed tray holds 32 square pots, and I wanted to plant just one seed per pot. I decided to start only 4 each of the Magda (a mottled light and dark green squash), yellow zucchini (Goldy)…

… and green zucchini (Endeavor). With these summer squash, I want to also try direct sowing more, and see if that makes any difference.

That left room to plant 8 each of the patty pans; Sunburst and G Star.

It occurred to me after I uploaded the pictures that I should have just planted each flat of 4 x 2 pots with one type, instead of two long rows of the patty pans. :-D Ah, well, The flats will come apart easily when it’s time to transplant.

The tray then went straight into the sunroom, covered to keep them moist until they germinate. As you can see by the one that got pushed to the back, it’s working rather well.

There we are. Done. No more seeds will be started indoors.

Honest.

;-)

The Re-Farmer

Garden prep – getting work done outside

Oh, what a lovely, lovely day! I was able to get things done that have been waiting for a day like today.

Before I get to that, though, take a look and who I found.

Possibly the same grog (groundhog) I saw this morning. It was at a space under the fence critters use to get through the chain link, but there’s water there right now. Because I was so close, it wanted to run through, but didn’t want to go through the water! It ended up running down the fence towards the junk pile, and I didn’t see it again until I was back in the house. The girls told me it was at the feeding station outside our living room window! I could tell it was the same one because it’s got burrs or something it its fur.

Then, as I sat down at my computer to upload photos, I saw two grogs running across the driveway towards the inner yard.

*sigh*

We’re going to have our work cut out for us!

Anyhow. Back to business!

The first thing I wanted to get done was lay out the salvaged black tarps (or whatever they are) in the main garden area.

Click on the images to see them larger.

In the background, you can see sticks coming out of the ground where a groundhog’s den used to be. It took shoving those sticks into the hole and burying them to finally get it out of there. They will be trimmed, later.

The black plastic should help warm up the soil, while also killing off the grass and weeds. We will be growing potatoes here, using the Ruth Stout deep mulching method, to start reclaiming this area.

When we’ve used these tarps before, we’d weigh the edges down with rocks, bricks, fence posts – whatever we could find. Since then, I found a big bag of cheap metal tent pegs, so I used some of those to pin the tarps down. The ground is thawed enough that I had no problem pushing them through – except for the rocks.

So. Many. Rocks.

I think only one tent peg actually made it through with minimal problems, and even then, I could feel it pushing past more rocks.

We have three types of potatoes on the way. Two at 5kg/11 pounds and one at 1kg/2.2 pounds. We will likely break the spaces covered by the tarps into 4 beds with paths, if only to make things easier to reach. We may plant the two 5kg types of potatoes here, and find somewhere else of the 1kg of potatoes. Maybe use one of the two grow bags I picked up on sale, for such a small amount.

The next area I wanted to work on was the chimney block bed along the chain link fence. The last 4 blocks had been brought over and were waiting to be placed.

At this point, all I wanted to do was level off the soil with a hoe, then line the blocks up along the fence. The ground slopes downward along this area, and the gap under the chain link increases along the way. When we built the bed here last year, we had to add boards along the fence to keep the soil from washing away when we watered things. It didn’t work as well as in the other bed (the one now bordered with bricks, in the background) because of all that space under the fence. Having these blocks will solve the erosion problem.

The blocks won’t be filled quite yet. I want to put some more organic material at the bottoms before returning the soil, and adding more, if needed. The ones we filled last year look like they could use some topping up, too.

Next, it was the garlic and asparagus beds.

I’ve been reading up and watching videos about growing asparagus – which is not yet showing – and it seems they do well with deep mulching (as well as being planted together with strawberries, which we might do). The garlic beds have mulch on them that I have decided to take off, and move to the asparagus.

First, the garlic beds.

Click on the images to see them in a larger size.

Pulling back the mulch, I can feel that the soil has thawed around the edges, but the closer to the middle, the more frozen it is. In the photo on the right, you can see some of the ice crystals exposed as the mulch was pulled back.

Also, this is oat straw, and quite a lot of seeds got caught up with the straw. I was seeing quite few sprouting grains, like the one in that second photo! (click to enlarge)

Both beds are now uncovered. The bed that’s in the back was more frozen than the one in the foreground. I couldn’t pull off some of the mulch because it was stuck in ice.

Now that there is no longer mulch insulating the ice, it should be melted by the end of the day. We’re at 18C/64F as I write this, so it won’t take long for the beds to thaw, and the garlic can start growing again.

As for the straw mulch…

The red lines mark there the asparagus is, plus there is a narrow band around it, where we shoved in some tiny onions that were really too small for transplanting, but we didn’t want to just toss. They didn’t do well, which is not a surprise, but what is a surprise is that the bulbs survived the winter and are starting to grow! So when the mulch from both garlic beds was added over the asparagus, I made sure it was not really covering where the onions are.

Who knows. We might ended up being able to collect Norstar onion seeds this year!

The asparagus planted here is a purple variety, and this is its second year. Two years from now, we should be able to start harvesting them. We also plan to get green asparagus crowns, but we’ve got so many things to plant this year, it sort of went by the wayside. I’m still not sure where we’d want to plant them, since it would be permanent.

Maybe here?

When we first cleaned out there area, there was a tire planter that was a car tire cut in half around the circumference, the tire flipped inside out, and still attached to the rim, which raised it up a bit. I had dug it out and tipped the soil onto the ground, discovering it was covering the stumps of a maple – which promptly started to send up suckers! Then we discovered that the planter had been for a type of flower that spreads through rhizomes. Which means I inadvertently spread a weed.

When we built the bed here last spring, we used carboard to try and kill things off first, then layered straw and soil on top of the carboard, to make the new bed. We planted strawberry spinach. If any of them sprouted, we had no way to tell, and they didn’t last long. Instead, the bed was filled with all sorts of other things we didn’t want in it.

So today, I took my nice, new garden fork to it, broke it up and pulled out as many roots and rhizomes as I could find. I then scrounged in the garage and found a couple of pieces of panelling, which I placed on top of the space between the two beds, for something to stand on, and also to smother out more of those flowers!

The little stumps are something we’re going to need to get rid of, too.

I’m not sure what we’ll be planting here. Maybe some squash or gourds, which can be heavily mulched and has large leaves to further shade and kill off anything we don’t want to be growing here.

That was it for outside garden prep. I also adjusted some things in the sun room.

The bright LED shop light that had been used on the inside of the plant shelf got rigged to light the new growing platform over the swing bench. This may be a “sun” room, but it’s not a greenhouse, and this far back from the window doesn’t get much direct sunlight at all.

Also, I’m happy to say that it looks like the two little peppers I thinned out of the other pots have perked up and may actually survive!

Once these were all taken care of, I started to dismantle the broken canopy tent frame. I could only do part of it, because I only brought a Phillip’s screwdriver with me, and the rest of them need a hex tip. Which I have, but I’ll continue it another time.

I still can’t get that one leg out of the soil. I can move it around, and the ground is thawed out for at least a couple of feed, but I just can’t pull it out. We’ll have to dig it out! The amount of force from that falling piece of tree must have been amazing to push that leg, with the flat plate on the bottom, through frozen ground must have been something else! So glad it didn’t land on the BBQ, or it would have been destroyed!

While working on the frame, I noticed the window in the back of the storage house had its cover knocked off, so I went over to put it back. Before I did, though, I could see it was wet under there, so I put my phone on flash, stuck it through the window and took some blind shots.

Oh, dear.

With how the water had formed a moat around the storage house, not coming up to the house itself, I thought it might have been pretty dry. Talk about wrong! It’s a lake under there! The kitties have lost their largest shelter.

This is also the brightest I’ve ever seen it under there. I’m not usually there and taking pictures, this time of day!

Well, no surprise that the entire storage house has been slowly sinking if it gets like this during wet years!

In the 14 day forecast, there are a couple of days where we are expecting light showers, but beyond that, we’ve got all warm and sunny, or mostly sunny, days for a while. That is going to be a huge help in giving the soil a chance to absorb more water, and the high water levels to drop or drain away. That means more chances to prepare garden beds for planting!

I’m having so much fun right now… :-D

The Re-Farmer

Our 2022 garden: first corn!

I just had to start out with this bit of gardening excitement.

When checking the plants in the sun room this morning, I spotted our very first Kulli corn seeds germinating!

When I took the picture, I could only see a couple in this larger bin in the plant shelf. After uploading the photo, I spotted several more and … oh! I just spotted one more that I missed when putting the arrows in! It’s two pots to the left of the single arrow in the middle.

These are in the smaller bin that recently got moved to the platform we made over the swing bench, at the west facing window.

I am just so thrilled! For the new folks who just started following this blog (welcome! I’m happy to see you!), Kulli is a Peruvian purple-black corn, also called maiz morado, that I’m trying to grow in our zone. I thought I was trying them last year, but the information from where I bought them kept changing, and it turned out they were developed for cold hardiness in the US, but were not actually acclimated Kulli corn, as I originally thought. I found some Kulli seeds at Mary’s Heirloom Seeds, in Texas. They are supposed to be good both as a fresh eating corn, and as a flour corn. They are also used to make a drink called chicha morado, and as a dye. I have not been able to learn much about their native growing conditions, since Peru is so mountainous, and it’s hard to compare to our Canadian growing zones. This is why I am starting them indoors – not typically recommended for corn – to transplant. Plus, they take 120 days to maturity. Our growing season, from last frost in the spring to first frost in the fall, averages 100 days.

This is a pet project of mine, in that I would like to acclimate the variety to our growing zone (if that’s even needed). These will be kept well away from other varieties of corn. Starting them indoors also means they will pollinate earlier than the other varieties we’ll be growing this year. Between those two factors, there should be no cross pollination.

We’ll have to take extra care when transplanting these, to protect them from the critters.

I saw my first ground hog running around, when I did my rounds this morning. I also saw a racoon in the kibble house about a week ago and, of course, the deer area always around. I’m not sure which critter destroyed our black corn last year, that had been doing so well.

Must protect the corn babies! :-)

The Re-Farmer

Our 2022 garden: last seed starts? Winter squash and cucumber

Today is 4 weeks from our average last frost date. We started some more seeds indoors, but I’m not sure if these will be our last ones or not.

But first, some re-arranging had to be done.

I moved more pots out of the mini-greenhouse and into the sun room. The mini-greenhouse is now about half empty.

The last of the tomatoes were moved out; these are almost all the Sophie’s Choice tomatoes and, I think, one last Cup of Moldova paste tomato. There was room in the bin, so I added the peppers I’d brought over yesterday. The larger bin with the larger tomatoes and the Canteen gourds got moved so this one could be closer to the window and not get overshadowed by the larger bin.

The re-started luffa, and ozark nest egg gourds, were brought over, too. The plants in the cups are the ones I thinned out from the larger, stronger pepper plants, yesterday. It doesn’t look like they’ll make it, but you never know.

The Red Baron bunching onions got moved out of the big aquarium greenhouse – and got a hair cut.

Then it was time to start planting.

We had only three seeds to start; two types of shorter season winter squash that we grew last year, and cucumber. For these, I used planting trays the same size that come with the Jiffy Pellets, but with 4 sets of 8 square Jiffy pots in them.

With the Little Gem (Red Kuri) seeds, we picked 8 seeds that looked the best, for 1 seed per square. We still have seeds left over, plus I also still have the seeds we saved from last year. The Teddy squash had only 10 seeds left, so we planted all of them, with a couple of squares having 2 seeds. The seeds got scarified and briefly soaked while the squares were filled with potting mix. With the cumber, we just planted 1 seed per pot, in half the tray, so we have plenty of those left over.

For all the re-arranging, we still couldn’t put the tray in the big aquarium greenhouse on the warming mat, because we still needed to use it for other things. With how warm the sun room is, though, the new tray went straight there!

I didn’t want them drying out too quickly, plus the overnight temperatures are still a bit of a concern. The tray didn’t come with a dome, so I improvised.

Two small bin lids cover the ends, while a small big is deep enough to fit over the labels. :-D

That done, the girls and I headed outside to check things out, and we were absolutely thrilled to find so many crocuses blooming!

Many of them are blooming in clusters like this. Each one of those clusters was a single flower, last year. I just love how they are already spreading!

There are more grape hyacinth coming up, though they are very hard to see. We also spotted wild strawberry leaves in the patch under a dead tree that we’ve framed with branches to make sure they don’t get accidentally mowed.

My younger daughter wanted to check her raspberries that had such a rough start last year. One of them has tiny new leaves coming up at the base! Hopefully, both will have survived the winter.

Once back inside, I fussed a bit more with the big aquarium greenhouse.

I’d already rotated the bin with the melons in it; the Zucca melon is now in the foreground and the watermelon in the back. The Chocolate Cherry and Yellow Pear tomatoes were moved to the mini-greenhouse, while the larger pumpkins got moved to take their place. Some of them were getting too close to the light fixture, and this tray gives them more head room.

A few remained on the warming tray, but moving so many post out freed up just enough room…

… to move the other winter squash out of the small aquarium greenhouse and put them on the warming mat. Hopefully, that will help them germinate sooner.

I have refills of those square pots that fit in the trays like the one on the warming mat. I find myself waffling back and forth over starting the summer squash in them. We have 5 types. These have a short enough season that I could get away with direct sowing. I could leave them be, but I’ve never NOT started summer squash indoors, so I find myself really wanted to start some of them!

If I do start them, it would have to be very soon, and they’ll be going straight into the sun room, too.

What do you think? Should I try go for it, or leave them?

The Re-Farmer

Our 2022 garden: sun room mods, and old kitchen garden prep

I am really loving the longer days. I was able to get all sorts done this evening, while it was still light out!

The first job was to make some changes in the sun room.

A few things needed to be reorganized, which I worked on while the girls got the new metal sawhorses out of their packaging and set them up. There was no place to move the table saw, so one of them sticks out further than is convenient, but we can still get around it.

I suppose we could have laid out the closet door with the hinges down, but that happened to be the way my daughter and I grabbed it and laid it out. I don’t expect it to be a problem.

That done, I wanted to get those tall tomato plants out of the shelf, where they just barely fit.

Oh, oh.

Looks like Potato Beetle tried to jump into the bin that was in his favourite spot!

I do wish I’d caught this earlier. It’s pretty wilted. Still, tomatoes being how they are, I tried to salvage it.

I just buried the stem on the soil. Hopefully, those hair roots on the stem will do their job, and it will recover. If it doesn’t, we still have quite a lot of Cup of Moldova tomatoes.

That done, I brought the onions out of the shelf to give them a “haircut”, then switched them around when putting them back on the shelf.

The new set up is the perfect height to work at!

Next, I brought out the tallest plants that were in the mini-greenhouse.

I moved the two Canteen gourds out of the bin in the shelf and in with the larger tomatoes, then added laughably large poles for them to climb on. The poles look too big now, only in relation to the size of the plants, but those plants are going to get much, much larger!

More tomatoes went into the bin the gourds were removed from, another gourd that had still been in the mini-greenhouse joined the other two in the larger bin. The small bin of kulli corn got moved over. Hopefully, this will be a better spot for them. I also brought over a couple of pepper pots. They each had a pair of peppers in them, so I thinned out the smaller ones and repotted them. We’ll see if they will survive. Two more tomato plants joined them, as there wasn’t room for them in any of the bins in the window shelf. With the changes, though, there is now more room on the shelf for a couple more bins of seedlings, once we’re ready to move them over.

That done, I took advantage of the daylight, grabbed a hoe and went into the old kitchen garden.

I was able to prep three beds, including the one alongside the retaining wall blocks. There’s another bed on the left, in between where you can see stone and brick stepping stones. I won’t be touching that, as it was fall seeded with the bread seed poppies that grew there last year. We still have some of the seed pods, and I’ll be adding more seeds to that bed later on, just to make sure we get at least something. We did get another variety of bread seed poppies, but those will be planted in a completely different area, to avoid cross pollination.

The soil in these beds is not at all frozen – what a difference location makes! We’ll look through the seeds for direct sowing and make some decisions on what to plant here. We already sort of mapped things out, but things are flexible. This is a good location for root crops, be we already grew carrots and beets here last year.

Whatever we do, we’ll have to be prepared to cover the beds, so we don’t get a repeat of last year’s critter damage!

There are still the retaining wall blocks at the end. I transplanted mint that was growing where the log framed bed is, into alternating blocks. We’ll soon find out of they survived the winter. They’re mint, though, so it’s highly likely they did. We haven’t decided what to plant in the empty blocks. Perhaps some of the herb seeds we have.

There is another bed that should be quite workable now; the bed along the chain link fence where we planted tomatoes last year. We’re actually intending to put tomatoes there again this year, as they did so well in that location. The soil was very thoroughly reworked when a border of bricks was placed around it, so using it for the same type of plant again shouldn’t be a problem. Since it’s going to have things transplanted into it, and got well mulched in the fall with leaves, it’ll be left alone until planting time.

Gosh, it felt so good to be working in the dirt again! Though it was funny when I got my hands muddy, pulling out roots and weeds as I found them, and was able to go “wash” them off in snow.

:-D

The Re-Farmer