Little bitty sprooooots actually showed up a couple of days ago, but they were so tiny, I didn’t bother trying to take a picture through the glass of the tank.
So far, only the Spoon tomatoes have started to show, not the Mosaic mix, though some of the bunching onions emerged even earlier.
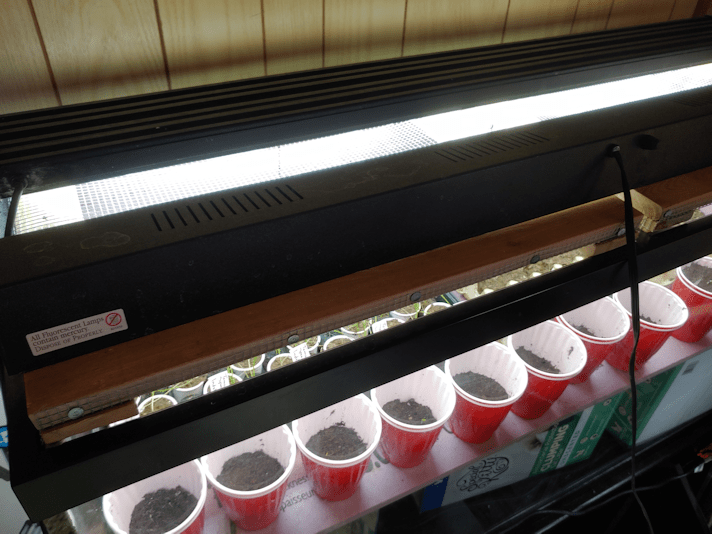
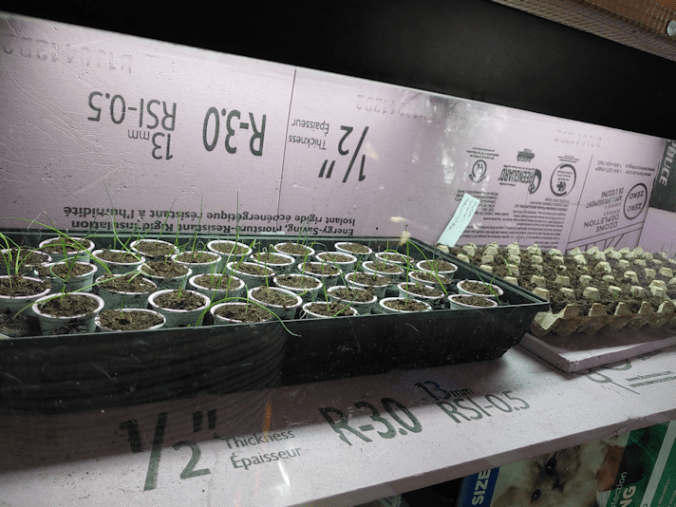
I unpacked the second light for the tank – this was the one that originally came with the tank kit – and set it over the red solo cups. It’s sitting partly on the wood of the mesh frames, to better light up the inside of the cups. That wood is way too wide, really, but it’s what I had available.
Sometimes, I will also put another light fixture on the tank covers, too. While it does have a full spectrum bulb in it, it’s more because it’s an incandescent bulb, which provides a bit of heat. The onions don’t need it as much, but from everything I’ve been reading, tomato seedlings need more warmth.
I look forward to when things warm up and we can start moving seedlings to the sun room (after Ginger has completed his convalescence in there!). By then, the tomatoes and, later, squash seedlings will get all the heat they need in there!
Yes! We managed to resist temptation, and not start the tomatoes too early. :-D
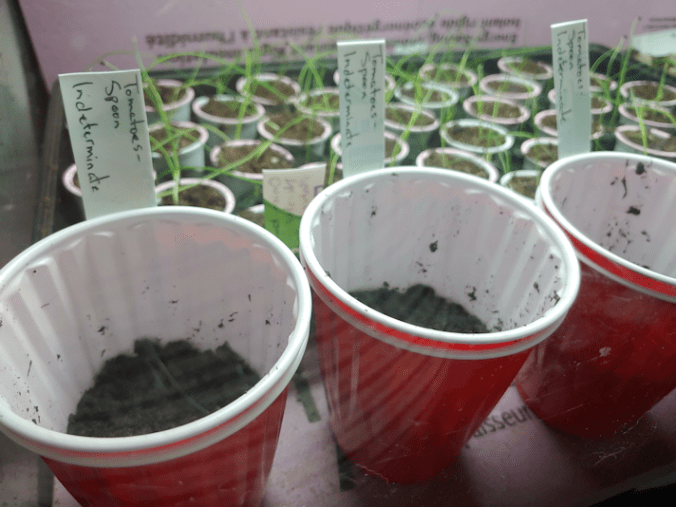
After a fair bit of research, plus an evaluation of our cat-safe spaces, I chose to start our tomatoes using the “double cup” method.
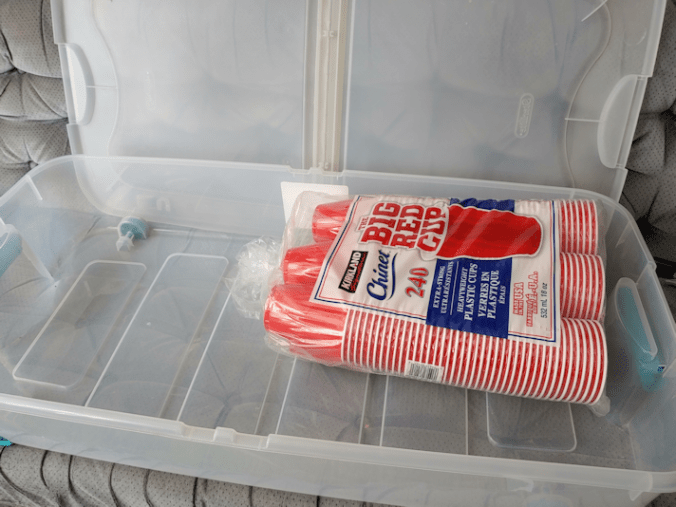
I’d already picked up a large package of the red beer cups, and those were the types recommended. The first thing to do was to make drainage holes in half the cups we’d be using.
These will later be used to start our squash and gourds, so I didn’t mind putting drainage holes in extra cups. I’ve got a bag of 250, so we’ll be putting holes in at least 125! :-D
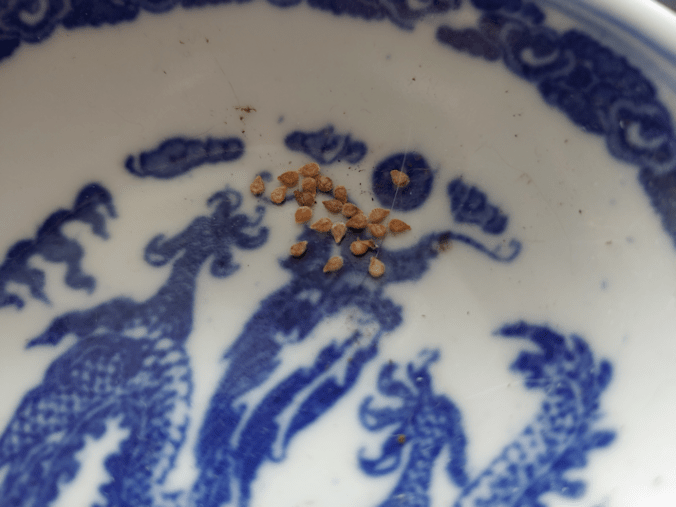
These are the seeds from one packet of Spoon tomatoes from Baker Creek. They are so tiny!!! And we didn’t even end up using them all!
Now, we’ve considered quite a few options for starting our seeds, including peat or similar pots, Jiffy pellets, starting trays of various types, and even looking at the pots of various sizes we found while cleaning out the basements. I settled on these cups for a few reasons. They are the size I want, you can get a LOT of them for a very low price, and I expect to be able to reuse them for many years. In some of the gardening videos I’ve watched, there are people who have been reusing these cups for as long as 10 years.
If I had the budget, I would prefer to use coir pots. I like the idea of those, or peat pots, as they can be put right into the soil with the transplants to break down, resulting in far less root disruption. The problem is, for the sheer volume of these that we would need, they’re just completely out of budget. Peat pots are fairly easy to find, but coir or any other biodegradable pots are things we’d have to seek out, and are far more expensive. :-/
The double cup method has added benefits. I can water them from below, using the outer cup, and not have to have them sitting in trays. That makes them more flexible for our spaces. Particularly since we’re using fish tanks as makeshift greenhouses. Using double cups means we can fit them inside the big tank, along with the trays of bulb unions and shallots.
Another benefit to using these cups for starting tomatoes is that we won’t need to “pot up” the tomatoes.
We filled the cups only half way with peat. The loose peat we’re using takes a long time to moisten, so I made sure to set some up in a container with water to saturate overnight, first.
As a bonus, the double cups hold the labels in place very well!
Once the seedlings reach a size large enough that we would be potting them up, we can just add more of the peat around the stems. No disruption of the main root, and the “hairs” on the stems will become new roots, making them hardier for when they finally get transplanted outside.
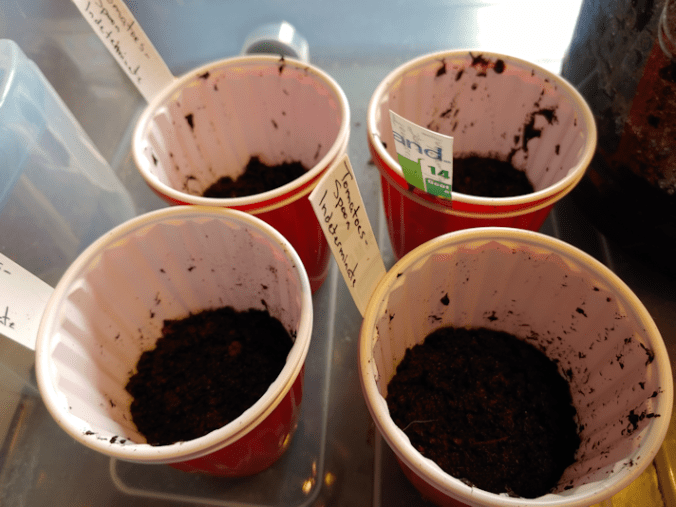
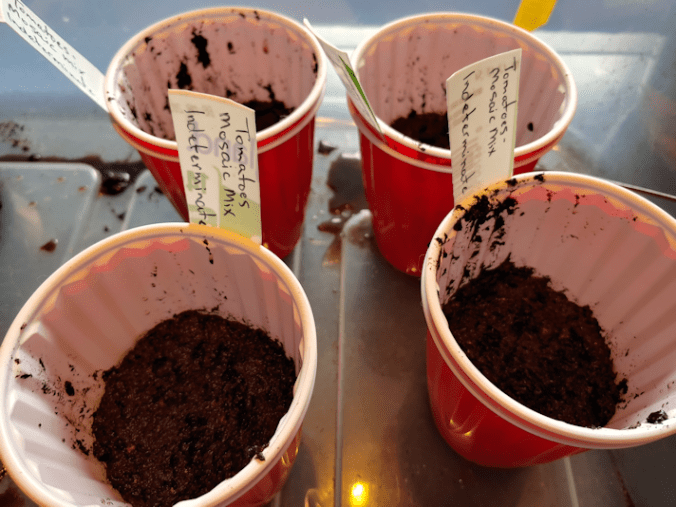
We planted 4 seeds in each cup. We shall see how many germinate, and how many make it to the transplant stage! The goal is for a total of 8 plants, but if we have extra… well, we’ll figure it out when the time comes. With the Mosaic Medley, it is a mix of cherry and grape tomatoes, so we will hopefully have several different varieties from the seeds that were planted, but I really don’t know how we’ll be able to tell until they start fruiting, really. There are plenty of seeds left in that packet, too.
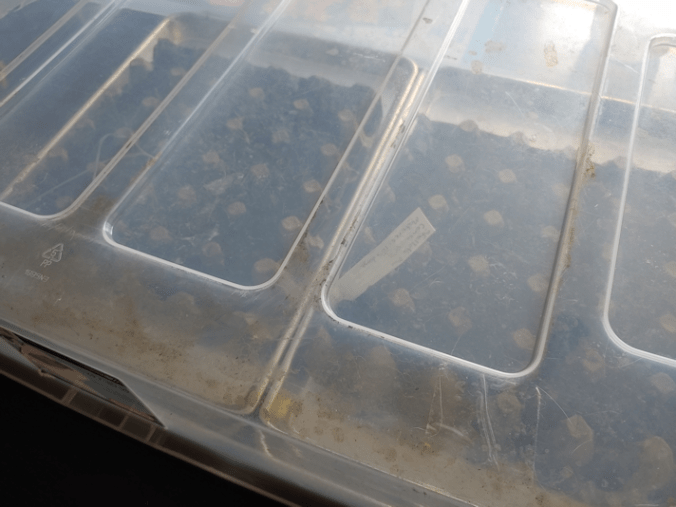
Here they are, all in a row along the front of the big tank. Once they start sprouting, if it seems they aren’t getting enough light, we can place the extra aquarium light over the tank above them.
At which point, I call your attention to the onions, behind them.
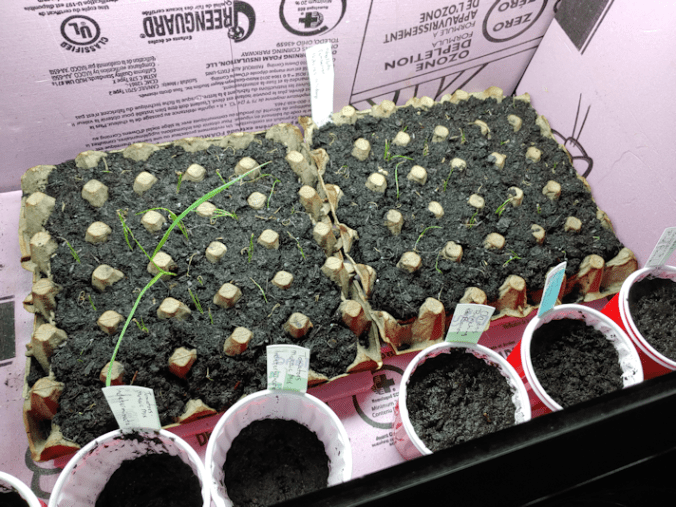
The bulb onions (Norstar) in the self-watering tray are doing all right. The K-cups are actually doing better than the ones in the Jiffy pellets, which was a surprise for me. In fact, so many seeded pellets didn’t germinate, I reseeded many of them (plus a few K-cups), and they seem to be doing better now. The K-cups dry out much faster, and don’t water from below as well as the pellets. Unfortunately, watering the taller K-cups without also over watering the pellets has been a challenge. In the future, I would not want to mix the two again.
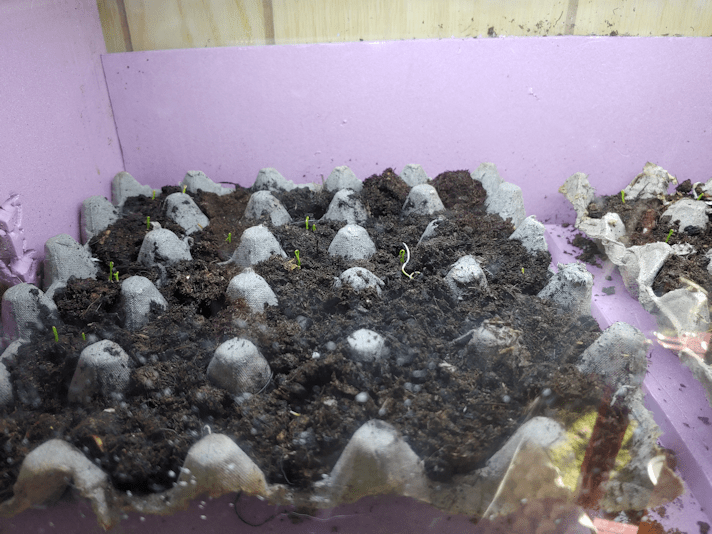
As for the shallots in the egg trays… Hmm.
I had thought that the wet cardboard of the egg trays might help the plugs stay moister, longer, but they seem to have done the opposite. They seem to be drying them out faster, and with this set up, I don’t have the space to put trays under them, to be able to water them from below. I’ve been using a spray bottle to water them from above, but … well, they really seem to be struggling. And I can’t even plant more, because all of the shallot seeds were used up in these trays.
Then there are the bunching onions, in the small tank.
*sigh*
The cat damage didn’t just wreck a lot of plugs, but it looks like the peat was contaminated, too. On one tray, a white mold has started to grow, while on the other tray, there is what looks like a more yellowish mold. Lack of air circulation in the tank certainly wasn’t helping matters.
That will not be as much of a problem now, at least. The window screen I found in the shed to replace the lid seems to be working, even though it is bigger than the tank. The frame along one side juuuuussssttt fits in the narrow gap between the tank and the wall, which means the tank itself helps hold the screen in place. A couple of 5 pound hand weights on the back, and it seems to actually be working. Yes, we did have a cat knock it off by going on the overhang, but since the weights have been added, that seems to have solved it.
On removing the light fixture from the lid, I had a slightly different issue. There is no “back” to the light bars, and while the waterproof tubes the lights are in have a dark strip along where it would have been against the lid, there was still a lot of light in every other direction. For now, I’ve simply placed the fixture on top of the metal mesh of the screen, then placed a somewhat-cut-to-size piece of rigid insulation, wrapped in aluminum foil, on top. All that “wasted” light is now being reflected downwards. It seemed darker in the tank, possibly because of the mesh itself, so I put aluminum foil around the sides of the tank, too. The foil wrapped “backing” for the light seems to be working well, so I plan to attach the light fixture to it, rather than just have it sitting loosely on top. I had intended to mount the light to the underside of the screen, but it actually seems to be working okay, sitting on top. As long as the cats leave it alone. They don’t seem to like the overhang of the screen, though, and only a couple of the kittens have been willing to make the effort to get past it.
We have a very small, light fan that can sit right on the screen and provide air circulation in the tank. For now, we’ve been switching the little fan back and forth between the tanks, until we feel it’s time to start using the oscillating room fan that’s on a stand.
I’m pretty sure those bunching onions are a lost cause, though.
So we had two things to deal with; the too dry shallots, and the dying bunching onions.
The girls took care of the shallots for me, while I made a run to the post office. They had to get creative, because… cats.
They put the seedlings into baking pans with water in them, to water the seedlings from below. That needed time, but they found that the under-bed storage container that we’ve been using to contain our potting mess was large enough to cover and protect both trays.
They successfully foiled the cats!
There was room for three more cups in the big tank, though, and we still had seeds for the bunching onions. So when I got back from my errands, I decided to plant more of them.
The shallots were well dampened by then, so I slid them back onto the pieces of insulation we’re using tho carry them, and put them back in the tank. Then I filled three double cups with peat and put about a dozen seeds, at least, in each cup. The seeds are all about half an inch apart, so I’ll be able to easily thin them, if necessary, or separate them for transplanting, later on.
And I still have seeds for the bunching onions left over!
So that is done. Tomato seeds have been planted, shallots have been, hopefully, rescued, and new bunching onion seeds have been planted.
The next batch of seeds that we will need to start are the gourds.
But not for another month or so.
Hopefully, by then, it will be warm enough even overnight, that the onions and tomatoes can be safely transferred to the sun room, so we can use the fish tank aquariums for the next batch of seed starts.
As the temperatures have gotten warmer and the snow melts away, I’ve been able to expand my morning rounds. Today, I was able to reach the barn and a shed near it, for the first time in months.
I had a purpose in mind.
One of the things we have found all over the place, beside mirrors and tires, are windows. All kinds of windows.
If there are windows, could there be… ??
… yes there could!
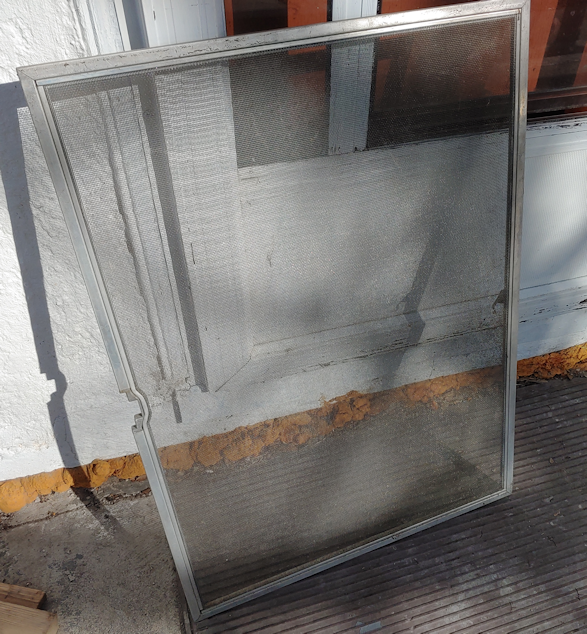
I found a fairly large screen at first, then found at least three like this one. It has an aluminum frame, and a very strong metal mesh.
This may work as a “lid” for the small fish tank greenhouse. It’s much bigger than the tank itself, but if I can secure it safely, I should be able to use it, even with the amount of overlap there will be at the front and sides. I can remove the light fixture from under the lid of the tank, and attach it to the underside of the screen – unlike the light on the big tank, this one can’t handle the weight of even one of our skinny cats on it. There is even a space I can use for the power cord from the light.
The screen itself is probably strong enough to hold even Dah Boy and Cheddar’s weights! As long as no jumping is involved. They don’t tend to try and get on the tanks in general, so I’m not too concerned about them.
The screen has been scrubbed and sanitized and is now set aside to dry. I have time to figure out what I can use to secure it to the tank, while still being able to open it easily to get at the seedlings inside.
Here’s hoping it works!!
Also, there are a LOT of old windows in the barn and shed. Some are broken, but others are still intact. I took a closer look at some in the barn. I am continually amazed by one group of reclaimed windows. They are so filthy with years of dust and grit, I actually didn’t realize they were windows until my brother told me that’s what they were! While some sort of canvas was draped over the middle one, to keep them from touching each other, they are thoroughly stuck to each other at the ends. I estimate them to be about 7 ft by almost 5 ft, and they are at least double pane. Possibly triple. There are a couple of others about 4 ft square that are double pane.
I am sure we will be able to find some use for these. Especially the big ones, if we can manage to separate them without breaking them. I see potential cold frames and mini greenhouses in them! :-)
Last night, while checking on the onion seedlings, I decided it was time to lower the shallot and bulb union seedlings in the big tank. The seedling tips were looking a little dried out, likely because they were getting too close to the warmth of the light fixture.
Doing that required removing the trays and the “floor” they were resting on, then shifting the boxes holding them all from standing on end, their tallest position, to standing on their narrow sides, which is their second tallest position. Later on, if it seems necessary, we can turn the boxes onto their broad sides to lower the plants even more.
So that worked out rather well. For the trays, anyhow. Unfortunately, being the suck that I am, I tried to do it without removing a kitten that was staying warm on the light fixture. Saffron is a tiny thing that gets cold easily, and she’s taken to using the light fixture to stay warm. So I just slid the whole thing to the back of the tank. It wasn’t enough to get the “floor” out, so I pushed one end a bit further. And a bit further…
The next thing I knew, the whole thing fell behind the tank as a Saffron launched herself across the living room in a panic.
And the lights went out.
At first, I feared I had broken a bulb, but no. The light in the small tank had gone out, too. As the fixture fell, it swiped the power bar’s plug into the wall.
This house does not have many power outlets. In the living room, there is an outlet behind the big tank, though only one plug in it works. We can access the outlet through the cabinet tank’s cabinet, as it is completely open in the back.
Which requires getting down on my knees and crawling half into the cabinet to reach.
My knees did not appreciate this at all.
After straightening out the prong on the plug that got bent when the fixture landed on it, I managed to get it back in and everything was working fine. Nothing broken.
Phew!
Then I put everything back in place.
Almost.
I had been keeping a small plant pot in the tank with the trays. We’ve had to put various types of barriers on, over or around all our house plants that can’t be hung from the ceiling, to keep cats from digging in the dirt. One small succulent was completely covered with a clear plastic dome, like a mini greenhouse, but the cats kept managing to knock the cover off. The last time that happened, I found the poor little succulent on the carpet, along with a pile of soil that had been dug out of the pot. I replanted it and stuck the pot in the aquarium, so it could get the light and the protection the seedlings were getting and, hopefully, recover.
When I lowered the trays, I forgot to put the plant pot back.
This morning, I discovered my error.
I also discovered a half empty pot, and a pile of soil on the shelf and scattered all over the carpet.
What I didn’t find was the plant. There is no sign of it. It’s likely under another shelf, but it could just as easily have been dragged down to the basement.
I had to do my outside rounds, though, so I rescued as much of the soil as I could – it’s a soil mix specifically for succulents – then moved the pot to the dining table. The table is covered in stuff. Partly because all flat surfaces just seem to invite things to be piled onto them, partly on purpose, to keep the cats off when we’re not around. I tucked the pot against some other stuff, then dashed outside to do my rounds.
I came back to another pile of soil on the dining table, and on the floor.
*sigh*
So, that’s another plant lost to the cats. I am pretty sure the culprit is Cabbages, as she’ has been caught many times, trying to get into other plants, but others have been caught, too, so I can’t say for sure.
I really hope the temperatures warm up overnight and stay warm, soon. When we start having to get larger numbers of seeds started, they’re not all going to fit in the two tanks. We’re going to have to use the sun room as a green house. Right now, I’ve seen it reaching as warm as 20C/68F during the day, but it does go below freezing overnight. We’ll be able to fit some things in the big tank with the onion trays (like the tomatoes we will be starting very soon), but when it comes time to start the corn and squash seeds, those onion trays are going to need to be moved to the sun room. This won’t happen for probably another month, at the earliest, so we should hopefully be okay by then.
I’m about ready to start throwing cats outside! :-(
This is what I discovered, this morning.
The long piece of insulation across the top is what had been blocking the opening on the back of the tank lid. You can even see the claw marks in it!
Some nasty little beast managed to pull one of the trays up!
The peat stayed in most of the cells, though a few at the very back were empty when I straightened it out. I found the plugs and put them back as best I could, and gently took loose peat off the cells it had fallen on and put it in the emptier cells. I will give it a day or two, then plant new seeds in the cells that didn’t survive.
Eventually, the seedlings will reach a height were I can take out the box that is keeping them closer to the light, and the cats won’t be able to reach the trays anymore, but for now they trays need to be this high. They should probably be a bit higher, but that would just make it easier for a cat to reach. The opening in the back is where I’m going to set up the tiny fan we have, to blow over the seedlings and help them get stronger, but for now, I’ve basically put a sheet of foam core over the tank’s lid and weighed it down. It should still have a bit of air circulation, but we’ll have to keep a close eye on it.
With how bitterly cold it has been for the past while, I have been doing my morning rounds much later in the morning. It may only have been a couple of degrees warmer, but I was taking anything I could get! Usually, by the time I came out, the outside cats were hovering around the door, looking for me to come out with warm water.
This morning, I headed out at a more usual time, even though it was -31C/-24F with a wind chill of -33C/-27F
Absolutely none of the cats came out to greet me! LOL
The only cat I saw was Nosy and, other than lifting his head to look at me, he did not move! Considering that he is curled up right under where the terrarium bulb is, I’m guessing it’s still working.
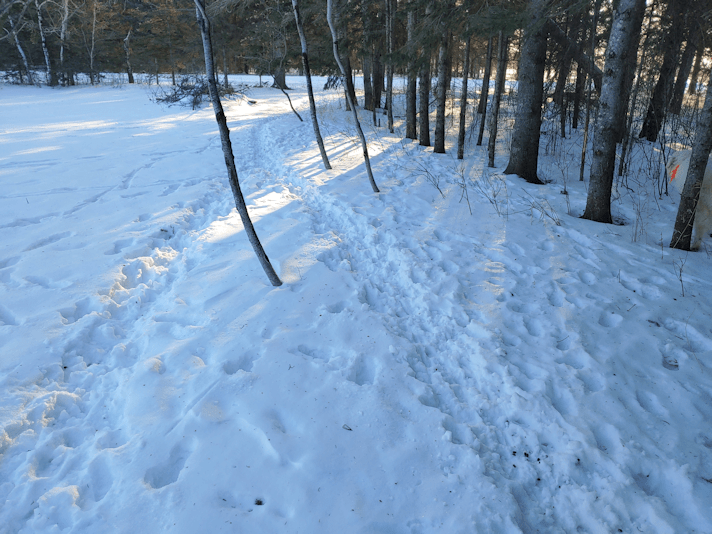
My brother’s dog was visiting again. He’s loving this cold so much! :-D I didn’t have any cats joining me for my rounds, but I did have him to keep me company! You can even see him in the photo below.
We have deer paths all through the garden area and the East yard, but none are as well worn as these, here. We used to have a trail cam facing where they would cross the road from my brother’s place and jump our fence. One of these days, I’d like to set one up again. I miss seeing how many deer used to cross here!
What I found this morning, however, is that the top barbed wire is loose from one post, and it was twisted around the middle wire. It had been torn loose when a deer didn’t quite clear the fence! I’m going to have to find some U nails and head out with a hammer to fix it.
Long term, we’re going to have to find a way to stop the deer from entering our yard around here at all. As much as I like them, I don’t want them eating the garden! Privacy is also a goal, and not just from our vandal creeping about. Even with the lilac hedge and other trees along the fence like, people driving by like to slow down and peer into the property. Particularly if there are deer at the house. The fence posts around the garden area all need to be replaced, and I want to get away from barbed wire completely, so building a privacy fence around the garden area that the deer can’t jump over is right in line with our goals. When we can do that is another question entirely! :-D
Speaking of gardens…
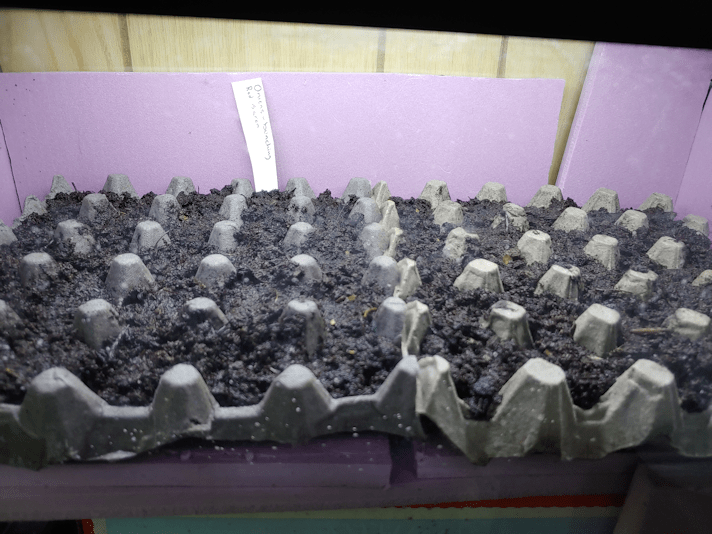
This morning, I noticed that the label for the bunching onions in the small tank had been knocked over. Though I had blocked the opening in the lid, a cat had still managed to reach in and bat at things. When I lifted the lid to fix it, though, I could feel it was noticeably colder than the room!
Clearly, lining the inside of the tank with insulation was not enough. The above picture is from when the trays were first put into the tank. Not only did a cat knock over the label, but I found one of the peaks of cardboard in a corner had been torn off!
The light on this tank is LED. It provides no warmth. The light on the big tank is fluorescent (I had thought it was LED, too, but was remembering incorrectly), so it does help keep the seedlings warm. The little tank was way too cold for the seeds!
After thinking about how we could warm up the inside of the tank, I remembered something. Years ago, I’d bought a small, recessed bulb, light fixture to provide spot lighting while I was working on crafts, etc. I stopped using it because it had a tendency to get very hot, even with an LED bulb. The bulb would be cool, but the fixture would get hot. I kept it and we even brought it along when we moved here. So this morning, I dug it out, then went through a bag of bulbs we have. We replaced almost all of the light bulbs here with LED bulbs, plus we still had some that the movers accidentally included when packing our stuff. Lo and behold, I found a full spectrum incandescent light bulb in the mix.
Perfect!
So I set the light fixture up on the edge of the tank, with the lid propped on it to hold it in place. I also dug around our aquarium supplies and found the little tank thermometer. The suction cup doesn’t work anymore, but I could still set it up inside the tank so that we could monitor the temperature.
It worked. In only a few minutes, I could feel a significant difference! (The thermometer will need more time to read accurately, since it was in the old kitchen, where it’s below freezing temperatures.)
We can only have this light going while someone is there to supervise, since it could literally melt the plastic of the lid. Since the tank is lined with insulation, once it warms up inside, it will stay warm for quite a while, so a few minutes here and there will be adequate.
On the down side, the cats still try to jump on the lid, even when it’s propped up over the light fixture.
I did not expect the small tank to be less cat proof than the big one!
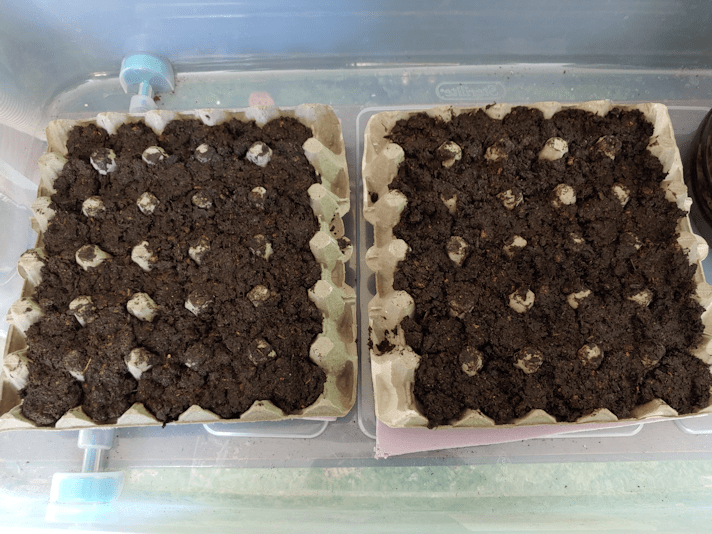
Finally! The last of our onion seeds have been planted!
These were the bunching onions; a variety called Red Baron, from Veseys. They have red root ends instead of the usual white.
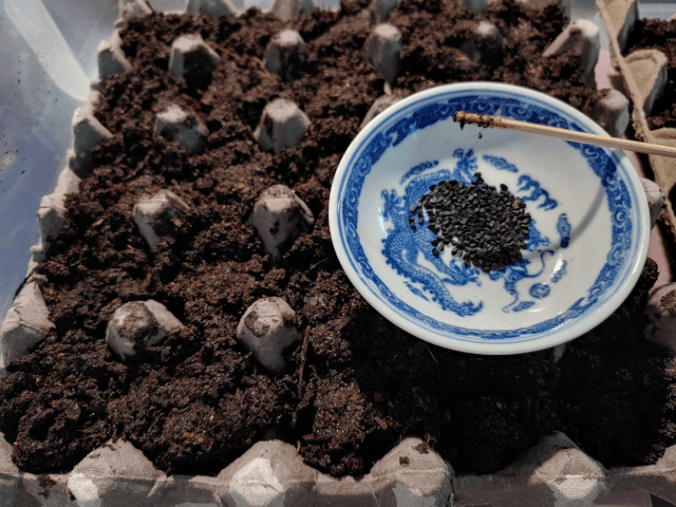
Using the dampened blunt end of a bamboo skewer made planting the seeds really easy. I could pick up a single seed at a time (two, if I really wanted to), press it into the growing medium, then cover the seed, all with the skewer. I put two seeds in each cell (though I think I might have lost track and double planted a couple! LOL), which left me with about half a package left over.
Then the trays went into the 20 gallon fish tank. It’s a bit snug, and I’ll likely have to fight a bit to get them out again later, but there is enough room at each end to move them, to get a grip under the tray supports.
This tank has a lid with the light fixture attached under it. I had thought that would be enough, but my daughter has already caught a cat on the lid, reaching through the opening in the back for the filter and hoses. I’m going to have to find a way to block that off, while still allowing air circulation!
Meanwhile…
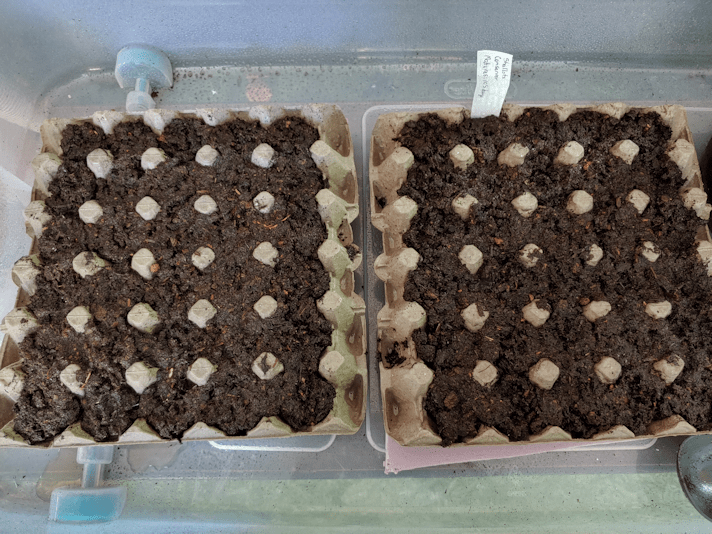
The first onions we planted, the Norstar bulb onion, now has sprouts large enough to see in a photo. :-D
You can also see how some of the K-cups are drier on the top. I’d already sprayed them this morning, and we’ll likely have to spray them again this evening. The peat pellets, at least, are holding their moisture quite well.
Special note: when using loose peat to start seeds, soak it with water before putting it in pots or cells!
As an aside, I am happy to say that my husband’s prescriptions got delivered today. I had asked for them to call first, so I could unlock the gate, only to get a phone call saying they were already here! So I quickly threw on some boots and a coat and dashed out to meet them.
Of course “dashing out” doesn’t mean the same thing on the farm than it did when we lived in the city! LOL
When I mentioned I had been expecting to be called in advance, so the gate could be unlocked for them, I was told they’d actually tried to call from the driveway, but couldn’t get a signal. They had to drive up the road about a quarter mile before they could get enough signal to call me.
The driver then commented that he recognized me, and he even remembered my name, as well as my parents! Unfortunately, even though we were outside and on opposite sides of the gate, he was wearing a mask, so I had no clue who he was. It turned out he was the principle when I was in school! He even remembered my husband from high school. Small world! :-) I have no idea why he and his wife were delivering prescriptions for the pharmacy, but I was happy to see them. :-)
My husband has gone over the new meds, and it turns out that the changed prescription isn’t for something he’s on right now. Another medication he used to be on years ago has been added back on, which is why I remembered the name when talking to the doctor about it. I’m losing track of them all! There are some very serious possible contraindications, mostly respiratory. With the setting on his CPAP as high as it already is, that, at least, is not as much of a concern while he’s asleep. It explains why the doctor was so hesitant to change my husband’s medications. He’s already maxed out on the doses of most of his other medications. Hopefully these changes, which will continue to be slowly adjusted over the next few months, will finally get the pain levels under control, and his quality of life will finally start to improve!
Among our goals with our permanent garden beds is for them to be accessible. High beds with wide spaces between them. It would be good for him to be able to get out with his walker, among growing things. :-)
There is more benefit to gardening than being able to grow food!
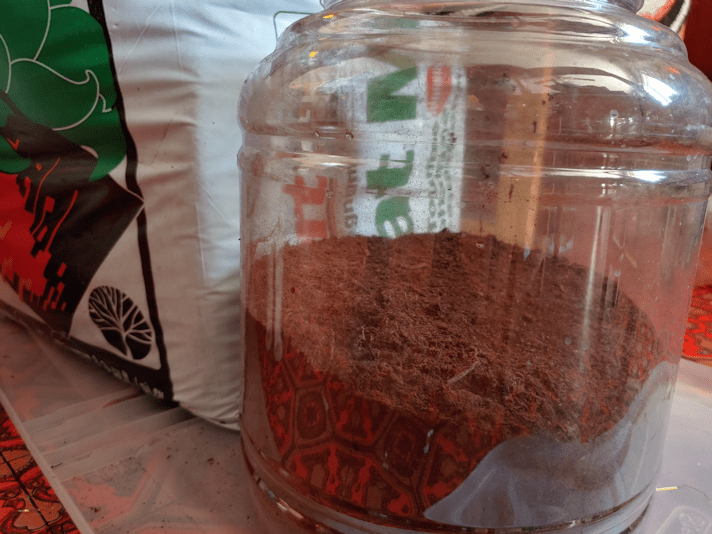
After adding more water and letting it soak overnight, we were left with a sort of peat slurry! :-D No fear of the seeds not getting enough moisture, this time!
To contain any potential mess, I set up inside the under-bed storage container that will eventually be used to hold the beer cups that I will be using as larger pots, when it’s time to start the squash seeds. It won’t be needed for some weeks, yet, and it was the perfect size and depth for this job.
It’s a bit hard to see in the photo, but you can tell why having something under the trays to support them was so essential. The first tray I filled is the slightly darker one on the left. It’s darker, because the cardboard is completely wet! Which means it’s also very floppy. There is no way these trays could be handled, without something solid under them.
When I planted the bulb onions, I was left with about half a package of unused seeds.
Not the shallots! I had just enough seed to put two in every cell, minus 1 seed. :-D
Though the peat was well saturated, I still sprayed the tops, more to settle the surface than for actual watering. When it came time to move the trays, I tipped them side to side a bit, to allow excess water that had soaked through the cardboard to spill off.
To get the trays into the tank, I had to take the light fixture off completely. All the trays fit perfectly, from end to end. If I wanted to, I’d be able to fit pots or egg cartons (dozen size, not 18’s) in the space at the front. That isn’t needed now, but when it’s time to start other seeds, we might find ourselves crowding the space as much as possible.
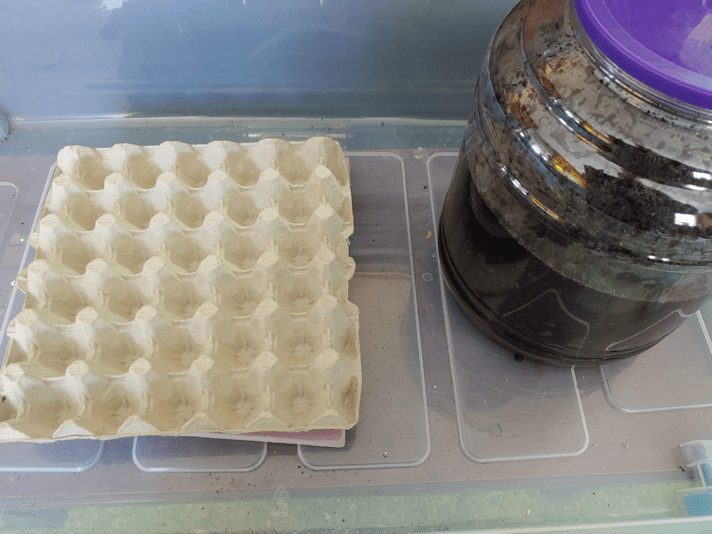
We freed up an 18 count egg carton this morning, so I checked out the fit in the smaller tank. One carton fits, of course, but only in one direction, and it’s long enough that we would not be able to fit in a second one. So I went back to my stack of flats and picked out two. The trays are 5 x 6 cells, and I cut them down to 5 x 5. That will allow two trays to fit in the smaller tank.
I will be adding a bit more peat to the container to absorb some of the excess water and leave it overnight. Tomorrow, I’ll be able to use the cut down trays and start the bunching onions in the small tank. :-)
Between these and the onion sets we’ll be getting in the spring, we should have enough onions in total, for fresh eating and for winter storage, to last us a year, if all goes well. With the bunching onions, I plan to dehydrate a lot of them, but will probably freeze some, too. We do use a lot of onions. I stopped to figure it out, and estimate we use about 200 yellow cooking onions a year, alone. Those are the ones we buy regularly. On top of that are the red onions, bunching onions and leeks we get more irregularly. We don’t usually buy shallots at all, because they are a fair bit more expensive. So it’s well worth the time end effort for us to grow a lot of onions! We won’t be trying this year, but I am hoping that by next year, we’ll be able to try growing leeks, too.
By the end if this year’s gardening, we’ll have a better handle on whether it’s worth it to keep growing from seed, or to go with buying sets. Growing from seed, for the amounts we’re after, takes up a lot of space, but there are more varieties available in seed than in sets. Either way, it’s going to be a trade off.
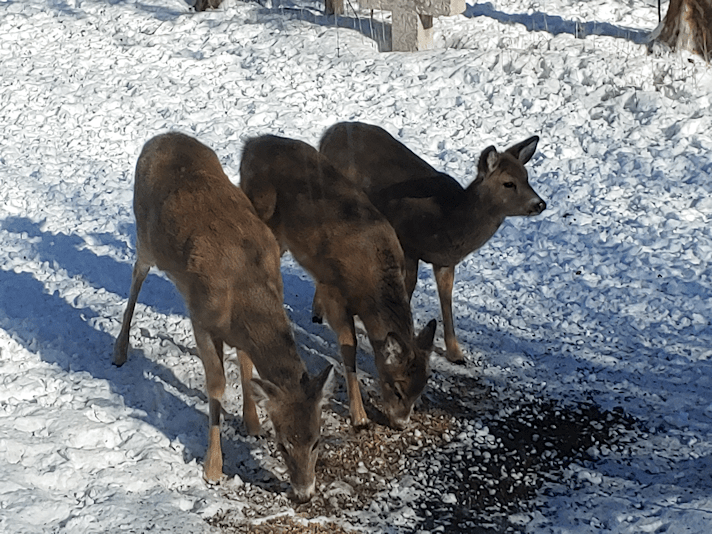
As a side note, we had company while I was working on the seeds.
I love that they’re coming around during the day now, when we can actually see them! :-D They are so beautiful!
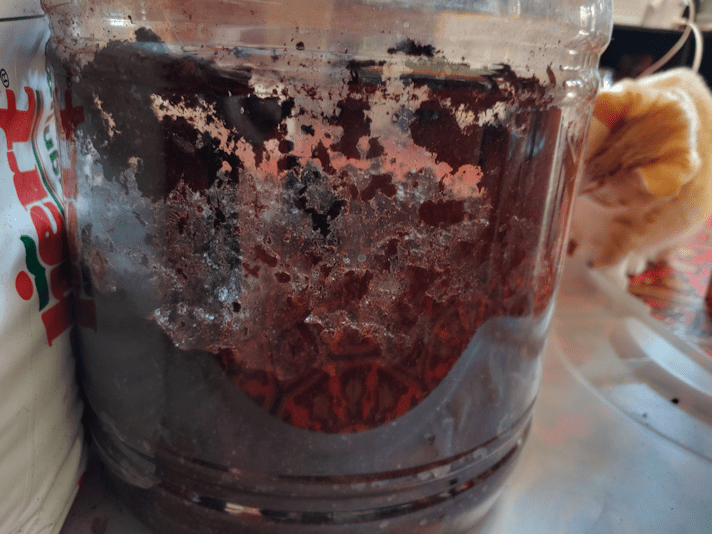
With our bulb onions already starting to show sprouts (so quickly!) I’ve got a bee in my bonnet about getting the shallot seed started, too. With how dry the loose peat in the K-cups are in the middles, this time I wanted to make sure the peat was thoroughly saturated before putting them into the planting trays.
After looking at what we had available that is cat proof, I settled on reusing a container from cheese balls that we would sometimes get at Costco. I’ve been keeping the containers like these, in various sizes, to cut open and use as cloche in the garden in the spring, but they are coming in very handy in other ways! We don’t actually buy these treats very often, which means that at this rate, I’m using them up pretty fast!
At least for this, I don’t have to cut it apart, so it will still be usable when it’s done. Because the peat is so very dry and fluffy, I made sure to scoop quite a bit into the container, filling it to just under half full.
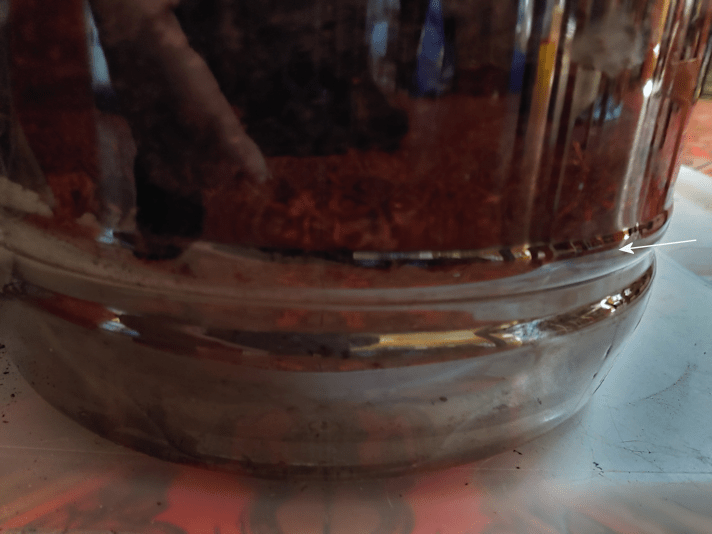
Then it was time to add water. The arrow in the above image is the water line! The peat just floated on top.
It took a while to mix the water into the peat. Even when I thought I was done I’d uncover another dry clump of peat!
Then it was time to cover it, to keep the cats out.
They were very interested in the process. It the few seconds it took me to put the mixing spoon down and pop the lid on the containers, Saffron was pulling at the spoon, trying to drag it away!
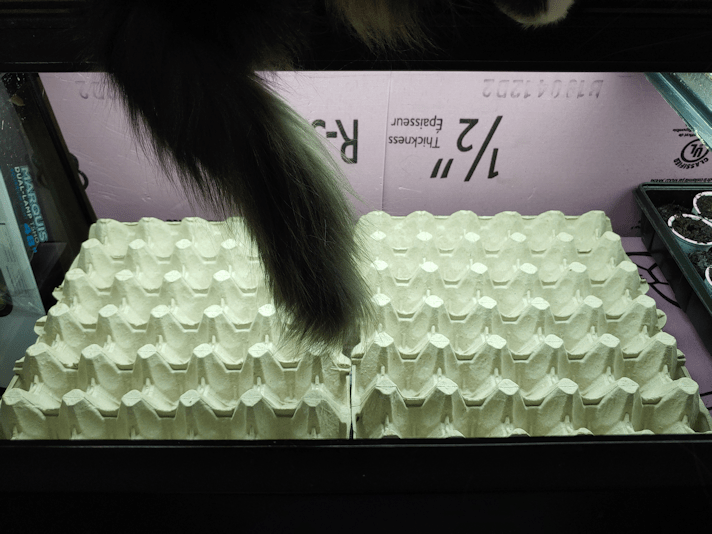
Once it was set aside to sit for a while, before we can see if it needs more water or not, I checked the space I had in the big aquarium. How many egg flats would I be able to fit inside? One, for sure, but would I be able to fit two?
Yes!!! Each tray holds 30 eggs, so I’ll have close to the same number of potential seedlings as the seed tray the bulb onion seeds are in.
The next question was, what to put under them to support them when they need to be moved?
Handily, I had a piece of leftover rigid insulation that was large enough to fit both trays. So I cut it in half, and we’ll be able to move them around independently, even after the cardboard has started to get soft.
I don’t have anything I can use as a drain tray that will fit, unfortunately. If I did, I would be keeping them watered from below. Ah, well. We’ll manage!
Since I was checking sizes, anyhow, I checked to see if these would fit in the 20 gallon, for when we start the bunching onions. One tray does fit, but it’s a bit too snug. We would not be able to lift it out again later, without problems.
But that’s okay. When my brother and his wife picked up groceries for us, there were no flats of eggs available, so they got us 2 packs of 18 eggs. Those will fit, plus I have long, narrow scraps of the rigid insulation I can put under them, to support the bottoms when it’s time to lift them out of the aquarium.
This is going to work out rather well!
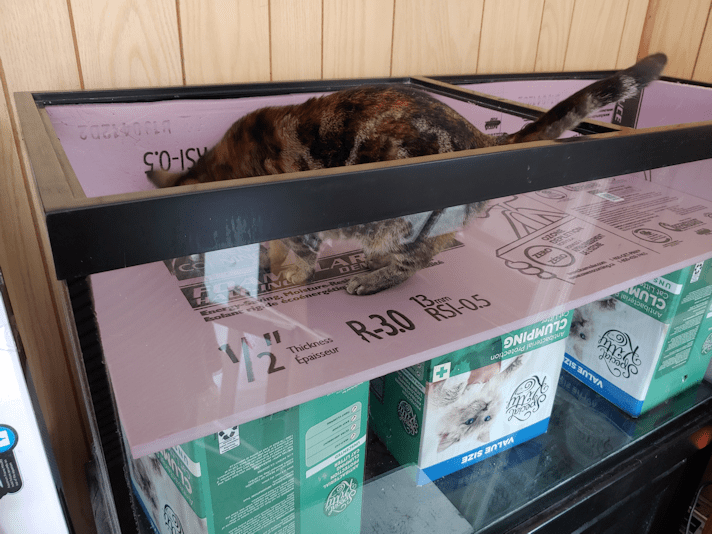
Also, that magnificent tail in the above photo is Fenrir, sitting on the light fixture. She did not approve of my activities! :-D
For now, it looks like I’ll need to add more water to the peat, so I will probably leave it to continue soaking overnight, and plant the shallots tomorrow.
What a fun and cheerful thing to do, to keep us thinking of summer on a cold, cold day! :-)
Today, I was finally able to continue setting up cat proof greenhouses in our unused fish tanks, to start seeds.
What I wanted to do was line the tanks with rigid insulation where they were near walls. Since there is no way to lower the lights to be closer to the seed starts, I was going to line the insides with foil for reflective light.
I may not need to do that.
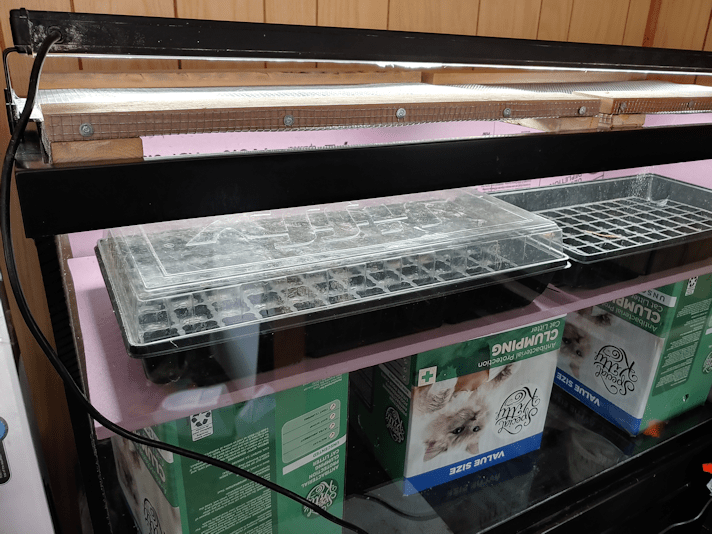
Here is the big tank.
I got photo bombed by a Susan.
I had three boxes with identical dimensions, which allow me to raise the rigid insulation floor high. As the seedlings get bigger, I can change the positions of the boxes to get different heights. I’ve got 3 boxes in there, but I might try to squeeze a 4th one in, to stabilize the floor better.
Because of how the top of the tank is designed, to hold glass covers that broke long ago, I had to cut the insulation to fit the opening, rather than the space I wanted them in. That meant the floor piece has quite a gap around it. The sheet of insulation I cut to size for the long, back wall had to be cut into thirds to get it in. Plus, there is a sheet at the end. The wall in the back of the picture is one of the original log walls. The wall at the left is an exterior wall. Yes, it has more modern (almost 50 years old) insulation, but it’s still pretty cold!
The insulation on the sides helps to fill the gaps around the floor piece, which stabilizes it as well.
At these dimensions, I can only fit two seed trays in here, which means there is a fair amount of space around them to add more containers with seed starts. I just have to figure out what waterproof surface I can fit in there to put them on.
I think I can get away with not adding foil, though. What do you think?
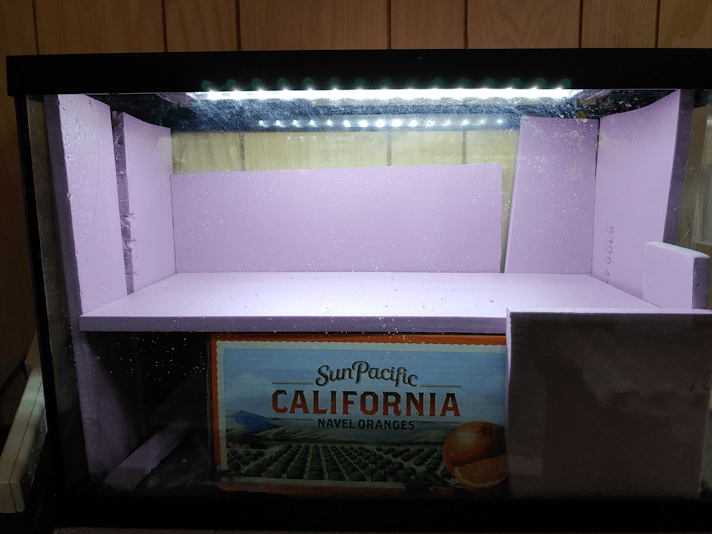
The second tank was much easier and faster.
Once again, I had to cut pieces smaller, to be able to fit them through the top. I only needed to add insulation to the back, which is against the exterior wall, but I added more to the sides to help fill in gaps around the floor piece.
I’m going to have to find something better to raise the floor. The orange box is a bit too small.
Photo bomb, courtesy of Saffron!
As you can tell by the dusty footprints, the cats like the lid of this tank!
At this point, I should be ready to start seeds in here. According to the package instructions, I don’t need to start my onion seeds – the ones that need to be started the earliest – until the end of March, but experienced zone 3 gardeners in groups that I’m on have already started theirs, and say they should be started now. The seed trays I have are too big to fit into the smaller tank, so I will have to find something else waterproof to hold seed starts in the little tank. I want to buy more seed trays, anyhow; I’ll have to take a good look at what dimensions are available.
There is only so much I’ll be able to fit in these, even if I’ll later be able to move the onions into the sun room and make room for something else. I did find something that I might be able to use, for when I’m starting the squash and gourd seeds.
The squash and gourds need more space to grow, and they are the things that need to be started soonest, after the onions. I’ll be using these cups, with drainage holes punched into their bottoms, as pots. The storage container is designed to fit under a bed, but the hinge on the lid is broken, so it has been languishing in the basement until now. I have a second one. Once I figure out what to do with the stuff stored inside it, I’ll be using that as well.
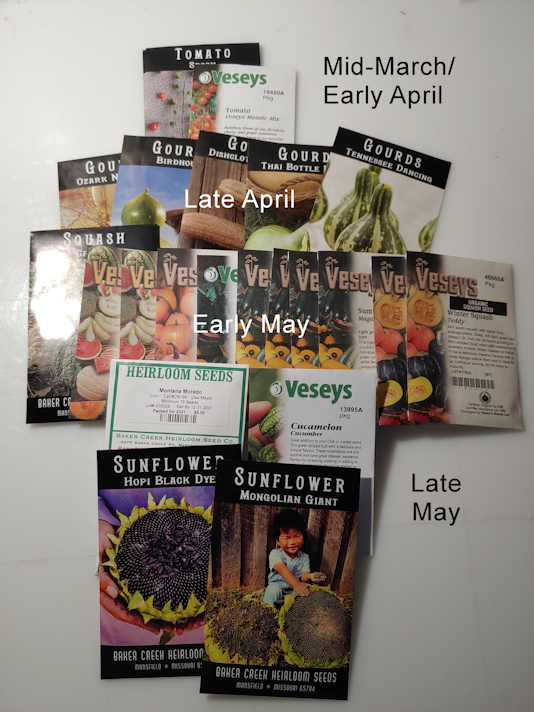
We have so many varieties of summer and winter squash, as well as gourds, to try. Depending on how many seeds are in each package, I may not plant them all. Some are packed by weight rather than number of seeds. I figure, at most, I’ll start 10 seeds each of the summer and winter squash. Whatever the germination rate turns out to be, that’s what I’ll be planting. If I get just a 50% germination rate, we will still have lots of each variety, and with the number of varieties, we should have plenty for both fresh eating, and preserving and storage. For the gourds, I’ve decided to start 5 seeds of each, and see how they do. One of them is an eating variety, but the others are to dry and use for crafting purposes. Curing them takes about a year, so the sooner I can get some grown, the sooner I’ll have materials to work with! If space in an issue, though, I’ll drop the gourds for this year.
I still have the mini greenhouse that my daughter bought for me last year, which can hold three of the trays that are in the big tank. The cats still managed to get into the closed plastic cover, and it gets knocked over easily, so anything we start in there will be done later in the season, and in the sun room!
With the trays I have now, all I need to figure out is what to use in the small tank, and I should be able to start the onion seeds very soon!