Hopefully, I’ll be able to continue later today, but if not, there is at least some progress in painting the inside of the outhouse.
This is the colour my daughter chose. Personally, I would have gone for a pale blue instead of a pale mint, but honestly, I don’t really care that much. We just needed a light colour to brighten things up on the inside, that wasn’t institutional white. :-D
I almost forgot to take the before photos!
The angle is bad because I was already standing on the seat box when I took these, and I wasn’t about to clamber down, just to take pictures. ;-)
My main goal for today was to do everything that needed me to be standing on the seat box to reach. The only exception was one side of a roof joist, right in the middle. For that, I made use of the thick boards we’d found stored in here when we cleaned it out. The three of them together gave me 6 inches in height, and that was enough.
This is probably the most difficult part to do, with all the corners and tight areas. After this, things should go a lot faster.
The opening at the top is covered with wire mesh window screen, stapled in place. It did not occur to me that the mesh was not flush with the surface when I started trying to paint over it. I didn’t want to take it off, though. I think we will pick up some more wire mesh window screen in the future for other projects, and when we do, I’ll look at replacing this screen. Then the frame can be painted properly. No hurry, though. Depending on how long before we can do that, we could paint the frame in the same colour as the outside. We haven’t decided what that colour will be.
For now, though, I’m off to the Farmer’s Market. I’ve discovered that organic humans are being allowed in, and I want to pick up some pork from our neighbour. :-) We’ve emailed briefly and I might be able to check their homestead out over the weekend, too. :-) I’m looking forward to it!
While it was incredibly handy that the old outhouse had been made safe and cleaned up inside, when we found ourselves unable to use our indoor bathroom, the reality is, it was still pretty… unpleasant… using it.
So now that we have the scrubbable, high traffic paint, I decided it was time to work on the inside of the outhouse. Because the way things seem to go in this house, we never know when we’re going to have to use it again!
Which means that today, I worked on preparing the inside for paint, starting with removing the remaining stuff stuck to the walls, after taking down all the colourful paper my mother had put up.
Thumb tacks, nails, staples, bits of paper, and bits of packing tape. Some of those tacks, I’m sure a hammer was used to put them in! I found myself using a staple remover, a screwdriver small enough to lever under the thumb tacks, and even a wrench, to yank out the most stubborn bits. They were all over the walls, on the top and front of the seat box, and the inside of the door.
Of course, I found more that I’d missed, after I took the photo, too!
My mother was very through in covering those walls! :-D
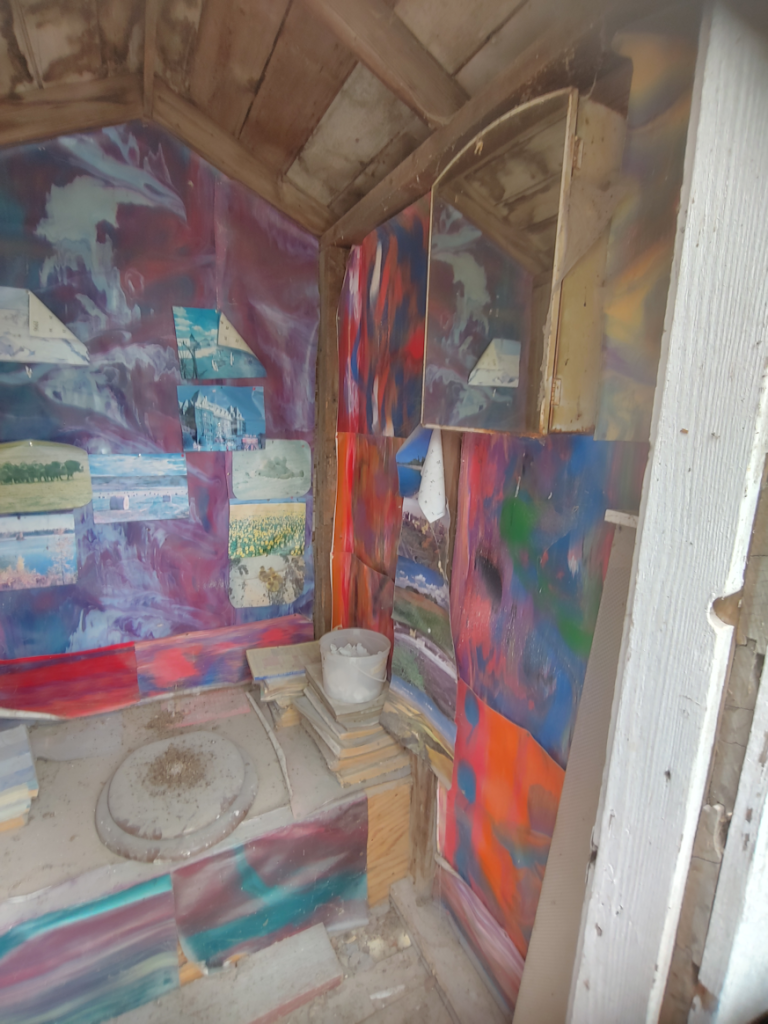
I also removed the mirrored medicine cabinet, then used a broom and brushes of different sizes to get as much dust and dirt off the walls, ceiling and floor, and out of the corners, as I could. The inside latch on the door was also removed. It was held in place with two very rusty screws, and a bent roofing nail!
The final step was to power wash the inside with the house. Remembering how difficult it was to go the front of the inside, before, that was where I started this time. By standing on the seat box, I was able to get at the cracks and crevices fairly well, without being splashed with water too badly! :-D Even doing the underside of the roof worked out all right. Once the front was done, I could get down and do the rest from the doorway.
Now it needs to dry overnight. It will be ready for painting, tomorrow!
I am happy to note that the floor is a lot sturdier than I thought it was. I had still been wanting to reinforce it by adding more boards on top. However, the seat box is pretty low. If we add any more height on the floor, it will make using the seat pretty hard on the knees. So I will have to rethink what to use to reinforce the floor. A sheet of metal could be thin enough, and strong enough, to do it. We have more like what is now in front of the outhouse, but they are huge pieces and I don’t have the tools to cut them with. Not that I would want to. I have no doubt that, some time in the future, I’m going to be thankful to have such large sheets of metal for some project! :-D There is no hurry, though. After it is painted, we can poke around the barn and the sheds and see what we can find.
After it is painted, I am thinking it would be good to replace the inside latch with a new one, as well as adding a handle or latch to the outside. Right now, it is kept closed with a piece of wood nailed loosely to the frame.
I should probably pick up new hinges. The door is starting to sag and I want to straighten it out, too. And if I’m going to do that, I may as well get matching handles and latches for the outside, too. There is not as much of a hurry on that, though, as the outside needs to be scraped and painted, and that likely won’t happen until next year. Fixing the roof is more of a priority, and I still hope to get that done this year. For now, I’ll just replace the inside latch with a new one.
Hmm. Now that I’m thinking about it, there is another medicine cabinet with a mirrored door in the basement. I think it’s in better shape than the one I took off. If it is, I’ll use that one, instead.
It may be just an old outhouse, but if we’re going to have to use it, we’re going to make that thing as pretty and pleasant as possible! The girls already have ideas for decorating it inside. :-D
It’s past midnight as I write this, and it has suddenly become a rather unpleasant night!
I was returning from the bathroom when, while walking past the old basement door, I heard a splashing sound I should not have been hearing, so I went down to take a look.
The septic backed up again.
The pipe with the P trap was full to the top, and water backed up into the laundry sink to the point of overflowing. Thankfully, we don’t really use this basement much, because the water has spread pretty far. Thankfully, whatever caused it to back up happened relatively recently; the last major use of water was a load of laundry, and greywater seems to be most of what I was looking at down there.
I’ve already arranged for the septic guy to come over tomorrow morning. Getting that done was actually in the budget for next month, which means we would have had it done at the next of next week, when my husband’s disability payment came in on Thursday.
Once the tank is empty, I can see what I can do about unclogging the pipes. I am guessing it is the same sort of thing that happened last time. If that turns out to not be it, we’ll have to call in a plumber.
*sigh*
The last time this happened, we were able to set up a honey pot in the bathroom until we could use the toilet again. We don’t have it anymore; I took it over to my mother’s when we found out she was having mobility issues getting to the bathroom at night. We did, however, get the outhouse cleaned up, and made the entry safe to use. So we do have an alternative.
There’s a bit of a new issue, though.
Once we determined that we would have to use the outhouse, I grabbed the flashlight, some cleaning supplies and toilet paper to set it up. It’s been a while since I’ve gone in there, so I wanted to sanitize the seating area. When I opened the toilet lid to clean it, however, things looked… different. When I was cleaning it out before, I made a point of checking underneath, and saw the contents were composted and level from being flooded out by melting snow over the years. It needed to be emptied, but not in any urgent way.
It’s now full.
Of gravel.
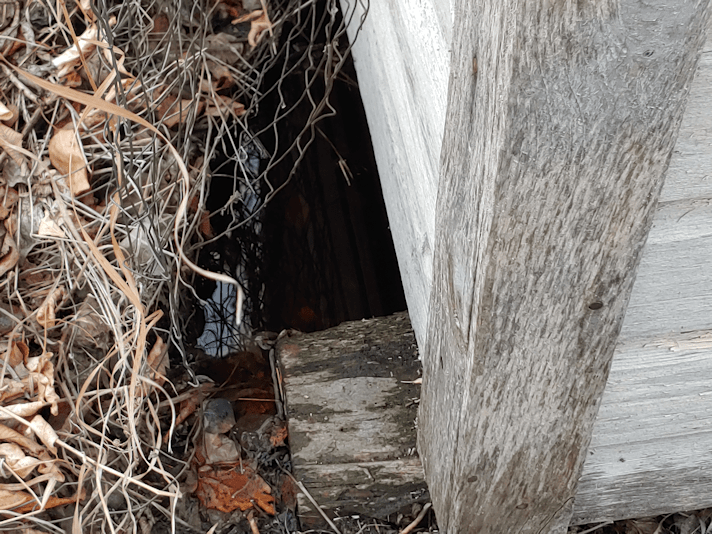
After shining the flashlight around, I was able to spot a small hole.
It looks like a groundhog made a den entry leading under the floor boards, filling much of the space under the seat with gravel.
*sigh*
So that’s going to have to be all dug out. It can be accessed from the back of the outhouse, but not very easily.
*sigh*
It’s been a while since we’ve seen the groundhogs; I’ve seen one, once, a couple of weeks ago or so, and that’s it. They no longer visit the bird seed, and we no longer see them around the yard. It seems early, but they seem to have gone into hibernation already.
I suppose it’s good to find this out now, and not in the middle of winter or something.
I am not looking forward to having to clean up the mess in the basement.
Okay, so the area in front of the outhouse is now safe to walk on.
What about the inside?
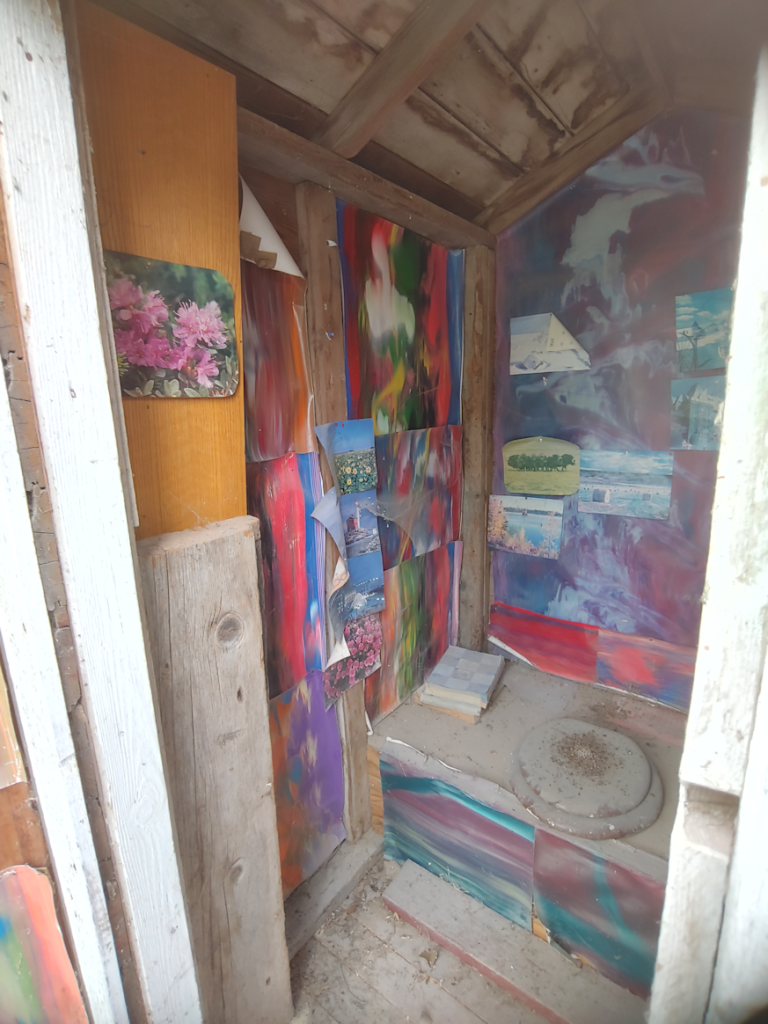
The very… colourful… inside.
I’d asked my mother about all the paper in there. She told me she put them there to make it pretty.
…
I… just don’t know what to say about that.
Like pretty much everything else around here, the outhouse was being used for storage.
The first thing I had to do, though, was check out the floor. Much to my surprise, it’s solid. I still plan to reinforce it, but there is nothing wrong with the floor boards.
Other than being really, really disgusting.
And that toilet seat…
*shudder*
This outhouse has actually been used a couple of times since we’ve moved here. Once or twice by my brother, who insisted on using it rather than going inside. Once by a poor guy who came out to service our internet that suddenly needed to go to the bathroom, but my daughter had just gone into the shower. He couldn’t wait for the bathroom to be available, and was actually willing to use this outhouse.
I still feel so bad about that. The poor guy!
The first order of business was to take everything out that was leaning in the corners.
Which included a folding closet door (minus one hinge), a length of copper pipe, a fluorescent light fixture, which I think still have bulbs in it, and several pieces of wood.
I might be able to use the bigger ones to reinforce the floor.
Oh, and more of that colourful paper that is all over the walls.
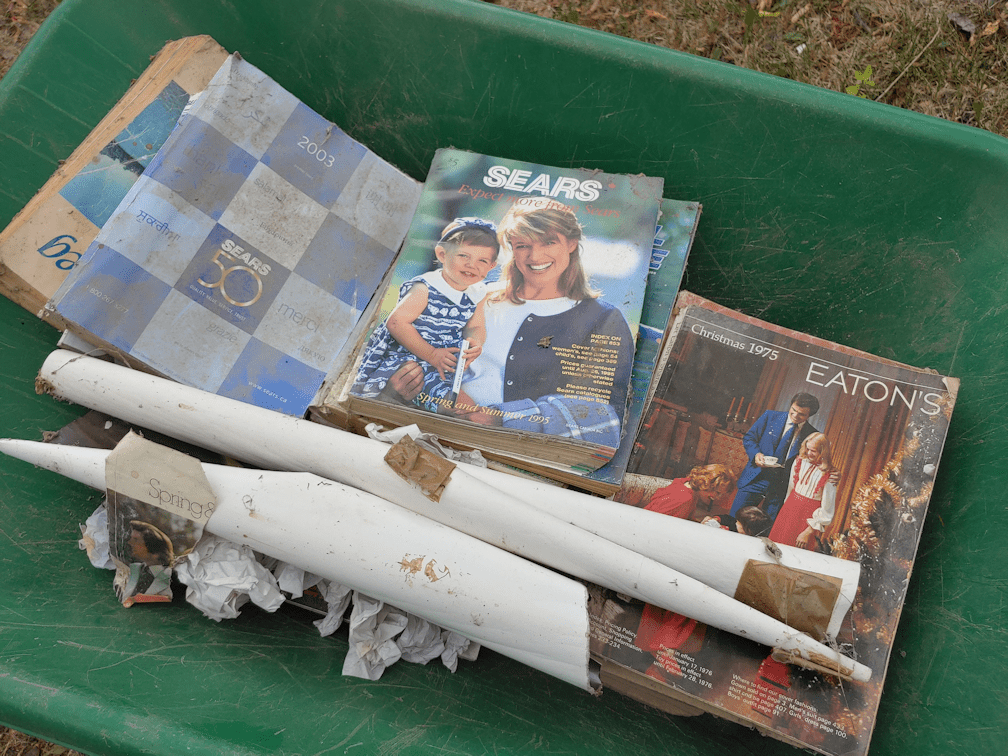
Then it was time to move the toilet paper.
Yes. I’m serious. That’s the toilet paper.
Well, not the rolled up paper with the tape on it. That was with the stuff stored in the corners.
When I was a kid, before we had an indoor bathroom, we used old catalogs, fliers, phone books, etc. as toilet paper. I didn’t think it was strange, since I knew nothing else. We didn’t buy toilet paper until we got an indoor bathroom, because this stuff couldn’t be flushed down the toilet.
While clearing things out, I emptied the medicine cabinet on the wall, too.
A 30 year old calendar page isn’t quite so strange when compared to a 46 year old Eaton’s Christmas catalog.
After moving the catalogs and whatnot away, I found this in the corner.
A pile of pine cones!
Also, my mother even covered the top of the toilet seat box with colourful paper!
When I saw the pine cones, my first through was that squirrels had got in and were starting to make a winter stash. Which was a surprise, since this outhouse is actually pretty animal proof. I don’t know where squirrels would have got in.
There was something I missed, however.
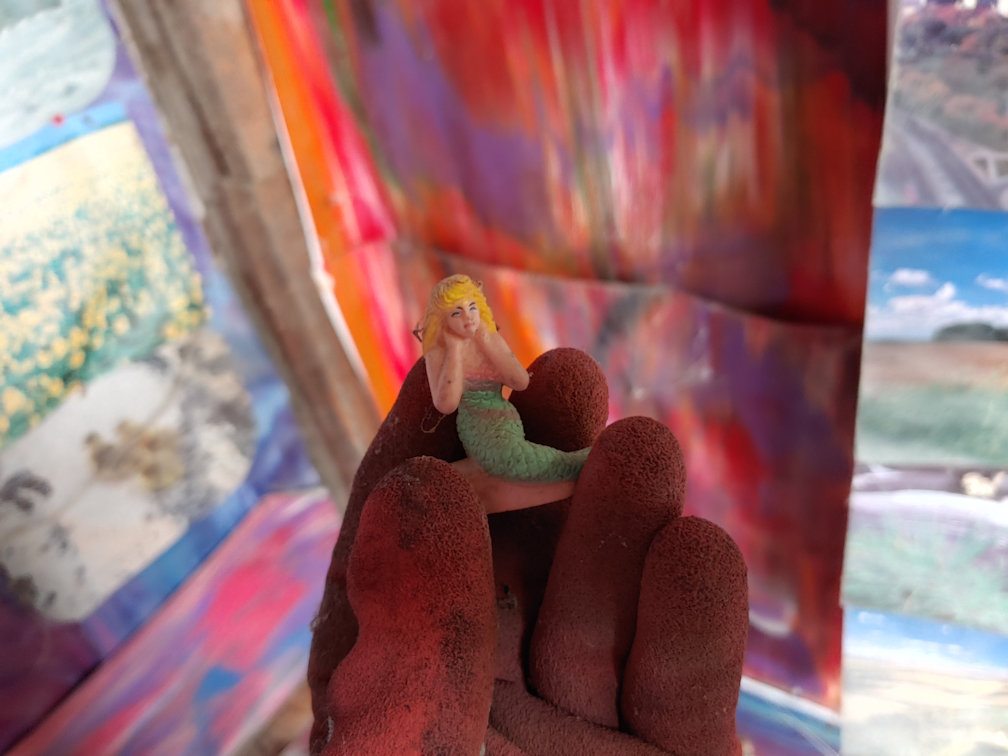
Do you see that tiny little something in the corner, a different colour from the pine cones?
When I started sweeping the cones away, I found this.
A mermaid!
I now think that perhaps my late brother’s kids may have played in here and left the pile of cones and mermaid behind, forgotten. If true, then this may have been here for more than 10 years. Probably quite a bit more! However it got here, when we are done with cleaning up and setting up the outhouse, this is going to get a place of honour for display! :-D More “found object” art… ;-)
Once everything was cleared out, it was time to take all the paper off the walls.
At that point, I was starting to really wish I could wear a mask. I tried to be careful not to kick up much dust, but there was no way to completely avoid it.
The outhouse might have been critter proof, but it was not moth proof! As I pulled sheets of paper off, I kept finding moths hiding behind them. Dozens of them.
They did not appreciate being woken up!
Moths were not the only surprise I found behind the paper.
I suspect this was the first attempt at “beautifying” the outhouse. This was right in the middle of the back wall, and would have been the first thing a person saw on opening the door. Then it got covered over with the colourful paper.
I … don’t know what to say. :-D
Yay!! It’s all done! All the paper is gone!
I was going to say, it already looks a lot better, but… no. It still looks disgusting.
Time to break out the big guns.
It’s power washing time!
I hosed down the entire inside, trying to get into every crevice. Which is not easy to do when trying to get the front, on either side of the doorway, while standing outside.
I sure as heck wasn’t going to be hosing it down while standing inside!!
That part took a while.
Okay, NOW I can say, it looks a lot better!
Also, that toilet seat is actually white. It’s been painted brown.
I… don’t know what to say.
Now that it’s have it’s initial cleaning done, I’m actually impressed with how sound this is. Ideally, we would jack it up higher and put it on blocks, rather than leave it on the beams that it’s on, but this is not meant to stay.
The next thing that needs to be done is to scrub the inside. That will be the time to get rid of all the bits of paper and packing tape stuck to the tacks and staples used to tack them to the walls. I forgot to hose down the inside of the medicine cabinet, but that’s okay. We will likely take that down for a while.
While the whole thing needs a paint job, the plan is to use a highly durable paint on the inside, that can handle scrubbing.
In a LIGHT colour! My daughter was suggesting a robin’s egg blue, but I’d be happy with anything that makes it brighter in there. Also, a new toilet seat. There’s nothing “wrong” with this one, except… ew.
I checked the pit, of course. It does need to be emptied. It’s also completely composted and level – being flooded out with melted snow for years did have a plus side. The cat litter compost is behind the outhouse, so it can be added to that. There are those that recommend using human waste as garden compost, but that is something we will never do. Who knows what medications a person might have been on when they left their “deposits”. While it is not urgent to empty the pit, it is definitely something I want to do before anyone actually uses it again.
Oh, we also have to do a bit of work on the door. It needs new hingles, as the current ones are sagging. It would probably be a good idea to calk around some areas, so no more moths will get in. Particularly around the screen covered opening at the top. I actually saw a moth squeezing through the wood around there!
The biggest job that needs to be done is the roof. The shingles have moss growing on them. Given the small size of the roof, however, I think we have options to modify. There are some scrap pieces of plywood in the barn that should be big enough. After removing the old shingles, I am thinking of adding some plywood that is longer than the current roof size, to make an overhang above the door. We also have lots of leftover pieces of metal roofing material that can be cut to size and used instead of using shingles.
The final touch I’d like to add is a solar powered light. I’ve been eyeballing some solar powered hanging light fixtures, thinking of the cordwood building we plan to make, and that can be used here just as well. That would be a huge improvement over using candles or flashlights, like we did when I was a child! :-D
If we do this right, this outhouse should not only last for years, but actually be pleasant to use.
Today turned out to be a very pleasant day, weather wise, so I used it to do a job that I’ve been avoiding for a long time.
I started cleaning up our “second bathroom.”
Yup.
The outhouse.
Now, we do have plans to build an outdoor bathroom that can be used should we ever lose power or water. We are wanting to build a cordwood practice building, with the intention that it will have a composting toilet in it, and no pit under it. That way, in the future, it could be converted to something else without too much difficulty. We were supposed to at least start preparing the base last year, but that didn’t work out, and now I’m glad it didn’t. We have a whole lot of dead trees to cut down not far from the location we chose for it. A location that is the most open space that we would want to fell the trees towards.
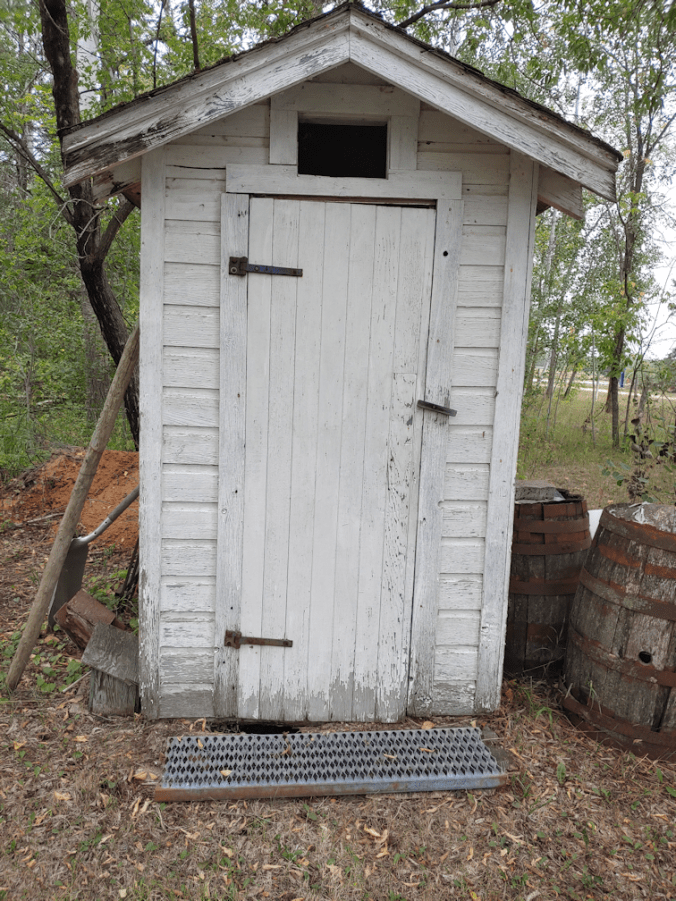
Meanwhile, we have this old thing.
This post will be about working on the outside. Part two will be about working on the inside.
This right here is the main issue with the outhouse. I placed the metal (I can never remember what those area called!) in front of the door because it would sometimes open in severe winds, but also because of that hole.
Our first two springs after we moved here, we discovered that when the snow melted, it would pool in front of the outhouse. I was able to see through that hole that the pit would fill with water. Another reason why we want to have an outdoor bathroom elsewhere, and no pit!
One of the delays in getting this done was trying to figure out what to replace this with! I didn’t want it to be an issue again in the future, so not wood, for starters. But what could I use that would be big enough to cover the front, solid enough to walk on, yet thin enough not to block the door from opening?
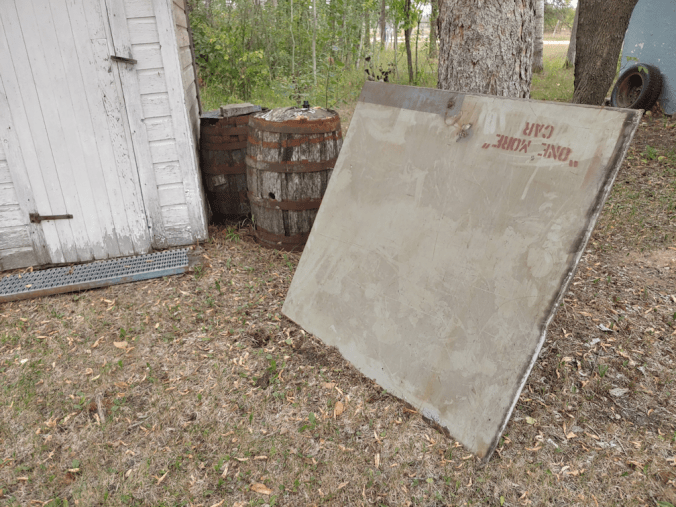
Barn salvage to the rescue.
There were several large sheets of steel in the barn and, tucked in between, was this smaller piece.
Yeah. That’s the smaller piece.
Now, when I was looking at the sheets, all I saw was rust. They’re heavy, so I hadn’t moved them enough to see their other sides. It wasn’t until I was bringing this over, turning it end over end, that I realized the other side had no rust on it.
Also, it had writing on it.
What a curious thing!
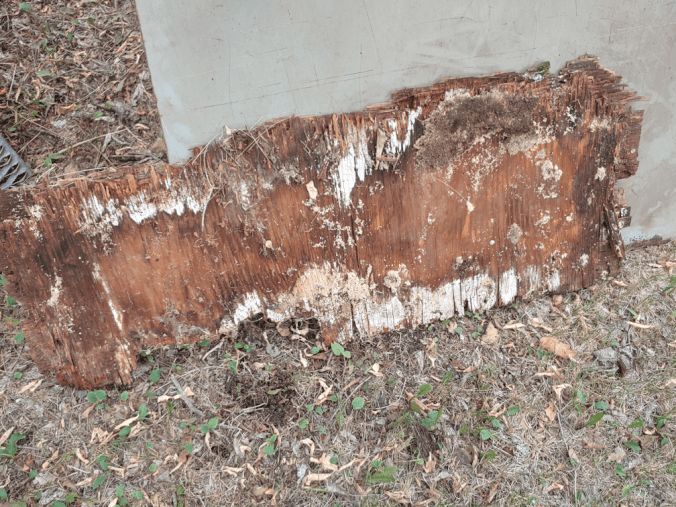
Once the steel sheet was brought over, I removed the top piece that was in front of the door.
So… that’s disgusting. !!!
The outhouse is sitting on top of two large beams, which extend in front. The piece I’d removed was nailed to those beams, but everything was so rotted, there was nothing holding anything anymore.
Also, that sawdust is from ants.
Time to clean up and assess what’s underneath.
The boards I uncovered felt surprisingly solid. They were also quite thick.
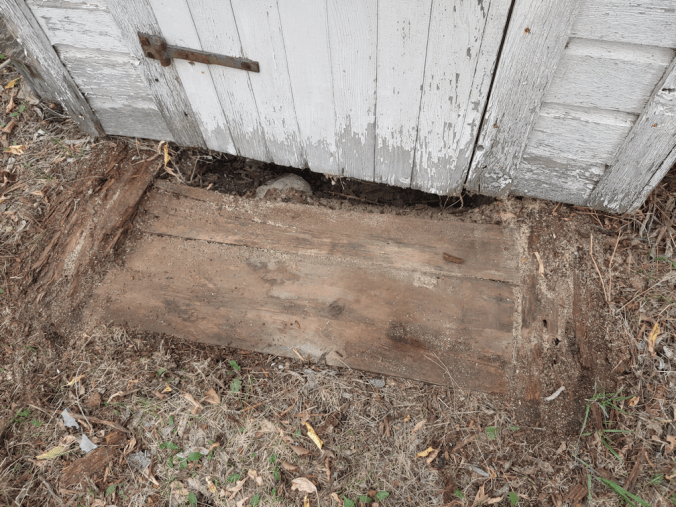
And very rotten. They only felt solid because they were supported by the soil beneath.
Also, that’s a very large opening under the door! It seems the edge of the pit had started to collapse. No surprise, since the pit was filling with water in the spring.
The first order of business, then, was to block that opening.
The garage is nearby, and there were some pieces of metal roofing leaning against the side. There was also a strip of what I think was the top cap for the metal roof. I’m not 100% sure, only because I’ve never seen one up close. I just see them at the top of the outbuildings we have with metal roofs.
Thankfully, we have some really heavy duty metal cutting sheers. I used them to cut the piece to fit under the door, between the two beams. The metal was already bent slightly in the middle, which made it easy to bend it to a 90 degree angle. It turned out to be the perfect width, as the top of the metal is flush with the floor of the outhouse. It will not get in the way of the door, nor be a tripping hazard.
It is also supported by that rock, so it’s not going anywhere.
There is, however, still a gap under it. Which is where the rest of the metal piece got used.
After bending it to a 90 degree angle, it also fit perfectly flush with the floor, and covered the largest part of the gap. The little bit of space under the door hinge is mostly filled with that big rock.
Now it’s time to fill the space.
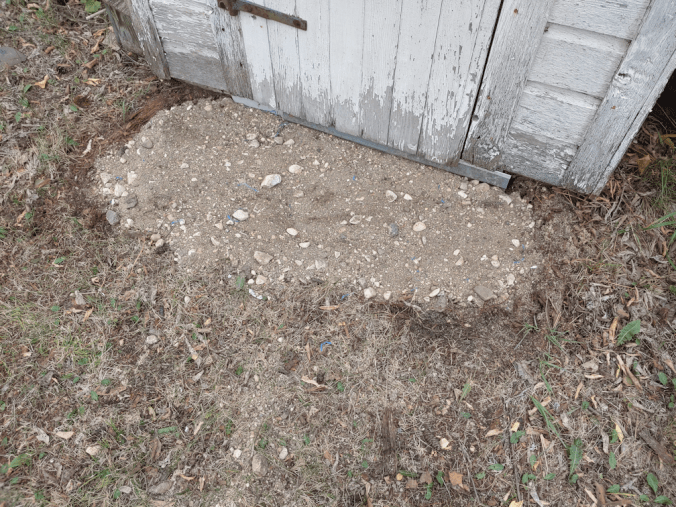
This is where I got to take advantage of the hard work the groundhogs have been doing, building their den under the junk pile, leaving some beautiful rocks and gravel for me to use!
First, I collected the biggest rocks that were visible. I also grabbed one of the flat rocks I’d found under the old half wine barrel planter I’d cleaned up from near the junk pile. That was used to cover the small gap near the big rock under the metal pieces. Then the rocks were added to keep everything in place.
Then I brought over a load of sand and gravel – and a few more larger rocks – from the groundhog den.
Most of it went to filling in the space left behind from removing the rotted wood and tamping it down.
The rest was spread out to go under the metal sheet. At this point, the sheet was laid down and removed a few times, until I got it fully supported by gravel and rocks, and level. I did end up having to get a bit more sand and gravel before I was done.
And there we have it! We can now to into the outhouse, and not worry about anything collapsing under our feet and getting hurt.
I just had to make sure the text on the metal sheet was facing so that it could be easily seen and read. I am curious as to why it says “one more” car, and why the words “one more” are in quotes, but the word “car” is not. :-D
Now that it’s safe on the outside, time to see if it’s safe on the inside!
My older daughter just finished a whole bunch of quick commissions, and after sitting at the computer for so many hours, she really needed to get out and walk!
So we headed out together, and wandered around beyond the outer yard, cutting through the old hay yard.
I just had to share this photo of a floating tree.
This tree is a bit of a mystery. It is one of several trees that had not fallen on their own, but were cut down and just left in the hay yard. Perhaps the intent was to clean them up, but it just never happened. Who knows?
This tree, however, has a piece missing.
Unlike the others that were lying near their stumps, there is what I estimate to be about 8 feet of trunk missing. The nearby stump is much wider than the cut end of this tree’s floating remains. There is no sign of the missing piece, anywhere! I find myself curious as to why someone would remove a section completely like that, and what it was used for!
While we were walking around, my daughter asked her if I’d seen the old outhouse.
…
Which old outhouse? I had to ask, since several came to mind.
Apparently, there was an old outhouse my daughters found in the bushes.
So of course, I had to see it!
You know how you can walk past something time after time, yet not “see” it, until something calls your attention to it? And then you wonder, when did that get there? Or, is this new?
I had to have had this sort of situational blindness, because I’ve gone through this area several times, and yet I can’t remember seeing this. It’s in the bushes, between the car graveyard and old gravel pit, and most definitely has been there a long time!
Truly an odd place for an outhouse. It’s not like this was a place people spent so much time, they’d need an outhouse!
The use of wood shingles for siding like that is another curious thing. Very unusual.
It’s possible I missed seeing it because I’d gone through here at a time of year when the bushes were in full leaf.
At this angle, you can see the hinged door at the bottom, for access to emptying the… contents.
There does not seem to be a pit under it.
I wonder if it was brought in from somewhere else, and just dumped here, like so many other things were, over the years?
The roof is gone and it’s collapsing into itself to the point the door cannot be opened, though it is somewhat ajar.
I was able to stick my phone into a gap and get a photo of the inside.
I’m guessing that little blue shelf was hanging on the nails under the coat hook.
What a curious thing to have somehow not seen while going through here! Or perhaps I did see it, but just dismissed it. There have been so many odd finds since we’ve moved here, they aren’t really odd anymore! :-D
Doing my rounds this morning is, for the most part, getting easier as the snow melts. There are just a couple of shaded areas where sheets of ice and formerly hard-packed snow suddenly giving way under my feet, have made walking somewhat more dangerous!
It also means that, while the water between the house and the garage has gone from “lake” to ” large muddy puddles”, there is a lot more water in other areas, too.
I noticed this while going past the outhouse this morning.
The outhouse door has a piece of plywood in front of it, with a rotted out hole. I’d had a metal… something I don’t know the name of, but it’s used as steps on large vehicles… over the hole, but while it’s there, the outhouse door can’t be opened. It had been set aside during our septic troubles (not that we used the outhouse; it’s too disgusting in there!) and not put back yet. This allowed me to see that the hole under the door is getting bigger – and the pit is full of water! I checked the access area at the back, and could see the water there, too. That pit is completely filled.
The outhouse is sitting on what is probably beams of pressure treated wood, which look like they have sunk into the ground. It really should have been on concrete or something, and raised slightly above ground level. I doubt any of the outhouses that have ever been here were done that way. Which would explain why they have been replaced so many times over the years. I know of at least 3, not counting the one that was there that we used before we got running water in the house.
Another reason why we want to build a new outhouse, without a pit and on a proper base! Composting toilets have their own issues, but I’ll take those over dealing with a pit, thankyouverymuch. :-D
I also had something I could really appreciate while doing this morning’s rounds.
I was able to do them without needing a cane.
Yesterday evening, after all the walking around with the wheelbarrow I’d done earlier, was a difficult one. I definitely over did it. My hip gave out again, and it didn’t recover as it had earlier. Thankfully, we keep canes around the house, including one of my dad’s canes that we’ve left hanging on an arm bar between the old and new parts of the house. I had to get my daughter to bring it to me, because I couldn’t walk from my desk chair to get it. Even my left hip was becoming more of a problem. Both hips have mild osteoarthritis, but my left hip hurts pretty constantly, due to bone spurs. Typically, it’s a level of pain I can ignore, but that was getting hard to do, yesterday evening. When my right hip was X-rayed, it showed mild OA, but also fragments basically floating around, and I think that’s what’s causing my problems. I think fragments are getting into the joint, causing pain until they get worked out of the joint again.
I will have to get myself to a doctor again to check it out.
I got very little sleep last night, due to the pain and discomfort, even though I’d taken pain killers. It’s better now, in that I can walk without a cane and put weight on my right leg again, but even with painkillers, it’s still hurting quite a lot. I also needed to use my husband’s bath chair while I showered.
So today is going to be a day of recovery for me. Aside from heading out to the pharmacy this afternoon, to pick up prescriptions, I’m going to have to focus on giving my body a break to heal up. I figure this is a good time to catch up on some more crochet projects. :-) I’ll have to remember to get the mail today, too. My order from Vesey’s is ready for pick up. The girls and I will go over what we want to start indoors. Almost everything we got can actually be sown outdoors after danger of frost is past, which would be about mid-May, but getting a head start on some of them would also be good.
I’m really looking forward to being able to garden this year!